
Lesson 76: Building Secure Payment Proof Uploads for Manual Payments in the Flipnzee Auctions Plugin

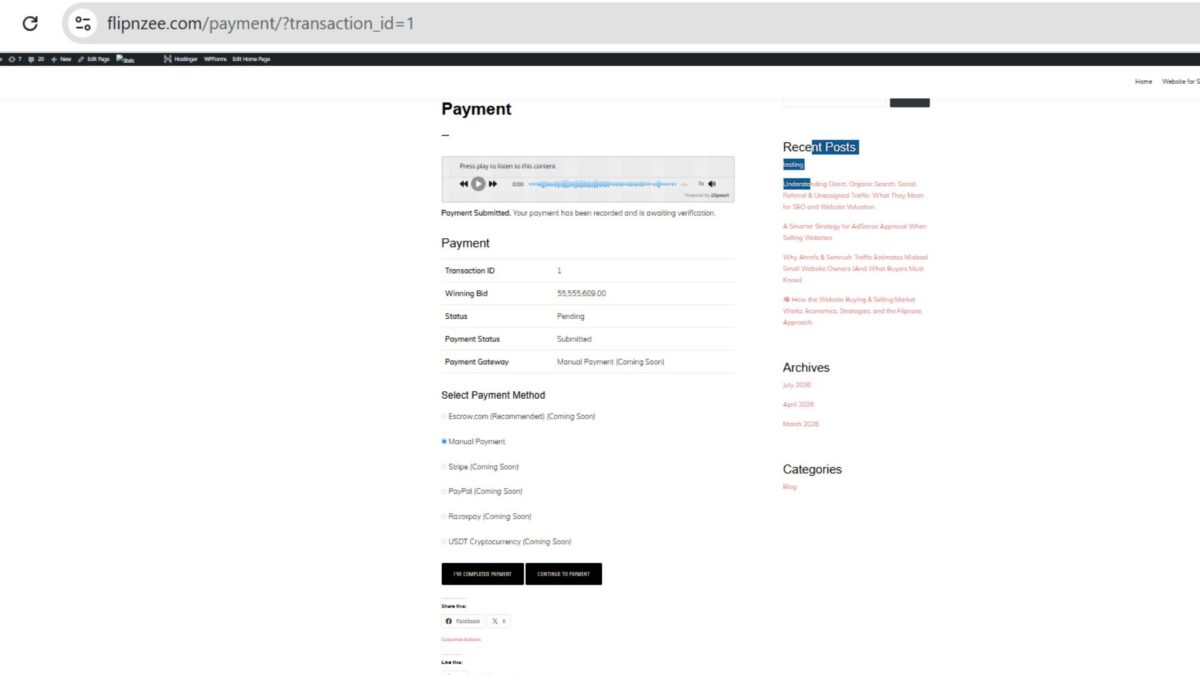
In the previous lesson, the Flipnzee Auctions plugin was refactored to separate the payment page into reusable methods. With the foundation now in place, the next logical step was to allow buyers to securely upload proof of payment after completing a manual bank transfer or other offline payment.
This lesson focused on implementing a complete payment proof upload workflow using WordPress’ built-in Media Library functions while ensuring security through nonce verification and preventing duplicate uploads.
Objective
Implement a secure payment proof upload system that:
- Allows buyers to upload payment receipts.
- Stores uploaded files in the WordPress Media Library.
- Saves the attachment ID in the transaction table.
- Prevents duplicate uploads.
- Displays appropriate confirmation messages.
- Prepares the plugin for future admin verification.
Step 1 – Creating the Upload Section
A new upload section was added beneath the manual payment instructions.
<h3>Upload Payment Proof</h3>

<p>
After completing your payment, upload your receipt or screenshot below.
</p>

<form
    method="post"
    enctype="multipart/form-data"
>
Using multipart/form-data is essential whenever files are uploaded.
Step 2 – Protecting the Form with a WordPress Nonce
Every upload request should be protected against CSRF attacks.
wp_nonce_field(
    'flipnzee_upload_proof',
    'flipnzee_upload_nonce'
);
The nonce is later verified before processing the upload.
Step 3 – Creating the File Input
The upload field accepts common payment proof formats.
<input
    type="file"
    name="flipnzee_payment_proof"
    accept=".jpg,.jpeg,.png,.pdf"
    required
>
Supported file types include:
- JPG
- JPEG
- PNG
Step 4 – Detecting Upload Requests
Inside the main render method, the plugin detects whether the buyer submitted a payment proof.
if (
    isset( $_POST['flipnzee_upload_payment_proof'] ) &&
    isset( $_FILES['flipnzee_payment_proof'] ) &&
    ! empty( $_FILES['flipnzee_payment_proof']['name'] )
) {

}
This ensures uploads are only processed when the upload button is pressed.
Step 5 – Verifying the Nonce
Before accepting any uploaded file, the nonce is validated.
if (
    ! isset( $_POST['flipnzee_upload_nonce'] ) ||
    ! wp_verify_nonce(
        sanitize_text_field(
            wp_unslash( $_POST['flipnzee_upload_nonce'] )
        ),
        'flipnzee_upload_proof'
    )
) {
    return '<p>Security check failed.</p>';
}
This protects the upload endpoint from forged requests.
Step 6 – Loading WordPress Upload Libraries
Instead of manually moving files, WordPress provides built-in upload helpers.
require_once ABSPATH . 'wp-admin/includes/file.php';
require_once ABSPATH . 'wp-admin/includes/media.php';
require_once ABSPATH . 'wp-admin/includes/image.php';
These libraries automatically handle:
- Uploads
- File validation
- Image metadata
- Media Library integration
Step 7 – Uploading the File
The upload is performed using WordPress’ native API.
$attachment_id = media_handle_upload(
    'flipnzee_payment_proof',
    0
);
Successful uploads immediately become Media Library attachments.
Step 8 – Saving the Attachment ID
After a successful upload, the attachment ID is saved against the transaction.
Flipnzee_Payment_Manager::save_payment_proof(
    $transaction->id,
    $attachment_id
);
This updates the transaction record with:
- payment_proof_id
- payment_status
Step 9 – Refreshing the Transaction
One subtle issue appeared during testing.
Although the database updated successfully, the current $transaction object still contained the old values because it had been loaded before the upload.
Refreshing the transaction solved the issue.
$transaction = Flipnzee_Payment_Manager::get_transaction(
    $transaction->id
);
This immediately reflects the latest payment information.
Step 10 – Preventing Duplicate Uploads
Instead of always displaying the upload form, the page now checks whether a payment proof already exists.
<?php if ( empty( $transaction->payment_proof_id ) ) : ?>

<!-- Upload Form -->

<?php else : ?>

<div class="notice notice-success">

    <p>

        <strong>Payment Proof Already Submitted.</strong>

        Your payment proof has already been uploaded and is awaiting verification by the Flipnzee team.

    </p>

</div>

<?php endif; ?>
This prevents accidental duplicate submissions.
Step 11 – Testing
The upload workflow was tested thoroughly.
Successful tests included:
- Uploading PNG payment receipts.
- Verifying files appear in the WordPress Media Library.
- Confirming
payment_proof_idis stored in the database. - Confirming
payment_statuschanges tosubmitted. - Confirming duplicate uploads are prevented.
- Confirming success messages appear after upload.
Challenges Encountered
Several issues were encountered during implementation.
Transaction Not Refreshing
Although the database updated correctly, the upload form continued appearing because the transaction object had not been refreshed after saving the payment proof.
Reloading the transaction solved this issue.
Media Library Confusion
Initially it appeared that uploads were failing because the uploaded image was not immediately visible.
The issue turned out to be Media Library filtering and caching rather than the upload itself.
Conditional Rendering
Wrapping the upload form inside a conditional block required careful placement of the opening and closing PHP tags to avoid syntax errors.
Once corrected, the page behaved exactly as expected.
What Was Achieved
By the end of this lesson, the Flipnzee Auctions plugin could:
- Accept secure payment proof uploads.
- Store uploaded receipts in the Media Library.
- Save attachment IDs with transactions.
- Prevent duplicate uploads.
- Display confirmation messages.
- Prepare transactions for future verification.
Lessons Learned
Several important WordPress development concepts were reinforced:
- Always use nonces when processing forms.
- Prefer WordPress Media APIs over custom upload code.
- Refresh database objects after updates.
- Use conditional rendering to improve user experience.
- Store Media Library attachment IDs instead of file paths whenever possible.
Download Source Code
Download the starting version of the plugin before the lesson:
Download the completed version after this lesson:
Next Lesson
In Lesson 77, the payment experience will be polished further by:
- Displaying Submitted for Verification instead of Pending.
- Hiding payment options once proof has been uploaded.
- Showing a cleaner buyer confirmation page.
- Adding links to view uploaded payment proof.
- Beginning the admin verification workflow.
This will complete the buyer-side manual payment journey and prepare the plugin for administrator approval of submitted payments.