
Lesson 77: Improving the Buyer Payment Experience After Payment Proof Submission

Overview
In the previous lesson, buyers gained the ability to upload payment proof securely using WordPress’ Media Library. Uploaded receipts were successfully stored, linked to transactions, and duplicate uploads were prevented.
Although the functionality worked correctly, the user experience could still be improved. After submitting payment proof, buyers continued to see payment options and generic transaction statuses, making it unclear whether their submission had been received successfully.
In this lesson, the focus shifts from functionality to user experience by redesigning the payment page after proof submission.
Objectives
By the end of this lesson, we will:
- Replace generic Pending messages with clearer payment statuses.
- Hide payment options after payment proof has been uploaded.
- Display a professional confirmation message.
- Add a “View Uploaded Payment Proof” link.
- Prevent buyers from attempting another payment.
- Prepare the plugin for administrator verification.
Why This Improvement Matters
Once a buyer uploads payment proof, their next question is usually:
- Did my upload succeed?
- Will someone review it?
- What happens next?
Showing payment options again creates uncertainty.
Instead, the page should reassure buyers that everything has been received and explain the next step.
Current Workflow
Current payment flow:
Auction Won
      │
      ▼
Choose Manual Payment
      │
      ▼
Complete Bank Transfer
      │
      ▼
Upload Payment Proof
      │
      ▼
Success Message
      │
      ▼
Payment Options Still Visible ❌
Desired Workflow
After this lesson:
Auction Won
      │
      ▼
Choose Manual Payment
      │
      ▼
Complete Bank Transfer
      │
      ▼
Upload Payment Proof
      │
      ▼
Payment Submitted
      │
      ▼
Waiting for Admin Verification
      │
      ▼
Payment Options Hidden
Planned Improvements
1. Improve Payment Status
Instead of displaying:
Pending
buyers should see something more meaningful, such as:
Submitted for Verification
or
Awaiting Verification
2. Hide Payment Method Selection
Once payment proof exists, buyers should no longer see:
- Manual Payment
- Escrow
- Stripe
- PayPal
- Razorpay
- USDT
These options are no longer relevant after submission.
3. Hide Action Buttons
Buttons such as:
- Continue to Payment
- I’ve Completed Payment
should disappear after payment proof submission.
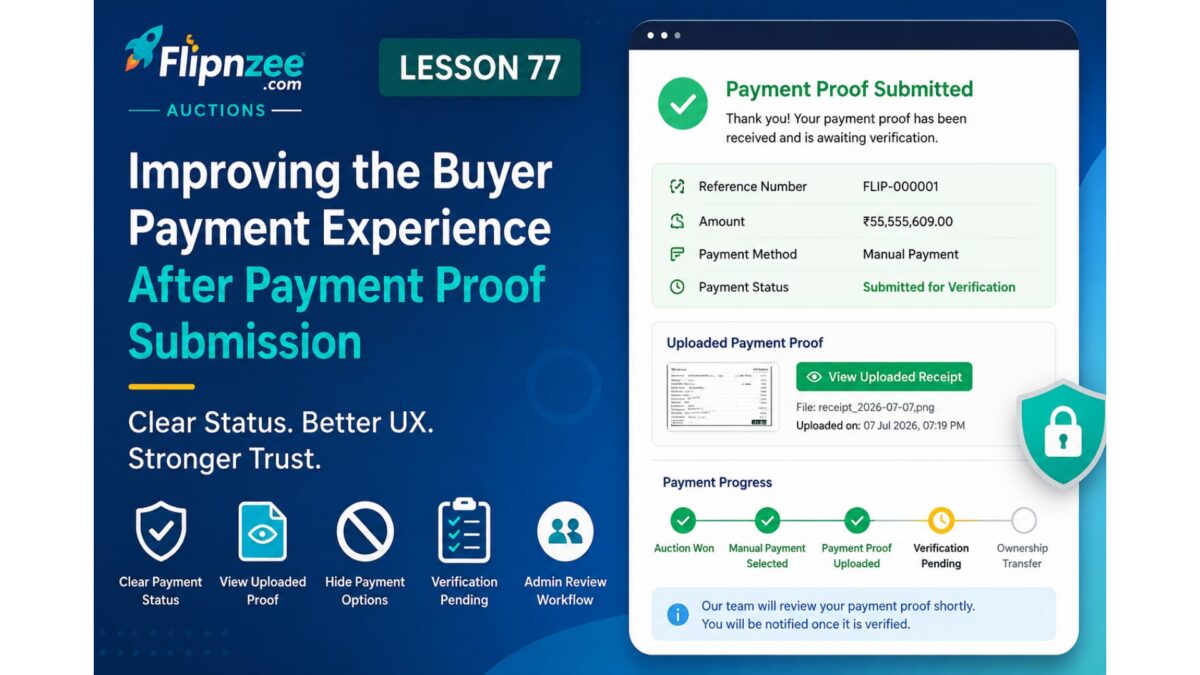
4. Display a Confirmation Card
Instead of payment controls, buyers should see a professional confirmation message.
Example:
✓ Payment Proof Submitted

Reference:
FLIP-000001

Payment Status:
Submitted for Verification

Thank you.

Our team will review your payment shortly.

Ownership transfer will begin once payment has been verified.
5. Add “View Uploaded Proof”
Since the uploaded receipt already exists in the WordPress Media Library, buyers should be able to confirm exactly what they uploaded.
Example:
View Uploaded Receipt
This will help buyers verify that the correct document was submitted.
6. Improve Transaction Summary
The transaction table should become more informative.
Example:
| Field | Value |
|---|---|
| Transaction | 1 |
| Winning Bid | ₹55,555,609 |
| Payment Status | Submitted for Verification |
| Payment Method | Manual Payment |
| Payment Proof | Uploaded ✓ |
7. Introduce a Timeline
A simple progress indicator makes the payment journey much easier to understand.
✓ Auction Won

✓ Manual Payment Selected

✓ Payment Proof Uploaded

⏳ Verification Pending

□ Ownership Transfer
8. Prepare for Admin Approval
This lesson also prepares the foundation for administrator workflows.
Future lessons will allow administrators to:
- Review uploaded receipts.
- Approve payments.
- Reject invalid payment proofs.
- Request new payment proof.
- Notify buyers automatically.
Expected Outcome
After completing this lesson:
- Buyers clearly understand their payment has been received.
- Duplicate payment attempts are eliminated.
- The payment page becomes cleaner and more professional.
- The plugin is ready for administrator verification features.
- The overall user experience aligns with real-world marketplace payment workflows.
What You Will Learn
Throughout this lesson, you will learn how to:
- Render different interfaces based on transaction state.
- Improve user experience using conditional rendering.
- Present payment progress more clearly.
- Separate buyer actions from administrator actions.
- Design workflows that scale as new payment gateways are added.
Next Lesson Preview
Lesson 78 – Building the Administrator Payment Verification Dashboard
In the next lesson, we will begin the administrator side of the payment system by creating a dashboard where site administrators can:
- View submitted payment proofs.
- Open uploaded receipts directly from the Media Library.
- Approve or reject payments.
- Update transaction statuses.
- Trigger the next stage of the website ownership transfer workflow.
This will complete the first full end-to-end manual payment verification process in the Flipnzee Auctions plugin.