For many developers, the emergence of AI coding agents has prompted an uncomfortable question: Was all the time spent learning software development worth it if AI can now generate working code in minutes?
A recent reflection on the development of the Flipnzee Auctions plugin offers an interesting perspective.
The project began as a learning exercise. Rather than rushing to release a product, its development progressed step by step, covering WordPress plugin architecture, object-oriented PHP, database design, AJAX, scheduled tasks, payment workflows, Git, debugging, and software organization. Every feature became an opportunity to understand not just what to build, but why it should be built that way.
Looking back, there is no denying that modern AI coding agents can now perform many of these implementation tasks remarkably quickly. Refactoring classes, generating CRUD interfaces, organizing project structures, fixing common bugs, writing documentation, and even producing test cases are increasingly becoming tasks that can be completed in minutes rather than days.
At first glance, this might suggest that months of development effort were unnecessary.
The reality is more nuanced.
The greatest value of the project was never the number of lines of PHP that were written. It was the understanding gained throughout the process.
By building the plugin manually, the developer learned how WordPress hooks interact, how database migrations work, why security checks matter, how to organize maintainable code, how to debug complex issues, and how seemingly small architectural decisions affect future development.
These lessons cannot simply be downloaded from an AI.
Ironically, this experience makes AI significantly more valuable rather than less. Someone who understands software engineering can evaluate AI-generated code, recognize hidden bugs, identify security concerns, and determine whether a suggested implementation truly fits the product.
Without that understanding, generated code often becomes little more than a black box.
There is, however, an important lesson for startups.
While the educational value of building software from scratch is enormous, there is also a point of diminishing returns. Projects can become trapped in endless cycles of refactoring, redesigning, and documenting instead of reaching users.
Many founders discover that they spend more time perfecting architecture than validating whether customers actually want the product.
In hindsight, a more balanced approach may have been to release an early version, gather feedback, and allow AI to accelerate subsequent iterations.
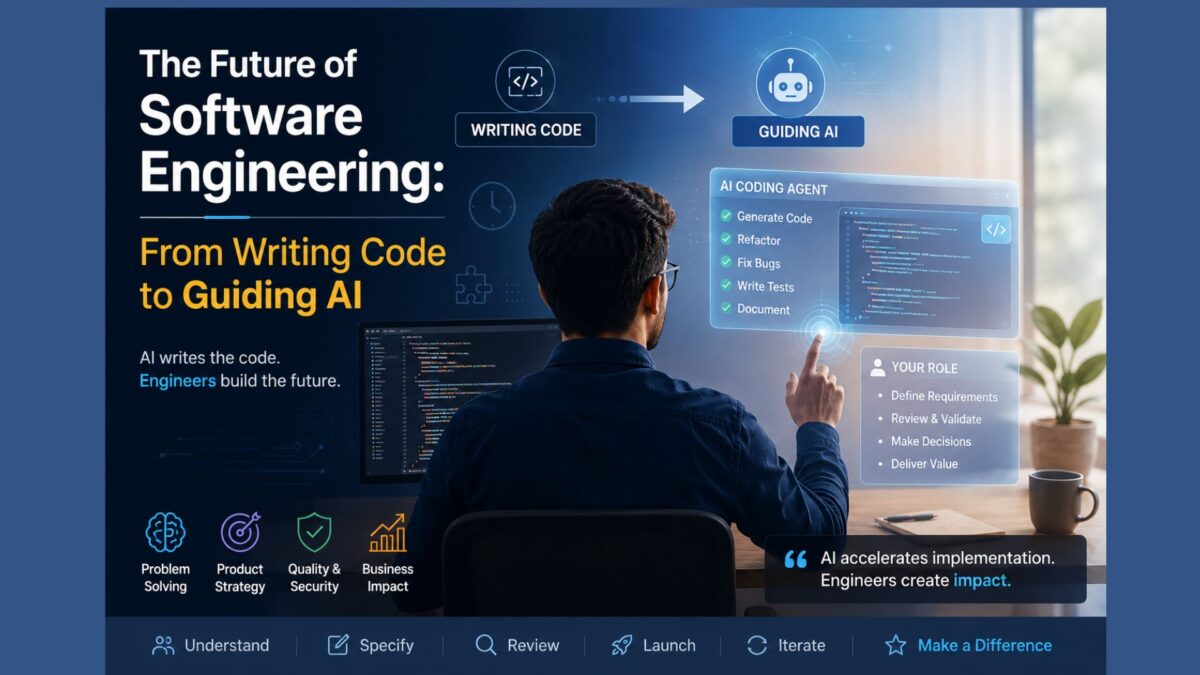
This highlights the real shift brought about by modern coding agents.
The competitive advantage is no longer typing code faster than everyone else.
The competitive advantage lies in identifying worthwhile problems, designing practical solutions, specifying clear requirements, reviewing AI-generated implementations, and continuously improving the product based on real-world feedback.
For developers who have invested years in learning programming, this should be encouraging rather than discouraging.
Their knowledge has not lost its value.
Instead, the nature of their work has evolved.
As AI increasingly handles implementation, software engineers move higher up the value chain—focusing on product strategy, architecture, user experience, quality assurance, and business decisions.
The future belongs not to those who write every line of code manually, nor to those who rely entirely on AI, but to those who can combine engineering judgment with AI-assisted development.
In many ways, learning software engineering has become more valuable than ever—not because developers must write every function themselves, but because they now possess the expertise to guide AI toward building better software.
In the previous lesson, we successfully installed and activated the Flipnzee Auctions plugin on our WordPress website. Even though the plugin doesn’t yet display any visible functionality, WordPress already recognizes it as a valid plugin and executes its code whenever appropriate.
But have you ever wondered what actually happens behind the scenes?
How does WordPress discover plugins?
When does it read the plugin header?
Why does the ABSPATH constant already exist?
When are activation hooks executed?
And why do they run only once?
Understanding these questions is one of the biggest differences between simply copying WordPress code and becoming a confident WordPress plugin developer.
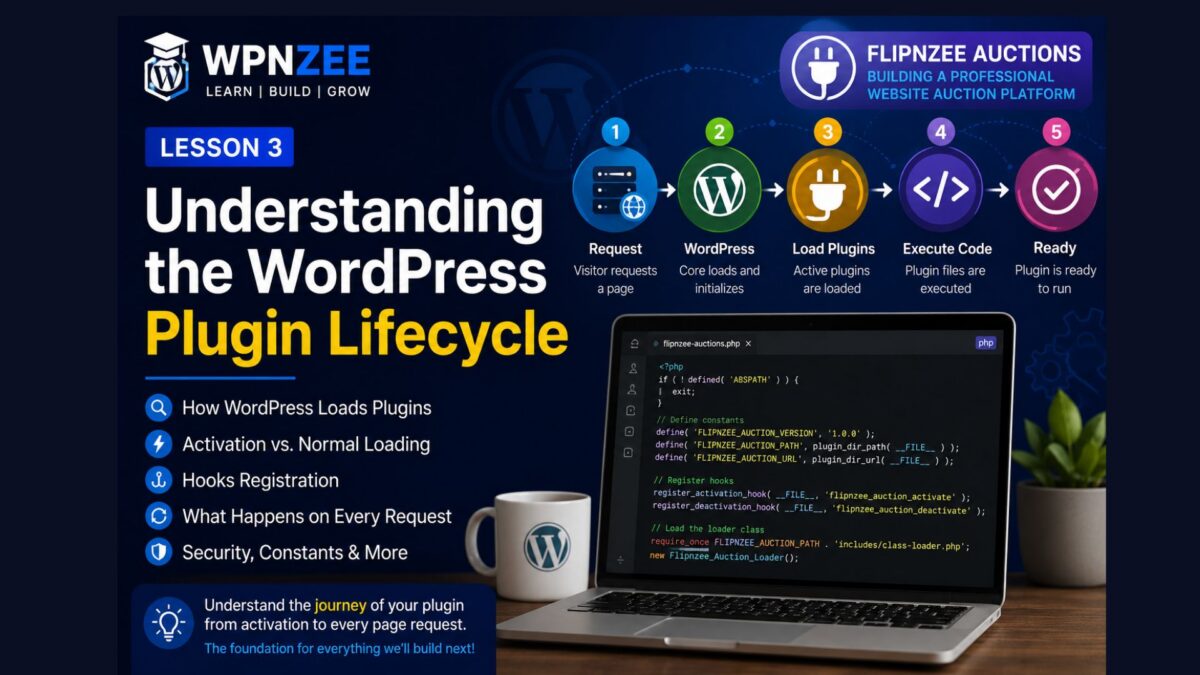
In this lesson, we’ll follow the complete journey of our plugin—from the moment a visitor requests a page until our code is executed.
Learning Objectives
By the end of this lesson, you’ll understand:
How WordPress discovers installed plugins.
What happens during plugin activation.
What happens during every page request.
Why the ABSPATH security check works.
When your plugin code executes.
The purpose of activation and deactivation hooks.
Why understanding the plugin lifecycle makes debugging easier.
Why This Matters
Many beginners think WordPress “magically” loads plugins.
It doesn’t.
There is a very specific sequence of events.
Once you understand that sequence, many concepts become much easier:
Hooks
Filters
AJAX
REST APIs
Database creation
Custom Post Types
Scheduled tasks
Almost every advanced WordPress feature depends on understanding when your code runs.
The Journey Begins
Imagine someone visits:
https://flipnzee.com
The browser sends a request to the web server.
The web server loads WordPress.
WordPress then begins its own startup process.
Eventually it reaches the point where it starts loading plugins.
Step 1 — WordPress Finds Active Plugins
WordPress stores the list of active plugins in its database.
During startup it reads that list.
If your plugin is active:
Flipnzee Auctions
WordPress prepares to load:
flipnzee-auctions/flipnzee-auctions.php
This is why the main plugin file is so important.
Step 2 — WordPress Reads the Plugin Header
Before executing the plugin, WordPress reads the comment block at the top of the file.
Load Plugin
↓
Execute Activation Function
↓
Return Control
Your activation function currently contains:
flush_rewrite_rules();
Later we’ll expand it to:
Create database tables.
Create default settings.
Set plugin version.
Prepare the auction system.
What Happens During Deactivation?
When you deactivate the plugin:
WordPress executes:
flipnzee_auction_deactivate()
Currently it refreshes rewrite rules.
Later we’ll also:
Remove scheduled tasks.
Clear caches.
Perform cleanup.
Notice that we won’t delete auction data during deactivation.
Users expect their data to remain if they reactivate the plugin later.
Understanding One Important Difference
Many beginners think:
Activation happens every time a page loads.
It doesn’t.
Activation occurs once.
Normal plugin loading occurs on every request.
Understanding this distinction prevents many common mistakes.
Improving Our Development Workflow
As our project grows, we’ll start generating temporary files such as plugin ZIP archives.
Rather than storing these generated files in Git, professional developers use a .gitignore file to tell Git which files should be ignored.
In the next lesson, we’ll create our first .gitignore file and begin adopting even more professional development practices.
Lesson Summary
In this lesson, we explored the complete lifecycle of a WordPress plugin. We learned how WordPress discovers plugins, reads plugin headers, executes PHP code, registers hooks, and loads classes. We also distinguished between activation, deactivation, and the normal loading process that occurs on every page request.
Understanding this lifecycle gives us a strong conceptual foundation for every feature we’ll build in the remaining lessons.
Key Takeaways
✓ WordPress loads active plugins during every request.
✓ Plugin headers are read by WordPress, not PHP.
✓ ABSPATH exists because WordPress has already started.
✓ Activation hooks are registered during loading but execute only during activation.
✓ Classes are loaded only after the main plugin file executes.
✓ Understanding the plugin lifecycle makes debugging much easier.
Common Mistakes
Assuming activation hooks run on every page load.
Placing expensive operations outside hooks, causing them to execute on every request.
Removing user data during plugin deactivation.
Confusing plugin registration with plugin execution.
✅ Development environment
✅ Plugin skeleton
✅ Plugin installation
✅ Plugin lifecycle
⬜ .gitignore
⬜ Database tables
⬜ Auction data model
⬜ Bidding engine
⬜ Escrow
⬜ Payment gateways
⬜ Website transfer
⬜ Version 1.0
Developer’s Notebook
One of the biggest milestones in becoming a professional WordPress developer is realizing that your code doesn’t run in isolation. Every plugin participates in WordPress’s startup process. The better you understand that process, the easier it becomes to write efficient, secure, and maintainable plugins. Throughout the remainder of this series, we’ll continue referring back to the plugin lifecycle as we introduce hooks, database tables, AJAX, REST APIs, and background tasks.
Looking Ahead
In Lesson 4, we’ll create our first .gitignore file and begin preparing the project for long-term development. We’ll also discuss which files belong in Git, which should never be committed, and why professional developers treat generated files differently from source code.
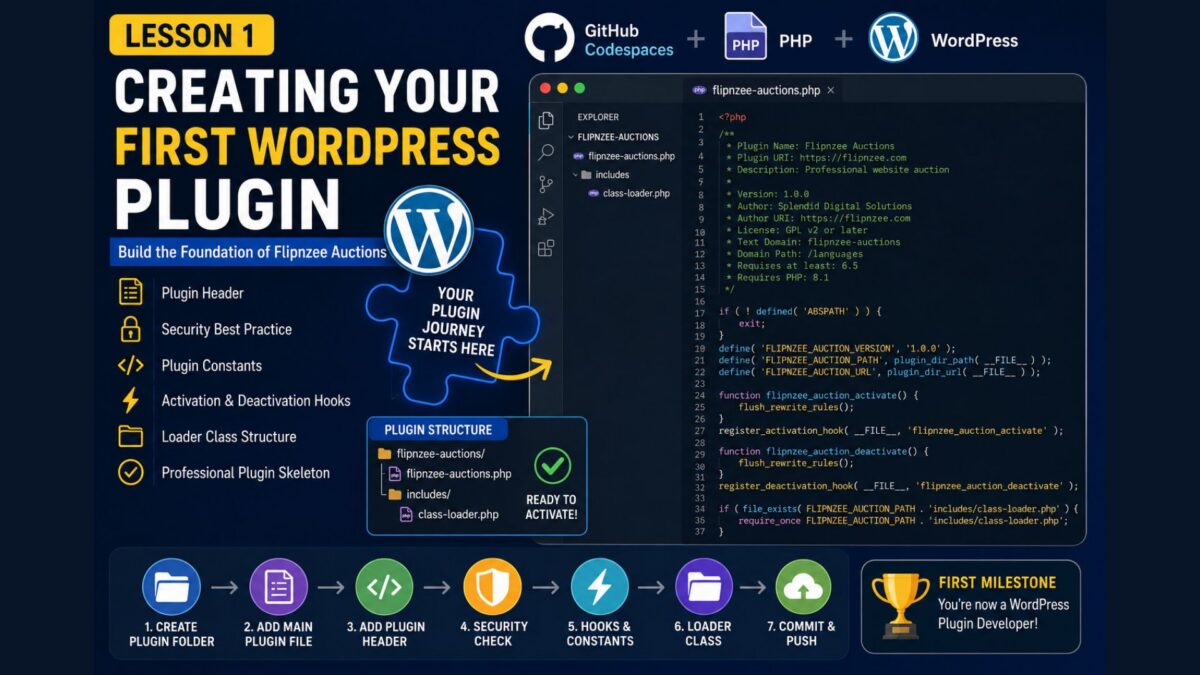
Welcome to Lesson 1 of the Building Flipnzee Auctions series.
In the previous lesson, we created our GitHub repository, launched GitHub Codespaces, organized our project, and learned the basics of version control.
Now it’s time to write our first PHP code.
By the end of this lesson, you’ll have a WordPress plugin that appears in the Plugins page of your WordPress website and can be activated just like any other plugin.
Although the plugin won’t do anything yet, this is an exciting milestone because we’re laying the foundation for everything that follows.
What You’ll Learn
In this lesson you’ll learn how to:
Create the WordPress plugin folder
Create the main plugin file
Understand the plugin header
Protect your plugin from direct access
Define reusable plugin constants
Register activation and deactivation hooks
Create a simple loader class
Commit your changes to GitHub
Step 1: Enter the Plugin Folder
Open the integrated terminal in GitHub Codespaces.
Navigate into the plugin folder:
cd flipnzee-auctions
Confirm your location:
pwd
You should see something similar to:
/workspaces/flipnzee-auctions/flipnzee-auctions
From now on, everything we create belongs inside this folder.
Step 2: Create the Main Plugin File
Create the plugin’s main PHP file.
GUI Method
Click New File in the Explorer.
Create:
flipnzee-auctions.php
Terminal Method
touch flipnzee-auctions.php
Open it:
code flipnzee-auctions.php
Step 3: Add the Plugin Header
Copy the following code into the file.
<?php
/**
* Plugin Name: Flipnzee Auctions
* Plugin URI: https://flipnzee.com
* Description: Professional website auction platform for Flipnzee.
* Version: 1.0.0
* Author: Splendid Digital Solutions
* Author URI: https://flipnzee.com
* License: GPL v2 or later
* Text Domain: flipnzee-auctions
* Domain Path: /languages
* Requires at least: 6.5
* Requires PHP: 8.1
*/
if (!defined('ABSPATH')) {
    exit;
}
Save the file.
Congratulations!
You’ve just created the smallest possible WordPress plugin.
Understanding the Plugin Header
Everything inside the comment block is called the Plugin Header.
When WordPress scans the plugins directory, it looks for these special comments.
Let’s understand each line.
Plugin Name
Plugin Name: Flipnzee Auctions
This is the name displayed on the Installed Plugins page.
Plugin URI
Plugin URI: https://flipnzee.com
This points users to the official plugin website.
Description
Description: Professional website auction platform for Flipnzee.
A short explanation shown beneath the plugin name.
Version
Version: 1.0.0
Every release should have a version number.
Later we’ll learn about semantic versioning.
Author
Author: Splendid Digital Solutions
Displays the plugin developer.
Author URI
Author URI: https://flipnzee.com
Links to your website.
Text Domain
Used for translating the plugin into different languages.
Requires PHP
Requires PHP: 8.1
Prevents installation on servers running older PHP versions.
Constants allow us to define values once and reuse them throughout the plugin.
For example:
FLIPNZEE_AUCTION_PATH
is much cleaner than repeatedly writing:
plugin_dir_path(__FILE__)
Step 6: Register the Activation Hook
Add:
function flipnzee_auction_activate() {
flush_rewrite_rules();
}
register_activation_hook(__FILE__, 'flipnzee_auction_activate');
This function runs automatically when the plugin is activated.
Today it only refreshes WordPress rewrite rules.
Later it will also create our database tables.
Step 7: Register the Deactivation Hook
Add:
function flipnzee_auction_deactivate() {
flush_rewrite_rules();
}
register_deactivation_hook(__FILE__, 'flipnzee_auction_deactivate');
This runs whenever the plugin is deactivated.
Step 8: Create the Includes Folder
Professional plugins avoid placing thousands of lines inside one file.
Create a folder named:
includes
Inside it, create a new file:
class-loader.php
Step 9: Load the Loader Class
Back in flipnzee-auctions.php, add:
if (file_exists(FLIPNZEE_AUCTION_PATH . 'includes/class-loader.php')) {
require_once FLIPNZEE_AUCTION_PATH . 'includes/class-loader.php';
}
This prepares the plugin for modular development.
Step 10: Create the Loader Class
Open:
includes/class-loader.php
Add:
<?php
if (!defined('ABSPATH')) {
    exit;
}
class Flipnzee_Auction_Loader
{
public function __construct()
{
}
}
new Flipnzee_Auction_Loader();
Although the class is currently empty, it will eventually load every component of our plugin, including auctions, bids, payments, reports, APIs, and notifications.
Your plugin skeleton is now safely stored in GitHub.
Summary
Congratulations!
You’ve officially written your first WordPress plugin.
Although it doesn’t yet contain any auction functionality, you’ve created the foundation that every future lesson will build upon.
Lesson Summary
In this lesson, we built the foundation of the Flipnzee Auctions plugin using GitHub Codespaces. We created the main plugin file, added the WordPress plugin header, protected the plugin from direct access, defined reusable constants, registered activation and deactivation hooks, and introduced a loader class to prepare for a modular architecture.
Although the plugin is still in its early stages, we’ve established a professional project structure that will allow us to add features in a clean and maintainable manner as the series progresses.
Key Takeaways
✓ Every WordPress plugin begins with a properly formatted plugin header.
✓ WordPress automatically discovers plugins by reading their headers.
✓ The ABSPATH check prevents direct access to plugin files.
✓ Plugin constants reduce repetition and improve maintainability.
✓ Activation and deactivation hooks allow WordPress to execute code at important points in the plugin lifecycle.
✓ A loader class helps organize larger plugins into smaller, reusable components.
Common Mistakes
When completing this lesson, beginners often encounter one or more of the following issues:
Creating files in the GitHub repository root instead of the flipnzee-auctions plugin folder.
Forgetting to save files before committing changes.
Omitting the opening <?php tag.
Misspelling one of the required plugin header fields.
Creating the includes folder in the wrong location.
Forgetting to commit and sync changes to GitHub.
If your plugin does not appear in the WordPress Plugins page, review each of these items before moving on.
Git Commands Used
During this lesson, we used the following Git and terminal commands:
cd flipnzee-auctions

touch flipnzee-auctions.php

mkdir includes

touch includes/class-loader.php

git add .

git commit -m "Lesson 1: Create plugin skeleton"

git push
Project Status
✅ Development environment ready

✅ GitHub repository created

✅ GitHub Codespaces configured

✅ Plugin skeleton completed

⬜ Database installation

⬜ Auction engine

⬜ Bidding system

⬜ Escrow workflow

⬜ Payment gateways

⬜ Website transfer

⬜ Reports & Analytics

⬜ REST API

⬜ Version 1.0 Release
Source Code
The complete source code for this project is maintained in the official GitHub repository.
Rather than embedding the full source code in every lesson, the GitHub repository serves as the single source of truth and always contains the latest version of the project. This allows the tutorial series to focus on explaining concepts and design decisions while ensuring readers have access to the most up-to-date implementation.
(Insert your GitHub repository link here.)
Developer’s Notebook
One of the biggest mistakes new developers make is trying to build an entire application before creating a solid foundation.
Professional software projects evolve incrementally. We start with a minimal but well-structured plugin, verify that it works, and then add one feature at a time. This approach makes debugging easier, keeps the codebase organized, and reduces the likelihood of introducing difficult-to-find bugs.
Throughout this series, you’ll see the Flipnzee Auctions plugin grow from a simple plugin skeleton into a fully featured website auction platform. By following this step-by-step approach, you’ll not only build a working plugin but also gain insight into how experienced WordPress developers approach large software projects.
Looking Ahead
In Lesson 2, we’ll package our plugin into a ZIP file, install it on a WordPress website, activate it, and verify that WordPress recognizes it as a valid plugin. This will be the first time we see the Flipnzee Auctions plugin running inside WordPress.
Have you ever wondered how website marketplaces like Flippa allow buyers to place bids, make offers, purchase websites, and complete secure transfers? If you’re a WordPress developer, you may have searched for an auction plugin only to discover that most are designed for physical products rather than digital assets such as websites and domain names.
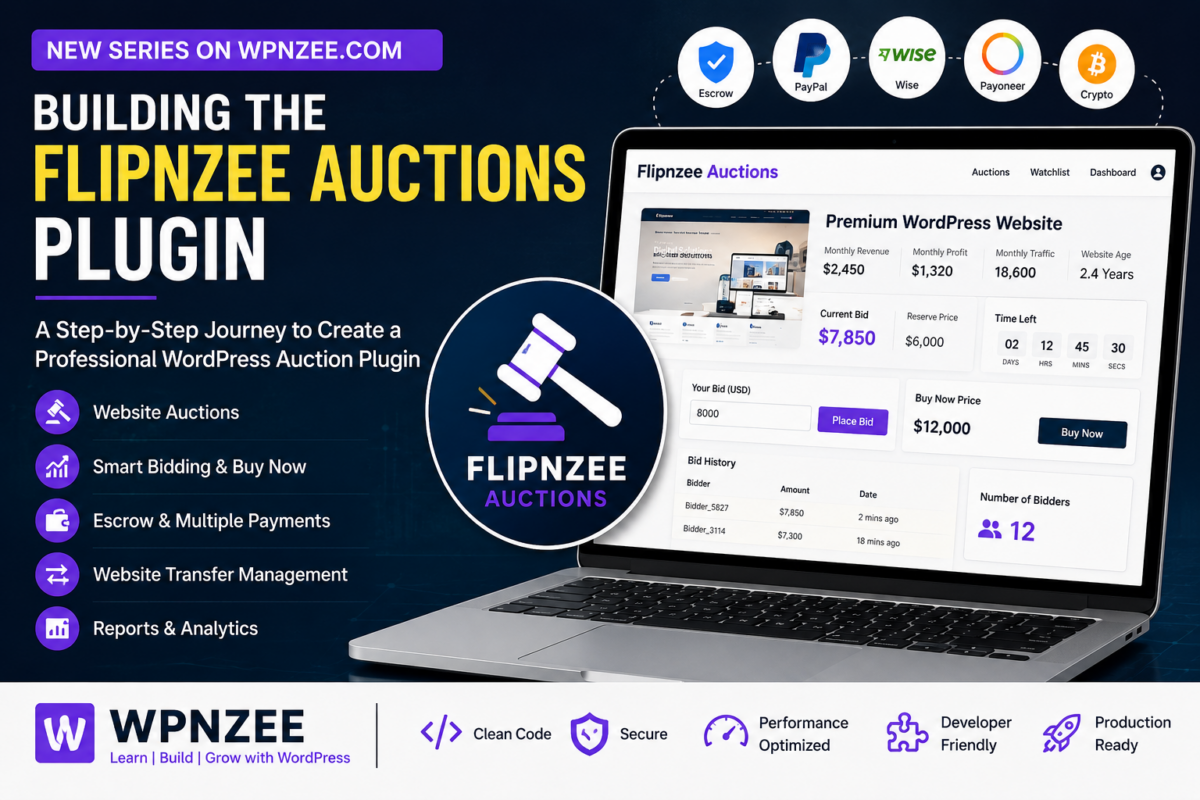
In this new series on WPNzee, we’re going to build a professional WordPress auction plugin from the ground up.
This won’t be a collection of isolated code snippets. Instead, it will be a structured, real-world software development project where each lesson builds upon the previous one. By the end of the series, we’ll have created a fully functional plugin that powers website auctions for Flipnzee.
What We’re Building
The plugin, Flipnzee Auctions, is designed specifically for buying and selling websites. It will eventually include features such as:
Website auction listings
Starting price and reserve price
Buy Now option
Automatic proxy bidding
Bid history
Watchlist
Countdown timers
Escrow-based payments
Alternative payment methods including PayPal, Wise, Payoneer, bank transfer, and cryptocurrency
Buyer and seller dashboards
Website transfer checklist
Auction reports and analytics
Email notifications
Security and anti-fraud measures
Rather than trying to build everything at once, we’ll develop the plugin step by step, just as a professional software team would.
Who Is This Series For?
This series is intended for:
WordPress developers
PHP developers
Plugin developers
Freelancers
Agency owners
Computer science students
Anyone who wants to learn how large WordPress plugins are architected
A basic understanding of PHP and WordPress will be helpful, but every important concept will be explained along the way.
What Makes This Series Different?
Many tutorials stop after creating a simple plugin that displays “Hello World.”
This series is different.
We’ll discuss software architecture, database design, WordPress coding standards, security, performance, scalability, maintainability, and clean code. Every lesson will explain not only what we’re building, but also why we’re building it that way.
Our goal is to produce a plugin that is robust enough for production use while serving as an educational resource for developers who want to build professional WordPress applications.
How the Series Will Be Organized
The series will be divided into logical stages, including:
Plugin foundation and architecture
Database design
Auction engine
Bidding system
Payment workflow
Escrow integration
Website transfer management
Notifications
Reporting and analytics
Testing, optimization, and release
Each lesson will contain complete source code, detailed explanations, and practical insights that you can immediately apply to your own projects.
Learn by Building
The best way to learn software development is by building something meaningful.
Instead of reading about plugin development in theory, you’ll follow the complete journey of creating a commercial-quality WordPress auction plugin from scratch.
Whether your goal is to build your own marketplace, improve your PHP skills, or better understand WordPress internals, I hope this series helps you gain both confidence and practical experience.
function wpnzee_dashboard_page() {

    echo '<div class="wrap">';

    echo '<h1>WPNzee Dashboard</h1>';

    echo '<p>Welcome to your first plugin dashboard.</p>';

    echo '</div>';

}
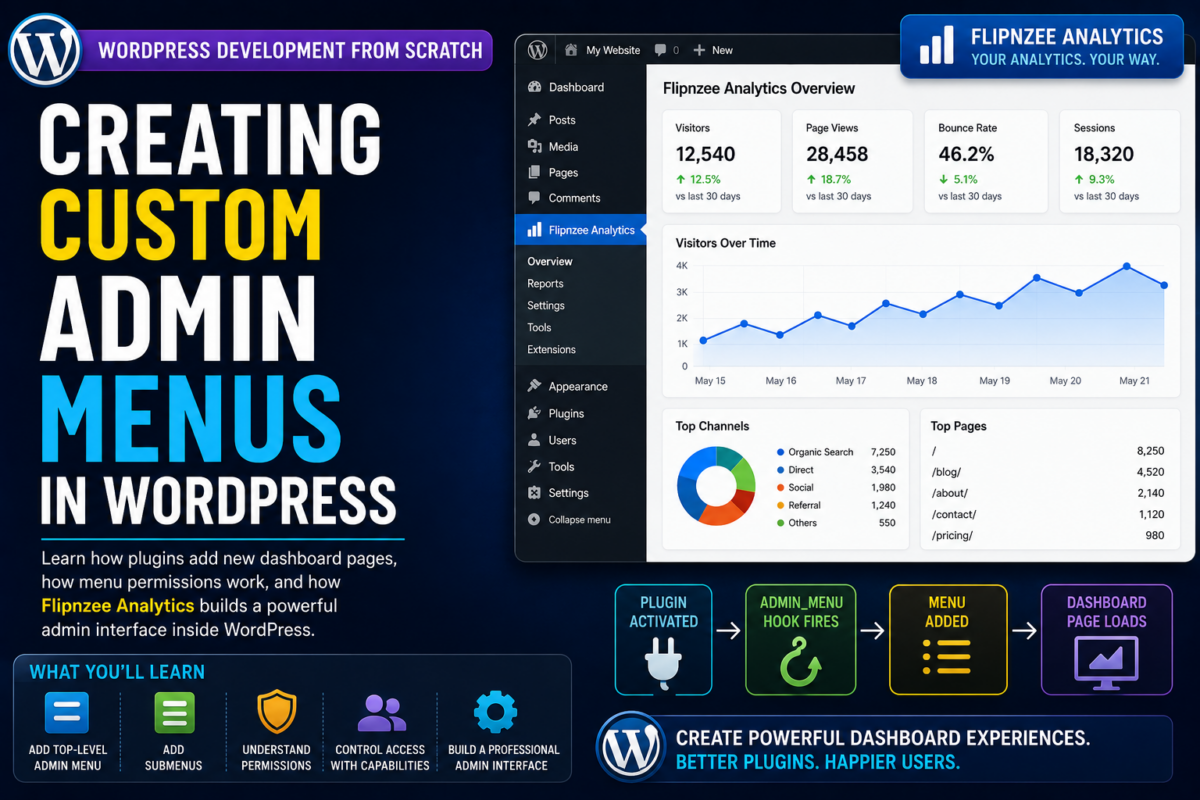
After activation, you’ll see a new menu inside the WordPress dashboard.
Understanding User Permissions
One of the most important concepts in WordPress administration is permissions.
Example:
'manage_options'
Only administrators can access pages using this capability.
Common Capabilities
Capability
Access
manage_options
Administrators
edit_posts
Authors and above
publish_posts
Editors and above
activate_plugins
Administrators
edit_pages
Editors and above
Choosing the correct capability is important for security.
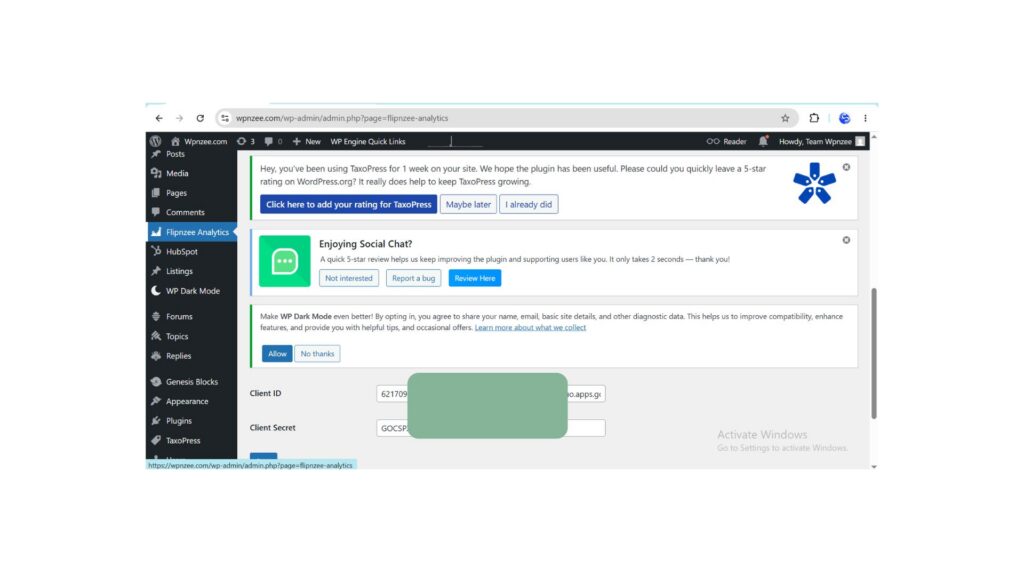
The Flipnzee Analytics plugin uses custom admin pages to manage:
Google Analytics connections
Property configuration
Reports
Dashboard widgets
Search Console integration
Instead of placing everything inside Settings, it provides a dedicated interface designed specifically for analytics management.
This creates a better user experience.
Typical Flow of an Admin Menu
Plugin Activated
          ↓
admin_menu Hook Fires
          ↓
add_menu_page()
          ↓
Menu Appears in Sidebar
          ↓
User Clicks Menu
          ↓
Callback Function Executes
          ↓
Dashboard Page Loads
Understanding this flow makes admin development much easier.
Common Beginner Mistakes
Using Duplicate Slugs
Bad:
'settings'
Good:
'wpnzee-settings'
Always use unique prefixes.
Incorrect Permissions
Avoid:
'read'
for administrative pages.
Choose capabilities carefully.
Mixing Logic and Presentation
Keep:
Menu Registration
separate from:
Page Rendering
This improves maintainability.
Creating Too Many Top-Level Menus
Bad:
Dashboard
Posts
Pages
Plugin A
Plugin B
Plugin C
Plugin D
Use submenus whenever possible.
What You’ve Learned
In this tutorial you learned:
✓ What admin menus are
✓ How plugins create dashboard pages
✓ How add_menu_page() works
✓ How add_submenu_page() works
✓ How permissions control access
✓ How menu callbacks work
✓ How Flipnzee Analytics organizes its admin interface
✓ Best practices for scalable dashboard development
Key Takeaway
Admin menus are the foundation of plugin user interfaces.
They provide a professional way for users to interact with plugin settings, reports, and tools.
Most successful WordPress plugins rely heavily on custom admin pages, making this an essential skill for every plugin developer.
Next Lesson
In the next tutorial we’ll explore:
Building a Professional Settings Page Using the WordPress Settings API
You’ll learn how plugins save settings securely, how WordPress stores configuration data, and how the Flipnzee Analytics plugin manages API credentials, analytics settings, and user preferences using professional WordPress development practices.
This is a common pattern you’ll see in professional plugins.
Common Beginner Mistakes
Running Setup Code on Every Page Load
Bad:
add_option(
    'plugin_version',
    '1.0'
);
This executes constantly.
Use activation hooks instead.
Forgetting Cleanup
Always remove:
Scheduled events
Temporary files
Cached data
when appropriate.
Deleting User Data on Deactivation
Avoid:
delete_option(...)
during deactivation.
Users may reactivate later.
Save permanent cleanup for uninstall.
Not Checking Existing Settings
Before creating options:
if (!get_option('plugin_version')) {
    add_option(...);
}
Avoid overwriting user settings.
What You’ve Learned
In this tutorial you learned:
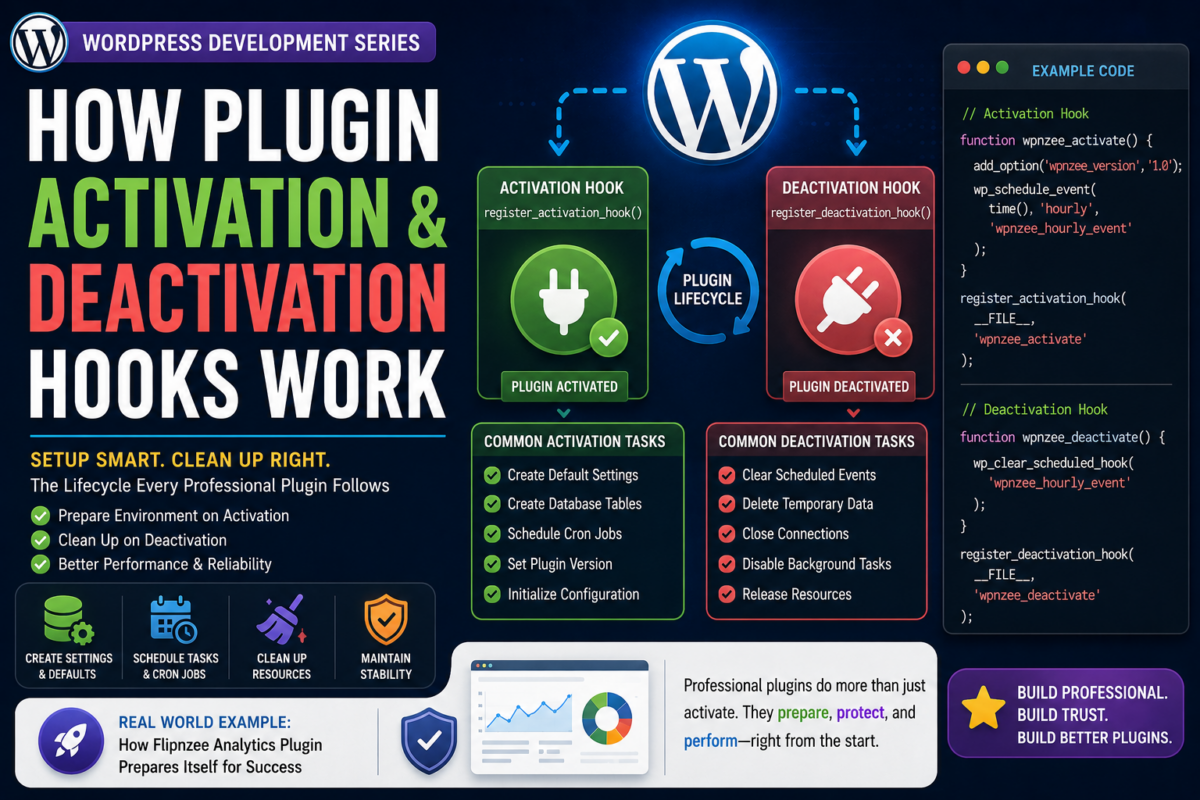
✓ What activation hooks are
✓ What deactivation hooks are
✓ How register_activation_hook() works
✓ How register_deactivation_hook() works
✓ Common setup tasks
✓ Common cleanup tasks
✓ The difference between deactivate and uninstall
✓ How professional plugins prepare their environment
Key Takeaway
Activation hooks allow a plugin to prepare itself before use.
Deactivation hooks allow a plugin to shut down gracefully.
Together they help create reliable, professional WordPress plugins that behave correctly throughout their lifecycle.
Every serious WordPress developer should understand these hooks before building larger projects.
Next Lesson
In the next tutorial we’ll explore:
Loading CSS and JavaScript Properly in WordPress
You’ll learn why professional plugins never use raw HTML <script> and <link> tags, how WordPress manages assets using enqueue functions, and how the Flipnzee Analytics plugin loads styles and scripts efficiently across the admin dashboard and frontend.
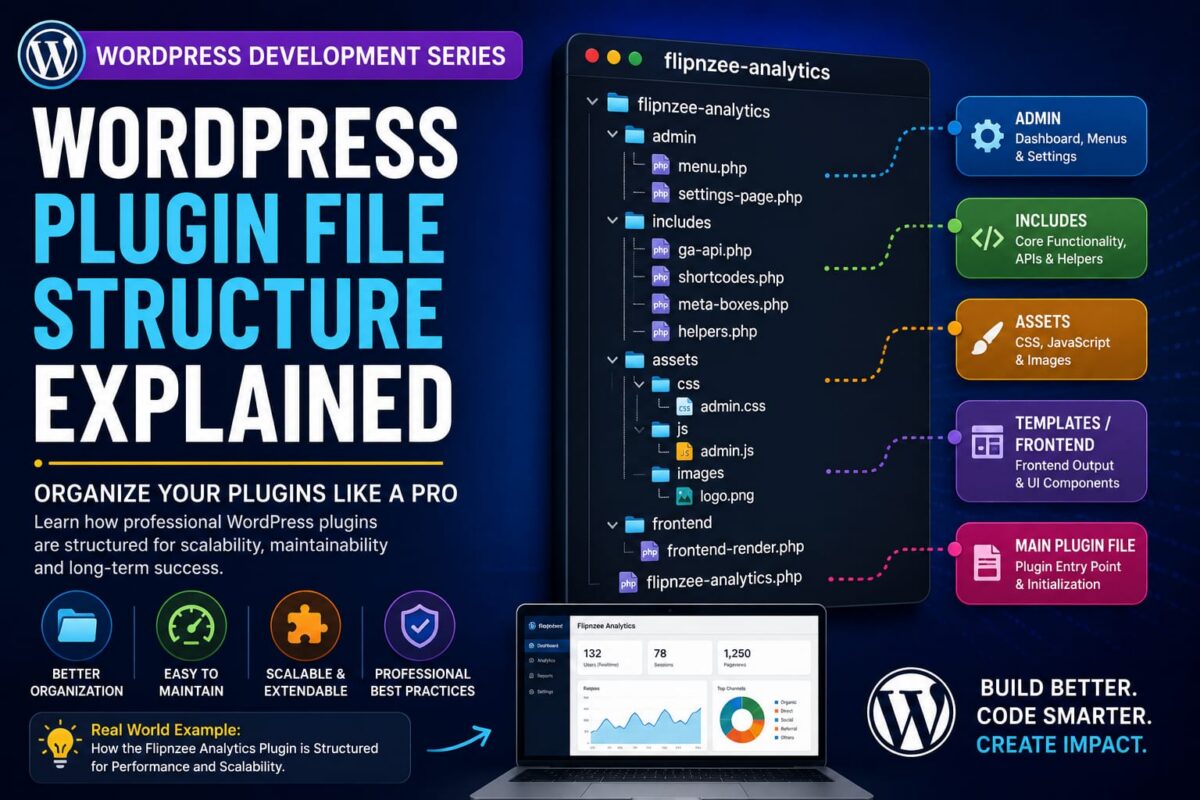
This structure is suitable for most professional WordPress projects.
Common Beginner Mistakes
Putting Everything in One File
Works initially.
Becomes difficult later.
Mixing HTML and PHP Everywhere
Hard to maintain.
Use templates instead.
Not Using Folders
Twenty files in the plugin root becomes confusing.
Organize related files together.
Poor File Names
Use descriptive names.
Future-you will thank you.
What You’ve Learned
In this tutorial you learned:
✓ Why plugin structure matters
✓ The role of the main plugin file
✓ What the includes folder does
✓ What the admin folder does
✓ What the assets folder does
✓ What the templates folder does
✓ How Flipnzee Analytics organizes functionality
✓ Best practices for scalable plugin development
Key Takeaway
A plugin’s structure may seem unimportant when a project is small.
However, as features grow, good organization becomes essential.
Professional WordPress developers spend just as much time organizing code as they do writing it.
A clean structure makes plugins easier to:
Maintain
Debug
Extend
Scale
Next Lesson
In the next tutorial we’ll explore:
How Plugin Activation and Deactivation Hooks Work
You’ll learn what happens when a plugin is activated, how WordPress runs setup tasks automatically, and how professional plugins prepare their environment before users start using them.