Lesson 63: Automatically Create Transactions When an Auction Ends Using WordPress Action Hooks

Overview

In the previous lesson, we built the Transaction Manager and created the wp_flipnzee_transactions table. However, transactions are still created manually. The next logical step is to connect the Auction Manager with the Transaction Manager.

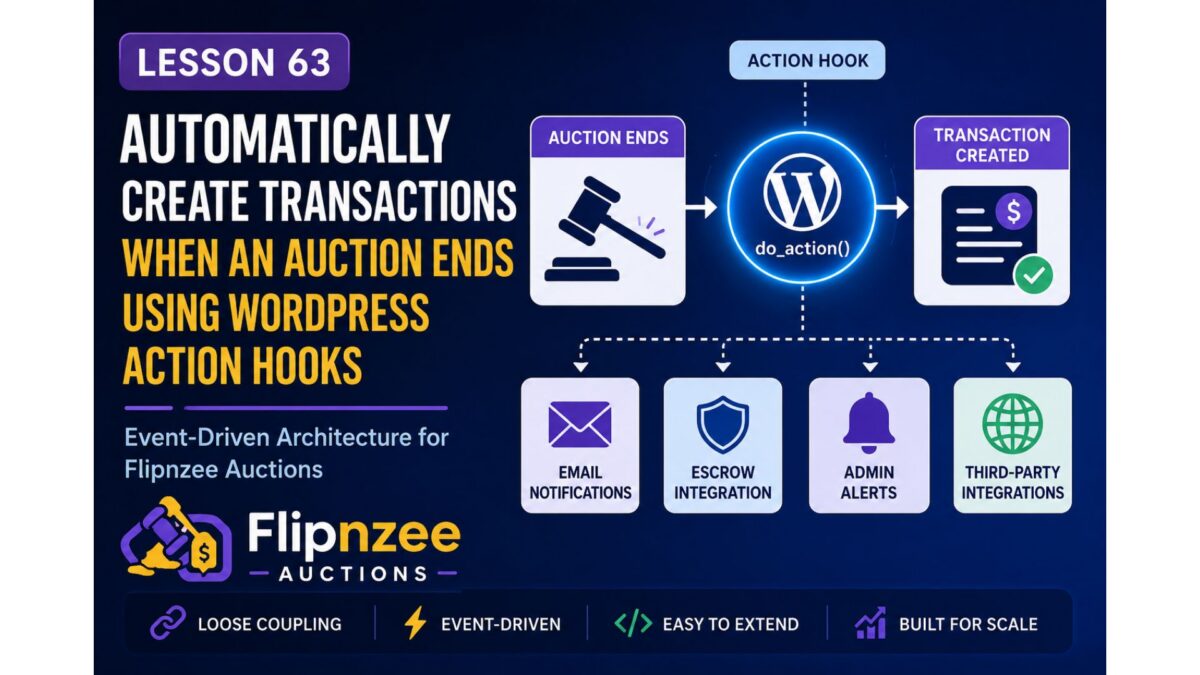
Rather than calling the Transaction Manager directly from the Auction Manager, we’ll use one of WordPress’ most powerful features—Action Hooks. This creates a loosely coupled, event-driven architecture where different components communicate through events instead of depending on each other directly.

By the end of this lesson, whenever an auction winner is determined, the plugin will automatically create a pending transaction without modifying the core auction logic.


What You Will Learn

In this lesson you will learn how to:

  • Understand event-driven programming in WordPress.
  • Create a custom WordPress action hook.
  • Pass auction data through an action hook.
  • Listen for custom actions.
  • Automatically create transactions after an auction closes.
  • Reduce coupling between plugin components.
  • Build an extensible architecture for future escrow integrations.

Why This Improvement Matters

Suppose the Auction Manager directly inserts a transaction into the database.

Today that may seem fine.

Tomorrow you may also want to:

  • Send buyer emails.
  • Send seller emails.
  • Start escrow.
  • Notify administrators.
  • Trigger webhooks.
  • Generate invoices.
  • Award badges.
  • Push data to an external CRM.

If every feature is added inside the Auction Manager, the class quickly becomes difficult to maintain.

Using WordPress hooks solves this problem elegantly.

Instead of saying:

“Create a transaction.”

the Auction Manager simply says:

“An auction has ended.”

Any other class can decide whether it wants to respond.


Architecture Before Lesson 63

Auction Manager
      │
      ▼
Determine Winner

Architecture After Lesson 63

Auction Manager
      │
      ▼
do_action()

      │
      ▼

Transaction Manager

      │
      ▼

Create Transaction

Later we can attach even more listeners:

Auction Manager

      │

do_action()

      │
      ├────────► Transaction Manager
      ├────────► Email Manager
      ├────────► Escrow Manager
      ├────────► Notification Manager
      └────────► REST API

This is exactly how many mature WordPress plugins are designed.


What Will Be Implemented

During this lesson we will:

Step 1

Fire a custom action when a winner is determined.


Step 2

Create a listener inside the Transaction Manager.


Step 3

Automatically insert a new transaction.


Step 4

Log transaction creation in the Activity Log.


Step 5

Test the complete workflow.


Expected Result

Before Lesson 63:

Auction Ends

↓

Winner Selected

↓

Nothing Else Happens

After Lesson 63:

Auction Ends

↓

Winner Selected

↓

WordPress Action Fired

↓

Transaction Created

↓

Activity Logged

Files That Will Be Modified

  • includes/class-auction-manager.php
  • includes/class-transaction-manager.php
  • includes/class-activity-log.php

No database changes are required.


Skills You’ll Practice

  • WordPress Action Hooks
  • Custom Events
  • Loose Coupling
  • Event-Driven Programming
  • Clean Plugin Architecture
  • Object-Oriented WordPress Development

Difficulty Level

Intermediate

This lesson introduces one of the most important architectural concepts in WordPress development. Understanding custom action hooks will help you build plugins that are easier to extend, maintain, and integrate with future features such as escrow services, payment gateways, and notification systems.


Final Thoughts

Lesson 63 represents a significant shift in the design of the Flipnzee Auctions plugin. Instead of tightly connecting the Auction Manager with every future component, we will use WordPress’ hook system to broadcast auction events and allow independent classes to respond as needed.

This event-driven approach provides a solid foundation for the remaining roadmap, including escrow integration, payment workflows, buyer and seller notifications, and third-party integrations, while keeping the codebase clean and modular.
Lesson 56 – Building a WordPress Hook-Based Auction Lifecycle


Why This Lesson?

In Lesson 55, we successfully automated the auction lifecycle.

Whenever active auctions are retrieved, the plugin now automatically detects expired auctions and updates their status to Closed.

The feature works correctly.

However, there is one limitation.

Only the Auction Manager knows that an auction has just been closed.

No other plugin can respond to that event.

As Flipnzee grows into an ecosystem of complementary plugins, we need a way for different plugins to communicate without becoming tightly coupled.

This is exactly what WordPress Actions and Filters were designed for.


Why Hooks Matter

Suppose in the future Flipnzee Analytics wants to know when an auction closes.

Without hooks, the Analytics plugin would need to modify the Auctions plugin directly.

That creates unnecessary dependencies.

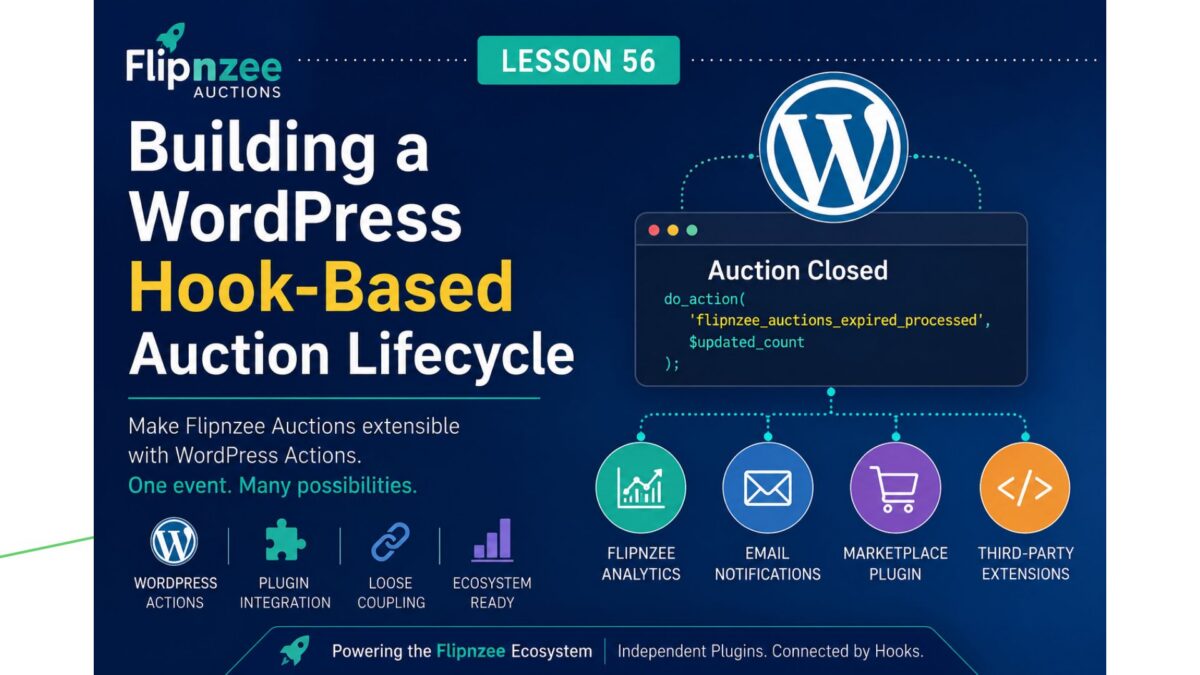
Instead, the Auctions plugin can simply announce:

“An auction has just been closed.”

Other plugins can decide whether they care about that event.


Current Flow

Visitor
    │
    ▼
Auction Shortcode
    │
    ▼
Auction Manager
    │
    ▼
Update Expired Auctions
    │
    ▼
Database

Only the Auction Manager knows what happened.


New Flow

Visitor
    │
    ▼
Auction Manager
    │
    ▼
Auction Closed
    │
    ├────────► Flipnzee Analytics
    │
    ├────────► Email Notifications
    │
    ├────────► Future Marketplace Plugin
    │
    └────────► Other Developers

Now the Auctions plugin becomes extensible.


What We’ll Build

Whenever one or more auctions are automatically closed, we’ll fire a WordPress action.

For example:

do_action(
    'flipnzee_auctions_expired_processed',
    $updated_count
);

or perhaps an even more descriptive hook if we process individual auctions in the future.

Initially, nothing else will listen to this action.

That’s perfectly fine.

We’re building the extension point first.


Why This Fits the Flipnzee Platform

Flipnzee Analytics should never need to edit the Auctions plugin.

Instead, it can simply listen for events such as:

  • Auction Created
  • Auction Updated
  • Bid Placed
  • Highest Bid Changed
  • Auction Closed
  • Winner Selected

Likewise, future plugins could react to the same events.

This keeps every plugin independent while allowing them to work together seamlessly.


Learning Objectives

In this lesson we will learn:

  • WordPress Actions
  • Plugin interoperability
  • Loose coupling
  • Designing extension points
  • Building an extensible plugin architecture

Files Expected to Change

Most likely only:

includes/class-auction-manager.php

No database changes.

No UI changes.

No CSS changes.


Expected Behaviour

Today:

Auction closes

Tomorrow:

Auction closes

↓

WordPress Action Fires

↓

Other plugins can respond

Visitors won’t notice any visual difference, but the internal architecture becomes significantly more powerful.


Why This Before WP-Cron?

At first glance, WP-Cron might seem like the obvious next step.

However, even when we introduce background processing, we will still want other plugins to know that an auction has closed.

By creating the extension point first, the scheduled task can later reuse the same lifecycle events.

This results in cleaner, more reusable code.


Looking Ahead

This lesson prepares the way for future features such as:

  • Scheduled auction processing (WP-Cron)
  • Winner email notifications
  • Seller notifications
  • Marketplace statistics
  • Analytics integration
  • Activity logs
  • Third-party extensions

Conclusion

Lesson 56 introduces one of the most important concepts in professional WordPress plugin development: building for extensibility.

Rather than treating Flipnzee Auctions as a standalone plugin, we begin designing it as part of the wider Flipnzee Platform, where independent plugins communicate through well-defined WordPress hooks instead of direct dependencies.


Why I changed the roadmap

I think this lesson is more valuable than jumping straight into WP-Cron because it establishes the architectural foundation first. When we later implement scheduled processing, email notifications, or deeper integration with Flipnzee Analytics, they’ll all be able to reuse the same hook system instead of requiring further refactoring.

This is exactly the kind of incremental, professional evolution we’ve been following throughout the project.

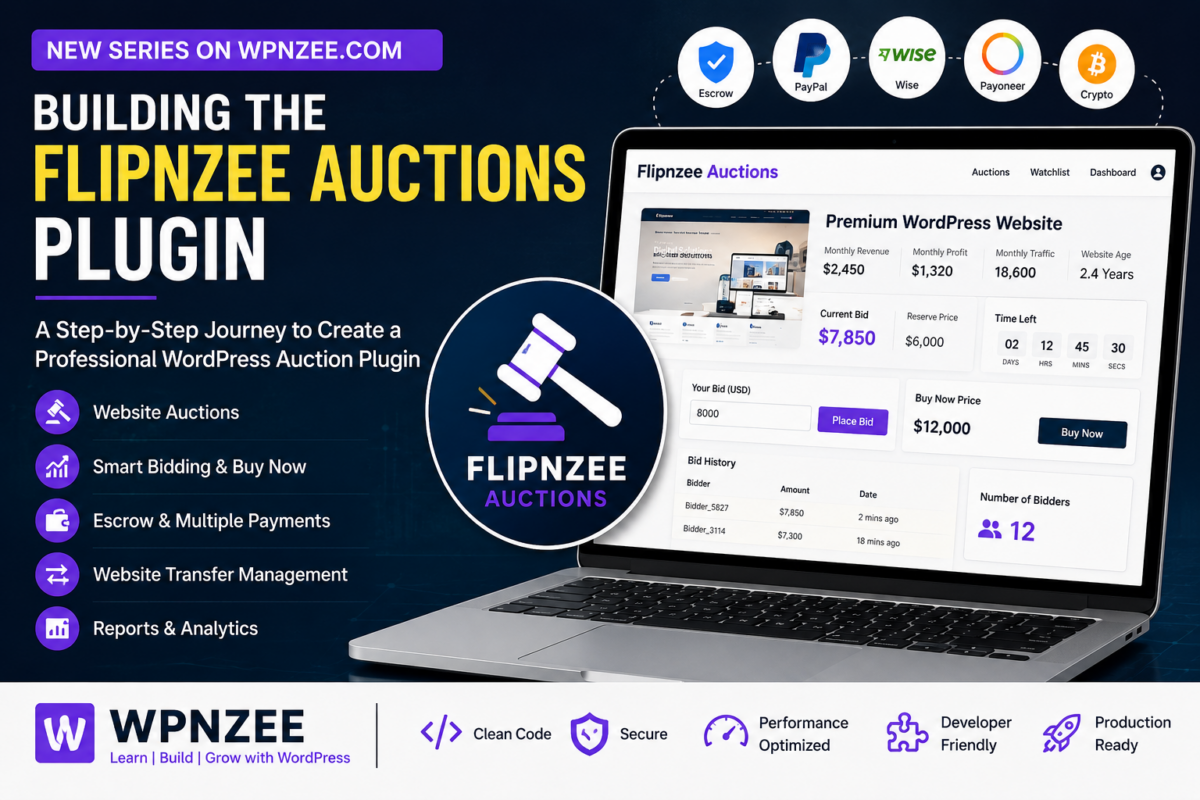
Introducing the Flipnzee Auctions Plugin Development Series

Have you ever wondered how website marketplaces like Flippa allow buyers to place bids, make offers, purchase websites, and complete secure transfers? If you’re a WordPress developer, you may have searched for an auction plugin only to discover that most are designed for physical products rather than digital assets such as websites and domain names.

In this new series on WPNzee, we’re going to build a professional WordPress auction plugin from the ground up.

This won’t be a collection of isolated code snippets. Instead, it will be a structured, real-world software development project where each lesson builds upon the previous one. By the end of the series, we’ll have created a fully functional plugin that powers website auctions for Flipnzee.

What We’re Building

The plugin, Flipnzee Auctions, is designed specifically for buying and selling websites. It will eventually include features such as:

  • Website auction listings
  • Starting price and reserve price
  • Buy Now option
  • Automatic proxy bidding
  • Bid history
  • Watchlist
  • Countdown timers
  • Escrow-based payments
  • Alternative payment methods including PayPal, Wise, Payoneer, bank transfer, and cryptocurrency
  • Buyer and seller dashboards
  • Website transfer checklist
  • Auction reports and analytics
  • Email notifications
  • Security and anti-fraud measures

Rather than trying to build everything at once, we’ll develop the plugin step by step, just as a professional software team would.

Who Is This Series For?

This series is intended for:

  • WordPress developers
  • PHP developers
  • Plugin developers
  • Freelancers
  • Agency owners
  • Computer science students
  • Anyone who wants to learn how large WordPress plugins are architected

A basic understanding of PHP and WordPress will be helpful, but every important concept will be explained along the way.

What Makes This Series Different?

Many tutorials stop after creating a simple plugin that displays “Hello World.”

This series is different.

We’ll discuss software architecture, database design, WordPress coding standards, security, performance, scalability, maintainability, and clean code. Every lesson will explain not only what we’re building, but also why we’re building it that way.

Our goal is to produce a plugin that is robust enough for production use while serving as an educational resource for developers who want to build professional WordPress applications.

How the Series Will Be Organized

The series will be divided into logical stages, including:

  1. Plugin foundation and architecture
  2. Database design
  3. Auction engine
  4. Bidding system
  5. Payment workflow
  6. Escrow integration
  7. Website transfer management
  8. Notifications
  9. Reporting and analytics
  10. Testing, optimization, and release

Each lesson will contain complete source code, detailed explanations, and practical insights that you can immediately apply to your own projects.

Learn by Building

The best way to learn software development is by building something meaningful.

Instead of reading about plugin development in theory, you’ll follow the complete journey of creating a commercial-quality WordPress auction plugin from scratch.

Whether your goal is to build your own marketplace, improve your PHP skills, or better understand WordPress internals, I hope this series helps you gain both confidence and practical experience.

Let’s begin our journey with Lesson 0: Setting Up Your Development Environment with GitHub Codespaces, where we’ll lay the foundation for everything that follows.

How Plugin Activation and Deactivation Hooks Work

Series: WordPress Development From Scratch
Level: Beginner to Intermediate
Project Reference: Flipnzee Analytics


Introduction

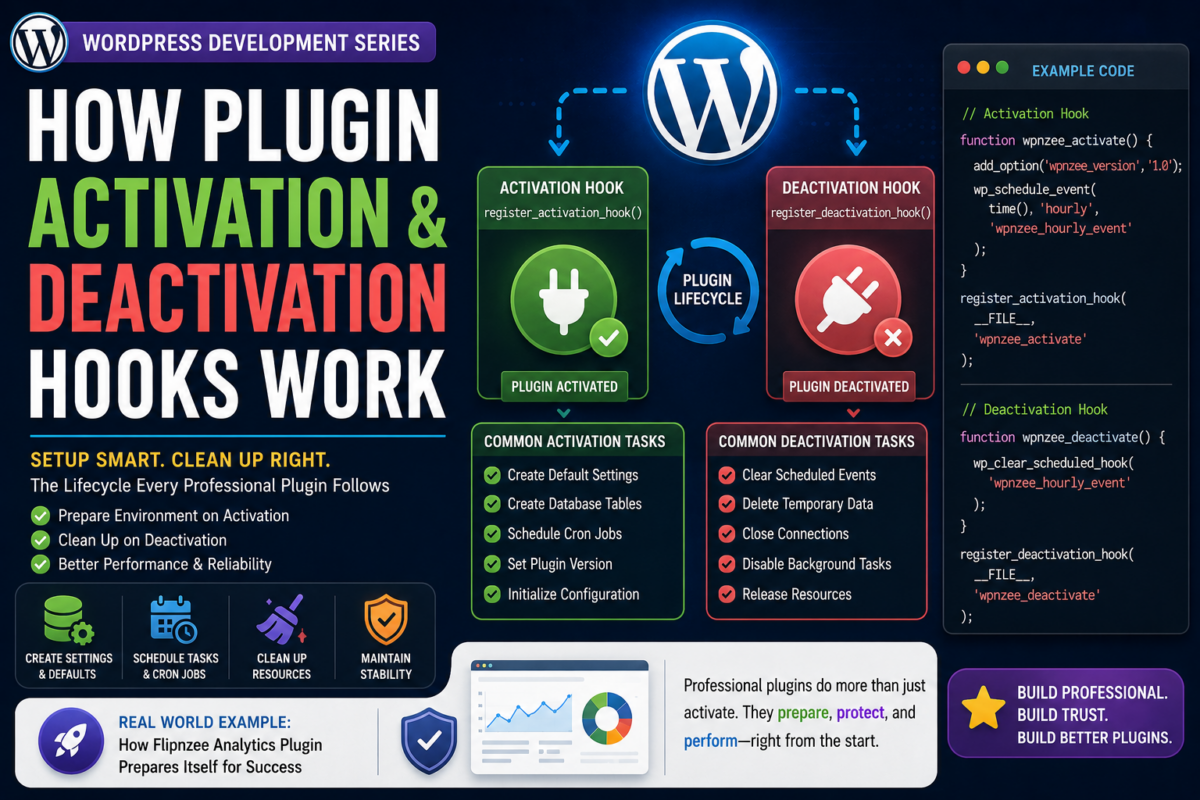
When you activate a WordPress plugin, something special happens behind the scenes.

WordPress doesn’t simply mark the plugin as “active.” Instead, it gives the plugin an opportunity to perform setup tasks before it starts running.

Similarly, when a plugin is deactivated, WordPress allows the plugin to clean up after itself.

This process is handled using Activation Hooks and Deactivation Hooks.

In this tutorial you’ll learn:

  • What activation hooks are
  • What deactivation hooks are
  • Why they are important
  • How WordPress executes them
  • Common setup tasks during activation
  • Common cleanup tasks during deactivation
  • How professional plugins use these hooks
  • How Flipnzee Analytics uses plugin initialization

By the end, you’ll understand one of the most important parts of building production-ready WordPress plugins.


What Happens When You Activate a Plugin?

Imagine installing a plugin that creates:

  • Custom database tables
  • Default settings
  • User roles
  • Scheduled tasks

These things must be created before the plugin can work properly.

WordPress solves this problem using an activation hook.

When a user clicks:

Plugins → Activate

WordPress automatically executes any activation function registered by the plugin.


Activation Hook Syntax

WordPress provides:

register_activation_hook()

Example:

register_activation_hook(
    __FILE__,
    'wpnzee_activate'
);

This tells WordPress:

“Run the function wpnzee_activate() when this plugin is activated.”


Creating Your First Activation Hook

Example:

function wpnzee_activate() {

    update_option(
        'wpnzee_version',
        '1.0.0'
    );

}

register_activation_hook(
    __FILE__,
    'wpnzee_activate'
);

When the plugin activates:

wpnzee_version = 1.0.0

is automatically stored in the database.


Why Store Plugin Settings During Activation?

Many plugins need default configuration values.

Example:

function wpnzee_activate() {

    add_option(
        'wpnzee_show_widget',
        'yes'
    );

}

Now the plugin starts with sensible defaults.

The user doesn’t need to configure everything manually.


What Happens Behind the Scenes?

The activation process looks like:

User clicks Activate
          ↓
WordPress loads plugin
          ↓
Activation Hook Executes
          ↓
Setup Tasks Run
          ↓
Plugin Becomes Active

Common Activation Tasks

Professional plugins often:

Create Default Settings

add_option(
    'plugin_color',
    'blue'
);

Create Database Tables

global $wpdb;

Custom tables are often created here.


Schedule Cron Jobs

wp_schedule_event(
    time(),
    'hourly',
    'my_plugin_event'
);

Create User Roles

add_role(
    'analytics_manager',
    'Analytics Manager'
);

Store Plugin Version

update_option(
    'plugin_version',
    '1.0'
);

This helps future upgrades.


Understanding Deactivation Hooks

Deactivation hooks perform cleanup.

WordPress provides:

register_deactivation_hook()

Example:

register_deactivation_hook(
    __FILE__,
    'wpnzee_deactivate'
);

When a user clicks:

Deactivate

the specified function runs.


Creating Your First Deactivation Hook

Example:

function wpnzee_deactivate() {

    wp_clear_scheduled_hook(
        'wpnzee_hourly_event'
    );

}

register_deactivation_hook(
    __FILE__,
    'wpnzee_deactivate'
);

This removes scheduled events when the plugin is disabled.


Why Deactivation Matters

Imagine a plugin schedules:

Every Hour:
Fetch Analytics Data

If the plugin is deactivated but the scheduled event continues running:

  • Resources are wasted
  • Errors may occur
  • Performance suffers

Deactivation hooks prevent this.


Activation vs Deactivation

ActivationDeactivation
Setup environmentClean up environment
Create settingsRemove temporary processes
Schedule tasksUnschedule tasks
Initialize pluginDisable plugin activity

Think of it like:

Activation   = Setup
Deactivation = Shutdown

What About Uninstall?

Many beginners confuse:

Deactivate

with:

Delete

They are different.

Deactivate

Plugin remains installed.

Delete

Plugin is removed entirely.

For deletion, WordPress provides:

uninstall.php

or

register_uninstall_hook()

These are used to permanently remove data.


Real Example: Analytics Plugin

Imagine Flipnzee Analytics is activated.

Possible activation tasks:

Store Plugin Version
Create Default Settings
Initialize Analytics Configuration
Prepare Cache System
Schedule Data Refresh Jobs

These ensure the plugin is ready before the user starts using it.


Example Plugin with Both Hooks

<?php

function wpnzee_activate() {

    add_option(
        'wpnzee_version',
        '1.0'
    );

}

function wpnzee_deactivate() {

    wp_clear_scheduled_hook(
        'wpnzee_hourly_event'
    );

}

register_activation_hook(
    __FILE__,
    'wpnzee_activate'
);

register_deactivation_hook(
    __FILE__,
    'wpnzee_deactivate'
);

This is a common pattern you’ll see in professional plugins.


Common Beginner Mistakes

Running Setup Code on Every Page Load

Bad:

add_option(
    'plugin_version',
    '1.0'
);

This executes constantly.

Use activation hooks instead.


Forgetting Cleanup

Always remove:

  • Scheduled events
  • Temporary files
  • Cached data

when appropriate.


Deleting User Data on Deactivation

Avoid:

delete_option(...)

during deactivation.

Users may reactivate later.

Save permanent cleanup for uninstall.


Not Checking Existing Settings

Before creating options:

if (!get_option('plugin_version')) {
    add_option(...);
}

Avoid overwriting user settings.


What You’ve Learned

In this tutorial you learned:

✓ What activation hooks are

✓ What deactivation hooks are

✓ How register_activation_hook() works

✓ How register_deactivation_hook() works

✓ Common setup tasks

✓ Common cleanup tasks

✓ The difference between deactivate and uninstall

✓ How professional plugins prepare their environment


Key Takeaway

Activation hooks allow a plugin to prepare itself before use.

Deactivation hooks allow a plugin to shut down gracefully.

Together they help create reliable, professional WordPress plugins that behave correctly throughout their lifecycle.

Every serious WordPress developer should understand these hooks before building larger projects.


Next Lesson

In the next tutorial we’ll explore:

Loading CSS and JavaScript Properly in WordPress

You’ll learn why professional plugins never use raw HTML <script> and <link> tags, how WordPress manages assets using enqueue functions, and how the Flipnzee Analytics plugin loads styles and scripts efficiently across the admin dashboard and frontend.

WordPress Plugin File Structure Explained

Series: WordPress Development From Scratch
Level: Beginner to Intermediate
Project Reference: Flipnzee Analytics


Introduction

As your WordPress plugins become more powerful, placing all your code inside a single PHP file quickly becomes difficult to manage.

While a simple plugin may only contain one file, professional plugins often contain dozens or even hundreds of files organized into folders.

In this tutorial you’ll learn:

  • Why plugin structure matters
  • How beginner plugins are organized
  • How professional plugins are organized
  • Common plugin folders and their purposes
  • How the Flipnzee Analytics plugin is structured
  • Best practices for scalable plugin development

By the end of this lesson, you’ll understand how to organize your WordPress projects like professional plugin developers.


The Problem with Single-File Plugins

In our first tutorial, we created a plugin using a single file:

my-first-plugin
└── my-first-plugin.php

This works perfectly for simple plugins.

However, imagine adding:

  • Admin settings pages
  • CSS files
  • JavaScript files
  • API integrations
  • Analytics reports
  • Dashboard widgets
  • Shortcodes

Soon your file may grow to thousands of lines.

Example:

my-first-plugin.php
  • 300 lines of settings code
  • 500 lines of API code
  • 400 lines of shortcode code
  • 600 lines of analytics code

Finding bugs becomes difficult.

Updating features becomes risky.

This is why professional developers organize plugins into folders.


A Better Structure

Instead of one giant file:

my-first-plugin.php

Use:

my-first-plugin
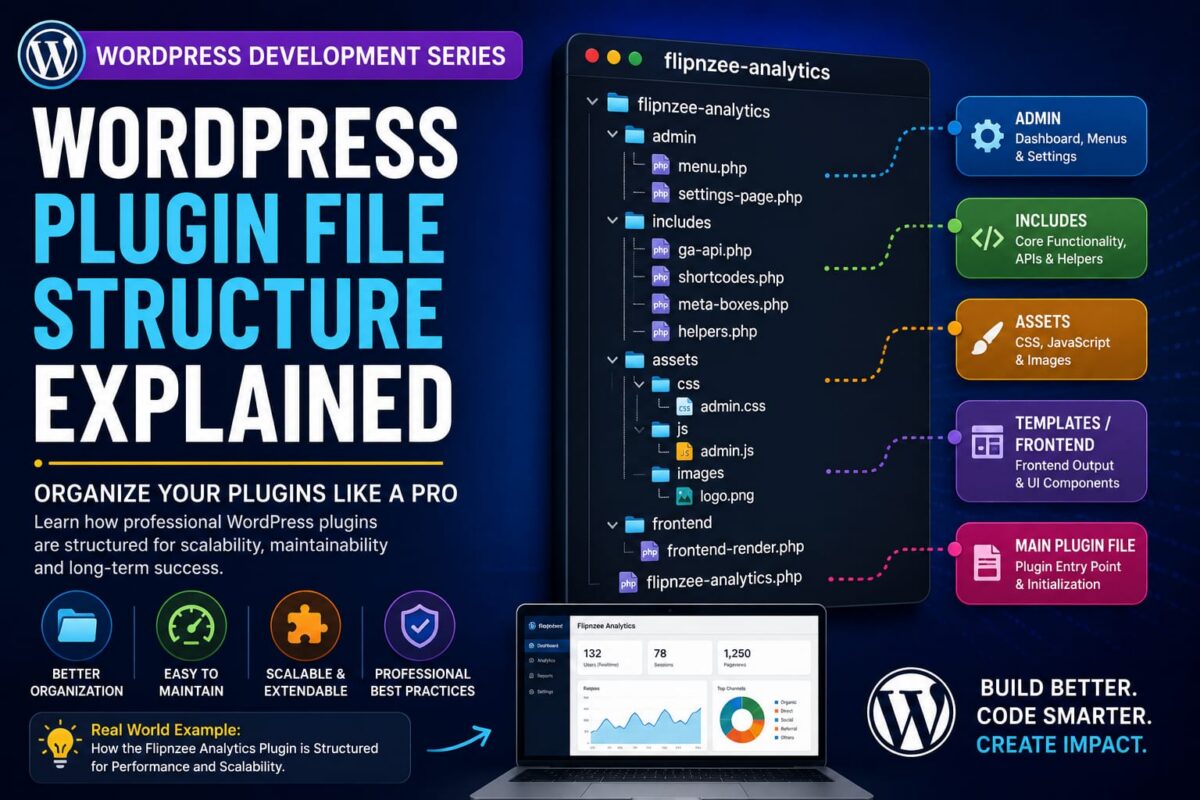
├── assets
├── includes
├── admin
├── templates
└── my-first-plugin.php

Each folder serves a specific purpose.

This makes development easier and more maintainable.


The Main Plugin File

Every plugin has an entry point.

Example:

my-first-plugin.php

This file usually contains:

  • Plugin header
  • Security checks
  • Constants
  • Required files
  • Initialization hooks

Example:

<?php

/*
Plugin Name: My First Plugin
Version: 1.0
*/

if (!defined('ABSPATH')) {
    exit;
}

require_once plugin_dir_path(__FILE__) . 'includes/functions.php';

Think of this file as the plugin’s front door.


The Includes Folder

Most plugins have an:

includes/

directory.

Purpose:

  • Core functions
  • API integrations
  • Helper functions
  • Business logic

Example:

includes
├── functions.php
├── api.php
├── helpers.php

Instead of placing everything inside the main plugin file, we separate functionality into reusable modules.


The Admin Folder

Administrative functionality belongs inside:

admin/

Examples:

  • Settings pages
  • Dashboard menus
  • Reports
  • Administrative tools

Example:

admin
├── menu.php
├── settings-page.php
├── reports.php

This keeps backend functionality separate from frontend functionality.


The Assets Folder

Every plugin eventually needs styling.

The assets folder stores:

assets
├── css
├── js
└── images

Example:

assets
├── css
│   └── admin.css
├── js
│   └── admin.js
└── images
    └── logo.png

Benefits:

  • Cleaner organization
  • Easier maintenance
  • Better scalability

The Templates Folder

Many plugins generate frontend output.

Instead of mixing HTML and PHP together, templates help separate presentation from logic.

Example:

templates
├── dashboard.php
├── report.php
└── widget.php

Benefits:

  • Cleaner code
  • Easier customization
  • Better readability

Understanding Separation of Concerns

Professional developers follow a principle called:

Separation of Concerns

Each file should have one responsibility.

Bad:

settings
analytics
HTML
CSS
API calls
database queries

all inside one file.

Good:

admin/settings.php
includes/analytics.php
templates/dashboard.php
assets/css/style.css

Each component has a dedicated location.


Real Example: Flipnzee Analytics Plugin

The Flipnzee Analytics plugin follows a modular architecture.

Its structure looks similar to:

flipnzee-analytics
├── assets
├── includes
│   ├── admin
│   ├── ga-api.php
│   ├── shortcodes.php
│   └── meta-boxes.php
├── frontend
└── flipnzee-analytics.php

This structure allows the plugin to support:

  • Google Analytics integration
  • Search Console integration
  • Dashboard reports
  • Shortcodes
  • Admin settings
  • Frontend widgets

without becoming a maintenance nightmare.


Why Flipnzee Analytics Uses Multiple Files

Imagine if all functionality existed inside:

flipnzee-analytics.php

The file could easily exceed several thousand lines.

Instead:

ga-api.php

Handles:

  • Google Analytics requests
  • Authentication
  • Report generation

shortcodes.php

Handles:

  • Visitor statistics display
  • Analytics widgets
  • Listing output

admin/

Handles:

  • Dashboard menus
  • Plugin settings
  • Configuration pages

This organization makes the code easier to understand and extend.


Loading Files Using require_once

Professional plugins load modules using:

require_once

Example:

require_once plugin_dir_path(__FILE__) . 'includes/functions.php';

require_once plugin_dir_path(__FILE__) . 'admin/settings-page.php';

This allows WordPress to load functionality only when needed.


Naming Conventions

Good file names:

analytics.php
settings-page.php
shortcodes.php
helpers.php

Avoid:

test.php
new.php
random.php
stuff.php

File names should clearly describe their purpose.


Example Structure for Your Future Plugins

As your plugins grow, consider this structure:

my-awesome-plugin
├── admin
│   ├── menu.php
│   └── settings.php
│
├── assets
│   ├── css
│   ├── js
│   └── images
│
├── includes
│   ├── api.php
│   ├── helpers.php
│   └── shortcodes.php
│
├── templates
│   └── dashboard.php
│
└── my-awesome-plugin.php

This structure is suitable for most professional WordPress projects.


Common Beginner Mistakes

Putting Everything in One File

Works initially.

Becomes difficult later.


Mixing HTML and PHP Everywhere

Hard to maintain.

Use templates instead.


Not Using Folders

Twenty files in the plugin root becomes confusing.

Organize related files together.


Poor File Names

Use descriptive names.

Future-you will thank you.


What You’ve Learned

In this tutorial you learned:

✓ Why plugin structure matters

✓ The role of the main plugin file

✓ What the includes folder does

✓ What the admin folder does

✓ What the assets folder does

✓ What the templates folder does

✓ How Flipnzee Analytics organizes functionality

✓ Best practices for scalable plugin development


Key Takeaway

A plugin’s structure may seem unimportant when a project is small.

However, as features grow, good organization becomes essential.

Professional WordPress developers spend just as much time organizing code as they do writing it.

A clean structure makes plugins easier to:

  • Maintain
  • Debug
  • Extend
  • Scale

Next Lesson

In the next tutorial we’ll explore:

How Plugin Activation and Deactivation Hooks Work

You’ll learn what happens when a plugin is activated, how WordPress runs setup tasks automatically, and how professional plugins prepare their environment before users start using them.