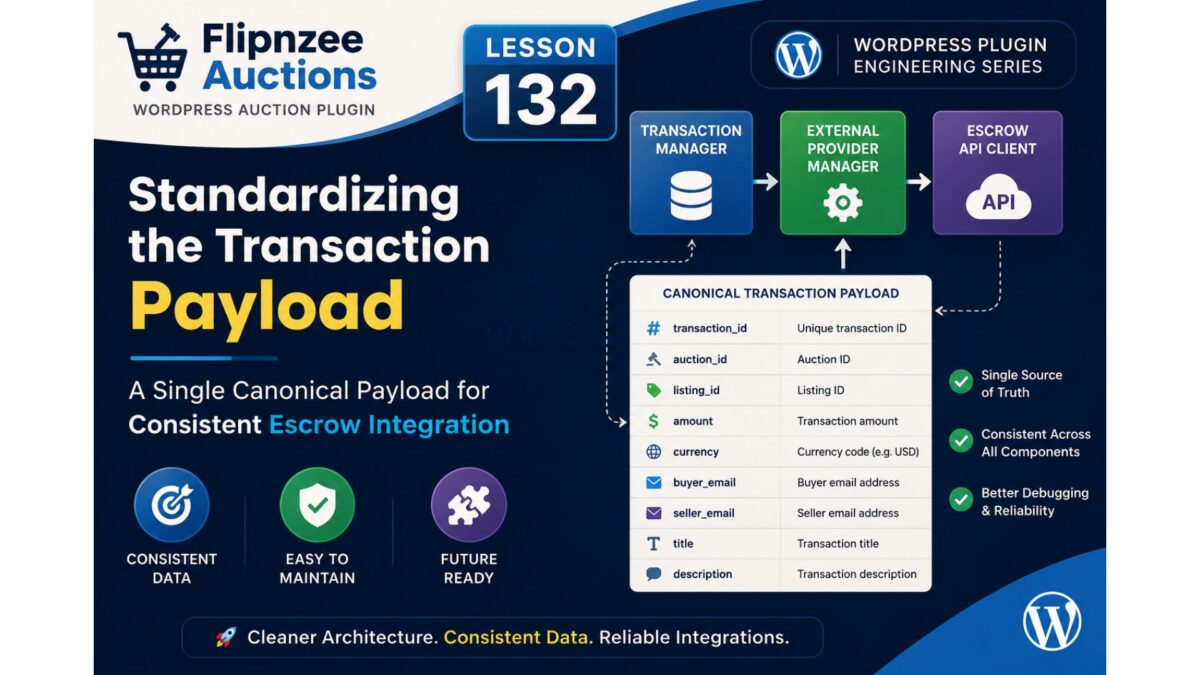
Lesson 132: Standardizing the Transaction Payload Across the Escrow Integration

In the previous lesson, the External Provider Manager was introduced as an abstraction layer between the Flipnzee Auctions plugin and external payment providers. This significantly improved the architecture by separating transaction management from provider-specific logic.

During testing, however, another issue became apparent. Different components were building and consuming transaction data in slightly different formats. While the Transaction Manager, External Provider Manager, and Escrow API Client all exchanged arrays of data, they did not always agree on which fields should exist or what they should be called.

Lesson 132 focuses on solving this problem by introducing a canonical transaction payload.


The Problem

Prior to this lesson, each component expected slightly different data.

For example:

  • Transaction Manager created transaction information.
  • External Provider Manager rebuilt parts of the payload.
  • Escrow API Client validated fields independently.

Although this worked in simple scenarios, it made debugging difficult because each layer could modify or recreate the transaction data.

The architecture looked like this:

Transaction Manager
        │
        ▼
Creates custom payload
        │
        ▼
External Provider Manager
        │
        ▼
Creates another payload
        │
        ▼
Escrow API Client

Every translation introduced another opportunity for inconsistencies.


The Solution

Lesson 132 introduces a single canonical payload structure that travels unchanged through the Escrow integration.

Instead of rebuilding arrays multiple times, the Transaction Manager becomes the authoritative source of transaction data.

The new workflow becomes:

Transaction Manager
        │
        ▼
Canonical Transaction Payload
        │
        ▼
External Provider Manager
        │
        ▼
Escrow API Client

Every component now speaks the same language.


Canonical Payload

The standardized transaction payload contains all information required by the provider layer.

Typical fields include:

  • Transaction ID
  • Auction ID
  • Listing ID
  • Amount
  • Currency
  • Buyer email
  • Seller email
  • Title
  • Description

Rather than generating missing values later, these are prepared once and reused throughout the transaction lifecycle.


Benefits

Single Source of Truth

Transaction information is generated once and remains consistent throughout the workflow.


Easier Debugging

When an API request fails, developers can inspect one payload instead of tracing multiple array transformations across different classes.


Reduced Code Duplication

Provider managers no longer recreate values already available from the Transaction Manager.


Better Maintainability

Future changes to transaction fields require updates in only one location instead of several independent methods.


Improved Extensibility

Additional payment providers can consume the same payload without requiring provider-specific transaction builders.

This makes future integrations significantly easier.


Architectural Improvement

The transaction flow is now much cleaner.

Before:

Transaction Manager
        │
        ▼
Creates Payload A
        │
        ▼
External Provider Manager
        │
        ▼
Creates Payload B
        │
        ▼
Escrow API Client

After:

Transaction Manager
        │
        ▼
Canonical Transaction Payload
        │
        ▼
External Provider Manager
        │
        ▼
Escrow API Client

This removes unnecessary translation layers while making the integration easier to understand.


What We Will Implement

During this lesson we will:

  • Define the canonical transaction payload.
  • Refactor the Transaction Manager to construct the payload once.
  • Remove duplicate payload construction from the External Provider Manager.
  • Ensure the Escrow API Client consumes the standardized structure directly.
  • Improve logging so the same payload can be traced throughout the entire transaction lifecycle.

What We’ll Learn

By the end of Lesson 132, you will understand:

  • Why a canonical data structure simplifies software architecture.
  • How to reduce coupling between components.
  • How consistent data contracts improve debugging and maintenance.
  • Why production-quality plugins rely on standardized payloads rather than ad hoc arrays.

Next Lesson

Lesson 133 will focus on persisting Escrow provider references and synchronizing provider status with local transactions, allowing the plugin to track external transaction identifiers and keep local records aligned with the provider throughout the transaction lifecycle.
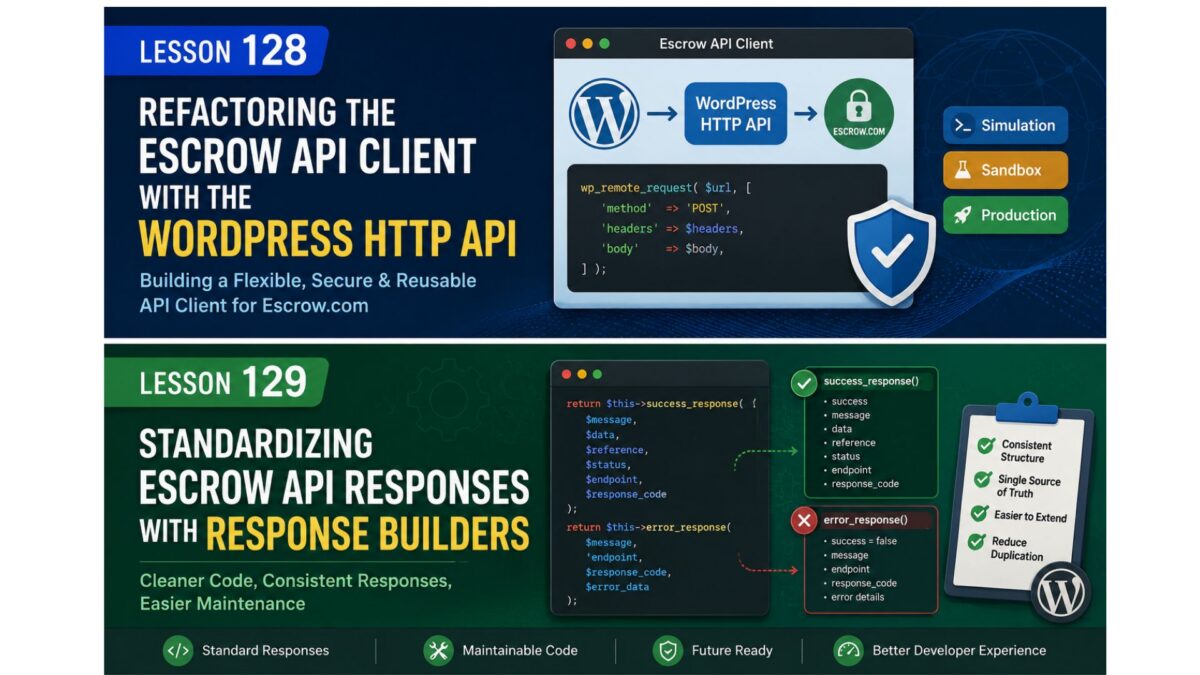
Lesson 129 – Simplifying Response Handling in the Escrow API Client

As Flipnzee Auctions continues to mature, one of the recurring goals is to reduce duplication while improving consistency across the codebase. After refactoring the Escrow API client in the previous lesson, we now have a centralized HTTP request layer built around the WordPress HTTP API.

Although that refactoring significantly improved the networking architecture, one area still contains unnecessary duplication: response construction.

In this lesson, we’ll simplify how the Escrow API client generates success and error responses.


Where We Left Off

Following the previous refactoring, every public method delegates its networking responsibilities to a reusable send_request() method.

The overall flow now looks like this:

Public Methods
        │
        ▼
send_request()
        │
        ▼
WordPress HTTP API
        │
        ▼
Escrow.com REST API

This removed duplicated networking logic and established a single entry point for all HTTP communication.

However, the responses returned by the client are still assembled in multiple places.


The Remaining Problem

Every interaction with the Escrow API ultimately returns a response array containing information such as:

  • success status
  • message
  • transaction reference
  • transaction status
  • endpoint
  • response code
  • response data

While these arrays follow the same general structure, they are still created repeatedly throughout the client.

This duplication increases maintenance effort because every future change requires modifying several return statements instead of one centralized implementation.


Objectives of Lesson 129

The goal of this lesson is to centralize response creation while keeping the public interface of the Escrow API client completely unchanged.

By the end of this lesson:

  • success responses will be generated consistently,
  • error responses will follow the same structure,
  • duplicated array construction will be removed,
  • networking code will become easier to read,
  • future enhancements will require fewer changes.

Separating Success and Error Responses

One useful design improvement is to clearly distinguish between successful operations and failed operations.

Rather than manually constructing response arrays throughout the client, we’ll introduce dedicated helper methods responsible for building standardized responses.

These helpers become the single source of truth for the response format used throughout the Escrow API client.


Benefits of Centralized Responses

Moving response construction into reusable helper methods provides several advantages.

Consistency

Every response—regardless of where it originates—shares the same structure.

This makes the client easier to consume throughout the plugin.


Maintainability

If new fields are added in the future, they only need to be implemented once.

For example, future enhancements might include:

  • request identifiers,
  • execution time,
  • timestamps,
  • provider metadata,
  • debugging information.

Instead of modifying numerous return statements, these additions can be made within a single helper.


Readability

The networking logic becomes easier to understand because it focuses solely on:

  • sending requests,
  • processing responses,
  • handling errors.

Constructing arrays is delegated to dedicated helper methods.

This separation makes the code significantly easier to follow.


Simulation Mode

Simulation mode remains an important part of the development workflow.

Rather than returning custom arrays directly, simulated responses will also use the new helper methods.

This ensures that simulation, sandbox, and production environments all produce responses with the same structure.

Maintaining identical response formats across environments simplifies testing and reduces the chance of environment-specific bugs.


Preparing for Future Features

A standardized response layer also provides a solid foundation for future Escrow integration features.

Upcoming lessons may introduce:

  • live transaction creation,
  • transaction updates,
  • webhook processing,
  • provider synchronization,
  • enhanced diagnostics,
  • detailed error reporting.

Having one centralized response format makes these enhancements considerably easier to implement.


Expected Outcome

After completing this lesson, the Escrow API client will return every success and failure through a consistent response mechanism.

The external behavior of the client will remain unchanged, but the internal implementation will be significantly cleaner, reducing duplicated code while improving maintainability and readability.


Conclusion

Good software architecture is often about removing repetition rather than adding new functionality.

By centralizing response handling, we’re making the Escrow API client simpler, more consistent, and easier to extend. This refactoring builds upon the improvements introduced in the previous lesson and prepares the client for the increasingly sophisticated payment features that will follow.

In the next lesson, we’ll implement this refactoring by introducing standardized success and error response helpers and updating the Escrow API client to use them throughout.

https://github.com/SplendidDigital/flipnzee-auctions/releases/tag/lesson-129-stable

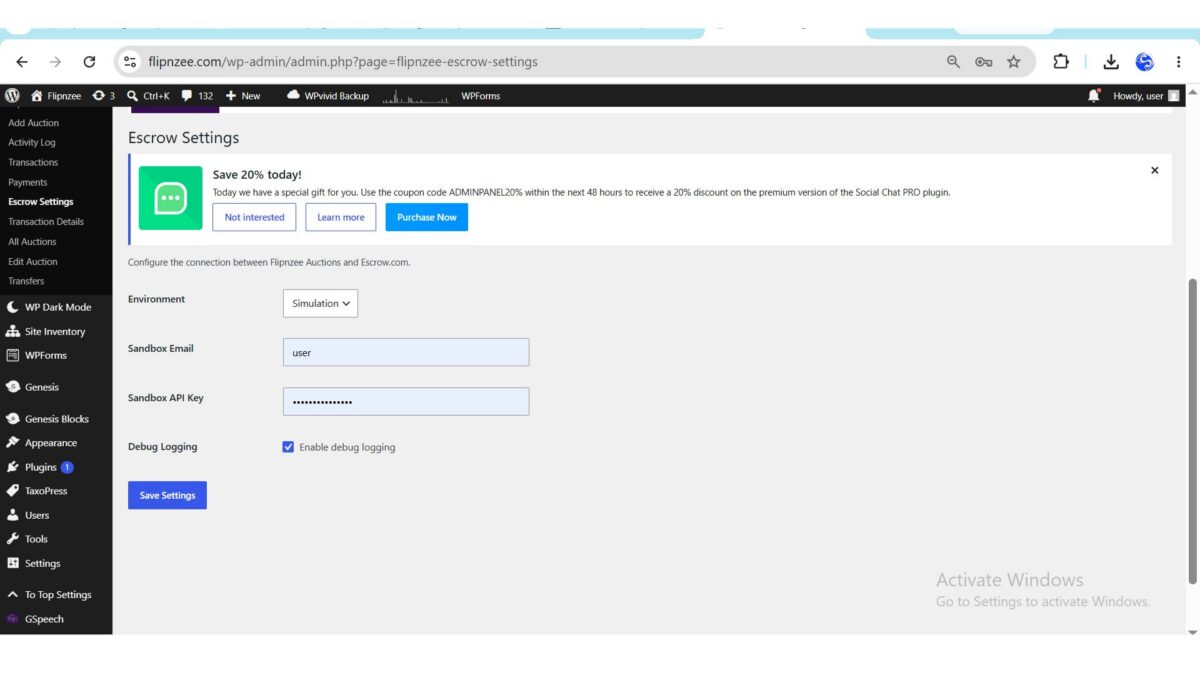
Lesson 126 Implementation — Building the Escrow Settings Administration Page

In the previous lesson, we introduced the Flipnzee_Escrow_API_Client to separate Escrow.com communication from the rest of the plugin. Before making live API requests, however, the plugin needs a secure and configurable way to store connection settings.

In this lesson, we implement a dedicated Escrow Settings administration page. This page becomes the central location for configuring the Escrow integration and provides the foundation for future Sandbox and Production connectivity.


Why This Lesson Matters

Rather than hard-coding credentials inside PHP files, professional WordPress plugins allow administrators to manage configuration through the WordPress dashboard.

This approach offers several advantages:

  • Secure credential storage
  • Easy environment switching
  • No source code modifications
  • Future extensibility
  • Better user experience

This lesson transforms our Escrow integration from a developer-only feature into one that can be configured by site administrators.


Objectives

By the end of this lesson the plugin can:

  • Display a dedicated Escrow Settings page
  • Store settings using the WordPress Options API
  • Support multiple environments
  • Store Sandbox credentials
  • Enable or disable debug logging
  • Protect submissions using WordPress nonces

Creating a Dedicated Admin Page

A new administration class was introduced:

admin/
└── class-admin-escrow-settings.php

Keeping Escrow settings isolated from the rest of the administration area improves maintainability and keeps responsibilities clearly separated.


Registering the Menu

A new submenu was added beneath the Flipnzee Auctions menu.

The page now appears as:

Flipnzee Auctions
    Escrow Settings

This provides administrators with a single location for all Escrow configuration.


Building the User Interface

The settings page currently includes:

  • Environment selector
  • Sandbox Email
  • Sandbox API Key
  • Debug Logging option
  • Save Settings button

The interface follows the standard WordPress administration style using native form controls and the familiar form-table layout.


Supported Environments

The plugin now supports multiple operating modes.

EnvironmentPurpose
SimulationInternal testing without API requests
SandboxEscrow.com’s testing environment
ProductionLive Escrow transactions

Development will continue using Simulation Mode until live API communication is introduced in later lessons.


Saving Configuration

Instead of storing credentials in PHP constants or configuration files, settings are saved using the WordPress Options API.

This provides several benefits:

  • Persistent storage
  • Automatic serialization
  • Easy retrieval
  • WordPress compatibility

The page automatically loads the stored configuration whenever it is opened.


Security

Administrative forms should never trust submitted data.

This lesson includes several security measures:

  • WordPress nonce verification
  • Capability checks through the admin menu
  • Data sanitization
  • Escaping output before rendering

These practices help protect against common attack vectors while following WordPress coding standards.


Object-Oriented Design

The implementation continues the plugin’s object-oriented architecture.

Responsibilities remain clearly separated.

Flipnzee_Admin_Escrow_Settings
        │
        ├── render_page()
        ├── save_settings()
        └── get_settings()

Each method performs a single responsibility, making future maintenance significantly easier.


Integration with Previous Lessons

This lesson connects naturally with the previous architecture.

Lesson 125
Escrow API Client
        │
        ▼
Lesson 126
Escrow Settings
        │
        ▼
Future Lessons
Sandbox API Requests
Production API Requests
Transaction Synchronization

The API Client introduced previously will soon begin reading these settings instead of relying on hard-coded values.


Testing

The following functionality was successfully verified:

  • Escrow Settings page loads correctly
  • Environment selection works
  • Sandbox credentials display properly
  • Debug Logging option is available
  • Settings persist using the WordPress Options API
  • WordPress nonce protection is functioning
  • Object-oriented structure loads correctly

Challenges Encountered

While implementing the page, several issues were identified and resolved:

  • Missing class loading in the plugin bootstrap
  • Callback registration issues
  • Runtime debugging for admin page rendering
  • Validation of class loading order
  • Refactoring the settings page into a dedicated administration class

Resolving these issues strengthened the plugin’s initialization process and improved its overall architecture.


What’s Next?

With configuration now handled through the WordPress dashboard, the next step is to make practical use of these settings.

In Lesson 127, we will connect the Escrow API Client to the stored configuration and implement the first Test Escrow Connection feature, allowing administrators to verify communication with the selected Simulation, Sandbox, or Production environment before creating live transactions.


Files Introduced / Updated

admin/class-admin-escrow-settings.php
admin/class-admin.php
flipnzee-auctions.php

These changes establish the administrative foundation required for the upcoming Escrow integration while keeping the plugin modular, secure, and aligned with WordPress development best practices.

https://github.com/SplendidDigital/flipnzee-auctions/releases/tag/lesson-126-stable

Lesson 107: Keeping Recently Closed Auctions Visible on the Frontend

One challenge with any auction platform is deciding what happens when an auction ends. If completed auctions disappear immediately, visitors have no way to verify the final outcome or learn from previous listings. On the other hand, displaying every completed auction forever eventually clutters the marketplace.

In this lesson, we improve the Flipnzee Auctions plugin by introducing a configurable auction history retention period. Recently closed auctions remain visible for a limited number of days before being automatically removed from the main auction listing.


Why This Improvement?

Previously, the frontend displayed only active auctions.

This created a poor user experience because:

  • Users could not verify the result of an auction after it ended.
  • Winning bidders had no convenient way to revisit their completed auction.
  • Visitors could not see whether a reserve price had been met.
  • Auctions disappeared immediately after completion.

Our goal was to provide a short auction history while keeping the homepage clean.


Defining a Configurable Retention Period

Instead of hardcoding the number of days inside our SQL query, we defined a reusable plugin constant.

In flipnzee-auctions.php:

/**
 * Number of days recently closed auctions remain visible.
 */
if ( ! defined( 'FLIPNZEE_AUCTION_HISTORY_DAYS' ) ) {
	define( 'FLIPNZEE_AUCTION_HISTORY_DAYS', 10 );
}

This provides a single location for configuring how long recently completed auctions remain visible.

Changing:

define( 'FLIPNZEE_AUCTION_HISTORY_DAYS', 10 );

to:

define( 'FLIPNZEE_AUCTION_HISTORY_DAYS', 30 );

will automatically extend the history period without modifying any SQL queries.


Updating the Auction Query

The get_active_auctions() method previously returned only active auctions.

It now returns:

  • active auctions
  • recently closed auctions within the configured retention period

The query now resembles:

WHERE
    status = 'active'
    OR (
        status = 'closed'
        AND auction_end >= DATE_SUB(
            NOW(),
            INTERVAL FLIPNZEE_AUCTION_HISTORY_DAYS DAY
        )
    )

Older completed auctions are automatically excluded.


Ordering Results

To improve usability, auctions are now ordered by their ending time.

ORDER BY auction_end DESC

This ensures:

  • Live auctions remain prominent.
  • Recently completed auctions appear directly beneath them.
  • Older retained auctions gradually move lower before disappearing.

Benefits

This small enhancement significantly improves the frontend experience.

Benefits include:

  • Recently completed auctions remain visible.
  • Winning bidders can revisit completed listings.
  • Visitors can verify auction outcomes.
  • The homepage remains uncluttered.
  • No manual cleanup is required.
  • Administrators can easily adjust the retention period.

Example Auction Lifecycle

The auction lifecycle now becomes:

Auction Created
        │
        ▼
Active Auction
        │
        ▼
Auction Ends
        │
        ▼
Recently Closed (Visible for 10 Days)
        │
        ▼
Automatically Removed from Homepage

This creates a much more professional auction experience while preventing old listings from accumulating indefinitely.


Looking Ahead

Keeping recently closed auctions visible is only the first step toward a complete auction history system.

In future lessons, we plan to add:

  • Dedicated Auction Archive page
  • Live / Ending Soon / Closed filters
  • Winner announcement pages
  • Transaction history
  • Escrow payment workflow
  • Website transfer tracking

Together, these features will transform Flipnzee Auctions into a complete marketplace for buying and selling websites and digital assets.

Download Source Code

Download the starting version of the plugin before the lesson:

Download the completed version after this lesson:


Conclusion

In this lesson, we enhanced the Flipnzee Auctions plugin by introducing configurable frontend auction history retention. Instead of removing completed auctions immediately, recently closed auctions remain visible for a configurable period before being automatically removed from the main listing.

This improvement provides greater transparency for buyers, better visibility into completed auctions, and a cleaner long-term marketplace experience while keeping the codebase flexible and easy to maintain.

Lesson 106 Implementation: Enforcing Reserve Price Rules in Flipnzee Auctions

One of the most important concepts in professional auction platforms is the reserve price. While Flipnzee Auctions already supported defining a reserve price, the auction engine still declared a winner even when the highest bid failed to reach that minimum value. This could result in incorrect transactions, transfer records, and buyer notifications.

In this lesson, we corrected the auction workflow so that a winner is only declared when the reserve price has actually been met.


Why This Lesson Was Needed

Consider the following auction:

  • Start Price: $100
  • Reserve Price: $200
  • Highest Bid: $10

Previously, the plugin incorrectly:

  • Declared the bidder as the winner.
  • Created a transaction record.
  • Created a transfer record.
  • Began the ownership transfer workflow.

This behavior defeats the purpose of a reserve price. The seller should never be forced to sell below their minimum acceptable amount.


Objectives

By the end of this lesson, the plugin should:

  • Respect reserve prices when determining a winner.
  • Prevent winner declaration if the reserve price is not met.
  • Stop transaction creation.
  • Stop transfer creation.
  • Record the event in the activity log.
  • Return control safely without breaking the auction workflow.

Creating a Reserve Price Validation Method

Rather than scattering reserve price checks throughout the codebase, we introduced a dedicated helper method inside the bid manager.

Example:

public static function reserve_price_met(
    $auction_id,
    $winner
)

This method centralizes all reserve-price logic into one reusable location.


Loading Auction Information

The helper retrieves the auction record from the database.

This allows us to compare:

  • Reserve Price
  • Highest Bid

without duplicating database queries elsewhere.


Comparing Highest Bid Against Reserve Price

The core comparison is straightforward.

If:

Highest Bid < Reserve Price

then:

  • No winner should exist.
  • The auction closes without a successful sale.

Otherwise:

Highest Bid >= Reserve Price

the auction proceeds normally.


Logging Failed Reserve Checks

When a reserve price is not met, the plugin now records an activity log entry.

Example:

reserve_not_met

Highest bid $10 did not meet reserve price $200.

This provides administrators with a complete audit trail explaining why an auction ended without a winner.


Updating Winner Determination

Previously, the plugin always returned the highest bidder.

Now the workflow becomes:

Find highest bid

↓

Check reserve price

↓

Reserve met?

├── Yes
│      Return winner
│
└── No
       Return false

This small change completely alters the auction outcome.


Preventing Downstream Processing

Returning false immediately prevents the rest of the auction pipeline from executing.

As a result:

  • Winner notifications are not generated.
  • Seller notifications are skipped.
  • Admin notifications are skipped.
  • Transactions are not created.
  • Transfer records are not created.

The auction simply ends without a successful sale.


Testing Scenario

We created the following auction:

SettingValue
Start Price$100
Reserve Price$200
Buy Now$500
Highest Bid$10

Expected behavior:

  • No winner declared
  • No transaction
  • No transfer
  • Auction closes normally

Test Results

After implementing the reserve price validation:

✔ Highest bidder was not declared as the winner.

✔ No transaction record was generated.

✔ No transfer record was generated.

✔ Auction closed successfully.

The backend auction logic now correctly respects reserve prices.


Remaining UI Improvement

One cosmetic issue remains.

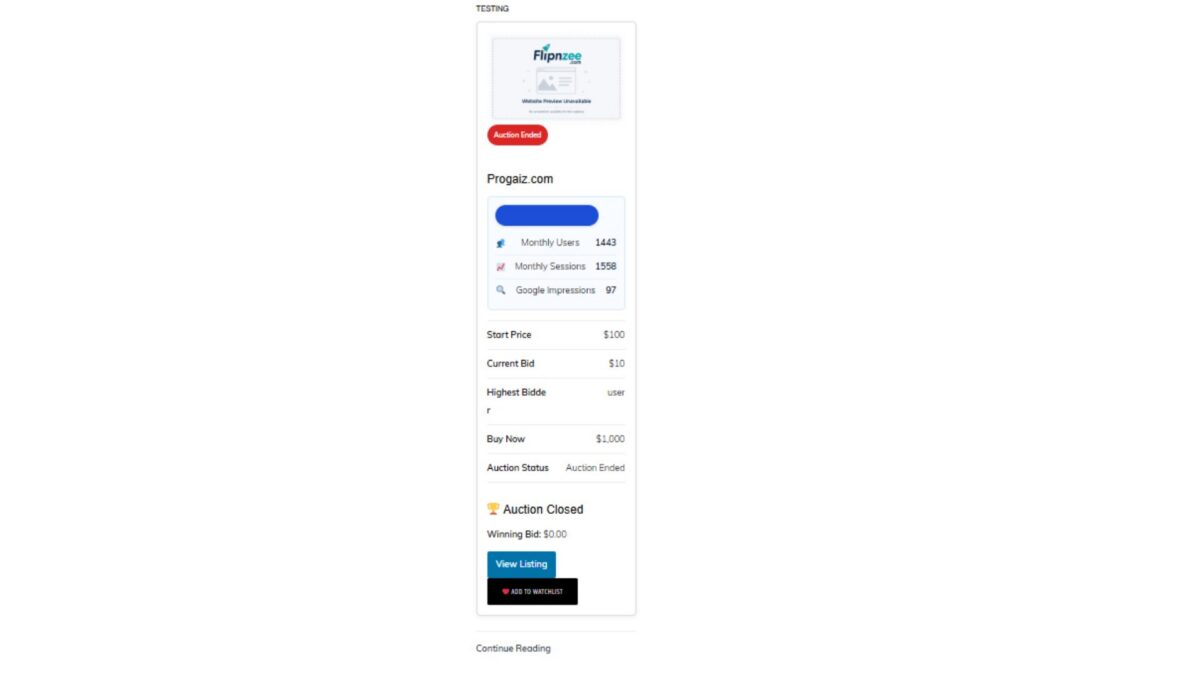
The auction page currently displays:

Auction Closed

Winning Bid: $0.00

Although technically harmless, this can confuse users because no winning bid actually exists.

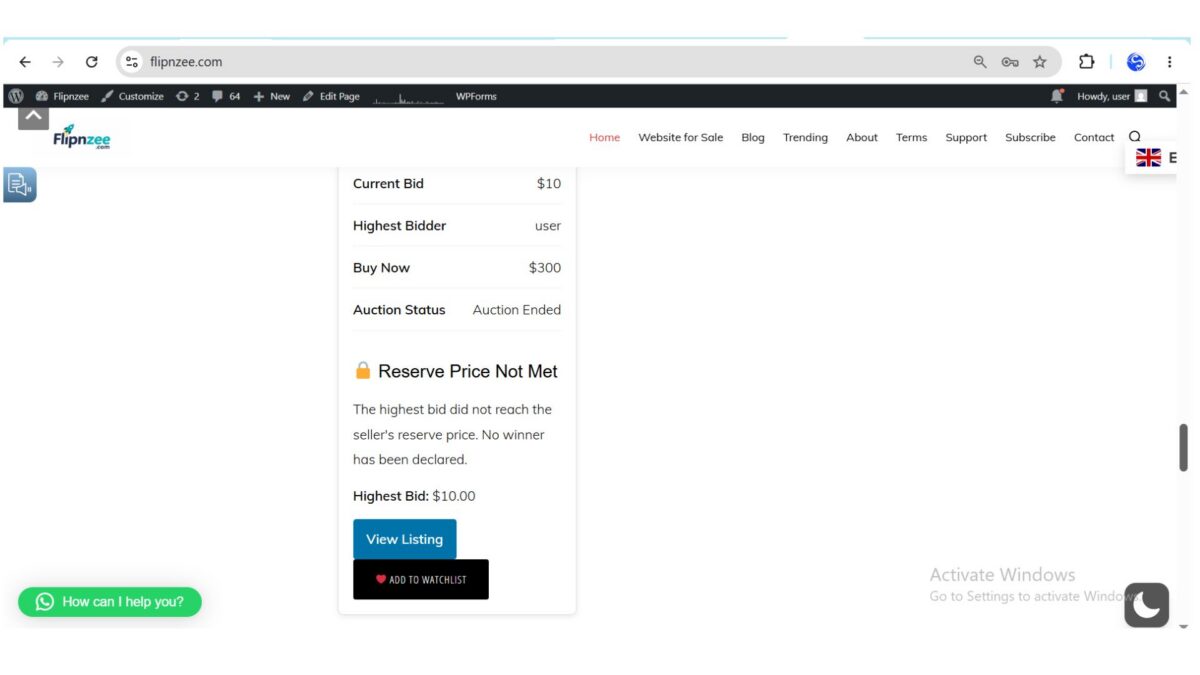
A future lesson will improve the interface by displaying messages such as:

Reserve Price Not Met

Highest Bid: $10

No winner was declared because the reserve price was not reached.

Why This Improvement Matters

Professional auction platforms such as eBay and domain marketplaces rely heavily on reserve prices to protect sellers.

By enforcing reserve prices correctly, Flipnzee Auctions now:

  • Protects seller interests.
  • Prevents accidental sales below minimum value.
  • Stops unnecessary transaction creation.
  • Prevents incorrect ownership transfers.
  • Produces a more reliable auction workflow.

What We Accomplished

In this lesson we:

  • Added centralized reserve price validation.
  • Checked reserve prices before declaring a winner.
  • Prevented winner creation when the reserve price was not met.
  • Logged reserve failures for administrators.
  • Prevented transaction generation.
  • Prevented transfer generation.
  • Verified the workflow using live auction testing.

Flipnzee Auctions now follows a much more robust auction lifecycle by ensuring that reserve prices are enforced before any sale is finalized. This improvement lays the groundwork for future enhancements such as reserve price status badges, improved auction summaries, and more informative buyer and seller notifications.

Download Source Code

Download the starting version of the plugin before the lesson:

Download the completed version after this lesson:

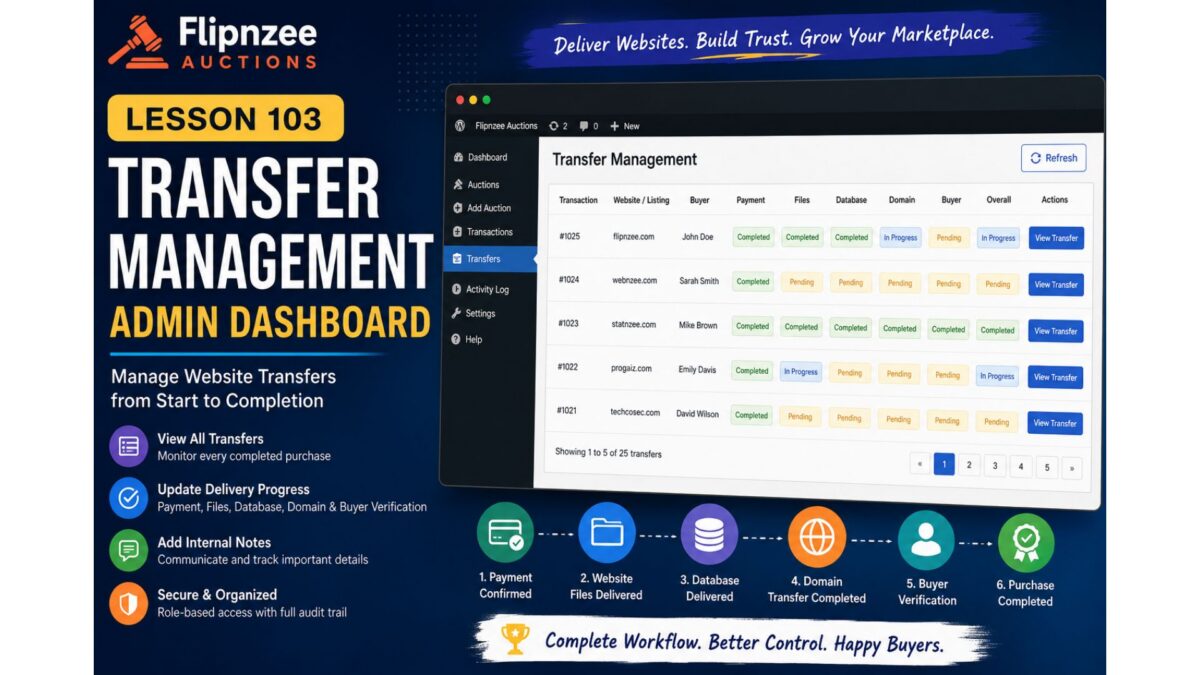
Lesson 103: Building the Transfer Management Administration Dashboard

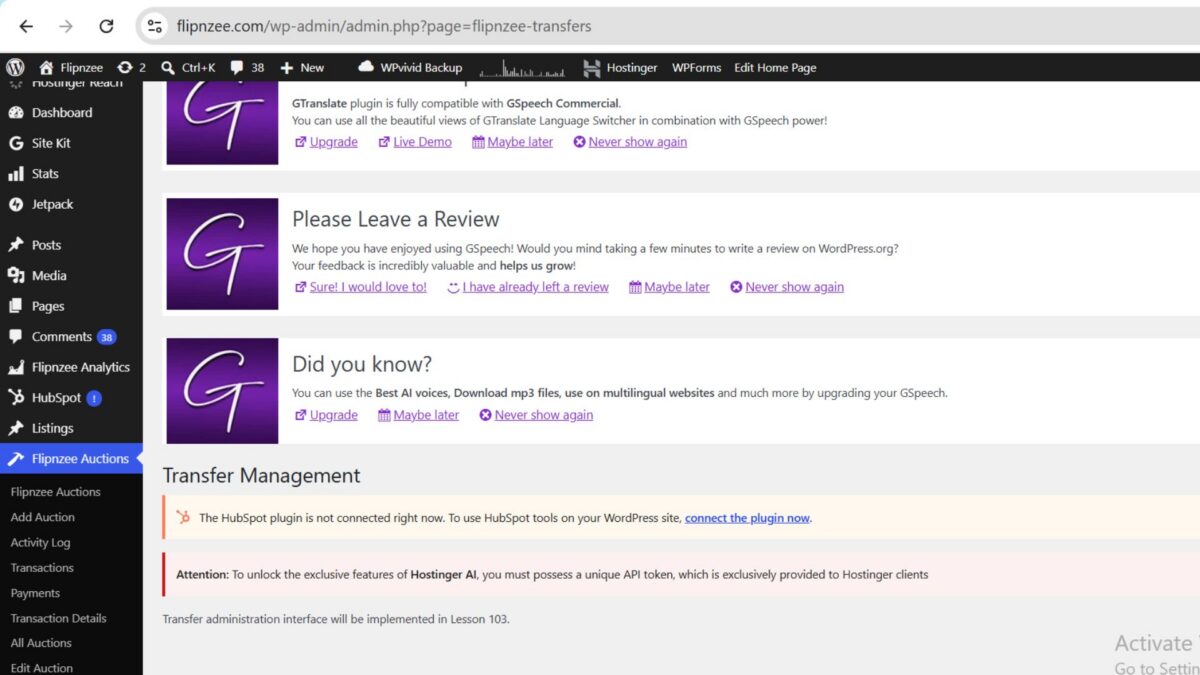
In the previous lesson, we introduced the Transfer Management system by creating the transfer database, transfer manager class, and automatically generating transfer records after successful transactions. However, administrators still cannot manage transfers through the WordPress dashboard.

In this lesson, we will transform the placeholder Transfer Management page into a fully functional administration panel where administrators can monitor every website transfer, update delivery progress, communicate internally, and track completed purchases.

This lesson marks the beginning of the operational side of Flipnzee Auctions, moving beyond auctions and payments into the real business process of delivering digital assets to buyers.


Objectives

By the end of this lesson we will:

  • Build a Transfer Management dashboard
  • Display all active transfers
  • Show buyer and auction information
  • Display current transfer progress
  • Add transfer status badges
  • View transfer details
  • Add administrator notes
  • Update transfer progress
  • Automatically refresh transfer completion
  • Improve overall admin workflow

Why This Feature Matters

Unlike physical products, selling a website requires several manual steps:

  • Payment confirmation
  • Website files delivery
  • Database delivery
  • Domain transfer
  • DNS verification
  • Buyer confirmation

Without proper tracking, administrators can easily lose track of which purchases are waiting for which stage.

The Transfer Dashboard becomes the operational center for managing these deliveries.


New Admin Menu

The existing menu

Flipnzee Auctions

Dashboard
Auctions
Transactions
Transfers

will now have a fully functional Transfers page.


Transfer List Table

Instead of displaying a placeholder message, the page will show a table similar to:

TransactionWebsiteBuyerPaymentFilesDatabaseDomainBuyerOverall

Each row represents one completed purchase.


Status Badges

Every stage will display colored badges.

Examples:

Green

Completed

Yellow

Pending

Blue

In Progress

Red (future)

Problem

This allows administrators to understand the transfer state at a glance.


View Transfer Button

Each row will contain:

View Transfer

which opens a detailed transfer screen.


Transfer Details Page

The detail page will display:

Purchase Information

  • Transaction ID
  • Auction
  • Listing
  • Purchase price
  • Buyer

Delivery Progress

  • Payment
  • Website files
  • Database
  • Domain
  • Buyer verification

Internal Notes

Administrators can leave notes such as:

Domain unlock completed.

Waiting for buyer authorization code.

These notes remain private.


Update Transfer Status

Administrators will be able to update each stage using dropdowns.

Example:

Payment

Completed

Files

Completed

Database

Pending

Domain

In Progress

Buyer

Pending

Save Changes

A Save button will update the database using the Transfer Manager methods created in Lesson 102.


Automatic Completion Detection

Whenever every stage becomes Completed, the plugin will automatically recognize that the transfer is finished.

Future lessons will use this event to:

  • send emails
  • archive transfers
  • update statistics
  • generate reports

Security

All updates will include:

  • nonce verification
  • capability checks
  • input sanitization
  • prepared SQL statements

This keeps transfer data secure.


User Experience Improvements

The dashboard will provide administrators with:

  • faster delivery tracking
  • cleaner workflow
  • centralized management
  • fewer manual database edits
  • better visibility into active purchases

Files Expected to Change

Primary files:

admin/class-admin-transfer.php
includes/class-transfer-manager.php
flipnzee-auctions.php

Possibly:

assets/css/admin.css

for status badge styling.


Development Roadmap

At the end of Lesson 103, Flipnzee Auctions will include:

  • ✅ Auctions
  • ✅ Bidding
  • ✅ Winner determination
  • ✅ Transactions
  • ✅ Buyer dashboard
  • ✅ Purchase details
  • ✅ Transfer records
  • ✅ Transfer management dashboard

This completes another major operational module of the plugin and lays the groundwork for future enhancements such as email notifications, automated reminders, document uploads, and buyer-admin communication during the website transfer process.

In the next implementation lesson, we will replace the current placeholder Transfers page with a complete management interface, connect it to the Transfer Manager, and enable administrators to manage every stage of a website transfer directly from the WordPress dashboard.

Lesson 102 Implementation: Building the Transfer Management System and Completing the Auction Workflow

After completing the core auction engine in previous lessons, this lesson focused on one of the most important components of any digital asset marketplace—the post-auction transfer process. Winning an auction is only the beginning; the real business value comes from securely transferring the website, domain, database, and related assets to the buyer.

Lesson 102 introduces the foundation of the Flipnzee Transfer Management System, bringing the plugin much closer to supporting a complete end-to-end marketplace experience.


What We Built

This lesson concentrated on connecting the auction, transaction, and transfer systems into one seamless workflow.

The following major features were implemented.


1. Transfer Status Database

A dedicated database table was introduced to manage the progress of every completed transaction.

Each transfer record now stores:

  • Transaction ID
  • Payment status
  • Website files status
  • Database status
  • Domain transfer status
  • Buyer verification status
  • Internal notes
  • Created date
  • Updated date

This provides a permanent audit trail for every completed auction.


2. Transfer Manager Class

A brand-new manager class was created to centralize all transfer operations.

Major helper methods include:

  • Retrieve transfer table name
  • Create transfer record
  • Retrieve transfer information
  • Update individual transfer status
  • Update transfer notes
  • Update an entire transfer in a single database query
  • Determine completion status
  • Default transfer steps
  • Default transfer statuses
  • Status badge helper methods

Using a dedicated manager class keeps transfer-related business logic completely separate from auction and transaction logic.


3. Automatic Transfer Creation

Previously, auctions ended with a winning bidder and transaction record.

Lesson 102 extends this workflow by automatically preparing a transfer record immediately after a successful transaction.

The auction lifecycle now becomes:

Auction
      ↓
Winner Selected
      ↓
Transaction Created
      ↓
Transfer Record Created

This removes manual database work and prepares every purchase for delivery.


4. Purchase Details Enhancements

The My Purchase Details page was expanded considerably.

Buyers can now view:

  • Purchase information
  • Auction details
  • Payment information
  • Transfer progress
  • Status badges
  • Delivery steps
  • Helpful instructions
  • Support links

The purchase page now serves as a central dashboard throughout the delivery process.


5. Default Transfer Workflow

A standard transfer checklist was introduced.

Current workflow:

  • Payment Confirmed
  • Website Files Delivered
  • Database Delivered
  • Domain Transfer Completed
  • Buyer Verification
  • Purchase Completed

This provides a structured process that can be reused for every website sold on Flipnzee.


6. Transfer Status System

Each transfer stage now supports standardized status values.

Examples include:

  • Completed
  • Pending
  • In Progress

Centralizing status values makes future reporting, dashboards, and filtering much easier.


7. Status Badge Helpers

Status badge helper methods were added to simplify frontend rendering.

Instead of scattering CSS logic throughout templates, badge classes are now managed from a single location.

Benefits include:

  • Cleaner templates
  • Easier maintenance
  • Consistent styling
  • Simpler future theme customization

8. Countdown and Auction Improvements

During implementation several improvements were made to the auction experience.

These include:

  • Fixed current bid updates
  • Highest bidder updates correctly
  • Improved bid validation
  • Highest bidder cannot bid again until outbid
  • Countdown improvements
  • Anti-sniping logic remains intact

A small UI issue where “Auction Ends In” wrapped onto two lines was also resolved by shortening the label to:

Auction Ends

9. New Transfer Administration Module

The first version of the Transfer Administration page was introduced.

A new admin menu now appears:

Flipnzee Auctions

├── Dashboard
├── All Auctions
├── Add Auction
├── Transactions
└── Transfers

Currently this page acts as the foundation for Lesson 103, where full transfer management functionality will be implemented.


10. Internal API Improvements

Several helper methods were added to simplify future development.

Examples include:

  • update_notes()
  • update_transfer()
  • get_transfer()
  • update_status()

These methods make future admin screens significantly easier to implement while reducing duplicate SQL queries.


Architecture Overview

The complete business workflow now looks like this:

Website Listed
        │
        ▼
Auction Starts
        │
        ▼
Users Place Bids
        │
        ▼
Auction Ends
        │
        ▼
Winner Determined
        │
        ▼
Transaction Created
        │
        ▼
Transfer Record Created
        │
        ▼
Buyer Views Purchase Details
        │
        ▼
Admin Manages Delivery
        │
        ▼
Purchase Completed

This represents one of the biggest architectural milestones of the Flipnzee Auctions plugin.


Challenges Faced

Like many real-world software projects, this lesson involved debugging and refinement alongside feature development.

Some of the issues addressed included:

  • Missing helper methods
  • PHP parse errors caused by misplaced braces
  • Incorrect placement of class methods
  • Database version synchronization
  • Bid update validation
  • Current bid synchronization
  • Transfer table integration
  • UI polishing for auction countdowns
  • Plugin activation errors caused by incorrect include paths

Each issue was resolved incrementally, reinforcing the importance of careful debugging and incremental testing during plugin development.


Benefits of the New Transfer System

The new architecture offers several practical advantages:

  • Dedicated transfer tracking
  • Better separation of responsibilities
  • Cleaner object-oriented design
  • Easier future enhancements
  • Improved buyer experience
  • Reduced manual administration
  • Complete audit trail for every purchase

Download Source Code

Download the starting version of the plugin before the lesson:

Download the completed version after this lesson:


What Comes Next

Lesson 103 will build upon the foundation created here.

Planned enhancements include:

  • Complete Transfer Management dashboard
  • Editable transfer statuses
  • Internal delivery notes
  • Admin update forms
  • Automatic progress synchronization
  • Activity log integration
  • Completion automation
  • Email notifications (future enhancement)

These additions will transform the placeholder Transfer page into a fully functional administrative workflow for managing completed website sales.


Conclusion

Lesson 102 marks another major milestone in the development of the Flipnzee Auctions plugin. By introducing a dedicated Transfer Management System and integrating it with auctions, transactions, and buyer purchase pages, the plugin now supports nearly the entire lifecycle of a digital asset sale.

While the administrative interface will be completed in Lesson 103, the underlying architecture established in this lesson provides a scalable and maintainable foundation for secure website transfers, improved buyer communication, and efficient post-auction management.

With auctions, transactions, and transfers now working together, Flipnzee Auctions moves significantly closer to becoming a complete marketplace solution for buying and selling websites, domains, and other digital assets.

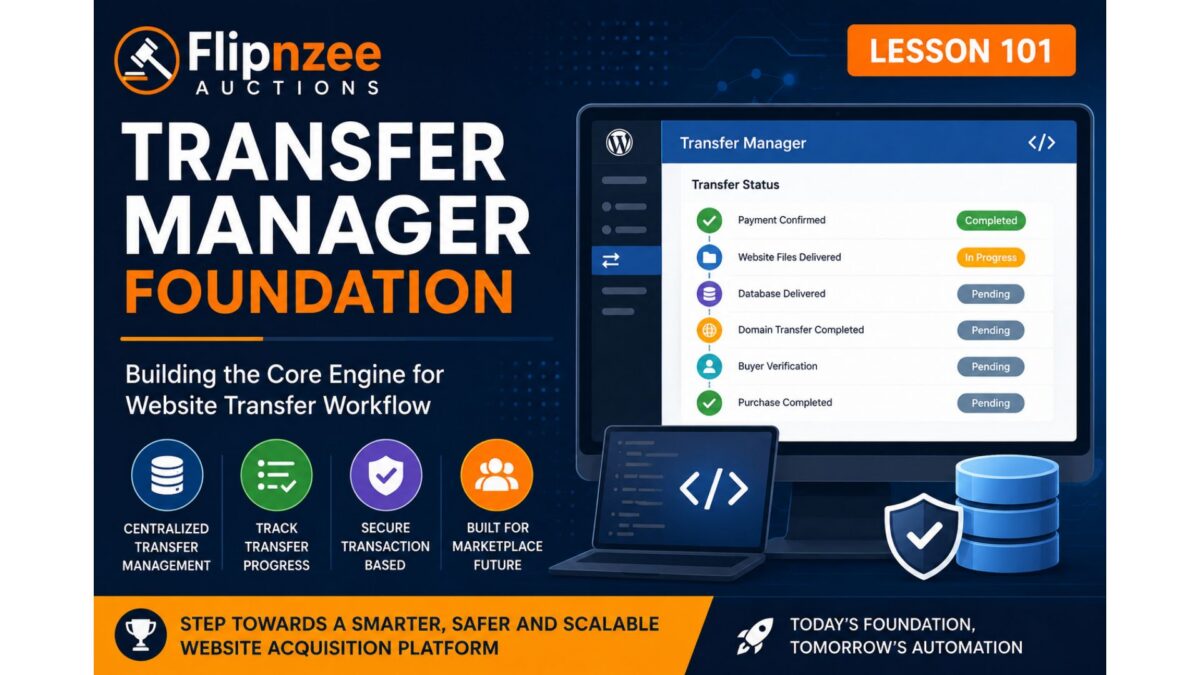
Lesson 101 — Implementing the Transfer Manager Foundation

Introduction

As the Flipnzee Auctions plugin continues to evolve into a professional platform for buying and selling websites, it is time to separate transfer management from the purchase details page.

Until Lesson 100, transfer progress was represented using hardcoded arrays inside the buyer purchase details page. While this allowed us to design and test the user interface, it is not suitable for a production-ready application.

Beginning with Lesson 101, we introduce a dedicated Transfer Manager class. This new class will become the central location for managing the website ownership transfer process after an auction has been won.

This architectural improvement keeps business logic separate from presentation, follows object-oriented design principles, and prepares the plugin for future marketplace support.


Objectives

In this lesson we will:

  • Create a dedicated Transfer Manager class.
  • Register the new class using the plugin loader.
  • Centralize transfer-related logic.
  • Prepare helper methods for transfer status retrieval.
  • Prepare helper methods for transfer progress updates.
  • Keep the purchase page fully functional.
  • Lay the groundwork for future admin and seller transfer workflows.

Why Create a Transfer Manager?

Currently, the purchase details page performs several responsibilities:

  • Displays purchase summary
  • Displays transfer timeline
  • Displays transfer status
  • Displays purchase notes
  • Displays buyer guidance

In addition, it currently stores transfer information directly inside the page itself.

That violates one of the most important software engineering principles:

A class should have one primary responsibility.

The purchase page should display information.

The Transfer Manager should manage transfer information.


New Architecture

Instead of this:

Purchase Details Page

├── Purchase Summary
├── Transfer Timeline
├── Transfer Status
├── Hardcoded Transfer Arrays
├── Notes
└── Buttons

We will move toward:

Purchase Details Page
        │
        │
        ▼
Flipnzee_Transfer_Manager
        │
        ├── Get Transfer Status
        ├── Update Transfer Status
        ├── Generate Timeline
        ├── Verify Completion
        └── Future Notifications

This dramatically improves maintainability.


Why Not Use Listing Meta?

During Lesson 100 we considered storing transfer progress using WordPress post meta attached to the listing.

However, that approach has an important limitation.

A website listing may eventually be sold more than once, particularly if someone uses the open-source Flipnzee Auctions plugin to build a marketplace where multiple sellers list digital assets.

Transfer progress belongs to an individual transaction, not the listing itself.

Therefore, future lessons will associate transfer data with transactions rather than listings.

This design also works perfectly for Flipnzee.com’s current business model, where only in-house websites are sold.


New File

A new class will be introduced:

includes/
    class-transfer-manager.php

Initially, the class will be lightweight.

Future lessons will gradually expand its capabilities.


Responsibilities of the Transfer Manager

Eventually this class will handle:

  • Website files delivered
  • Database delivered
  • Domain transfer completed
  • Buyer verification
  • Seller confirmation
  • Transfer completion
  • Admin verification
  • Transfer history
  • Transfer notes
  • Automatic progress calculations
  • Future email notifications

Planned Public Methods

The class will gradually expose methods similar to:

get_transfer_status()

update_transfer_status()

get_transfer_steps()

is_transfer_complete()

get_transfer_percentage()

add_transfer_note()

get_transfer_history()

These methods keep transfer logic centralized and reusable throughout the plugin.


Benefits

Creating a dedicated Transfer Manager provides several advantages:

  • Cleaner object-oriented architecture
  • Easier maintenance
  • Smaller purchase details page
  • Better code reuse
  • Easier testing
  • Future marketplace compatibility
  • Simpler notification integration
  • Cleaner admin interface development

Development Roadmap

Lesson 101

  • Create Transfer Manager class
  • Register with loader
  • Prepare architecture

Lesson 102

  • Implement transaction-based transfer status retrieval

Lesson 103

  • Allow admin to update transfer progress

Lesson 104

  • Buyer dashboard displays live transfer progress

Lesson 105

  • Seller transfer workflow

Lesson 106

  • Transfer completion verification

Lesson 107

  • Transfer history

Lesson 108

  • Email notifications

Expected Outcome

After completing Lesson 101, the Flipnzee Auctions plugin will have a dedicated Transfer Manager integrated into the plugin architecture.

Although the buyer interface will continue using placeholder transfer data temporarily, the plugin will now have a solid foundation for implementing a fully dynamic, transaction-driven website transfer workflow in subsequent lessons.

This marks an important architectural milestone, transitioning the project from frontend presentation enhancements toward a scalable backend transfer management system.

Lesson 100 – Admin Transfer Manager (Transaction Workflow Management)

Objective

In Lesson 99, we created a professional Buyer Purchase Details page. However, the transfer timeline and checklist are still driven by static arrays. In this lesson, we will make the transfer process administrator-controlled, allowing the Flipnzee admin to update website transfer progress directly from the Transaction Details page.

Although Flipnzee.com currently sells only its own in-house websites, this architecture is intentionally designed so that developers using the open-source Flipnzee Auctions plugin can later extend it into a full multi-vendor marketplace.


Why This Lesson?

A completed payment does not mean the transaction is finished.

Website sales typically involve multiple stages:

  • Payment received
  • Website files shared
  • Database delivered
  • Domain transfer initiated
  • Buyer verification
  • Transaction completed

These stages should be manageable from the admin panel rather than being hard-coded.


Objectives

By the end of this lesson we will:

  • Add a Transfer Manager section to Transaction Details.
  • Allow administrators to update transfer progress.
  • Save transfer progress securely.
  • Automatically update the Buyer Purchase Details page.
  • Prepare the plugin for future notifications and email updates.

Current Workflow

Auction Ends
        │
        ▼
Transaction Created
        │
        ▼
Buyer Purchase Page
        │
        ▼
Static Timeline

New Workflow

Auction Ends
        │
        ▼
Transaction Created
        │
        ▼
Admin Transfer Manager
        │
        ▼
Transfer Progress Saved
        │
        ▼
Buyer Purchase Details
        │
        ▼
Dynamic Timeline

Database Strategy

Rather than adding numerous columns to the transactions table, we will use WordPress transaction meta (or a dedicated metadata layer in future lessons).

Each transaction will eventually store values such as:

payment_confirmed

website_files_delivered

database_delivered

domain_transfer_completed

buyer_verified

purchase_completed

This keeps the system extensible without modifying the main transaction table whenever new workflow steps are introduced.


Admin Interface

Inside:

Flipnzee Auctions → Transactions → Transaction Details

we will introduce a new card:

Transfer Manager

☑ Payment Confirmed

☐ Website Files Delivered

☐ Database Delivered

☐ Domain Transfer Completed

☐ Buyer Verified

☐ Purchase Completed

[ Save Progress ]

Only administrators will have permission to modify these values.


Buyer Experience

The buyer page will automatically reflect the saved progress.

Instead of displaying a static checklist, buyers will see:

✓ Payment Confirmed

✓ Website Files Delivered

✓ Database Delivered

○ Domain Transfer Pending

○ Buyer Verification

○ Completed

No manual edits to frontend templates will be required.


Security

This lesson introduces several important security practices:

  • Administrator capability checks
  • Nonce verification
  • Sanitization
  • Validation of transaction IDs
  • Secure saving of transfer data

Only authorized administrators will be able to update transfer progress.


Why This Fits Flipnzee

Because Flipnzee currently sells only its own websites, the transfer workflow is managed entirely by the site administrator.

Typical workflow:

Auction Won
      │
Payment Received
      │
Website ZIP Sent
      │
Database Sent
      │
Domain Transfer
      │
Buyer Confirms
      │
Completed

This closely matches how professional website acquisitions are handled.


Benefits for Marketplace Developers

Developers using the open-source Flipnzee Auctions plugin can later replace the administrator with individual sellers.

The exact same workflow can become:

Seller uploads files

↓

Buyer downloads files

↓

Seller starts domain transfer

↓

Buyer verifies

↓

Transaction completed

No redesign of the buyer interface will be necessary.


Files Planned for Modification

This lesson will primarily work with:

includes/class-transaction-manager.php

includes/class-my-purchase-details.php

includes/class-loader.php

assets/css/admin.css

Additional helper methods may be introduced if required.


Skills Covered

  • WordPress admin forms
  • Secure POST handling
  • Nonce verification
  • Capability checks
  • Updating transaction metadata
  • Dynamic frontend rendering
  • Admin workflow design
  • Separation of presentation and business logic

Expected Outcome

By the end of Lesson 100, administrators will have a dedicated Transfer Manager that controls the progress of every website sale. Buyers will immediately see real-time updates to their purchase page, replacing the static checklist introduced in Lesson 99.

This lesson marks an important transition in the Flipnzee Auctions plugin—from presenting purchase information to actively managing the post-sale website transfer process. It establishes the foundation for future enhancements such as automated notifications, secure file delivery, domain transfer tracking, and Escrow.com integration while remaining fully compatible with Flipnzee’s current in-house sales model and future marketplace implementations.

Lesson 99 Implementation – Buyer Purchase Details Page & Purchase Journey

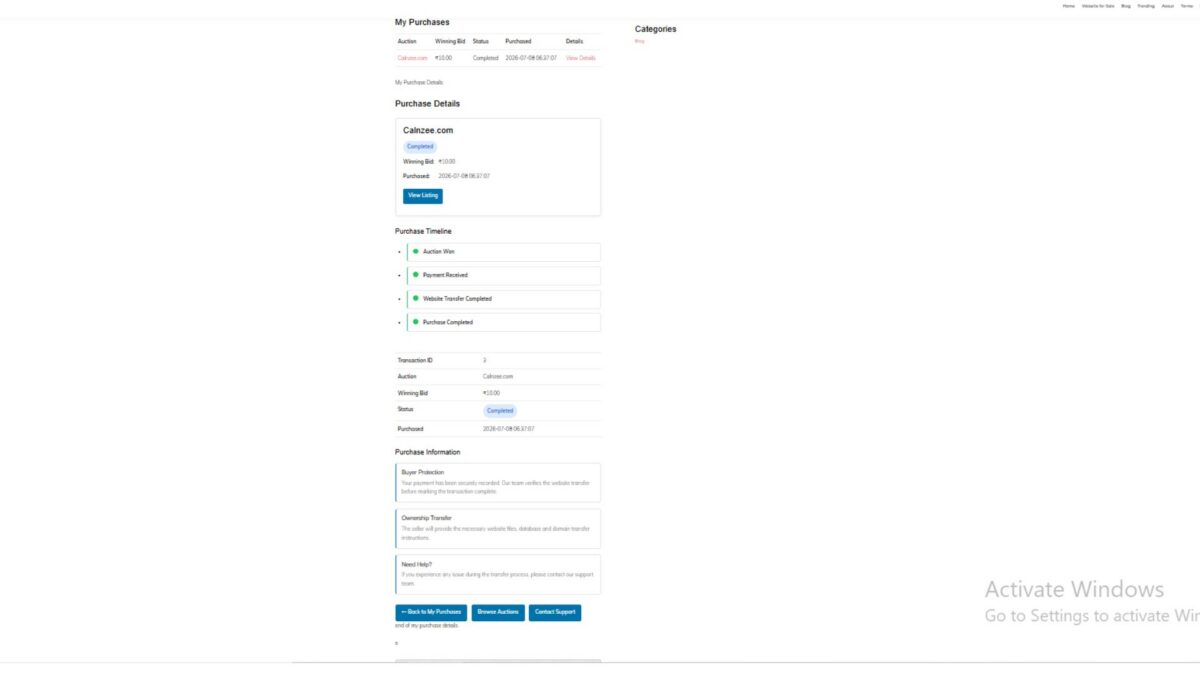
After completing the Buyer Dashboard in Lesson 98, the next logical step was to provide buyers with a dedicated page where they could review every aspect of a completed purchase. Simply listing purchased websites is not sufficient for a professional auction platform. Buyers need a central place to verify transaction information, monitor transfer progress, understand the next steps, and quickly access important resources.

Lesson 99 focused on designing and implementing a comprehensive Buyer Purchase Details page within the Flipnzee Auctions plugin. The implementation lays the foundation for a transparent website transfer workflow while remaining flexible enough for both Flipnzee’s own business model and future marketplace implementations by other developers.


Objectives

The primary goals of this lesson were:

  • Create a dedicated Purchase Details shortcode.
  • Securely display transaction information only to the purchasing user.
  • Build a professional purchase summary card.
  • Display transaction metadata in an organized table.
  • Introduce a visual purchase timeline.
  • Add buyer guidance and protection information.
  • Present transfer instructions and recommended next steps.
  • Improve overall user experience through frontend styling.

1. Secure Transaction Validation

The Purchase Details page begins by ensuring that only authenticated buyers can access purchase information.

The implementation validates:

  • Logged-in user
  • Transaction ID from the URL
  • Ownership of the transaction
  • Existence of the transaction record

Example:

$transaction_id = isset( $_GET['transaction_id'] )
	? absint( $_GET['transaction_id'] )
	: 0;

if ( ! $transaction_id ) {

	return '<p>No purchase selected.</p>';
}

The database query also confirms that the transaction belongs to the current user before displaying any information.


2. Purchase Summary Card

Instead of immediately showing raw transaction data, the page now opens with a visually appealing purchase summary card containing:

  • Website title
  • Featured image
  • Purchase status badge
  • Winning bid
  • Purchase date
  • Quick “View Listing” button

This provides buyers with an immediate overview of their purchase.


3. Transaction Reference

A unique purchase reference is generated for every completed transaction.

Example:

FLIP-2026-000003

The reference helps buyers and administrators identify transactions during support conversations without relying solely on numeric IDs.


4. Transaction Metadata

Additional metadata was added to make the page feel more professional.

Displayed information includes:

  • Transaction ID
  • Purchase Reference
  • Purchase Date
  • Purchase Time
  • Payment Method
  • Auction Title
  • Winning Bid
  • Purchase Status
  • Original Purchase Timestamp

Dates and times are displayed using WordPress localization functions.


5. Purchase Timeline

A simple timeline visually communicates the major milestones of the purchase process.

Current implementation includes:

  • Auction Won
  • Payment Received
  • Website Transfer Completed
  • Purchase Completed

The timeline prepares the plugin for future workflow automation.


6. Purchase Information Cards

To improve buyer confidence, several informational cards were introduced.

These explain topics such as:

Buyer Protection

Explains that payment has been securely recorded and that the transfer process is monitored.

Ownership Transfer

Provides an overview of the expected transfer of website files, database, and domain ownership.

Need Help?

Directs buyers toward support if they encounter problems during the transfer process.


7. Transfer Checklist

A dedicated “Next Steps” section guides buyers through the website acquisition process.

The current checklist includes items such as:

  • Payment confirmed
  • Receive website files
  • Receive database
  • Domain transfer
  • Verify website
  • Change passwords
  • Confirm successful transfer

Although currently driven by a static array, the structure is intentionally designed so future lessons can connect it to dynamic transaction data managed by administrators.


8. Purchase Action Buttons

Quick navigation buttons were added to improve usability.

Buyers can easily:

  • Return to My Purchases
  • Browse additional auctions
  • Contact Support

This reduces unnecessary navigation and provides convenient access to common actions.


9. Status Badges

Purchase status is displayed using colored badges instead of plain text.

Examples include:

  • Completed
  • Pending
  • Processing

The CSS implementation allows additional statuses to be introduced later without modifying the page layout.


10. Frontend Styling

Several reusable frontend components were added, including:

  • Purchase summary card
  • Timeline styling
  • Information cards
  • Success badges
  • Action buttons
  • Transfer checklist
  • Responsive spacing and typography

The page now matches the overall design language of the Buyer Dashboard introduced in Lesson 98.


Testing Performed

The implementation was tested using completed auction transactions.

The following functionality was verified:

  • Buyer authentication
  • Transaction ownership validation
  • Transaction lookup
  • Purchase summary display
  • Reference generation
  • Timeline rendering
  • Purchase information cards
  • Action buttons
  • Responsive frontend layout
  • URL-based transaction loading

Challenges Encountered

Several development issues were resolved during implementation:

  • Missing shortcode registration
  • Transaction ID validation
  • URL parameter handling
  • Purchase ownership verification
  • PHP syntax errors caused by mixed PHP and HTML
  • Duplicate HTML table elements
  • Status badge styling
  • Responsive layout adjustments
  • Frontend CSS refinements

These debugging sessions significantly improved the overall code quality and reinforced the importance of validating PHP syntax throughout development.


Lessons Learned

Lesson 99 demonstrated that a successful website auction platform requires much more than simply recording completed transactions.

A dedicated Purchase Details page:

  • improves buyer confidence,
  • provides transparency during ownership transfer,
  • reduces support requests,
  • prepares the system for future automation,
  • and creates a professional post-purchase experience comparable to commercial digital asset marketplaces.

The lesson also highlighted the value of separating presentation from future business logic by designing components that can later be connected to dynamic transaction metadata.

Download Source Code

Download the starting version of the plugin before the lesson:

Download the completed version after this lesson:


Looking Ahead

While the Purchase Details page is now functionally complete, several opportunities remain for future enhancements.

Planned improvements include:

  • Dynamic transfer progress managed by administrators
  • Buyer notifications
  • Secure file delivery
  • Domain transfer tracking
  • Private buyer-admin messaging
  • Escrow workflow integration
  • Downloadable purchase documents

These features will gradually transform the Purchase Details page into a complete digital asset transfer portal.


Conclusion

Lesson 99 represents a major milestone in the Flipnzee Auctions plugin. Buyers now have a centralized location where they can review completed purchases, understand the transfer process, and access important transaction information.

Although Flipnzee.com currently sells only in-house websites, the implementation has been designed with extensibility in mind. Developers who adopt the open-source Flipnzee Auctions plugin for marketplace scenarios will be able to build upon this foundation, replacing static workflow elements with dynamic seller-managed processes while retaining the same user experience.

The result is a significantly more polished, trustworthy, and scalable post-purchase system that strengthens both the current Flipnzee platform and the plugin’s long-term roadmap.