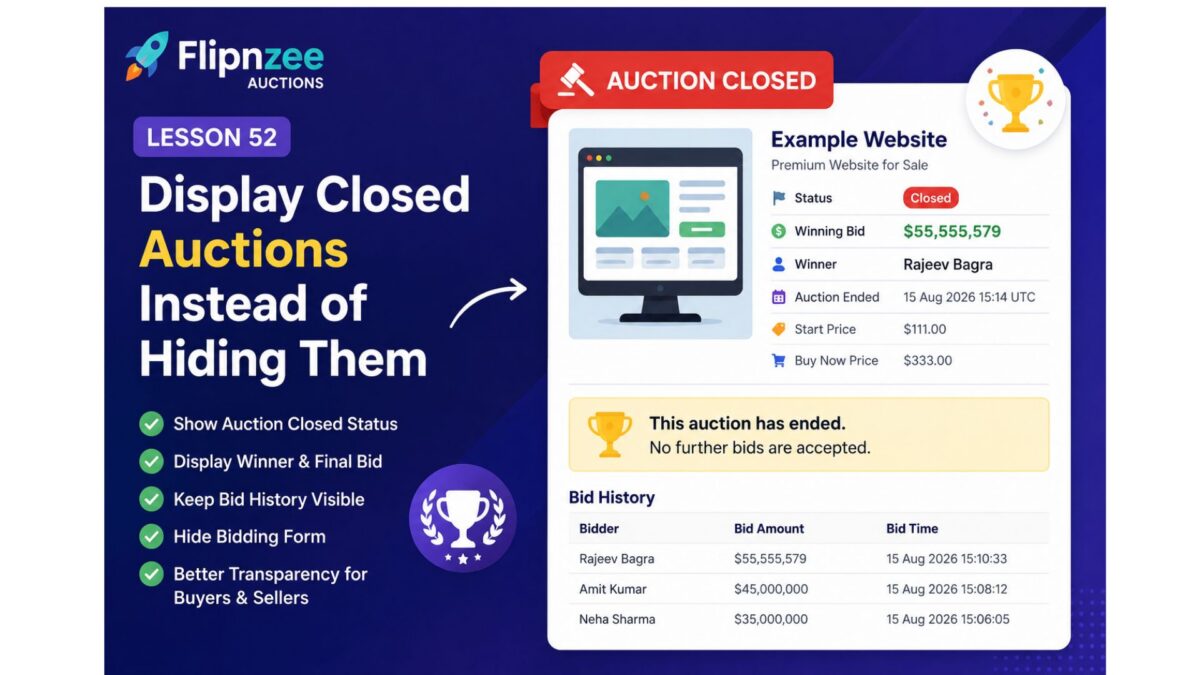
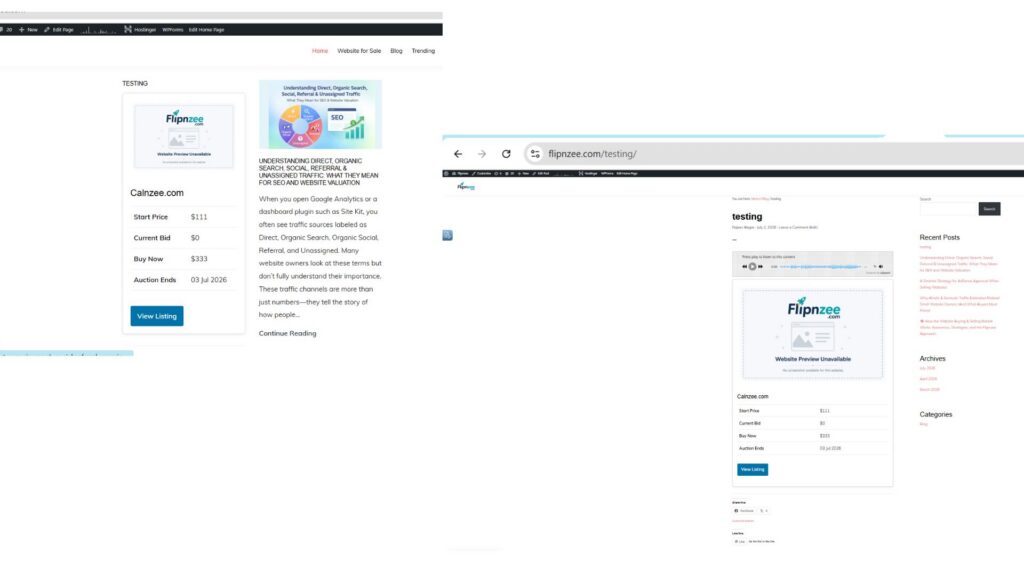
Lesson 52: Display Closed Auctions Instead of Hiding Them

In the previous lesson, we introduced automatic auction closure based on the auction end time. While that prevented late bids, it also exposed an important usability issue—once an auction was marked as closed, the entire auction disappeared from the frontend.

In this lesson, we’ll improve the user experience by displaying completed auctions instead of hiding them. Visitors will still be able to see the auction results, while bidding will be disabled.


What You’ll Learn

By the end of this lesson, you’ll be able to:

  • Display both active and closed auctions.
  • Show an Auction Closed status message.
  • Continue displaying the final bid amount.
  • Display the winning bidder.
  • Keep the complete bid history visible.
  • Disable the bid form once the auction has ended.
  • Improve transparency and trust for buyers and sellers.

Why This Matters

Imagine visiting an auction page only to discover that it has completely disappeared after the auction ended.

Questions immediately arise:

  • Who won?
  • What was the final bid?
  • Was the auction successful?
  • Is the page broken?

Professional auction platforms never hide completed auctions. Instead, they preserve the auction page as a permanent record.

Examples include:

  • eBay
  • Heritage Auctions
  • Sotheby’s
  • Copart

Visitors can still review the auction outcome even though bidding has ended.


Current Behaviour

At present, our shortcode behaves roughly like this:

if ( $auction['status'] !== 'active' ) {
    return '';
}

As soon as the auction status changes to closed, nothing is displayed.


Desired Behaviour

Instead of hiding the auction, we’ll show something like this:

Status
Closed

Winning Bid
$55,555,579

Winner
Rajeev Bagra

Auction Ended
15 Aug 2026 15:14 UTC

🏆 This auction has ended.
No further bids are accepted.

The bid history will remain visible.

Only the bidding form will disappear.


Implementation Plan

During this lesson we’ll:

Step 1

Remove the logic that hides closed auctions.


Step 2

Display an “Auction Closed” badge whenever the auction status is closed.


Step 3

Continue showing:

  • Start Price
  • Current Bid
  • Highest Bidder
  • Buy Now Price
  • Auction End Time
  • Bid History

Step 4

Hide only:

  • Bid input field
  • Place Bid button

Step 5

Display a friendly message:

🏁 This auction has ended. No further bids are accepted.


Benefits

After completing this lesson, Flipnzee Auctions will provide a much more professional experience.

Visitors will be able to:

  • Verify who won the auction.
  • See the final selling price.
  • Review the complete bid history.
  • Trust that auctions are permanently recorded.
  • Understand immediately that bidding has ended.

What We’ll Build

By the end of this lesson, every completed auction page will resemble a real-world auction result page instead of disappearing completely.

This lays the foundation for future enhancements such as:

  • 🏆 Winner badges
  • 🎉 Sold ribbons
  • Seller notifications
  • Winner email notifications
  • Auction archives
  • Recently Sold listings
  • Searchable auction history

Next Lesson

Lesson 53: Highlight the Winning Bidder and Final Selling Price for Closed Auctions

In the next lesson, we’ll enhance the completed auction page by prominently displaying the winner and the final sale price with improved styling, making the auction results more visually appealing and easier to understand.
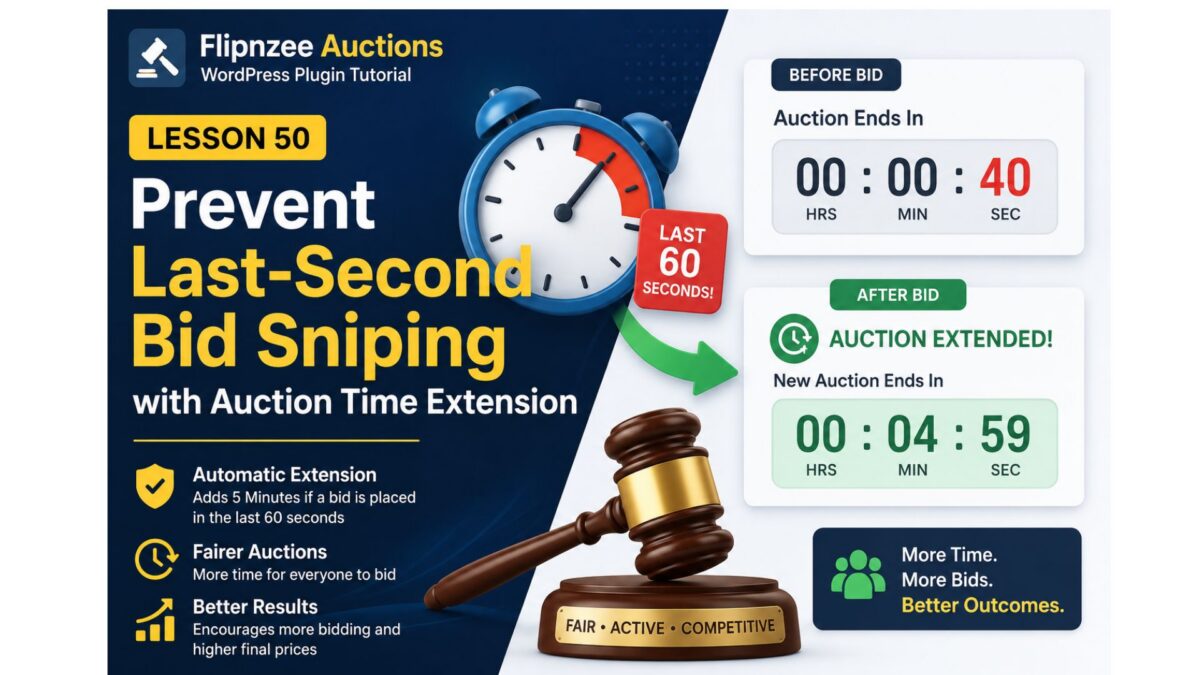
Lesson 50 Implementation: Prevent Last-Second Bid Sniping with Automatic Auction Time Extension

One of the biggest frustrations in online auctions is bid sniping—when someone waits until the final few seconds before placing a bid, leaving other bidders with no opportunity to respond. Many professional auction platforms solve this by automatically extending the auction if a bid is received near the end.

In this lesson, we implemented the same feature in the Flipnzee Auctions plugin. Whenever a valid bid is placed during the final 60 seconds of an auction, the auction end time is automatically extended by five minutes.


What We Built

The auction system now:

  • Detects every successful bid.
  • Checks how much time remains before the auction ends.
  • If 60 seconds or less remain:
    • Extends the auction by five minutes.
    • Updates the auction end time in the database.
  • Otherwise, the auction continues normally.

This gives every interested bidder a fair opportunity to respond.


Step 1: Locate the Bid Processing Method

Open:

includes/class-bid-manager.php

Locate:

public static function place_bid(

This method already:

  • validates bids,
  • inserts the bid into the database,
  • updates the auction’s current highest bid.

Step 2: Keep the Existing Current Bid Update

After a successful bid, the plugin already updates the auction table.

$wpdb->update(
    $auction_table,
    array(
        'current_bid' => $bid_amount,
    ),
    array(
        'id' => $auction_id,
    ),
    array(
        '%f',
    ),
    array(
        '%d',
    )
);

Immediately after this block, we inserted the anti-sniping logic.


Step 3: Retrieve the Auction End Time

First, fetch the current auction end time.

$auction = $wpdb->get_row(
    $wpdb->prepare(
        "SELECT auction_end
        FROM {$auction_table}
        WHERE id = %d",
        $auction_id
    )
);

This retrieves the existing end time directly from the database.


Step 4: Calculate Remaining Time

Convert the auction end time into a Unix timestamp.

$end_time = strtotime(
    $auction->auction_end
);

$current_time = current_time(
    'timestamp'
);

$seconds_left =
    $end_time - $current_time;

Using timestamps makes it easy to compare dates mathematically.


Step 5: Detect Last-Minute Bids

Only extend the auction if less than one minute remains.

if ( $seconds_left <= 60 ) {

    // Extend auction
}

This prevents unnecessary extensions while protecting against last-second sniping.


Step 6: Extend the Auction

Add five minutes to the existing end time.

$new_end = date(
    'Y-m-d H:i:s',
    $end_time + ( 5 * 60 )
);

Notice that:

5 × 60 = 300 seconds

The new end time is generated in MySQL datetime format.


Step 7: Save the New Auction End Time

Update the auction record.

$wpdb->update(
    $auction_table,
    array(
        'auction_end' => $new_end,
    ),
    array(
        'id' => $auction_id,
    ),
    array(
        '%s',
    ),
    array(
        '%d',
    )
);

The countdown timer will now use this updated value.


Complete Anti-Sniping Code

/*
 * Anti-sniping:
 * Extend auction by 5 minutes if
 * less than 60 seconds remain.
 */
$auction = $wpdb->get_row(
    $wpdb->prepare(
        "SELECT auction_end
        FROM {$auction_table}
        WHERE id = %d",
        $auction_id
    )
);

if ( $auction ) {

    $end_time = strtotime(
        $auction->auction_end
    );

    $current_time = current_time(
        'timestamp'
    );

    $seconds_left =
        $end_time - $current_time;

    if ( $seconds_left <= 60 ) {

        $new_end = date(
            'Y-m-d H:i:s',
            $end_time + ( 5 * 60 )
        );

        $wpdb->update(
            $auction_table,
            array(
                'auction_end' => $new_end,
            ),
            array(
                'id' => $auction_id,
            ),
            array(
                '%s',
            ),
            array(
                '%d',
            )
        );
    }
}

Why This Feature Matters

Many professional auction websites use automatic auction extensions because they:

  • Prevent unfair last-second bidding.
  • Give genuine buyers time to react.
  • Encourage competitive bidding.
  • Increase seller confidence.
  • Often lead to higher final selling prices.

Instead of rewarding the fastest click during the final seconds, the auction rewards the highest genuine bidder.


Testing

Although this lesson was successfully implemented, testing was intentionally postponed.

Because auction end times depend on server time and WordPress timezone settings, it is more practical to verify the feature during a real auction approaching its end. When a bid is placed within the final 60 seconds, the auction end time should automatically increase by five minutes.

Download Source Code

Download the starting version of the plugin before the lesson:

Download the completed version after this lesson:


What We Learned

In this lesson we learned how to:

  • Improve auction fairness with anti-sniping logic.
  • Work with Unix timestamps in PHP.
  • Calculate remaining auction time.
  • Update MySQL datetime values.
  • Extend auction durations dynamically.
  • Build a feature commonly found in commercial auction platforms.

Final Thoughts

A simple five-minute extension can significantly improve the fairness and competitiveness of an online auction. By adding anti-sniping protection, Flipnzee Auctions now behaves much more like established auction marketplaces, ensuring that every bidder has a reasonable opportunity to respond before an auction closes.

Lesson 50: Prevent Last-Second Bid Sniping with an Auction Time Extension

One of the biggest frustrations in online auctions is bid sniping—when someone waits until the last few seconds to place a bid, leaving no time for other bidders to respond. Many professional auction platforms solve this by automatically extending the auction whenever a bid is placed near the end.

In this lesson, we’ll implement the same feature in the Flipnzee Auctions plugin.


What You Will Build

By the end of this lesson, your plugin will automatically extend an auction if a bid is placed during the final minute.

For example:

  • Auction ends at 10:00:00 AM
  • A bid is placed at 9:59:45 AM
  • The auction end time automatically changes to 10:05:00 AM

This gives other bidders a fair opportunity to respond.


Why This Feature Is Important

Without an extension mechanism:

  • Someone can win with a last-second bid.
  • Other bidders never get a chance to react.
  • Auctions feel unfair.

With an automatic extension:

  • Competition remains active.
  • Sellers often receive higher final prices.
  • Buyers perceive the auction as more transparent and fair.

How the Feature Will Work

Each time a bid is accepted, the plugin will:

  1. Read the current auction end time.
  2. Compare it with the current server time.
  3. Calculate the remaining time.
  4. If less than 60 seconds remain:
    • Extend the auction by 5 minutes.
  5. Save the new end time in the database.
  6. The countdown timer automatically updates on the frontend.

Logic Flow

Bid Received
      │
      ▼
Is Auction Ending Within 60 Seconds?
      │
 ┌────┴────┐
 │         │
No        Yes
 │         │
 ▼         ▼
Keep     Add 5 Minutes
Time     to auction_end
 │         │
 └────┬────┘
      ▼
Save Auction
      ▼
Update Countdown

Files We Will Modify

During this lesson we will work with:

includes/class-bid-manager.php

to update the auction end time after a successful bid.

We will also verify the countdown in:

assets/js/countdown.js

No changes should be needed there because it already reads the updated end time from the database.


What You Will Learn

In this lesson you will learn how to:

  • Work with PHP date and time functions.
  • Compare timestamps.
  • Update auction records automatically.
  • Modify existing database values.
  • Build anti-sniping protection similar to commercial auction platforms.

Expected Result

Before:

Auction Ends In

00m 40s

User places a bid.

After:

Auction Extended!

04m 59s

The countdown immediately reflects the new auction end time, giving all bidders additional time to compete.


Why This Makes Flipnzee Better

Adding automatic auction extensions moves Flipnzee Auctions closer to enterprise-grade auction platforms. It encourages fair competition, discourages last-second bid sniping, and can help sellers achieve better final prices through increased bidding activity.


Coming Up Next

In Lesson 51, we’ll build an Auction Winner System that automatically determines the winning bidder once the auction ends and records the auction result, paving the way for payment processing and order fulfillment.

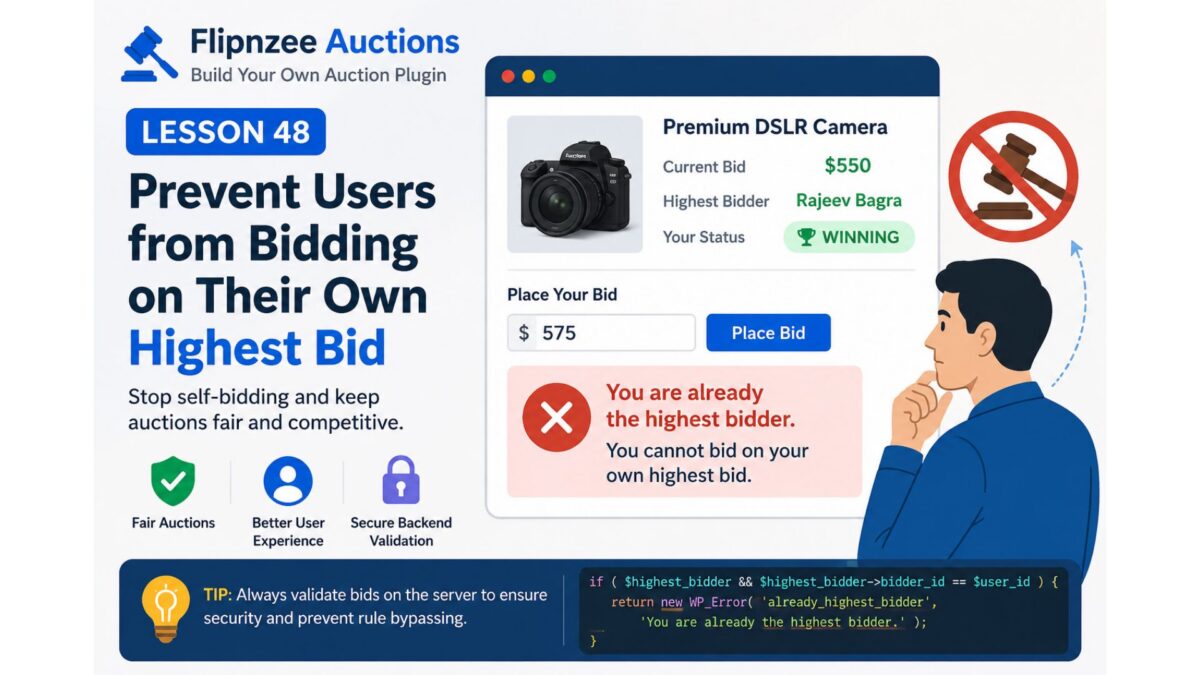
Lesson 48: Prevent Users from Bidding on Their Own Highest Bid

In the previous lesson, we showed users whether they are currently winning or have been outbid. However, there is still one issue with our auction system:

A user who is already the highest bidder can continue placing higher bids against themselves.

Real-world auction platforms like eBay don’t allow this because it serves no purpose. In this lesson, we’ll prevent users from bidding again if they already hold the highest bid.


Why Is This Important?

Imagine this scenario:

  • Rajeev bids $500
  • Rajeev is now the highest bidder
  • Rajeev accidentally bids $550
  • Nobody else has bid yet

The auction price increases without any competition.

Preventing this keeps auctions fair and avoids unnecessary price inflation.


The Solution

Before accepting a bid, we need to determine:

  1. Who is currently the highest bidder?
  2. Is the logged-in user the same person?
  3. If yes, reject the bid.

This validation belongs in the bid processing logic, not just the frontend.


Step 1: Retrieve the Highest Bidder

Inside the bid placement function, retrieve the current highest bidder.

$highest_bidder =
    self::get_highest_bidder(
        $auction_id
    );

Step 2: Compare User IDs

Check whether the logged-in user already owns the highest bid.

if (
    $highest_bidder &&
    (int) $highest_bidder->bidder_id === (int) $bidder_id
) {
    return new WP_Error(
        'already_highest_bidder',
        __( 'You are already the highest bidder.', 'flipnzee-auctions' )
    );
}

Step 3: Stop Processing

If this condition is true:

  • No new bid is inserted.
  • Current bid remains unchanged.
  • Bid history remains unchanged.

The function exits immediately.


Step 4: Display the Error

Instead of silently failing, redirect back to the auction page with an error message such as:

You are already the highest bidder.

This provides immediate feedback to the user.


Why Backend Validation Matters

Some developers disable the bid button on the frontend and think the problem is solved.

It isn’t.

A malicious user could still:

  • submit the form manually
  • use browser developer tools
  • send a POST request directly

That’s why validation must happen inside the PHP bid processing code.


Example Flow

Current Auction

BidderAmount
Rajeev$500

Rajeev clicks Place Bid again.

Server checks:

Current Highest Bidder = Rajeev

Current User = Rajeev

Match = TRUE

Result:

❌ Bid rejected.

Another user bids:

BidderAmount
Rajeev$500
Amit$550

Now Rajeev is allowed to bid again because he is no longer the highest bidder.


Benefits

Implementing this validation provides several advantages:

  • Prevents self-bidding
  • Makes auctions behave like professional auction websites
  • Prevents accidental price increases
  • Protects users from unnecessary mistakes
  • Keeps auction history meaningful
  • Enforces rules securely on the server

What You’ll Learn Next

In Lesson 49, we’ll improve the bidding experience further by displaying success and error notifications after a bid is submitted, so users receive clear feedback such as:

  • ✅ Bid placed successfully.
  • ❌ Bid is too low.
  • ❌ You are already the highest bidder.
  • ❌ Auction has ended.

This will make the auction workflow much more user-friendly and professional.

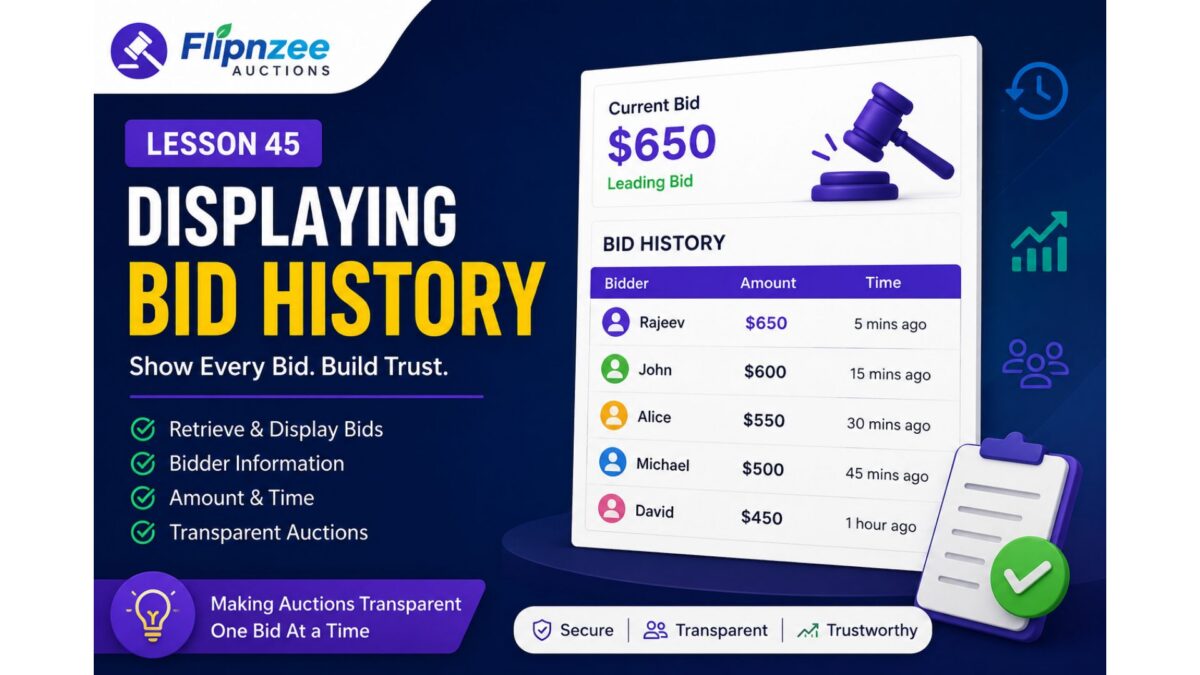
Lesson 45: Displaying Bid History in Flipnzee Auctions


In the previous lesson, we built the core bidding engine that allows logged-in users to place bids on an auction. Every successful bid is securely stored in the database and the current highest bid is updated automatically.

However, a real auction is about more than just the latest bid. Participants want to see the competition, understand how the auction has progressed, and gain confidence that the bidding process is transparent.

In this lesson, we’ll build a Bid History feature that displays every bid placed on an auction.


What You’ll Learn

By the end of this lesson you will know how to:

  • Retrieve auction bids from the database
  • Sort bids from highest to lowest
  • Display bidder information
  • Show bid timestamps
  • Build a frontend bid history table
  • Gracefully handle auctions with no bids

Why Bid History Matters

Imagine visiting an auction where only the highest bid is visible.

Questions immediately arise:

  • How many people are bidding?
  • When was the last bid placed?
  • Has the auction been active?
  • Is the current price increasing steadily?

Displaying bid history answers all these questions and makes the auction feel much more trustworthy.


What We Will Build

Each auction page will display something similar to this:

BidderAmountTime
Rajeev$6505 mins ago
John$60015 mins ago
Alice$55030 mins ago

Visitors can immediately understand the progress of the auction.


New Functionality

We’ll enhance our plugin by adding:

  • A database query to fetch bids
  • Bid history retrieval method
  • Frontend HTML table
  • User name lookup
  • Proper currency formatting
  • Date and time formatting

User Experience Improvements

If no bids exist, instead of showing an empty table, visitors will see a friendly message such as:

No bids have been placed yet. Be the first bidder!

This small detail greatly improves usability.


Security Considerations

While displaying bids, we’ll ensure:

  • All output is properly escaped
  • User data is sanitized
  • Only public information is displayed
  • SQL queries use prepared statements

Following WordPress coding standards remains a priority.


Skills You’ll Practice

During this lesson you’ll gain experience with:

  • Database retrieval using $wpdb
  • Looping through database results
  • Fetching WordPress user information
  • Formatting frontend tables
  • Escaping output correctly
  • Improving frontend user experience

Expected Outcome

After completing this lesson, every auction page will show:

  • Current highest bid
  • Complete bid history
  • Bidder names
  • Bid amounts
  • Bid timestamps

The auction will feel much more interactive and transparent.


Coming Up Next

After implementing bid history, we’ll continue improving the auction system with features such as:

  • Minimum bid increments
  • Automatic auction closing
  • Declaring the winning bidder
  • Buy Now functionality
  • Auction status badges
  • Email notifications

Each lesson will move Flipnzee Auctions closer to becoming a fully featured marketplace plugin.

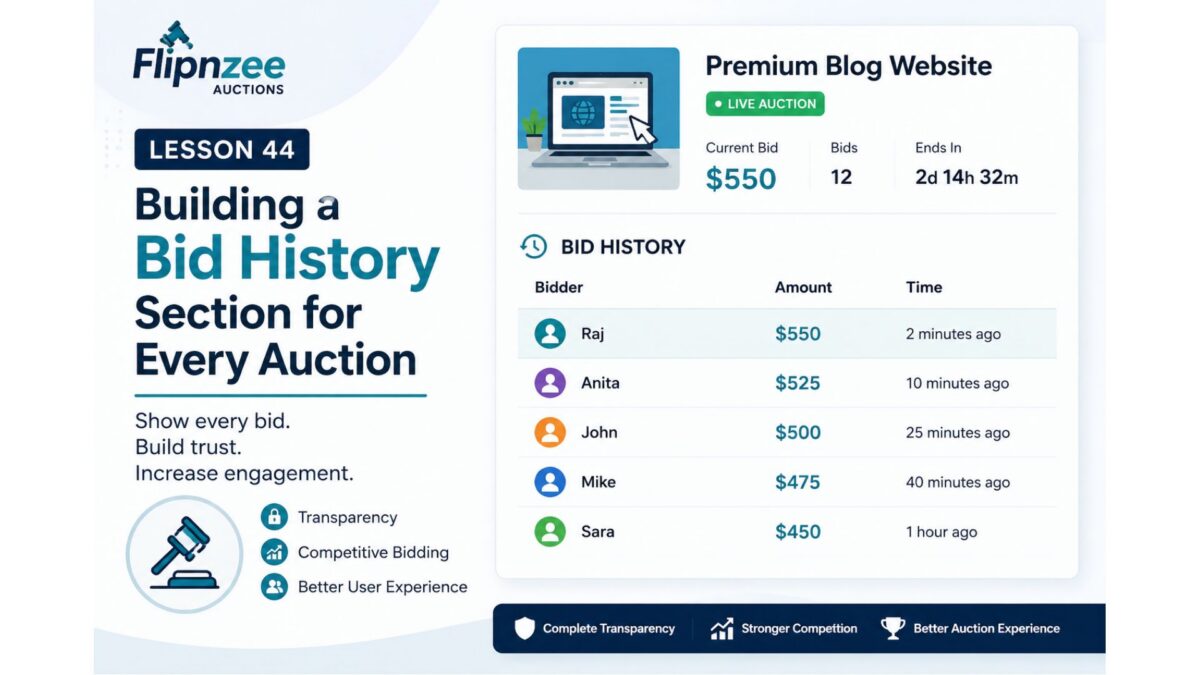
Lesson 44: Building a Bid History Section for Every Auction

Objective

In this lesson, we will add a Bid History section to every auction page.

Instead of only showing the current highest bid, visitors will be able to see the progression of bidding throughout the auction.


Why This Feature Matters

Every successful auction platform provides transparency.

A visible bid history helps users:

  • Build confidence in the auction
  • See bidding activity
  • Understand how quickly prices are increasing
  • Encourage competitive bidding
  • Increase engagement

Without bid history, visitors only know the current highest bid.

With bid history, they can see the auction’s journey.


What We Will Build

Each auction page will include a new section:

Bid History

-----------------------------------
Bidder         Amount        Time
-----------------------------------
Raj            $550         2 mins ago
Anita          $525         10 mins ago
John           $500         25 mins ago
-----------------------------------

Initially, we can display:

  • Bid amount
  • Date & time

Later, when user accounts are fully integrated, we can add bidder names (or anonymised usernames).


Features We’ll Implement

1. Create a Bid History Table

We’ll create a new custom database table to store every bid.

Example fields:

  • Bid ID
  • Auction ID
  • User ID
  • Bid Amount
  • Bid Time

2. Record Every Bid

Instead of simply replacing the current bid, every bid will be stored permanently.

This creates a complete bidding history.


3. Retrieve Bid History

We’ll build helper functions to retrieve bids ordered by:

Newest First

or

Highest First

depending on the display requirement.


4. Display Bid History on the Frontend

Each auction card (or single auction page) will include:

Latest Bids

beneath the auction details.


5. Format Dates

Instead of displaying raw database timestamps, we’ll use WordPress date formatting functions.

Example:

Instead of:

2026-07-03 15:30:00

display

3 July 2026
3:30 PM

or

5 minutes ago

for recent bids.


6. Empty State

If no bids exist yet:

No bids have been placed yet.

Be the first bidder!

What You’ll Learn

By completing this lesson, you’ll gain experience with:

  • Creating another custom database table
  • Database relationships
  • One-to-many data structures
  • Retrieving ordered records
  • Displaying dynamic lists
  • Formatting dates and times
  • Improving auction transparency

Why This Is an Important Milestone

Until now, the plugin has focused primarily on auction setup and presentation.

With bid history, we begin adding the interactive elements that make an auction platform feel alive. It also lays the foundation for future features such as:

  • Highest bidder tracking
  • Automatic winner selection
  • User bidding dashboards
  • Email notifications
  • Auction analytics
  • Escrow integration after auction completion

Each of these features will build naturally on the bid history system.


End Result

After Lesson 44, every auction will not only display its current price but also the complete story of how bidding has progressed, making the Flipnzee Auctions plugin more transparent, engaging, and closer to a production-ready auction platform.

Lesson 44 Implementation: Building the First Working Bidding System

Lesson 42 Implementation: Adding a Live JavaScript Auction Countdown to Flipnzee Auctions

One of the key characteristics of any modern auction website is a live countdown timer. Instead of showing visitors only the auction end date, a countdown creates urgency and helps buyers know exactly how much time remains before bidding closes.

In this lesson, the Flipnzee Auctions plugin was enhanced by replacing the static auction end date with a live JavaScript countdown timer that updates every second.


Objective

Convert this:

Auction Ends
03 Jul 2026

into something like:

Auction Ends In
5d 14h 32m 08s

and automatically display:

Auction Ended

once the auction expires.


What Was Implemented

The countdown feature required changes in three different areas of the plugin.

Step 1 — Create a JavaScript Countdown File

A new file was created:

assets/js/countdown.js

This script:

  • Finds every countdown on the page
  • Reads the auction end date
  • Calculates the remaining time
  • Updates every second
  • Automatically displays “Auction Ended” when time runs out

Step 2 — Pass the Auction End Date to JavaScript

Inside the shortcode output, the auction end date was stored inside a custom HTML data attribute.

Example:

<span
class="flipnzee-countdown"
data-end="2026-07-03 06:29:00">
Loading...
</span>

This allows JavaScript to read the date without embedding PHP inside the script.


Step 3 — Enqueue the JavaScript File

The plugin originally loaded only the frontend CSS.

It was updated to also load the countdown script.

Example:

wp_enqueue_script(
    'flipnzee-countdown',
    FLIPNZEE_AUCTION_URL . 'assets/js/countdown.js',
    array(),
    FLIPNZEE_AUCTION_VERSION,
    true
);

Loading the script in the footer ensures the HTML has already been generated before JavaScript executes.


Step 4 — Update the Countdown Every Second

JavaScript calculates the remaining:

  • Days
  • Hours
  • Minutes
  • Seconds

and refreshes the display every second using:

setInterval(updateCountdown, 1000);

The visitor therefore always sees an accurate countdown without refreshing the page.


Step 5 — Display “Auction Ended”

When the remaining time reaches zero, the script automatically changes the display to:

Auction Ended

instead of showing negative numbers.


Step 6 — Add Visual Styling

The countdown text was styled using CSS.

Normal countdown:

  • Blue text
  • Semi-bold

Expired auction:

  • Red text
  • Bold

Example CSS:

.flipnzee-countdown {
    color: #1d4ed8;
    font-weight: 600;
}

.flipnzee-countdown.ended {
    color: #dc2626;
    font-weight: 700;
}

This makes expired auctions immediately obvious to visitors.


Final Result

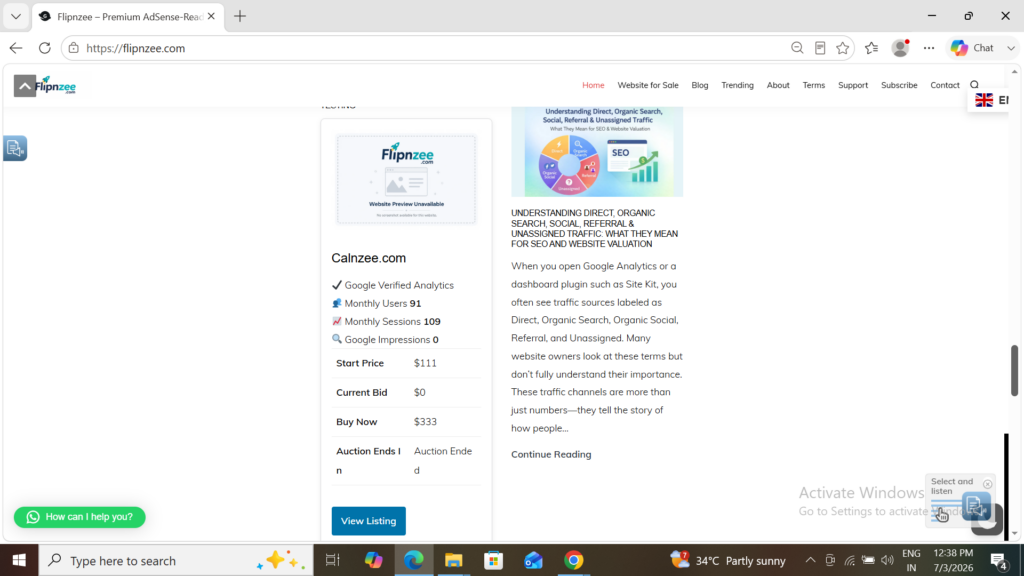
Each auction listing now displays:

✔ Google Verified Analytics

👥 Monthly Users
📈 Monthly Sessions
🔍 Google Impressions

Start Price
Current Bid
Buy Now

Auction Ends In
5d 08h 16m 42s

View Listing

Once the timer reaches zero, it automatically changes to:

Auction Ends In
Auction Ended

with the expired status highlighted in red.


What Was Learned

During this lesson, several important WordPress development concepts were covered:

  • Creating and organizing external JavaScript files
  • Loading JavaScript properly using wp_enqueue_script()
  • Passing PHP data to JavaScript through HTML data attributes
  • Using setInterval() to update content dynamically
  • Calculating countdown timers with JavaScript date functions
  • Enhancing user experience with conditional CSS classes

Why This Feature Matters

A live countdown is a standard feature on professional auction platforms because it creates urgency and encourages users to act before time runs out. Even without refreshing the page, visitors always know exactly how much time remains.

With this enhancement, the Flipnzee Auctions plugin feels significantly more interactive and professional, bringing it one step closer to a production-ready auction solution.


Download Source Code

Download the starting version of the plugin before the lesson:

Download the completed version after this lesson:

Complete Source Code

The complete source code for this lesson is available in the Flipnzee Auctions GitHub repository and reflects the changes made to implement the live JavaScript auction countdown.

Lesson 40 (Implementation): Improving Auction Card Readability with Better Formatting


In the previous lesson, the auction card displayed all the required information, but the layout looked more like raw data than a professional marketplace listing. In this implementation, the auction card was refined to improve readability and give visitors a cleaner browsing experience.


What We Wanted to Improve

The original auction card displayed:

  • Prices without a currency symbol
  • Auction end date in raw database format (YYYY-MM-DD HH:MM:SS)
  • Labels and values that were difficult to scan quickly

The objective was to make the card resemble a professional online marketplace.


Step 1: Improve the Auction Details Layout

The auction details were converted into a definition list (<dl>), making the labels and values much easier to align.

Instead of using several independent paragraphs, the HTML now groups related information together.

Example:

<dl class="flipnzee-auction-meta">

    <dt>Start Price</dt>
    <dd>...</dd>

    <dt>Current Bid</dt>
    <dd>...</dd>

    <dt>Buy Now</dt>
    <dd>...</dd>

    <dt>Auction Ends</dt>
    <dd>...</dd>

</dl>

This produces a much cleaner appearance.


Step 2: Format Currency Values

Instead of printing plain numbers such as

111
333
0

the values are now formatted using WordPress’s localization function.

Example:

<?php echo esc_html( '$' . number_format_i18n( $auction['start_price'], 0 ) ); ?>

Similarly,

<?php echo esc_html( '$' . number_format_i18n( $auction['current_bid'], 0 ) ); ?>

and

<?php echo esc_html( '$' . number_format_i18n( $auction['buy_now_price'], 0 ) ); ?>

Now the auction card displays

$111
$0
$333

which immediately looks more professional.


Step 3: Display a Friendly Auction End Date

Previously, the auction end date appeared exactly as stored in the database.

Example:

2026-07-03 06:29:00

A visitor does not need to see the database timestamp.

Instead, the value is formatted before displaying it.

<?php
echo esc_html(
    date_i18n(
        'd M Y',
        strtotime( $auction['auction_end'] )
    )
);
?>

The visitor now sees

03 Jul 2026

which is much easier to read.


Step 4: Style the Definition List

CSS was added to create two neat columns.

Example:

.flipnzee-auction-meta {
    display: grid;
    grid-template-columns: 1fr auto;
    gap: 12px 20px;
}

.flipnzee-auction-meta dt {
    font-weight: 600;
}

.flipnzee-auction-meta dd {
    margin: 0;
    text-align: right;
}

This aligns every label with its corresponding value.


Step 5: Keep the Call-to-Action Prominent

The View Listing button remains at the bottom of the card, giving visitors a clear next step.

The wording is intentional.

Rather than taking users directly to the website being sold, the button takes them to the listing page where they can review:

  • Verified analytics
  • Traffic statistics
  • Pricing
  • Auction details
  • Future bidding functionality

This avoids any confusion about where the visitor is being directed.


Result

The auction card now provides a much cleaner presentation.

Before:

  • Raw prices
  • Raw timestamps
  • Basic formatting

After:

  • Dollar-formatted prices
  • Human-readable auction dates
  • Better aligned labels and values
  • Improved visual hierarchy
  • More professional marketplace appearance

What We Learned

Small formatting improvements can significantly enhance the perceived quality of a marketplace.

Visitors usually decide within a few seconds whether a listing looks trustworthy. Clear prices, readable dates, and a well-organized layout contribute to a better user experience and help build confidence in the platform.


Source Code

The primary changes were made in:

  • includes/class-shortcodes.php
  • assets/css/frontend.css

Download Source Code

Download the completed version after this lesson:


Next Lesson

In Lesson 41, we’ll begin integrating Flipnzee Analytics into the auction cards themselves, displaying key verified metrics such as Users, Sessions, and Google Impressions directly on the marketplace. This will highlight one of Flipnzee’s unique advantages: allowing buyers to evaluate website performance before even opening the full listing page.

Implementation Lesson 37: Automating Auction Maintenance with WordPress Cron

In the previous two lessons, we added the ability to manually activate scheduled auctions and manually close expired auctions. Those features worked correctly, but they still required an administrator to click buttons from the dashboard.

In this implementation lesson, we’ll take the next logical step by allowing WordPress to perform these maintenance tasks automatically using WP-Cron.

By the end of this lesson, Flipnzee Auctions will periodically check auction schedules in the background without administrator intervention.


Starting Point

Before beginning this lesson, ensure you have completed:

  • Lesson 35 – Activate Scheduled Auctions
  • Lesson 36 – Close Expired Auctions


Why WP-Cron?

Unlike a traditional Linux cron job, WordPress includes its own scheduling system called WP-Cron.

Instead of relying on server-level scheduled tasks, WordPress executes scheduled events whenever someone visits the website.

Many popular plugins use WP-Cron for tasks such as:

  • Publishing scheduled posts
  • Sending email notifications
  • Clearing expired caches
  • Running maintenance jobs

We’ll use the same mechanism for auction management.


Step 1: Create a Central Maintenance Method

Inside:

includes/class-auction-manager.php

we created a new method:

public static function run_scheduled_maintenance() {

	self::activate_scheduled_auctions();

	self::close_expired_auctions();
}

Rather than scheduling multiple background events, we created one maintenance method responsible for the complete auction lifecycle.

This keeps the plugin architecture simple and easier to extend.


Step 2: Register a Custom Cron Hook

Inside:

flipnzee-auctions.php

we registered a custom WordPress action.

add_action(
	'flipnzee_auction_maintenance',
	array(
		'Flipnzee_Auction_Manager',
		'run_scheduled_maintenance',
	)
);

Whenever WordPress executes the custom hook, our maintenance method is called automatically.


Step 3: Schedule the Event During Plugin Activation

Next, we modified the plugin activation routine.

function flipnzee_auction_activate() {

	Flipnzee_Database::create_tables();

	if ( ! wp_next_scheduled( 'flipnzee_auction_maintenance' ) ) {

		wp_schedule_event(
			time(),
			'hourly',
			'flipnzee_auction_maintenance'
		);
	}
}

The plugin now schedules a recurring hourly event when activated.

Using wp_next_scheduled() prevents duplicate scheduled events from being created if the plugin is activated multiple times.


Step 4: Remove the Scheduled Event on Deactivation

Good WordPress plugins clean up after themselves.

We therefore added a deactivation routine.

function flipnzee_auction_deactivate() {

	$timestamp = wp_next_scheduled(
		'flipnzee_auction_maintenance'
	);

	if ( $timestamp ) {

		wp_unschedule_event(
			$timestamp,
			'flipnzee_auction_maintenance'
		);
	}
}

This ensures WordPress no longer runs auction maintenance after the plugin has been deactivated.


Step 5: Register Activation and Deactivation Hooks

Finally, we registered both hooks.

register_activation_hook(
	__FILE__,
	'flipnzee_auction_activate'
);

register_deactivation_hook(
	__FILE__,
	'flipnzee_auction_deactivate'
);

WordPress now automatically schedules the maintenance event during activation and removes it during deactivation.


Plugin Architecture

Our maintenance workflow now looks like this:

Plugin Activated
        │
        ▼
Schedule Hourly Event
        │
        ▼
WordPress Cron
        │
        ▼
flipnzee_auction_maintenance
        │
        ▼
run_scheduled_maintenance()
        │
        ├───────────────┐
        ▼               ▼
Activate Auctions   Close Auctions

Using a single maintenance method keeps the code organized and simplifies future enhancements.


Testing During Development

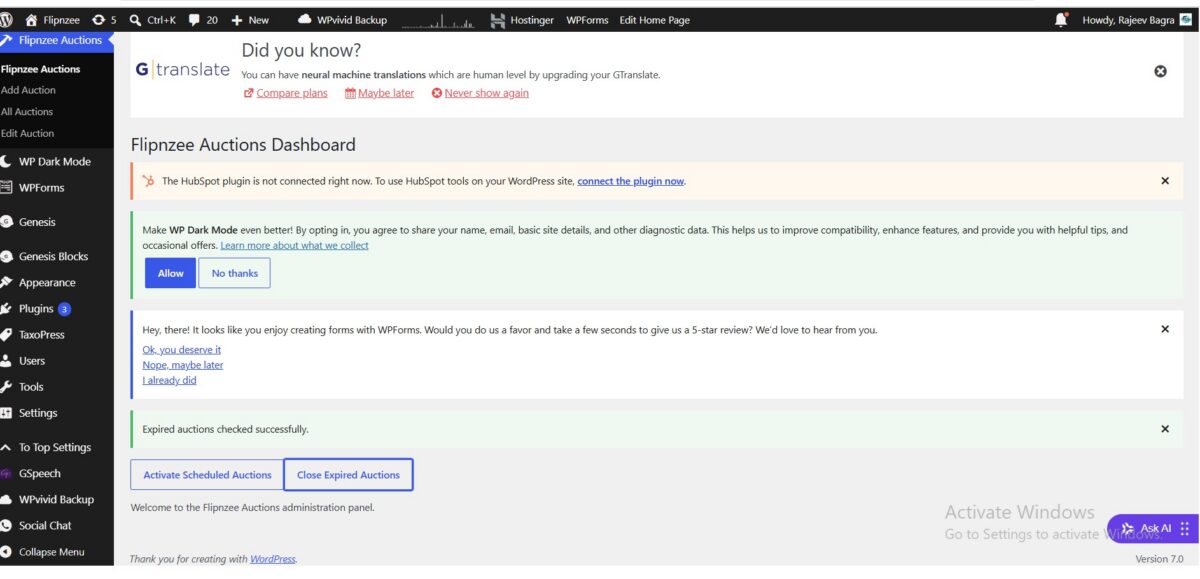
Although the plugin now supports automatic scheduling, we intentionally kept the two dashboard buttons:

  • Activate Scheduled Auctions
  • Close Expired Auctions

These manual tools remain extremely valuable because they allow developers to test the maintenance logic immediately without waiting for the next scheduled Cron execution.

Keeping manual maintenance actions available is a practical approach during development and troubleshooting.


Debugging Along the Way

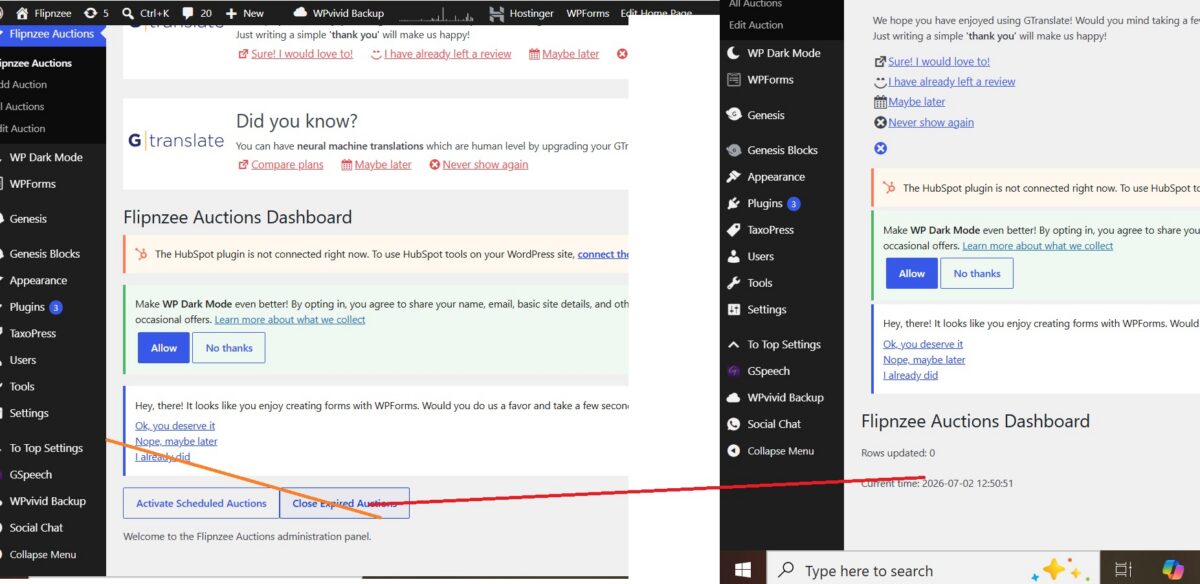
During implementation, we temporarily inserted debugging statements such as:

wp_die();

and displayed the number of rows updated by SQL queries.

These temporary diagnostics helped confirm:

  • Dashboard buttons were submitting correctly.
  • Nonce verification was successful.
  • Maintenance methods were being executed.
  • SQL queries were running as expected.
  • WordPress time handling influenced scheduling behaviour.

Once testing was complete, all debugging statements were removed to ensure Cron jobs could run silently in the background.


Lessons Learned

This implementation introduced several important WordPress development concepts:

  • Creating custom Cron hooks
  • Scheduling recurring events
  • Preventing duplicate scheduled events
  • Cleaning up scheduled tasks during plugin deactivation
  • Organizing background processes into a single maintenance method
  • Using temporary debugging techniques while developing background tasks

These concepts are widely used in production-quality WordPress plugins.


Final Result

At the end of this lesson, Flipnzee Auctions is capable of:

  • Scheduling recurring background maintenance
  • Automatically activating scheduled auctions
  • Automatically closing expired auctions
  • Cleaning up scheduled events during plugin deactivation

This marks a significant milestone in the project’s evolution from an administrative CRUD plugin to an intelligent, self-managing auction platform.


Download Source Code

Download the starting version of the plugin before the lesson:

Download the completed version after this lesson:


What’s Next?

In Lesson 38, we’ll begin implementing the frontend auction experience, allowing visitors to view live auctions, auction details, countdown timers, and bidding information directly from the website. This will shift the focus from administrator tools to the public-facing auction marketplace.

Implementation Lesson 36: Automatically Close Expired Auctions in Flipnzee Auctions

In the previous lesson, we added the ability to manually activate scheduled auctions. In this lesson, we build another important piece of auction lifecycle management by implementing the ability to automatically close auctions once their end time has passed.

Although the feature is currently triggered manually from the dashboard for testing purposes, the underlying logic is exactly the same as what will later be executed automatically by WordPress Cron.


What We Will Build

At the end of this lesson, the plugin will be able to:

  • Detect auctions whose end time has already passed.
  • Change their status from Active to Closed.
  • Execute the update using a single SQL query.
  • Allow administrators to manually trigger the check from the Dashboard.
  • Protect the action using WordPress nonces.

Starting Point

Download the plugin completed in the previous lesson.

↓ Download Plugin (After Lesson 35)


Step 1: Create the Auction Closing Method

Open:

includes/class-auction-manager.php

Add a new static method.

public static function close_expired_auctions() {

	global $wpdb;

	$table = $wpdb->prefix . 'flipnzee_auctions';

	$current_time = current_time( 'mysql' );

	$wpdb->query(
		$wpdb->prepare(
			"UPDATE {$table}
			SET status = %s
			WHERE status = %s
			AND auction_end IS NOT NULL
			AND auction_end <= %s",
			'closed',
			'active',
			$current_time
		)
	);
}

Instead of loading every auction into PHP, this query updates every expired auction directly inside MySQL, making it fast even for large numbers of auctions.


Step 2: Add a Dashboard Button

Open:

admin/class-admin.php

Inside the dashboard form, add another submit button.

submit_button(
	'Close Expired Auctions',
	'secondary',
	'flipnzee_close_now',
	false
);

The dashboard now contains two management tools:

  • Activate Scheduled Auctions
  • Close Expired Auctions

Step 3: Process the Button Submission

Still inside the dashboard page, add another POST handler.

if ( isset( $_POST['flipnzee_close_now'] ) ) {

	check_admin_referer(
		'flipnzee_activate_now',
		'flipnzee_activate_nonce'
	);

	Flipnzee_Auction_Manager::close_expired_auctions();

	?>

	<div class="notice notice-success is-dismissible">
		<p>Expired auctions checked successfully.</p>
	</div>

	<?php
}

When the administrator clicks the button, the plugin securely executes the closing routine.


Step 4: Protect the Form

The dashboard form already contained a nonce from the previous lesson.

wp_nonce_field(
	'flipnzee_activate_now',
	'flipnzee_activate_nonce'
);

Since both dashboard buttons belong to the same form, the same nonce can safely protect both actions.


Step 5: Test the Feature

Create an auction that:

  • has status Active
  • has an auction end time in the past

Click:

Close Expired Auctions

The auction should immediately change its status to:

closed

Debugging During Development

During implementation, we temporarily added debugging statements such as:

wp_die();

and

Rows updated: X

These simple debugging techniques helped verify several important points:

  • the dashboard button was submitting correctly
  • nonce verification succeeded
  • the function was being executed
  • the SQL query was running
  • the number of updated rows matched expectations

After confirming everything worked, the temporary debugging code was removed from the final implementation.


Why Use a Single SQL UPDATE?

Instead of writing code like this:

foreach ($auctions as $auction) {

    if (...) {

        update_database();

    }

}

we execute one SQL statement.

Advantages include:

  • Faster execution
  • Less PHP memory usage
  • Fewer database operations
  • Better scalability

This is a common optimization technique in professional WordPress plugin development.


What We Learned

In this lesson we learned how to:

  • update multiple database records using SQL
  • automatically detect expired auctions
  • change auction status programmatically
  • execute administrative actions from the dashboard
  • secure form submissions using nonces
  • debug SQL updates using temporary diagnostic output

Final Result

The Flipnzee Auctions plugin can now manage both ends of an auction lifecycle:

  • Lesson 35: Activate scheduled auctions.
  • Lesson 36: Close expired auctions.

Together, these features lay the foundation for fully automated auction scheduling in future lessons using WordPress Cron.


Download Source Code

Download the starting version of the plugin before the lesson:

Download the completed version after this lesson:


What’s Next?

In Lesson 37, we’ll begin moving these manual processes toward full automation by integrating them with WordPress’s scheduling system, reducing the need for administrators to manually trigger auction state changes.