Lesson 64 Implementation: Creating the Transactions Admin Page in Flipnzee Auctions

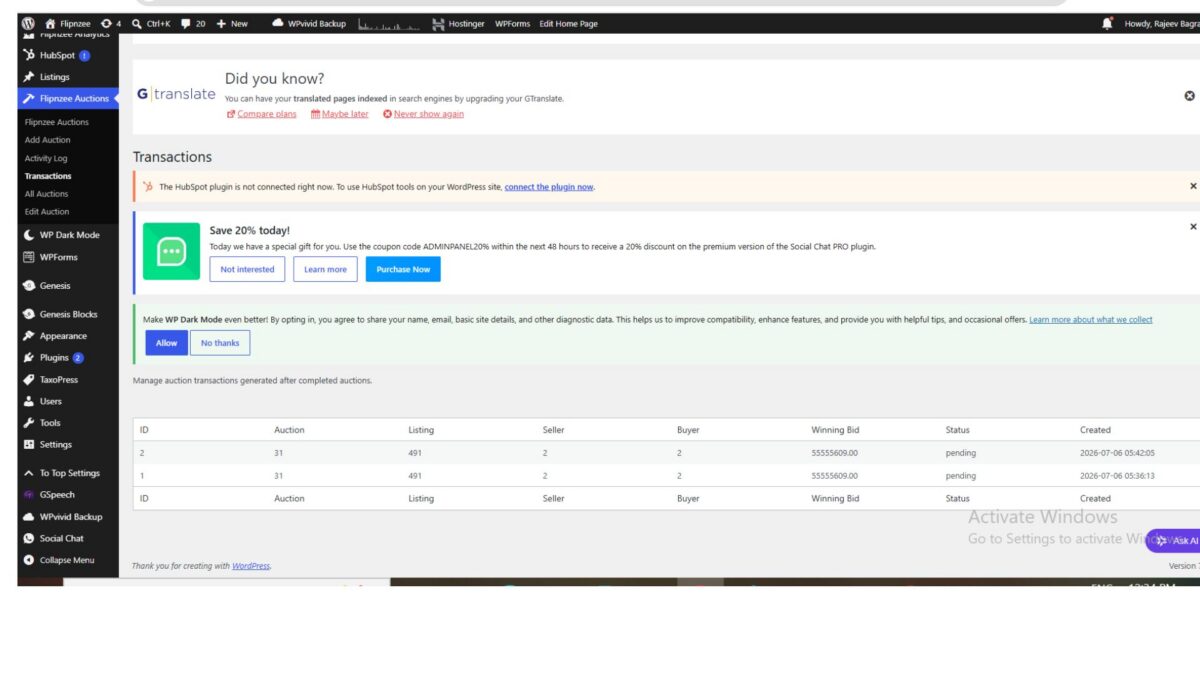
After completing automatic transaction generation in Lesson 63, the next step was to allow administrators to view all completed auction transactions directly from the WordPress dashboard.

In this lesson, we created a dedicated Transactions admin page that displays every transaction stored in the plugin’s custom database table. This gives administrators a centralized place to monitor completed sales and lays the groundwork for future payment processing, invoices, commissions, refunds, and reporting.


What We Built

By the end of this lesson, the plugin includes:

  • A new Transactions submenu
  • A custom admin page
  • A WP_List_Table based transactions table
  • Automatic loading of transaction records
  • Display of important transaction information
  • Professional WordPress admin interface

Step 1 — Create the Transactions Table Class

Inside the admin folder create:

admin/class-admin-transactions.php

This file is responsible for:

  • Loading the transactions page
  • Creating the transactions table
  • Displaying all stored transactions

Step 2 — Create the Transactions List Table

Inside the same file create a class extending WP_List_Table.

Example:

class Flipnzee_Transactions_Table extends WP_List_Table {

}

This gives us the familiar WordPress admin table interface.


Step 3 — Define Table Columns

Create the columns method.

public function get_columns() {

    return array(
        'id'          => 'ID',
        'auction_id'  => 'Auction',
        'listing_id'  => 'Listing',
        'seller_id'   => 'Seller',
        'buyer_id'    => 'Buyer',
        'winning_bid' => 'Winning Bid',
        'status'      => 'Status',
        'created_at'  => 'Created',
    );
}

These columns match the structure of the custom transactions database table.


Step 4 — Load Transactions From Database

Inside prepare_items() we queried the database.

global $wpdb;

$table = $wpdb->prefix . 'flipnzee_transactions';

$this->items = $wpdb->get_results(
    "SELECT * FROM {$table} ORDER BY id DESC",
    ARRAY_A
);

The newest transactions now appear first.


Step 5 — Configure Table Headers

Still inside prepare_items() we configured the table headers.

$this->_column_headers = array(
    $columns,
    array(),
    array(),
    'id',
);

This tells WordPress which columns should appear.


Step 6 — Display Column Values

Next we created the default column renderer.

public function column_default( $item, $column_name ) {

    return isset( $item[ $column_name ] )
        ? esc_html( $item[ $column_name ] )
        : '';
}

This automatically outputs the correct value for each column.


Step 7 — Register the Transactions Menu

Inside class-admin.php we added another submenu.

add_submenu_page(
    'flipnzee-auctions',
    'Transactions',
    'Transactions',
    'manage_options',
    'flipnzee-transactions',
    array( $this, 'transactions_page' )
);

The new menu now appears beneath Flipnzee Auctions.


Step 8 — Create the Page Callback

The callback loads and displays the table.

Example:

$table = new Flipnzee_Transactions_Table();

$table->prepare_items();

$table->display();

This is all that’s required for WordPress to render the table.


Step 9 — Load the New Admin File

Inside the main plugin file we loaded the new class.

require_once FLIPNZEE_AUCTION_PATH .
    'admin/class-admin-transactions.php';

Without this step the Transactions page would never load.


Step 10 — Test the Feature

After activating the updated plugin we verified everything worked correctly.

The Transactions page displayed:

  • Transaction ID
  • Auction ID
  • Listing ID
  • Seller
  • Buyer
  • Winning Bid
  • Status
  • Created Date

Every automatically generated transaction appeared successfully.


Result

The Flipnzee Auctions plugin now provides a dedicated Transactions dashboard for administrators.

When an auction ends and a winner is determined, the plugin now has the ability to:

  • Store the transaction
  • Display it inside WordPress
  • Allow administrators to monitor completed sales

This transforms the plugin from simply tracking auctions into managing the entire auction lifecycle.


What We Learned

In this lesson we learned how to:

  • Create a custom WordPress admin page
  • Use WP_List_Table
  • Display custom database records
  • Load transaction history
  • Register new admin submenu pages
  • Build a professional backend interface

Challenges Faced

During implementation we encountered a few issues that are common when building WordPress admin tables:

  • A misplaced method inside prepare_items() caused PHP syntax errors, which were resolved by moving get_table_classes() outside the method while keeping it inside the class.
  • Initially, the Transactions menu did not appear because the new admin file had not been included in the main plugin file.
  • After everything worked, an extra header row appeared at the bottom of the table. This is a cosmetic behavior of the simplified WP_List_Table implementation and does not affect functionality. It will be refined in a future lesson when we enhance sorting, pagination, and table styling.

Working through these issues reinforced the importance of careful class structure, proper file loading, and incremental testing during plugin development.

Download Source Code

Download the starting version of the plugin before the lesson:

Download the completed version after this lesson:


Final Outcome

By the end of Lesson 64, Flipnzee Auctions includes a fully functional Transactions management page that lists all automatically generated auction transactions. This provides administrators with immediate visibility into completed sales and establishes the foundation for future features such as payment integration, invoices, commissions, refunds, transaction status updates, and downloadable reports.
Lesson 63 Implementation: Building an Event-Driven Transaction System for Flipnzee Auctions

After completing the database structure in Lesson 62, the next logical step was to automate what happens after an auction successfully ends.

Instead of tightly coupling transaction creation with the auction closing logic, this lesson introduced an event-driven architecture using WordPress hooks. This approach keeps the plugin modular and makes future integrations—such as escrow services, payment gateways, and notifications—much easier.


Objective

Automatically create a transaction record whenever an auction winner is determined.

By the end of this lesson:

  • Auction winner determination triggers an event.
  • The Transaction Manager listens for that event.
  • A transaction is automatically created.
  • The Activity Log records the transaction creation.

Step 1: Fire an Event After Determining the Winner

Winner determination is handled inside:

includes/class-bid-manager.php

After recording the winner in the Activity Log, add:

do_action(
	'flipnzee_auction_winner_determined',
	$auction_id,
	$winner
);

The end of the method becomes:

Flipnzee_Activity_Log::log(
	'winner_determined',
	$auction_id,
	$winner->bidder_id,
	sprintf(
		'Winning bid: %s',
		$winner->bid_amount
	)
);

do_action(
	'flipnzee_auction_winner_determined',
	$auction_id,
	$winner
);

return true;

This broadcasts an event without knowing who will respond to it.


Step 2: Create the Transaction Manager Listener

Open:

includes/class-transaction-manager.php

Add a constructor:

public function __construct() {

	add_action(
		'flipnzee_auction_winner_determined',
		array(
			$this,
			'create_transaction_from_auction',
		),
		10,
		2
	);
}

Whenever the event is fired, this callback will execute automatically.


Step 3: Build the Callback Method

Add the following method:

/**
 * Create transaction when an auction winner is determined.
 *
 * @param int    $auction_id Auction ID.
 * @param object $winner     Winning bid.
 * @return void
 */
public function create_transaction_from_auction(
	$auction_id,
	$winner
) {

	global $wpdb;

	$auction = $wpdb->get_row(
		$wpdb->prepare(
			"SELECT *
			FROM {$wpdb->prefix}flipnzee_auctions
			WHERE id = %d",
			$auction_id
		)
	);

	if ( ! $auction ) {
		return;
	}

	$listing_author = (int) get_post_field(
		'post_author',
		$auction->listing_id
	);

	$transaction_id = self::create_transaction(
		array(
			'auction_id'  => $auction->id,
			'listing_id'  => $auction->listing_id,
			'seller_id'   => $listing_author,
			'buyer_id'    => $winner->bidder_id,
			'winning_bid' => $winner->bid_amount,
		)
	);

	if ( $transaction_id ) {

		Flipnzee_Activity_Log::log(
			'transaction_created',
			$auction->id,
			$winner->bidder_id,
			'Transaction ID: ' . $transaction_id
		);
	}
}

This method:

  • retrieves the auction,
  • identifies the seller,
  • creates a transaction,
  • logs the successful creation.

Step 4: Load the Transaction Manager

Open:

flipnzee-auctions.php

Near the bottom:

new Flipnzee_Shortcodes();

Add:

new Flipnzee_Transaction_Manager();

Result:

new Flipnzee_Shortcodes();
new Flipnzee_Transaction_Manager();

Without instantiating the class, WordPress would never register the action hook.


Step 5: Verify Syntax

Run:

php -l includes/class-bid-manager.php

Then:

php -l includes/class-transaction-manager.php

Both should report:

No syntax errors detected

Step 6: Test the Workflow

Create a test auction.

Place at least one bid.

Allow the auction to expire naturally.

After scheduled maintenance runs, verify:

Activity Log

You should see:

  • winner_determined
  • transaction_created

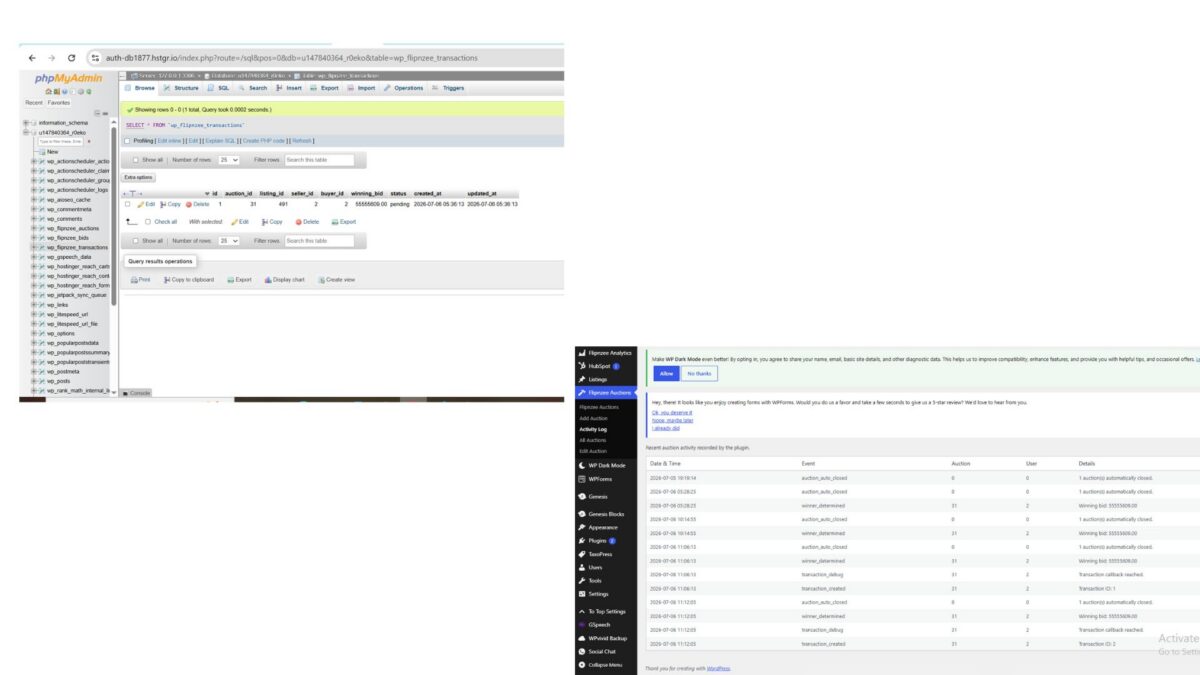
Transactions Table

A new row should appear inside:

wp_flipnzee_transactions

Example:

AuctionSellerBuyerStatus
3122pending

Event Flow

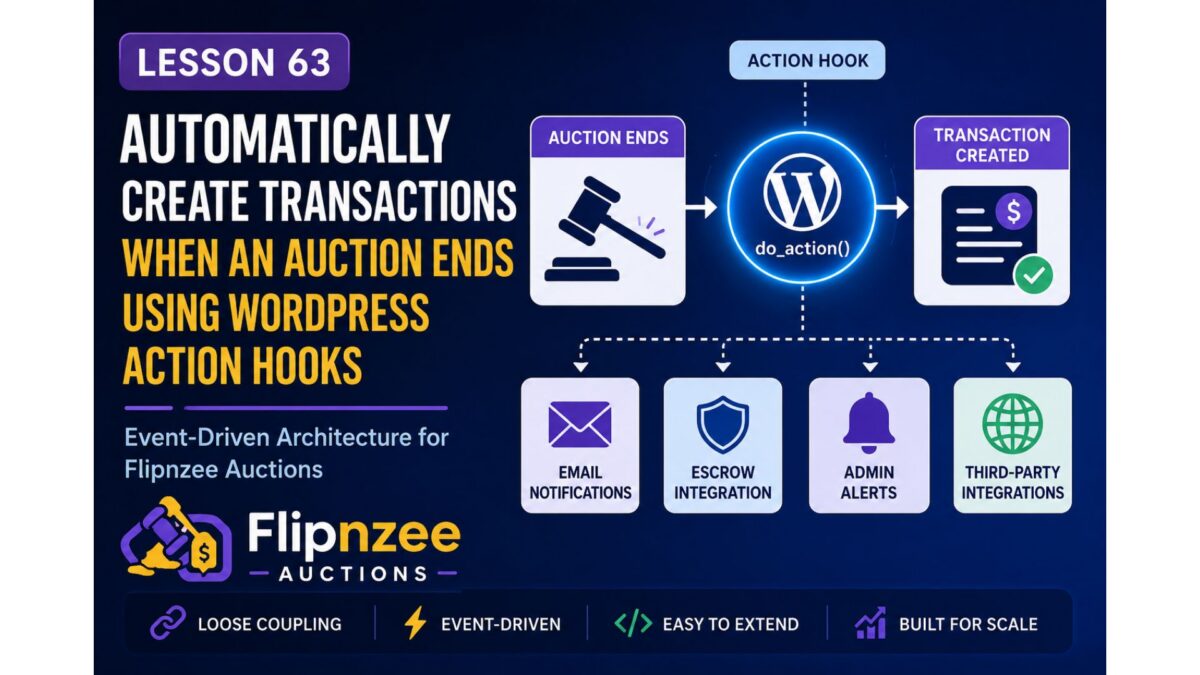
The plugin now follows this architecture:

Auction Ends
        │
        ▼
Bid Manager
Determines Winner
        │
        ▼
do_action(
    flipnzee_auction_winner_determined
)
        │
        ▼
Transaction Manager
        │
        ▼
Creates Transaction
        │
        ▼
Activity Log

Each component has a single responsibility.


Challenges Faced

During implementation, an important architectural refinement emerged.

Initially, the event hook was placed inside the Auction Manager. However, testing showed that winner determination actually occurs within the Bid Manager. Moving the hook to the correct location ensured that the event is fired exactly when the winning bid is known.

This adjustment resulted in a cleaner and more maintainable design.


Lessons Learned

Several important WordPress development concepts were reinforced:

  • WordPress hooks can be used to build event-driven systems.
  • Managers should communicate through actions rather than direct method calls.
  • Keeping responsibilities separated improves maintainability.
  • Activity logs provide valuable insight during debugging and verification.
  • Incremental testing after each change makes it easier to isolate and resolve issues.

Download Source Code

Download the starting version of the plugin before the lesson:

Download the completed version after this lesson:


Outcome

By the end of this lesson, the Flipnzee Auctions plugin automatically creates a transaction record whenever an auction successfully determines a winner. The transaction is stored in its own database table and recorded in the Activity Log, providing a reliable foundation for future features such as escrow integration, payment processing, seller confirmation, buyer confirmation, and ownership transfer.

This lesson marks an important architectural milestone, transitioning the plugin toward a scalable, event-driven design that will support the remaining stages of the auction lifecycle.

Lesson 63: Automatically Create Transactions When an Auction Ends Using WordPress Action Hooks

Overview

In the previous lesson, we built the Transaction Manager and created the wp_flipnzee_transactions table. However, transactions are still created manually. The next logical step is to connect the Auction Manager with the Transaction Manager.

Rather than calling the Transaction Manager directly from the Auction Manager, we’ll use one of WordPress’ most powerful features—Action Hooks. This creates a loosely coupled, event-driven architecture where different components communicate through events instead of depending on each other directly.

By the end of this lesson, whenever an auction winner is determined, the plugin will automatically create a pending transaction without modifying the core auction logic.


What You Will Learn

In this lesson you will learn how to:

  • Understand event-driven programming in WordPress.
  • Create a custom WordPress action hook.
  • Pass auction data through an action hook.
  • Listen for custom actions.
  • Automatically create transactions after an auction closes.
  • Reduce coupling between plugin components.
  • Build an extensible architecture for future escrow integrations.

Why This Improvement Matters

Suppose the Auction Manager directly inserts a transaction into the database.

Today that may seem fine.

Tomorrow you may also want to:

  • Send buyer emails.
  • Send seller emails.
  • Start escrow.
  • Notify administrators.
  • Trigger webhooks.
  • Generate invoices.
  • Award badges.
  • Push data to an external CRM.

If every feature is added inside the Auction Manager, the class quickly becomes difficult to maintain.

Using WordPress hooks solves this problem elegantly.

Instead of saying:

“Create a transaction.”

the Auction Manager simply says:

“An auction has ended.”

Any other class can decide whether it wants to respond.


Architecture Before Lesson 63

Auction Manager
      │
      ▼
Determine Winner

Architecture After Lesson 63

Auction Manager
      │
      ▼
do_action()

      │
      ▼

Transaction Manager

      │
      ▼

Create Transaction

Later we can attach even more listeners:

Auction Manager

      │

do_action()

      │
      ├────────► Transaction Manager
      ├────────► Email Manager
      ├────────► Escrow Manager
      ├────────► Notification Manager
      └────────► REST API

This is exactly how many mature WordPress plugins are designed.


What Will Be Implemented

During this lesson we will:

Step 1

Fire a custom action when a winner is determined.


Step 2

Create a listener inside the Transaction Manager.


Step 3

Automatically insert a new transaction.


Step 4

Log transaction creation in the Activity Log.


Step 5

Test the complete workflow.


Expected Result

Before Lesson 63:

Auction Ends

↓

Winner Selected

↓

Nothing Else Happens

After Lesson 63:

Auction Ends

↓

Winner Selected

↓

WordPress Action Fired

↓

Transaction Created

↓

Activity Logged

Files That Will Be Modified

  • includes/class-auction-manager.php
  • includes/class-transaction-manager.php
  • includes/class-activity-log.php

No database changes are required.


Skills You’ll Practice

  • WordPress Action Hooks
  • Custom Events
  • Loose Coupling
  • Event-Driven Programming
  • Clean Plugin Architecture
  • Object-Oriented WordPress Development

Difficulty Level

Intermediate

This lesson introduces one of the most important architectural concepts in WordPress development. Understanding custom action hooks will help you build plugins that are easier to extend, maintain, and integrate with future features such as escrow services, payment gateways, and notification systems.


Final Thoughts

Lesson 63 represents a significant shift in the design of the Flipnzee Auctions plugin. Instead of tightly connecting the Auction Manager with every future component, we will use WordPress’ hook system to broadcast auction events and allow independent classes to respond as needed.

This event-driven approach provides a solid foundation for the remaining roadmap, including escrow integration, payment workflows, buyer and seller notifications, and third-party integrations, while keeping the codebase clean and modular.

Lesson 61 Implementation: Automatically Determine the Winning Bidder When an Auction Ends

One of the most important milestones in the Flipnzee Auctions project has now been completed. In this lesson, the plugin was enhanced to automatically determine the winning bidder as soon as an auction expires.

Previously, the plugin was already capable of automatically closing expired auctions. However, after the auction was closed, no winner was selected automatically. An administrator would have needed to determine the highest bidder manually.

This lesson bridges that gap and moves the project much closer to becoming a fully functional online auction marketplace.


Objective

The goal of this lesson was to:

  • Detect the highest valid bid after an auction closes.
  • Save the winning bidder in the auction record.
  • Update the final bid amount.
  • Record the event in the Flipnzee Activity Log.
  • Lay the foundation for future escrow integration.

The Problem

The plugin already contained logic that automatically changed an auction’s status from Active to Closed after the auction end time.

However, closing an auction alone is not sufficient.

A complete auction workflow should also:

  • Find the highest bidder.
  • Declare the winner.
  • Store the winner permanently.
  • Prepare the transaction for the next stage.

Without this step, the marketplace cannot proceed to payment or escrow.


Implementation Overview

The implementation consisted of three major improvements.

1. Creating a Winner Selection Method

A new method named determine_winner() was added to the Bid Manager.

Its responsibility is to:

  • Retrieve all bids for an auction.
  • Sort bids by highest amount.
  • Use the earliest bid as the tie-breaker.
  • Save the winning bidder.
  • Update the final bid.
  • Record the event in the activity log.

This centralizes the winner selection logic so it can be reused in future features.


2. Updating the Auction Closing Process

The auction closing routine was modified to perform two operations:

  1. Automatically close expired auctions.
  2. Immediately determine the winner for every auction that was closed.

Before updating auction statuses, the IDs of all expired auctions are collected.

Once the status update completes successfully, the plugin loops through those auction IDs and calls the new winner selection method.

This keeps the code clean while ensuring every expired auction receives a winner automatically.


3. Recording the Winner

After selecting the winning bid, the plugin stores:

  • Winning User ID
  • Final Bid Amount

inside the auction record.

It also records a new activity log entry similar to:

winner_determined
Auction: 31
User: 2
Winning bid: 55555609.00

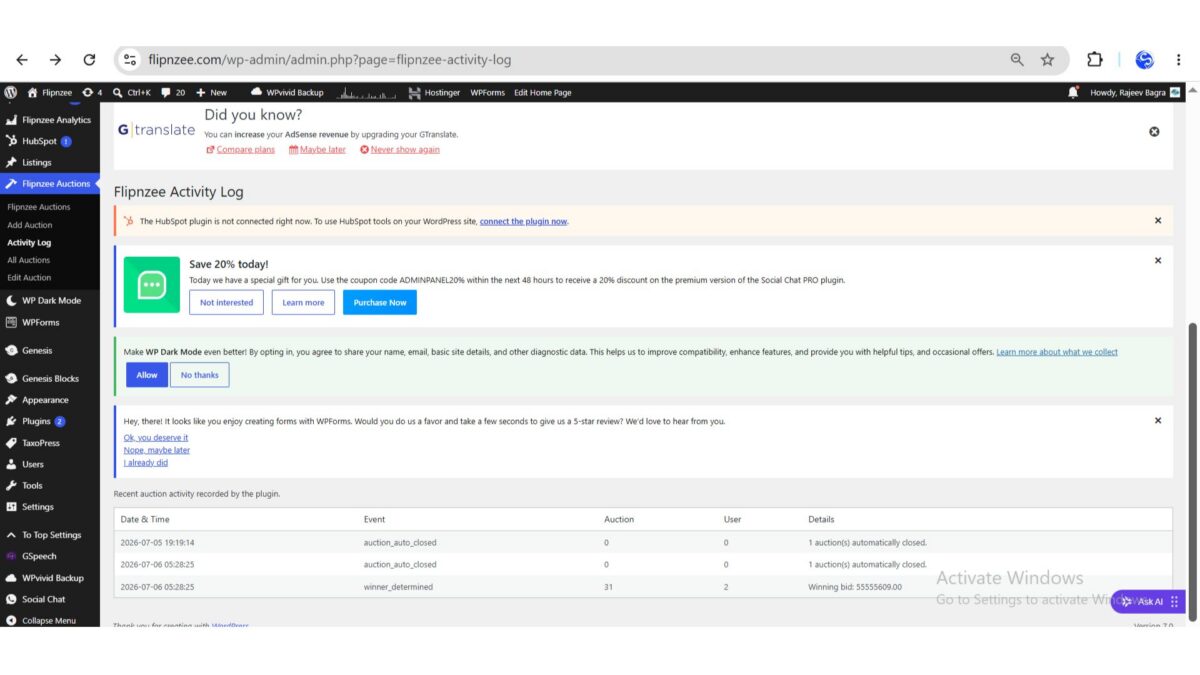
This creates an audit trail that administrators can review at any time.


Testing the Feature

After uploading the updated plugin:

  • The plugin activated successfully.
  • An auction automatically changed to Closed after expiration.
  • The highest bidder was identified correctly.
  • The winner was saved.
  • A new winner_determined entry appeared in the Activity Log.

This confirmed that the entire workflow executed successfully.


Challenges Faced

During development, one major issue occurred.

The plugin failed to activate because of a PHP parse error caused by an incorrectly placed closing brace inside the admin class.

Using:

php -l admin/class-admin.php

made it possible to quickly identify the syntax issue.

After correcting the misplaced brace and re-uploading the plugin, activation succeeded.

This served as another reminder of the importance of validating PHP files before deployment.


Files Modified

The following files were updated during this lesson:

  • includes/class-bid-manager.php
  • includes/class-auction-manager.php

No database schema changes were required because the necessary fields already existed.


What Was Achieved

By the end of this lesson, the Flipnzee Auctions plugin can now:

  • Automatically close expired auctions.
  • Identify the highest bidder.
  • Resolve ties using the earliest bid.
  • Save the winner in the auction record.
  • Update the final bid amount.
  • Record the event in the Activity Log.

These enhancements significantly improve the automation of the auction lifecycle.


Lessons Learned

Several important development practices were reinforced:

  • Separate business logic into reusable methods.
  • Keep auction closing and winner determination as distinct responsibilities.
  • Always validate PHP files using php -l before deployment.
  • Activity logging is invaluable when testing automated workflows.

Download Source Code

Download the starting version of the plugin before the lesson:

Download the completed version after this lesson:


Looking Ahead

With automatic winner determination now complete, the next stage of development will focus on transforming a completed auction into a real transaction.

Upcoming lessons will introduce:

  • Buyer and seller notifications.
  • Transaction records.
  • Escrow workflow preparation.
  • Payment integration.
  • Marketplace completion.

The project has now moved beyond simply displaying auctions. It is steadily evolving into a complete auction marketplace capable of supporting secure, end-to-end online transactions.

Lesson 60: Parsing Activity Logs into a Professional Admin Table in the Flipnzee Auctions Plugin

As the Flipnzee Auctions plugin continued to evolve, the Activity Log introduced in previous lessons became increasingly useful for tracking important auction events. However, displaying each log entry as a single line made it difficult to scan and understand.

In this lesson, the plugin was enhanced to parse each log entry and display it inside a structured WordPress admin table. This small improvement greatly increases readability and lays the groundwork for advanced features like searching, filtering, exporting, and pagination.


Why Improve the Activity Log?

A plain text log might work for developers, but administrators need information that is easy to understand at a glance.

Instead of displaying this:

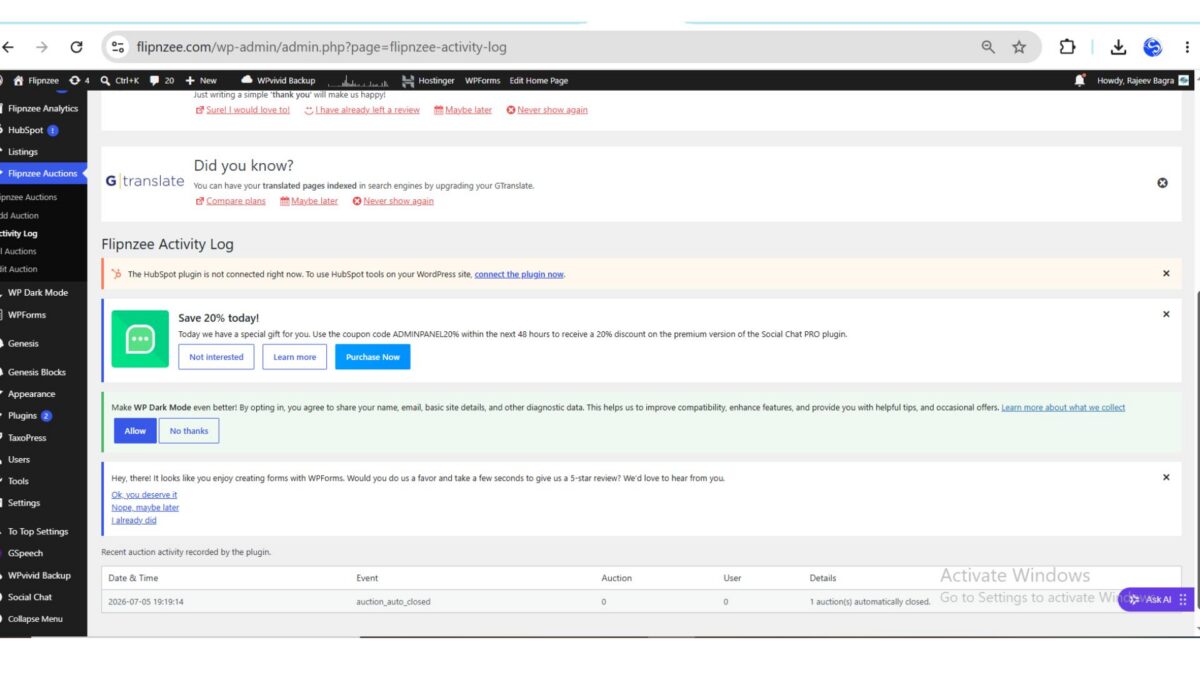
[2026-07-05 19:19:14] Event: auction_auto_closed | Auction: 0 | User: 0 | Details: 1 auction(s) automatically closed.

the Activity Log now presents the information in separate columns.

Date & TimeEventAuctionUserDetails
2026-07-05 19:19:14auction_auto_closed001 auction(s) automatically closed.

This makes the history of auction activity much easier to browse.


What Was Implemented

During this lesson, the Activity Log renderer was upgraded to:

  • Read each log entry from the log file
  • Parse the stored text using a regular expression
  • Extract individual values
  • Display the information inside a structured HTML table
  • Continue displaying unknown log formats safely using a fallback

Understanding the Log Format

Every activity recorded by the plugin follows a consistent structure.

Example:

[2026-07-05 19:19:14] Event: auction_auto_closed | Auction: 0 | User: 0 | Details: 1 auction(s) automatically closed.

The parser separates this into five individual fields:

  • Date & Time
  • Event
  • Auction ID
  • User ID
  • Details

Because every log entry follows the same format, PHP can reliably extract the values before displaying them.


Using Regular Expressions

The parser uses PHP’s preg_match() function to identify each section of the log.

Rather than treating the entire line as plain text, it captures the different values individually.

This allows each value to be displayed inside its own table cell.


Creating the Admin Table

Instead of printing one long string, the renderer now creates a table containing:

  • Date & Time
  • Event
  • Auction
  • User
  • Details

Each log entry becomes a separate row.

The result is much cleaner and far easier to read.


Fallback for Unexpected Entries

Not every log file remains perfectly formatted forever.

To prevent errors, the renderer checks whether the regular expression successfully matches the expected format.

If it does, the values are displayed in separate columns.

If not, the original log line is still displayed safely inside a single table row.

This ensures older or unexpected entries never disappear.


Testing the Feature

After updating the plugin:

  1. Upload the latest plugin ZIP.
  2. Activate the plugin.
  3. Open:

Flipnzee Auctions → Activity Log

If log entries already exist, they should automatically appear as structured table rows.


Final Result

The Activity Log is now significantly more useful for administrators.

Instead of reading long text strings, administrators can quickly identify:

  • when something happened,
  • what event occurred,
  • which auction was involved,
  • which user performed the action,
  • and additional details.

This makes troubleshooting and auditing much easier.


What I Learned

This lesson demonstrated how small user interface improvements can dramatically improve usability.

Key concepts covered included:

  • Reading log files
  • Parsing structured text
  • Using PHP regular expressions
  • Displaying dynamic data inside HTML tables
  • Building fallback logic for unexpected input
  • Improving the WordPress admin experience

Download Source Code

Download the starting version of the plugin before the lesson:

Download the completed version after this lesson:


Looking Ahead

With structured activity logs now working, the next logical improvements include:

  • Search within logs
  • Filter events by type
  • Download logs as CSV
  • Pagination for large log files
  • Clear log button
  • Colour-coded event badges
  • Date range filtering

These enhancements will transform the Activity Log into a powerful administration and debugging tool for the Flipnzee Auctions plugin.


Lesson 60 Complete! The Flipnzee Auctions plugin now features a professional, structured Activity Log that presents auction events in an organized table, making plugin administration cleaner, faster, and more user-friendly.

Lesson 58: Building an Auction Activity Log

As Flipnzee Auctions continues to evolve, the plugin is becoming more than a simple auction manager. It now has automatic lifecycle processing, scheduled background maintenance, and public lifecycle hooks that allow future Flipnzee plugins to respond to important events.

The next logical step is recording those events.

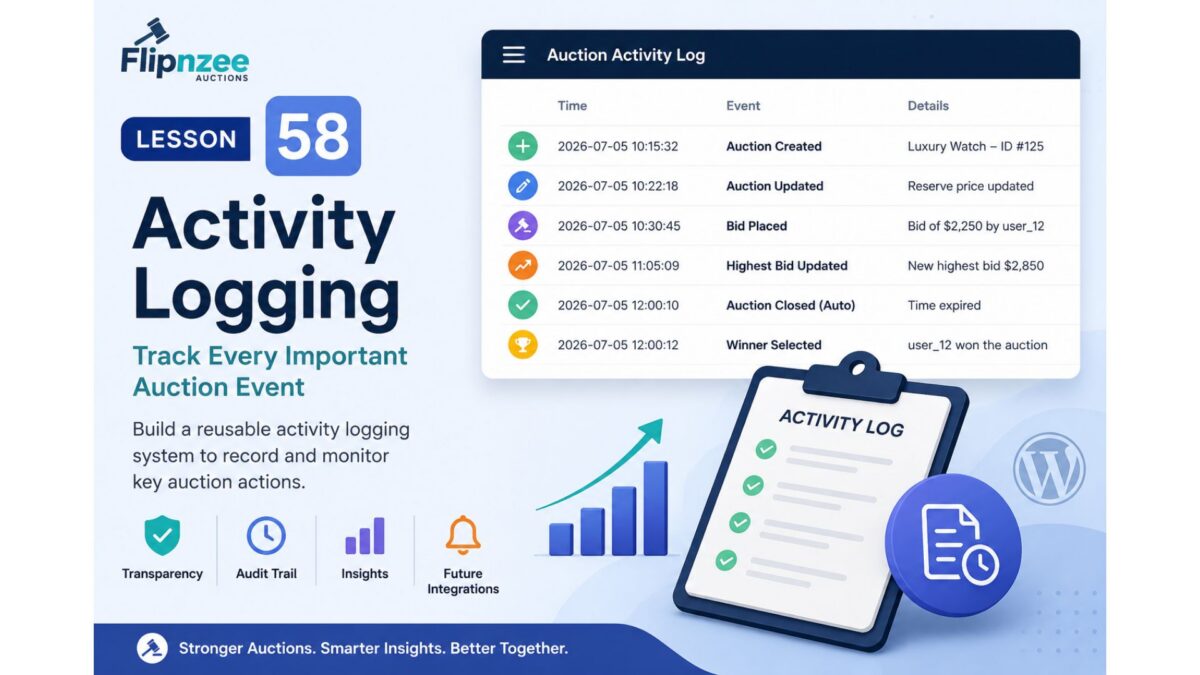
In this lesson, we’ll begin building an Auction Activity Log, allowing administrators to track significant actions performed within the plugin.


Why This Lesson Is Needed

Currently, auctions can:

  • be created
  • be updated
  • receive bids
  • automatically close
  • select winners

All of these actions happen successfully.

However, once they occur, there is no historical record of when they happened or how they happened.

Imagine receiving a support request such as:

“Why did my auction close early?”

Or:

“When was this bid placed?”

Or:

“Who changed this auction?”

Without an activity log, answering those questions becomes difficult.

Professional systems almost always maintain some form of event history.


The Vision

Instead of treating actions as isolated events, Flipnzee Auctions will begin recording them as part of a timeline.

For example:

10:15 Auction Created

10:22 First Bid Placed

10:45 Highest Bid Updated

11:00 Reserve Price Met

12:00 Auction Automatically Closed

12:01 Winner Selected

This history provides valuable insight for both administrators and future integrations.


Relationship with Previous Lessons

The work completed in Lessons 55–57 makes this lesson much easier.

When an auction is automatically processed, the lifecycle hook introduced in Lesson 56 can be used to trigger logging.

Rather than scattering logging code throughout the plugin, important lifecycle events can simply record themselves as they occur.

This keeps the architecture clean while making the system more observable.


Planned Features

During this lesson we will:

  • Design an activity logging system.
  • Create a reusable logging method.
  • Record auction lifecycle events.
  • Prepare the system for future bid and notification events.
  • Keep logging lightweight and efficient.

Initial Events to Record

The first version of the logger will focus on major auction lifecycle events, including:

  • Auction created
  • Auction updated
  • Auction automatically activated
  • Auction automatically closed
  • Auction deleted

Later lessons can expand this list to include:

  • Bid placed
  • Highest bidder changed
  • Buy Now completed
  • Winner selected
  • Notifications sent

Designing for the Flipnzee Ecosystem

The activity log isn’t intended solely for administrators.

Future plugins may also use it.

For example:

  • Flipnzee Analytics could analyze auction behaviour.
  • Marketplace reports could summarize activity.
  • Email notifications could reference logged events.
  • Developers could troubleshoot integrations more easily.

Because the logging system will be reusable, every new feature can record events without rewriting the logging infrastructure.


Learning Objectives

In this lesson we’ll learn:

  • Designing reusable helper methods
  • Recording lifecycle events
  • Centralizing logging logic
  • Preparing for future integrations
  • Improving plugin observability
  • Keeping WordPress plugins maintainable

Files Likely to Change

Depending on the implementation, we may modify:

includes/class-auction-manager.php
includes/class-database.php

If we decide to store logs in a dedicated database table, we’ll also update the database installation routine.


Expected Benefits

After completing this lesson, Flipnzee Auctions will begin maintaining a historical record of important auction events.

This improves:

  • debugging
  • administration
  • auditing
  • future reporting
  • analytics integration
  • developer experience

Looking Ahead

The activity logging system will become the foundation for several future enhancements, including:

  • Admin Activity Log screen
  • Exportable audit reports
  • User activity timelines
  • Analytics dashboards
  • Notification history
  • Marketplace insights

Rather than treating logging as an afterthought, we’ll build it into the plugin architecture from the beginning.


Conclusion

Lesson 58 introduces one of the most valuable architectural features of a professional application: an activity logging system.

Although visitors won’t immediately see this feature, it significantly improves transparency, debugging, and maintainability while providing a reusable foundation for future analytics, reporting, and ecosystem integrations.


Why I recommend this next

One of our long-term goals has always been that Flipnzee Auctions and Flipnzee Analytics should complement each other naturally.

An activity log is the perfect bridge between them. It creates structured event data that can later be analyzed, visualized, or summarized by Flipnzee Analytics without tightly coupling the two plugins.

It also fits our development philosophy: each lesson adds a focused, reusable capability while strengthening the overall architecture rather than just adding another isolated feature.

Implementing Automatic Auction Lifecycle Management in Flipnzee Auctions (Lesson 55)


In the previous lesson, we improved the frontend by ensuring manually closed auctions no longer displayed a misleading countdown timer. However, there was still an important piece missing from the auction lifecycle.

Although an auction could reach its end time, its status in the database would remain Active until an administrator manually changed it. This meant the plugin’s stored data didn’t always reflect the true state of the auction.

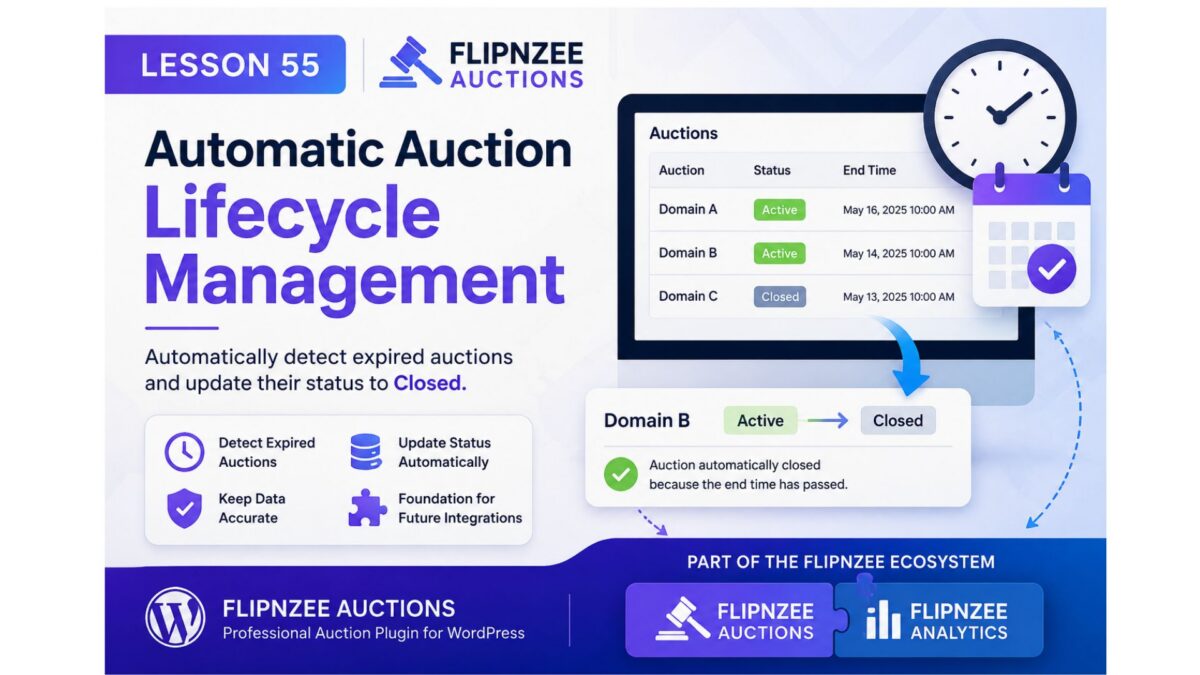
In this lesson, I implemented Automatic Auction Lifecycle Management, allowing the plugin to automatically detect expired auctions and update their status to Closed.

This may seem like a small enhancement, but it significantly improves the reliability and architecture of the plugin.


The Problem

Before this lesson, an auction could look like this in the database:

StatusAuction End
ActiveYesterday

Although the auction had already expired, its status remained Active until someone manually edited it.

As the plugin grows, relying on manual updates becomes impractical. Features such as winner notifications, analytics, and scheduled processing all depend on accurate auction statuses.


Designing the Solution

Rather than placing the expiry logic inside the frontend or scattering it across multiple files, we decided to keep all lifecycle management inside the Auction Manager.

This follows one of the fundamental principles of object-oriented programming:

Business logic belongs in the manager classes, while presentation classes should focus only on displaying information.


Creating a Dedicated Lifecycle Method

The first step was creating a new method inside includes/class-auction-manager.php.

public static function update_expired_auctions()

Its responsibility is straightforward:

  • Find auctions that are still marked as Active.
  • Compare their end date and time with the current WordPress time.
  • Update only those auctions whose expiry time has already passed.

Keeping this functionality in a dedicated method makes it reusable throughout the plugin.


Letting the Database Do the Work

Instead of retrieving every auction and checking them individually in PHP, we allowed MySQL to perform the update directly.

$result = $wpdb->query(
    $wpdb->prepare(
        "
        UPDATE {$table}
        SET status = %s
        WHERE status = %s
          AND auction_end < %s
        ",
        'closed',
        'active',
        current_time( 'mysql' )
    )
);

This approach is far more efficient because the database updates all matching auctions in a single query.

We also used:

current_time( 'mysql' )

instead of PHP’s date() function so that the comparison respects the timezone configured in WordPress.


Our First Implementation

Initially, I called the new method directly inside the auction shortcode.

Flipnzee_Auction_Manager::update_expired_auctions();

$auctions = Flipnzee_Auction_Manager::get_active_auctions();

The feature worked correctly.

However, after reviewing the architecture, we realised the shortcode had started doing more than simply displaying auctions.


Refactoring for Better Architecture

The shortcode was now responsible for two different tasks:

  • Updating auction statuses.
  • Displaying auction listings.

Although functional, this wasn’t the cleanest design.

Instead, we moved the lifecycle processing into the Auction Manager itself.

Inside get_active_auctions() we added:

self::update_expired_auctions();

The shortcode then became much cleaner.

$auctions = Flipnzee_Auction_Manager::get_active_auctions();

Now the shortcode simply requests active auctions, while the Auction Manager ensures that the returned data is already accurate.


Why This Refactoring Matters

This small architectural improvement keeps responsibilities clearly separated.

Auction Manager

Responsible for:

  • Auction lifecycle
  • Business rules
  • Database operations
  • Retrieving auction data

Shortcode Class

Responsible for:

  • Displaying auction information
  • Rendering HTML
  • User interface

Separating responsibilities like this makes future maintenance much easier.


Testing the Feature

After completing the implementation, I carried out a real-world test instead of relying only on syntax validation.

First, I confirmed that the WordPress site was configured to use the Kolkata timezone under Settings → General.

I then created an auction with an expiry time a few minutes in the future.

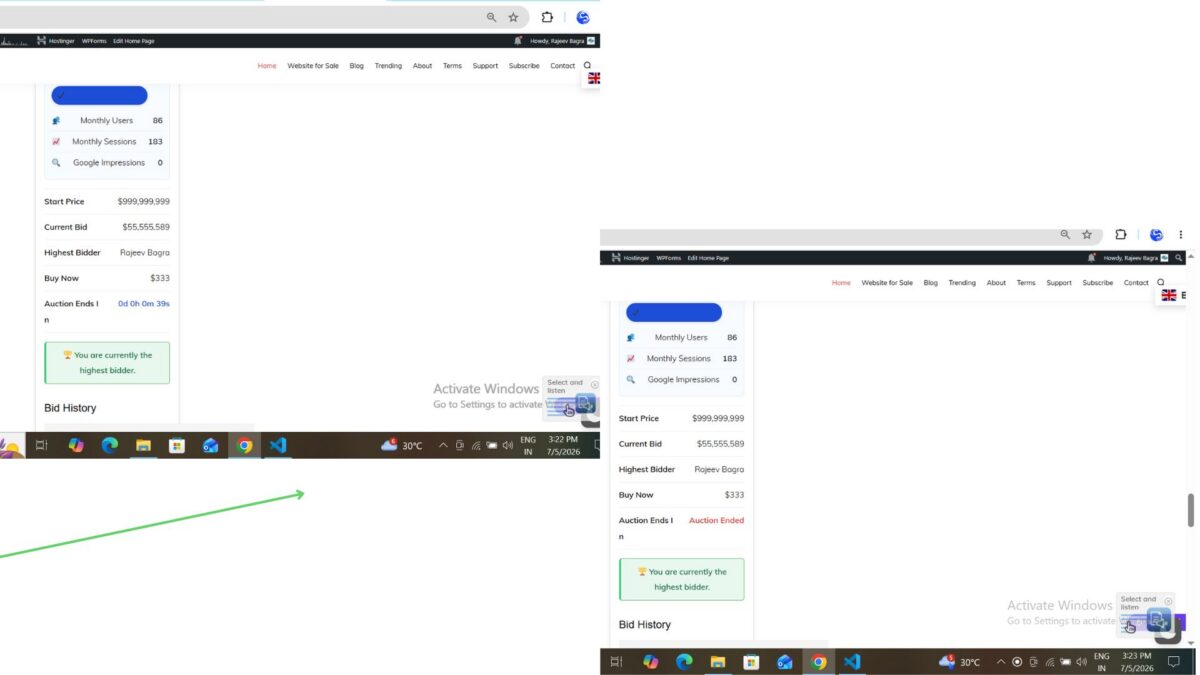
Once the end time was reached, I refreshed the auction page.

The results were exactly as expected:

  • The auction automatically transitioned from Active to Closed.
  • The countdown was replaced with the Auction Ended notice.
  • No manual status update was required.

This confirmed that the automatic lifecycle management works correctly with the site’s configured WordPress timezone.


Lessons Learned

One of the biggest takeaways from this lesson was that good software isn’t just about making features work—it’s about placing responsibilities in the right classes.

The feature functioned correctly in its initial form, but moving the lifecycle processing into the Auction Manager resulted in a cleaner and more maintainable architecture.

Small refactorings like this become increasingly valuable as a project grows.


Looking Ahead

This lesson also supports the long-term vision for the Flipnzee Platform.

Although Flipnzee Auctions and Flipnzee Analytics are separate plugins, they are designed to complement each other. Keeping auction lifecycle management centralized provides a solid foundation for future integrations, including:

  • Winner notifications
  • Scheduled background processing
  • Marketplace statistics
  • Analytics events
  • Dashboard updates

Building this foundation now will make future lessons much easier to implement.

Download Source Code

Download the starting version of the plugin before the lesson:

Download the completed version after this lesson:


Conclusion

Lesson 55 introduced automatic auction lifecycle management to the Flipnzee Auctions plugin.

Expired auctions now automatically transition from Active to Closed, keeping the database synchronized with real-world auction activity.

Just as importantly, this lesson reinforced the architectural principles that guide the project: business logic belongs in manager classes, presentation classes should remain focused on the user interface, and each improvement should prepare the plugin for future growth.

With Lesson 55 complete, Flipnzee Auctions has become more reliable, easier to maintain, and better prepared for the next stage of development.

Lesson 55 – Automatic Auction Lifecycle Management


Why This Lesson?

In the previous lesson, we improved how closed auctions are displayed to visitors. However, there is still an important aspect of a professional auction system that happens behind the scenes: managing the auction lifecycle.

An auction doesn’t simply display different information after its end time—it progresses through defined states such as Active, Closed, and Sold. Keeping these states accurate ensures the rest of the plugin behaves consistently.

This lesson introduces automatic lifecycle management by allowing the plugin to recognize when an active auction has expired and update its status accordingly.

Although this feature is simple, it lays the foundation for future capabilities such as scheduled processing, winner notifications, payment workflows, and analytics integration.


Why It Matters

Every professional application has a clear business lifecycle.

For Flipnzee Auctions, that lifecycle includes:

Draft
   ↓
Published
   ↓
Active
   ↓
Closed
   ↓
Sold (future)

Instead of relying on administrators to manually update statuses, the plugin should keep auction records synchronized with real-world events.


Learning Objectives

By completing this lesson, you will learn how to:

  • Separate business logic from presentation.
  • Automatically manage auction states.
  • Write reusable methods that can be called throughout the plugin.
  • Keep the database synchronized with auction expiry.
  • Prepare the plugin for future automation features.

What We’ll Build

We’ll introduce a dedicated method inside the Auction Manager that:

  • Finds auctions that are still marked as Active.
  • Checks whether their end date and time have passed.
  • Updates only those auctions to Closed.

The method will be reusable and can later be called by scheduled tasks or other parts of the plugin.


Why This Fits the Flipnzee Ecosystem

Although Flipnzee Auctions and Flipnzee Analytics are separate plugins, they are designed to complement one another as part of the Flipnzee Platform.

Maintaining an accurate auction status benefits not only the Auctions plugin but also provides reliable events that other Flipnzee plugins can use.

For example, future integrations could respond when an auction closes by:

  • Refreshing marketplace statistics.
  • Updating auction dashboards.
  • Recording historical trends.
  • Triggering winner notifications.
  • Calculating conversion metrics.

By keeping the auction lifecycle accurate, we create a stronger foundation for the entire Flipnzee ecosystem.


Scope of This Lesson

To keep the lesson focused, we will only:

  • Detect expired active auctions.
  • Update their status to Closed.
  • Keep the implementation reusable.

We will not introduce background scheduling or email notifications yet. Those topics will be covered in future lessons.


Expected Behaviour

AuctionCurrent StatusEnd TimeResult
Domain AActiveTomorrowRemains Active
Domain BActiveYesterdayAutomatically Closed
Domain CClosedYesterdayNo Change

Only auctions that are both Active and Expired will be updated.


Files Expected to Change

The implementation should require only a small number of changes, primarily within:

  • includes/class-auction-manager.php
  • One location where auctions are retrieved before being displayed.

No database schema changes or user interface redesigns are expected.


Looking Ahead

This lesson begins the Auction Lifecycle series.

Future lessons can build upon it with features such as:

  • WP-Cron automation.
  • Winner and seller notifications.
  • Auction archive pages.
  • Marketplace statistics.
  • Integration hooks for other Flipnzee plugins.

Lesson 54: Automatically Declare and Display the Auction Winner


So far, the Flipnzee Auctions plugin can:

  • Create auctions
  • Prevent duplicate auctions
  • Accept bids
  • Track the highest bidder
  • Display bid history
  • Prevent bid sniping
  • Automatically close expired auctions

However, one important question still remains unanswered:

Who actually won the auction?

Although the highest bidder is already stored in the bids table, the plugin does not yet officially declare a winner once the auction ends.

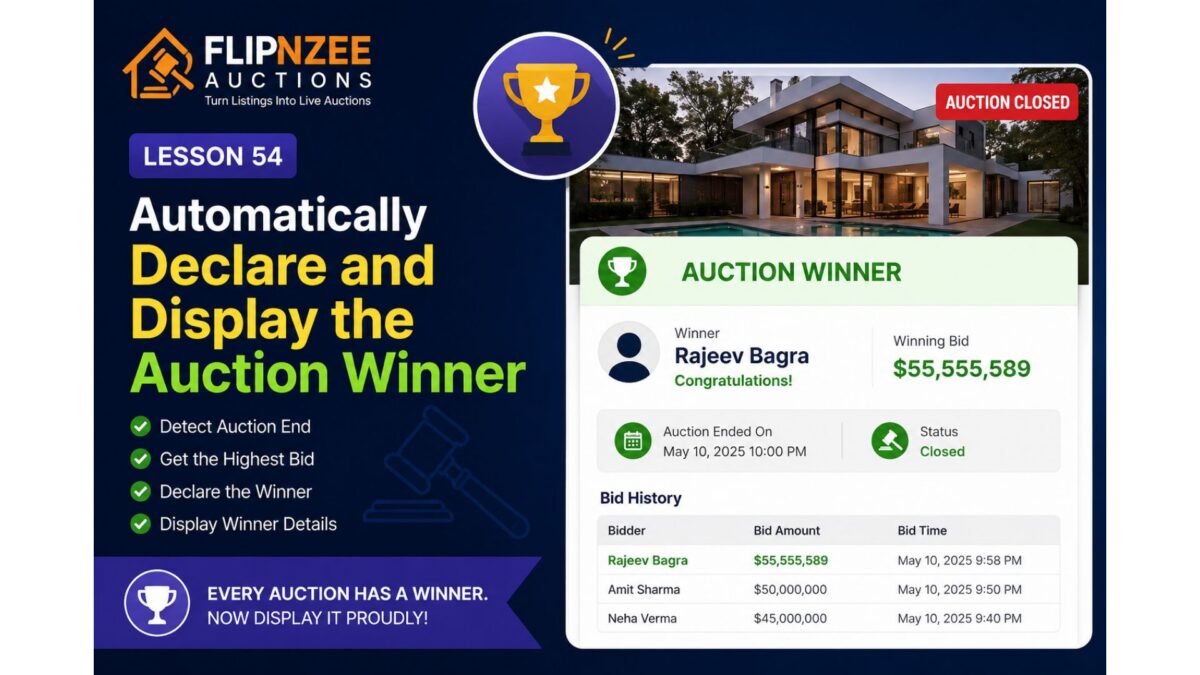
In this lesson, we’ll introduce winner determination and display the auction winner on the frontend.


What You’ll Build

By the end of this lesson, the plugin will automatically:

  • Detect that an auction has ended.
  • Retrieve the highest bid.
  • Declare that bidder as the winner.
  • Display the winner prominently.
  • Display the final winning bid.
  • Replace the bidding interface with a winner announcement.

Why This Matters

Every successful auction should end with a clear result.

Visitors should immediately know:

  • Who won?
  • What was the winning bid?
  • Is the auction still active?
  • Has the property been sold?

Professional auction platforms always display this information after an auction concludes.


Current Behaviour

Currently, a closed auction only shows:

Auction Closed

No further bids are accepted.

Although useful, it doesn’t tell visitors the outcome.


Desired Behaviour

Once the auction ends, visitors should see something like:

🏆 Auction Winner

Winner:
Rajeev Bagra

Winning Bid:
$55,555,589

Status:
Auction Closed

The bid history should remain visible below the winner announcement.


Implementation Plan

During this lesson we’ll:

Step 1

Determine whether the auction has ended.


Step 2

Retrieve the highest bidder from the bids table.


Step 3

Display the winner section above the bid history.


Step 4

Highlight the winning amount.


Step 5

Show a congratulatory message.

Example:

🏆 Congratulations!

Rajeev Bagra won this auction with a bid of
$55,555,589.

User Experience

Before the auction ends:

  • Live countdown
  • Bid form
  • Highest bidder
  • Bid history

After the auction ends:

  • 🏆 Winner
  • Winning bid
  • Auction Closed badge
  • Bid history
  • No bid form

This creates a clear transition from an active auction to a completed sale.


What You’ll Learn

In this lesson, you’ll learn how to:

  • Reuse existing database queries efficiently.
  • Display conditional content based on auction status.
  • Present auction results in a user-friendly way.
  • Improve the overall completion flow of an online auction.

Final Thoughts

An auction isn’t complete until a winner is announced. By automatically displaying the winning bidder and final selling price, the Flipnzee Auctions plugin will provide visitors with a satisfying conclusion to every auction while laying the groundwork for future enhancements such as winner notifications, payment processing, sold badges, and auction archives.


Next Lesson

Lesson 55: Notify the Winning Bidder and Administrator After Auction Completion

We’ll build on this by automatically sending email notifications to the winner and the site administrator when an auction concludes, making the auction workflow even more complete.

Lesson 51 Implementation: Automatically Closing Expired Auctions

One of the most important responsibilities of an auction platform is ensuring that bidding stops exactly when the auction ends. In earlier lessons, our Flipnzee Auctions plugin allowed users to place bids while the auction was active. However, there was still one significant issue—an auction could technically remain active in the database even after its scheduled end time.

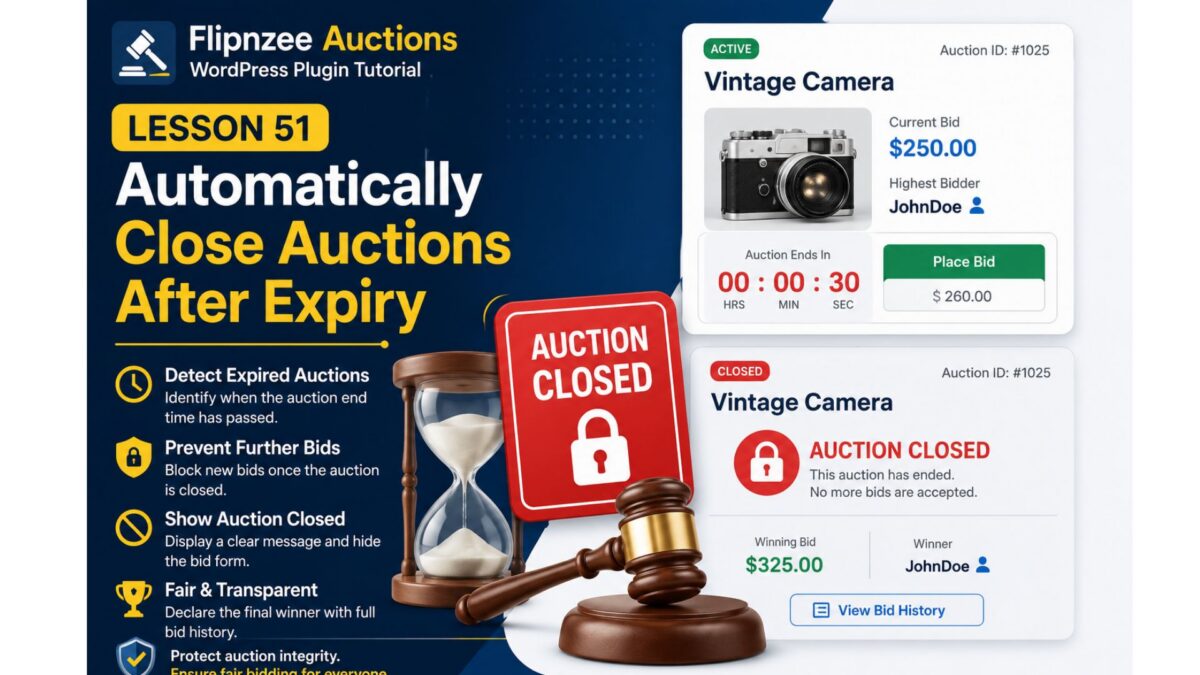
In this lesson, we solved that problem by automatically closing expired auctions during the bid validation process.


The Problem

Imagine an auction scheduled to end at 15:00 UTC.

If nobody manually changes its status, the auction could continue showing as Active, allowing visitors to attempt placing bids after the deadline.

This creates several problems:

  • Bids may be accepted after the auction has ended.
  • Auction status becomes inaccurate.
  • Administrators must manually close every auction.
  • Buyers lose confidence in the auction system.

We wanted the plugin to handle this automatically.


Our Approach

Whenever a user submits a bid, the plugin now performs one additional check before accepting it:

  1. Retrieve the auction’s end time.
  2. Compare it with the current UTC time.
  3. If the auction has expired:
    • Update its status to closed.
    • Reject the bid immediately.

This ensures that expired auctions are automatically closed the first time someone interacts with them after the deadline.


Step 1: Compare the Current Time

We used PHP’s gmdate() function to generate the current UTC time and compared it with the stored auction end time.

if (
    strtotime( gmdate( 'Y-m-d H:i:s' ) ) >=
    strtotime( $auction->auction_end )
) {

Using UTC prevents issues caused by different server time zones.


Step 2: Update the Auction Status

If the auction has expired, we update the auction record in the database.

$wpdb->update(
    $auction_table,
    array(
        'status' => 'closed',
    ),
    array(
        'id' => $auction_id,
    ),
    array(
        '%s',
    ),
    array(
        '%d',
    )
);

This permanently marks the auction as closed.


Step 3: Reject the Bid

After closing the auction, the function immediately returns false.

return false;

This prevents any further processing and ensures no late bids are accepted.


Complete Code

The new logic added to place_bid() looks like this:

if (
    strtotime( gmdate( 'Y-m-d H:i:s' ) ) >=
    strtotime( $auction->auction_end )
) {

    $wpdb->update(
        $auction_table,
        array(
            'status' => 'closed',
        ),
        array(
            'id' => $auction_id,
        ),
        array(
            '%s',
        ),
        array(
            '%d',
        )
    );

    return false;
}

Why This Design Works

Instead of relying on scheduled cron jobs or manual administration, the auction closes itself naturally whenever someone attempts to interact with it after its end time.

This approach is:

  • Simple
  • Reliable
  • Lightweight
  • Easy to maintain

It also avoids unnecessary background processes for smaller websites.


Current Limitation

While the auction now closes automatically, our frontend currently hides closed auctions from visitors.

This means that once an auction expires, its page no longer displays any auction information.

Although this successfully prevents further bidding, it isn’t the best user experience because visitors cannot see:

  • the winning bidder,
  • the final bid,
  • or the auction history.

We’ll address this in the next lesson.


What We Learned

In this lesson, we enhanced the bidding system by introducing automatic auction closure.

Specifically, we learned how to:

  • compare UTC timestamps using gmdate() and strtotime(),
  • update database records using $wpdb->update(),
  • automatically change an auction’s status,
  • prevent late bids,
  • and improve the reliability of the auction workflow.


Next Lesson

In Lesson 52, we’ll improve the user experience by displaying completed auctions instead of hiding them. Visitors will still be able to view the final auction details, including the winning bidder, winning amount, bid history, and a clear “Auction Closed” status, while the bidding form will be disabled.