Lesson 19: Creating the Edit Auction Page

Introduction

In the previous lesson, we enhanced our auction list by adding View, Edit, and Delete row actions beneath each Auction ID. Although these links improved the user interface, they were only placeholders.

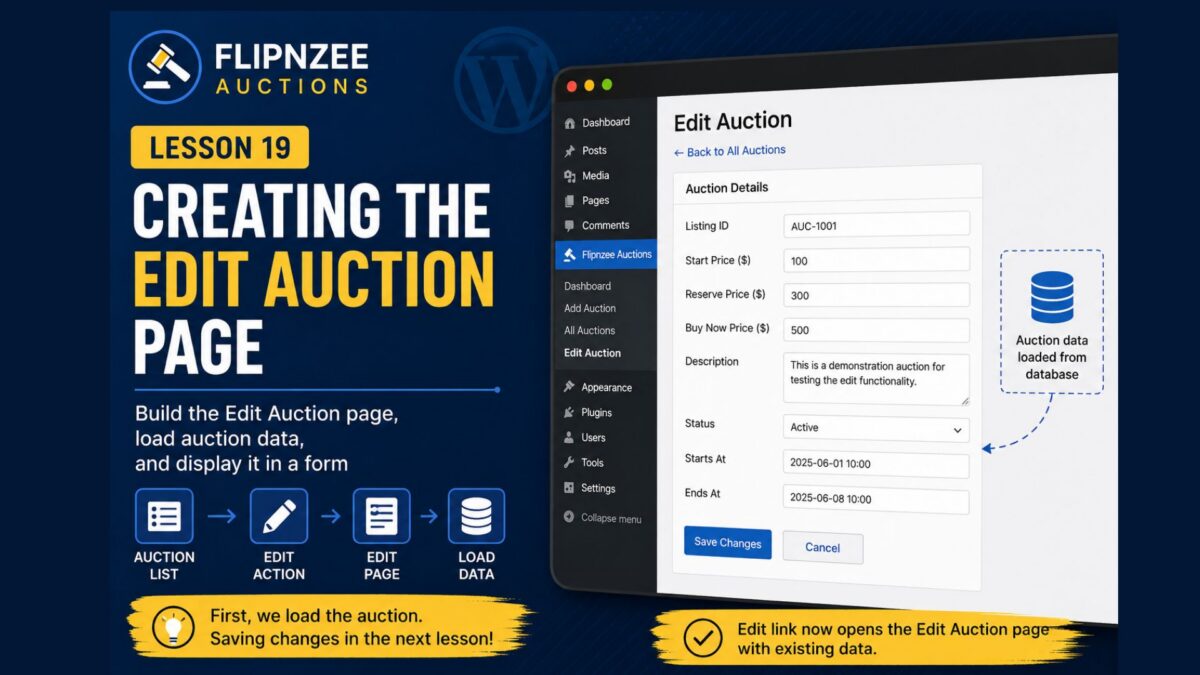
In this lesson, we’ll make the Edit action functional by creating a dedicated Edit Auction page inside the WordPress administration area. Initially, this page will retrieve an auction from the database and display its existing information in a form. We’ll save the changes in the next lesson.

Breaking the workflow into two lessons makes it easier to understand and follows the same incremental approach we’ve used throughout this series.


Learning Objectives

By the end of this lesson, you’ll be able to:

  • Build an Edit Auction administration page.
  • Pass an auction ID through a URL.
  • Retrieve a single auction from the database.
  • Populate a form with existing values.
  • Understand how editing workflows begin in WordPress plugins.

How the Workflow Changes

Our administration flow now becomes:

All Auctions
      ↓
Click Edit
      ↓
Edit Auction Page
      ↓
Retrieve Auction
      ↓
Display Existing Values

Notice that we’re still not saving changes yet. Today’s goal is to display the current data.


Step 1 – Update the Edit Row Action

Open:

admin/class-auctions-table.php

Locate the column_id() method.

Replace the Edit action with:

'edit' => sprintf(
	'<a href="%s">Edit</a>',
	admin_url(
		'admin.php?page=flipnzee-edit-auction&auction_id=' . absint( $item->id )
	)
),

Now every Edit link will open the correct auction.


Step 2 – Register a New Submenu

Open:

admin/class-admin.php

Inside register_menu(), add another submenu:

add_submenu_page(
	'flipnzee-auctions',
	'Edit Auction',
	'Edit Auction',
	'manage_options',
	'flipnzee-edit-auction',
	array( $this, 'edit_auction_page' )
);

This page won’t normally appear in the menu because administrators will access it through the Edit link.


Step 3 – Create the Edit Page

Inside class-admin.php, create:

public function edit_auction_page() {

	$auction_id = isset( $_GET['auction_id'] )
		? absint( $_GET['auction_id'] )
		: 0;

	$auction = Flipnzee_Auction_Manager::get_auction(
		$auction_id
	);

	if ( ! $auction ) {

		echo '<div class="notice notice-error"><p>Auction not found.</p></div>';

		return;
	}

	?>

	<div class="wrap">

		<h1>Edit Auction</h1>

		<p>The auction was loaded successfully.</p>

	</div>

	<?php
}

At this stage, we’re simply verifying that the selected auction can be retrieved.


Step 4 – Test the Plugin

Create a fresh ZIP.

Upload the plugin.

Navigate to:

Flipnzee Auctions → All Auctions

Click Edit beneath any auction.

If everything is working correctly, you’ll see:

Edit Auction

The auction was loaded successfully.

This confirms that:

  • The row action works.
  • The auction ID is passed correctly.
  • The Auction Manager retrieves the correct record.
  • The administration page loads successfully.

Why Stop Here?

Many beginners try to retrieve, display, validate, and save data in a single lesson.

Breaking the process into smaller steps makes debugging much easier.

Today we verify that the correct auction is loaded.

In the next lesson, we’ll build the complete editing form.


Lesson Summary

In this lesson, we transformed the placeholder Edit link into a working navigation path.

Administrators can now select an auction from the list, open an Edit Auction page, and retrieve the corresponding record from the database.

Although editing isn’t complete yet, we’ve successfully implemented the first half of the editing workflow.


Key Takeaways

  • ✓ Row actions can pass record IDs through URLs.
  • ✓ Retrieve individual records using the Auction Manager.
  • ✓ Separate retrieval from saving.
  • ✓ Build editing workflows incrementally.

Common Mistakes

  • Forgetting to sanitize the auction ID.
  • Accessing the database directly instead of using the Auction Manager.
  • Assuming every ID exists.
  • Trying to save changes before displaying the existing values.

Git Commands Used

git add .

git commit -m "Lesson 19: Create Edit Auction page"

git push

Testing Checklist

Before continuing:

  • ✅ Plugin activates successfully.
  • ✅ All Auctions page still loads.
  • ✅ Every Edit link opens a new page.
  • ✅ Correct auction ID is passed.
  • ✅ Auction record is retrieved successfully.
  • ✅ “Auction not found” appears only for invalid IDs.

Project Status

✅ Dashboard

✅ Add Auction

✅ Save Auctions

✅ View Auctions

✅ WP_List_Table

✅ Row Actions

✅ Edit Auction Page

⬜ Edit Auction Form

⬜ Save Edited Auction

⬜ Delete Auction

⬜ Bid Engine

⬜ Escrow Workflow

Project Evolution

With the introduction of the Edit Auction page, Flipnzee Auctions now supports navigation from a list of records to an individual record. This pattern is common in many WordPress plugins and content management systems. By retrieving a single auction before attempting to modify it, we’ve established a clean editing workflow that can be expanded safely in future lessons.


Developer’s Notebook

Professional applications rarely perform retrieval, validation, and persistence in one step. Separating these responsibilities improves readability, simplifies testing, and makes future enhancements much easier. Today’s lesson focuses entirely on retrieving the correct record, allowing the next lesson to concentrate solely on editing and saving changes.
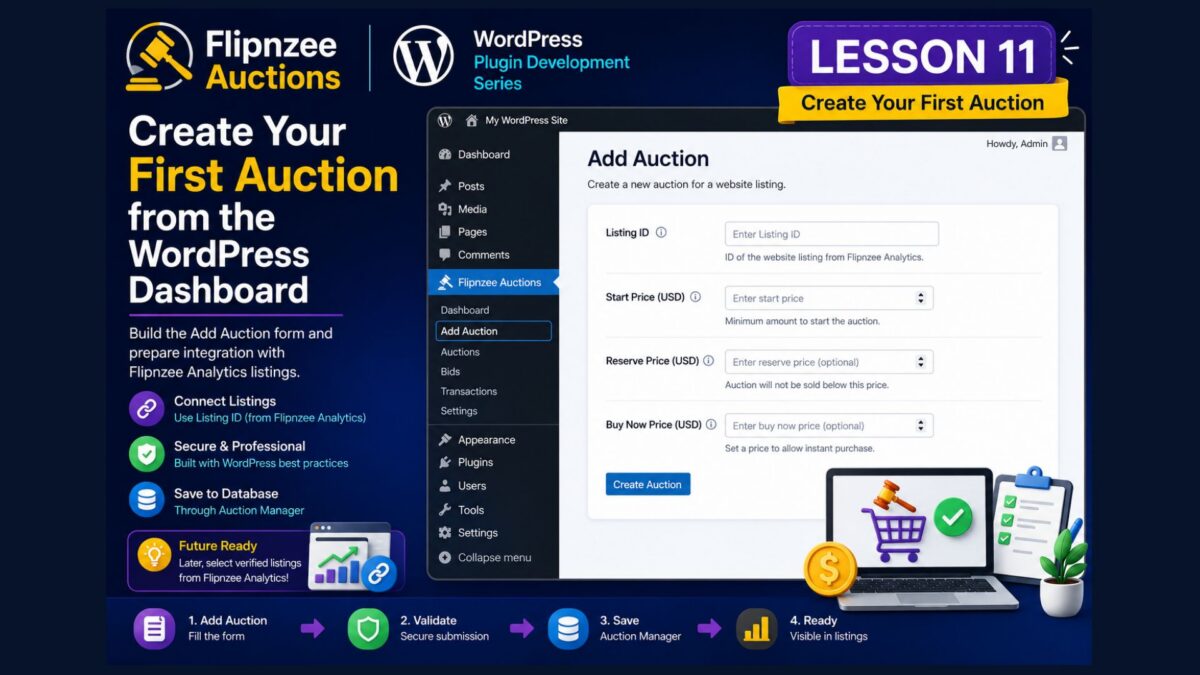
Lesson 11: Creating Your First Auction from the WordPress Dashboard

Introduction

In the previous lesson, we created the first administration dashboard for Flipnzee Auctions. Although the dashboard displays useful plugin information, administrators still cannot create auctions.

In this lesson, we’ll build our first administration form.

Instead of inserting records directly into the database, administrators will be able to create auctions using the familiar WordPress Dashboard.

This marks an important milestone in the project because it connects our user interface to the database through the Auction Manager class.


Learning Objectives

By the end of this lesson, you’ll be able to:

  • Create your first administration form.
  • Submit form data securely.
  • Insert auction records into the database.
  • Use the Auction Manager class from the administration interface.
  • Understand why business logic should remain separate from the user interface.

Our Architecture

Remember the design we’ve adopted throughout this project.

Administrator

        │

        ▼

Admin Form

        │

        ▼

Auction Manager

        │

        ▼

Database

Notice that the form never communicates directly with the database.

Instead, it delegates the work to the Auction Manager.


Why Not Use SQL Here?

Imagine writing SQL inside every administration page.

Soon your project would become difficult to maintain.

Instead:

  • Forms collect information.
  • Auction Manager performs the work.
  • Database stores the results.

Each component has one responsibility.


Step 1 – Create a New Menu

Open:

admin/class-admin.php

Inside the register_menu() method, immediately below add_menu_page(), add:

add_submenu_page(
	'flipnzee-auctions',
	'Add Auction',
	'Add Auction',
	'manage_options',
	'flipnzee-add-auction',
	array( $this, 'add_auction_page' )
);

Step 2 – Create the Add Auction Page

Inside the class, add the following method.

public function add_auction_page() {

	?>

	<div class="wrap">

		<h1>Add Auction</h1>

		<form method="post">

			<table class="form-table">

				<tr>

					<th>Listing ID</th>

					<td>

						<input
							type="number"
							name="listing_id"
							min="1"
							required
						>

					</td>

				</tr>

				<tr>

					<th>Start Price</th>

					<td>

						<input
							type="number"
							step="0.01"
							name="start_price"
							required
						>

					</td>

				</tr>

				<tr>

					<th>Reserve Price</th>

					<td>

						<input
							type="number"
							step="0.01"
							name="reserve_price"
						>

					</td>

				</tr>

				<tr>

					<th>Buy Now Price</th>

					<td>

						<input
							type="number"
							step="0.01"
							name="buy_now_price"
						>

					</td>

				</tr>

			</table>

			<?php submit_button( 'Create Auction' ); ?>

		</form>

	</div>

	<?php
}

Step 3 – Why Listing ID?

Some readers may wonder why we’re asking for a Listing ID instead of a website title.

The answer is simple.

Website listings already belong to the Flipnzee Analytics plugin.

Rather than storing duplicate information, Flipnzee Auctions simply references the existing listing.

For now, we’ll enter the Listing ID manually.

Later in this series, we’ll replace this field with a dropdown that automatically displays verified listings from Flipnzee Analytics.


Step 4 – Upload the Plugin

Create a new ZIP.

Upload it.

Activate the plugin.

Open:

Flipnzee Auctions

↓

Add Auction

You should now see your first administration form.

Although the form doesn’t yet save data, we’ve successfully built the user interface.

We’ll connect it to the Auction Manager in the next lesson.


Lesson Summary

In this lesson, we created our first administration form for Flipnzee Auctions.

Rather than inserting data directly into the database, we focused on building a clean user interface that will soon communicate with the Auction Manager.

This layered approach keeps the plugin organized and prepares us for more advanced functionality.


Key Takeaways

  • ✓ WordPress administration pages use standard HTML forms.
  • ✓ Keep forms separate from database logic.
  • ✓ Prepare for future integrations instead of duplicating data.
  • ✓ Build one layer at a time.

Common Mistakes

  • Writing SQL directly inside administration pages.
  • Mixing business logic with HTML.
  • Duplicating listing information.
  • Building complicated forms before the backend is ready.

Git Commands Used

git add .

git commit -m "Lesson 11: Add Auction form"

git push

Project Status

✅ Development environment

✅ Plugin skeleton

✅ Plugin installation

✅ Plugin lifecycle

✅ .gitignore

✅ Data architecture

✅ Database table

✅ Auction Manager

✅ Retrieve auction records

✅ WordPress admin menu

✅ Plugin dashboard

✅ Add Auction page

⬜ Save auction

⬜ List auctions

⬜ Edit auctions

⬜ Bid engine

⬜ Escrow workflow

⬜ Website transfer

⬜ Version 1.0

Project Evolution

When we first planned this plugin, we considered storing all website information inside Flipnzee Auctions.

As the project evolved, we recognized that Flipnzee Analytics already provides verified website listings. Rather than duplicating that data, the auction plugin now references listings through a listing_id.

This architectural refinement keeps both plugins modular and easier to maintain while allowing them to work together as part of the broader Flipnzee ecosystem.


Developer’s Notebook

One of the biggest advantages of separating the user interface from the business logic is flexibility. Today we’re creating a simple administration form, but tomorrow the same Auction Manager methods could be called from REST APIs, AJAX requests, WP-CLI commands, or even another plugin. By keeping responsibilities separate, we avoid rewriting the core logic every time a new interface is introduced.


Looking Ahead

In Lesson 12, we’ll connect this form to the Auction Manager so that submitting it actually creates a new auction in the database. We’ll also introduce WordPress nonces to protect the form against unauthorized submissions, an essential security practice for professional plugin development.

Lesson 10: Building Your First Plugin Dashboard

Introduction

In the previous lesson, we created our first WordPress administration menu. Although our plugin now has its own dashboard page, the content is very simple.

Professional plugins do more than display a welcome message. They provide administrators with useful information at a glance, such as plugin status, database health, statistics, and recent activity.

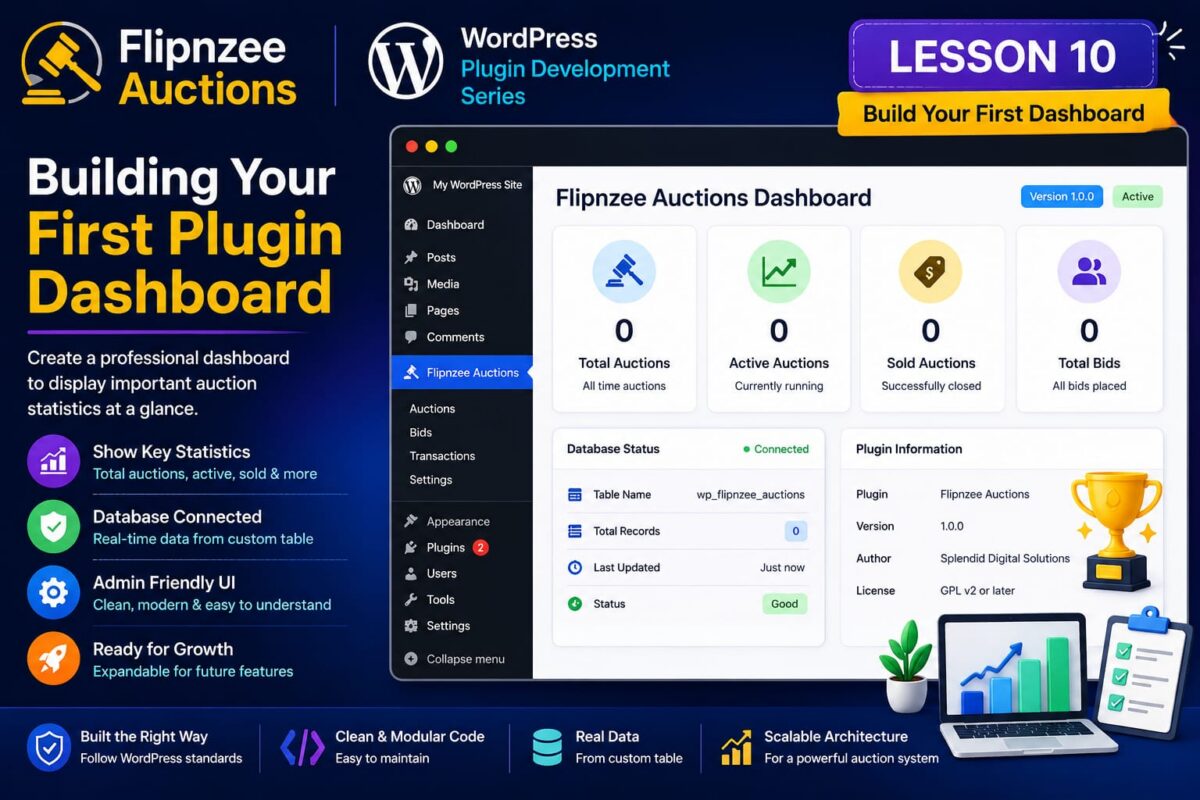
In this lesson, we’ll transform our basic dashboard into a professional-looking administration page by displaying several information cards.

Even though most of the values are placeholders for now, this dashboard establishes the layout we’ll continue enhancing throughout the project.


Learning Objectives

By the end of this lesson, you’ll be able to:

  • Build a professional WordPress dashboard page.
  • Display plugin information.
  • Count database records.
  • Use WordPress dashboard styling.
  • Prepare the interface for future features.

Why Build a Dashboard First?

As our plugin grows, administrators will need quick access to important information.

Instead of searching through multiple pages, they’ll be able to see everything from one central dashboard.

Later, this page will display:

  • Total Auctions
  • Active Auctions
  • Sold Auctions
  • Total Bids
  • Pending Transfers
  • Escrow Transactions
  • Plugin Version
  • Database Status

Today’s lesson lays the foundation for that dashboard.


Step 1 – Open the Admin Class

Open:

admin/class-admin.php

We’ll replace the simple welcome page with a more useful dashboard.


Step 2 – Replace dashboard_page()

Replace the existing dashboard_page() method with the following:

/**
 * Dashboard page.
 */
public function dashboard_page() {

	global $wpdb;

	$table = $wpdb->prefix . 'flipnzee_auctions';

	$total_auctions = (int) $wpdb->get_var(
		"SELECT COUNT(*) FROM {$table}"
	);

	?>

	<div class="wrap">

		<h1>Flipnzee Auctions Dashboard</h1>

		<p>Welcome to the Flipnzee Auctions administration panel.</p>

		<table class="widefat striped">

			<thead>
				<tr>
					<th>Information</th>
					<th>Value</th>
				</tr>
			</thead>

			<tbody>

				<tr>
					<td>Plugin Version</td>
					<td><?php echo esc_html( FLIPNZEE_AUCTION_VERSION ); ?></td>
				</tr>

				<tr>
					<td>Total Auctions</td>
					<td><?php echo esc_html( $total_auctions ); ?></td>
				</tr>

				<tr>
					<td>Database Table</td>
					<td><?php echo esc_html( $table ); ?></td>
				</tr>

				<tr>
					<td>Plugin Status</td>
					<td>Active</td>
				</tr>

			</tbody>

		</table>

	</div>

	<?php
}

Understanding the Code

The dashboard retrieves the total number of auctions using:

$wpdb->get_var()

Unlike get_row() or get_results(), this method returns only a single value.

In our case:

SELECT COUNT(*)

returns the number of auction records stored in the database.


Why Use COUNT(*)?

Imagine there are:

Auction 1

Auction 2

Auction 3

Instead of loading all three records, MySQL simply returns:

3

This is much faster and more efficient.


Step 3 – Upload the Plugin

Create a new ZIP.

Upload it.

Replace the existing plugin.

Refresh the Dashboard.


What You Should See

Your dashboard should now display something similar to:

Flipnzee Auctions Dashboard

Plugin Version      1.0.0

Total Auctions      0

Database Table      wp_flipnzee_auctions

Plugin Status       Active

Because we haven’t created any auctions yet, the total remains zero.

That’s exactly what we expect.


Lesson Summary

In this lesson, we transformed our simple administration page into a functional plugin dashboard.

Although the statistics are currently minimal, we’ve established a reusable layout that will gradually expand as more features are added.


Key Takeaways

  • ✓ Use $wpdb->get_var() to retrieve a single value.
  • COUNT(*) efficiently counts database records.
  • ✓ Dashboards provide administrators with useful information.
  • ✓ Build the user interface gradually.
  • ✓ Reuse WordPress styling whenever possible.

Common Mistakes

  • Loading unnecessary data when only a count is required.
  • Forgetting to escape output.
  • Mixing business logic with HTML.
  • Hardcoding plugin information.

Git Commands Used

git add .

git commit -m "Lesson 10: Build plugin dashboard"

git push

Project Status

✅ Development environment

✅ Plugin skeleton

✅ Plugin installation

✅ Plugin lifecycle

✅ .gitignore

✅ Data architecture

✅ Database table

✅ Auction Manager

✅ Retrieve auction records

✅ WordPress admin menu

✅ Plugin dashboard

⬜ Create first auction

⬜ Auction listing page

⬜ Bid engine

⬜ Escrow workflow

⬜ Website transfer

⬜ Notifications

⬜ Version 1.0

Project Evolution

Earlier in the series, our focus was on backend architecture. Now we’re beginning to expose that functionality through a professional administration interface.

As additional features are developed, this dashboard will evolve into the central control panel for the entire auction marketplace, giving administrators quick access to auctions, bids, transfers, and transaction status.

The GitHub repository will always contain the latest implementation, while these lessons explain the reasoning behind each architectural decision.


Developer’s Notebook

A dashboard is often the first screen administrators see when using a plugin. A clean, informative dashboard creates confidence and reduces the time needed to find important information. Even simple statistics such as plugin version, total records, and database status can be valuable during development and troubleshooting.


Looking Ahead

In Lesson 11, we’ll create our first Add New Auction page. Instead of working directly with database methods, administrators will begin creating auctions through a WordPress form, bringing the plugin one step closer to becoming a fully functional marketplace.

Creating Custom Admin Menus in WordPress

Series: WordPress Development From Scratch
Level: Beginner to Intermediate
Project Reference: Flipnzee Analytics


Introduction

One of the most powerful features of WordPress plugins is the ability to create custom pages inside the WordPress dashboard.

Have you ever installed a plugin and noticed a new menu item appear in the admin sidebar?

Examples include:

  • WooCommerce
  • Yoast SEO
  • Elementor
  • MonsterInsights
  • Flipnzee Analytics

These plugins create custom admin menus that allow users to configure settings, view reports, and manage plugin features.

In this tutorial you’ll learn:

  • How WordPress admin menus work
  • How plugins create dashboard pages
  • The purpose of menu permissions
  • Creating top-level menus
  • Creating submenu pages
  • Best practices for admin interfaces
  • How the Flipnzee Analytics plugin creates its dashboard

By the end, you’ll be able to add professional dashboard pages to your own plugins.


What Is an Admin Menu?

An admin menu is a navigation item inside the WordPress dashboard.

Examples:

Dashboard
Posts
Media
Pages
Comments
Appearance
Plugins
Users
Tools
Settings

Plugins can add their own entries:

Dashboard
Posts
Media
Pages
Flipnzee Analytics

Clicking the menu opens a custom admin page.


Why Create Admin Menus?

Many plugins need a place to:

  • Store settings
  • Display reports
  • Configure APIs
  • Show analytics
  • Manage users
  • Run maintenance tools

Without admin menus, users would have no easy way to interact with the plugin.


How WordPress Creates Menus

WordPress uses the:

admin_menu

hook.

Example:

add_action(
    'admin_menu',
    'wpnzee_admin_menu'
);

This tells WordPress:

“Run my function when admin menus are being built.”


Creating Your First Admin Menu

Example:

function wpnzee_admin_menu() {

    add_menu_page(
        'WPNzee Dashboard',
        'WPNzee Dashboard',
        'manage_options',
        'wpnzee-dashboard',
        'wpnzee_dashboard_page'
    );

}

add_action(
    'admin_menu',
    'wpnzee_admin_menu'
);

Understanding add_menu_page()

The function:

add_menu_page()

creates a top-level menu.

Example:

add_menu_page(
    'WPNzee Dashboard',
    'WPNzee Dashboard',
    'manage_options',
    'wpnzee-dashboard',
    'wpnzee_dashboard_page'
);

Let’s examine each parameter.


Page Title

'WPNzee Dashboard'

Displayed in the browser title.


Menu Title

'WPNzee Dashboard'

Displayed in the sidebar.


Capability

'manage_options'

Determines who can access the page.


Menu Slug

'wpnzee-dashboard'

Unique page identifier.


Callback Function

'wpnzee_dashboard_page'

Function that displays page content.


Creating the Dashboard Page

Now create the callback:

function wpnzee_dashboard_page() {

    echo '<div class="wrap">';

    echo '<h1>WPNzee Dashboard</h1>';

    echo '<p>Welcome to your first plugin dashboard.</p>';

    echo '</div>';

}

After activation, you’ll see a new menu inside the WordPress dashboard.


Understanding User Permissions

One of the most important concepts in WordPress administration is permissions.

Example:

'manage_options'

Only administrators can access pages using this capability.


Common Capabilities

CapabilityAccess
manage_optionsAdministrators
edit_postsAuthors and above
publish_postsEditors and above
activate_pluginsAdministrators
edit_pagesEditors and above

Choosing the correct capability is important for security.


Adding a Custom Icon

You can assign an icon:

add_menu_page(
    'WPNzee Dashboard',
    'WPNzee Dashboard',
    'manage_options',
    'wpnzee-dashboard',
    'wpnzee_dashboard_page',
    'dashicons-chart-line'
);

WordPress includes hundreds of Dashicons.

Examples:

dashicons-chart-line
dashicons-admin-generic
dashicons-analytics
dashicons-admin-tools
dashicons-chart-pie

Creating Submenus

Professional plugins usually contain multiple pages.

Example:

Flipnzee Analytics
├── Dashboard
├── Reports
├── Settings

WordPress provides:

add_submenu_page()

Example Submenu

add_submenu_page(
    'wpnzee-dashboard',
    'Reports',
    'Reports',
    'manage_options',
    'wpnzee-reports',
    'wpnzee_reports_page'
);

This creates a Reports page beneath the main menu.


Creating the Reports Page

Example:

function wpnzee_reports_page() {

    echo '<div class="wrap">';

    echo '<h1>Reports</h1>';

    echo '<p>Analytics reports appear here.</p>';

    echo '</div>';

}

Organizing Menu Code

As plugins grow, menu code should move into a dedicated file.

Example:

admin
├── menu.php
├── settings-page.php
└── reports-page.php

Then load it:

require_once plugin_dir_path(__FILE__) . 'admin/menu.php';

This keeps the plugin organized.


Real Example: Flipnzee Analytics

The Flipnzee Analytics plugin uses custom admin pages to manage:

  • Google Analytics connections
  • Property configuration
  • Reports
  • Dashboard widgets
  • Search Console integration

Instead of placing everything inside Settings, it provides a dedicated interface designed specifically for analytics management.

This creates a better user experience.


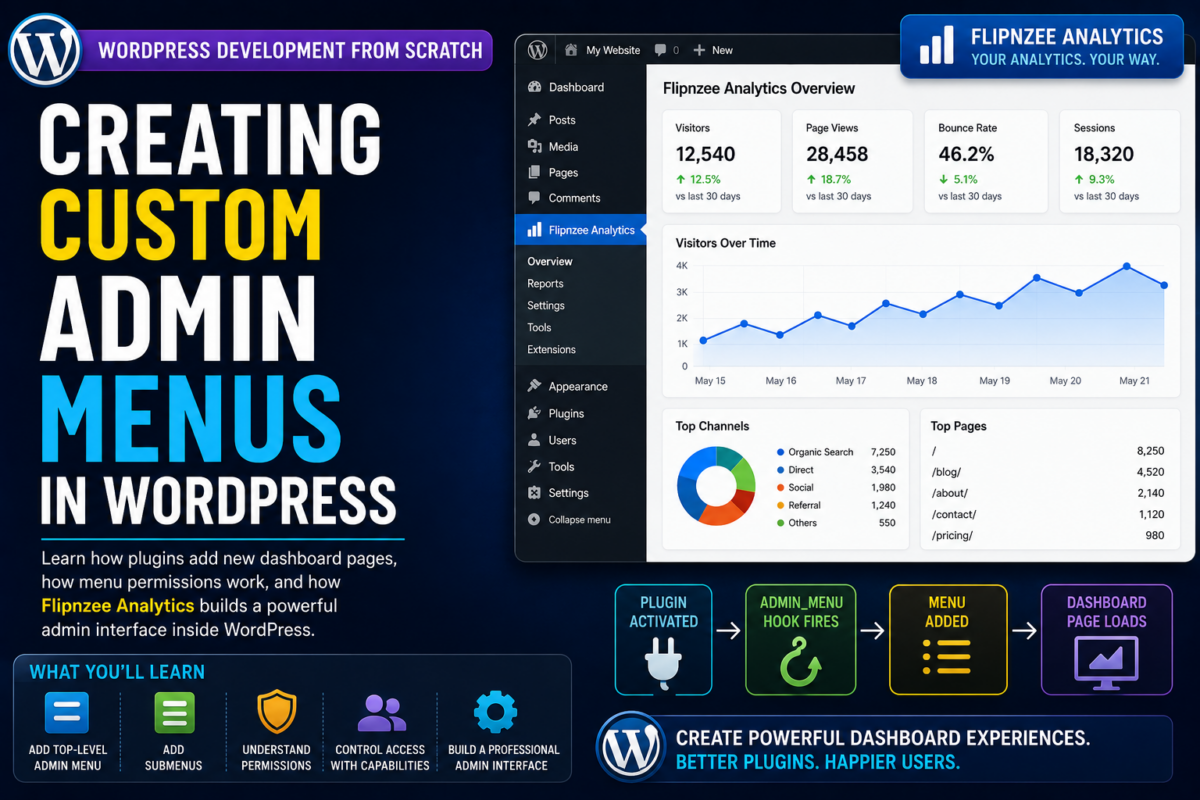
Typical Flow of an Admin Menu

Plugin Activated
          ↓
admin_menu Hook Fires
          ↓
add_menu_page()
          ↓
Menu Appears in Sidebar
          ↓
User Clicks Menu
          ↓
Callback Function Executes
          ↓
Dashboard Page Loads

Understanding this flow makes admin development much easier.


Common Beginner Mistakes

Using Duplicate Slugs

Bad:

'settings'

Good:

'wpnzee-settings'

Always use unique prefixes.


Incorrect Permissions

Avoid:

'read'

for administrative pages.

Choose capabilities carefully.


Mixing Logic and Presentation

Keep:

Menu Registration

separate from:

Page Rendering

This improves maintainability.


Creating Too Many Top-Level Menus

Bad:

Dashboard
Posts
Pages
Plugin A
Plugin B
Plugin C
Plugin D

Use submenus whenever possible.


What You’ve Learned

In this tutorial you learned:

✓ What admin menus are

✓ How plugins create dashboard pages

✓ How add_menu_page() works

✓ How add_submenu_page() works

✓ How permissions control access

✓ How menu callbacks work

✓ How Flipnzee Analytics organizes its admin interface

✓ Best practices for scalable dashboard development


Key Takeaway

Admin menus are the foundation of plugin user interfaces.

They provide a professional way for users to interact with plugin settings, reports, and tools.

Most successful WordPress plugins rely heavily on custom admin pages, making this an essential skill for every plugin developer.


Next Lesson

In the next tutorial we’ll explore:

Building a Professional Settings Page Using the WordPress Settings API

You’ll learn how plugins save settings securely, how WordPress stores configuration data, and how the Flipnzee Analytics plugin manages API credentials, analytics settings, and user preferences using professional WordPress development practices.