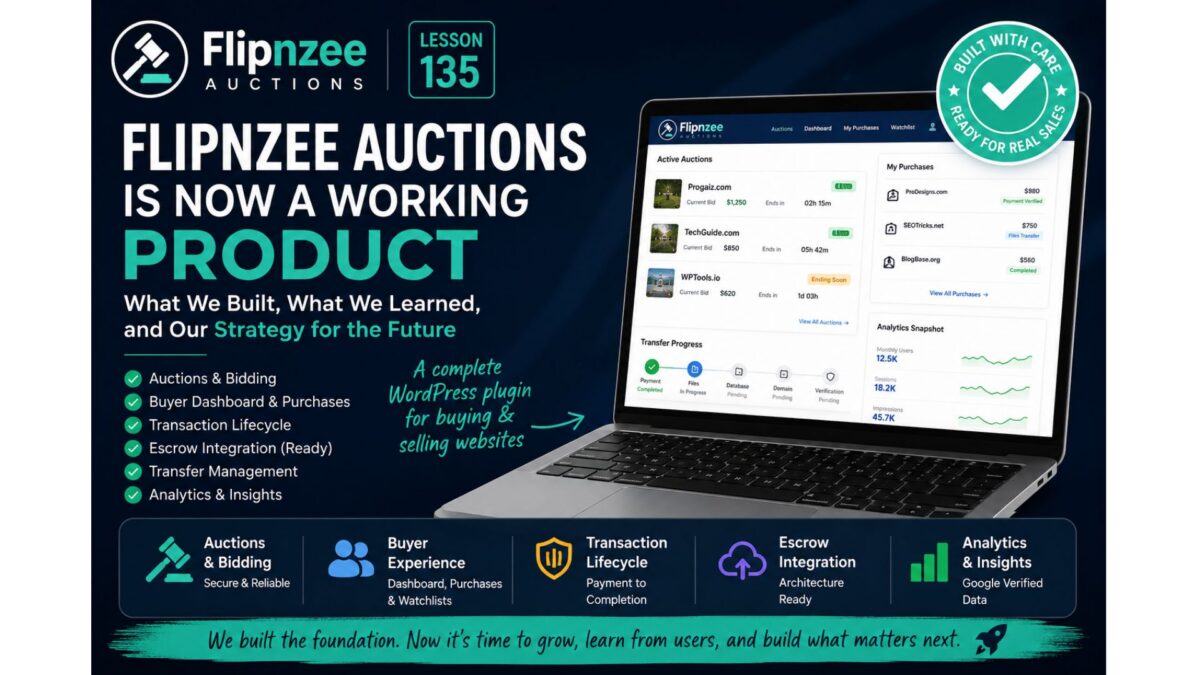
Lesson 135 – Flipnzee Auctions Is Now a Working Product: Lessons Learned and Future Roadmap


Introduction

When this lesson series began, the objective was simple: build a WordPress auction plugin while learning professional plugin development.

Over the course of 135 lessons, that objective gradually evolved.

Instead of producing a tutorial project, the result is a functional auction plugin designed specifically for buying and selling websites, domains, and other digital assets.

Although there are still many possible enhancements, the plugin has reached a point where it can already support real marketplace transactions.

This final lesson summarizes what has been built, the architectural decisions made throughout the series, and where future development may lead.


Looking Back

The project started with a single goal:

Learn WordPress plugin development by building something practical.

Instead of isolated code examples, every lesson contributed to a growing production codebase.

Along the way we explored:

  • WordPress plugin architecture
  • Object-oriented PHP
  • Custom database tables
  • WordPress hooks and filters
  • Secure form handling
  • Shortcodes
  • REST APIs
  • Transaction workflows
  • External provider integrations
  • Database migrations
  • Refactoring techniques
  • Maintainable software design

The result is not merely a collection of lessons but a complete working project.


What the Plugin Already Supports

Today Flipnzee Auctions includes support for:

Auction Management

  • Create auctions
  • Edit auctions
  • Delete auctions
  • Schedule auctions
  • Automatically activate auctions
  • Automatically close expired auctions

Bidding

  • Secure bid placement
  • Highest bidder tracking
  • Bid validation
  • Reserve price support
  • Anti-sniping auction extensions
  • Winner determination

Marketplace

  • Active auction listings
  • Recently closed auctions
  • Analytics summaries
  • Listing thumbnails
  • Countdown timers
  • Buy Now pricing
  • Watchlists

Buyer Experience

  • Buyer Dashboard
  • My Purchases
  • Purchase Details
  • Transaction history
  • Transfer progress

Transaction Management

  • Automatic transaction creation
  • Transaction lifecycle
  • Payment workflow
  • State management
  • Activity logging
  • Notifications

Transfer Workflow

Support for tracking:

  • Payment
  • Website files
  • Database
  • Domain transfer
  • Buyer verification

External Providers

The architecture already supports integration with external services.

Current work includes:

  • Escrow provider abstraction
  • External Provider Manager
  • Escrow API client
  • Provider lifecycle management

Although currently operating in simulation or staged workflows, the underlying architecture has been designed so that additional providers can be added in the future with minimal disruption.


Why Development Slowed Near the End

As the plugin matured, a different question emerged.

Instead of asking:

“Can another feature be built?”

the more important question became:

“Should another feature be built right now?”

There is an important difference.

Software development becomes significantly more valuable when guided by real users rather than assumptions.


The Next Stage Is Validation

The plugin is now capable of supporting real marketplace listings.

Rather than immediately implementing every planned feature, the focus shifts to understanding how buyers actually interact with the marketplace.

Questions that only real users can answer include:

  • Do buyers prefer bidding or Buy Now?
  • How often do negotiations occur before a purchase?
  • Does verified analytics increase buyer confidence?
  • Which information influences purchasing decisions most?
  • Which parts of the purchase workflow deserve automation?

Answers to these questions cannot be discovered through programming alone.

They require real marketplace activity.


Features Deferred Intentionally

Several ideas remain on the roadmap, including:

  • Dedicated Buy Now purchase pages
  • Dynamic Escrow checkout generation
  • Multiple payment providers
  • Stripe integration
  • PayPal integration
  • Wise support
  • Cryptocurrency payments
  • Seller dashboards
  • Public seller onboarding
  • Offer and negotiation workflows
  • Messaging between buyers and sellers
  • Automated transfer checklists
  • Public marketplace analytics

None of these ideas have been abandoned.

They have simply been postponed until real usage demonstrates their value.


An Important Lesson

One of the biggest lessons learned during this project is that good software is not defined by the number of features it contains.

Good software solves real problems while remaining understandable and maintainable.

Throughout the series there were many occasions where existing code was refactored instead of adding new functionality.

Those refactoring lessons were just as valuable as implementing new features because they improved the long-term quality of the project.


The Plugin Is No Longer Just a Tutorial

Although these lessons were written as an educational series, the project gradually became something more.

Flipnzee Auctions is now:

  • a learning resource for WordPress developers,
  • a reference implementation for plugin architecture,
  • and a functional marketplace plugin capable of supporting real website sales.

Future improvements will continue to be driven by practical experience rather than simply expanding the feature list.


Final Thoughts

Building software is rarely about reaching a finish line.

Instead, each release represents a milestone in an ongoing process of learning, refinement, and adaptation.

This lesson series demonstrates that a complex WordPress plugin can be developed incrementally through small, understandable improvements while maintaining a working codebase throughout the journey.

The next chapter for Flipnzee Auctions is no longer primarily about writing code.

It is about observing real users, learning from actual marketplace transactions, and allowing those experiences to guide future development.

For anyone who followed this series from the beginning, thank you for joining the journey. Hopefully it has shown that large software projects are not built in a single leap—they are created one carefully considered lesson at a time.


Series Conclusion

With this lesson, the initial Flipnzee Auctions development series comes to a close.

Future articles will focus less on building features in isolation and more on maintaining, improving, and evolving the plugin based on real-world experience. That transition—from development to product stewardship—is a natural step in the lifecycle of any software project and, arguably, one of the most valuable lessons of all.
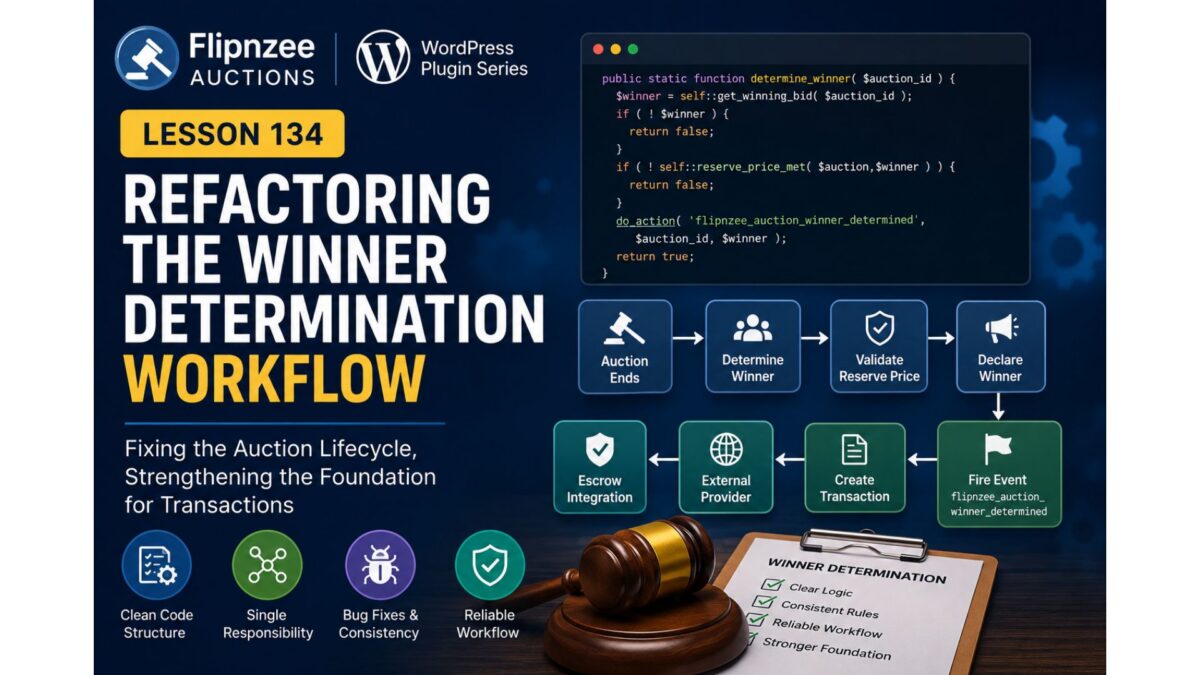
Lesson 134: Refactoring the Winner Determination Workflow

As the Escrow integration matured, testing uncovered an unexpected issue. Although the transaction management architecture had been significantly improved, transaction creation was still not occurring when an auction completed. Rather than immediately assuming the problem existed inside the new transaction code, a systematic review of the auction lifecycle was performed.

This lesson documents the investigation, identifies the true source of the problem, and begins refactoring the winner determination workflow.


The Initial Symptoms

The plugin loaded successfully.

The logs confirmed:

  • Auction Manager initialized.
  • Escrow Provider initialized.
  • Transaction Manager instantiated.

However, one important log entry never appeared:

FLIPNZEE: create_transaction_from_auction() started.

This indicated that the transaction manager itself was not the source of the problem.


Following the Execution Path

Instead of modifying more code, the auction completion workflow was traced step by step.

The execution path is:

Auction Ends
      │
      ▼
Determine Winner
      │
      ▼
Fire Winner Event
      │
      ▼
Transaction Manager
      │
      ▼
Create Transaction
      │
      ▼
Create External Provider
      │
      ▼
Escrow API

Since the Transaction Manager never received control, the investigation moved further upstream.


Reviewing the Bid Manager

The winner determination logic resides inside the Bid Manager.

The following event was confirmed to exist:

do_action(
    'flipnzee_auction_winner_determined',
    $auction_id,
    $winner
);

The event itself was not missing.

Instead, attention shifted to the code responsible for deciding whether a winner should be declared.


Problems Identified

During inspection, the reserve price validation logic had become increasingly difficult to follow after several previous feature additions.

Several architectural issues were identified.

Mixed Responsibilities

The reserve price helper was no longer acting as a simple validation function.

Instead, it contained:

  • Database queries
  • Activity logging
  • Winner modification
  • Business rules
  • Validation logic

A helper function should ideally perform only one task.


Recursive Logic

The helper contained recursive calls back into itself.

This unnecessarily complicated the control flow and made debugging much harder.


Inconsistent Parameters

Different parts of the code expected different inputs.

Some calls passed:

Auction ID

while the helper expected:

Auction Object

This inconsistency made the workflow fragile and difficult to reason about.


Duplicate Business Rules

Reserve price validation appeared in multiple locations.

When business rules are duplicated:

  • bugs become harder to fix,
  • future changes become risky,
  • behavior can become inconsistent.

A single source of truth is always preferable.


Why This Matters

The transaction system depends entirely on the auction lifecycle.

If the winner determination process is unstable, then:

  • transactions cannot be created,
  • provider records cannot be generated,
  • Escrow integration cannot begin.

Rather than continuing to build on uncertain foundations, the focus shifted toward stabilizing the auction lifecycle first.


Architectural Principle

This lesson reinforced an important software engineering principle.

Each stage of the workflow should have one clearly defined responsibility.

Determine Winner
        │
        ▼
Validate Reserve Price
        │
        ▼
Declare Winner
        │
        ▼
Fire Event
        │
        ▼
Create Transaction

When each stage performs only one job, the entire workflow becomes easier to understand, test, and extend.


Benefits of the Refactor

Although this lesson does not introduce new user-facing functionality, it significantly improves the maintainability of the codebase.

Benefits include:

  • Cleaner control flow.
  • Easier debugging.
  • Reduced code duplication.
  • Better separation of concerns.
  • More predictable transaction lifecycle.
  • Stronger foundation for Escrow integration.

Looking Ahead

With the transaction architecture now largely complete and the root cause isolated to the winner determination workflow, the next phase will focus on simplifying the reserve price validation logic into a dedicated, single-purpose component.

Once the auction lifecycle is fully stabilized, the transaction manager, external provider manager, and Escrow integration will operate on a much more reliable foundation.


Lesson 134 demonstrates that effective debugging is often about validating assumptions rather than immediately writing new code. By tracing the complete execution path and identifying weaknesses in the winner determination workflow, Flipnzee Auctions moves closer to a robust, maintainable architecture capable of supporting future payment providers and marketplace features.

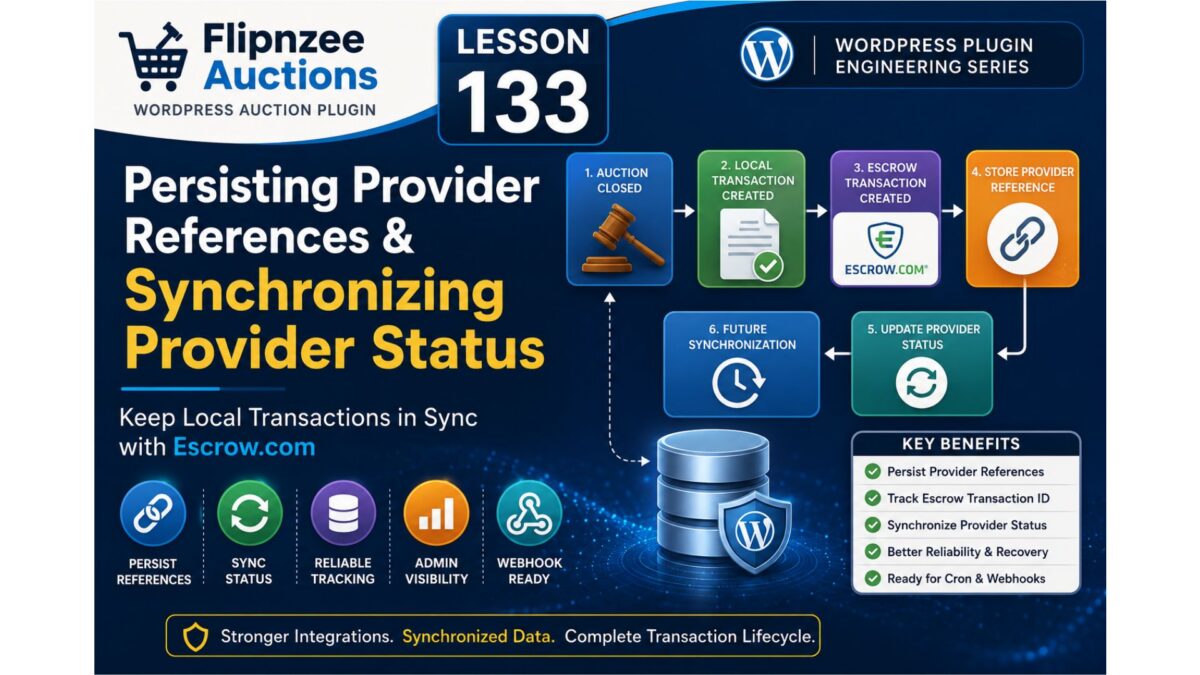
Lesson 133: Persisting Provider References and Synchronizing Provider Status

With the transaction payload standardized in Lesson 132, the Flipnzee Auctions plugin now has a consistent way to exchange transaction data between its internal components. The next step is ensuring that information returned by external providers is not lost.

Creating an Escrow transaction is only half of the process. Once the provider responds, the plugin should store the provider’s transaction reference, record its current status, and keep the local database synchronized with the external service.

Lesson 133 focuses on completing that connection.


Why this lesson is important

Until now, the transaction workflow has looked like this:

Auction Closed
      │
      ▼
Local Transaction Created
      │
      ▼
External Provider Record Created
      │
      ▼
Escrow API Request
      │
      ▼
Response Returned

Although the API returns useful information, much of it is not yet persisted for future use.

Without storing provider references, the plugin cannot reliably:

  • Revisit an external transaction
  • Check its latest status
  • Display provider information in the admin area
  • Recover gracefully after temporary API failures

The Goal

After this lesson, every successful provider transaction should immediately update the corresponding provider record.

The workflow becomes:

Auction Closed
      │
      ▼
Local Transaction
      │
      ▼
Create Provider Record
      │
      ▼
Escrow Transaction
      │
      ▼
Store Provider Reference
      │
      ▼
Update Provider Status
      │
      ▼
Future Synchronization

The provider record becomes the permanent link between Flipnzee Auctions and the external provider.


Provider Information to Store

When a provider successfully creates a transaction, the plugin should save information such as:

  • Provider transaction reference
  • Current provider status
  • Provider transaction URL (when available)
  • Last updated timestamp
  • Synchronization notes

Persisting this information ensures that future API calls always know which external transaction they belong to.


Synchronizing Status

Rather than leaving every provider record in a generic “Pending” state, the plugin will begin recording the actual status returned by the provider.

Typical values may include:

  • Created
  • Awaiting Payment
  • Payment Received
  • In Progress
  • Completed
  • Cancelled

Using normalized status values makes the rest of the plugin independent of provider-specific terminology.


Strengthening the External Provider Manager

The External Provider Manager now evolves from simply forwarding API requests into coordinating provider lifecycle management.

Its responsibilities include:

  • Sending provider requests
  • Validating provider responses
  • Saving provider references
  • Updating provider status
  • Returning standardized results to the Transaction Manager

This keeps provider-specific behavior isolated from the rest of the application.


Benefits

Persistent Transaction Tracking

Every auction remains permanently linked to its external provider transaction.

Better Administration

Administrators can identify provider transactions without manually searching the external platform.

Improved Reliability

If synchronization fails, the stored provider reference allows the plugin to retry later.

Foundation for Scheduled Synchronization

Saving provider identifiers prepares the plugin for future background status checks using WP-Cron.

Webhook Ready

Future webhook events can immediately identify the correct local transaction because the provider reference has already been stored.


Architecture After Lesson 133

Auction Closed
      │
      ▼
Transaction Manager
      │
      ▼
Canonical Transaction Payload
      │
      ▼
External Provider Manager
      │
      ▼
Escrow API Client
      │
      ▼
Persist Provider Reference
      │
      ▼
Synchronize Provider Status
      │
      ▼
Local Database

This completes the core transaction lifecycle by ensuring that local records remain connected to their corresponding external transactions.


What We Will Implement

During this lesson we will:

  • Process successful responses returned by the Escrow API client.
  • Persist provider transaction references in the database.
  • Update provider status automatically after transaction creation.
  • Store provider URLs when available.
  • Record synchronization timestamps.
  • Improve activity logging for provider creation and status updates.
  • Prepare the architecture for future scheduled synchronization and webhook support.

What You’ll Learn

By completing Lesson 133, you’ll gain practical experience with:

  • Synchronizing local records with external services.
  • Designing reliable provider integrations.
  • Persisting external identifiers for long-term tracking.
  • Building extensible transaction workflows.
  • Preparing a WordPress plugin for production-grade third-party integrations.

Next Lesson

Lesson 134 will introduce an External Provider Management screen within the WordPress admin area, allowing administrators to view provider records, monitor synchronization status, inspect provider references, and manage external transactions from a single dashboard.

Lesson 132: Standardizing the Transaction Payload Across the Escrow Integration

In the previous lesson, the External Provider Manager was introduced as an abstraction layer between the Flipnzee Auctions plugin and external payment providers. This significantly improved the architecture by separating transaction management from provider-specific logic.

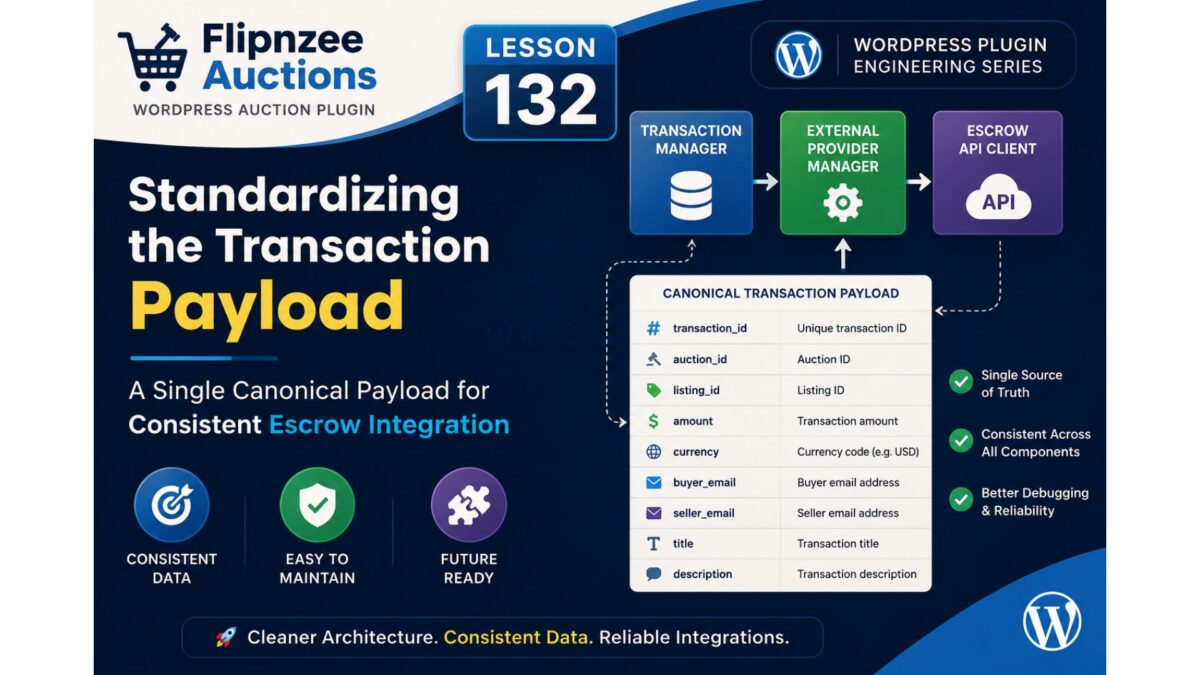
During testing, however, another issue became apparent. Different components were building and consuming transaction data in slightly different formats. While the Transaction Manager, External Provider Manager, and Escrow API Client all exchanged arrays of data, they did not always agree on which fields should exist or what they should be called.

Lesson 132 focuses on solving this problem by introducing a canonical transaction payload.


The Problem

Prior to this lesson, each component expected slightly different data.

For example:

  • Transaction Manager created transaction information.
  • External Provider Manager rebuilt parts of the payload.
  • Escrow API Client validated fields independently.

Although this worked in simple scenarios, it made debugging difficult because each layer could modify or recreate the transaction data.

The architecture looked like this:

Transaction Manager
        │
        ▼
Creates custom payload
        │
        ▼
External Provider Manager
        │
        ▼
Creates another payload
        │
        ▼
Escrow API Client

Every translation introduced another opportunity for inconsistencies.


The Solution

Lesson 132 introduces a single canonical payload structure that travels unchanged through the Escrow integration.

Instead of rebuilding arrays multiple times, the Transaction Manager becomes the authoritative source of transaction data.

The new workflow becomes:

Transaction Manager
        │
        ▼
Canonical Transaction Payload
        │
        ▼
External Provider Manager
        │
        ▼
Escrow API Client

Every component now speaks the same language.


Canonical Payload

The standardized transaction payload contains all information required by the provider layer.

Typical fields include:

  • Transaction ID
  • Auction ID
  • Listing ID
  • Amount
  • Currency
  • Buyer email
  • Seller email
  • Title
  • Description

Rather than generating missing values later, these are prepared once and reused throughout the transaction lifecycle.


Benefits

Single Source of Truth

Transaction information is generated once and remains consistent throughout the workflow.


Easier Debugging

When an API request fails, developers can inspect one payload instead of tracing multiple array transformations across different classes.


Reduced Code Duplication

Provider managers no longer recreate values already available from the Transaction Manager.


Better Maintainability

Future changes to transaction fields require updates in only one location instead of several independent methods.


Improved Extensibility

Additional payment providers can consume the same payload without requiring provider-specific transaction builders.

This makes future integrations significantly easier.


Architectural Improvement

The transaction flow is now much cleaner.

Before:

Transaction Manager
        │
        ▼
Creates Payload A
        │
        ▼
External Provider Manager
        │
        ▼
Creates Payload B
        │
        ▼
Escrow API Client

After:

Transaction Manager
        │
        ▼
Canonical Transaction Payload
        │
        ▼
External Provider Manager
        │
        ▼
Escrow API Client

This removes unnecessary translation layers while making the integration easier to understand.


What We Will Implement

During this lesson we will:

  • Define the canonical transaction payload.
  • Refactor the Transaction Manager to construct the payload once.
  • Remove duplicate payload construction from the External Provider Manager.
  • Ensure the Escrow API Client consumes the standardized structure directly.
  • Improve logging so the same payload can be traced throughout the entire transaction lifecycle.

What We’ll Learn

By the end of Lesson 132, you will understand:

  • Why a canonical data structure simplifies software architecture.
  • How to reduce coupling between components.
  • How consistent data contracts improve debugging and maintenance.
  • Why production-quality plugins rely on standardized payloads rather than ad hoc arrays.

Next Lesson

Lesson 133 will focus on persisting Escrow provider references and synchronizing provider status with local transactions, allowing the plugin to track external transaction identifiers and keep local records aligned with the provider throughout the transaction lifecycle.

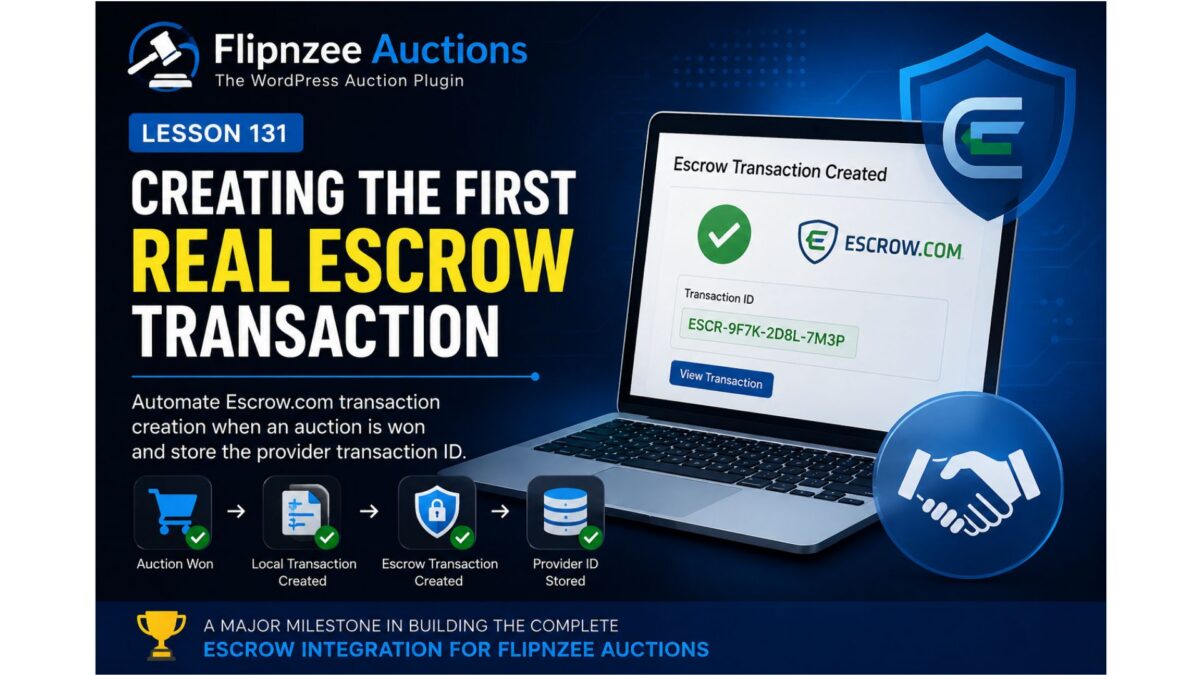
Lesson 131 – Creating the First Real Escrow Transaction

Over the previous lessons, we’ve focused on building a reliable foundation for the Escrow integration within Flipnzee Auctions. We’ve introduced environment management, refactored the API client, standardized response handling, and built a production-ready administration interface.

Although the plugin is now capable of communicating with Escrow.com, it still isn’t performing the task it was ultimately designed for—creating real Escrow transactions.

In this lesson, that changes.

We’ll implement the first step of the complete Escrow transaction lifecycle by creating an actual Escrow transaction through the refactored API client.


Where We Stand

At the end of Lesson 130, the plugin supports:

  • Simulation environment
  • Sandbox environment
  • Production environment
  • Credential validation
  • Connection testing
  • Standardized API responses
  • Configuration dashboard

The networking layer is complete enough to begin sending real business requests.


The Missing Piece

Winning an auction currently updates the local database.

The plugin knows:

  • the winning bidder,
  • the auction,
  • the final price,
  • the payment provider.

However, nothing is yet created at Escrow.com.

The workflow still ends inside WordPress.


Current Workflow

Today’s workflow looks like this:

Auction Ends
        │
        ▼
Winner Selected
        │
        ▼
Local Transaction Created
        │
        ▼
END

While useful, this means the administrator must manually create an Escrow transaction.

That defeats the purpose of integrating directly with Escrow.com.


New Workflow

After Lesson 131, the process becomes significantly more powerful.

Auction Ends
        │
        ▼
Winner Selected
        │
        ▼
Local Transaction Created
        │
        ▼
Escrow Transaction Created
        │
        ▼
Provider Transaction ID Stored

This becomes the beginning of the complete payment lifecycle.


Objectives

The primary objective of this lesson is to automate the creation of an Escrow transaction whenever the plugin is ready to initiate payment.

By the end of this lesson, Flipnzee Auctions will be capable of requesting a new transaction from Escrow.com using the existing API client.


Building on Existing Architecture

One advantage of the previous refactoring work is that almost everything required already exists.

The plugin already provides:

  • Escrow API Client
  • External Provider Manager
  • Transaction Manager
  • Standardized responses
  • Environment management

Rather than introducing a completely new architecture, this lesson simply connects these existing components together.


Transaction Creation

The Escrow API client already understands how to communicate with the selected environment.

We’ll now extend it with support for creating transactions.

The request will include information such as:

  • auction identifier,
  • transaction amount,
  • buyer,
  • seller,
  • currency,
  • description.

Initially, the request will focus on the minimum data required to establish the transaction.

Additional metadata can be added in future lessons.


Provider Transaction IDs

One of the most important pieces of information returned by Escrow.com is its transaction identifier.

This identifier becomes the permanent link between:

  • Flipnzee Auctions
  • Escrow.com

Rather than relying solely on local transaction IDs, the plugin will now store the provider’s unique identifier for future synchronization.


Centralized Workflow

Instead of allowing different parts of the plugin to communicate directly with Escrow.com, all requests will continue flowing through the Escrow API client.

The architecture remains:

Auction
      │
      ▼
Transaction Manager
      │
      ▼
External Provider Manager
      │
      ▼
Escrow API Client
      │
      ▼
Escrow.com

Maintaining this separation keeps networking concerns isolated from business logic.


Error Handling

Creating an external transaction introduces new failure scenarios.

Examples include:

  • network failures,
  • authentication errors,
  • invalid request data,
  • temporary provider outages.

Rather than assuming success, the plugin will continue using the standardized response format introduced in earlier lessons.

This ensures consistent error handling throughout the integration.


Preparing for Synchronization

Creating the transaction is only the beginning.

Future lessons will build upon the provider transaction identifier to support:

  • transaction synchronization,
  • status updates,
  • payment completion,
  • cancellations,
  • dispute handling,
  • webhook processing.

Lesson 131 establishes the foundation upon which these features will be built.


Expected Outcome

After completing this lesson, Flipnzee Auctions will no longer stop after creating a local transaction.

Instead, it will immediately communicate with the configured Escrow environment and request creation of a corresponding provider transaction.

The resulting provider identifier will be stored locally, allowing future synchronization with Escrow.com.


Conclusion

Configuration alone does not create business value. Real value begins when software starts automating real-world workflows.

Lesson 131 represents one of the most significant milestones in the Flipnzee Auctions project. For the first time, the plugin moves beyond configuration and local transaction management to begin interacting directly with Escrow.com as part of the auction lifecycle.

In the next implementation lesson, we’ll connect the auction workflow to the Escrow API client, create our first provider transaction, and persist the returned transaction identifier for future synchronization.

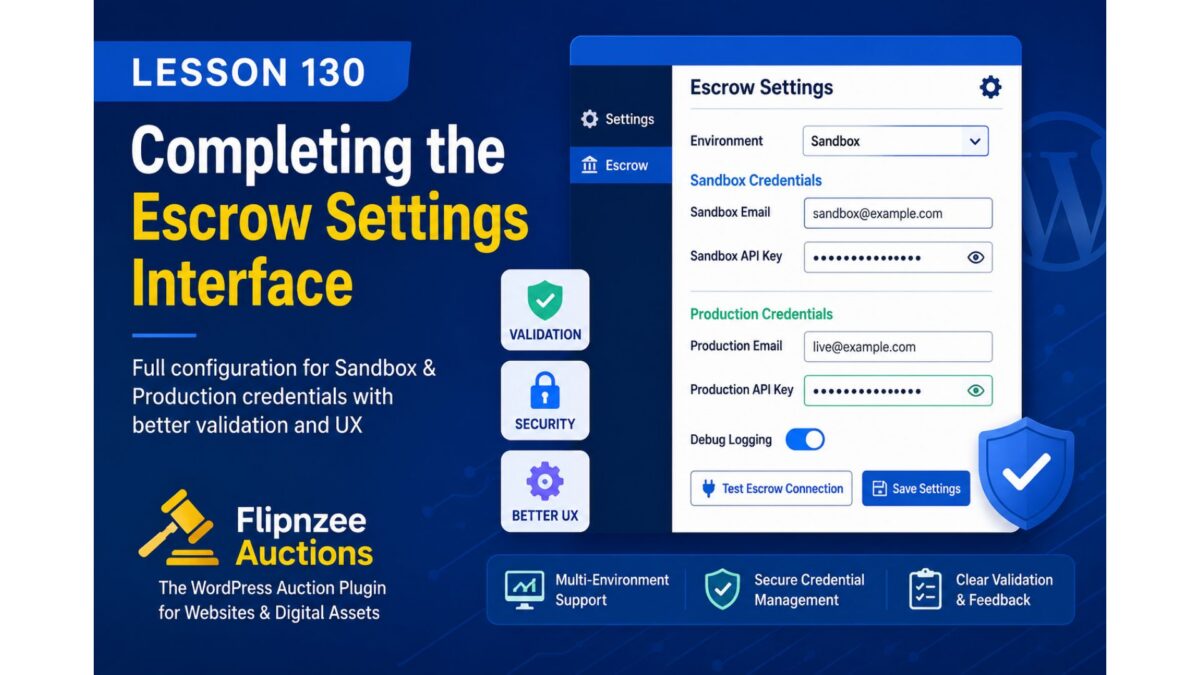
Lesson 130 – Validating Escrow Credentials and Strengthening Environment Safety

Over the past several lessons, we’ve steadily improved the architecture of the Escrow integration within Flipnzee Auctions. The API client now relies on the WordPress HTTP API, networking has been centralized, and response handling has been standardized.

While these improvements make the client easier to maintain, production-ready software requires more than clean code. It must also protect administrators from configuration mistakes before they affect live transactions.

In this lesson, we’ll improve how the plugin validates Escrow credentials and handles environment-specific configuration.


Where We Stand

The Escrow Settings page currently supports:

  • Simulation mode
  • Sandbox mode
  • Production mode
  • Sandbox credentials
  • Production credentials
  • Connection testing
  • Debug logging

The API client can communicate with different environments while returning standardized responses throughout the plugin.

Although this provides a solid foundation, the plugin still assumes that administrators have entered valid credentials.


Why Validation Matters

Incorrect configuration is one of the most common causes of integration failures.

Examples include:

  • selecting Sandbox without entering Sandbox credentials,
  • selecting Production while leaving production credentials empty,
  • accidentally using Sandbox credentials in Production,
  • forgetting to save updated API keys.

Without validation, these mistakes are only discovered after a connection attempt has already failed.

A better administrator experience is to identify these problems before any HTTP request is sent.


Objectives of Lesson 130

The goal of this lesson is to introduce stronger validation and safer environment handling throughout the Escrow integration.

By the end of this lesson, the plugin will perform additional checks before attempting to communicate with Escrow.com.


Credential Validation

The settings page will verify that the required credentials exist for the currently selected environment.

For example:

Simulation

No credentials are required.

Simulation mode remains available for plugin development without requiring an Escrow account.


Sandbox

The plugin will verify that:

  • Sandbox Email has been provided.
  • Sandbox API Key has been provided.

If either value is missing, administrators will receive a clear validation message.


Production

Likewise, the plugin will verify that:

  • Production Email has been configured.
  • Production API Key has been configured.

This prevents unnecessary API requests that are guaranteed to fail.


Safer Environment Handling

We’ll also improve how environments are interpreted throughout the plugin.

Instead of relying solely on user input, the Escrow client will explicitly determine which credentials belong to the currently selected environment.

This makes the code easier to understand while reducing the possibility of accidentally using the wrong credentials.


Improved Administrator Feedback

Validation messages should explain exactly what needs attention.

Rather than displaying generic failures, administrators should immediately understand:

  • which environment is active,
  • which credentials are missing,
  • why a connection test could not proceed.

Clear feedback reduces troubleshooting time and improves the overall configuration experience.


Defensive Programming

This lesson also introduces another important software engineering principle: defensive programming.

Instead of assuming that configuration is always correct, the plugin will verify its assumptions before performing external operations.

This approach makes integrations more reliable while reducing unexpected runtime failures.


Preparing for Live Transactions

As Flipnzee Auctions moves closer to supporting real Escrow.com transactions, preventing configuration mistakes becomes increasingly important.

By validating credentials before communicating with the API, we’re building a safer foundation for future lessons involving live transaction creation, synchronization, and payment processing.


Expected Outcome

After completing this lesson, the Escrow integration will perform environment-aware credential validation before initiating external communication.

Administrators will receive clearer feedback when configuration is incomplete, while the API client will become more resilient against invalid settings.

These improvements enhance both usability and reliability without changing the public interface of the Escrow API client.


Conclusion

A robust integration is not defined solely by its ability to communicate with external services—it must also guide administrators toward correct configuration and prevent avoidable mistakes.

By introducing stronger credential validation and safer environment handling, we’re taking another step toward making Flipnzee Auctions a production-quality WordPress plugin capable of supporting real-world website transactions with confidence.

In the next lesson, we’ll implement these improvements by adding environment-aware validation, clearer administrator notices, and additional safety checks before any Escrow API request is made.

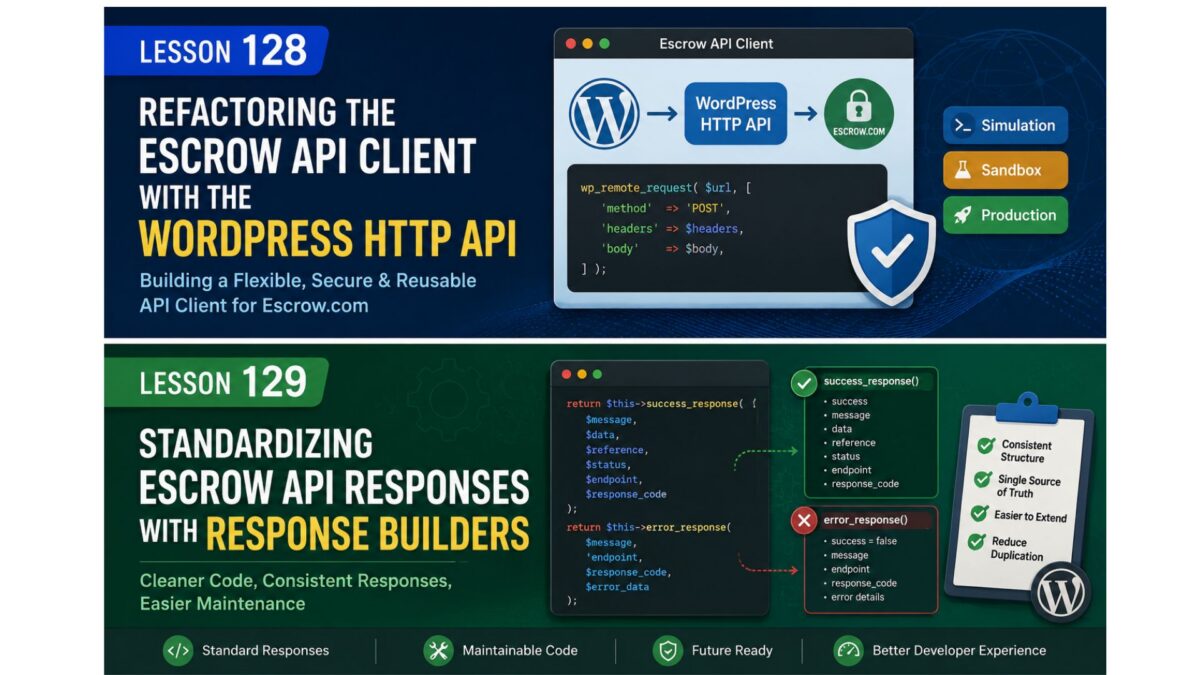
Lesson 129 – Standardizing Escrow API Responses with Response Builders


Objective

Refactor the Escrow API client to eliminate duplicated response arrays by introducing reusable response builder methods.

Instead of manually constructing arrays in every public method, the client will centralize response creation through dedicated helper methods.


Why this refactoring?

After Lesson 128, every public method returns a structure similar to:

array(
    'success'      => true,
    'message'      => '',
    'data'         => array(),
    'reference'    => '',
    'status'       => '',
    'endpoint'     => '',
    'response_code'=> 200,
);

This structure is repeated throughout the class.

Although functional, it introduces unnecessary duplication and increases maintenance effort.


Goals

By the end of this lesson we will:

  • Remove duplicated response arrays.
  • Introduce reusable helper methods.
  • Standardize success responses.
  • Standardize error responses.
  • Improve readability.
  • Reduce future maintenance.

New helper methods

Introduce two new private methods.

success_response()

Responsible for constructing successful API responses.

Example responsibilities:

  • success flag
  • message
  • data
  • reference
  • status
  • endpoint
  • response code

error_response()

Responsible for constructing error responses.

Example responsibilities:

  • success = false
  • error message
  • endpoint
  • response code
  • optional error payload

Refactoring send_request()

Instead of manually returning arrays such as:

return array(
    'success' => false,
    ...
);

the method becomes

return $this->error_response(
    ...
);

Likewise,

return $this->success_response(
    ...
);

Benefits

This provides several advantages.

Single source of truth

Every response follows exactly the same structure.


Easier maintenance

If we later decide to add:

provider
timestamp
request_id
duration

only two helper methods require updating.


Cleaner code

Large repetitive array blocks disappear.

The public methods become easier to understand because they focus on business logic instead of formatting arrays.


Preparing for future lessons

Lesson 129 also prepares the client for future functionality.

Upcoming lessons will introduce:

  • Provider synchronization
  • Escrow transaction lifecycle
  • Webhook handling
  • Audit logging
  • Retry mechanisms

Having standardized response builders greatly simplifies those additions.


Expected outcome

After completing Lesson 129:

  • Every public API method returns standardized responses.
  • Response formatting exists in one place.
  • The Escrow client becomes smaller, cleaner, and easier to extend.

Implementation roadmap

We will:

  1. Create success_response().
  2. Create error_response().
  3. Refactor send_request().
  4. Refactor simulation responses.
  5. Refactor all public API methods.
  6. Verify backward compatibility.

I think this is a natural continuation of Lesson 128. Lesson 128 established how the client communicates with external services; Lesson 129 refines how those communications are represented internally, making the codebase more maintainable before moving on to real Escrow transaction payloads and synchronization.

Lesson 128 – Refactoring the Escrow API Client with the WordPress HTTP API

As Flipnzee Auctions continues to evolve from a learning project into a production-ready WordPress plugin, it’s important to periodically pause feature development and improve the underlying architecture.

Our current Escrow API client has served its purpose well by simulating API interactions, allowing us to build and test the payment workflow without relying on external services. However, before integrating with the real Escrow.com API, the client needs to be redesigned into a reusable, maintainable networking component.

In this lesson, we’ll plan that refactoring.


Where We Stand

The current Escrow API client already provides:

  • Simulation mode for development
  • Basic transaction creation methods
  • Transaction status retrieval
  • Connection testing
  • Integration with the Escrow settings page

While functional, much of the networking logic is still tightly coupled to individual methods.

This makes future enhancements more difficult.


Current Limitations

Some of the issues with the existing implementation include:

  • API logic duplicated across multiple methods.
  • No centralized HTTP request handler.
  • Environment handling mixed with business logic.
  • Authentication generated in several places.
  • Difficult to extend for future API endpoints.
  • Response handling not fully standardized.

None of these issues prevent the plugin from working today, but addressing them now will make future development significantly easier.


Objectives of Lesson 128

The primary goal is to transform the Escrow API client into a reusable HTTP client while keeping its public interface compatible with the rest of the plugin.

By the end of this refactoring we want:

  • A cleaner architecture.
  • Better separation of responsibilities.
  • Improved maintainability.
  • Easier testing.
  • Simpler future integration with Escrow.com.

Architectural Changes

Instead of allowing every public method to perform its own networking, we’ll introduce a dedicated request layer.

The new architecture will look like this:

Public API Methods
        │
        ▼
send_request()
        │
        ▼
WordPress HTTP API
        │
        ▼
Escrow REST API

Every network request will pass through a single reusable method.


Environment Support

The refactored client will continue supporting three operating modes:

  • Simulation
  • Sandbox
  • Production

Simulation mode will remain an important development tool, allowing contributors to work on the plugin without requiring live Escrow credentials.


Authentication

Authentication will also be centralized.

Rather than constructing credentials inside individual methods, the client will generate HTTP Basic Authentication headers automatically using the settings saved within the plugin.

This keeps credential handling consistent throughout the class.


WordPress HTTP API

Instead of custom request logic, all communication will use the WordPress HTTP API.

This provides several advantages:

  • Better compatibility with WordPress hosting environments.
  • SSL handling managed by WordPress.
  • Consistent error handling.
  • Proxy support.
  • Easier debugging.

Using native WordPress APIs also keeps the plugin aligned with WordPress development best practices.


Standardized Responses

Another important objective is to ensure every public method returns a predictable structure.

Whether the request succeeds or fails, callers should receive a consistent response containing information such as:

  • Success status
  • Message
  • Provider reference
  • Transaction status
  • Response data
  • Endpoint
  • HTTP response code

This simplifies error handling throughout the rest of the plugin.


Preparing for Future Lessons

This refactoring is not about adding new user-facing features.

Instead, it creates the technical foundation for upcoming work, including:

  • Real Escrow transaction creation
  • Transaction updates
  • Provider synchronization
  • Improved error reporting
  • Webhook support
  • Production deployment

Completing this work now will make those lessons significantly cleaner.


Expected Outcome

After Lesson 128, the Escrow API client will become a reusable networking component rather than a simple simulation helper.

The rest of the plugin will continue using the same public methods, but internally those methods will rely on a much cleaner architecture built around the WordPress HTTP API.


Conclusion

Before integrating with a live payment provider, it’s worth investing time in improving the underlying design.

Refactoring the Escrow API client now will reduce technical debt, improve code quality, and establish a solid networking layer that can support future payment functionality without requiring major architectural changes.

In the next lesson, we’ll implement this new design by introducing a centralized HTTP request handler and refactoring the Escrow API client to use the WordPress HTTP API throughout.

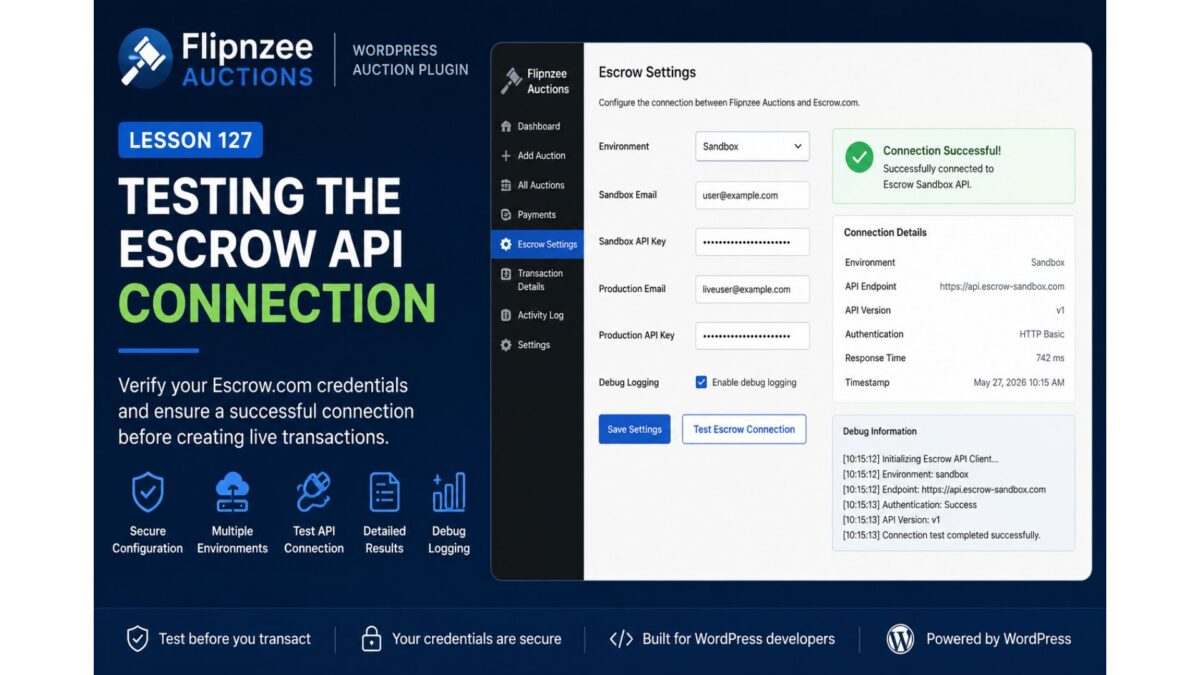
Lesson 127 — Testing the Escrow API Connection

Introduction

In the previous lesson, we implemented a dedicated Escrow Settings administration page, allowing administrators to securely configure the plugin without modifying source code. Those settings now provide the foundation for interacting with the Escrow.com API.

However, before the plugin can create transactions or manage escrow payments, it is important to verify that the supplied credentials are valid and that communication with the selected environment is functioning correctly.

In this lesson, we will implement a Test Escrow Connection feature that allows administrators to verify connectivity directly from the WordPress dashboard.


Why Test the Connection?

Many integration problems occur long before the first API request is made.

Examples include:

  • Incorrect API credentials
  • Wrong environment selected
  • Network connectivity issues
  • Invalid API endpoints
  • Authentication failures

Rather than discovering these problems during a live auction, administrators should be able to verify their configuration beforehand.


Lesson Objectives

By the end of this lesson, the plugin will:

  • Add a Test Escrow Connection button.
  • Read configuration from the Escrow Settings page.
  • Initialize the Escrow API Client.
  • Determine the selected environment.
  • Attempt a connection.
  • Display the connection result to the administrator.
  • Record diagnostic information when debug logging is enabled.

Current Architecture

The plugin currently looks like this:

Administrator
        │
        ▼
Escrow Settings Page
        │
        ▼
WordPress Options API
        │
        ▼
Escrow API Client

This lesson extends the final stage by allowing the administrator to verify that communication with Escrow.com is working.


Reading Stored Configuration

The API client should no longer rely on hard-coded values.

Instead, it should retrieve configuration from the settings saved in Lesson 126.

Typical values include:

  • Environment
  • Sandbox Email
  • Sandbox API Key
  • Production Email
  • Production API Key
  • Debug Logging

This keeps the plugin flexible and makes switching environments as simple as changing a dropdown selection.


Initializing the API Client

The Test Connection action will instantiate the existing Flipnzee_Escrow_API_Client and configure it using the stored settings.

The client should automatically determine which endpoint to use based on the selected environment.

For example:

  • Simulation
  • Sandbox
  • Production

Keeping this logic inside the API client avoids duplicating environment selection throughout the plugin.


Simulation Mode

During development, many developers may not yet have Sandbox credentials.

To support plugin development, the existing Simulation mode remains useful.

Instead of making an external HTTP request, the plugin simply returns a simulated successful response.

Example:

✓ Simulation Mode Active

No external API request was performed.

This allows developers to continue building other parts of the plugin without depending on a live service.


Sandbox Connection

When Sandbox mode is selected, the plugin should:

  1. Validate the stored credentials.
  2. Build the appropriate request.
  3. Contact the Escrow Sandbox endpoint.
  4. Capture the response.
  5. Report the outcome.

A successful response confirms that the configuration is ready for development and testing.


Production Connection

Production mode follows the same workflow but communicates with the live Escrow.com environment.

Because Production interacts with live services, administrators should verify that:

  • Correct credentials are being used.
  • The intended environment is selected.
  • Debug logging is configured appropriately.

No financial transaction should be created during the connection test.

The purpose is only to confirm connectivity and authentication.


Displaying Results

After testing the connection, the administration page should present a clear status message.

Examples include:

Successful:

✓ Connected successfully.

Environment:
Sandbox

API Version:
Available

Authentication:
Successful

Simulation:

✓ Simulation Mode Active

No remote connection required.

Failure:

Connection Failed

Reason:
Authentication failed.

Please verify your API credentials.

Providing meaningful feedback helps administrators diagnose configuration issues without consulting server logs.


Debug Logging

If Debug Logging is enabled, the plugin should record useful diagnostic information.

Examples include:

  • Environment selected
  • Endpoint used
  • Request start time
  • Response received
  • HTTP status code
  • Error messages

Sensitive information such as API keys or passwords should never be written to logs.


Error Handling

External services are not always available.

The implementation should gracefully handle situations such as:

  • Invalid credentials
  • HTTP errors
  • Timeout exceptions
  • SSL problems
  • Unexpected API responses

Administrators should receive clear messages while detailed diagnostics remain available through debug logging.


Security Considerations

The Test Connection action should follow the same security practices established in previous lessons.

This includes:

  • WordPress nonce verification
  • Administrator capability checks
  • Sanitized user input
  • Escaped output
  • No exposure of API secrets

Maintaining consistent security practices is essential when interacting with third-party services.


Expected Workflow

Administrator
      │
      ▼
Clicks Test Connection
      │
      ▼
Load Saved Settings
      │
      ▼
Initialize API Client
      │
      ▼
Select Environment
      │
      ▼
Attempt Connection
      │
      ▼
Receive Response
      │
      ▼
Display Status Message
      │
      ▼
Optional Debug Log

Files Likely to be Updated

admin/class-admin-escrow-settings.php

includes/class-escrow-api-client.php

includes/class-logger.php (if required)

The exact implementation may vary, but the objective is to keep responsibilities clearly separated while reusing the API client introduced in earlier lessons.


What You’ll Learn

This lesson introduces several practical concepts commonly found in production WordPress plugins:

  • Testing third-party API connectivity.
  • Reading configuration from the WordPress Options API.
  • Environment-aware application design.
  • Graceful error handling.
  • Diagnostic logging.
  • Secure administrator actions.
  • Integrating existing classes rather than duplicating functionality.

These patterns are applicable to many WordPress integrations beyond Escrow.com.


Conclusion

With a dedicated settings page now in place, the next logical step is to verify that the plugin can successfully communicate with the configured Escrow environment. Implementing a Test Connection feature provides administrators with immediate feedback, reduces configuration errors, and lays the groundwork for future features such as transaction creation, status synchronization, and payment management.

In the next implementation lesson, we will build the Test Escrow Connection feature and connect it to the Flipnzee_Escrow_API_Client, completing the first end-to-end interaction between the plugin and the configured Escrow environment.

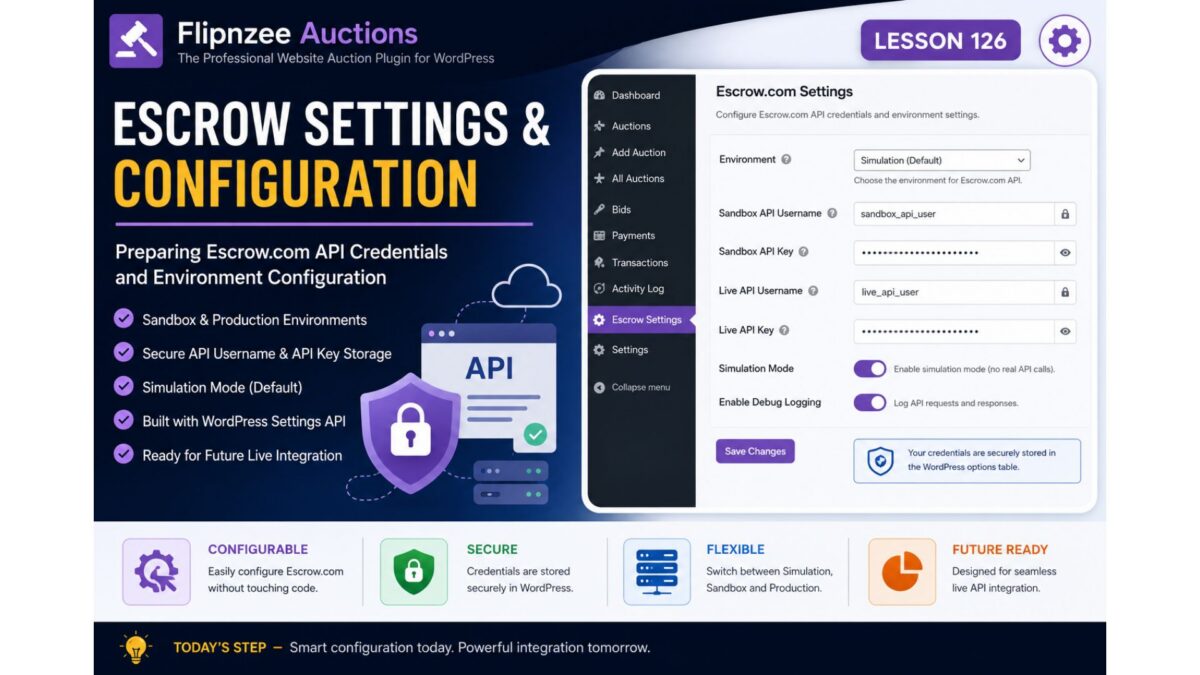
Lesson 126: Preparing Escrow.com API Credentials and Environment Configuration

Overview

In Lesson 125, Flipnzee Auctions introduced a dedicated Escrow API Client that separates API communication from the rest of the auction workflow. The client currently operates entirely in simulation mode, allowing the plugin to behave like a production system without contacting Escrow.com’s servers.

The next step is to prepare the plugin for real-world integration by introducing configurable API credentials and environment settings.

Rather than hardcoding URLs, usernames, or API keys into the source code, professional software stores these values in a secure configuration interface. This lesson lays that foundation.


Why This Lesson Matters

A production plugin should never contain credentials inside PHP files.

Instead, administrators should be able to configure:

  • Escrow Environment
  • Sandbox credentials
  • Live credentials
  • API username
  • API key
  • Enable/Disable simulation mode

This makes the plugin:

  • safer
  • easier to deploy
  • easier to migrate
  • suitable for multiple environments

Objectives

During this lesson we will:

  • create an Escrow Settings page
  • register plugin options
  • securely store credentials in WordPress options
  • allow Sandbox vs Live selection
  • update the API Client to read configuration instead of hardcoded values
  • continue operating in simulation mode by default

No live API requests will be made yet.


What Will Be Added

A new administration page:

Flipnzee Auctions
    └── Escrow Settings

It will contain fields such as:

  • Environment
Simulation
Sandbox
Production
  • Sandbox API Username
  • Sandbox API Key
  • Live API Username
  • Live API Key
  • Enable Debug Logging

Simulation Remains the Default

Even after credentials are introduced, the plugin will continue using simulation mode.

This is intentional.

The goal is to verify:

  • settings storage
  • configuration loading
  • environment switching

before sending any real HTTP requests.


Updating the API Client

Currently the API client contains values similar to:

const SANDBOX_URL = 'https://api.escrow-sandbox.com/2017-09-01';
const LIVE_URL    = 'https://api.escrow.com/2017-09-01';

After this lesson it will also retrieve:

  • username
  • API key
  • environment
  • simulation flag

from the plugin settings instead of hardcoded values.

This means future lessons can switch between Simulation, Sandbox, and Production without changing any PHP code.


Benefits

After Lesson 126 the Escrow subsystem becomes much more flexible.

Instead of editing source files, administrators will simply configure credentials through WordPress.

The API Client becomes environment-aware while remaining completely isolated from the rest of the payment workflow.

This mirrors how mature commercial plugins manage third-party integrations.


Looking Ahead

Lesson 126 prepares the configuration layer.

The next lessons will build on it:

  • Lesson 127 – Sending the First Real HTTP Request Using the WordPress HTTP API (initially to a safe endpoint or authentication check).
  • Lesson 128 – Creating Live Escrow Sandbox Transactions.
  • Lesson 129 – Synchronizing Transaction Status from Escrow.com.
  • Lesson 130 – Automatic Status Updates and Administrative Monitoring.

Conclusion

Lesson 126 moves Flipnzee Auctions another step toward production readiness by introducing configurable Escrow.com settings. Although the plugin continues to operate in simulation mode, the underlying architecture is now prepared to support Sandbox and Production environments without modifying the source code. This configuration-first approach improves security, simplifies deployment, nd provides a stable foundation for live API communication in the lessons that follow.