Lesson 125: Designing the Escrow.com Integration Architecture


Overview

With the transaction management workflow now established, the next objective is to replace the simulated Escrow provider with a production-ready integration.

Rather than treating Escrow.com as simply another payment gateway, Flipnzee Auctions will use it as the central transaction platform responsible for securely managing website sales between buyers and sellers.

This lesson focuses on designing that integration before implementing live API communication.


Why Escrow.com?

Unlike Stripe or PayPal, Escrow.com is designed for high-value transactions where assets are transferred after payment conditions have been satisfied.

Website and domain sales fit this model almost perfectly.

The buyer wants assurance that ownership will be transferred.

The seller wants assurance that payment has been secured.

Escrow.com acts as the trusted intermediary throughout that process. (escrow.com)


Current Plugin Workflow

Today the plugin works like this:

Auction Ends

↓

Transaction Created

↓

Payment Completed

↓

Ownership Transfer

↓

Transaction Closed

This is ideal for simulation, but it doesn’t yet involve Escrow.com.


Future Workflow

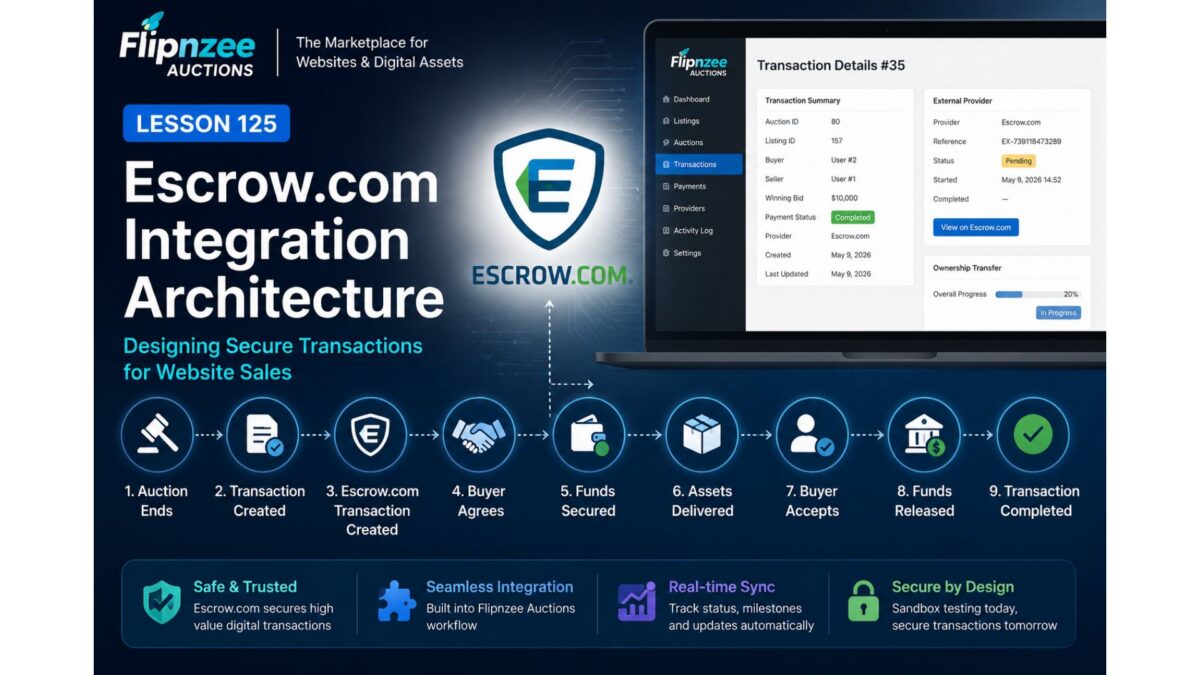
With API integration the workflow becomes:

Auction Ends

↓

Flipnzee Creates Transaction

↓

Escrow.com Transaction Created

↓

Buyer Agrees

↓

Buyer Funds Escrow

↓

Escrow Confirms Funds

↓

Seller Transfers Website

↓

Buyer Accepts Website

↓

Escrow Releases Funds

↓

Transaction Completed

The Flipnzee plugin becomes the orchestration layer, while Escrow.com manages the escrow lifecycle. (escrow.com)


Components We Will Build

The architecture will evolve as follows:

Flipnzee Auctions

│

├── Auction Manager

├── Transaction Manager

├── Payment Manager

├── External Provider Manager

│

└── Escrow Provider

        │

        ▼

Escrow API Client

        │

        ▼

Escrow.com REST API

The existing Flipnzee_Escrow_Provider becomes responsible for communicating with the live API instead of generating simulated references.


API Responsibilities

The Escrow API Client will eventually support operations such as:

  • Create Escrow transaction
  • Retrieve transaction details
  • Synchronize provider status
  • Generate agreement links
  • Monitor funding status
  • Track inspection periods
  • Detect completion
  • Detect cancellation
  • Record disputes

This logic will remain isolated from the rest of the plugin.


Mapping Plugin Data

Most of the information required by Escrow.com already exists inside Flipnzee Auctions.

FlipnzeeEscrow.com
AuctionTransaction
ListingItem
BuyerBuyer
SellerSeller
Winning BidAmount
Transaction IDReference
Ownership TransferInspection & Acceptance

Very little additional data will be required.


Website Sales as Milestone Transactions

One particularly interesting discovery is that Escrow.com recommends Milestone Transactions for services and website/domain sales involving staged delivery. This maps well to your plugin because ownership transfer already has multiple steps that can be represented as milestones rather than a single “completed” event. (escrow.com)

A future transaction could look like:

Payment Funded

↓

Website Files Delivered

↓

Database Delivered

↓

Domain Transferred

↓

Buyer Verification

↓

Escrow Releases Funds

Your existing Ownership Transfer feature already provides the beginnings of this model.


Keeping Responsibilities Separate

One design principle remains unchanged:

  • Transaction Manager manages marketplace transactions.
  • External Provider Manager stores provider records.
  • Escrow Provider communicates with Escrow.com.
  • Escrow API Client performs HTTP requests.

Each class retains a single responsibility, making the integration easier to maintain and test.


Immediate Goal

The next implementation lessons will focus on introducing a dedicated API client and configuration rather than making live requests immediately.

A sensible progression would be:

  • Lesson 126 — Build an Escrow_API_Client class (authentication, HTTP abstraction, sandbox support).
  • Lesson 127 — Add Escrow API settings (API key, email, sandbox/live mode).
  • Lesson 128 — Create live transactions from Flipnzee Auctions.
  • Lesson 129 — Synchronize transaction status from Escrow.com.
  • Lesson 130 — Handle agreement links, funding, and milestone updates.

This staged approach lets us test each layer independently before enabling real financial transactions.


One recommendation

I also noticed from your screenshot that you’re already using Escrow.com “Buy It Now” and “Make an Offer” buttons on your listings. That’s a smart transitional solution because it gives buyers a trusted path today while the plugin evolves.

When the API integration is complete, those external buttons can be replaced by plugin-driven actions:

  • Buy with Escrow
  • Make Offer
  • Proceed to Escrow

These buttons would create and manage Escrow.com transactions automatically while keeping the user inside the Flipnzee workflow until it’s time to complete the secure escrow process. That will make Flipnzee feel like a complete marketplace rather than a site that links out to Escrow.com.
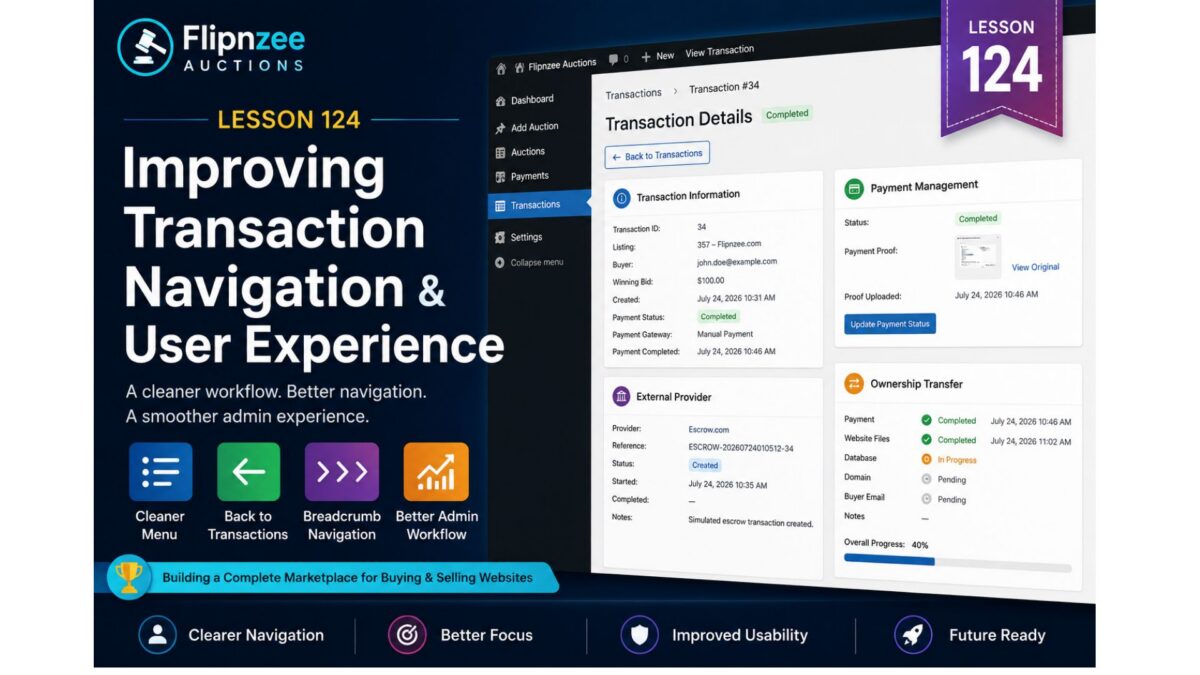
Lesson 124: Improving Transaction Navigation and User Experience


Overview

As the Flipnzee Auctions plugin has evolved, the transaction management interface has become significantly more capable. Administrators can now manage payments, monitor ownership transfers, and inspect external provider information from a single screen.

However, one aspect of the user experience can still be improved.

The Transaction Details page currently exists as a standalone administration page, even though it is only meaningful when viewing a specific transaction. This creates unnecessary clutter in the WordPress administration menu and makes navigation less intuitive.

In this lesson, we will refine the transaction management workflow by improving navigation and aligning the plugin more closely with common WordPress administration patterns.


Why Improve Navigation?

The Transaction Details screen represents a detail view, not a destination in its own right.

Administrators typically follow this workflow:

Transactions

        │

        ▼

Select Transaction

        │

        ▼

Transaction Details

        │

        ▼

Payment Management

        │

        ▼

External Provider

        │

        ▼

Ownership Transfer

The page should therefore be accessed from the Transactions list rather than appearing as a permanent menu item.


Objectives

By the end of this lesson we will:

  • Hide the Transaction Details page from the WordPress sidebar.
  • Continue allowing direct access through secure admin URLs.
  • Improve navigation between the Transactions list and individual transactions.
  • Add contextual navigation for administrators.
  • Prepare the interface for future transaction actions.

Current Navigation

Today the administrator sees:

Flipnzee Auctions

Dashboard

Add Auction

Auctions

Payments

Transactions

Transaction Details

Settings

The final item is only useful when a specific transaction has been selected.


Desired Navigation

After this lesson the administration menu becomes:

Flipnzee Auctions

Dashboard

Add Auction

Auctions

Payments

Transactions

Settings

The Transaction Details page still exists, but it becomes a hidden administrative page accessed only when needed.


Improved Workflow

Instead of manually navigating to Transaction Details, the administrator simply clicks View from the Transactions list.

The flow becomes:

Transactions

        │

        ▼

View Transaction

        │

        ▼

Transaction Details

        │

        ├── Payment

        ├── External Provider

        └── Ownership Transfer

This mirrors the user experience provided by many established WordPress plugins.


Contextual Navigation

To make navigation clearer, the Transaction Details page will also introduce contextual controls such as:

← Back to Transactions

and a simple breadcrumb:

Transactions
        >
Transaction #34

These additions help administrators understand where they are within the transaction management workflow.


Architectural Benefits

This lesson is primarily about user experience rather than backend functionality, but it still reinforces good architectural principles.

The page hierarchy becomes:

Transactions

        │

        ▼

Transaction Details

        │

        ├── Payment Management

        ├── External Provider

        └── Ownership Transfer

Each screen now has a clear responsibility.


Future Expansion

This refined navigation also prepares the interface for future transaction actions, including:

  • Refresh Provider Status
  • View Activity History
  • Retry Provider Synchronization
  • Open Escrow Dashboard
  • Generate Transaction Report
  • Archive Completed Transaction

These features will naturally belong within the Transaction Details page rather than cluttering the main Transactions list.


Benefits

Completing this lesson provides several improvements:

  • Cleaner WordPress administration menu.
  • Better navigation between list and detail views.
  • Improved administrator workflow.
  • More intuitive transaction management.
  • Better alignment with WordPress administration conventions.
  • A stronger foundation for future transaction management features.

Looking Ahead

With the transaction workflow becoming easier to navigate, future lessons can focus on enriching the transaction experience rather than reorganizing it.

Upcoming work may include:

  • Provider status synchronization.
  • Transaction activity timelines.
  • Administrator action buttons.
  • Escrow API integration.
  • Automated provider updates.
  • Transaction reporting.

By refining the navigation before introducing these capabilities, the Flipnzee Auctions plugin continues its progression from a collection of independent management pages toward a cohesive, production-ready marketplace administration system.

Lesson 123: Displaying External Provider Information in the Transaction Details Screen


Overview

In the previous lesson, we introduced persistent storage for external provider transactions. Every completed payment now creates a provider record containing the provider name, escrow reference, timestamps, status, and notes.

However, this information is only available by directly inspecting the database.

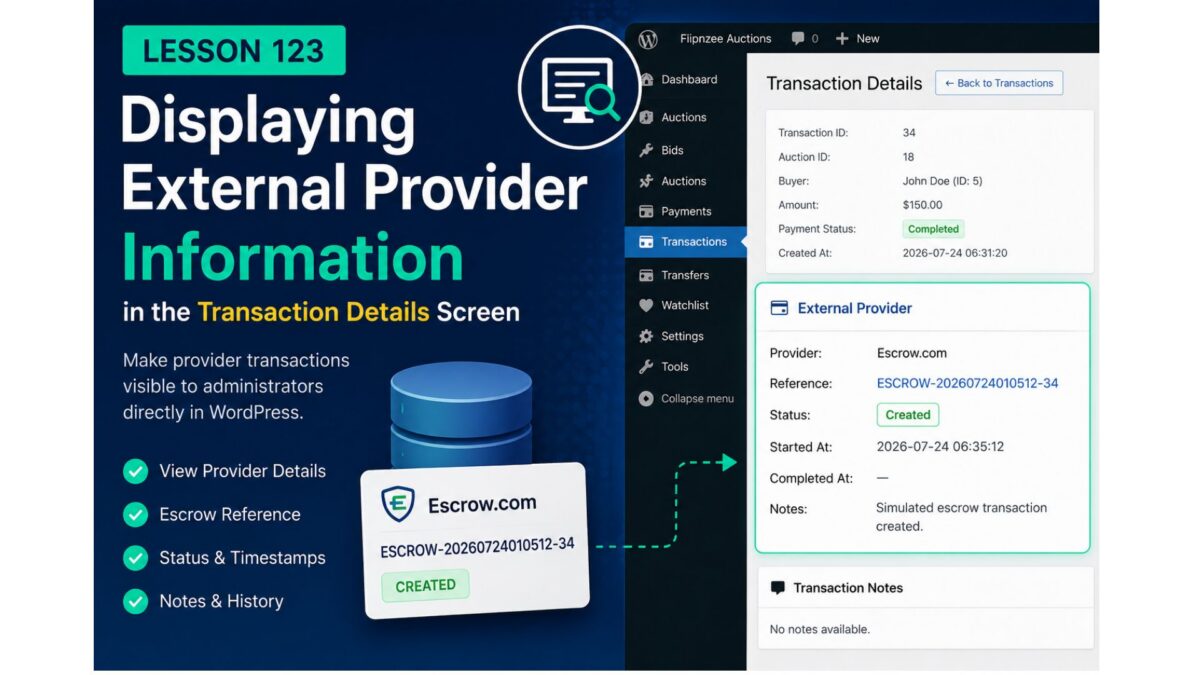
In this lesson, we’ll integrate the External Provider Manager with the WordPress administration interface so administrators can view provider information directly from the Transaction Details page.

This represents an important shift from building backend infrastructure to exposing meaningful operational information through the plugin’s user interface.


Why this lesson?

At the moment, an administrator managing a website sale has no immediate visibility into the external provider handling the transaction.

To answer questions such as:

  • Which provider is managing this payment?
  • What is the escrow reference?
  • Has the provider transaction been created?
  • What status is the provider reporting?
  • Were any notes recorded?

the administrator must manually inspect the database.

The goal of this lesson is to eliminate that requirement.


Objectives

By the end of this lesson we will:

  • Retrieve provider information using Flipnzee_External_Provider_Manager
  • Associate provider records with auction transactions
  • Display provider details inside the Transaction Details page
  • Gracefully handle transactions without a provider record
  • Lay the foundation for future provider actions and status synchronization

Planned Interface

The Transaction Details page will gain a new section similar to:

──────────────────────────────────────────
External Provider
──────────────────────────────────────────

Provider
Escrow.com

Reference
ESCROW-20260724010512-34

Status
Created

Started
24 Jul 2026 06:35

Completed
—

Notes
Simulated escrow transaction created.

If no provider record exists, the interface will instead display:

External Provider

No provider information is available for this transaction.

This ensures the interface remains informative without producing errors for historical transactions.


Architectural Improvements

Rather than querying the database directly from the admin screen, the page will use:

Flipnzee_External_Provider_Manager::get_provider_by_transaction()

This maintains a clear separation of responsibilities:

  • External Provider Manager retrieves provider data.
  • Admin Transaction Details focuses solely on presentation.
  • Escrow Provider remains responsible for provider creation.
  • Transaction Lifecycle Manager continues orchestrating the workflow.

This follows the object-oriented architecture established throughout the project.


Benefits

After completing this lesson:

  • Administrators can inspect provider information without leaving WordPress.
  • Transaction debugging becomes significantly easier.
  • Escrow references become immediately accessible.
  • Provider status is visible during transaction processing.
  • The UI becomes ready for future actions such as “Open Escrow Transaction”, “Refresh Provider Status”, or “Retry Provider Synchronization”.

What We’ll Build

The implementation will involve three primary steps:

  1. Retrieve provider information for the current transaction.
  2. Add a dedicated External Provider panel to the Transaction Details page.
  3. Display provider fields using WordPress admin styling and proper escaping.

No database changes are required, as the persistence layer introduced in Lesson 122 already provides everything needed.


Looking Ahead

Displaying provider information is only the first step toward a fully integrated provider management system.

Future lessons will build on this interface by allowing administrators to:

  • Synchronize provider status with external services.
  • View provider history.
  • Launch provider-specific actions.
  • Integrate with the real Escrow.com API.
  • Support multiple external payment and escrow providers through the same abstraction layer.

With provider information now visible inside the administration interface, the Flipnzee Auctions plugin moves one step closer to providing a complete transaction management experience for buying and selling websites.

Lesson 122: Persisting Escrow Provider Information for Future API Integration

In the previous lesson, Flipnzee Auctions introduced its first Escrow Provider Engine. Payment completion automatically created a simulated escrow transaction and generated a unique escrow reference.

While that proved the event-driven architecture worked, the generated reference only existed during execution. Once the request finished, there was no permanent record of the escrow transaction.

In this lesson, the plugin takes the next step by designing a persistent storage strategy for external providers.


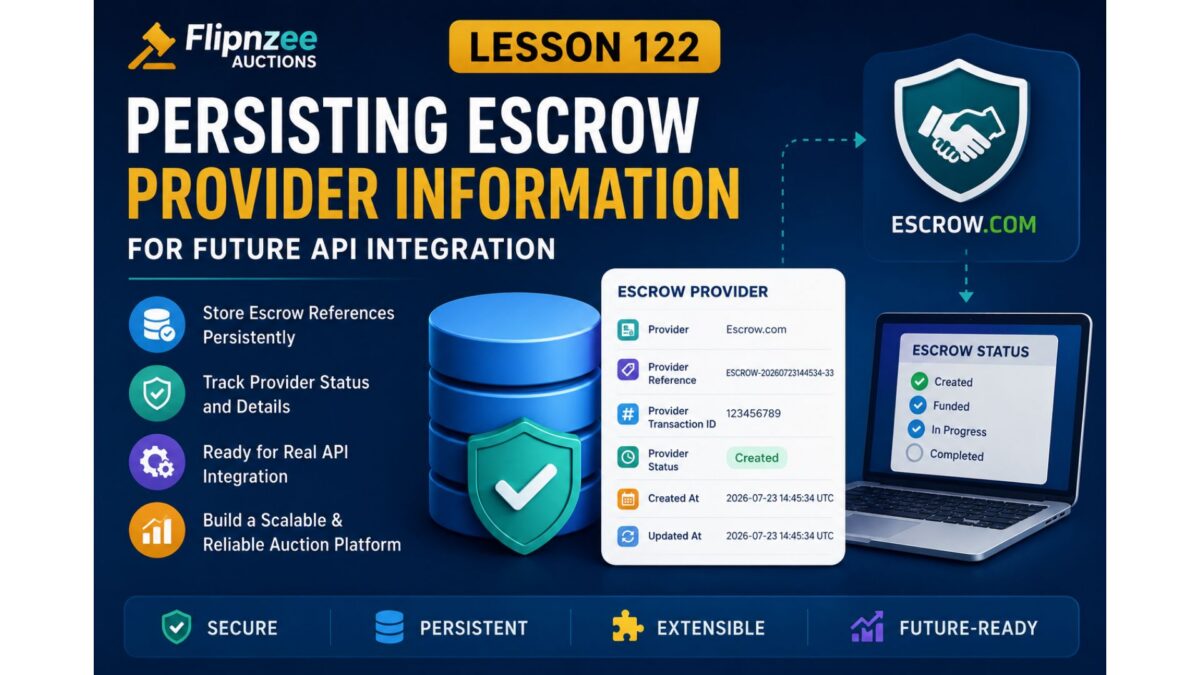
Why Store Escrow Information?

Real-world escrow services return much more than a reference number.

An external provider may return:

  • Provider transaction ID
  • Escrow reference
  • Current escrow status
  • Creation timestamp
  • Last update timestamp
  • API response details
  • Provider-specific metadata

Without storing this information, the plugin would have no way to:

  • check escrow progress
  • synchronize status
  • reopen existing escrow transactions
  • display escrow details inside the admin panel

Persistence is therefore essential.


Objectives

By the end of this lesson the plugin architecture will support:

  • persistent escrow references
  • provider-specific transaction identifiers
  • provider status tracking
  • future API synchronization
  • support for multiple external providers

Thinking Beyond Escrow.com

Although Flipnzee Auctions is initially designed around Escrow.com, the architecture should never assume only one provider exists.

Instead of storing fields like:

escrow_reference
escrow_status

the plugin adopts more generic terminology.

For example:

provider
provider_reference
provider_transaction_id
provider_status

This makes the database independent of any specific vendor.

Future providers could include:

  • Escrow.com
  • custom enterprise escrow
  • regional payment escrow services
  • internal manual escrow workflows

Extending the Transaction Model

The transaction lifecycle now grows beyond internal auction information.

Auction
        │
        ▼
Transaction
        │
        ▼
External Provider
        │
        ▼
Escrow Workflow

Instead of treating external services as an afterthought, they become a first-class component of the transaction architecture.


Recommended Provider Fields

A professional transaction record may eventually include:

FieldPurpose
providerName of the provider
provider_referenceHuman-readable reference
provider_transaction_idExternal system ID
provider_statusCurrent provider status
provider_created_atProvider creation time
provider_updated_atLast synchronization
provider_responseRaw API response (optional)

Not every provider will use every field, but the structure remains flexible.


Keeping Responsibilities Separate

The Transaction Manager remains responsible for:

  • internal auction transactions
  • payment information
  • ownership workflow

The Escrow Provider becomes responsible for:

  • creating provider records
  • communicating with external APIs
  • interpreting provider responses
  • tracking provider-specific statuses

This clear separation keeps the plugin easier to maintain.


Future Synchronization

Creating an escrow transaction is only the beginning.

Eventually the plugin should support periodic synchronization.

Escrow Created
        │
        ▼
Store Provider Details
        │
        ▼
Scheduled Status Check
        │
        ▼
Retrieve Latest Status
        │
        ▼
Update Local Database

This enables administrators to see real-time escrow progress without manually checking the provider website.


Benefits of Persistent Storage

Persisting provider information allows administrators to:

  • search escrow transactions
  • troubleshoot failed payments
  • view escrow references
  • synchronize provider status
  • audit completed transactions
  • generate financial reports

These capabilities become increasingly valuable as transaction volume grows.


Preparing for API Integration

Most modern payment and escrow APIs follow a similar lifecycle:

  1. Create transaction
  2. Receive external reference
  3. Store the response
  4. Poll or receive status updates
  5. Finalize the transaction

Because Flipnzee Auctions now separates provider logic from transaction logic, integrating a live API becomes a matter of implementing provider-specific communication rather than rewriting the auction system.


Architectural Benefits

This lesson strengthens several important software engineering principles:

  • Separation of concerns
  • Single responsibility
  • Provider abstraction
  • Extensibility
  • Maintainability

By treating external providers as independent services, the plugin becomes easier to evolve as new payment technologies emerge.


What We Accomplished

In this lesson we:

  • designed a persistent model for external provider information
  • separated provider data from transaction data
  • prepared the database for long-term escrow tracking
  • laid the groundwork for status synchronization
  • ensured future provider integrations remain modular
  • continued evolving Flipnzee Auctions into a production-ready architecture

Looking Ahead

With provider persistence planned, the next stage is to build the synchronization layer that keeps local transaction records aligned with external escrow providers.

This will allow Flipnzee Auctions to automatically monitor escrow progress, refresh statuses, and provide administrators with an accurate, real-time view of every transaction without relying on manual updates.

Lesson 121: Designing the Escrow Provider Engine

Series: Building Flipnzee Auctions – From Prototype to Production
Lesson: 121


Introduction

One of the primary objectives of Flipnzee Auctions has always been to facilitate the sale of valuable digital assets such as websites, domains, SaaS applications, WordPress plugins, and online businesses.

Unlike physical products, transferring ownership of a digital business involves several coordinated steps:

  • Buyer submits payment
  • Seller receives confirmation
  • Website files are transferred
  • Database is migrated
  • Domain ownership changes
  • Buyer verifies successful delivery

For transactions involving significant amounts of money, both parties require confidence that the process is secure and fair.

This is precisely the problem that professional escrow services solve.

In this lesson, Flipnzee Auctions begins integrating with external escrow providers by introducing a dedicated Escrow Provider Engine.

Rather than hardcoding support for a single provider, the plugin will establish a generic architecture capable of supporting multiple external transaction providers in the future.


Why Not Hardcode Escrow?

A common mistake during plugin development is embedding provider-specific code directly into payment or transaction managers.

For example:

if provider == Escrow.com
    ...
else if provider == Stripe
    ...
else if provider == PayPal
    ...

As additional providers are added, the code becomes increasingly difficult to maintain.

Instead, Flipnzee Auctions will treat every provider as an interchangeable component.


The Provider Architecture

The plugin already includes an External Provider Manager introduced in previous lessons.

Lesson 121 builds upon that foundation.

The architecture becomes:

Auction

↓

Transaction

↓

Transaction State

↓

External Provider Manager

↓

Escrow Provider

↓

Escrow.com

Instead of communicating directly with Escrow.com, the transaction lifecycle communicates with the External Provider Manager.

The manager then delegates responsibility to the appropriate provider.


Responsibilities of the Escrow Provider

The Escrow Provider will eventually manage tasks such as:

  • Creating an escrow transaction
  • Recording provider references
  • Tracking escrow status
  • Updating transaction states
  • Storing escrow URLs
  • Synchronizing payment progress
  • Logging provider activity

The provider should never contain business rules unrelated to Escrow.

Its responsibility is simply translating Flipnzee Auctions’ workflow into the language understood by the external provider.


Separation of Responsibilities

Each component now has a clear responsibility.

Transaction Lifecycle Manager

Determines when an external provider should be invoked.


Transaction State Manager

Tracks the current lifecycle stage.


External Provider Manager

Determines which provider should handle the transaction.


Escrow Provider

Knows how to communicate with Escrow.com.


This separation dramatically improves maintainability.


Future Providers

Although Lesson 121 focuses on Escrow, the architecture is intentionally generic.

Future providers may include:

  • Escrow.com
  • Stripe
  • PayPal
  • Wise
  • Payoneer
  • Coinbase Commerce
  • Binance Pay
  • Manual Bank Transfer

Every provider should expose a consistent interface while implementing its own communication logic.


Benefits of a Provider Engine

By introducing a provider engine instead of provider-specific code, Flipnzee Auctions gains several advantages:

  • Cleaner architecture
  • Easier testing
  • Reduced coupling
  • Better extensibility
  • Simpler maintenance
  • Multiple payment workflows
  • Enterprise-ready integrations

Perhaps most importantly, administrators will eventually be able to switch providers without modifying the underlying transaction workflow.


Preparing for Real Escrow Integration

Initially, the provider engine will simulate interactions with Escrow.com.

This allows the plugin architecture to mature before introducing:

  • Authentication
  • API credentials
  • Webhooks
  • Callback verification
  • Live transaction synchronization
  • Production error handling

Once these foundations are complete, replacing simulated responses with real API calls becomes significantly easier.


Looking Ahead

In the implementation lesson, we will begin constructing the Escrow Provider Engine by:

  • creating a dedicated Escrow Provider class
  • registering it with the External Provider Manager
  • simulating escrow transaction creation
  • storing provider references
  • connecting provider creation to transaction lifecycle events
  • preparing the plugin for future API communication

This marks the beginning of one of the most significant functional additions to Flipnzee Auctions: secure third-party transaction management through professional escrow services.

Lesson 120: Designing a Transaction State Machine for Flipnzee Auctions

Series: Building Flipnzee Auctions – From Prototype to Production
Lesson: 120


Introduction

Over the previous lessons, the Flipnzee Auctions plugin has gained several important capabilities. It can create auctions, record winning bids, manage transactions, process payments, and guide administrators through ownership transfers.

Although these features work together, they currently rely on individual events rather than a centralized workflow. A payment completion triggers one action, an ownership transfer triggers another, and each component makes decisions independently.

As the plugin grows to support Escrow.com, additional payment providers, automated notifications, and buyer dashboards, this approach becomes increasingly difficult to maintain.

In this lesson, the plugin takes another significant architectural step by introducing a Transaction State Machine.

Instead of asking:

What event just happened?

the system will begin asking:

What is the current state of this transaction?

This subtle change lays the foundation for a much more scalable and maintainable architecture.


Why a State Machine?

Consider the complete journey of a website sale.

Auction Won

↓

Payment Pending

↓

Payment Completed

↓

Website Files Transfer

↓

Database Transfer

↓

Domain Transfer

↓

Buyer Verification

↓

Completed

Previously, these stages existed only as business knowledge in the administrator’s mind.

The plugin itself had no single place describing where a transaction currently stood.

A transaction state machine changes that.

Every transaction now progresses through a defined sequence of states that represent its lifecycle.


Problems Without States

Without a state machine, different parts of the plugin ask different questions.

The payment manager asks:

Has payment completed?

The transfer manager asks:

Which transfer steps are finished?

The notification system asks:

Which email should I send?

The Escrow integration will eventually ask:

Should Escrow.com be created now?

Each component ends up making its own assumptions.

Eventually those assumptions become inconsistent.


A Better Architecture

Instead of every component deciding independently, every component will consult the same source of truth.

Transaction

↓

Current State

↓

Business Logic

↓

Actions

Examples:

payment_pending

↓

Display payment instructions


payment_completed

↓

Create ownership transfer


database_transfer

↓

Show migration progress


completed

↓

Archive transaction


State vs Event

This distinction is extremely important.

An event describes something that happened.

Payment Completed

A state describes where the transaction is now.

Payment Verified

Events are temporary.

States persist.

Events trigger transitions between states.


Initial Transaction States

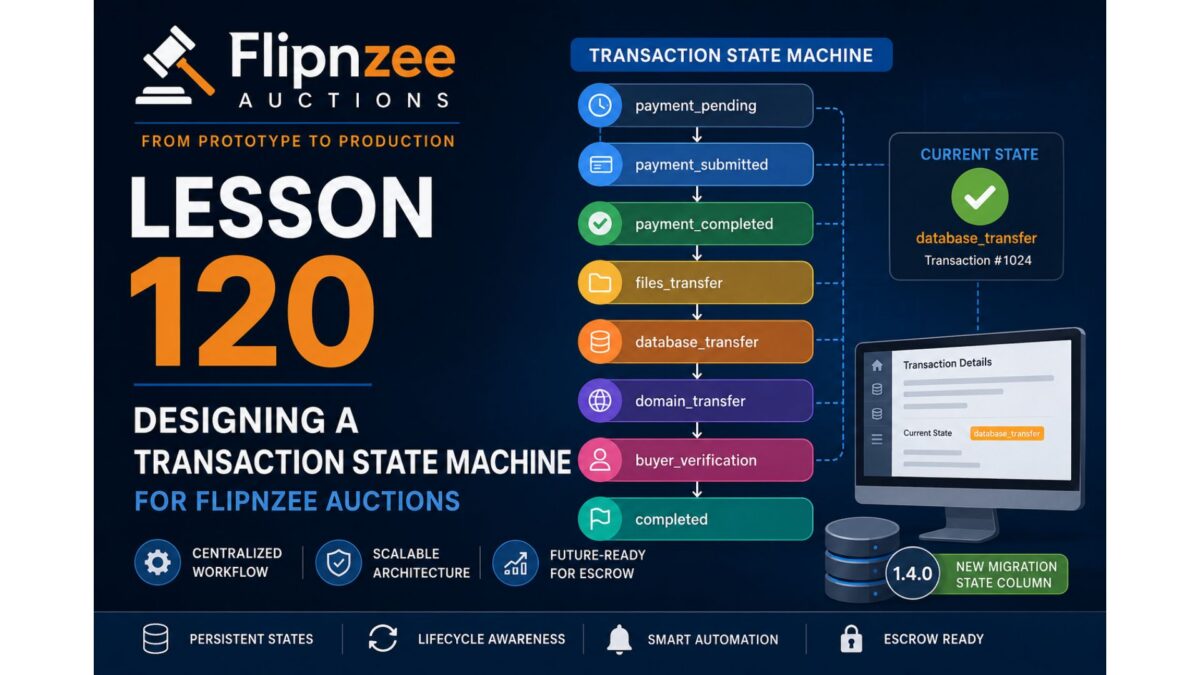
The first version of the state machine introduces the following lifecycle.

payment_pending

↓

payment_submitted

↓

payment_completed

↓

files_transfer

↓

database_transfer

↓

domain_transfer

↓

buyer_verification

↓

completed

Additional states such as:

  • cancelled
  • refunded
  • disputed
  • escrow_pending

can be added later without redesigning the plugin.


Centralizing State Definitions

Rather than scattering strings throughout dozens of PHP files, Lesson 120 introduces a dedicated class responsible for transaction states.

For example:

Flipnzee_Transaction_State_Manager::PAYMENT_PENDING

Flipnzee_Transaction_State_Manager::PAYMENT_COMPLETED

Flipnzee_Transaction_State_Manager::COMPLETED

This provides:

  • one authoritative location
  • fewer typing mistakes
  • easier refactoring
  • future localization support

Preparing for Escrow

One of the main goals of this refactoring project is preparing Flipnzee Auctions for external providers such as Escrow.com.

Escrow workflows are inherently state-based.

For example:

Auction Won

↓

Escrow Created

↓

Buyer Funded Escrow

↓

Seller Delivered Website

↓

Buyer Accepted

↓

Escrow Released

Rather than hardcoding Escrow logic into payment pages, the provider will simply observe state transitions.

That is only possible because the plugin now has a formal transaction state machine.


Benefits

By the end of this lesson, Flipnzee Auctions will gain:

  • centralized transaction states
  • reusable state labels
  • helper methods
  • lifecycle awareness
  • cleaner business logic
  • stronger preparation for Escrow integration

Most importantly, the plugin will move away from isolated procedural actions toward a genuine workflow engine.


Coming Next

In the implementation lesson, the plugin will:

  • create a Transaction State Manager
  • define state constants
  • centralize state labels
  • provide helper methods
  • introduce version 1.4.0 database migration
  • prepare persistent transaction states
  • connect the Lifecycle Manager to the new architecture

The result will be a much more maintainable transaction workflow that future lessons can build upon.


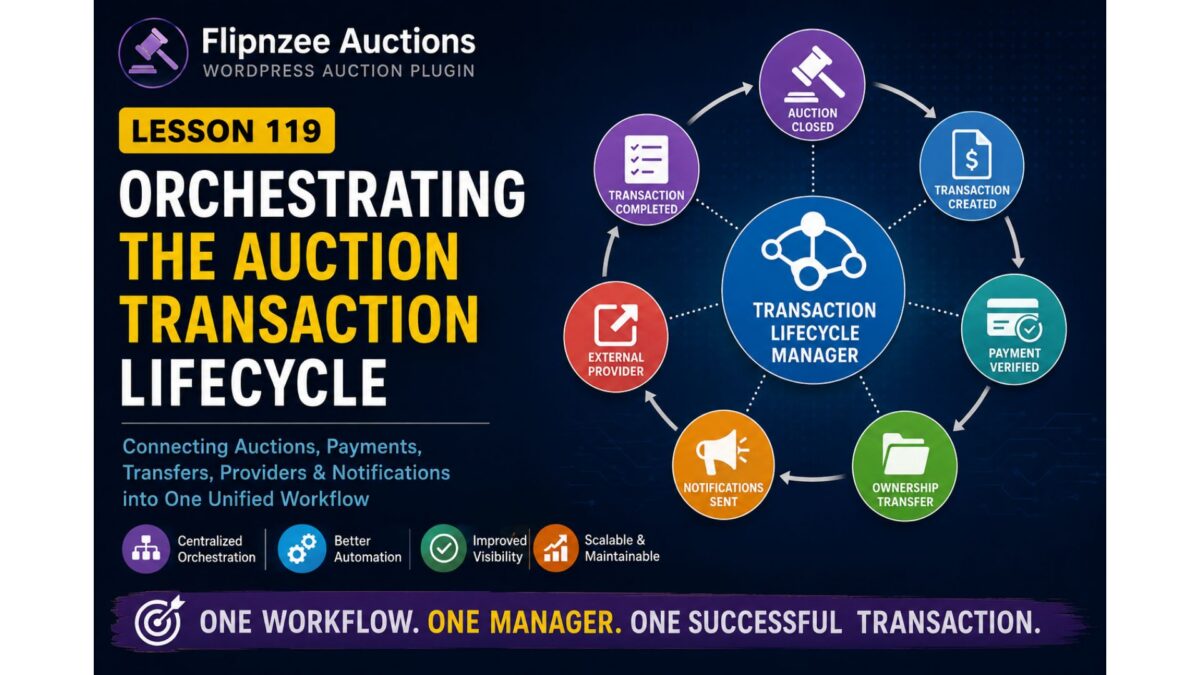
Lesson 119: Orchestrating the Auction Transaction Lifecycle


Objective

Build a central Transaction Lifecycle Manager that coordinates the various managers responsible for an auction after it closes.


Why This Lesson?

Currently, several managers know about parts of the workflow:

Auction Manager
Payment Manager
Transaction Manager
Transfer Manager
External Provider Manager
Activity Log
Notification Manager

Each performs its own task.

However, there is no single class responsible for the overall business process.

This means workflow logic is currently scattered across multiple classes.


Current Flow

Auction Ends
      │
      ▼
Winner Determined
      │
      ▼
Transaction Created
      │
      ▼
Payment Submitted
      │
      ▼
Payment Verified
      │
      ▼
Ownership Transfer
      │
      ▼
Transaction Completed

Every step currently triggers another manually.


Proposed Architecture

Introduce a new class:

Flipnzee_Transaction_Lifecycle_Manager

Its responsibility is orchestration—not storage.

Think of it as the project manager of the plugin.


Responsibilities

The Lifecycle Manager will coordinate:

Auction Closed
        │
        ▼
Create Transaction
        │
        ▼
Notify Winner
        │
        ▼
Wait For Payment
        │
        ▼
Verify Payment
        │
        ▼
Create Transfer Record
        │
        ▼
Notify Seller
        │
        ▼
Ownership Transfer
        │
        ▼
Complete Transaction
        │
        ▼
Notify Buyer

Notice that it doesn’t replace the other managers.

It simply tells them when to perform their work.


New Responsibilities

The Lifecycle Manager may call methods such as:

Transaction_Manager::create()

Payment_Manager::create()

Transfer_Manager::create_transfer()

Notification_Manager::send()

Activity_Log::log()

External_Provider_Manager::create_provider()

Each manager remains focused on its own domain.


Benefits

Instead of this:

Auction Manager
     │
     ├── calls Payment
     ├── calls Transfer
     ├── calls Activity Log
     ├── calls Notifications

we move to:

Auction Manager
        │
        ▼
Lifecycle Manager
        │
        ├── Transaction
        ├── Payment
        ├── Transfer
        ├── Activity Log
        ├── Notifications
        └── External Provider

This greatly reduces coupling.


Design Principle

This lesson introduces an important software engineering principle:

Managers should perform work. Coordinators should orchestrate work.

The Lifecycle Manager is a coordinator.

The other managers remain specialists.


Future Expansion

Once this class exists, adding features becomes much easier.

For example:

Escrow.com

↓

Lifecycle Manager

↓

Transfer Manager

or

Stripe Webhook

↓

Lifecycle Manager

↓

Payment Verified

↓

Transfer Manager

No existing managers need major changes.


What We’ll Build

During Lesson 119 we’ll implement:

  • Flipnzee_Transaction_Lifecycle_Manager
  • Lifecycle orchestration methods
  • Central workflow entry points
  • Manager-to-manager coordination
  • Cleaner separation of responsibilities
  • Improved maintainability for future integrations

Learning Objectives

By the end of Lesson 119, readers will understand:

  • The difference between coordination and business logic
  • Why orchestration classes are useful in large plugins
  • How to reduce coupling between components
  • How to design a scalable workflow architecture for complex WordPress plugins

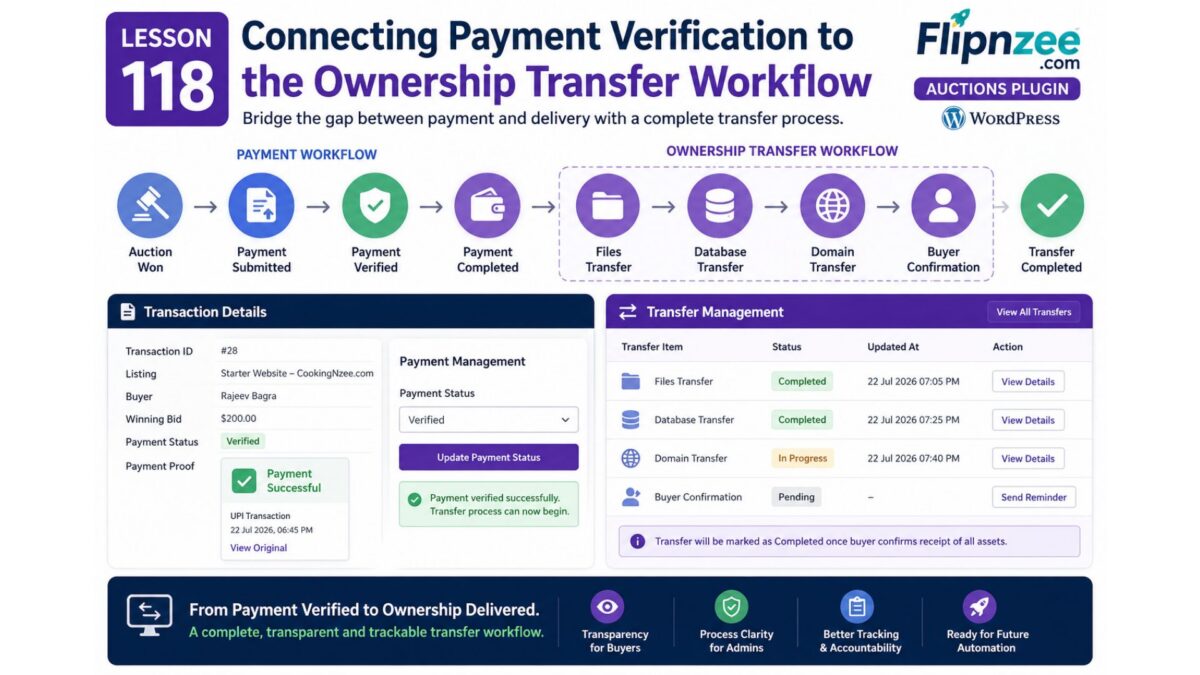
Lesson 118: Connecting Payment Verification to the Ownership Transfer Workflow

In the previous lesson, the Flipnzee Auctions plugin introduced a complete payment verification workflow. Buyers can upload payment proof, administrators can review the submission, and the payment progresses through a structured lifecycle from Pending to Submitted, Verified, and finally Completed.

Although this completes the payment process, a website sale does not end when payment is received. The actual ownership transfer still needs to take place.

This lesson focuses on bridging the gap between payment management and website transfer management.


Why a Transfer Workflow?

Unlike physical products, websites consist of multiple digital assets that must be transferred individually.

A successful website sale may include:

  • Website files
  • Database
  • Domain name
  • Hosting credentials
  • Administrator accounts
  • Email accounts
  • Documentation

Completing payment simply authorizes the beginning of this process.


Current Workflow

After Lesson 117, the payment lifecycle looks like this:

Auction Won
      │
      ▼
Pending
      │
      ▼
Payment Submitted
      │
      ▼
Payment Verified
      │
      ▼
Payment Completed

While technically correct, this skips one of the most important business processes.


Introducing Ownership Transfer

Instead of ending the transaction after payment, we’ll introduce a dedicated transfer phase.

The revised workflow becomes:

Auction Won
      │
      ▼
Payment Submitted
      │
      ▼
Payment Verified
      │
      ▼
Ownership Transfer
      │
      ▼
Transaction Completed

This separates financial completion from operational completion.


The Transfer Dashboard

The Flipnzee Auctions plugin already includes a Transfer Management page.

Rather than creating another administration interface, this page will evolve into the central dashboard for tracking every ownership transfer.

Each transfer will contain multiple independent tasks.


Transfer Components

Instead of a single “Transferred” flag, the workflow will track individual stages.

For example:

Files
───────────────
Pending
In Progress
Completed
Database
────────────────
Pending
In Progress
Completed
Domain
───────────────
Pending
In Progress
Completed
Buyer Confirmation
──────────────────────
Pending
Completed

Tracking each component independently provides administrators with much greater visibility into the progress of a transaction.


Why Separate Payment and Transfer?

Although payment and ownership transfer are related, they represent different business processes.

Payment answers one question:

Has the buyer paid?

Transfer answers another:

Has the buyer actually received ownership of the website?

Separating these workflows reduces ambiguity and more accurately reflects how website acquisitions are managed.


Triggering a Transfer

Once an administrator verifies a payment, the plugin can automatically prepare the transfer process.

The simplified workflow becomes:

Payment Verified
        │
        ▼
Transfer Record Ready
        │
        ▼
Files
Database
Domain
Buyer Confirmation

Administrators no longer need to manually create transfer records.


Administrative Workflow

The administrator’s responsibilities now expand beyond payment approval.

A typical transaction becomes:

Review Payment Proof
        │
        ▼
Verify Payment
        │
        ▼
Transfer Website Files
        │
        ▼
Transfer Database
        │
        ▼
Transfer Domain
        │
        ▼
Buyer Confirms Receipt
        │
        ▼
Complete Transaction

This mirrors the practical workflow followed by agencies and marketplace operators when transferring ownership of digital assets.


Buyer Experience

The buyer also benefits from a more transparent process.

Instead of seeing only:

Payment Completed

they can eventually follow the transfer itself.

Example:

Payment Verified

Website Transfer

✓ Files

✓ Database

✓ Domain

Waiting for Buyer Confirmation

This reduces uncertainty and provides confidence that the transaction is progressing.


Foundation for Future Automation

Designing transfer management as its own workflow opens the door to future enhancements.

Potential additions include:

  • Automatic transfer record creation
  • Progress tracking
  • Email notifications
  • Buyer acknowledgements
  • Transfer checklists
  • Internal notes
  • Document uploads
  • Completion certificates

Because the transfer system is independent of payment processing, these features can be added without changing the payment workflow.


Lessons Learned

Real-world business processes often consist of multiple related workflows rather than a single sequence of events.

By separating payment verification from ownership transfer, the Flipnzee Auctions plugin becomes easier to maintain while better representing the lifecycle of a website sale.

This modular approach also keeps the codebase extensible as additional transfer features are introduced.


Conclusion

Lesson 118 marks the transition from payment management to operational ownership transfer. Instead of treating payment as the end of the transaction, the plugin now recognizes it as the beginning of the website handover process.

With a dedicated Transfer Management workflow already in place, the next lessons will focus on automating transfer creation, tracking progress across multiple transfer stages, and providing administrators and buyers with a clearer view of each transaction from payment verification through final ownership transfer.

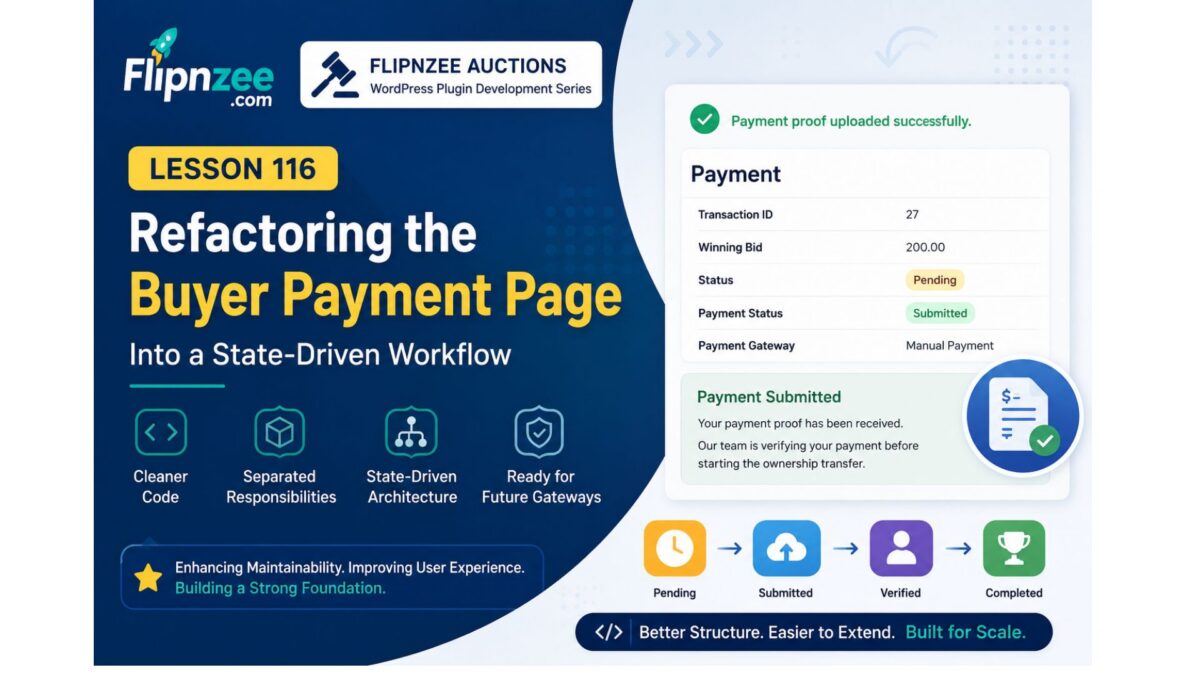
Lesson 116 – Designing a State-Driven Buyer Payment Workflow


Introduction

In the previous lesson, the Buy Now workflow became fully functional. When a buyer purchases a website, the auction is closed, a winner is declared, a transaction is created, an external provider record is initialized, and a transfer record is prepared. Finally, the buyer is redirected to the payment page.

Although the backend workflow is now complete, the payment page itself still behaves like a prototype. Every payment option is displayed, buttons remain visible regardless of transaction status, and the interface does not yet guide buyers through the payment process.

In this lesson, the focus shifts from backend infrastructure to user experience. Rather than treating the payment page as a static form, it will evolve into a workflow that changes based on the current state of the transaction.


Why this lesson is important

A payment page should answer one simple question:

“What should the buyer do next?”

Instead of always displaying the same controls, the interface should respond to the transaction’s current status.

For example:

  • Before payment, buyers should choose a payment method.
  • After payment submission, buyers should see confirmation instead of payment options.
  • Once payment is verified, they should see transfer progress.
  • After transfer completion, they should receive ownership confirmation.

This creates a guided experience instead of presenting every possible action at once.


Current Workflow

Listing
        │
        ▼
Place Bid / Buy Now
        │
        ▼
Auction Closed
        │
        ▼
Winner Determined
        │
        ▼
Transaction Created
        │
        ▼
External Provider Created
        │
        ▼
Transfer Record Created
        │
        ▼
Buyer Payment Page

The backend now reaches the payment page successfully.


Proposed Workflow

Instead of one static page:

Pending Payment
        │
        ▼
Select Payment Method
        │
        ▼
Manual Payment Instructions
        │
        ▼
Upload Proof
        │
        ▼
Payment Submitted
        │
        ▼
Admin Verification
        │
        ▼
Payment Verified
        │
        ▼
Transfer Started
        │
        ▼
Ownership Delivered

Each state presents only the actions that are relevant at that moment.


Planned UI States

State 1 — Pending Payment

Display:

  • Transaction summary
  • Winning bid
  • Payment methods
  • Continue to Payment

State 2 — Manual Payment

Display:

  • Bank details
  • Payment instructions
  • Upload payment proof

Hide all unnecessary payment options.


State 3 — Payment Submitted

Display:

✔ Payment Submitted

Our team has received your payment proof.

Status:
Awaiting Verification

No payment buttons should remain visible.


State 4 — Payment Verified

Display:

✔ Payment Verified

Preparing ownership transfer...

Show transfer progress instead of payment controls.


State 5 — Transfer Complete

Display:

✔ Congratulations!

The website has been transferred successfully.

Offer download links or ownership instructions if applicable.


Why State-Driven Interfaces Matter

Large marketplaces rarely present every possible action simultaneously.

Instead, the interface adapts according to the transaction.

Benefits include:

  • Less confusion
  • Cleaner interface
  • Better user guidance
  • Reduced accidental actions
  • Easier maintenance
  • Simpler future payment gateway integration

Lesson Objectives

By the end of this lesson, readers will understand:

  • Why payment pages should be workflow-driven
  • How transaction status determines the interface
  • How payment and transfer states relate
  • Why state-driven design scales better as new gateways are added

Looking Ahead

The backend payment architecture is now in place. Future lessons will focus on polishing the buyer experience by hiding irrelevant controls, presenting clear payment instructions, and progressively revealing the next action as the transaction advances through its lifecycle.


Previous Lesson: Lesson 115 – Completing the Buy Now Transaction Pipeline and External Provider Integration

Next Lesson: Lesson 116 Implementation – Building a State-Driven Buyer Payment Interface


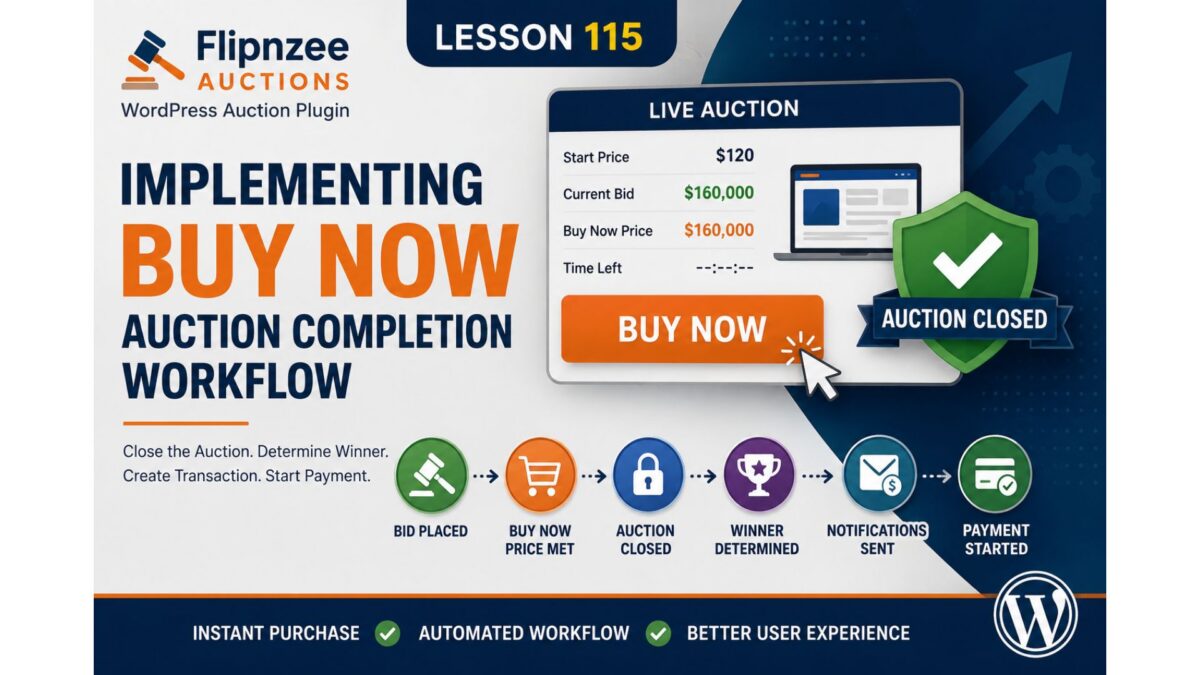
Lesson 115: Buy Now Auction Completion Workflow (Planning)

Introduction

Until now, the Flipnzee Auctions plugin has treated every bid in the same way. Regardless of the bid amount, the auction remains active until its scheduled end time, where a scheduled process later determines the winner.

However, this behavior is not how a traditional Buy Now feature is expected to work.

When a bidder agrees to pay the Buy Now price, they are effectively accepting the seller’s asking price. At that point there should be no reason to keep the auction running or allow additional bids.

This lesson focuses on transforming Buy Now from a simple display price into an action that immediately completes the auction.


Current Problem

Suppose an auction has:

  • Start Price: $120
  • Current Bid: $1,200
  • Buy Now Price: $5,000

If a buyer places a bid of exactly $5,000, the plugin currently:

  • accepts the bid,
  • updates the current bid,
  • leaves the auction active,
  • allows other users to continue bidding.

This defeats the purpose of having a Buy Now option.


Expected Behaviour

The expected workflow should become:

Buyer submits Buy Now bid
        │
        ▼
Bid is accepted
        │
        ▼
Buy Now condition detected
        │
        ▼
Auction closes immediately
        │
        ▼
Winner determined
        │
        ▼
Winner notifications sent
        │
        ▼
Transaction created
        │
        ▼
Buyer redirected to payment

Instead of waiting until the scheduled auction end, the auction lifecycle should complete immediately.


Why This Matters

This change transforms the auction from a passive bidding system into an actual marketplace transaction.

It establishes a complete workflow where:

  • bidding,
  • winner determination,
  • transaction creation,
  • payment,
  • ownership transfer

all become part of a single automated process.

Without this behaviour, Buy Now is merely another bid amount rather than an instant purchase mechanism.


Design Considerations

Rather than scattering Buy Now logic throughout the plugin, we will introduce a clear sequence of responsibilities.

The bid handler should remain responsible for accepting bids.

Once a valid bid has been recorded, it should ask one simple question:

“Did this bid satisfy the Buy Now price?”

If the answer is yes, the auction manager will immediately close the auction and the existing winner determination workflow can continue unchanged.

This approach reuses the infrastructure already built in previous lessons instead of creating an entirely separate purchase system.


Objectives

By the end of this lesson we will:

  • Detect when a submitted bid reaches the Buy Now price.
  • Close the auction immediately.
  • Determine the winning bidder instantly.
  • Reuse the existing notification system.
  • Automatically create the buyer transaction.
  • Launch the payment workflow without waiting for auction expiry.

What We’ll Build

At the end of this lesson, the auction lifecycle will look like this:

Auction Created
        │
        ▼
Buyer Places Bid
        │
        ▼
Buy Now Price Reached
        │
        ▼
Auction Closed Immediately
        │
        ▼
Winner Determined
        │
        ▼
Notifications Sent
        │
        ▼
Transaction Created
        │
        ▼
Buyer Payment Page

This is one of the most important milestones in the Flipnzee Auctions project, as it connects bidding with the complete post-auction purchase workflow.