
Lesson 93 Implementation: AJAX-Powered Watchlist Functionality

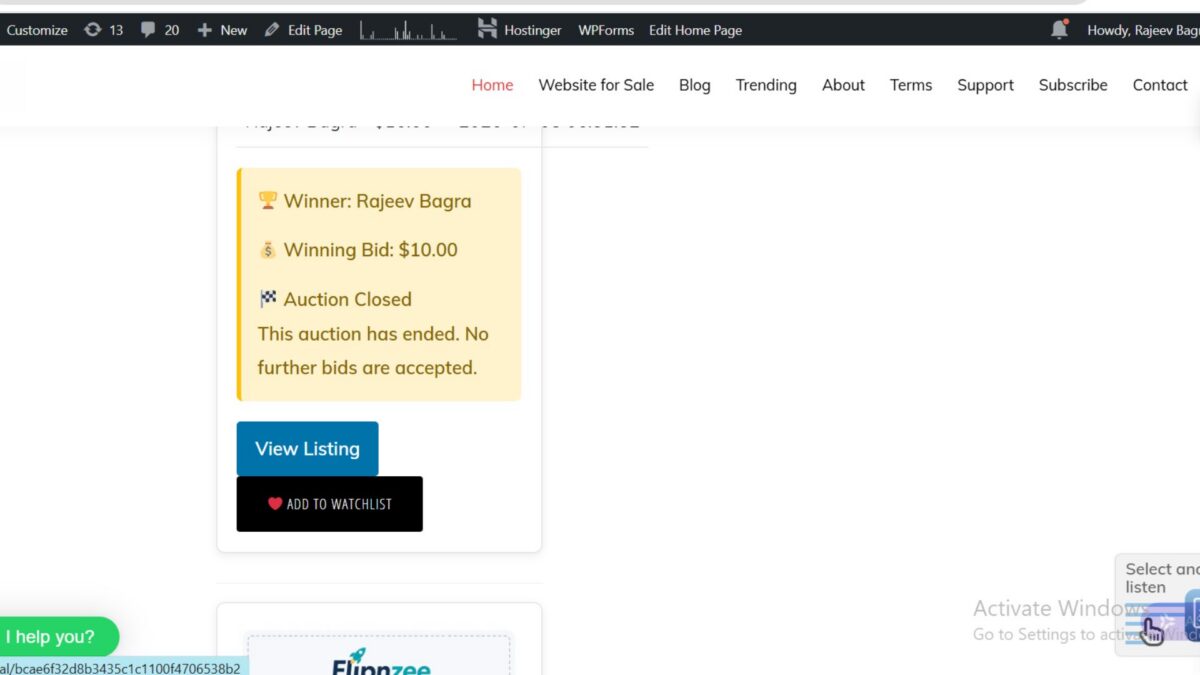
Introduction
In the previous lesson, we designed the foundation of the Watchlist system by creating the database manager and rendering the Watchlist button. In this lesson, we focused on bringing the feature to life by implementing AJAX communication between the frontend and backend. Users can now add auction listings to their personal watchlist without reloading the page, making the bidding experience smoother and more interactive.
Although we encountered a few debugging challenges during development, each issue helped us better understand the interaction between JavaScript, WordPress AJAX, and our database layer.
Objective
Implement a working AJAX-based Watchlist system that:
- Displays an “Add to Watchlist” button.
- Sends AJAX requests securely using WordPress nonces.
- Processes requests in PHP.
- Stores watchlist entries in the database.
- Prevents duplicate watchlist entries.
- Lays the foundation for future Watchlist enhancements.
Files Modified
flipnzee-auctions.php

includes/
    class-watchlist-manager.php
    class-watchlist-ajax.php

assets/js/
    watchlist.js
Step 1 – Loading the Watchlist JavaScript
The first task was loading a dedicated JavaScript file for the Watchlist feature.
wp_enqueue_script(
    'flipnzee-watchlist',
    FLIPNZEE_AUCTION_URL . 'assets/js/watchlist.js',
    array( 'jquery' ),
    FLIPNZEE_AUCTION_VERSION,
    true
);

wp_localize_script(
    'flipnzee-watchlist',
    'flipnzeeWatchlist',
    array(
        'ajaxUrl' => admin_url( 'admin-ajax.php' ),
        'nonce'   => wp_create_nonce( 'flipnzee_watchlist_nonce' ),
    )
);
This provides JavaScript with:
- AJAX endpoint
- Security nonce
Step 2 – Building the Watchlist JavaScript
A new JavaScript file was created.
assets/js/watchlist.js
Initially, we verified that the script was loading correctly.
console.log('Flipnzee Watchlist JS Loaded');
Once confirmed, click handling was added.
$(document).on(
    'click',
    '.flipnzee-watchlist-button',
    function (e) {

        e.preventDefault();

        const button = $(this);
        const auctionId = button.data('auction-id');

        console.log('Clicked auction:', auctionId);

    }
);
Step 3 – Sending AJAX Requests
The click handler was expanded to send AJAX requests to WordPress.
$.post(
    flipnzeeWatchlist.ajaxUrl,
    {
        action: 'flipnzee_add_to_watchlist',
        auction_id: auctionId,
        nonce: flipnzeeWatchlist.nonce
    }
);
This sends:
- auction ID
- nonce
- AJAX action
without reloading the page.
Step 4 – Creating the AJAX Handler
A dedicated AJAX controller was created.
includes/class-watchlist-ajax.php
AJAX actions were registered.
add_action(
    'wp_ajax_flipnzee_add_to_watchlist',
    array(
        __CLASS__,
        'add_to_watchlist'
    )
);
Step 5 – Connecting AJAX with the Watchlist Manager
The AJAX controller delegates all database work to the Watchlist Manager.
$result = Flipnzee_Watchlist_Manager::add_to_watchlist(
    $auction_id,
    $user_id
);
This separation keeps responsibilities clear:
- AJAX Controller → request handling
- Watchlist Manager → database operations
Step 6 – Rendering the Watchlist Button
The Watchlist Manager renders the frontend button.
<button
    type="button"
    class="flipnzee-watchlist-button"
    data-auction-id="<?php echo esc_attr( $auction_id ); ?>">
    ❤ Add to Watchlist
</button>
The button embeds the auction ID using a data attribute, allowing JavaScript to identify the selected auction.
Step 7 – Database Integration
The Watchlist Manager inserts new records.
self::$wpdb->insert(
    self::$table,
    array(
        'auction_id' => absint( $auction_id ),
        'user_id'    => absint( $user_id ),
        'created_at' => current_time( 'mysql' ),
    ),
    array(
        '%d',
        '%d',
        '%s',
    )
);
Duplicate entries are prevented by checking:
if ( self::is_in_watchlist(
    $auction_id,
    $user_id
) ) {
    return false;
}
Debugging Journey
This lesson involved significant debugging.
Script Loading
Initially the JavaScript file was not executing.
Using Chrome DevTools we confirmed:
- Script loading
- Console output
- AJAX requests
Button Detection
The Watchlist button initially did not appear.
After tracing the rendering logic, we successfully integrated:
Flipnzee_Watchlist_Manager::render_button();
AJAX Communication
Network Inspector confirmed requests reaching:
admin-ajax.php
Payload included:
action
auction_id
nonce
Database Verification
Using phpMyAdmin we confirmed:
wp_flipnzee_watchlist
was successfully populated.
Example:
| auction_id | user_id |
|---|---|
| 222 | 2 |
| 357 | 2 |
This confirmed:
- successful inserts
- duplicate prevention
- proper database connectivity
AJAX Response Analysis
An interesting discovery was that the response:
Unable to add to watchlist.
was not always a database error.
In many cases it simply indicated that the selected auction was already present in the user’s watchlist.
This insight will guide improvements in future lessons by distinguishing duplicate entries from genuine database failures.
Testing Performed
The following tests were completed successfully:
- Plugin activated successfully.
- Watchlist table detected.
- JavaScript loaded correctly.
- Button rendered successfully.
- Click events detected.
- AJAX requests reached WordPress.
- Nonce validation passed.
- Auction ID transmitted correctly.
- User ID detected correctly.
- Watchlist entries stored in database.
- Duplicate entries prevented.
Challenges Faced
Several valuable debugging sessions helped strengthen the implementation.
Challenges included:
- JavaScript not initially loading.
- Locating the correct place to render the Watchlist button.
- Confirming AJAX endpoint registration.
- Verifying nonce handling.
- Investigating AJAX responses.
- Inspecting Network requests.
- Validating database inserts using phpMyAdmin.
Each challenge improved our understanding of WordPress AJAX architecture and reinforced a modular plugin design.
Lessons Learned
During this lesson I learned:
- How to enqueue and localize frontend JavaScript.
- How WordPress AJAX requests flow from JavaScript to PHP.
- How to register secure AJAX actions.
- How to organize plugin logic using dedicated manager classes.
- How to prevent duplicate database entries.
- How to debug AJAX using Chrome DevTools.
- How to verify backend operations directly in phpMyAdmin.
- The importance of separating business logic from AJAX controllers.
Current Status
The Watchlist feature now includes:
- ✔ Watchlist database table
- ✔ Watchlist Manager
- ✔ AJAX Controller
- ✔ Frontend JavaScript
- ✔ Secure nonce validation
- ✔ Database insertion
- ✔ Duplicate protection
- ✔ Watchlist button rendering
- ✔ AJAX communication pipeline
The foundation is now complete and ready for user interface improvements.
Download Source Code
Download the starting version of the plugin before the lesson:
Download the completed version after this lesson:
Next Lesson Preview
In Lesson 94, we will enhance the Watchlist user experience by implementing:
- Toggle Watchlist button (Add ↔ Remove)
- Dynamic button text updates
- Instant UI feedback after AJAX requests
- Remove from Watchlist functionality
- Improved success and error messaging
- Watchlist state detection on page load
This will transform the Watchlist from a functional backend feature into a polished, user-friendly experience.