Lesson 110: Identifying Responsibilities in the Flipnzee Auctions Bootstrap


Series: Building Flipnzee Auctions → Plugin Engineering
Lesson: 110
Difficulty: Beginner to Intermediate
Prerequisites: Lessons 108–109
Code Changes: None (Architecture Review)


Introduction

In Lessons 108 and 109, we learned what a plugin bootstrap is and why professional developers review existing code before making changes.

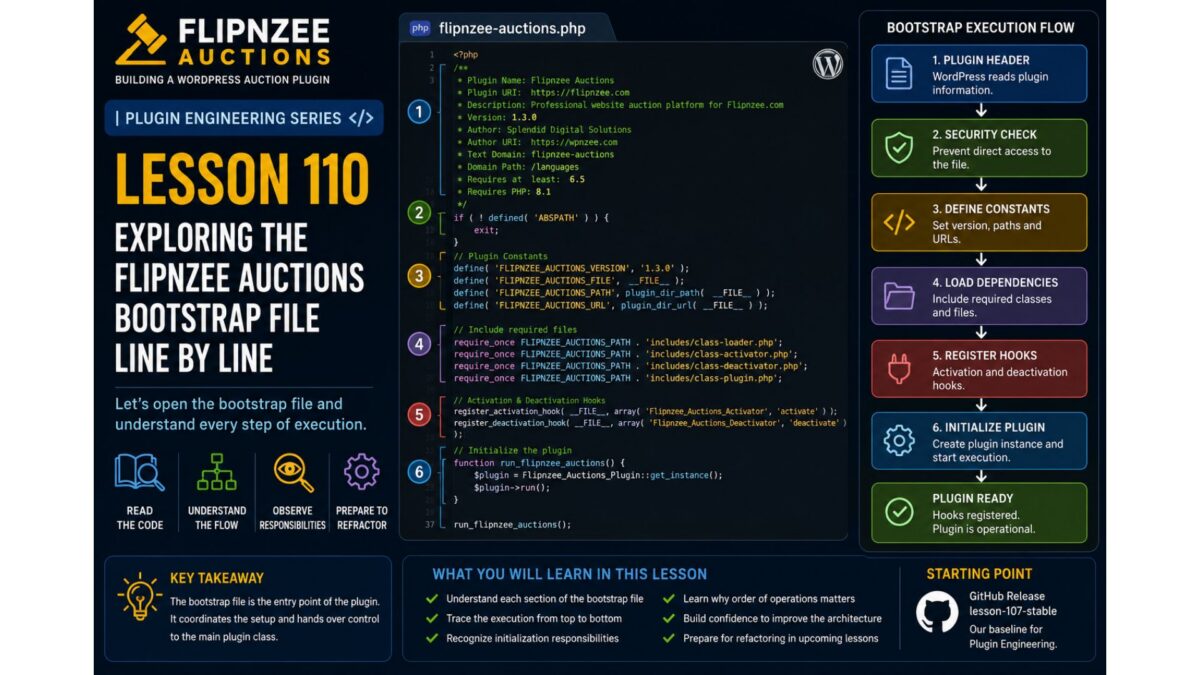
Now it’s time to examine the actual flipnzee-auctions.php file from the Lesson 107 Stable release. Unlike many tutorials that use simplified examples, this lesson is based on the real bootstrap powering Flipnzee Auctions.
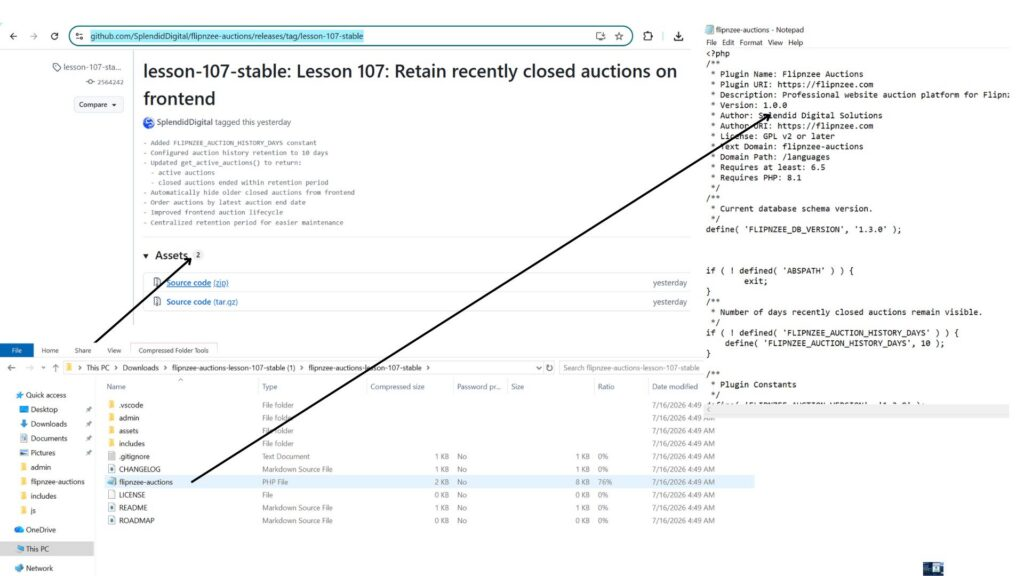
Our goal is not to refactor the code. Instead, we will identify the different responsibilities contained within the bootstrap and understand why each one exists. By the end of this lesson, you’ll begin seeing the bootstrap not as a long PHP file, but as the central coordinator that connects WordPress with every major component of the plugin.


Learning Objectives

By the end of this lesson, you will be able to:

  • Identify the major responsibilities handled by the plugin bootstrap.
  • Understand why bootstrap files naturally grow as plugins evolve.
  • Recognize how WordPress uses hooks to communicate with plugins.
  • Explain why loading classes, registering hooks, and initializing components are separate responsibilities.
  • Prepare for future refactoring by first understanding the existing architecture.

Why Focus on Responsibilities?

Imagine walking into a manufacturing plant for the first time.

Before examining individual machines, you first identify the departments:

  • Reception
  • Manufacturing
  • Quality Control
  • Packaging
  • Shipping

Only after understanding those departments do you begin studying the machines inside each one.

Professional software engineers approach large codebases the same way.

Instead of immediately reading every line of code, they first identify the major responsibilities.

That is exactly what we’ll do with the Flipnzee Auctions bootstrap.


The Bootstrap at a Glance

After reviewing the file, we can divide its responsibilities into the following sections.

Plugin Header
        │
Security Check
        │
Plugin Constants
        │
Load Core Classes
        │
Initialize Notifications
        │
Plugin Activation
        │
Plugin Deactivation
        │
Register WordPress Hooks
        │
Load Frontend Assets
        │
AJAX Localization
        │
Instantiate Core Objects
        │
Load Admin Assets

Even without reading every line, this diagram tells us something important:

The bootstrap does far more than simply “start the plugin.”

It acts as the coordinator for nearly every subsystem inside Flipnzee Auctions.


Section 1 – Plugin Header

The bootstrap begins with the standard WordPress plugin header.

It contains information such as:

  • Plugin Name
  • Version
  • Description
  • Author
  • Text Domain
  • Minimum WordPress Version
  • Minimum PHP Version

Although this appears to be nothing more than a PHP comment, WordPress reads this information to display the plugin on the Plugins screen and determine compatibility requirements.


Section 2 – Security

Immediately after the header, the bootstrap protects itself from direct access.

if ( ! defined( 'ABSPATH' ) ) {
    exit;
}

Why does this exist?

Every plugin file lives inside the web server.

Without this check, someone could attempt to execute the file directly through a browser.

By verifying that ABSPATH exists, the plugin ensures it is only executed through WordPress.


Section 3 – Plugin Constants

Next, the plugin defines several constants.

Examples include:

  • FLIPNZEE_DB_VERSION
  • FLIPNZEE_AUCTION_VERSION
  • FLIPNZEE_AUCTION_PATH
  • FLIPNZEE_AUCTION_URL
  • FLIPNZEE_AUCTION_HISTORY_DAYS

These values act as shared configuration used throughout the plugin. Rather than repeating version numbers or file paths in multiple locations, the plugin defines them once and reuses them everywhere.


Section 4 – Loading Classes

The largest portion of the bootstrap is responsible for loading the PHP classes that power the plugin.

Among them are:

  • Database
  • Database Migration
  • Auction Manager
  • Bid Manager
  • Payment Manager
  • Activity Log
  • Transaction Manager
  • Watchlist Manager
  • Buyer Dashboard
  • Notification Manager
  • Transfer Manager

…along with numerous administrative classes.

Why does this exist?

Before WordPress can execute any plugin functionality, PHP must know where those classes are located.

The bootstrap acts like a librarian—it gathers every required class before the plugin begins working.

Notice that some files are loaded after checking file_exists(), while others are included directly with require_once. This difference is an architectural observation that we’ll revisit in a future Plugin Engineering lesson.


Section 5 – Notification Initialization

After loading the notification manager class, the bootstrap immediately calls:

Flipnzee_Notification_Manager::init();

Unlike many other classes that are instantiated later using the new keyword, this class exposes a static init() method.

Why does this exist?

The notification manager needs to perform startup tasks as soon as it becomes available, such as registering its own hooks or preparing notification services.

This also introduces an interesting engineering question:

Why do some classes use new, while others use a static init() method?

We’ll explore different initialization patterns later in this series.


Section 6 – Activation and Deactivation

The bootstrap also contains the plugin’s activation and deactivation functions.

The activation function:

  • checks the stored database version,
  • creates database tables for new installations,
  • performs database migrations during upgrades,
  • and contains several debug log statements that were helpful during development.

The deactivation function removes the scheduled maintenance event before the plugin is disabled.

One interesting observation is that the activation hook is registered, while the deactivation function currently exists without a corresponding register_deactivation_hook() call in this file. We’ll revisit this during our engineering review rather than changing it immediately.


Section 7 – Registering WordPress Hooks

One of the bootstrap’s most important responsibilities is connecting Flipnzee Auctions to WordPress.

For example, the plugin registers an activation hook:

register_activation_hook(
    __FILE__,
    'flipnzee_auction_activate'
);

It also registers actions for:

  • scheduled maintenance,
  • frontend asset loading,
  • transaction updates,
  • payment status updates,
  • and admin asset loading.

Why are hooks important?

WordPress is an event-driven system.

Instead of constantly checking whether something has happened, the plugin simply tells WordPress:

“When this event occurs, call my function.”

This keeps the plugin efficient and allows WordPress to control the execution flow.


Section 8 – Frontend Assets

The bootstrap also loads the plugin’s frontend resources.

These include:

  • the main frontend stylesheet,
  • the auction countdown JavaScript,
  • the watchlist JavaScript,
  • and localized AJAX data containing the AJAX endpoint and security nonce.

Why doesn’t the plugin simply print <script> tags?

WordPress provides the enqueue system so plugins can:

  • avoid duplicate loading,
  • manage script dependencies,
  • support cache busting through version numbers,
  • and remain compatible with themes and other plugins.

The localized AJAX data also allows JavaScript to communicate with WordPress securely without hardcoding URLs.


Section 9 – Instantiating Core Objects

Near the end of the bootstrap, several objects are created.

Examples include:

  • Flipnzee_Shortcodes
  • Flipnzee_Transaction_Manager
  • Flipnzee_Watchlist_Ajax
  • Flipnzee_Buyer_Dashboard

Why are these objects created here?

Creating these objects allows their constructors to register hooks, initialize services, or prepare functionality required while WordPress is running.

Notice the contrast with the earlier Flipnzee_Notification_Manager::init() call. Different initialization strategies are being used, and understanding those differences will be an important part of our Plugin Engineering journey.


Engineering Observations

Professional engineers learn to observe before they modify.

While reviewing the bootstrap, we noticed several architectural characteristics:

  • The bootstrap coordinates many different responsibilities.
  • Most class loading is grouped together.
  • Multiple initialization patterns are used.
  • Different file-loading styles appear throughout the bootstrap.
  • Some debugging statements remain from earlier development.
  • One file is loaded more than once.

These observations are not criticisms—they simply reflect how the plugin evolved over many lessons.

Understanding them is the first step toward thoughtful refactoring.


Testing

No code has been modified.

Therefore:

  • Plugin activation should behave exactly as before.
  • Frontend functionality should remain unchanged.
  • Admin functionality should remain unchanged.

This lesson focuses entirely on understanding the existing architecture.


Git

No Git commit is required because no source code was modified.


Key Takeaways

In this lesson, we shifted our perspective from reading PHP line by line to understanding the architecture of the Flipnzee Auctions bootstrap.

We discovered that the bootstrap is responsible for:

  • protecting the plugin,
  • defining shared configuration,
  • loading the application’s classes,
  • initializing core components,
  • registering WordPress hooks,
  • loading frontend resources,
  • and starting the plugin.

Most importantly, we learned that effective Plugin Engineering begins with understanding. Before we refactor code, we must first understand why it exists and what responsibility it serves.


Looking Ahead

In Lesson 111, we’ll evaluate the bootstrap using the Single Responsibility Principle (SRP). We’ll examine whether each responsibility belongs in the bootstrap or whether some can eventually be delegated to dedicated classes, laying the groundwork for our first architectural refactoring.
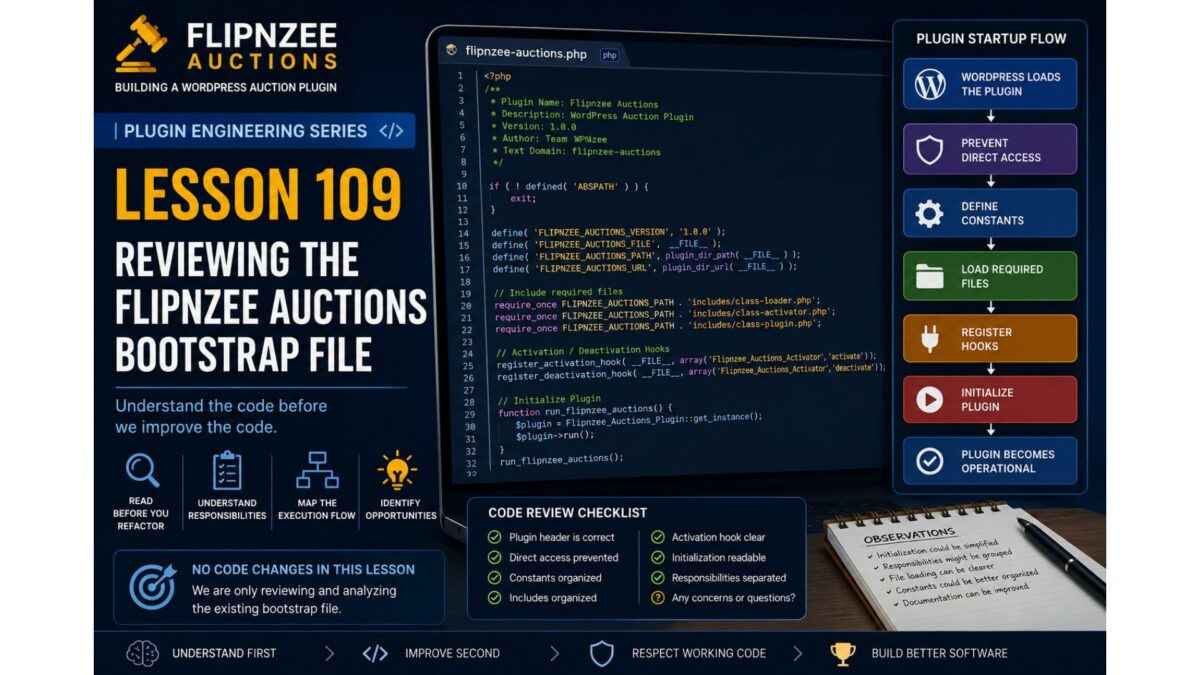
Lesson 109: Reviewing the Flipnzee Auctions Bootstrap File

Series: Building Flipnzee Auctions → Plugin Engineering
Lesson: 109
Difficulty: Beginner to Intermediate
Prerequisites: Lesson 108 – Understanding the Plugin Bootstrap and Execution Flow
Code Changes: None (Analysis & Code Review)


Introduction

In Lesson 108, we learned how WordPress loads plugins and why understanding execution flow is the first step toward professional software engineering.

In this lesson, we finally open the Flipnzee Auctions bootstrap file—the file that WordPress executes whenever the plugin is loaded.

Our goal is not to change anything yet.

Instead, we will carefully study what the bootstrap currently does, identify its responsibilities, and decide whether each responsibility belongs there.

Professional developers spend a significant amount of time reading code before modifying it. That habit reduces bugs and results in better architectural decisions.


Learning Objectives

By the end of this lesson, you will understand:

  • What the Flipnzee Auctions bootstrap file does.
  • Why WordPress starts execution from this file.
  • Which responsibilities belong inside a bootstrap.
  • Which responsibilities should eventually move elsewhere.
  • How to review existing code without immediately refactoring it.

Why Review Existing Code First?

Many beginner developers immediately start rewriting code whenever they think they see an improvement.

Experienced developers do something different.

They ask questions like:

  • Why was this written?
  • Does it already work correctly?
  • Is there hidden functionality?
  • Will changing this break something else?
  • Can this responsibility be better organized?

Only after answering these questions do they begin making changes.

Our objective is understanding, not criticism.


What Is the Bootstrap File?

The bootstrap file is the plugin’s entry point.

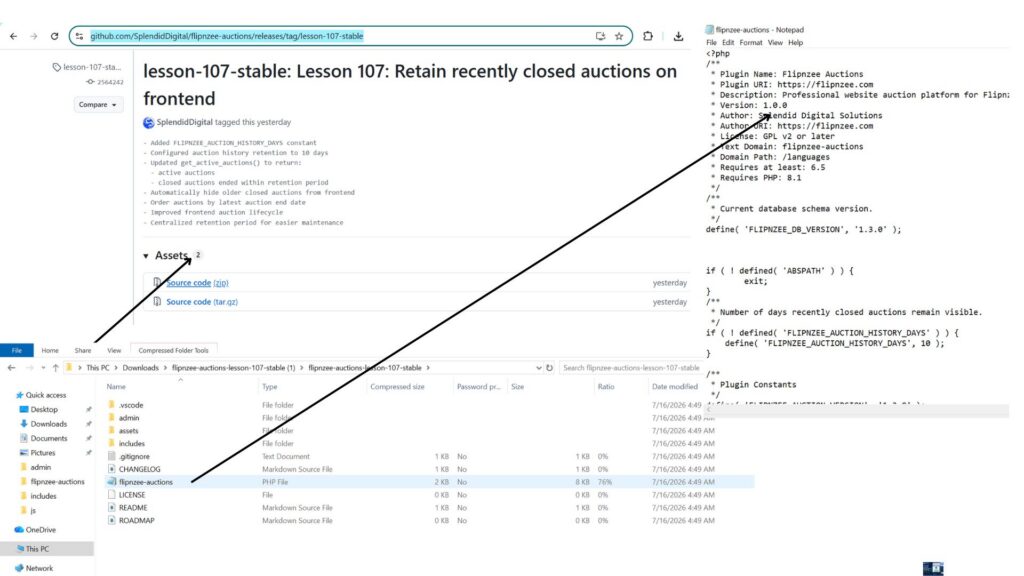
For Flipnzee Auctions, it is:

flipnzee-auctions.php
Figure 1. Starting Point for the Plugin Engineering Series
GitHub Release
lesson-107-stable
Starting Point for Plugin Engineering

Every request begins here.

Think of it as the reception desk of a company.

Visitors arrive here first.

The receptionist doesn’t perform accounting, legal work, or engineering.

Instead, the receptionist directs each visitor to the correct department.

A good bootstrap behaves the same way.

It coordinates.

It does not perform business logic.


Typical Responsibilities of a Bootstrap

A clean WordPress bootstrap usually performs responsibilities such as:

  • Plugin metadata
  • Prevent direct access
  • Define constants
  • Load required files
  • Register activation hook
  • Register deactivation hook
  • Load translations
  • Initialize the plugin

Notice what is missing.

A bootstrap should not:

  • Process bids
  • Create transactions
  • Query auctions
  • Render frontend HTML
  • Execute payment logic
  • Perform transfer workflows

Those belong elsewhere.


Reviewing the Flipnzee Auctions Bootstrap

As we examine our bootstrap file, ask yourself the following questions.

1. Does it have a single responsibility?

Is it primarily responsible for starting the plugin?

Or is it doing too much?


2. Is the execution flow easy to follow?

Can another developer understand the startup sequence within a few minutes?

Or must they jump between many unrelated sections?


3. Are constants grouped together?

Constants should be easy to find.

Examples include:

  • Version
  • Plugin path
  • Plugin URL
  • Asset paths

These values are typically defined early because many other classes depend on them.


4. Are dependencies loaded clearly?

Does the bootstrap make it obvious:

  • which files are required,
  • why they are required,
  • and in what order?

A predictable loading sequence makes debugging much easier.


5. Does it initialize one central plugin class?

A common professional pattern looks like this:

Bootstrap
        │
        ▼
Main Plugin Class
        │
        ▼
Services
        │
        ▼
Features

Instead of creating dozens of objects directly inside the bootstrap, one central class coordinates the rest of the plugin.

We’ll evaluate whether Flipnzee Auctions already follows this pattern or whether it can be improved.


Understanding the Current Startup Sequence

Although every plugin is different, the startup sequence generally looks like this:

WordPress loads plugin
        │
        ▼
Plugin header is read
        │
        ▼
Prevent direct access
        │
        ▼
Define constants
        │
        ▼
Load required files
        │
        ▼
Register activation hooks
        │
        ▼
Initialize plugin
        │
        ▼
Register WordPress hooks
        │
        ▼
Plugin becomes operational

As we inspect the Flipnzee Auctions bootstrap, we will map each section to one of these responsibilities.


Code Review Checklist

During this lesson, create a simple checklist.

QuestionStatus
Plugin header is correct
Direct access prevented
Constants organizedReview
Includes organizedReview
Activation hook clearReview
Initialization readableReview
Responsibilities separatedReview

This checklist becomes the foundation for future refactoring.


Engineering Notes

One important principle throughout this series is:

Working code deserves respect.

Just because code can be improved does not mean it was poorly written.

Most software evolves over time.

Every version reflects the knowledge and priorities of the project at that moment.

Our goal is to improve the code while preserving its working behavior.


No Refactoring Yet

You may already notice opportunities to improve the bootstrap.

Resist the temptation.

One of the easiest ways to introduce bugs is to refactor before fully understanding the code.

Instead, maintain a list of observations.

For example:

  • Initialization could be simplified.
  • Responsibilities might be grouped differently.
  • File loading may become more readable.
  • Constants could be organized together.
  • Documentation could be improved.

These observations become candidates for future lessons.


Testing

Since we are only reviewing code:

  • No functionality should change.
  • Plugin behavior should remain identical.
  • Existing features should continue working.

This lesson is purely analytical.


Git

Because no code changes were made, there is nothing to commit.

If you took notes separately, you may commit documentation only.

Otherwise, proceed directly to Lesson 110.


Key Takeaways

In this lesson, we learned that professional engineering begins with careful observation.

We identified the responsibilities of a plugin bootstrap, discussed what belongs there and what does not, and established a framework for reviewing the Flipnzee Auctions startup sequence.

Most importantly, we adopted an engineering mindset:

  • Understand before changing.
  • Respect working code.
  • Identify responsibilities.
  • Record observations.
  • Refactor deliberately.

Looking Ahead

In Lesson 110, we will perform our first real code walkthrough of the flipnzee-auctions.php bootstrap file.

We’ll examine each section line by line, trace the execution path through the plugin, and build an execution-flow diagram based on the actual code. Only after fully understanding the implementation will we decide whether and how to refactor it.


Discussion

Before moving on, consider these questions:

  1. Why should a bootstrap file avoid business logic?
  2. Which startup responsibilities belong in the bootstrap, and which belong elsewhere?
  3. Why is reviewing working code often more valuable than immediately rewriting it?
  4. If you opened a plugin for the first time, what information would you look for in its bootstrap file?

Share your thoughts in the comments. In the next lesson, we’ll replace theory with practice by tracing the real execution flow of Flipnzee Auctions from its bootstrap file.

Lesson 108: Understanding the Plugin Bootstrap and Execution Flow (No Code Changes)

Series: Building Flipnzee Auctions → Plugin Engineering
Lesson: 108
Difficulty: Beginner to Intermediate
Prerequisites: Basic PHP, WordPress Fundamentals
Code Changes: None


Introduction

Welcome to the Plugin Engineering phase of the Building Flipnzee Auctions series.

The first 107 lessons focused on planning, designing, and building a functional WordPress auction plugin. Along the way, we implemented numerous features including auctions, bidding, watchlists, transactions, buyer dashboards, payment workflows, and transfer management.

The plugin now works well enough to demonstrate a complete auction workflow. However, like many real-world software projects, it has also accumulated technical debt through incremental development. As features were added one by one, some code became duplicated, responsibilities became mixed, naming conventions evolved, and temporary debugging code occasionally remained longer than intended.

This is perfectly normal. Real software is rarely perfect on its first iteration.

The purpose of this new series is not to rewrite Flipnzee Auctions from scratch. Instead, we will study the existing codebase, understand why it works, and gradually transform it into a cleaner, more maintainable, and production-quality WordPress plugin.

This lesson begins that journey.


Learning Objectives

By the end of this lesson, you should understand:

  • What a plugin bootstrap file is.
  • How WordPress loads a plugin.
  • The plugin execution lifecycle.
  • Why understanding execution flow is essential before refactoring.
  • The roadmap for the Plugin Engineering series.

Why Start with Understanding?

Imagine being asked to renovate a large house.

Would you immediately begin knocking down walls?

Probably not.

You would first walk through every room, inspect the plumbing and wiring, identify load-bearing walls, and understand how everything fits together.

Refactoring software follows the same principle.

Before improving code, we must understand how the application works today.

Professional developers spend significant time reading existing code before modifying it. This reduces bugs, preserves working functionality, and leads to better design decisions.

Throughout this series, our philosophy will be:

Understand first. Improve second.


What Is a Plugin Bootstrap?

Every WordPress plugin has one file that serves as its entry point.

This file contains the plugin header that WordPress reads when displaying installed plugins in the admin dashboard.

More importantly, it acts as the bootstrap of the plugin.

Its responsibilities typically include:

  • Preventing direct access.
  • Defining plugin constants.
  • Loading required PHP files.
  • Registering activation and deactivation hooks.
  • Initializing the plugin.
  • Starting the execution process.

Think of the bootstrap file as the front door to the entire plugin.

Every request begins here.


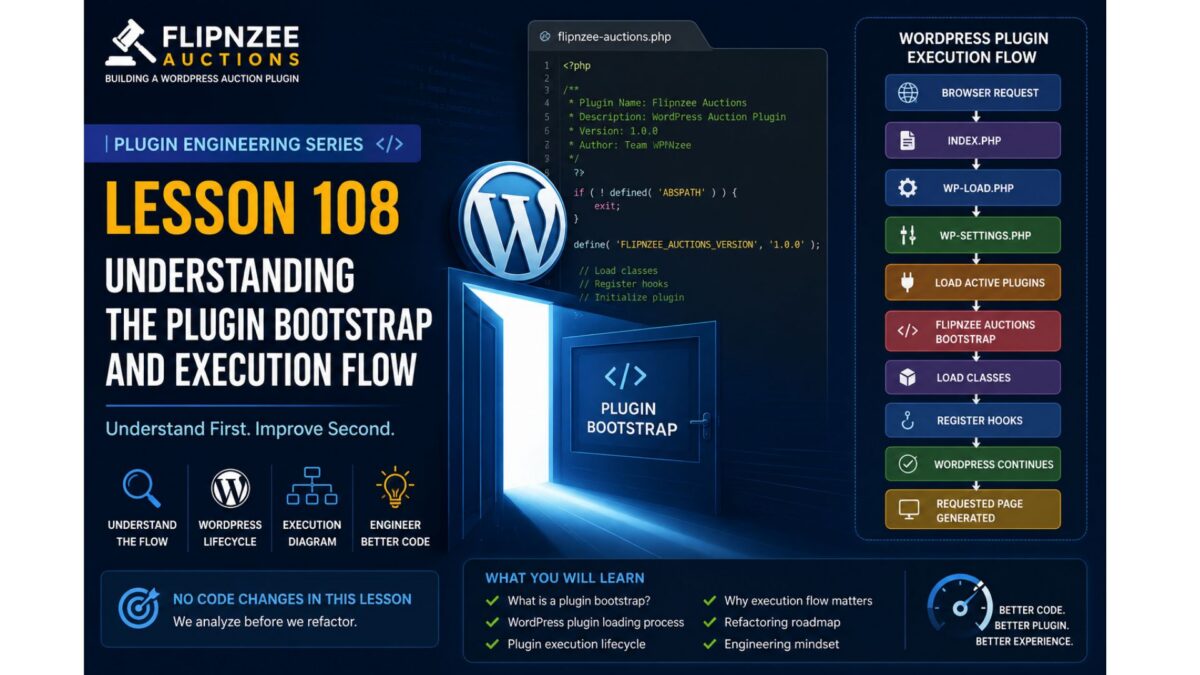
Understanding the WordPress Plugin Loading Process

Whenever WordPress loads, it follows a sequence similar to the one below:

Browser Request
       │
       ▼
index.php
       │
       ▼
wp-blog-header.php
       │
       ▼
wp-load.php
       │
       ▼
wp-settings.php
       │
       ▼
Load Active Plugins
       │
       ▼
Flipnzee Auctions Bootstrap
       │
       ▼
Load Classes
       │
       ▼
Register Hooks
       │
       ▼
WordPress Continues Loading
       │
       ▼
Requested Page is Generated

Understanding this sequence helps explain why some code belongs in the bootstrap file while other logic belongs inside dedicated classes.


Why This Matters

Many beginners believe that a plugin simply “runs.”

In reality, WordPress controls the entire execution lifecycle.

Your plugin responds to events generated by WordPress through hooks and filters.

This event-driven architecture is one of the defining characteristics of WordPress development.

Understanding it makes the rest of the plugin much easier to follow.


Our Refactoring Philosophy

From this lesson onward, every engineering lesson will follow a consistent structure.

1. Concept

We begin by introducing a software engineering principle.

Examples include:

  • Single Responsibility Principle (SRP)
  • Separation of Concerns
  • Encapsulation
  • Dependency Management
  • Event-Driven Programming

2. PHP Concepts

Next, we explain only the PHP features required for the lesson.

Examples include:

  • Classes
  • Objects
  • Visibility
  • Static Methods
  • Namespaces (when introduced)
  • Interfaces (later)
  • Traits (later)

3. WordPress Concepts

We then study the relevant WordPress APIs.

Examples include:

  • Hooks
  • Filters
  • Activation Hooks
  • Shortcodes
  • AJAX
  • Nonces
  • Sanitization
  • Escaping

4. Current Code Review

Before changing anything, we inspect the existing implementation.

We ask questions such as:

  • What is this code responsible for?
  • What does it do well?
  • Can responsibilities be separated more clearly?
  • Is there duplication?
  • Does the naming reflect its purpose?

The goal is understanding, not criticism.


5. Refactoring

Only after fully understanding the existing code do we perform a focused improvement.

Each lesson will concentrate on a single engineering concept rather than attempting multiple unrelated changes.


6. Testing

Every change should be verified.

Testing is an essential part of engineering, not an optional extra.

We’ll discuss:

  • Expected behavior.
  • Regression risks.
  • Manual testing procedures.
  • Future opportunities for automated testing.

7. Git

Every lesson concludes with version control.

Typical workflow:

git add .
git commit -m "Refactor bootstrap initialization"
git tag lesson-109
git push
git push --tags

8. Documentation

Finally, each lesson will produce material suitable for publication on WPNzee.

By documenting every engineering decision, we create both a learning resource and a development record.


Plugin Engineering Roadmap

Over the coming lessons, we will explore the plugin in a logical order.

Phase 0 – Understanding the Plugin

  • Plugin Bootstrap
  • Folder Structure
  • Execution Flow
  • Class Responsibilities

Phase 1 – Development Environment

  • Debugging
  • Version Control
  • Coding Standards
  • Development Workflow

Phase 2 – Database Layer

  • Custom Tables
  • Migrations
  • Schema Versioning
  • Indexes

Phase 3 – Auction Engine

  • Business Logic
  • Lifecycle
  • Validation

Phase 4 – Bid Engine

  • Bid Processing
  • Reserve Prices
  • Winner Determination

Phase 5 – Transactions

  • Transaction Creation
  • Event-Driven Design

Phase 6 – Transfer Management

  • Transfer Lifecycle
  • Workflow States

Phase 7 – Payment Layer

  • Gateway Architecture
  • Payment Abstraction

Phase 8 – Frontend

  • Templates
  • Shortcodes
  • AJAX

Phase 9 – Security

  • Nonces
  • Sanitization
  • Escaping
  • Capability Checks

Phase 10 – Plugin Architecture

  • SOLID Principles
  • Dependency Management
  • Service Layers

Phase 11 – Performance

  • Database Optimization
  • Query Performance
  • Caching
  • Lazy Loading

Phase 12 – Production Release

Preparing Flipnzee Auctions for a stable v1.0 release.


Key Takeaways

This lesson deliberately made no code changes.

Instead, we established the mindset required for successful refactoring:

  • Understand before modifying.
  • Improve incrementally.
  • Refactor one concept at a time.
  • Preserve working functionality.
  • Document every engineering decision.

These principles will guide every lesson in the Plugin Engineering series.


Looking Ahead

In the next lesson, we will open the Flipnzee Auctions bootstrap file and trace the plugin’s execution from the moment WordPress loads it. We will examine how the plugin initializes, identify each responsibility within the bootstrap, and determine whether those responsibilities are appropriately placed or should be delegated elsewhere.

Only after fully understanding the bootstrap will we begin making carefully planned architectural improvements.


Discussion

Before reading the next lesson, consider the following questions:

  1. Why is it important to understand existing code before refactoring it?
  2. What responsibilities should a plugin bootstrap file have?
  3. Why does WordPress use an event-driven architecture based on hooks and actions?
  4. How can small, incremental refactoring reduce the risk of introducing bugs?

Share your thoughts in the comments below. In Lesson 109, we will answer these questions by exploring the Flipnzee Auctions bootstrap file in detail and tracing its execution flow from start to finish.

Lesson 107: Keeping Recently Closed Auctions Visible on the Frontend

One challenge with any auction platform is deciding what happens when an auction ends. If completed auctions disappear immediately, visitors have no way to verify the final outcome or learn from previous listings. On the other hand, displaying every completed auction forever eventually clutters the marketplace.

In this lesson, we improve the Flipnzee Auctions plugin by introducing a configurable auction history retention period. Recently closed auctions remain visible for a limited number of days before being automatically removed from the main auction listing.


Why This Improvement?

Previously, the frontend displayed only active auctions.

This created a poor user experience because:

  • Users could not verify the result of an auction after it ended.
  • Winning bidders had no convenient way to revisit their completed auction.
  • Visitors could not see whether a reserve price had been met.
  • Auctions disappeared immediately after completion.

Our goal was to provide a short auction history while keeping the homepage clean.


Defining a Configurable Retention Period

Instead of hardcoding the number of days inside our SQL query, we defined a reusable plugin constant.

In flipnzee-auctions.php:

/**
 * Number of days recently closed auctions remain visible.
 */
if ( ! defined( 'FLIPNZEE_AUCTION_HISTORY_DAYS' ) ) {
	define( 'FLIPNZEE_AUCTION_HISTORY_DAYS', 10 );
}

This provides a single location for configuring how long recently completed auctions remain visible.

Changing:

define( 'FLIPNZEE_AUCTION_HISTORY_DAYS', 10 );

to:

define( 'FLIPNZEE_AUCTION_HISTORY_DAYS', 30 );

will automatically extend the history period without modifying any SQL queries.


Updating the Auction Query

The get_active_auctions() method previously returned only active auctions.

It now returns:

  • active auctions
  • recently closed auctions within the configured retention period

The query now resembles:

WHERE
    status = 'active'
    OR (
        status = 'closed'
        AND auction_end >= DATE_SUB(
            NOW(),
            INTERVAL FLIPNZEE_AUCTION_HISTORY_DAYS DAY
        )
    )

Older completed auctions are automatically excluded.


Ordering Results

To improve usability, auctions are now ordered by their ending time.

ORDER BY auction_end DESC

This ensures:

  • Live auctions remain prominent.
  • Recently completed auctions appear directly beneath them.
  • Older retained auctions gradually move lower before disappearing.

Benefits

This small enhancement significantly improves the frontend experience.

Benefits include:

  • Recently completed auctions remain visible.
  • Winning bidders can revisit completed listings.
  • Visitors can verify auction outcomes.
  • The homepage remains uncluttered.
  • No manual cleanup is required.
  • Administrators can easily adjust the retention period.

Example Auction Lifecycle

The auction lifecycle now becomes:

Auction Created
        │
        ▼
Active Auction
        │
        ▼
Auction Ends
        │
        ▼
Recently Closed (Visible for 10 Days)
        │
        ▼
Automatically Removed from Homepage

This creates a much more professional auction experience while preventing old listings from accumulating indefinitely.


Looking Ahead

Keeping recently closed auctions visible is only the first step toward a complete auction history system.

In future lessons, we plan to add:

  • Dedicated Auction Archive page
  • Live / Ending Soon / Closed filters
  • Winner announcement pages
  • Transaction history
  • Escrow payment workflow
  • Website transfer tracking

Together, these features will transform Flipnzee Auctions into a complete marketplace for buying and selling websites and digital assets.

Download Source Code

Download the starting version of the plugin before the lesson:

Download the completed version after this lesson:


Conclusion

In this lesson, we enhanced the Flipnzee Auctions plugin by introducing configurable frontend auction history retention. Instead of removing completed auctions immediately, recently closed auctions remain visible for a configurable period before being automatically removed from the main listing.

This improvement provides greater transparency for buyers, better visibility into completed auctions, and a cleaner long-term marketplace experience while keeping the codebase flexible and easy to maintain.

Lesson 107: Improving Auction Results When the Reserve Price Is Not Met

Introduction

In Lesson 106, we implemented one of the most important business rules of any auction platform: a winner is no longer declared if the highest bid does not meet the reserve price. We also confirmed that no transaction or transfer records are created in such cases.

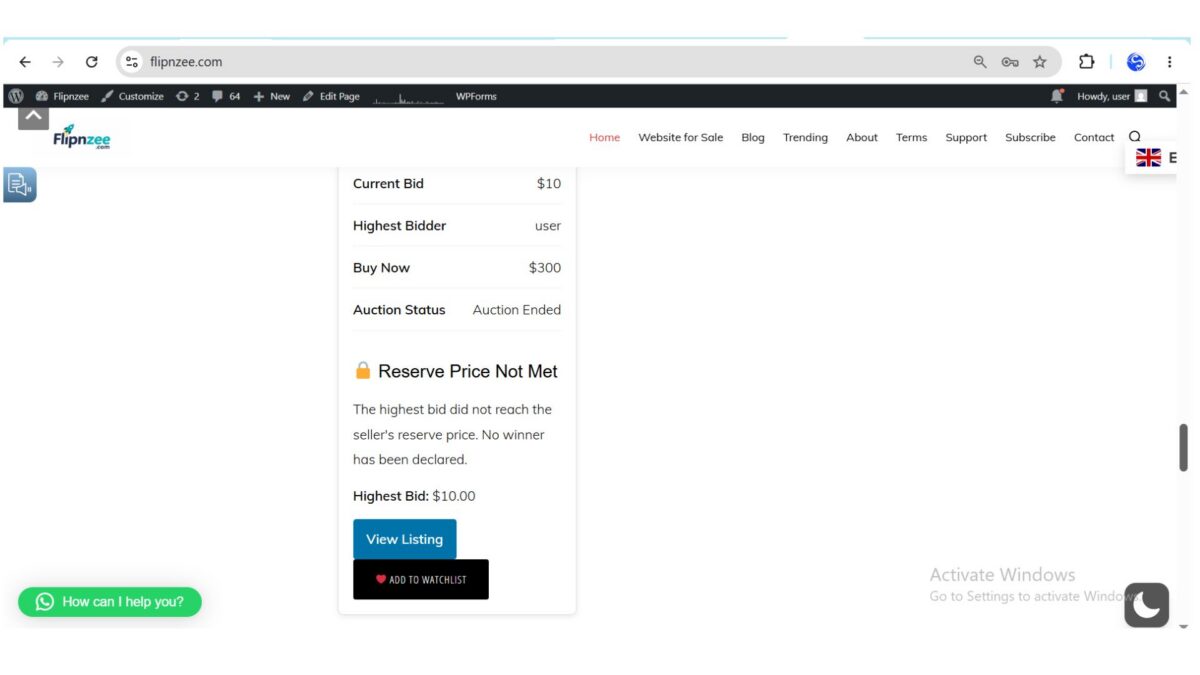
While the backend logic now works correctly, the frontend still needs improvement. For example, after an unsuccessful auction, users currently see confusing information such as:

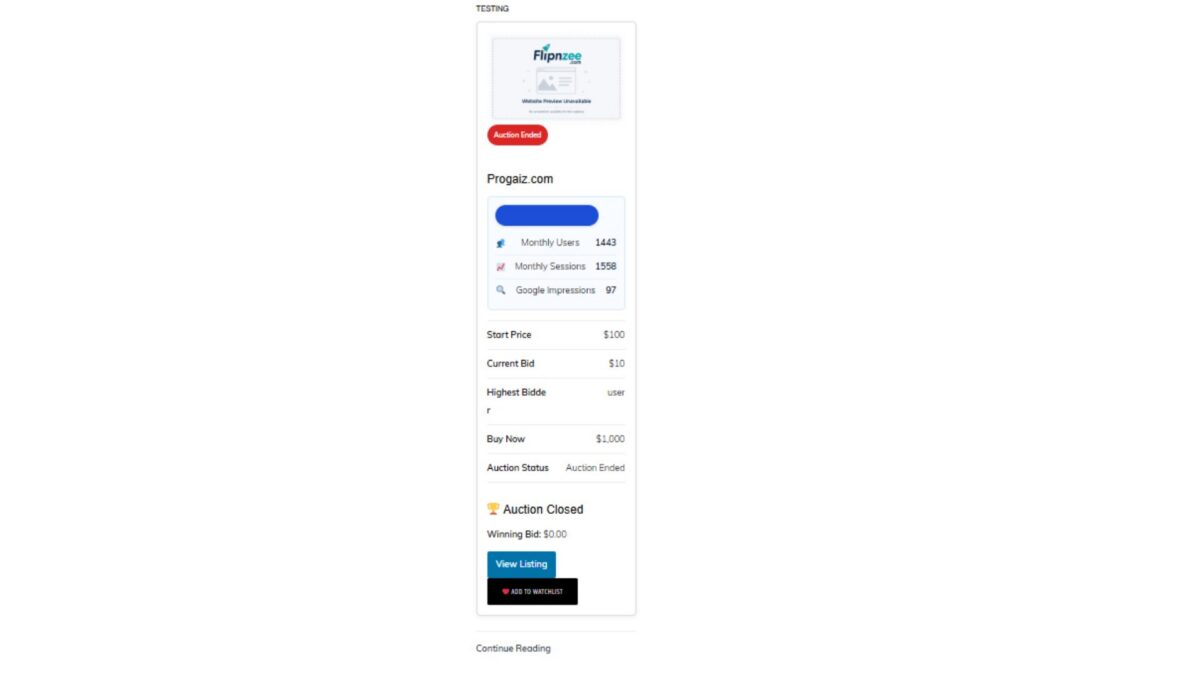
Auction Closed

Winning Bid: $0.00

Although technically no winner exists, this message can mislead both buyers and sellers.

In this lesson, we will focus on polishing the auction closing experience by clearly communicating that the reserve price was not met.


Objectives

By the end of this lesson, Flipnzee Auctions will:

  • Detect unsuccessful auctions on the frontend.
  • Display a clear “Reserve Price Not Met” message.
  • Show the highest bid instead of “$0.00”.
  • Explain why no winner was declared.
  • Improve the overall user experience.
  • Prepare the plugin for future auction result badges and reporting.

Why This Improvement Is Important

Professional auction platforms do more than enforce business rules—they also explain the outcome to users.

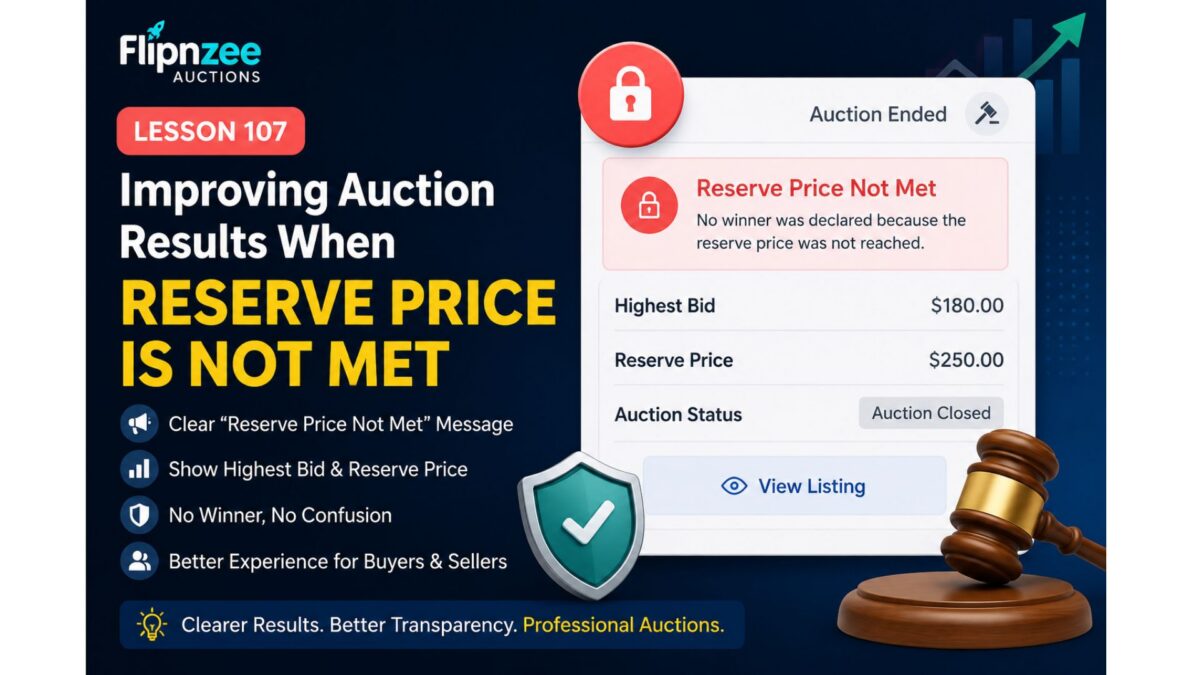
Instead of confusing visitors with:

Auction Closed

Winning Bid: $0.00

Flipnzee Auctions should display:

🔒 Reserve Price Not Met

Highest Bid: $10.00

Reserve Price: $200.00

No winner was declared because the reserve price was not reached.

This gives both buyers and sellers complete clarity.


Features We Will Implement

During this lesson we will:

  • Detect when an auction ends without meeting its reserve price.
  • Replace the “Winning Bid” section with a reserve status message.
  • Display the highest bid received.
  • Display the reserve price.
  • Prevent misleading winner information.
  • Improve the shortcode output used on auction pages.

Expected Result

Successful auction:

🏆 Auction Closed

Winning Bid: $650

Winner:
John Doe

Reserve not met:

🔒 Auction Closed

Reserve Price Not Met

Highest Bid: $180

Reserve Price: $250

No winner was declared.

Files Expected to Change

During implementation we will mainly modify:

includes/class-shortcodes.php

Possible minor updates may also be made to:

assets/css/frontend.css

for improved styling of the new reserve notice.


What You’ll Learn

In this lesson you will learn how to:

  • Improve frontend auction UX.
  • Display different content based on auction outcome.
  • Separate business logic from presentation.
  • Make auction results easier for buyers and sellers to understand.

Final Thoughts

Lesson 106 ensured that Flipnzee Auctions behaves correctly by enforcing reserve prices. Lesson 107 completes that work by making the auction results clear and informative for users.

By the end of this lesson, unsuccessful auctions will no longer appear broken or confusing. Instead, visitors will immediately understand that the auction ended without a sale because the seller’s reserve price was not reached, bringing Flipnzee Auctions one step closer to the polished experience expected from modern digital asset marketplaces.

Lesson 106 Implementation: Enforcing Reserve Price Rules in Flipnzee Auctions

One of the most important concepts in professional auction platforms is the reserve price. While Flipnzee Auctions already supported defining a reserve price, the auction engine still declared a winner even when the highest bid failed to reach that minimum value. This could result in incorrect transactions, transfer records, and buyer notifications.

In this lesson, we corrected the auction workflow so that a winner is only declared when the reserve price has actually been met.


Why This Lesson Was Needed

Consider the following auction:

  • Start Price: $100
  • Reserve Price: $200
  • Highest Bid: $10

Previously, the plugin incorrectly:

  • Declared the bidder as the winner.
  • Created a transaction record.
  • Created a transfer record.
  • Began the ownership transfer workflow.

This behavior defeats the purpose of a reserve price. The seller should never be forced to sell below their minimum acceptable amount.


Objectives

By the end of this lesson, the plugin should:

  • Respect reserve prices when determining a winner.
  • Prevent winner declaration if the reserve price is not met.
  • Stop transaction creation.
  • Stop transfer creation.
  • Record the event in the activity log.
  • Return control safely without breaking the auction workflow.

Creating a Reserve Price Validation Method

Rather than scattering reserve price checks throughout the codebase, we introduced a dedicated helper method inside the bid manager.

Example:

public static function reserve_price_met(
    $auction_id,
    $winner
)

This method centralizes all reserve-price logic into one reusable location.


Loading Auction Information

The helper retrieves the auction record from the database.

This allows us to compare:

  • Reserve Price
  • Highest Bid

without duplicating database queries elsewhere.


Comparing Highest Bid Against Reserve Price

The core comparison is straightforward.

If:

Highest Bid < Reserve Price

then:

  • No winner should exist.
  • The auction closes without a successful sale.

Otherwise:

Highest Bid >= Reserve Price

the auction proceeds normally.


Logging Failed Reserve Checks

When a reserve price is not met, the plugin now records an activity log entry.

Example:

reserve_not_met

Highest bid $10 did not meet reserve price $200.

This provides administrators with a complete audit trail explaining why an auction ended without a winner.


Updating Winner Determination

Previously, the plugin always returned the highest bidder.

Now the workflow becomes:

Find highest bid

↓

Check reserve price

↓

Reserve met?

├── Yes
│      Return winner
│
└── No
       Return false

This small change completely alters the auction outcome.


Preventing Downstream Processing

Returning false immediately prevents the rest of the auction pipeline from executing.

As a result:

  • Winner notifications are not generated.
  • Seller notifications are skipped.
  • Admin notifications are skipped.
  • Transactions are not created.
  • Transfer records are not created.

The auction simply ends without a successful sale.


Testing Scenario

We created the following auction:

SettingValue
Start Price$100
Reserve Price$200
Buy Now$500
Highest Bid$10

Expected behavior:

  • No winner declared
  • No transaction
  • No transfer
  • Auction closes normally

Test Results

After implementing the reserve price validation:

✔ Highest bidder was not declared as the winner.

✔ No transaction record was generated.

✔ No transfer record was generated.

✔ Auction closed successfully.

The backend auction logic now correctly respects reserve prices.


Remaining UI Improvement

One cosmetic issue remains.

The auction page currently displays:

Auction Closed

Winning Bid: $0.00

Although technically harmless, this can confuse users because no winning bid actually exists.

A future lesson will improve the interface by displaying messages such as:

Reserve Price Not Met

Highest Bid: $10

No winner was declared because the reserve price was not reached.

Why This Improvement Matters

Professional auction platforms such as eBay and domain marketplaces rely heavily on reserve prices to protect sellers.

By enforcing reserve prices correctly, Flipnzee Auctions now:

  • Protects seller interests.
  • Prevents accidental sales below minimum value.
  • Stops unnecessary transaction creation.
  • Prevents incorrect ownership transfers.
  • Produces a more reliable auction workflow.

What We Accomplished

In this lesson we:

  • Added centralized reserve price validation.
  • Checked reserve prices before declaring a winner.
  • Prevented winner creation when the reserve price was not met.
  • Logged reserve failures for administrators.
  • Prevented transaction generation.
  • Prevented transfer generation.
  • Verified the workflow using live auction testing.

Flipnzee Auctions now follows a much more robust auction lifecycle by ensuring that reserve prices are enforced before any sale is finalized. This improvement lays the groundwork for future enhancements such as reserve price status badges, improved auction summaries, and more informative buyer and seller notifications.

Download Source Code

Download the starting version of the plugin before the lesson:

Download the completed version after this lesson:

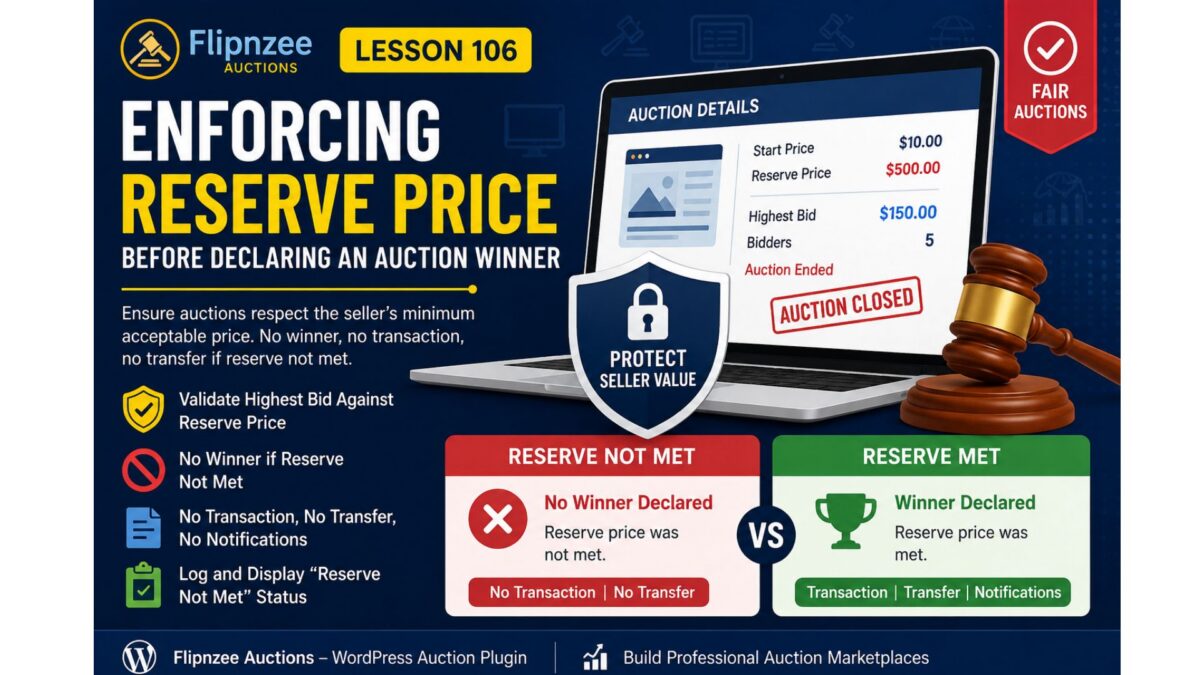
Lesson 106: Enforcing Reserve Price Before Declaring an Auction Winner

Introduction

A reserve price is one of the most important concepts in any professional auction platform. It protects sellers by ensuring that an asset is not sold below a minimum acceptable price.

During testing of the Flipnzee Auctions plugin, a critical business logic issue was identified. Although the plugin correctly determined the highest bidder when an auction closed, it declared that bidder as the winner even when the highest bid failed to meet the reserve price.

This lesson corrects that behavior and aligns the plugin with industry-standard auction platforms.


The Problem

Consider the following auction:

SettingValue
Start Price$10
Reserve Price$500
Highest Bid$150

Before this lesson, the plugin performed the following sequence:

Auction Closed
        │
        ▼
Highest Bid Found
        │
        ▼
Winner Declared
        │
        ▼
Transaction Created
        │
        ▼
Transfer Created

Although technically correct from a bidding perspective, this is incorrect from a business perspective because the seller never agreed to sell below the reserve price.


Why This Is a Serious Issue

Reserve prices exist to protect sellers.

Without reserve price enforcement:

  • Sellers may unintentionally sell valuable websites below their minimum acceptable price.
  • Buyers may assume ownership has been secured even though the seller expected otherwise.
  • Transactions and transfer records may be created for auctions that should have ended without a sale.

Professional auction marketplaces never ignore reserve prices.


Lesson Objectives

By the end of this lesson, the Flipnzee Auctions plugin will:

  • Validate the highest bid against the reserve price.
  • Prevent a winner from being declared if the reserve price has not been met.
  • Prevent transactions from being created.
  • Prevent transfer records from being created.
  • Prevent winner notifications.
  • Display an appropriate auction status on the frontend.
  • Record the event in the activity log.

Expected Auction Flow

Scenario 1 – Reserve Price Not Met

Auction Ends
        │
        ▼
Highest Bid Retrieved
        │
        ▼
Compare With Reserve Price
        │
        ▼
Reserve NOT Met
        │
        ▼
No Winner
        │
        ▼
No Transaction
        │
        ▼
No Transfer
        │
        ▼
Reserve Not Met Message

Scenario 2 – Reserve Price Met

Auction Ends
        │
        ▼
Highest Bid Retrieved
        │
        ▼
Compare With Reserve Price
        │
        ▼
Reserve Met
        │
        ▼
Winner Declared
        │
        ▼
Notifications
        │
        ▼
Transaction Created
        │
        ▼
Transfer Created

Files Expected to Change

The implementation will primarily involve:

includes/
    class-bid-manager.php

Additional updates may be required in:

admin/
    class-admin-posts.php
includes/
    class-shortcodes.php
includes/
    class-activity-log.php

New Business Rules

When an auction closes:

  1. Retrieve the highest bid.
  2. Retrieve the reserve price.
  3. Compare both values.
  4. If the reserve has not been met:
    • do not declare a winner
    • do not create a transaction
    • do not create a transfer
    • do not send notifications
    • log the event
  5. Otherwise continue with the normal auction completion workflow.

Frontend Improvements

Instead of displaying:

🏆 Auction Closed

Winning Bid: $150

the plugin should display something similar to:

⚠ Auction Closed

Reserve price was not met.

No winning bidder.

This provides clear feedback to both buyers and sellers.


Activity Logging

A new activity type will be introduced for reserve price failures.

Example:

auction_reserve_not_met

Example log message:

Auction #45 closed.

Highest bid: $150

Reserve price: $500

No winner declared.

This creates a useful audit trail for administrators.


Why This Matters

Almost every major auction platform enforces reserve prices before completing a sale.

Examples include:

  • Flippa
  • Empire Flippers
  • GoDaddy Auctions
  • eBay Auctions
  • Heritage Auctions

Adding this safeguard moves the Flipnzee Auctions plugin closer to production-grade marketplace behavior.


What You’ll Learn

In this lesson, you will learn how to:

  • Implement business rule validation.
  • Separate bidding logic from selling rules.
  • Prevent invalid transactions.
  • Improve auction integrity.
  • Build auction software that reflects real-world marketplace practices.

Conclusion

Lesson 106 introduces one of the most important safeguards in any auction platform: reserve price enforcement.

Rather than automatically declaring the highest bidder as the winner, the plugin will first verify that the seller’s reserve price has been satisfied. If it has not, the auction will end without a winner, ensuring that no notifications, transactions, or transfer records are created incorrectly.

This enhancement significantly improves the reliability and professionalism of the Flipnzee Auctions plugin, bringing its behavior in line with established online auction marketplaces while protecting both buyers and sellers.

Lesson 105 Implementation: Building an Event-Driven Notification System for Flipnzee Auctions

One of the strengths of WordPress is its event-driven architecture. Core WordPress features and many popular plugins communicate through actions and filters, allowing components to remain independent while still working together.

In this lesson, the Flipnzee Auctions plugin adopts the same design philosophy by introducing a dedicated Notification Manager. Rather than embedding notification logic inside the auction or transaction code, the plugin now responds to auction events using WordPress actions.

This approach keeps the code cleaner, easier to extend, and much simpler to maintain.


What We Built

Lesson 105 introduces a new notification subsystem that listens for auction events and records notifications for different participants.

Currently, the system logs notifications for:

  • Auction Winner
  • Seller
  • Site Administrator

Although these notifications are currently written to the debug log, the architecture has been designed so that future versions can easily send:

  • Emails
  • SMS
  • WhatsApp messages
  • Slack notifications
  • Discord webhooks
  • Push notifications

without modifying the core auction logic.


Why Use an Event-Driven Design?

Instead of writing code like this:

Auction Closed
↓

Determine Winner
↓

Send Winner Email
↓

Send Seller Email
↓

Send Admin Email
↓

Create Transaction
↓

Create Transfer

the plugin now works like this:

Auction Closed
↓

Determine Winner
↓

Fire WordPress Action
flipnzee_auction_winner_determined

↓

Notification Manager
Transaction Manager
Analytics
Future Extensions

The auction manager no longer needs to know what happens after a winner is determined.

It simply announces that the event has occurred.

Other components decide whether they need to respond.


Creating the Notification Manager

A new class was added:

includes/
    class-notification-manager.php

This class contains all notification-related functionality.

Separating responsibilities like this follows good object-oriented design and makes future maintenance much easier.


Initializing the Notification Manager

The plugin bootstrap file was updated to include the new class.

flipnzee-auctions.php

The Notification Manager is then initialized when the plugin loads.

This ensures every notification hook is registered automatically whenever WordPress loads the plugin.


Registering WordPress Actions

Inside the Notification Manager, three listeners were registered.

add_action(
    'flipnzee_auction_winner_determined',
    array( __CLASS__, 'notify_winner' ),
    10,
    2
);

add_action(
    'flipnzee_auction_winner_determined',
    array( __CLASS__, 'notify_seller' ),
    10,
    2
);

add_action(
    'flipnzee_auction_winner_determined',
    array( __CLASS__, 'notify_admin' ),
    10,
    2
);

Notice something important.

Three completely different methods are listening for exactly the same event.

This is one of the biggest advantages of WordPress actions.


Firing the Event

During Lesson 103, winner determination already triggered an action.

do_action(
    'flipnzee_auction_winner_determined',
    $auction_id,
    $winner
);

Lesson 105 takes advantage of that event.

No modifications to the auction manager were required.

The Notification Manager simply listens for it.


Implementing Notification Methods

Three notification methods were created.

notify_winner()

notify_seller()

notify_admin()

Each currently records an entry in the debug log.

Example:

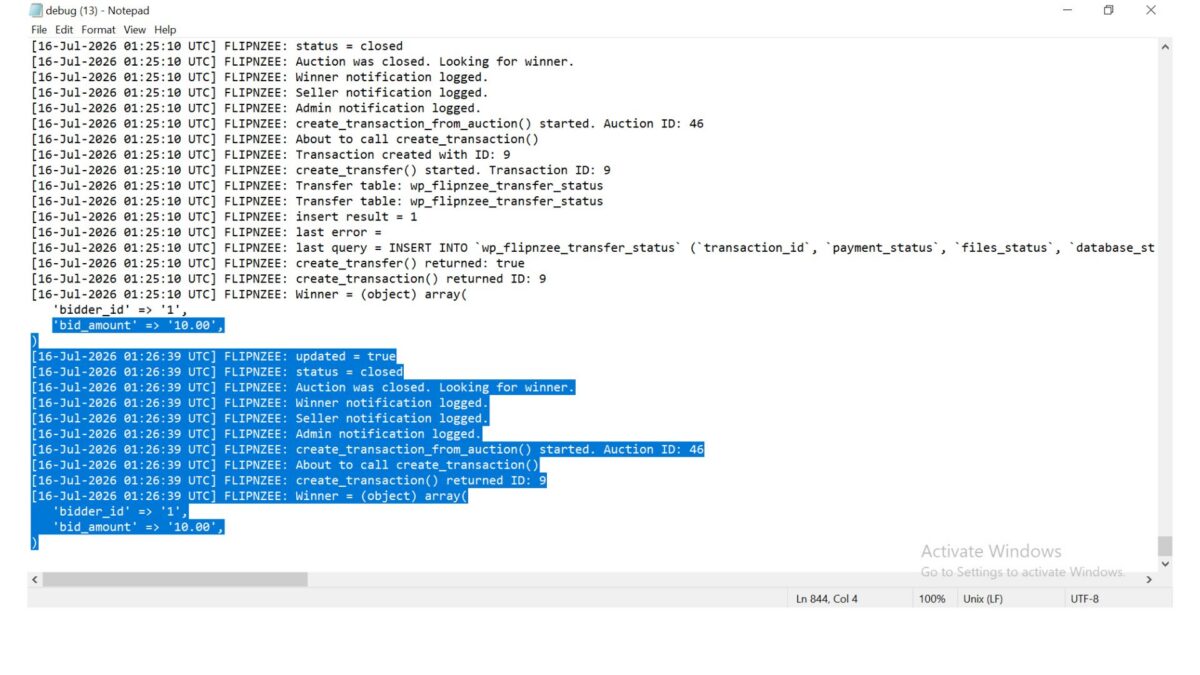
FLIPNZEE: Winner notification logged.

FLIPNZEE: Seller notification logged.

FLIPNZEE: Admin notification logged.

Although simple, this verifies that the notification system is functioning correctly.


Keeping Responsibilities Separate

One of the design goals of this lesson was to avoid tightly coupling unrelated systems.

The Notification Manager does not:

  • determine auction winners
  • create transactions
  • update transfer status
  • modify auctions

Likewise, the Auction Manager does not send notifications.

Each class has one clearly defined responsibility.

This makes future development much easier.


End-to-End Testing

Several live auction tests were performed.

The following workflow completed successfully.

Auction Closed

↓

Winner Determined

↓

Winner Notification Logged

↓

Seller Notification Logged

↓

Admin Notification Logged

↓

Transaction Created

↓

Transfer Status Created

Database verification confirmed that:

  • Transactions were created successfully.
  • Transfer records were created successfully.
  • Notification handlers executed without affecting existing functionality.

No SQL errors or PHP fatal errors were encountered during testing.


Benefits of This Architecture

The Notification Manager now provides a foundation for future communication features.

Possible additions include:

  • Email confirmations
  • Bid confirmation emails
  • Winning bid emails
  • Seller notifications
  • Administrator alerts
  • SMS gateways
  • WhatsApp Business integration
  • Discord notifications
  • Slack integrations
  • Push notifications
  • Third-party CRM integrations

Most of these can be added by creating new action listeners without modifying the auction lifecycle.


Lessons Learned

This lesson demonstrates an important software engineering principle:

Code should communicate through events rather than direct dependencies whenever practical.

Using WordPress actions allows independent components to work together while remaining loosely coupled.

The result is code that is easier to extend, easier to test, and easier to maintain over time.

Download Source Code

Download the starting version of the plugin before the lesson:

Download the completed version after this lesson:


Conclusion

Lesson 105 introduced an event-driven notification system to the Flipnzee Auctions plugin.

Instead of embedding notification logic inside auction processing, the plugin now responds to auction events using native WordPress actions. Winner, seller, and administrator notifications are handled independently, while transactions and transfer records continue to function without modification.

Although the current implementation logs notifications for testing purposes, the underlying architecture is now ready for future enhancements such as email delivery, SMS alerts, messaging platform integrations, and other communication channels. This modular design represents an important architectural milestone, bringing the plugin closer to a scalable and production-ready auction platform.

Lesson 105 — Automatic Winner Notification System

Now that Lesson 104 introduced the automated auction lifecycle (scheduled activation and automatic closing), the next logical milestone is notifying everyone involved when an auction finishes.

This adds real business value because an auction platform should communicate results automatically rather than requiring administrators to monitor auctions manually.


Objective

Create an automatic notification system that sends notifications immediately after an auction closes and a winner has been determined.

Initially, notifications will be written to the Activity Log.

Later lessons will expand this to:

  • Email notifications
  • Dashboard notifications
  • Buyer dashboard alerts
  • Seller dashboard alerts
  • Webhooks
  • SMS/WhatsApp (optional)

What will happen automatically?

Current workflow

Auction Ends
      ↓
Cron Job
      ↓
Auction Closed
      ↓
Winner Determined

New workflow

Auction Ends
      ↓
Cron Job
      ↓
Auction Closed
      ↓
Winner Determined
      ↓
Winner Notification
      ↓
Seller Notification
      ↓
Administrator Notification

Notifications to create

1. Winner

Example

Congratulations!

You won the auction for

example.com

Winning Bid:
$1,250

Please complete payment within 7 days.

2. Seller

Example

Your auction has ended.

Winner:
John

Winning Bid:
$1,250

Waiting for payment.

3. Administrator

Example

Auction Closed

Listing:
example.com

Winner:
John

Winning Bid:
$1,250

Transaction Created:
Yes

New Class

includes/
    class-notification-manager.php

Responsibilities

  • notify_winner()
  • notify_seller()
  • notify_admin()
  • future email support
  • future dashboard support

Initial Implementation

For now we won’t send emails.

Instead we’ll use

Flipnzee_Activity_Log::log()

This lets us verify the notification workflow before integrating email providers.

Example

Winner Notification Sent

Seller Notification Sent

Admin Notification Sent

Hook Integration

Lesson 104 already introduced an excellent hook:

flipnzee_auctions_expired_processed

Lesson 105 introduces another event-driven hook:

flipnzee_auction_winner_determined

When this action fires:

Winner Determined
        ↓
Notification Manager
        ↓
Notify Winner
Notify Seller
Notify Admin

No existing code needs modification.

This follows proper WordPress architecture.


Future Expansion

The same Notification Manager will later support

  • Email
  • HTML Email Templates
  • WooCommerce Mailer
  • WP Mail SMTP
  • Slack
  • Discord
  • Telegram
  • SMS
  • Push Notifications

without changing the auction logic.


Files to Modify

New

includes/class-notification-manager.php

Modify

includes/class-loader.php

Load the new class.


Modify

flipnzee-auctions.php

Initialize the notification hooks.


Why This Lesson Matters

By the end of Lesson 105, Flipnzee Auctions will evolve from simply closing auctions automatically to communicating auction outcomes automatically. This is a key feature expected in any production auction platform and lays the foundation for robust email, dashboard, and third-party notification systems in future lessons.


Expected Outcome

After Lesson 105:

  • ✔ Winner determined automatically
  • ✔ Transaction created automatically
  • ✔ Transfer record created automatically
  • ✔ Notification events generated automatically
  • ✔ Activity Log records every notification
  • ✔ Ready for email notifications in subsequent lessons

This lesson continues the transition from a functional auction engine to a complete marketplace workflow.

Lesson 104: Implementing Automatic Auction Lifecycle Management in the Flipnzee Auctions Plugin

Welcome to Lesson 104 of our Flipnzee Auctions plugin development series. In the previous lessons, we successfully implemented winner determination, automatic transaction creation, and transfer record generation after an auction was closed manually.

One limitation still remained: auctions depended on an administrator to change their status from Active to Closed. In a real auction marketplace, this process should happen automatically. In this lesson, we introduce an automated auction lifecycle that allows the plugin to activate scheduled auctions, close expired auctions, determine winners, and update the frontend without manual intervention.


Why Automatic Auction Processing Matters

An auction marketplace should continue functioning even when no administrator is logged into WordPress.

The plugin should automatically:

  • Activate auctions when their scheduled start time arrives.
  • Close auctions after the end time.
  • Determine the winning bidder.
  • Begin the post-auction workflow.
  • Prevent additional bids after the auction ends.

This automation makes the marketplace significantly more reliable and scalable.


Objectives

By the end of this lesson, the plugin will:

  • Automatically activate scheduled auctions.
  • Automatically close expired auctions.
  • Determine winners for automatically closed auctions.
  • Log auction lifecycle events.
  • Fire WordPress hooks for future integrations.
  • Hide the bidding form after the auction ends.
  • Display a professional “Auction Closed” message to visitors.

Scheduling the Maintenance Process

The plugin already registered a scheduled maintenance event using WordPress Cron.

During activation, the maintenance event is scheduled:

if ( ! wp_next_scheduled( 'flipnzee_auction_maintenance' ) ) {

    wp_schedule_event(
        time(),
        'hourly',
        'flipnzee_auction_maintenance'
    );

}

During plugin deactivation, the scheduled event is removed:

$timestamp = wp_next_scheduled(
    'flipnzee_auction_maintenance'
);

if ( $timestamp ) {

    wp_unschedule_event(
        $timestamp,
        'flipnzee_auction_maintenance'
    );

}

This prevents orphaned scheduled events from remaining in WordPress.


Registering the Maintenance Hook

The scheduled event must execute plugin code.

We connected the cron event to the Auction Manager:

add_action(
    'flipnzee_auction_maintenance',
    array(
        'Flipnzee_Auction_Manager',
        'run_scheduled_maintenance',
    )
);

Whenever WordPress runs the scheduled event, the auction maintenance routine is executed automatically.


Creating the Maintenance Method

Inside the Auction Manager we created a dedicated method responsible for all automated auction lifecycle operations.

public static function run_scheduled_maintenance() {

    self::activate_scheduled_auctions();

    self::update_expired_auctions();

}

This creates a clean orchestration layer that can easily be expanded later.

Future maintenance tasks can simply be added here.


Automatically Closing Expired Auctions

The plugin searches for all auctions that:

  • are still Active
  • have an end date earlier than the current time
SELECT id
FROM wp_flipnzee_auctions
WHERE status='active'
AND auction_end < current_time()

The matching auctions are then updated to:

Status = Closed

without administrator intervention.


Automatically Determining Winners

Before updating the auction status, the plugin stores the list of expired auction IDs.

After closing them, each auction is processed individually:

foreach ( $expired_auctions as $auction_id ) {

    Flipnzee_Bid_Manager::determine_winner(
        (int) $auction_id
    );

}

This guarantees every closed auction immediately receives a winner.


Logging Automatic Closures

Whenever one or more auctions are automatically closed, an activity log entry is created.

Example:

3 auction(s) automatically closed.

This gives administrators a historical record of automated maintenance.


Introducing a New Action Hook

After processing expired auctions we introduced a brand-new action hook:

do_action(
    'flipnzee_auctions_expired_processed',
    $updated_count
);

This hook allows future extensions to respond whenever auction maintenance finishes.

Possible integrations include:

  • Analytics updates
  • Email notifications
  • Cache invalidation
  • Third-party marketplace integrations
  • Custom reporting

Following WordPress hook architecture keeps the plugin modular and extensible.


Updating the Frontend

One remaining issue existed.

Although auctions were closed successfully, buyers could still see:

  • Bid amount field
  • Place Bid button

Obviously, no additional bids should be accepted.

We solved this by displaying the bidding interface only when the auction status is Active.

if ( 'active' === $auction['status'] ) {

    // Display bidding form.

}

Otherwise, visitors now see an auction summary.


Showing the Auction Closed Message

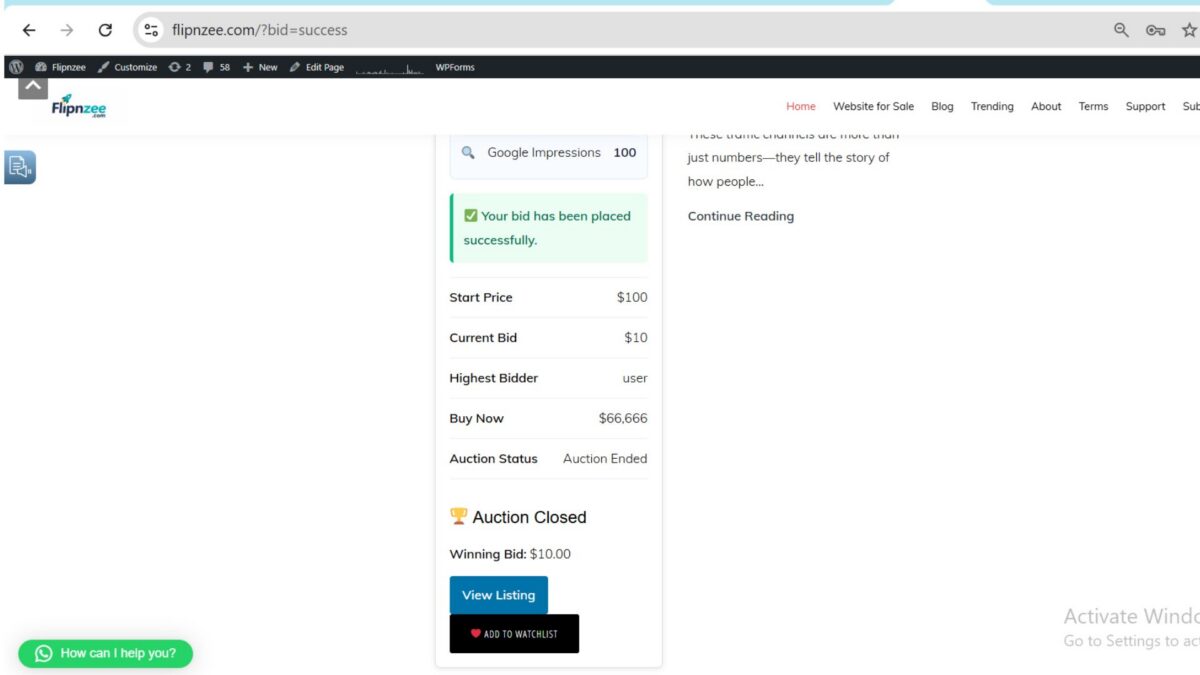
Instead of the bidding form, the plugin now displays:

🏆 Auction Closed

Winning Bid:
$10.00

If no bids were placed, the interface displays:

No bids were placed.

This provides a much clearer experience for buyers.


Final Result

After completing this lesson, the auction lifecycle now works as follows:

Auction Created
        │
        ▼
Scheduled Start
        │
        ▼
Auction Automatically Activated
        │
        ▼
Users Place Bids
        │
        ▼
Highest Bid Tracked
        │
        ▼
Auction Automatically Closed
        │
        ▼
Winner Determined
        │
        ▼
Transaction Created
        │
        ▼
Transfer Record Created
        │
        ▼
Auction Closed Message Displayed

The entire process now requires virtually no manual intervention after an auction has been created.


What We Learned

In this lesson we learned how to:

  • Schedule recurring plugin maintenance using WordPress Cron.
  • Register custom cron actions.
  • Build a centralized maintenance routine.
  • Automatically close expired auctions.
  • Automatically determine auction winners.
  • Record automated activity logs.
  • Introduce extensible WordPress action hooks.
  • Improve the frontend after auction completion.
  • Hide bidding controls once an auction has ended.

Download Source Code

Download the starting version of the plugin before the lesson:

Download the completed version after this lesson:


Conclusion

Lesson 104 marks an important milestone in the Flipnzee Auctions plugin. With automatic auction lifecycle management in place, the marketplace now behaves much more like a production-ready auction platform. Auctions can activate, expire, determine winners, create transactions, initiate transfer workflows, and update the user interface without requiring continuous administrator oversight.

In the next lesson, we will continue refining the marketplace by introducing additional automation and administrative improvements that build upon this fully automated auction lifecycle.