When developing a WordPress plugin, one of the most satisfying moments is seeing your first custom database table appear.
In our Flipnzee Auctions series, we created the wp_flipnzee_auctions table using WordPress’s dbDelta() function.
But how do we know the table was actually created?
There are several ways to verify this. In this article, I’ll show the method I used while developing Flipnzee Auctions on Hostinger, along with several other approaches that work on different hosting providers.
Why Verify the Database?
Suppose you activate your plugin and nothing appears to happen.
Did the activation hook run?
Was the SQL correct?
Did dbDelta() create the table?
Rather than guessing, it’s always a good idea to verify the database.
Method 1 – Using Hostinger phpMyAdmin (Recommended)
Since Flipnzee.com is hosted on Hostinger, this is the method I personally used.
Step 1
Log in to your Hostinger hPanel.
Step 2
Open:
Websites → Manage
for your WordPress website.
Step 3
Open:
Databases → phpMyAdmin
Step 4
Select your WordPress database.
You’ll see all WordPress tables listed in the left sidebar.
Step 5
Scroll through the list.
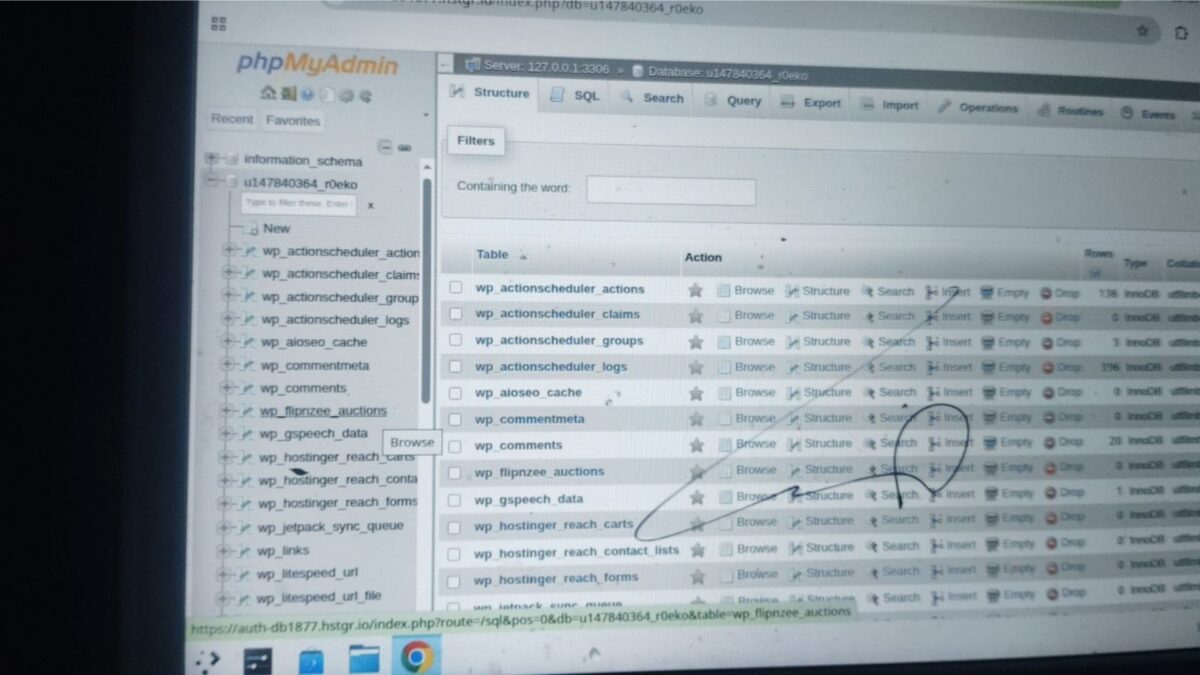
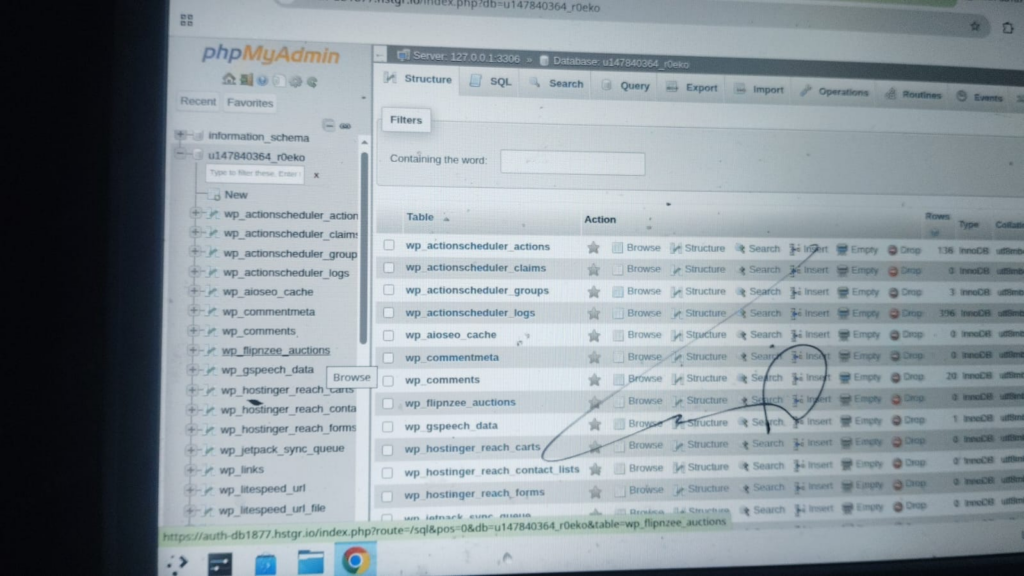
After activating the Flipnzee Auctions plugin, I found the newly created table:
wp_flipnzee_auctions
This confirmed that the activation hook executed successfully and that WordPress created the database table.
My Development Screenshot
The following screenshot shows the actual database used while developing the Flipnzee Auctions plugin.
Notice the presence of the wp_flipnzee_auctions table among the standard WordPress tables.
Method 2 – phpMyAdmin on Other Hosting Providers
Most shared hosting providers offer phpMyAdmin.
For example:
cPanel Hosting
Bluehost
SiteGround
DreamHost
A2 Hosting
Namecheap Hosting
The process is almost identical:
Open phpMyAdmin.
Select your database.
Look for your custom table.
Method 3 – MySQL Workbench
Many professional developers use:
MySQL Workbench
Connect using your database credentials.
Refresh the database.
Your custom table should appear automatically.
Method 4 – Adminer
Adminer is a lightweight alternative to phpMyAdmin.
Many developers prefer it because it’s fast and easy to use.
Simply connect to your database and check whether your table exists.
Method 5 – DBeaver
Another popular database tool is DBeaver.
It’s free and supports multiple database systems.
After connecting to your WordPress database, simply refresh the tables list.
Method 6 – Create an Admin Dashboard (Future Lesson)
As our plugin evolves, we won’t need to open phpMyAdmin every time.
Instead, we’ll build an administration page inside Flipnzee Auctions that displays information such as:
Plugin Status

✓ Plugin Active

✓ Database Connected

✓ Auction Table Exists

Version 1.0.0
This provides a much friendlier experience for plugin users.
We’ll build this later in the series.
Which Method Should Beginners Use?
If you’re just getting started with WordPress plugin development, phpMyAdmin is usually the easiest place to begin because it lets you see exactly what’s happening behind the scenes.
As you become more experienced, you’ll probably rely more on dedicated database tools or build your own plugin diagnostics.
Lesson Learned
Creating a database table is only half the job.
Professional developers always verify that the database matches what the code intended to create.
Developing the habit of checking your database after major schema changes can save hours of debugging later.
Final Thoughts
One of the goals of the Flipnzee Auctions project is not just to build a marketplace plugin, but to understand what happens behind the scenes as WordPress plugins interact with the database.
Learning to inspect your database is an important step toward becoming a confident WordPress developer.
As we continue this series, we’ll gradually move from simply creating tables to inserting records, updating them, retrieving data, and eventually powering a complete website marketplace.
In the previous lesson, we made one of the most important architectural decisions for the Flipnzee ecosystem.
Rather than building one massive plugin that manages everything, we decided to split responsibilities between two plugins:
Flipnzee Analytics manages website listings, verification, Google Analytics, Search Console data, and marketplace insights.
Flipnzee Auctions manages auctions, bidding, transactions, and the website transfer process.
This separation of responsibilities keeps both plugins modular, easier to maintain, and easier to extend in the future.
Now it’s time to create our first custom database table.
WordPress provides a special function called dbDelta() that safely creates or updates database tables. Instead of executing raw SQL directly, dbDelta() compares your desired table structure with the existing database and applies only the necessary changes.
In this lesson, we’ll use dbDelta() to create the first table for the Flipnzee Auctions plugin.
Learning Objectives
By the end of this lesson, you’ll be able to:
Understand why WordPress provides the dbDelta() function.
Create a custom database table during plugin activation.
Use the $wpdb object correctly.
Understand the importance of $wpdb->prefix.
Design a database table that complements another plugin instead of duplicating data.
Why Are We Creating a Custom Table?
Earlier in this series, we decided that auctions are transactional data, not content.
A website listing already exists in Flipnzee Analytics.
The auction plugin only needs to know:
Which listing is being auctioned.
The auction settings.
The current bid.
The auction status.
Who won the auction.
This keeps each plugin focused on its own responsibility.
If your WordPress installation uses a different table prefix, the table name will begin with that prefix instead of wp_.
Why We’re Keeping This Table Simple
You might notice that this table doesn’t include:
Bid history
Payments
Escrow transactions
Website transfers
That’s intentional.
Each of these responsibilities will receive its own dedicated database table in future lessons.
Keeping each table focused on a single responsibility makes the database easier to maintain and allows the plugin to scale as more features are added.
Lesson Summary
In this lesson, we created our first custom database table using WordPress’s dbDelta() function. Instead of duplicating website information, we designed the table to reference listings managed by Flipnzee Analytics using the listing_id field.
This modular architecture allows Flipnzee Analytics to remain the source of truth for website information while Flipnzee Auctions focuses entirely on managing auctions and transactions.
Key Takeaways
✓ Use dbDelta() when creating WordPress database tables.
✓ Always use $wpdb->prefix.
✓ Avoid duplicating data between plugins.
✓ Design each database table with a single responsibility.
✓ Modular plugins are easier to maintain and extend.
Common Mistakes
Hardcoding the wp_ table prefix.
Forgetting to load upgrade.php.
Storing the same information in multiple tables.
Mixing listing data with auction data.
Forgetting to reactivate the plugin after updating the activation hook.
If you’ve been following this series from Lesson 0, you may notice that the architecture of Flipnzee Auctions has evolved as the project has grown.
Originally, the plugin was planned as a standalone website auction platform responsible for both listings and auctions.
As development progressed, we realized that Flipnzee Analytics already provides website listings, verification, Google Analytics integration, and Search Console data. Rather than duplicating those responsibilities, we decided to keep Flipnzee Auctions focused on auctions and transaction management.
This architectural change brings several advantages:
It avoids storing the same data in multiple places.
It keeps each plugin focused on a single responsibility.
It makes both plugins easier to maintain.
It allows future improvements to Flipnzee Analytics to benefit the auction system automatically.
You’ll notice similar design refinements throughout this series. That’s intentional. Real-world software development is an iterative process, and one of the goals of this series is to demonstrate how professional software evolves over time rather than presenting it as if it were designed perfectly from the beginning.
The GitHub repository will always contain the latest implementation, while these lessons document the reasoning behind each important decision.
Project Status
✅ Development environment

✅ Plugin skeleton

✅ Plugin installation

✅ Plugin lifecycle

✅ .gitignore

✅ Data architecture

✅ First database table

⬜ Auction Manager

⬜ Bid engine

⬜ Escrow workflow

⬜ Website transfer workflow

⬜ Notifications

⬜ Version 1.0
Developer’s Notebook
One of the most important principles in software engineering is Separation of Concerns. Each component of a system should have a clearly defined responsibility.
In the Flipnzee ecosystem, Flipnzee Analytics is responsible for collecting and presenting website information, while Flipnzee Auctions is responsible for managing the buying and selling process. By keeping these responsibilities separate, we avoid duplication, reduce complexity, and make both plugins easier to maintain as they evolve.
Looking Ahead
In Lesson 7, we’ll create the Auction Manager class and learn how to insert, retrieve, update, and delete auction records using WordPress’s $wpdb methods. This will be the first time our plugin stores and retrieves real auction data, moving us from database design into application development.
Up to this point, we’ve built a solid foundation for the Flipnzee Auctions plugin. Our plugin installs correctly, follows good development practices, and is managed with Git.
Now it’s time to ask one of the most important questions in WordPress plugin development:
Where should we store our data?
WordPress offers several ways to store information, and choosing the right one can significantly affect your plugin’s performance, scalability, and maintainability.
For Flipnzee Auctions, we’ll eventually need to store:
Website listings
Auctions
Bids
Escrow transactions
Payment records
Website transfer progress
User watchlists
Notifications
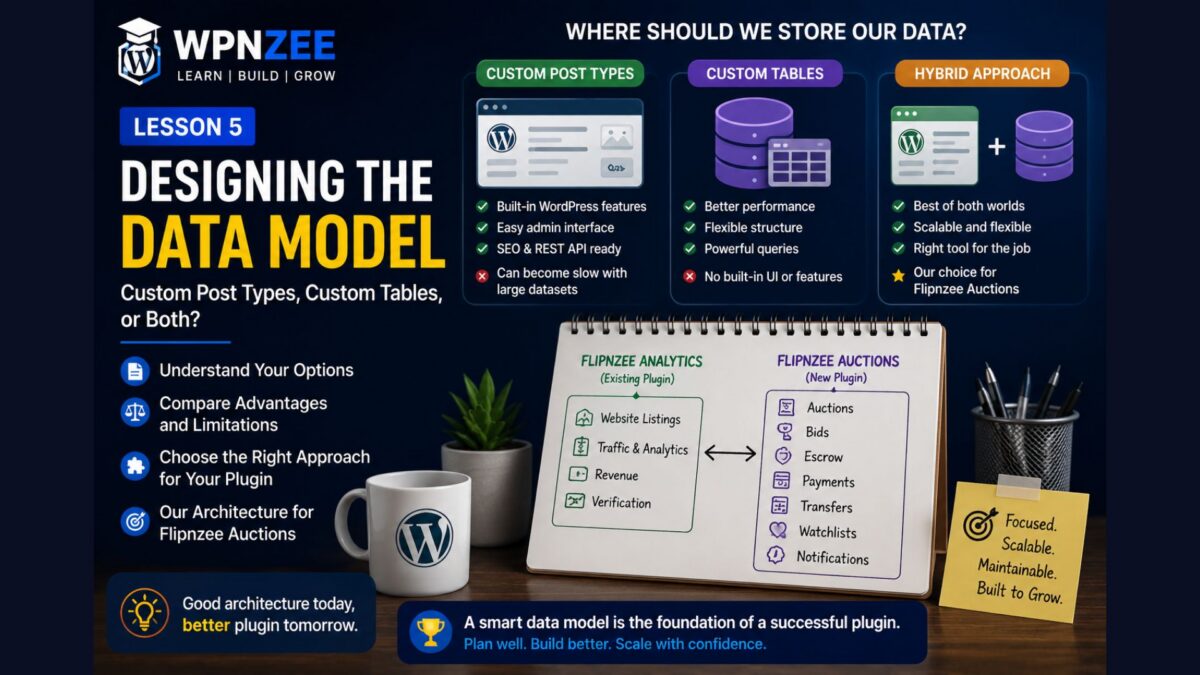
Should all of these be stored as WordPress posts? Should we create our own database tables? Or is a hybrid approach the best solution?
In this lesson, we’ll explore the strengths and limitations of each approach before making our architectural decision.
Learning Objectives
By the end of this lesson, you’ll understand:
How WordPress stores content.
What Custom Post Types (CPTs) are.
What custom database tables are.
The advantages and disadvantages of each approach.
Why many professional plugins combine both.
Why Flipnzee Auctions will use a hybrid architecture.
Option 1 – Using Custom Post Types
Many plugins use Custom Post Types to store structured content.
For example:
Post
Page
Product
Event
Property
Listing
Each item is stored in the standard WordPress posts table, while additional information is stored as post meta.
Advantages include:
Built-in WordPress admin interface.
Revisions.
Categories and tags.
SEO compatibility.
REST API support.
Familiar editing experience.
For website listings, this is often an excellent choice.
This keeps the overall system modular, easier to maintain, and easier to extend.
Why This Matters
One of the biggest mistakes beginners make is trying to solve every problem with the same tool.
Professional developers choose the storage mechanism that best fits the type of data being stored.
Content and transactions have different requirements.
By recognizing that difference early, we can build a plugin that scales more effectively over time.
Lesson Summary
In this lesson, we explored three approaches to storing data in WordPress:
Custom Post Types
Custom Database Tables
A Hybrid Approach
Rather than choosing one exclusively, we’ve decided that Flipnzee Auctions will complement the existing Flipnzee Analytics plugin by storing transactional data in dedicated database tables while continuing to use WordPress where it makes sense.
This architectural decision will guide the remainder of the project.
Key Takeaways
✓ WordPress provides several ways to store data.
✓ Custom Post Types are ideal for content.
✓ Custom tables are well suited to transactional data.
✓ Many successful plugins use both approaches.
✓ Flipnzee Auctions will use a hybrid architecture.
Common Mistakes
Assuming every plugin should use only Custom Post Types.
Creating database tables without a clear need.
Duplicating data already managed by another plugin.
Designing the database before understanding the application’s requirements.
Note: This lesson focuses on architecture and planning. Unless you’ve actually changed files in your repository (such as updating ROADMAP.md or documentation), you don’t need to create a Git commit just because you published the lesson.
Project Status
✅ Development environment

✅ Plugin skeleton

✅ Plugin installation

✅ Plugin lifecycle

✅ .gitignore

✅ Data architecture planned

⬜ Database tables

⬜ Auction model

⬜ Bid engine

⬜ Escrow

⬜ Payment gateways

⬜ Website transfer

⬜ Version 1.0
Developer’s Notebook
Software architecture is about making good decisions before writing code. It’s tempting to start creating tables immediately, but taking time to understand your data leads to cleaner, more maintainable systems. In this series, we’ll build Flipnzee Auctions step by step, ensuring each design decision has a clear purpose rather than simply following convention.
Looking Ahead
In Lesson 6, we’ll create our first custom database table using WordPress’s dbDelta() function. We’ll learn why WordPress provides this function, how it safely creates and updates tables, and how we’ll use it to store auction data as our plugin grows.
In the previous lesson, we learned how WordPress discovers and loads plugins during every request. We also explored the difference between plugin activation and the normal loading process.
While developing Flipnzee Auctions, we created a ZIP file so that we could install and test our plugin in WordPress. That ZIP file served its purpose, but it raised an important question:
Should generated files be stored in Git?
The answer is usually no.
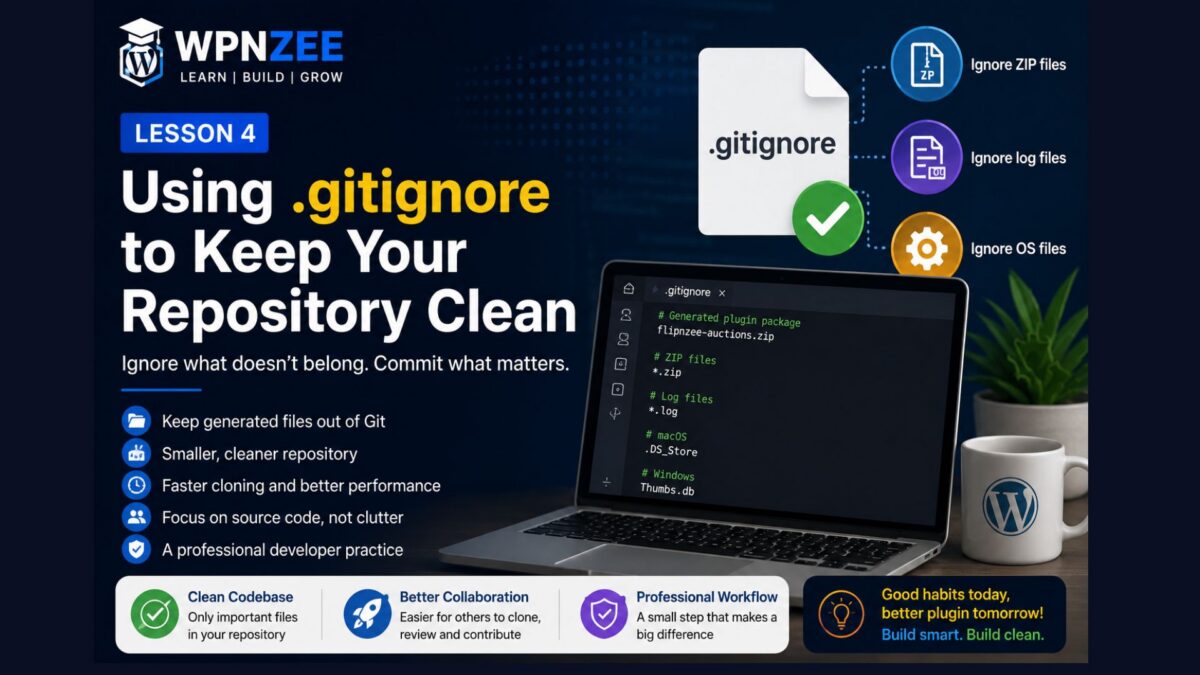
Professional developers use a special file called .gitignore to tell Git which files and folders should never be tracked.
In this lesson, we’ll create our first .gitignore file and learn why keeping a repository clean is an important part of software development.
Learning Objectives
By the end of this lesson, you’ll be able to:
Understand the purpose of a .gitignore file.
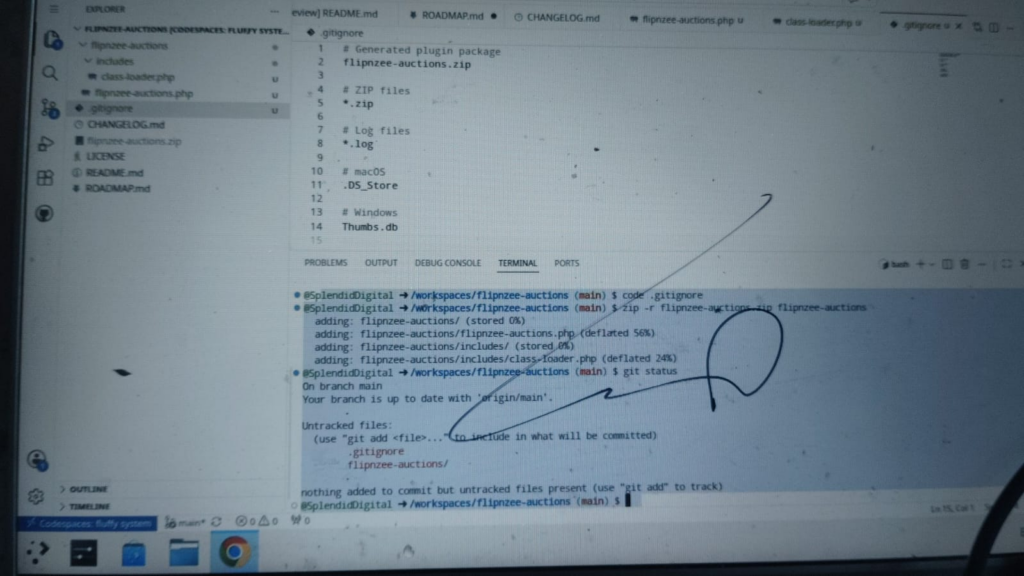
Create a .gitignore file in GitHub Codespaces.
Prevent generated ZIP files from being tracked by Git.
Understand the difference between source code and generated files.
Learn what kinds of files should never be committed.
What Is a .gitignore File?
A .gitignore file tells Git:
“Ignore these files. Don’t show them as changes, and don’t include them in commits.”
It does not delete files.
It simply prevents Git from tracking them.
Why Do We Need One?
Suppose you create:
flipnzee-auctions.zip
This ZIP file is generated from your source code.
It can always be recreated.
If we committed every ZIP file to GitHub, our repository would quickly become cluttered with generated files instead of the source code that actually matters.
Our Git repository should contain the recipe, not the finished product.
Step 1 – Delete the Existing ZIP File
If you still have the ZIP file from Lesson 2, delete it.
GUI Method
In GitHub Codespaces Explorer:
Right-click flipnzee-auctions.zip
Select Delete
Terminal Method
rm flipnzee-auctions.zip
Verify it has been removed:
ls
The ZIP file should no longer appear.
Step 2 – Create a .gitignore File
Make sure you’re in the repository root.
pwd
Expected output:
/workspaces/flipnzee-auctions
GUI Method
Click New File.
Create:
.gitignore
Terminal Method
touch .gitignore
Open it:
code .gitignore
Step 3 – Add Your First Ignore Rule
Add the following:
# Generated plugin package
flipnzee-auctions.zip
Save the file.
That’s all!
From now on, Git will ignore the generated plugin ZIP.
Step 4 – Let’s Expand It
As our project grows, we’ll generate more temporary files.
Let’s prepare for that now.
Replace the contents of .gitignore with:
# Generated plugin package
flipnzee-auctions.zip

# ZIP files
*.zip

# Log files
*.log

# macOS
.DS_Store

# Windows
Thumbs.db
This is still a very small .gitignore, but it’s a good start.
We’ll continue adding to it throughout the project.
Generally speaking, Git repositories should contain:
✅ Source code
✅ Documentation
✅ Configuration
❌ Generated ZIP files
❌ Temporary files
❌ Cache files
❌ Log files
❌ Operating system metadata
Why This Matters
A clean Git repository has many advantages:
Smaller repositories.
Faster cloning.
Easier code reviews.
Fewer accidental commits.
More professional project organization.
Keeping only the files that matter makes collaboration much easier.
Lesson Summary
In this lesson, we created our first .gitignore file and learned why professional developers keep generated files out of version control. We also distinguished between source code, which belongs in Git, and generated artifacts, which can always be recreated.
Although .gitignore is a small file, it plays an important role in keeping software projects clean and maintainable.
Key Takeaways
✓ .gitignore tells Git which files to ignore.
✓ Ignored files remain on your computer.
✓ Generated ZIP files should not be committed.
✓ Source code belongs in Git.
✓ Build artifacts generally do not.
Common Mistakes
Creating .gitignore.txt instead of .gitignore.
Adding files to .gitignore after they’ve already been committed.
Thinking .gitignore deletes files.
Forgetting to save the .gitignore file before testing.
✅ Development environment

✅ Plugin skeleton

✅ Plugin installation

✅ Plugin lifecycle

✅ .gitignore

⬜ Database tables

⬜ Auction data model

⬜ Bidding engine

⬜ Escrow

⬜ Payment gateways

⬜ Website transfer

⬜ Version 1.0
Developer’s Notebook
One of the easiest ways to recognize a well-maintained software project is by looking at its Git repository. Professional repositories focus on the source code, documentation, and configuration files that define the project. Temporary files, generated packages, and operating system metadata are intentionally left out. A well-crafted .gitignore file is a small investment that pays dividends throughout the lifetime of a project.
Looking Ahead
In Lesson 5, we’ll take our first step into persistent data by creating the database tables that will power the Flipnzee Auctions plugin. We’ll learn why complex plugins often use custom database tables instead of relying entirely on WordPress post types and post meta, and we’ll create our first table using WordPress’s dbDelta() function.
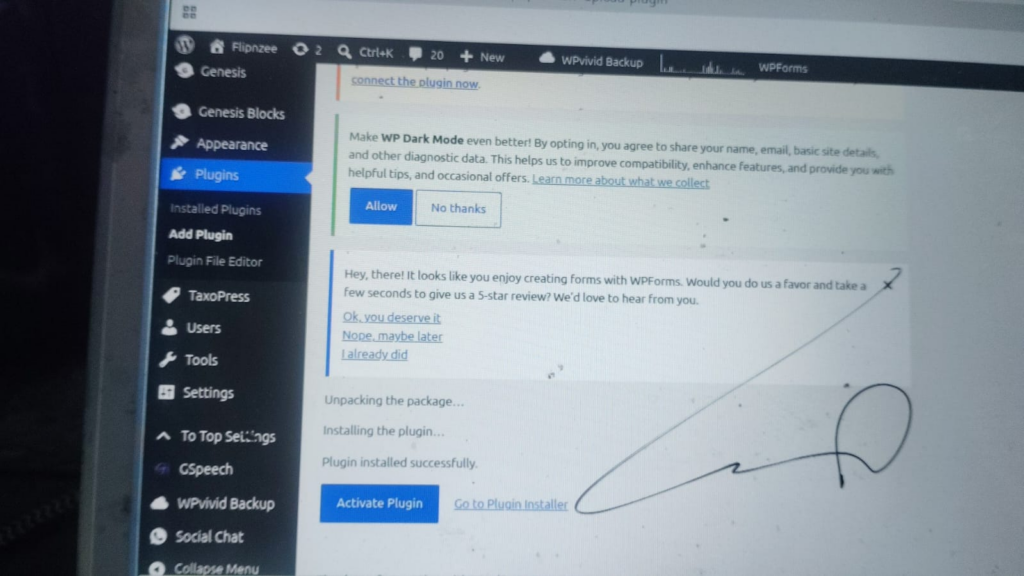
If everything is correct, WordPress will display a success message.
Step 5: Activate the Plugin
Click:
Activate Plugin
Navigate to:
Plugins → Installed Plugins
You should now see:
Flipnzee Auctions

Version 1.0.0

By Splendid Digital Solutions
Congratulations! WordPress now recognizes your plugin.
Although it doesn’t yet contain any auction functionality, it has officially become a valid WordPress plugin.
Step 6: Test Activation and Deactivation
Deactivate the plugin.
Activate it again.
Nothing visible should happen—and that’s perfectly normal.
Behind the scenes, WordPress executes the activation and deactivation hooks that we created in Lesson 1.
At the moment they simply refresh the rewrite rules.
In future lessons, those same hooks will create database tables, initialize settings, and perform other setup tasks.
Understanding What Just Happened
When WordPress activated your plugin, it performed several tasks automatically:
Read the plugin header.
Loaded flipnzee-auctions.php.
Checked the ABSPATH security condition.
Defined the plugin constants.
Registered the activation hook.
Loaded the Flipnzee_Auction_Loader class.
Even though your plugin currently has no visible features, WordPress has already built the execution environment that will support everything we add later.
Common Installation Problems
“Plugin could not be activated.”
Usually caused by:
PHP syntax errors
Missing semicolons
Incorrect file names
Plugin Doesn’t Appear
Usually caused by:
Plugin header missing
Main PHP file inside the wrong folder
Incorrect ZIP structure
White Screen
Usually caused by a PHP fatal error.
Enable debugging by adding the following to wp-config.php:
In this lesson, we packaged our plugin, installed it on a WordPress website, activated it, and confirmed that WordPress recognizes it as a valid plugin. This milestone is important because it proves that our project structure and plugin header are correct before we begin adding more complex functionality.
Key Takeaways
WordPress installs plugins from ZIP files.
Only the plugin folder—not the entire repository—should be packaged.
Testing early helps identify problems before they become difficult to debug.
Activation hooks execute every time the plugin is activated.
Common Mistakes
Zipping the entire GitHub repository instead of the plugin folder.
Uploading the wrong ZIP file.
Forgetting to save changes before creating the ZIP.
Ignoring PHP errors during activation.
Git Commands Used
zip -r flipnzee-auctions.zip flipnzee-auctions

git add .

git commit -m "Lesson 2: Install plugin in WordPress"

git push
Project Status
✅ Development environment ready

✅ GitHub repository created

✅ Plugin skeleton completed

✅ Plugin installed successfully

⬜ Database installation

⬜ Auction engine

⬜ Bidding system

⬜ Escrow workflow

⬜ Payment gateways

⬜ Website transfer

⬜ Reports

⬜ REST API

⬜ Version 1.0 Release
Developer’s Notebook
Professional developers validate their work continuously. A plugin that installs and activates successfully gives you confidence that the project’s structure is sound. As we continue adding features, we’ll continue testing after each major milestone, making problems easier to isolate and fix.
As the Flipnzee ecosystem grows, this plugin will work alongside other Flipnzee plugins. For example, Flipnzee Analytics is responsible for collecting and displaying verified website metrics, while Flipnzee Auctions focuses on the buying, bidding, payment, and transfer process. Keeping these responsibilities separate makes each plugin easier to maintain and extend.
Looking Ahead
In Lesson 3, we’ll explore the WordPress Plugin Lifecycle. You’ll learn exactly what happens from the moment WordPress loads your plugin until your code is executed. Understanding this lifecycle is essential for writing efficient, secure, and maintainable plugins, and it will prepare us for creating our first database tables in the lessons that follow.
In the previous lesson, we successfully installed and activated the Flipnzee Auctions plugin on our WordPress website. Even though the plugin doesn’t yet display any visible functionality, WordPress already recognizes it as a valid plugin and executes its code whenever appropriate.
But have you ever wondered what actually happens behind the scenes?
How does WordPress discover plugins?
When does it read the plugin header?
Why does the ABSPATH constant already exist?
When are activation hooks executed?
And why do they run only once?
Understanding these questions is one of the biggest differences between simply copying WordPress code and becoming a confident WordPress plugin developer.
In this lesson, we’ll follow the complete journey of our plugin—from the moment a visitor requests a page until our code is executed.
Learning Objectives
By the end of this lesson, you’ll understand:
How WordPress discovers installed plugins.
What happens during plugin activation.
What happens during every page request.
Why the ABSPATH security check works.
When your plugin code executes.
The purpose of activation and deactivation hooks.
Why understanding the plugin lifecycle makes debugging easier.
Why This Matters
Many beginners think WordPress “magically” loads plugins.
It doesn’t.
There is a very specific sequence of events.
Once you understand that sequence, many concepts become much easier:
Hooks
Filters
AJAX
REST APIs
Database creation
Custom Post Types
Scheduled tasks
Almost every advanced WordPress feature depends on understanding when your code runs.
The Journey Begins
Imagine someone visits:
https://flipnzee.com
The browser sends a request to the web server.
The web server loads WordPress.
WordPress then begins its own startup process.
Eventually it reaches the point where it starts loading plugins.
Step 1 — WordPress Finds Active Plugins
WordPress stores the list of active plugins in its database.
During startup it reads that list.
If your plugin is active:
Flipnzee Auctions
WordPress prepares to load:
flipnzee-auctions/flipnzee-auctions.php
This is why the main plugin file is so important.
Step 2 — WordPress Reads the Plugin Header
Before executing the plugin, WordPress reads the comment block at the top of the file.
Load Plugin
↓
Execute Activation Function
↓
Return Control
Your activation function currently contains:
flush_rewrite_rules();
Later we’ll expand it to:
Create database tables.
Create default settings.
Set plugin version.
Prepare the auction system.
What Happens During Deactivation?
When you deactivate the plugin:
WordPress executes:
flipnzee_auction_deactivate()
Currently it refreshes rewrite rules.
Later we’ll also:
Remove scheduled tasks.
Clear caches.
Perform cleanup.
Notice that we won’t delete auction data during deactivation.
Users expect their data to remain if they reactivate the plugin later.
Understanding One Important Difference
Many beginners think:
Activation happens every time a page loads.
It doesn’t.
Activation occurs once.
Normal plugin loading occurs on every request.
Understanding this distinction prevents many common mistakes.
Improving Our Development Workflow
As our project grows, we’ll start generating temporary files such as plugin ZIP archives.
Rather than storing these generated files in Git, professional developers use a .gitignore file to tell Git which files should be ignored.
In the next lesson, we’ll create our first .gitignore file and begin adopting even more professional development practices.
Lesson Summary
In this lesson, we explored the complete lifecycle of a WordPress plugin. We learned how WordPress discovers plugins, reads plugin headers, executes PHP code, registers hooks, and loads classes. We also distinguished between activation, deactivation, and the normal loading process that occurs on every page request.
Understanding this lifecycle gives us a strong conceptual foundation for every feature we’ll build in the remaining lessons.
Key Takeaways
✓ WordPress loads active plugins during every request.
✓ Plugin headers are read by WordPress, not PHP.
✓ ABSPATH exists because WordPress has already started.
✓ Activation hooks are registered during loading but execute only during activation.
✓ Classes are loaded only after the main plugin file executes.
✓ Understanding the plugin lifecycle makes debugging much easier.
Common Mistakes
Assuming activation hooks run on every page load.
Placing expensive operations outside hooks, causing them to execute on every request.
Removing user data during plugin deactivation.
Confusing plugin registration with plugin execution.
✅ Development environment
✅ Plugin skeleton
✅ Plugin installation
✅ Plugin lifecycle
⬜ .gitignore
⬜ Database tables
⬜ Auction data model
⬜ Bidding engine
⬜ Escrow
⬜ Payment gateways
⬜ Website transfer
⬜ Version 1.0
Developer’s Notebook
One of the biggest milestones in becoming a professional WordPress developer is realizing that your code doesn’t run in isolation. Every plugin participates in WordPress’s startup process. The better you understand that process, the easier it becomes to write efficient, secure, and maintainable plugins. Throughout the remainder of this series, we’ll continue referring back to the plugin lifecycle as we introduce hooks, database tables, AJAX, REST APIs, and background tasks.
Looking Ahead
In Lesson 4, we’ll create our first .gitignore file and begin preparing the project for long-term development. We’ll also discuss which files belong in Git, which should never be committed, and why professional developers treat generated files differently from source code.
Welcome to Lesson 1 of the Building Flipnzee Auctions series.
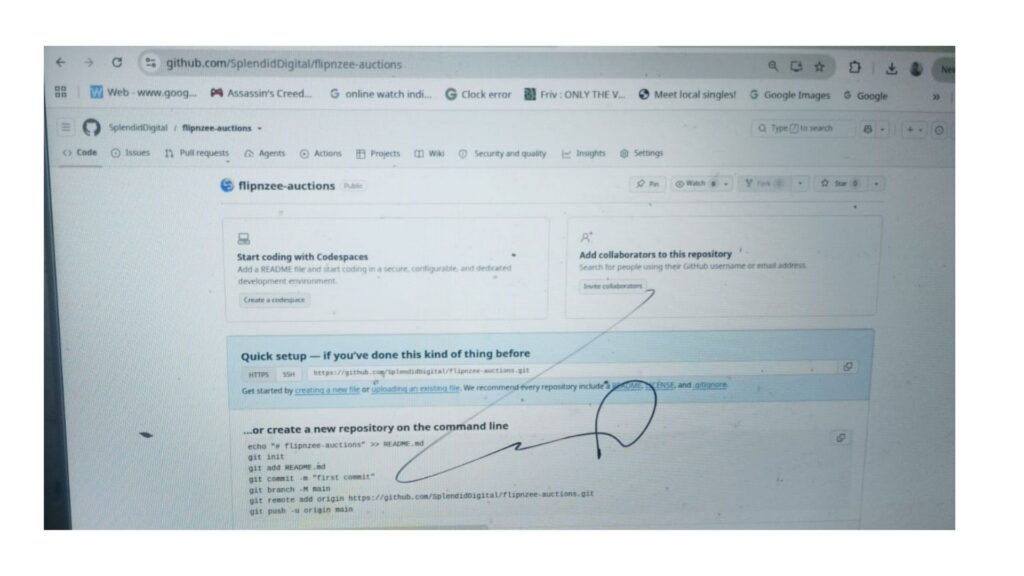
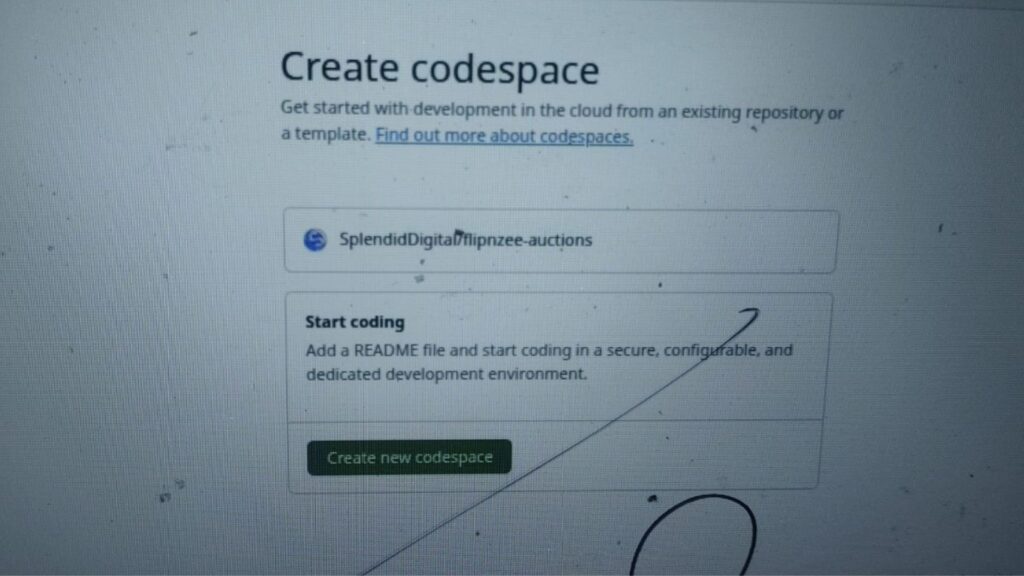
In the previous lesson, we created our GitHub repository, launched GitHub Codespaces, organized our project, and learned the basics of version control.
Now it’s time to write our first PHP code.
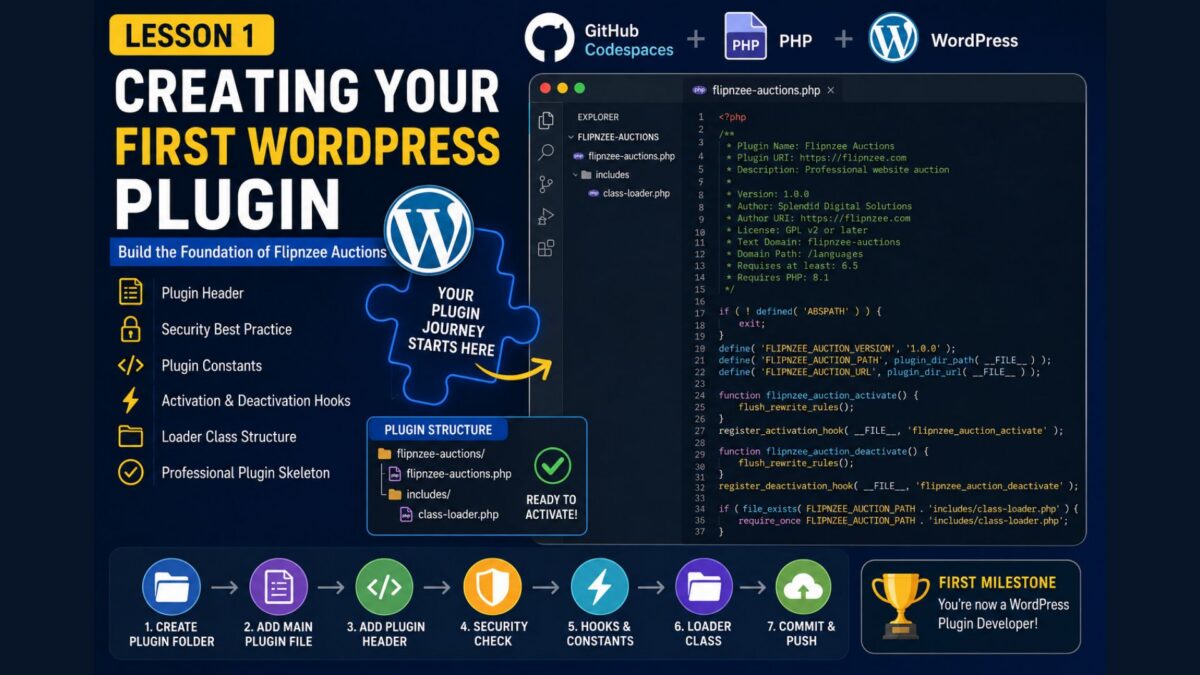
By the end of this lesson, you’ll have a WordPress plugin that appears in the Plugins page of your WordPress website and can be activated just like any other plugin.
Although the plugin won’t do anything yet, this is an exciting milestone because we’re laying the foundation for everything that follows.
What You’ll Learn
In this lesson you’ll learn how to:
Create the WordPress plugin folder
Create the main plugin file
Understand the plugin header
Protect your plugin from direct access
Define reusable plugin constants
Register activation and deactivation hooks
Create a simple loader class
Commit your changes to GitHub
Step 1: Enter the Plugin Folder
Open the integrated terminal in GitHub Codespaces.
Navigate into the plugin folder:
cd flipnzee-auctions
Confirm your location:
pwd
You should see something similar to:
/workspaces/flipnzee-auctions/flipnzee-auctions
From now on, everything we create belongs inside this folder.
Step 2: Create the Main Plugin File
Create the plugin’s main PHP file.
GUI Method
Click New File in the Explorer.
Create:
flipnzee-auctions.php
Terminal Method
touch flipnzee-auctions.php
Open it:
code flipnzee-auctions.php
Step 3: Add the Plugin Header
Copy the following code into the file.
<?php
/**
* Plugin Name: Flipnzee Auctions
* Plugin URI: https://flipnzee.com
* Description: Professional website auction platform for Flipnzee.
* Version: 1.0.0
* Author: Splendid Digital Solutions
* Author URI: https://flipnzee.com
* License: GPL v2 or later
* Text Domain: flipnzee-auctions
* Domain Path: /languages
* Requires at least: 6.5
* Requires PHP: 8.1
*/
if (!defined('ABSPATH')) {
    exit;
}
Save the file.
Congratulations!
You’ve just created the smallest possible WordPress plugin.
Understanding the Plugin Header
Everything inside the comment block is called the Plugin Header.
When WordPress scans the plugins directory, it looks for these special comments.
Let’s understand each line.
Plugin Name
Plugin Name: Flipnzee Auctions
This is the name displayed on the Installed Plugins page.
Plugin URI
Plugin URI: https://flipnzee.com
This points users to the official plugin website.
Description
Description: Professional website auction platform for Flipnzee.
A short explanation shown beneath the plugin name.
Version
Version: 1.0.0
Every release should have a version number.
Later we’ll learn about semantic versioning.
Author
Author: Splendid Digital Solutions
Displays the plugin developer.
Author URI
Author URI: https://flipnzee.com
Links to your website.
Text Domain
Used for translating the plugin into different languages.
Requires PHP
Requires PHP: 8.1
Prevents installation on servers running older PHP versions.
Constants allow us to define values once and reuse them throughout the plugin.
For example:
FLIPNZEE_AUCTION_PATH
is much cleaner than repeatedly writing:
plugin_dir_path(__FILE__)
Step 6: Register the Activation Hook
Add:
function flipnzee_auction_activate() {
flush_rewrite_rules();
}
register_activation_hook(__FILE__, 'flipnzee_auction_activate');
This function runs automatically when the plugin is activated.
Today it only refreshes WordPress rewrite rules.
Later it will also create our database tables.
Step 7: Register the Deactivation Hook
Add:
function flipnzee_auction_deactivate() {
flush_rewrite_rules();
}
register_deactivation_hook(__FILE__, 'flipnzee_auction_deactivate');
This runs whenever the plugin is deactivated.
Step 8: Create the Includes Folder
Professional plugins avoid placing thousands of lines inside one file.
Create a folder named:
includes
Inside it, create a new file:
class-loader.php
Step 9: Load the Loader Class
Back in flipnzee-auctions.php, add:
if (file_exists(FLIPNZEE_AUCTION_PATH . 'includes/class-loader.php')) {
require_once FLIPNZEE_AUCTION_PATH . 'includes/class-loader.php';
}
This prepares the plugin for modular development.
Step 10: Create the Loader Class
Open:
includes/class-loader.php
Add:
<?php
if (!defined('ABSPATH')) {
    exit;
}
class Flipnzee_Auction_Loader
{
public function __construct()
{
}
}
new Flipnzee_Auction_Loader();
Although the class is currently empty, it will eventually load every component of our plugin, including auctions, bids, payments, reports, APIs, and notifications.
Your plugin skeleton is now safely stored in GitHub.
Summary
Congratulations!
You’ve officially written your first WordPress plugin.
Although it doesn’t yet contain any auction functionality, you’ve created the foundation that every future lesson will build upon.
Lesson Summary
In this lesson, we built the foundation of the Flipnzee Auctions plugin using GitHub Codespaces. We created the main plugin file, added the WordPress plugin header, protected the plugin from direct access, defined reusable constants, registered activation and deactivation hooks, and introduced a loader class to prepare for a modular architecture.
Although the plugin is still in its early stages, we’ve established a professional project structure that will allow us to add features in a clean and maintainable manner as the series progresses.
Key Takeaways
✓ Every WordPress plugin begins with a properly formatted plugin header.
✓ WordPress automatically discovers plugins by reading their headers.
✓ The ABSPATH check prevents direct access to plugin files.
✓ Plugin constants reduce repetition and improve maintainability.
✓ Activation and deactivation hooks allow WordPress to execute code at important points in the plugin lifecycle.
✓ A loader class helps organize larger plugins into smaller, reusable components.
Common Mistakes
When completing this lesson, beginners often encounter one or more of the following issues:
Creating files in the GitHub repository root instead of the flipnzee-auctions plugin folder.
Forgetting to save files before committing changes.
Omitting the opening <?php tag.
Misspelling one of the required plugin header fields.
Creating the includes folder in the wrong location.
Forgetting to commit and sync changes to GitHub.
If your plugin does not appear in the WordPress Plugins page, review each of these items before moving on.
Git Commands Used
During this lesson, we used the following Git and terminal commands:
cd flipnzee-auctions

touch flipnzee-auctions.php

mkdir includes

touch includes/class-loader.php

git add .

git commit -m "Lesson 1: Create plugin skeleton"

git push
Project Status
✅ Development environment ready

✅ GitHub repository created

✅ GitHub Codespaces configured

✅ Plugin skeleton completed

⬜ Database installation

⬜ Auction engine

⬜ Bidding system

⬜ Escrow workflow

⬜ Payment gateways

⬜ Website transfer

⬜ Reports & Analytics

⬜ REST API

⬜ Version 1.0 Release
Source Code
The complete source code for this project is maintained in the official GitHub repository.
Rather than embedding the full source code in every lesson, the GitHub repository serves as the single source of truth and always contains the latest version of the project. This allows the tutorial series to focus on explaining concepts and design decisions while ensuring readers have access to the most up-to-date implementation.
(Insert your GitHub repository link here.)
Developer’s Notebook
One of the biggest mistakes new developers make is trying to build an entire application before creating a solid foundation.
Professional software projects evolve incrementally. We start with a minimal but well-structured plugin, verify that it works, and then add one feature at a time. This approach makes debugging easier, keeps the codebase organized, and reduces the likelihood of introducing difficult-to-find bugs.
Throughout this series, you’ll see the Flipnzee Auctions plugin grow from a simple plugin skeleton into a fully featured website auction platform. By following this step-by-step approach, you’ll not only build a working plugin but also gain insight into how experienced WordPress developers approach large software projects.
Looking Ahead
In Lesson 2, we’ll package our plugin into a ZIP file, install it on a WordPress website, activate it, and verify that WordPress recognizes it as a valid plugin. This will be the first time we see the Flipnzee Auctions plugin running inside WordPress.
Welcome to Lesson 0 of the Building Flipnzee Auctions series.
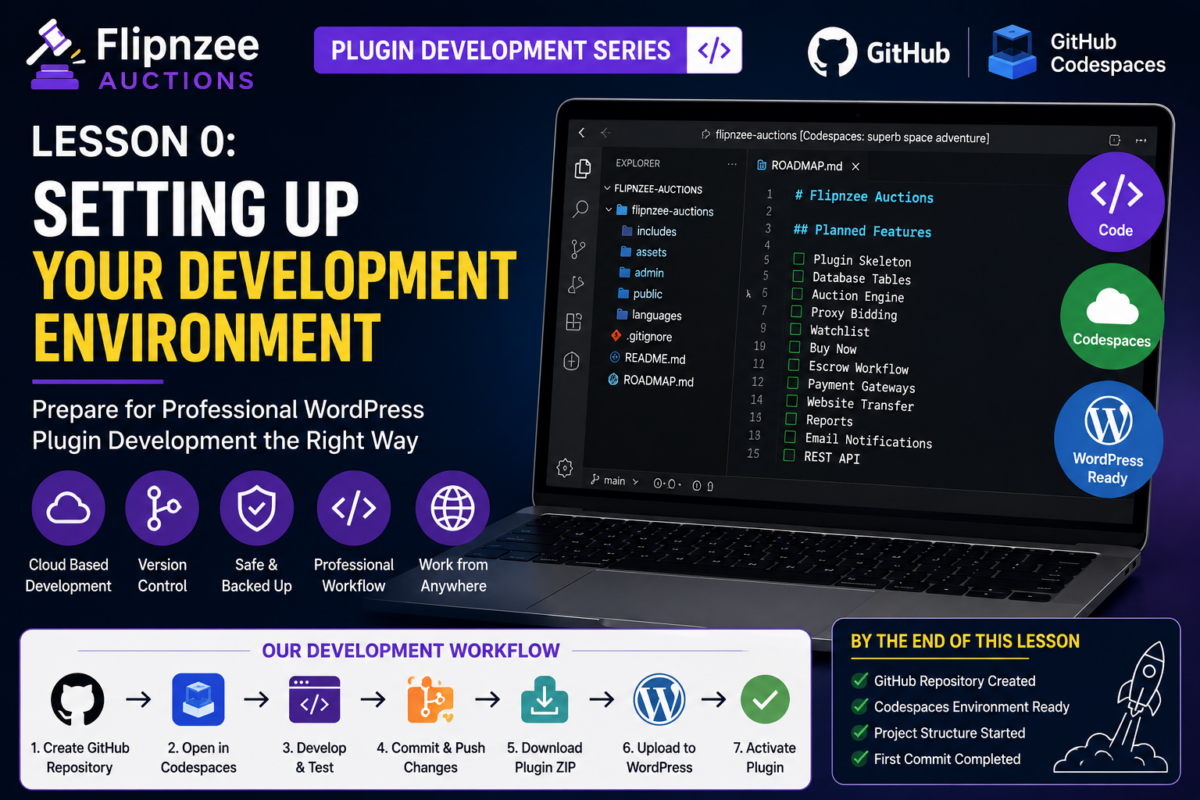
Before writing a single line of PHP, let’s prepare our development environment.
Many WordPress tutorials begin by creating a folder inside wp-content/plugins and editing files directly on the server. While that approach works, it doesn’t scale well and doesn’t teach the workflow used by most professional developers.
Throughout this series, we’ll use GitHub Codespaces as our development environment. This means you can build your plugin entirely in your web browser, keep your code safely backed up in GitHub, and deploy it to any WordPress website by simply uploading a ZIP file.
Even if you’ve never used Git or GitHub before, don’t worry. We’ll learn everything step by step.
Why Use GitHub Codespaces?
GitHub Codespaces provides a complete Visual Studio Code development environment in your browser.
There is no need to install:
PHP
Apache
MySQL
Visual Studio Code
Git
Everything runs in the cloud.
Some of the benefits include:
Develop from any computer
Automatic backups with Git
Professional development workflow
Easy collaboration
No risk of accidentally breaking your live website
Perfect for open-source projects
By the end of this series, your entire plugin will be stored in a GitHub repository that you can continue improving for years.
Our Development Workflow
Every lesson in this series will follow the same workflow.
Learning a few terminal commands now will make development much easier later.
Step 7: Organize Your Repository
Before we start writing plugin code, let’s organize our GitHub repository like a professional software project.
It’s important to understand that a GitHub repository and a WordPress plugin are not exactly the same thing.
Think of the repository as the home for your entire project. Besides the plugin itself, it also contains documentation, licenses, changelogs, and other files that help you manage and distribute the project.
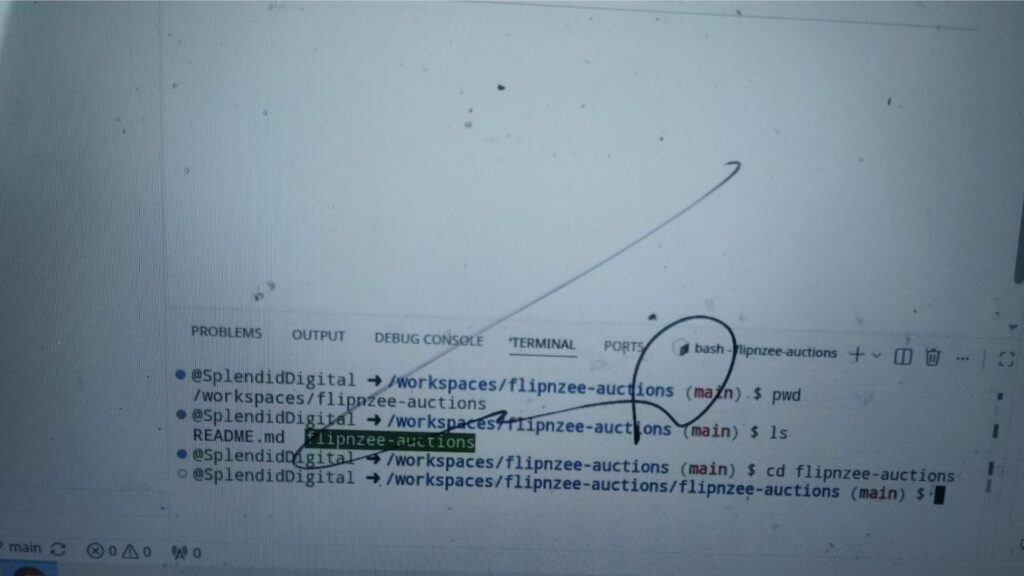
By the end of this step, your repository should look like this:
Notice that there are two folders named flipnzee-auctions.
The outer one is your GitHub repository, while the inner one will become the actual WordPress plugin.
When we eventually upload our plugin to WordPress, we’ll package only the inner folder into a ZIP file.
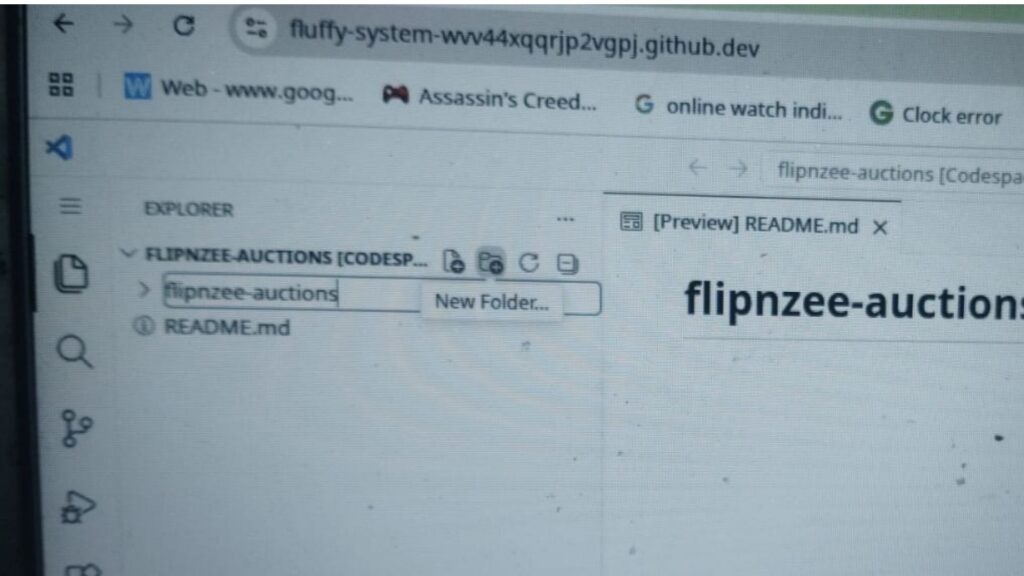
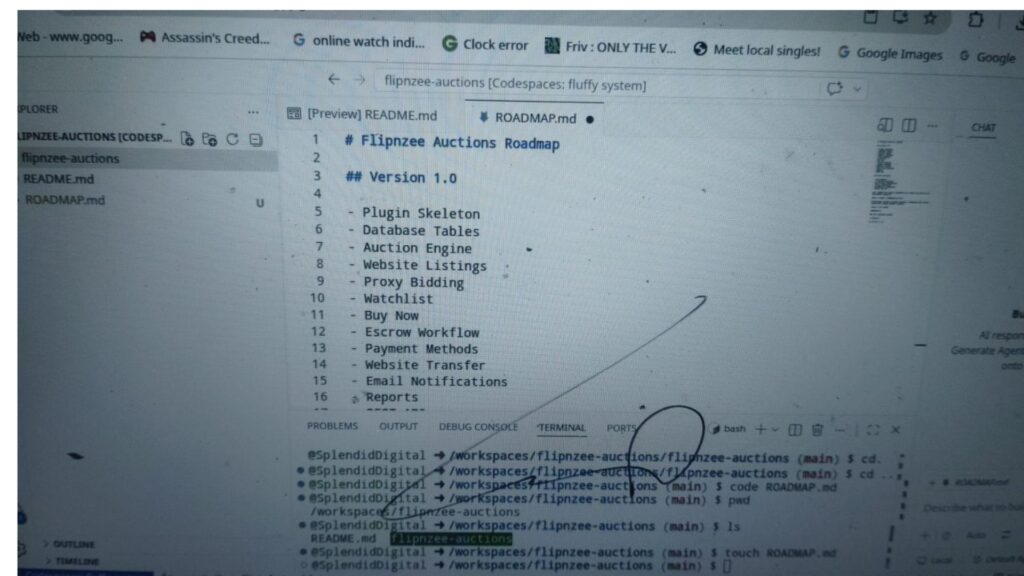
Step 8: Create the ROADMAP.md File
In the root of your GitHub repository (not inside the plugin folder), create a file named:
ROADMAP.md
Add the following content:
# Flipnzee Auctions Roadmap

## Version 1.0

- Plugin Skeleton
- Database Tables
- Auction Engine
- Website Listings
- Proxy Bidding
- Watchlist
- Buy Now
- Escrow Workflow
- Payment Methods
- Website Transfer
- Email Notifications
- Reports
- REST API

## Future Versions

- Live Bidding
- AI Website Valuation
- Multi-vendor Marketplace
- Stripe Integration
- WooCommerce Integration
- Mobile App API
This roadmap will evolve throughout the project and serve as our development checklist.
A Note About README.md
You may have noticed that your repository already contains a file named README.md.
That’s perfectly normal.
If you created your repository with the “Add a README file” option enabled, GitHub automatically generated this file for you. This is standard practice and gives every repository a landing page describing the project.
We’ll continue updating this README.md throughout the series as our plugin evolves. By the time we release Flipnzee Auctions v1.0, it will contain installation instructions, feature highlights, requirements, screenshots, and developer documentation.
For now, there’s nothing you need to change in README.md. We’ll focus on creating the remaining project files.
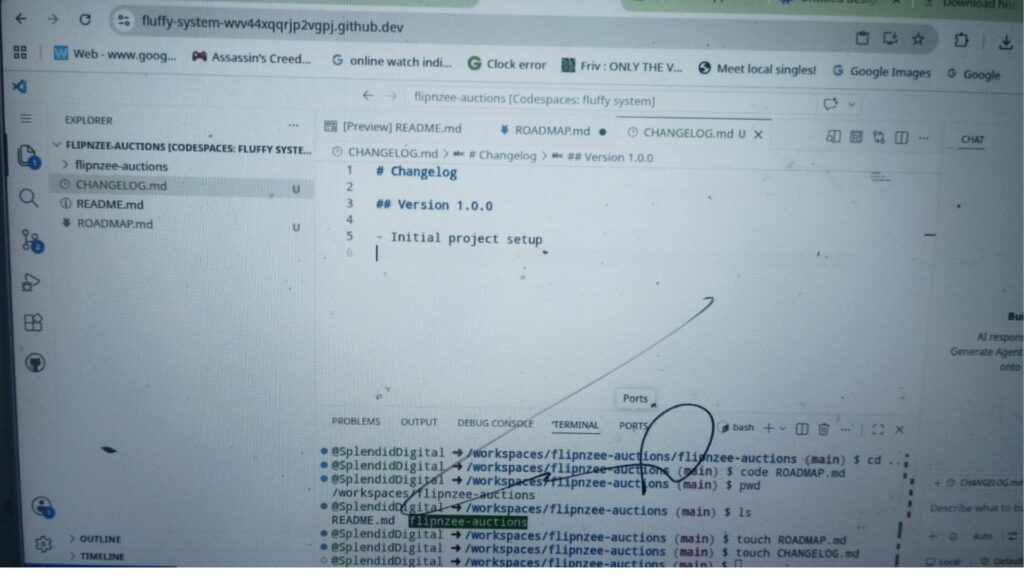
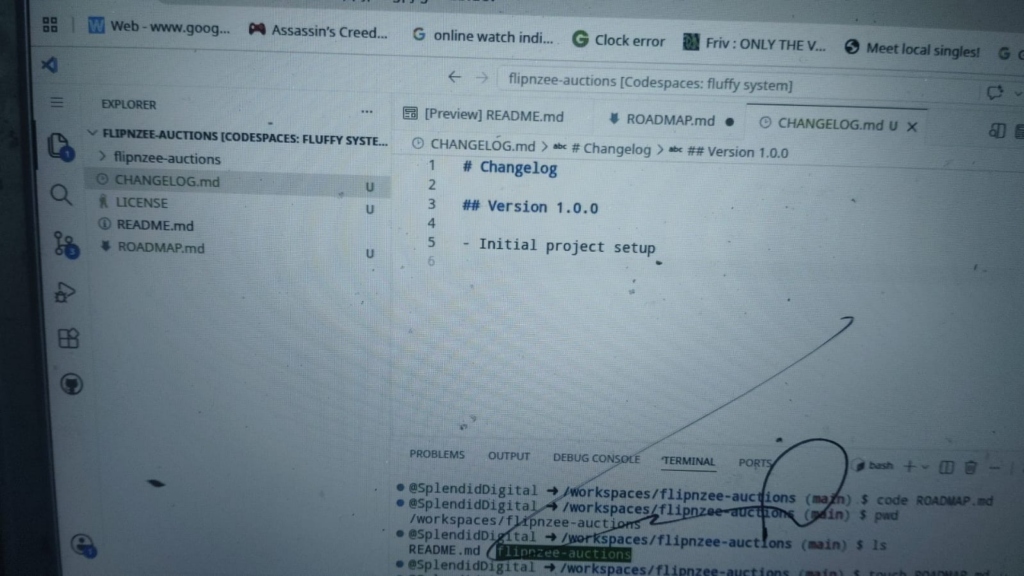
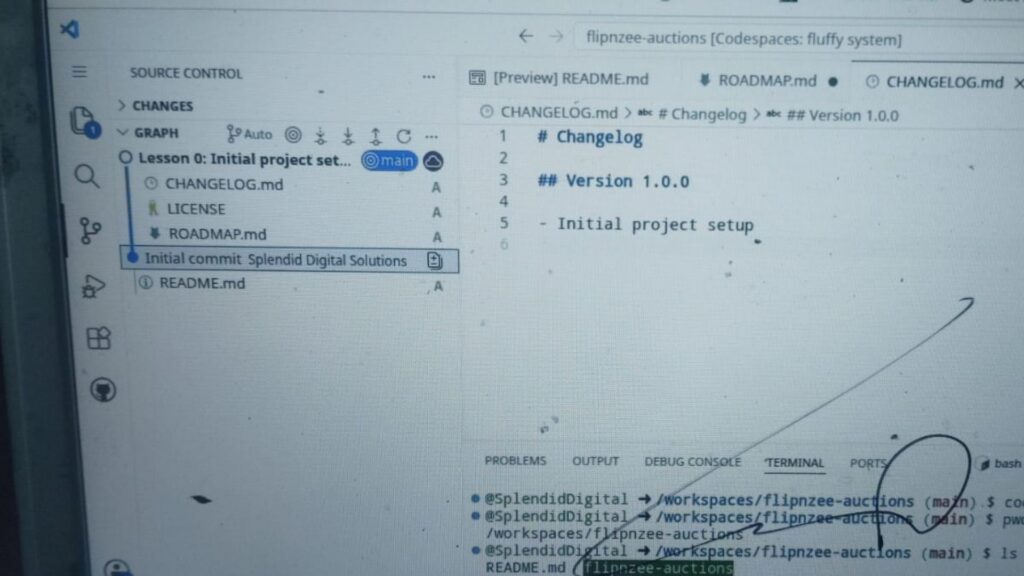
Step 9: Create a CHANGELOG.md File
Professional software projects maintain a changelog that records significant changes between releases.
Create a file named:
CHANGELOG.md
Add the following content:
# Changelog

## Version 1.0.0

- Initial project setup
As we complete each lesson, we’ll update this file with new features and improvements.
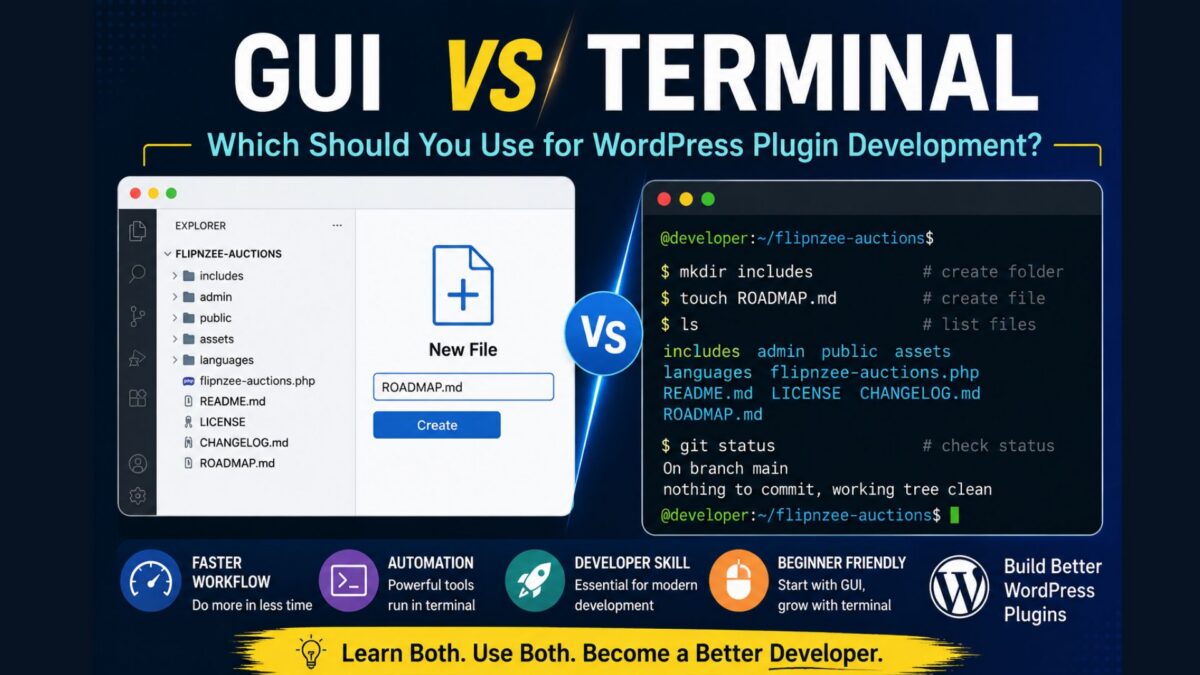
If you’re just starting your journey into WordPress plugin development, one of the first things you’ll notice is that experienced developers often use the terminal (command line), while beginners usually prefer the graphical user interface (GUI).
Should you force yourself to learn the terminal immediately? Or is it perfectly acceptable to rely on the GUI?
The answer is simpler than you might think.
What Is a GUI?
A Graphical User Interface (GUI) lets you interact with your computer using windows, buttons, icons, and menus.
Examples include:
Windows File Explorer
macOS Finder
GitHub Codespaces Explorer
Visual Studio Code Explorer
WordPress Dashboard
Instead of typing commands, you simply click your way through folders and files.
For example, creating a new file in GitHub Codespaces can be as simple as:
Click the New File button
Type ROADMAP.md
Press Enter
No commands required.
What Is a Terminal?
A terminal is a text-based interface where you type commands instead of clicking buttons.
For example, instead of creating a file using the mouse, you could type:
touch ROADMAP.md
Instead of opening a folder, you might type:
cd flipnzee-auctions
Instead of listing files, you would type:
ls
The terminal may seem intimidating at first, but it is simply another way of communicating with your computer.
GUI vs Terminal
Task
GUI
Terminal
Create a file
Click New File
touch filename
Create a folder
Click New Folder
mkdir foldername
Rename a file
Right-click → Rename
mv oldname newname
Delete a file
Right-click → Delete
rm filename
Open a file
Double-click
code filename
View files
Explorer
ls
Change folders
Click folders
cd foldername
Both approaches accomplish the same goal.
Why Do Professional Developers Use the Terminal?
There are several reasons.
Speed
Typing one command is often faster than clicking through multiple menus.
For example:
mkdir includes admin public assets languages
creates five folders instantly.
Automation
Many development tools only work from the command line.
Examples include:
git status
composer install
npm install
phpunit
As your projects grow, these tools become increasingly valuable.
Universal Skills
Whether you’re working with WordPress, Laravel, Django, Node.js, or Linux servers, terminal knowledge transfers across technologies.
Learning a handful of commands today will continue to benefit you for years.
Does That Mean Beginners Should Avoid the GUI?
Absolutely not.
In fact, beginners often learn more effectively by combining both approaches.
Suppose you create a file using the Explorer. Later, you learn the equivalent terminal command:
touch ROADMAP.md
Now you’ve learned two different ways to accomplish the same task.
Over time, you’ll naturally begin using whichever method feels more efficient.
Our Approach in This Tutorial Series
Throughout the Building Flipnzee Auctions series, we’ll demonstrate both methods whenever practical.
For example, if we create a new folder, you’ll learn:
GUI Method
Click New Folder
Enter the folder name
Press Enter
Terminal Method
mkdir includes
This dual approach allows every reader to progress comfortably, regardless of prior experience.
There’s No “Right” Way
Some developers spend nearly their entire day inside Visual Studio Code without touching the terminal.
Others rarely use the mouse.
Both groups build excellent software.
The goal isn’t to replace one with the other. Instead, it’s to understand that both interfaces are simply different tools for interacting with the same files.
As your confidence grows, you’ll likely find yourself using the GUI for visual tasks and the terminal for repetitive or automated work.
Final Thoughts
Don’t feel pressured to master the terminal overnight.
Start with the GUI if it makes you comfortable. Learn one or two terminal commands each week. Before long, commands like cd, ls, pwd, git status, and touch will become second nature.
Remember, great developers aren’t defined by whether they use a mouse or a keyboard. They’re defined by their ability to solve problems, write clean code, and continue learning.
Every expert was once a beginner who typed their first command.
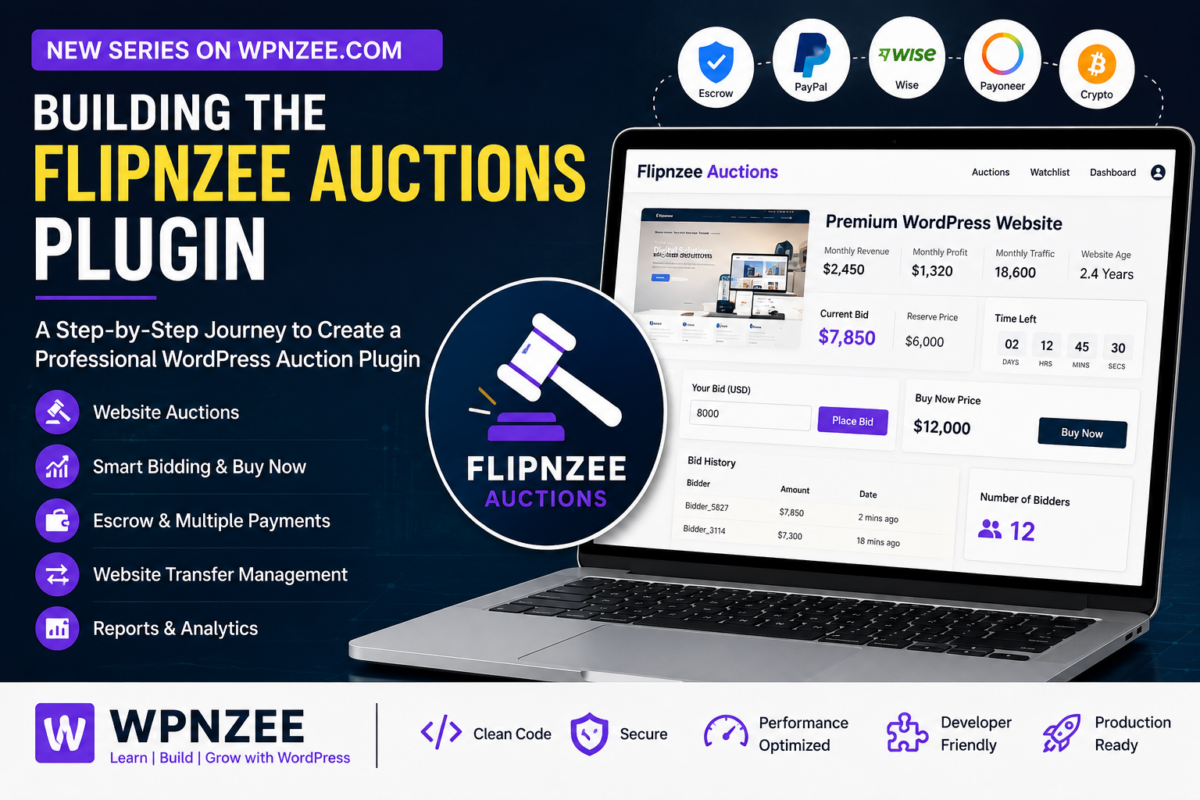
Have you ever wondered how website marketplaces like Flippa allow buyers to place bids, make offers, purchase websites, and complete secure transfers? If you’re a WordPress developer, you may have searched for an auction plugin only to discover that most are designed for physical products rather than digital assets such as websites and domain names.
In this new series on WPNzee, we’re going to build a professional WordPress auction plugin from the ground up.
This won’t be a collection of isolated code snippets. Instead, it will be a structured, real-world software development project where each lesson builds upon the previous one. By the end of the series, we’ll have created a fully functional plugin that powers website auctions for Flipnzee.
What We’re Building
The plugin, Flipnzee Auctions, is designed specifically for buying and selling websites. It will eventually include features such as:
Website auction listings
Starting price and reserve price
Buy Now option
Automatic proxy bidding
Bid history
Watchlist
Countdown timers
Escrow-based payments
Alternative payment methods including PayPal, Wise, Payoneer, bank transfer, and cryptocurrency
Buyer and seller dashboards
Website transfer checklist
Auction reports and analytics
Email notifications
Security and anti-fraud measures
Rather than trying to build everything at once, we’ll develop the plugin step by step, just as a professional software team would.
Who Is This Series For?
This series is intended for:
WordPress developers
PHP developers
Plugin developers
Freelancers
Agency owners
Computer science students
Anyone who wants to learn how large WordPress plugins are architected
A basic understanding of PHP and WordPress will be helpful, but every important concept will be explained along the way.
What Makes This Series Different?
Many tutorials stop after creating a simple plugin that displays “Hello World.”
This series is different.
We’ll discuss software architecture, database design, WordPress coding standards, security, performance, scalability, maintainability, and clean code. Every lesson will explain not only what we’re building, but also why we’re building it that way.
Our goal is to produce a plugin that is robust enough for production use while serving as an educational resource for developers who want to build professional WordPress applications.
How the Series Will Be Organized
The series will be divided into logical stages, including:
Plugin foundation and architecture
Database design
Auction engine
Bidding system
Payment workflow
Escrow integration
Website transfer management
Notifications
Reporting and analytics
Testing, optimization, and release
Each lesson will contain complete source code, detailed explanations, and practical insights that you can immediately apply to your own projects.
Learn by Building
The best way to learn software development is by building something meaningful.
Instead of reading about plugin development in theory, you’ll follow the complete journey of creating a commercial-quality WordPress auction plugin from scratch.
Whether your goal is to build your own marketplace, improve your PHP skills, or better understand WordPress internals, I hope this series helps you gain both confidence and practical experience.