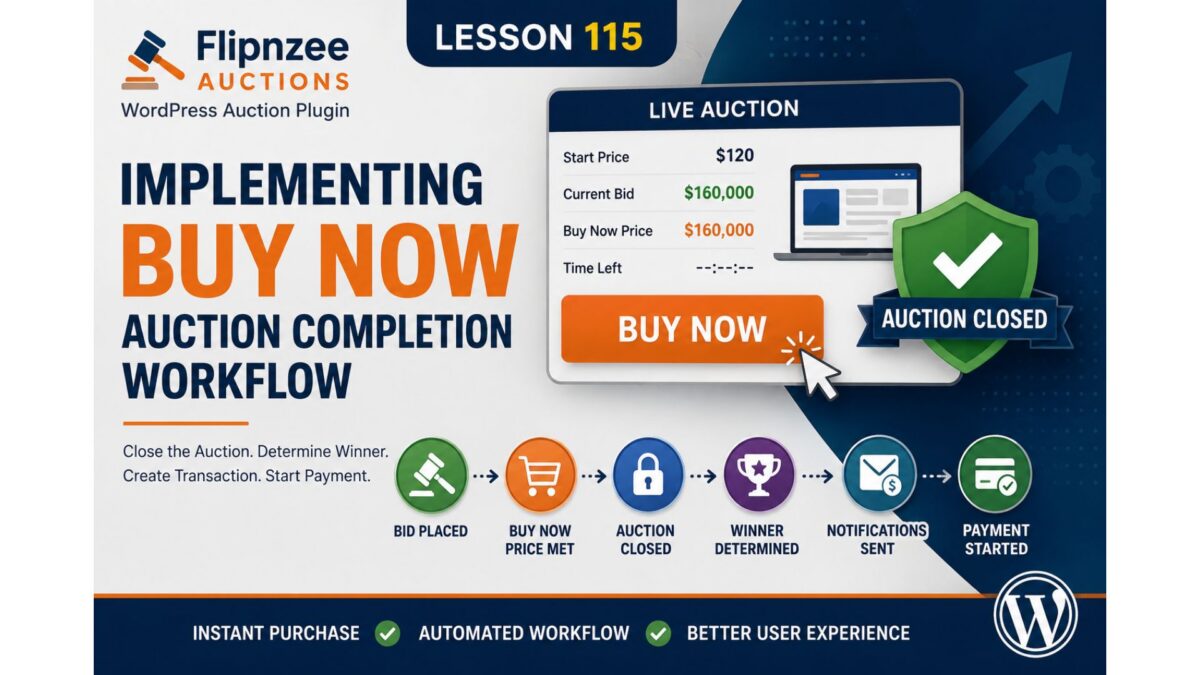
Lesson 115 – Implementation: Implementing the Buy Now Auction Completion Workflow


Introduction

In the previous lesson, we outlined how the Buy Now feature should behave from a business perspective. In this implementation lesson, we transform that design into working code.

Rather than introducing a separate purchase engine, the implementation builds upon the auction infrastructure already developed throughout the project. The result is a cleaner architecture where a Buy Now purchase is simply a special case of a successful bid that immediately concludes the auction.


Step 1 – Detect Buy Now Bids

A new helper method was introduced:

Flipnzee_Bid_Manager::is_buy_now_bid()

This method retrieves the configured Buy Now price for the auction and compares it against the submitted bid amount.

If the bid is equal to or greater than the Buy Now price, the method returns true.

Keeping this logic separate makes the bid placement code easier to understand and allows future enhancements without modifying the core bidding workflow.


Step 2 – Update the Bid Handler

After a successful bid is recorded, the bid handler now performs an additional check:

$is_buy_now = Flipnzee_Bid_Manager::is_buy_now_bid(
    $auction_id,
    $bid_amount
);

For ordinary bids, execution continues exactly as before.

For Buy Now bids, the workflow branches into an immediate auction completion sequence.


Step 3 – Close the Auction

A new method was added to the Auction Manager:

Flipnzee_Auction_Manager::close_auction(
    $auction_id
);

This method:

  • updates the auction status to closed,
  • records the closing timestamp,
  • returns whether the update succeeded.

Centralising this behaviour inside the Auction Manager keeps auction state management in a single location.


Step 4 – Determine the Winner Immediately

Once the auction is closed, the existing winner determination logic is reused:

Flipnzee_Bid_Manager::determine_winner(
    $auction_id
);

No duplicate winner-selection logic is required.

The plugin simply performs the same process that would normally occur after the scheduled auction expiry.


Step 5 – Reuse Existing Hooks

Because winner determination already fires the existing action hook:

do_action(
    'flipnzee_auction_winner_determined',
    $auction_id,
    $winner
);

the following systems continue working automatically:

  • Buyer notification
  • Seller notification
  • Administrator notification
  • Transaction creation

This demonstrates one of the benefits of designing around WordPress actions rather than tightly coupled method calls.


Step 6 – Automatically Create the Transaction

The existing Transaction Manager now creates the purchase transaction immediately after the winner is determined.

This removes the delay that previously existed between auction completion and payment.

The buyer is now ready to proceed directly to the payment stage.


Step 7 – Integrate the External Provider Workflow

During implementation, the transaction workflow also creates an associated external provider record for future integrations such as Escrow.com.

This lays the foundation for supporting external payment and escrow services without altering the auction workflow itself.


Debugging the Workflow

This lesson involved significantly more debugging than implementation.

Extensive logging was added throughout the Buy Now workflow to verify each stage executed correctly.

Typical log entries included:

  • Buy Now detection
  • Auction closure
  • Winner determination
  • Notification dispatch
  • Transaction creation
  • External provider creation

These logs made it possible to isolate failures quickly and verify that each subsystem executed in the expected order.


Issues Encountered

Several issues surfaced while implementing this workflow:

  • Buy Now bids behaved like normal bids.
  • Auctions remained active after reaching the Buy Now price.
  • Winner determination was not triggered immediately.
  • Transaction creation exposed a missing class loading issue for the External Provider Manager.
  • Front-end auction state required refreshing after administrative changes because the database status remained closed until explicitly reopened.

Resolving these issues reinforced the importance of validating the complete workflow rather than assuming each individual component behaved correctly in isolation.


Final Workflow

After completing Lesson 115, the Buy Now process now follows this sequence:

Buyer submits Buy Now bid
        │
        ▼
Bid accepted
        │
        ▼
Buy Now detected
        │
        ▼
Auction closed
        │
        ▼
Winner determined
        │
        ▼
Notifications sent
        │
        ▼
Transaction created
        │
        ▼
External provider record created
        │
        ▼
Buyer proceeds to payment

Conclusion

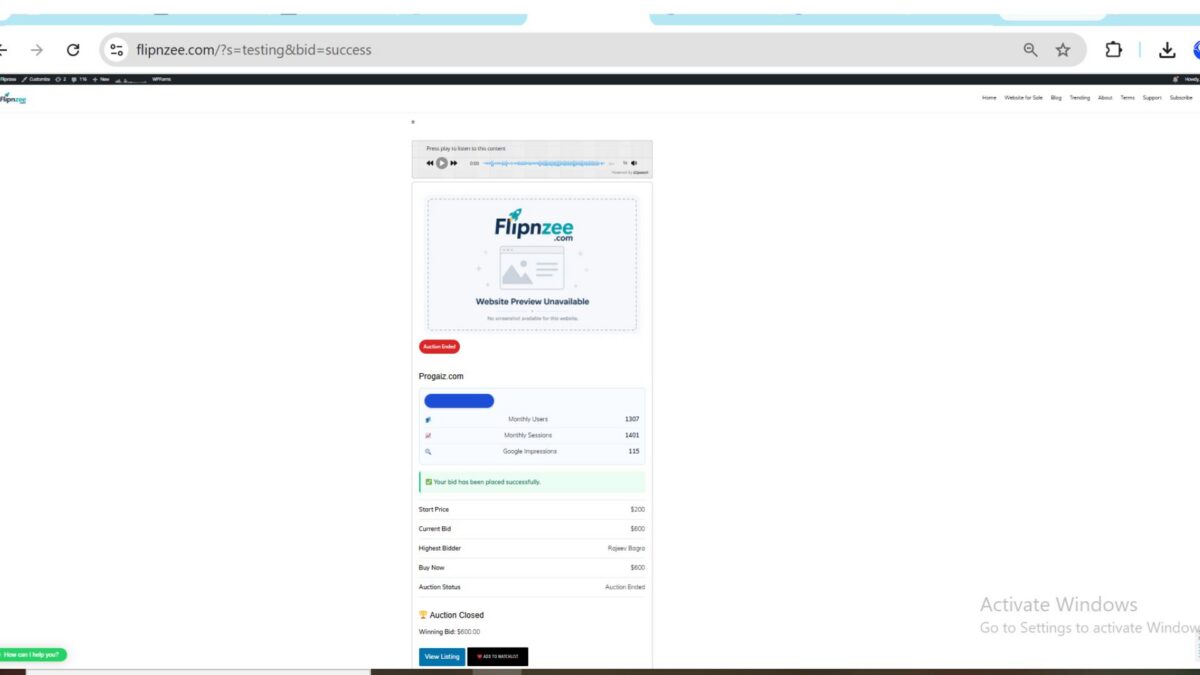
With this lesson complete, the Flipnzee Auctions plugin now supports an end-to-end Buy Now workflow. A qualifying bid no longer waits for the auction timer to expire; instead, it immediately concludes the auction, determines the winner, creates the transaction, and launches the payment process.

This represents a major architectural milestone. The plugin has evolved from handling bids and scheduled auction endings to supporting immediate purchases through a unified auction lifecycle, providing a solid foundation for future enhancements such as escrow integrations, automated transfers, and richer post-sale workflows.

https://github.com/SplendidDigital/flipnzee-auctions/releases/tag/lesson-115-stable
Lesson 115: Buy Now Auction Completion Workflow (Planning)

Introduction

Until now, the Flipnzee Auctions plugin has treated every bid in the same way. Regardless of the bid amount, the auction remains active until its scheduled end time, where a scheduled process later determines the winner.

However, this behavior is not how a traditional Buy Now feature is expected to work.

When a bidder agrees to pay the Buy Now price, they are effectively accepting the seller’s asking price. At that point there should be no reason to keep the auction running or allow additional bids.

This lesson focuses on transforming Buy Now from a simple display price into an action that immediately completes the auction.


Current Problem

Suppose an auction has:

  • Start Price: $120
  • Current Bid: $1,200
  • Buy Now Price: $5,000

If a buyer places a bid of exactly $5,000, the plugin currently:

  • accepts the bid,
  • updates the current bid,
  • leaves the auction active,
  • allows other users to continue bidding.

This defeats the purpose of having a Buy Now option.


Expected Behaviour

The expected workflow should become:

Buyer submits Buy Now bid
        │
        ▼
Bid is accepted
        │
        ▼
Buy Now condition detected
        │
        ▼
Auction closes immediately
        │
        ▼
Winner determined
        │
        ▼
Winner notifications sent
        │
        ▼
Transaction created
        │
        ▼
Buyer redirected to payment

Instead of waiting until the scheduled auction end, the auction lifecycle should complete immediately.


Why This Matters

This change transforms the auction from a passive bidding system into an actual marketplace transaction.

It establishes a complete workflow where:

  • bidding,
  • winner determination,
  • transaction creation,
  • payment,
  • ownership transfer

all become part of a single automated process.

Without this behaviour, Buy Now is merely another bid amount rather than an instant purchase mechanism.


Design Considerations

Rather than scattering Buy Now logic throughout the plugin, we will introduce a clear sequence of responsibilities.

The bid handler should remain responsible for accepting bids.

Once a valid bid has been recorded, it should ask one simple question:

“Did this bid satisfy the Buy Now price?”

If the answer is yes, the auction manager will immediately close the auction and the existing winner determination workflow can continue unchanged.

This approach reuses the infrastructure already built in previous lessons instead of creating an entirely separate purchase system.


Objectives

By the end of this lesson we will:

  • Detect when a submitted bid reaches the Buy Now price.
  • Close the auction immediately.
  • Determine the winning bidder instantly.
  • Reuse the existing notification system.
  • Automatically create the buyer transaction.
  • Launch the payment workflow without waiting for auction expiry.

What We’ll Build

At the end of this lesson, the auction lifecycle will look like this:

Auction Created
        │
        ▼
Buyer Places Bid
        │
        ▼
Buy Now Price Reached
        │
        ▼
Auction Closed Immediately
        │
        ▼
Winner Determined
        │
        ▼
Notifications Sent
        │
        ▼
Transaction Created
        │
        ▼
Buyer Payment Page

This is one of the most important milestones in the Flipnzee Auctions project, as it connects bidding with the complete post-auction purchase workflow.


Lesson 114 – Refactoring the Buyer Payment Page with a State-Driven Interface

One of the goals of the Flipnzee Auctions project is to continuously improve the codebase while keeping the plugin functional at every stage. Rather than adding new features immediately, this lesson focuses on improving the buyer payment experience by making the interface respond to the current payment status.

Instead of always displaying payment options regardless of the transaction state, the payment page now renders different views depending on where the buyer is in the payment process.


Project Goals

In previous lessons, the payment workflow allowed buyers to:

  • View transaction details
  • Choose a payment gateway
  • View manual payment instructions
  • Upload payment proof

Although functional, the payment page continued to display payment controls even after payment proof had already been submitted. This could confuse buyers and encourage duplicate submissions.

The objective of this lesson was to make the payment page aware of the payment lifecycle.


Problems with the Previous Implementation

Previously, the payment page always rendered:

  • Transaction summary
  • Gateway selector
  • Payment buttons

regardless of whether the buyer had already submitted payment proof.

This produced an interface similar to:

Transaction Summary

↓

Payment Gateway Selection

↓

Manual Payment Instructions

↓

Upload Proof

↓

Payment Gateway Selection (still visible)

The buyer could continue interacting with payment controls that were no longer relevant.


Design Objective

The payment page should automatically display information that matches the transaction’s current state.

Instead of asking the buyer what to do next, the interface should guide them naturally through the workflow.


State-Driven Rendering

A new rendering controller was introduced:

self::render_payment_state(
    $transaction,
    $gateways
);

Instead of directly rendering the gateway selector, the payment page now delegates rendering to a state-aware method.


Payment States

The renderer evaluates the current payment status.

switch ( strtolower( $transaction->payment_status ) ) {

    case 'submitted':
        ...
        break;

    case 'verified':
        ...
        break;

    case 'completed':
        ...
        break;

    default:
        ...
}

Each payment status now has its own dedicated renderer.


Pending State

Pending transactions continue using the existing payment workflow.

private static function render_pending_state(
    $transaction,
    $gateways
) {

    self::render_gateway_selector(
        $gateways
    );

}

From the buyer’s perspective, nothing changes until payment has actually been submitted.


Submitted State

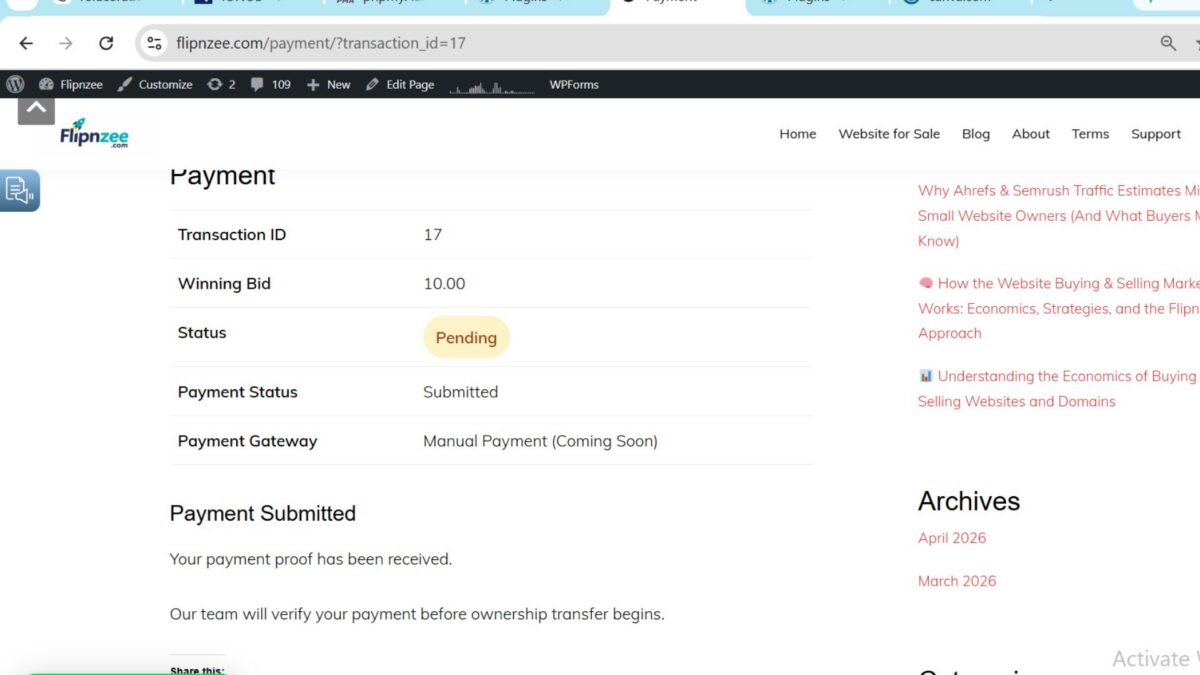
After payment proof is uploaded, the page now replaces the gateway selector with a confirmation message.

Example:

Payment Submitted

Your payment proof has been received.

Our team will verify your payment before ownership transfer begins.

This prevents unnecessary duplicate uploads while reassuring the buyer that their submission has been received.


Verified State

Future lessons will allow administrators to verify payments.

Once verification occurs, buyers will see a confirmation such as:

Payment Verified

Ownership transfer has started.

No additional payment actions are displayed.


Completed State

When ownership transfer has been completed, the payment page will display a completion message instead of payment controls.

Example:

Transaction Completed

Ownership has been transferred successfully.

This provides a natural end to the purchase workflow.


Transaction Summary

The transaction summary remains available throughout every stage.

Information displayed includes:

  • Transaction ID
  • Winning Bid
  • Transaction Status
  • Payment Status
  • Selected Payment Gateway

This allows buyers to monitor the progress of their purchase without losing important transaction details.


User Experience Improvements

Before this lesson:

Payment Summary

↓

Gateway Selection

↓

Manual Payment

↓

Upload Proof

↓

Gateway Selection still visible

After this lesson:

Payment Summary

↓

Pending

↓

Gateway Selection

↓

Upload Proof

↓

Submitted

↓

Waiting for Verification

↓

Verified

↓

Ownership Transfer

↓

Completed

The payment page now behaves more like a modern checkout portal, displaying only the actions that are appropriate for the buyer’s current stage.


Architectural Benefits

Although this lesson introduced only a small visible change, it significantly improved the overall design.

Benefits include:

  • State-driven rendering
  • Reduced UI clutter
  • Clear buyer guidance
  • Easier maintenance
  • Better separation between transaction information and payment workflow
  • Foundation for future payment gateways

Lessons Learned

One important lesson during development was recognizing the difference between refactoring and rewriting.

Several attempts were made to extract large portions of the payment processing logic into separate methods. While architecturally appealing, making too many structural changes at once introduced unnecessary complexity during debugging.

The final implementation adopted a more conservative approach by refactoring only the rendering layer while preserving the existing payment processing logic. This resulted in a cleaner user interface without risking regressions in the working payment workflow.

This incremental strategy is often preferable in production software, where maintaining stability is just as important as improving code quality.


Conclusion

Lesson 114 transformed the Buyer Payment Page from a static form into a state-driven interface that responds intelligently to the payment lifecycle.

While the underlying payment processing remains unchanged, buyers now receive a clearer and more intuitive experience, and the architecture is better prepared for future enhancements such as administrator payment verification and automated ownership transfers.

In the next lesson, we will build the Admin Payment Verification Workflow, allowing administrators to approve submitted payments and advance transactions to the ownership transfer stage.

lesson-114-stable: Lesson 114: Refactor buyer payment page with state-driven rendering

Lesson 114 — State-Driven Payment Workflow

Objective

In Lesson 113, the Flipnzee Auctions plugin gained a complete payment workflow, including gateway selection, manual payments, payment proof uploads, and transaction tracking.

However, the payment page still displays multiple interface components simultaneously, regardless of the transaction’s current state. As additional payment providers and transfer stages are introduced, this approach will become increasingly difficult to maintain.

The objective of Lesson 114 is to refactor the payment page into a state-driven workflow, where the user interface changes automatically based on the transaction’s current payment status.


Why Refactor?

Currently, class-payment-page.php mixes together several responsibilities:

  • Loading transactions
  • Processing uploads
  • Rendering summaries
  • Rendering payment gateways
  • Rendering manual payment instructions
  • Displaying success messages

As more payment providers and statuses are added, the file will become difficult to understand and maintain.

Instead of checking multiple conditions throughout the page, the plugin should have one central decision point responsible for determining which interface to display.


Current Workflow

Load Transaction

↓

Display Summary

↓

Display Gateway Selection

↓

Manual Payment

↓

Upload Proof

↓

Display Messages

Regardless of payment status, much of the interface continues to be shown.


Desired Workflow

Load Transaction

↓

Read payment_status

↓

pending
│
├── Show Gateway Selection
├── Allow Payment
└── Allow Upload

submitted
│
├── Payment Submitted
├── Awaiting Verification
└── Hide Payment Controls

verified
│
├── Payment Verified
├── Ownership Transfer Started
└── Display Progress

completed
│
├── Transfer Completed
└── Transaction Finished

Only the interface relevant to the current stage should be displayed.


Architectural Goal

Rather than writing numerous if statements throughout the payment page, the plugin will introduce a dedicated payment state renderer.

render()

        │
        ▼

Load Transaction

        │
        ▼

render_transaction_summary()

        │
        ▼

render_payment_state()

        │
        ▼

Pending
Submitted
Verified
Completed

Each payment state becomes responsible for rendering its own interface.


New Rendering Methods

The payment page will gradually be divided into focused rendering methods such as:

  • render_pending_state()
  • render_submitted_state()
  • render_verified_state()
  • render_completed_state()

Each method will display only the controls appropriate for that stage.


Benefits

This refactoring provides several advantages.

Cleaner Code

Instead of hundreds of lines inside render(), each payment state becomes a small, focused method.


Easier Maintenance

Adding new payment providers no longer requires editing multiple parts of the payment page.


Better User Experience

Buyers only see the actions relevant to their current payment stage.

For example:

Pending

  • Select Gateway
  • Upload Proof

Submitted

  • Confirmation message
  • Waiting for review

Verified

  • Ownership transfer started

Completed

  • Auction completed

Easier Future Integrations

Future lessons will introduce:

  • Escrow.com API
  • Stripe
  • PayPal
  • Razorpay
  • Cryptocurrency
  • Admin verification
  • Automatic ownership transfer

Each of these features can simply render the appropriate payment state without restructuring the payment page.


Engineering Principle

Lesson 114 introduces an important software engineering concept:

The user interface should reflect the current state of the underlying business process.

Instead of asking:

“Which buttons should I display?”

the plugin asks:

“What is the current payment state?”

The interface then naturally follows from that answer.


Files to Modify

Primary:

includes/class-payment-page.php

Potentially:

includes/class-payment-manager.php

for helper methods if needed.


Expected Outcome

By the end of Lesson 114:

  • Payment rendering will be state-driven.
  • Gateway selection will only appear when payment is pending.
  • Submitted payments will display confirmation instead of payment controls.
  • The payment page will be significantly cleaner and easier to extend.
  • The foundation will be ready for Lesson 115, which will introduce the Admin Payment Verification Workflow.

Git Tag Recommendation

lesson-114-stable

This lesson marks an architectural milestone. Rather than adding new functionality, it refines the payment system into a scalable design that will support all future payment providers and ownership transfer stages.

Lesson 113: Building the Payment Workflow Foundation

In the previous lessons, auctions could successfully determine a winner and create a transaction. However, there was still no mechanism for the buyer to complete payment or for the marketplace to track payment progress.

This lesson introduces the payment workflow foundation for Flipnzee Auctions.

Rather than integrating directly with a payment provider immediately, the plugin now establishes a flexible payment architecture capable of supporting multiple providers in future releases while already allowing manual payment submissions.


Objectives

This lesson aimed to:

  • Create a buyer payment page
  • Support multiple payment providers
  • Introduce an External Provider architecture
  • Allow manual payment submissions
  • Upload payment proof
  • Prepare the plugin for Escrow.com integration
  • Preserve compatibility with future gateways

External Provider Architecture

Instead of embedding payment provider logic directly inside the transaction manager, the plugin now introduces an independent provider layer.

Auction
    │
    ▼
Transaction
    │
    ▼
External Provider
    │
    ▼
Transfer

This separation keeps responsibilities clear.

Transactions continue to represent marketplace events, while external providers maintain information about third-party payment services.


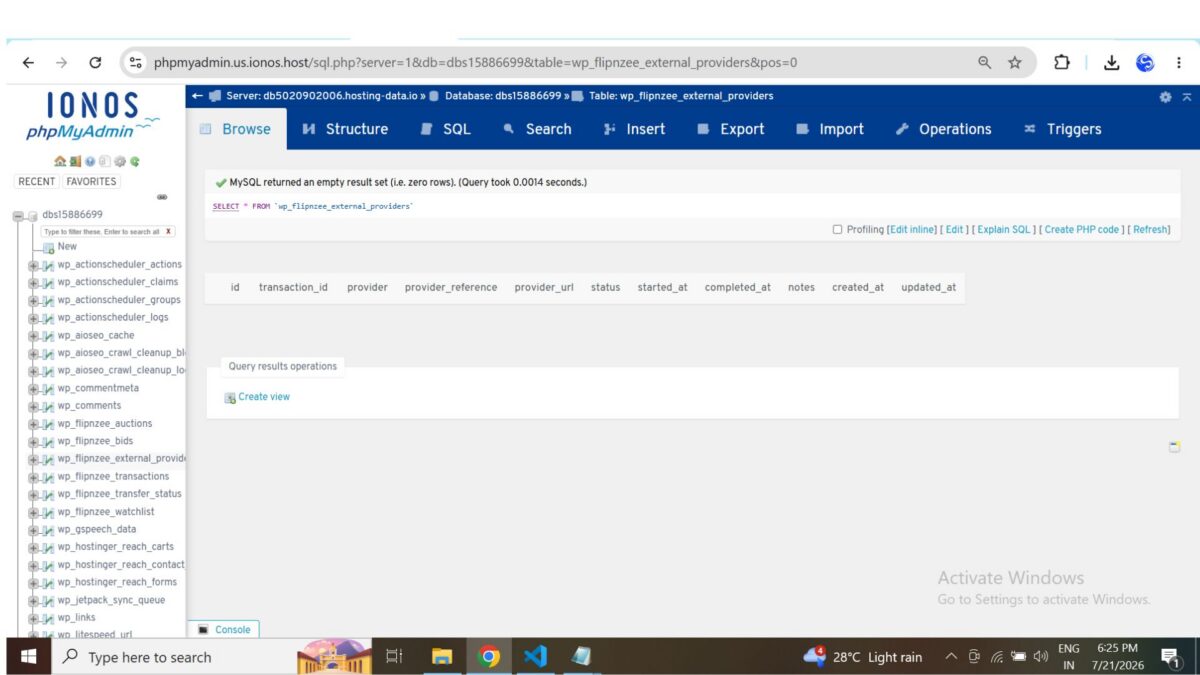
Database Changes

Lesson 113 introduces a dedicated table for provider-specific information.

wp_flipnzee_external_providers

The table stores:

  • Transaction ID
  • Provider name
  • External reference
  • External URL
  • Provider status
  • Notes
  • Timestamps

This allows each transaction to maintain its own provider lifecycle independently of the payment record itself.


Buyer Payment Page

A new frontend payment page was implemented.

The page now:

  • Displays transaction information
  • Shows the winning bid
  • Displays payment status
  • Displays the selected payment gateway

The payment page retrieves transactions securely using the transaction ID passed through the URL.


Supported Payment Providers

The gateway selector was designed from the beginning to support multiple providers.

Current options include:

  • Escrow.com (recommended)
  • Manual Payment
  • Stripe
  • PayPal
  • Razorpay
  • Cryptocurrency (USDT)

Only Manual Payment is currently active.

The remaining gateways are intentionally displayed as “Coming Soon,” allowing the interface to remain stable while future integrations are developed.


Manual Payment Workflow

The first complete payment workflow now exists.

After selecting Manual Payment, buyers receive:

  • Payment instructions
  • Reference number
  • Amount due
  • Payment status
  • Important reminders

The workflow is intentionally simple while providing a complete end-to-end payment process.


Uploading Payment Proof

Buyers can upload payment evidence directly from the payment page.

Supported formats include:

  • JPG
  • JPEG
  • PNG
  • PDF

Uploads are handled using the standard WordPress Media Library APIs rather than creating a custom upload system.

Once uploaded, the attachment ID is stored against the transaction for later verification.


Transaction Improvements

Several improvements were made to transaction handling.

The payment page now:

  • Retrieves transactions using the correct transaction ID
  • Reloads transactions after updates
  • Displays current payment information
  • Handles missing transactions gracefully

During development, a bug caused older transactions to appear because of confusion between multiple transaction records. This was resolved by ensuring that payment pages always retrieve the exact transaction referenced in the URL.


Debugging Improvements

Lesson 113 also included several reliability improvements.

These included fixing:

  • Object versus array access errors
  • Transaction retrieval bugs
  • Payment page rendering issues
  • Upload state refresh
  • Gateway display consistency

Additional logging was temporarily introduced during development to validate the payment workflow before being cleaned up.


Why This Architecture Matters

Although only Manual Payment is currently operational, the underlying architecture was designed for long-term extensibility.

Future payment providers can now plug into the same workflow without redesigning the payment page.

This makes it possible to introduce services such as Escrow.com, Stripe, PayPal, or cryptocurrency while keeping a consistent buyer experience.


Files Added

  • includes/class-external-provider-manager.php

Major Files Updated

  • includes/class-payment-page.php
  • includes/class-payment-manager.php
  • includes/class-transaction-manager.php
  • includes/class-database.php
  • includes/class-database-migration.php
  • flipnzee-auctions.php

What Comes Next

With the payment foundation complete, the next lesson will shift from adding functionality to improving architecture.

Lesson 114 will refactor the payment page into a state-driven workflow, allowing each payment stage—Pending, Submitted, Verified, and Completed—to present only the actions relevant to that stage. This will simplify future integrations with Escrow.com, admin verification, and automated ownership transfers.


Git Tag Recommendation

lesson-113-stable

I recommend tagging this release as lesson-113-stable. It represents the first complete payment workflow in Flipnzee Auctions and establishes the architecture that future payment providers and transfer features will build upon.

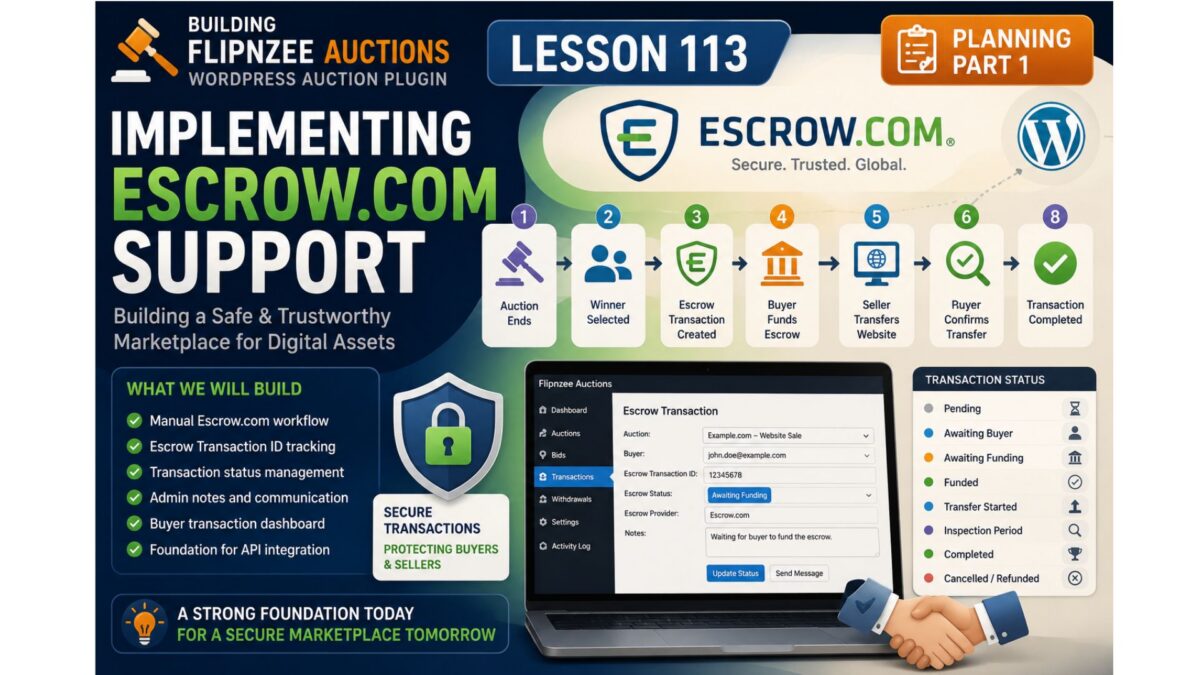
Building Flipnzee Auctions – Lesson 113 (Planning) – Implementing Escrow.com Support (Part 1)


Objective

In this lesson we’ll build the foundation for external transaction management.

Instead of trying to duplicate Escrow.com’s workflow, Flipnzee Auctions will simply track that an auction has entered an external transaction process.

This makes the plugin simpler, easier to maintain, and ready for future providers.


Philosophy

The plugin is responsible for:

✅ Auction

✅ Winner

✅ Transaction Record

✅ External Provider

✅ Completion Status

The plugin is not responsible for:

❌ collecting payment

❌ holding funds

❌ inspection

❌ disputes

❌ fee calculation

❌ releasing payment

Those remain the responsibility of the external transaction provider.


New Workflow

Auction Ends
        │
        ▼
Winner Selected
        │
        ▼
Create External Transaction
        │
        ▼
Transaction In Progress
        │
        ▼
Seller Receives Confirmation
        │
        ▼
Mark Transaction Completed
        │
        ▼
Auction Completed

Notice how much cleaner this is.


Database Changes

We’ll extend the existing transaction table.

New columns:

ColumnPurpose
providerEscrow.com
external_transaction_idTransaction reference
external_transaction_urlOptional link
statusIn Progress / Completed
started_atStarted date
completed_atCompletion date
notesInternal notes

No provider-specific columns.


Statuses

Instead of many workflow states we’ll begin with four.

Pending

↓

Initiated

↓

In Progress

↓

Completed

Simple.

Reliable.

Expandable.


Provider Architecture

Instead of

Escrow Manager

we’ll build

External Transaction

↓

Provider

↓

Escrow.com

Later we can support

Escrow.com

Escrow Europe

Sedo

Afternic

Dan.com

Manual Transfer

without changing the architecture.


Administration Screen

Each transaction will eventually contain something similar to:

Auction

Website.com

Winner

[email protected]

Provider

Escrow.com

External Transaction ID

E48329844

Started

21 July 2026

Status

In Progress

Notes

Buyer funded transaction.
Waiting for completion.

[Mark Completed]

Nothing more is needed.


Why We Aren’t Tracking Every Step

A common temptation is to mirror every stage of the escrow process.

For example:

Buyer Paid

↓

Funds Verified

↓

Seller Transfers

↓

Buyer Inspection

↓

Funds Released

Although these stages are useful within Escrow.com, they are not controlled by Flipnzee Auctions.

Attempting to reproduce them inside the plugin would require manual updates, duplicate information already maintained by the escrow provider, and increase the risk of inconsistencies.

Instead, Flipnzee Auctions records only what it can reliably know:

  • when an external transaction begins
  • which provider is being used
  • the provider’s transaction reference
  • whether the transaction is still in progress or has been completed

This keeps responsibilities clearly separated between the marketplace and the external escrow service.


Future API Integration

When we eventually integrate with the Escrow.com API, this design will remain unchanged.

Instead of an administrator manually updating the transaction status, the plugin will retrieve the latest information from the provider automatically.

Because the underlying architecture is provider-independent, future integrations with additional services will require minimal changes.


What We’ll Build in This Lesson

Rather than making isolated edits throughout the plugin, we’ll implement the feature as a cohesive unit.

The implementation will include:

  • Extending the transaction database schema with provider-independent fields.
  • Enhancing the Transaction Manager to create and manage external transaction records.
  • Updating the Payment Manager to recognise external providers.
  • Adding administrator controls for recording provider information, transaction references, and notes.
  • Displaying transaction progress within the existing administration interface.
  • Preparing the codebase for future API integration without introducing provider-specific dependencies.

Expected Result

After completing this lesson, a finished auction will be able to move into an external transaction workflow.

Administrators will be able to record the transaction provider, store the provider’s reference number, monitor whether the transaction is still in progress, and mark it as completed once the provider confirms that the sale has successfully concluded.

Although the financial transaction itself remains under the supervision of the external provider, Flipnzee Auctions will maintain an accurate record of every completed marketplace sale.


Git Commit

Lesson 113

Implement external transaction tracking

• extend transaction schema
• support external transaction providers
• add transaction references
• add transaction tracking
• prepare for Escrow.com integration

Before we write the code

I also want to make one additional architectural improvement, and I believe you’ll appreciate it.

At the moment, your plugin has Payment Manager and Transaction Manager. Once we introduce external transaction tracking, those responsibilities become distinct:

  • Payment Manager → Responsible for available payment methods (Escrow.com, Stripe, Manual, etc.).
  • Transaction Manager → Responsible for recording and managing the lifecycle of a completed auction transaction.

This separation follows the Single Responsibility Principle and will make future enhancements—such as API integrations or support for multiple providers—much easier to implement. Since we’re moving quickly toward a production-ready plugin, I recommend making this distinction now rather than after additional features have been added.

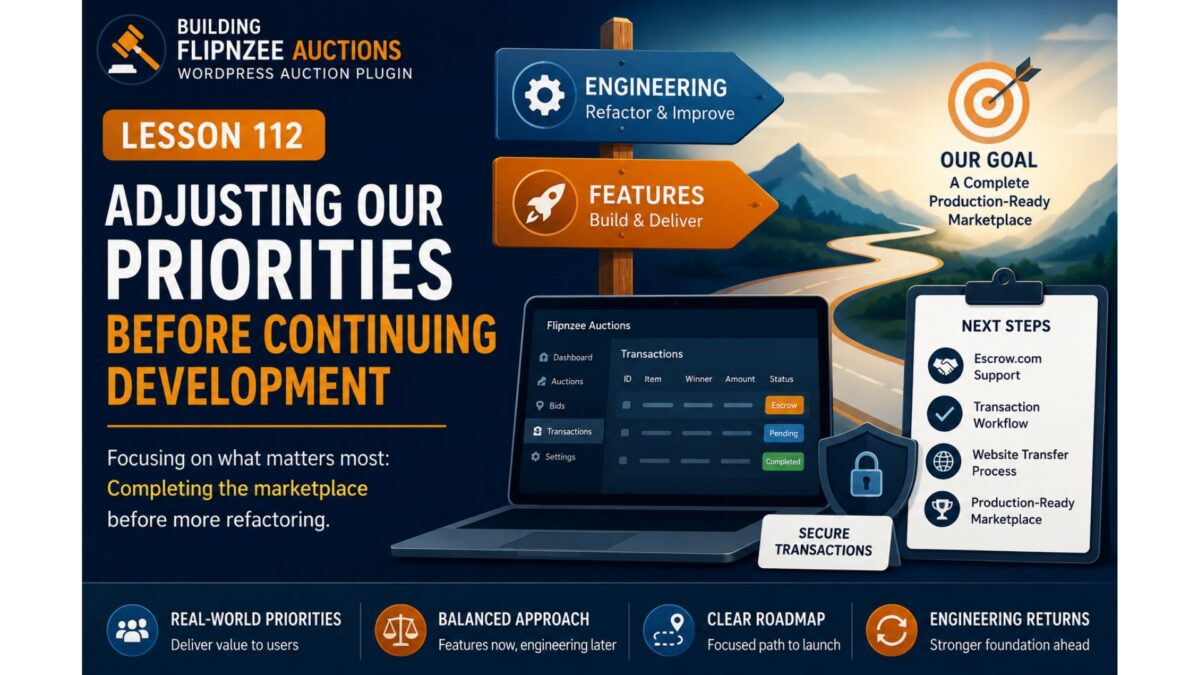
Building Flipnzee Auctions – Lesson 112


Adjusting Our Priorities Before Continuing Development

Series: Building Flipnzee Auctions

Lesson: 112

Difficulty: Beginner

Prerequisites: Lesson 111

Code Changes: None (Project Planning)


Introduction

Over the past several lessons, we’ve taken a short break from adding new features to review parts of the Flipnzee Auctions codebase from a software engineering perspective.

During that review, we examined the plugin bootstrap, explored the plugin lifecycle, and identified several areas that could eventually be improved through refactoring.

Our original intention was to continue along that path.

However, software projects rarely follow a perfectly straight roadmap.

Before continuing with additional engineering improvements, we’ve decided to return to feature development and complete one of the most important capabilities originally planned for Flipnzee Auctions: Escrow.com support.


Why Change Direction?

When this project began, Flipnzee Auctions was primarily a learning exercise for building a WordPress plugin.

As development progressed, it gradually evolved into a real marketplace application intended to power Flipnzee.com.

That changes the project’s priorities.

Instead of focusing solely on cleaner architecture, we now need to ensure that the marketplace itself is capable of supporting real transactions.


The Marketplace Is Almost Complete

Most of the core auction functionality already exists.

Today the plugin can:

  • Create auction listings
  • Accept bids
  • Determine auction winners
  • Manage transactions
  • Display buyer information
  • Support watchlists
  • Record activity
  • Handle administrative workflows

From a feature perspective, the marketplace is surprisingly close to being usable.

One important piece, however, is still missing.


The Missing Piece

Website and domain sales are often significantly more valuable than ordinary online purchases.

Because of that, buyers and sellers frequently prefer using a trusted third-party escrow service instead of sending money directly.

From the beginning of this project, Escrow.com was intended to become the primary payment method for completed auctions.

Although the plugin already contains the foundation for transaction management, the Escrow workflow itself has not yet been implemented.

Completing that workflow now provides more value than continuing with additional internal refactoring.


Engineering Is Not Being Abandoned

This is important.

We’re not abandoning the Plugin Engineering series.

We’re simply changing priorities.

Professional software projects constantly alternate between two activities:

Build New Features
        │
        ▼
Improve Existing Code
        │
        ▼
Build More Features
        │
        ▼
Refactor and Maintain

Both activities are important.

The challenge is deciding which one creates the greatest value at a particular stage of the project.

Right now, completing the marketplace is the higher priority.


Why Not Finish Refactoring First?

It might seem logical to finish every planned engineering improvement before adding more features.

In practice, that isn’t always the best approach.

Major features often influence the final architecture of a project.

Refactoring too early may result in restructuring code that will soon need to change again.

By completing the marketplace workflow first, future engineering decisions can be based on a more complete product.


What Happens Next?

The next phase of development returns to the Building Flipnzee Auctions series.

We’ll begin implementing the long-planned Escrow workflow, starting with a practical solution that can be used in production before exploring deeper integrations.

The immediate roadmap becomes:

Escrow.com Support
        │
        ▼
Transaction Workflow
        │
        ▼
Website Transfer Process
        │
        ▼
Production-Ready Marketplace

Once these marketplace features are complete, we’ll return to the Plugin Engineering series and continue improving the plugin’s architecture.


Key Takeaways

Software development is rarely a straight line.

As projects evolve, priorities naturally change.

Although we originally planned to continue refactoring the plugin, completing the marketplace now provides greater value for both the project and its future users.

The engineering work remains important—but the marketplace comes first.


Looking Ahead

In the next lesson, we’ll begin designing the Escrow.com payment workflow for Flipnzee Auctions.

Rather than jumping directly into API integration, we’ll first design a practical transaction process that allows buyers, sellers, and administrators to complete website sales securely while laying the foundation for future automation.


Why I prefer this version

This version doesn’t feel like an apology or a detour. Instead, it reflects a real-world product decision:

  • Lessons 110–111 introduced engineering thinking.
  • Lesson 112 explains why the project is returning to feature development.
  • Lesson 113 onward resumes the familiar Building Flipnzee Auctions two-post format (planning first, implementation second).

That keeps both series coherent and makes the transition feel intentional rather than abrupt.

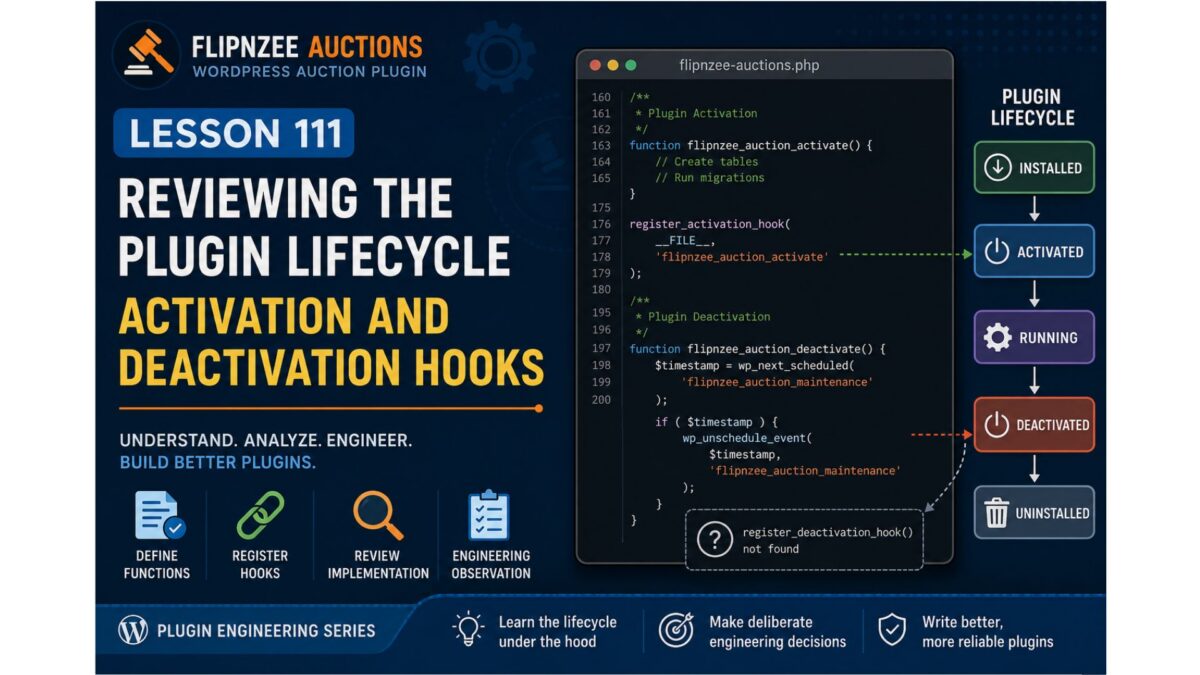
Lesson 111: Reviewing the Plugin Lifecycle – Activation and Deactivation Hooks


Series: Plugin Engineering for Flipnzee Auctions
Lesson: 111
Difficulty: Beginner to Intermediate
Prerequisites: Lesson 110
Code Changes: None (Engineering Review)


Introduction

In Lesson 110, we examined the overall responsibilities of the Flipnzee Auctions bootstrap file. Rather than modifying code immediately, we learned to identify the different responsibilities handled by the bootstrap and understand why they exist.

One of those responsibilities is managing the plugin’s lifecycle.

Every WordPress plugin has important lifecycle events such as installation, activation, deactivation, updates, and uninstallation. During these events, WordPress gives plugins an opportunity to perform setup or cleanup tasks.

In this lesson, we’ll focus on activation and deactivation, and review how Flipnzee Auctions currently handles these lifecycle events.

Unlike many coding tutorials, this lesson is based entirely on the current Lesson 107 Stable codebase.


Learning Objectives

By the end of this lesson you will be able to:

  • Explain the difference between defining a lifecycle function and registering it.
  • Understand how register_activation_hook() works.
  • Understand how register_deactivation_hook() works.
  • Review the current lifecycle implementation in Flipnzee Auctions.
  • Identify an engineering improvement for a future lesson.

Understanding the Plugin Lifecycle

A WordPress plugin is not simply loaded and forgotten.

Instead, WordPress communicates with plugins during specific lifecycle events.

Plugin Installed
        │
        ▼
Plugin Activated
        │
        ▼
Plugin Executes Normally
        │
        ▼
Plugin Deactivated
        │
        ▼
Plugin Activated Again
        │
        ▼
Plugin Uninstalled

Each stage gives the plugin an opportunity to perform work.

For example:

Activation

  • Create database tables
  • Initialize default options
  • Schedule recurring maintenance tasks

Deactivation

  • Remove scheduled events
  • Stop recurring background tasks
  • Perform temporary cleanup

Uninstall

  • Remove plugin data (if appropriate)
  • Delete database tables (optional)
  • Delete plugin options

Defining a Lifecycle Function

A lifecycle function simply describes what should happen.

For example, Flipnzee Auctions defines an activation function similar to:

function flipnzee_auction_activate() {

    // Create tables

    // Run migrations

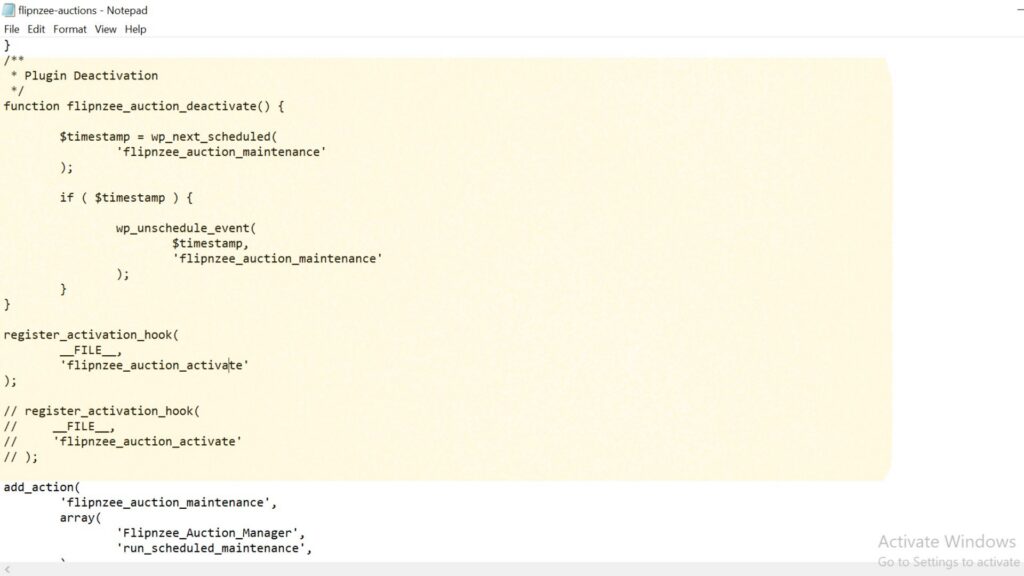
}

Likewise, it defines a deactivation function:

function flipnzee_auction_deactivate() {

    $timestamp = wp_next_scheduled(
        'flipnzee_auction_maintenance'
    );

    if ( $timestamp ) {

        wp_unschedule_event(
            $timestamp,
            'flipnzee_auction_maintenance'
        );

    }

}

At this stage, these are simply ordinary PHP functions.

Defining a function does not automatically cause WordPress to execute it.


Registering the Activation Hook

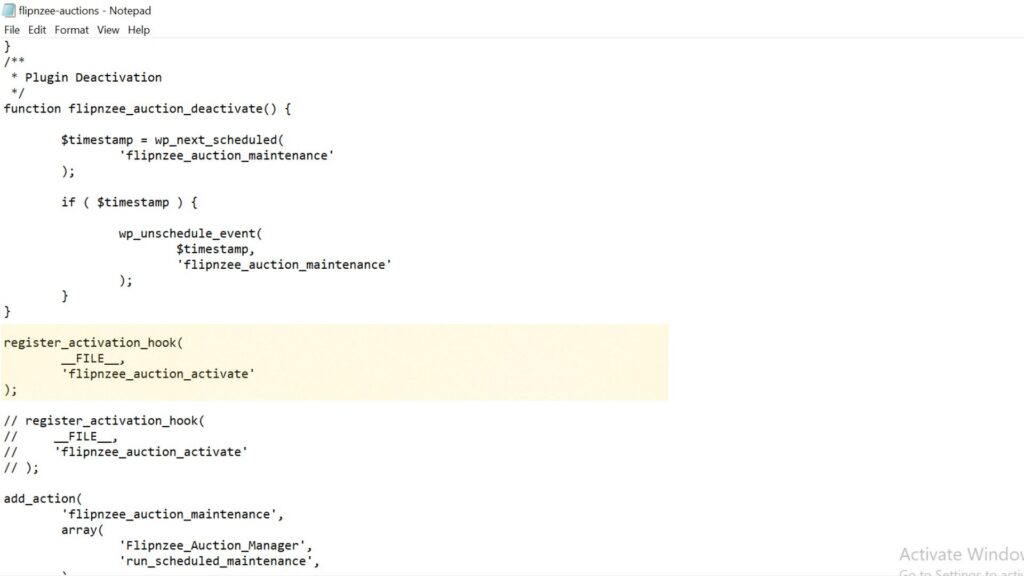
To tell WordPress when to execute the activation function, the bootstrap registers an activation hook.

register_activation_hook(

    __FILE__,

    'flipnzee_auction_activate'

);

This tells WordPress:

“Whenever this plugin is activated, execute flipnzee_auction_activate().”

Without this registration, the activation function would never be called automatically.


The Difference Between Defining and Registering

This distinction is important.

Defining a function

answers the question:

What should happen?

Registering a hook

answers the question:

When should it happen?

Professional developers treat these as two separate responsibilities.


Reviewing the Current Bootstrap

Now let’s review the current Flipnzee Auctions bootstrap.

During our review we found:

✅ An activation function exists.

✅ A deactivation function exists.

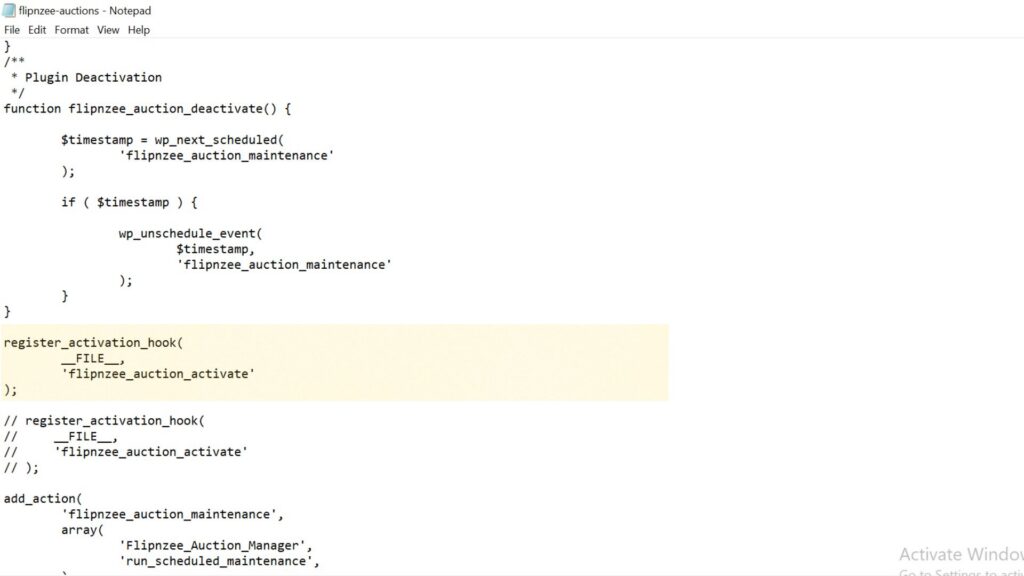
✅ The activation function is registered using register_activation_hook().

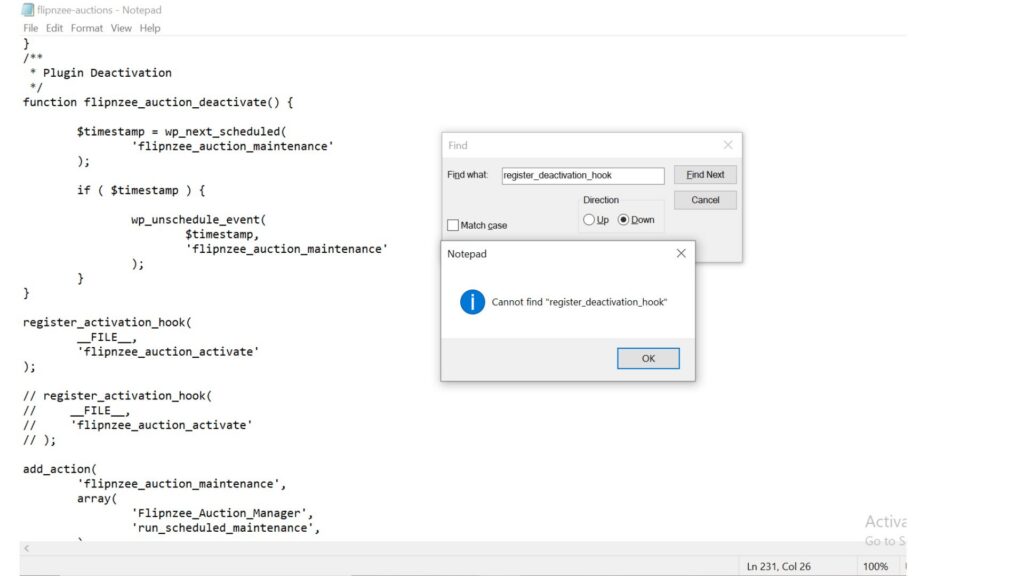
We then searched the bootstrap for:

register_deactivation_hook

No corresponding registration was found.

This does not necessarily mean the plugin is broken.

Instead, it raises an engineering question:

If a deactivation function exists, should it also be registered so that WordPress executes it automatically?

At this stage, we deliberately avoid making changes.

Professional engineering begins by understanding the existing implementation before deciding whether modifications are appropriate.


Why Not Fix It Immediately?

It can be tempting to immediately add:

register_deactivation_hook(
    __FILE__,
    'flipnzee_auction_deactivate'
);

However, good engineering follows a process:

  1. Observe
  2. Verify
  3. Understand
  4. Implement
  5. Test

Skipping directly to implementation can introduce unintended side effects.

Our goal is to make deliberate improvements backed by evidence rather than assumptions.


Testing

No source code was modified during this lesson.

Instead, we verified the current implementation by reviewing the bootstrap and searching for lifecycle hook registrations.

This confirms our understanding before any refactoring takes place.


Git

No Git commit is required because no source code was changed.


Key Takeaways

In this lesson we learned that defining a lifecycle function and registering it are two separate responsibilities.

We reviewed the current Flipnzee Auctions bootstrap and confirmed that:

  • activation logic is defined,
  • deactivation logic is defined,
  • activation is registered with WordPress,
  • and no deactivation hook registration was found in the current stable bootstrap.

Rather than treating this as an immediate bug, we recorded it as an engineering observation for further investigation.

This disciplined approach helps ensure that future changes are intentional, well-tested, and based on a clear understanding of the existing architecture.

Ends here (for now).

The Plugin Engineering series will pause temporarily while we complete several high-priority marketplace features. Once Flipnzee Auctions reaches a feature-complete milestone, we’ll return to refactoring and architectural improvements

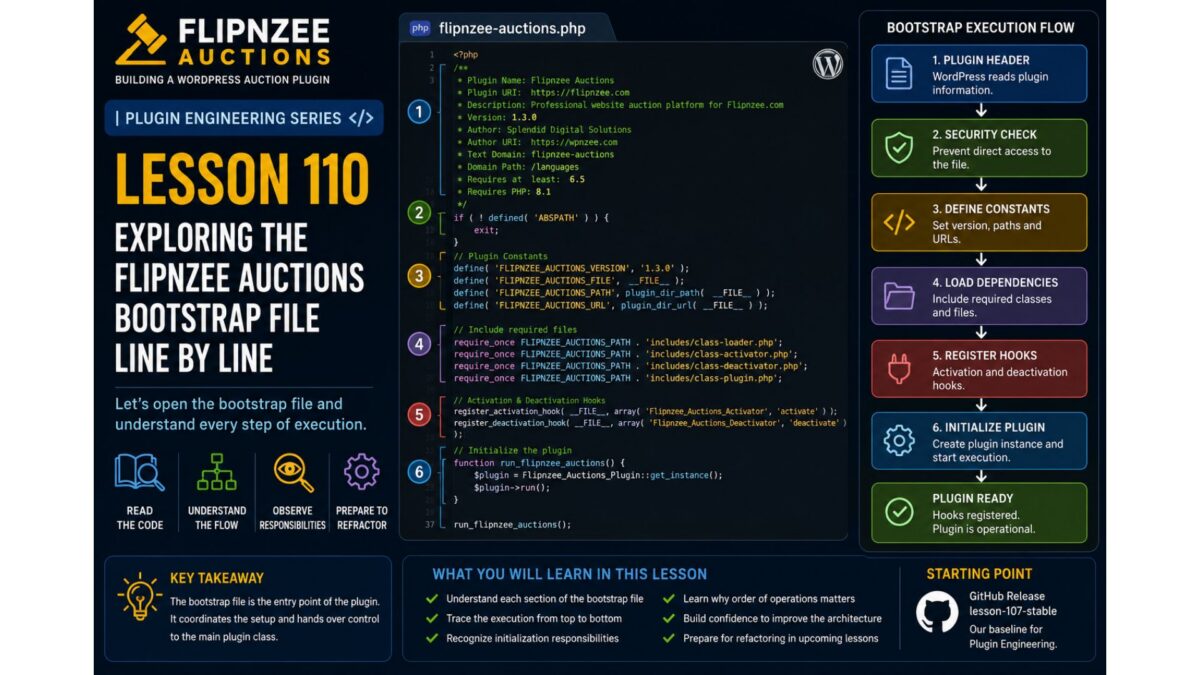
Lesson 110: Identifying Responsibilities in the Flipnzee Auctions Bootstrap


Series: Building Flipnzee Auctions → Plugin Engineering
Lesson: 110
Difficulty: Beginner to Intermediate
Prerequisites: Lessons 108–109
Code Changes: None (Architecture Review)


Introduction

In Lessons 108 and 109, we learned what a plugin bootstrap is and why professional developers review existing code before making changes.

Now it’s time to examine the actual flipnzee-auctions.php file from the Lesson 107 Stable release. Unlike many tutorials that use simplified examples, this lesson is based on the real bootstrap powering Flipnzee Auctions.

Our goal is not to refactor the code. Instead, we will identify the different responsibilities contained within the bootstrap and understand why each one exists. By the end of this lesson, you’ll begin seeing the bootstrap not as a long PHP file, but as the central coordinator that connects WordPress with every major component of the plugin.


Learning Objectives

By the end of this lesson, you will be able to:

  • Identify the major responsibilities handled by the plugin bootstrap.
  • Understand why bootstrap files naturally grow as plugins evolve.
  • Recognize how WordPress uses hooks to communicate with plugins.
  • Explain why loading classes, registering hooks, and initializing components are separate responsibilities.
  • Prepare for future refactoring by first understanding the existing architecture.

Why Focus on Responsibilities?

Imagine walking into a manufacturing plant for the first time.

Before examining individual machines, you first identify the departments:

  • Reception
  • Manufacturing
  • Quality Control
  • Packaging
  • Shipping

Only after understanding those departments do you begin studying the machines inside each one.

Professional software engineers approach large codebases the same way.

Instead of immediately reading every line of code, they first identify the major responsibilities.

That is exactly what we’ll do with the Flipnzee Auctions bootstrap.


The Bootstrap at a Glance

After reviewing the file, we can divide its responsibilities into the following sections.

Plugin Header
        │
Security Check
        │
Plugin Constants
        │
Load Core Classes
        │
Initialize Notifications
        │
Plugin Activation
        │
Plugin Deactivation
        │
Register WordPress Hooks
        │
Load Frontend Assets
        │
AJAX Localization
        │
Instantiate Core Objects
        │
Load Admin Assets

Even without reading every line, this diagram tells us something important:

The bootstrap does far more than simply “start the plugin.”

It acts as the coordinator for nearly every subsystem inside Flipnzee Auctions.


Section 1 – Plugin Header

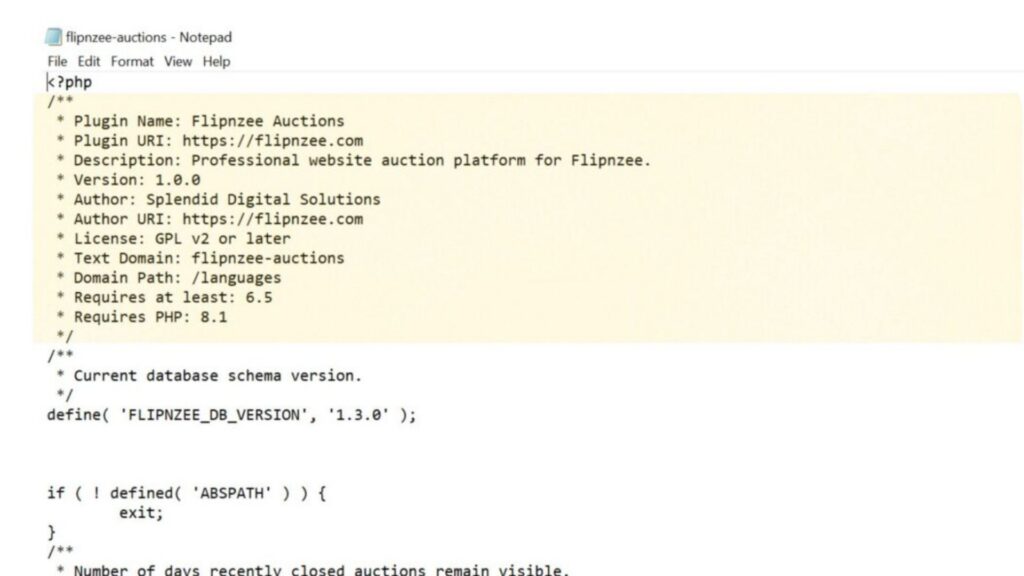
The bootstrap begins with the standard WordPress plugin header.

It contains information such as:

  • Plugin Name
  • Version
  • Description
  • Author
  • Text Domain
  • Minimum WordPress Version
  • Minimum PHP Version

Although this appears to be nothing more than a PHP comment, WordPress reads this information to display the plugin on the Plugins screen and determine compatibility requirements.


Section 2 – Security

Immediately after the header, the bootstrap protects itself from direct access.

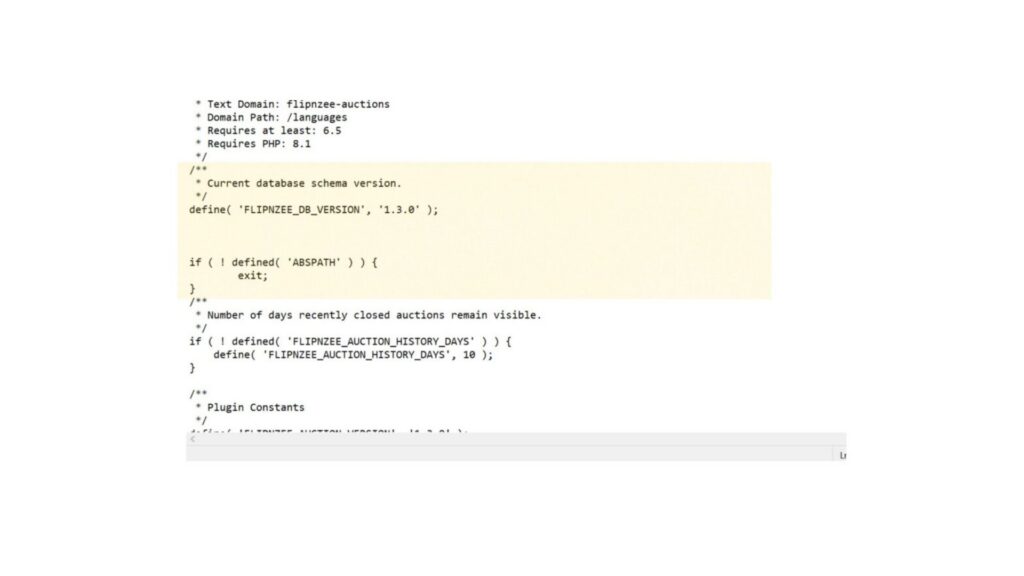
if ( ! defined( 'ABSPATH' ) ) {
    exit;
}

Why does this exist?

Every plugin file lives inside the web server.

Without this check, someone could attempt to execute the file directly through a browser.

By verifying that ABSPATH exists, the plugin ensures it is only executed through WordPress.


Section 3 – Plugin Constants

plugin constants

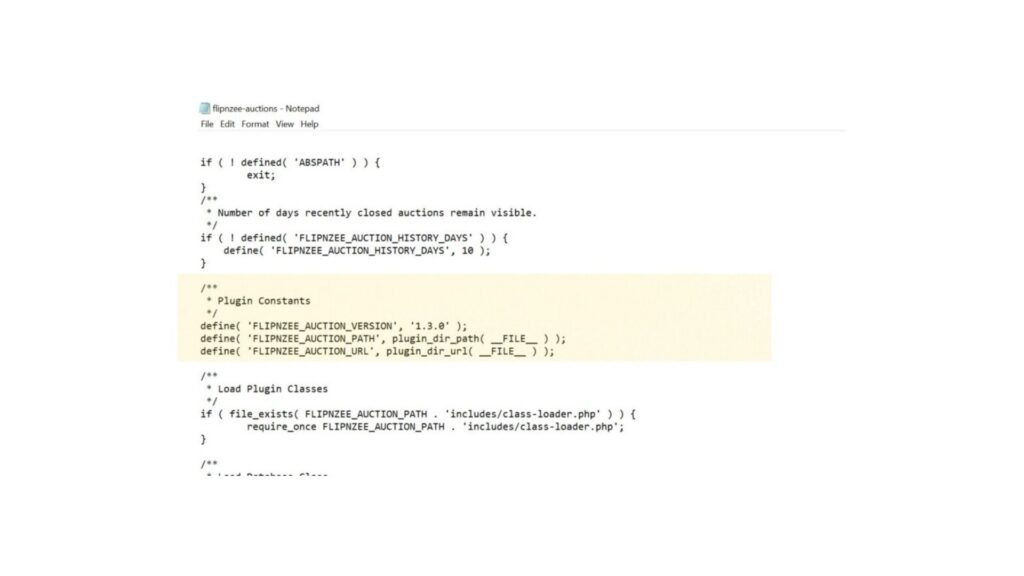
Next, the plugin defines several constants.

Examples include:

  • FLIPNZEE_DB_VERSION
  • FLIPNZEE_AUCTION_VERSION
  • FLIPNZEE_AUCTION_PATH
  • FLIPNZEE_AUCTION_URL
  • FLIPNZEE_AUCTION_HISTORY_DAYS

These values act as shared configuration used throughout the plugin. Rather than repeating version numbers or file paths in multiple locations, the plugin defines them once and reuses them everywhere.


Section 4 – Loading Classes

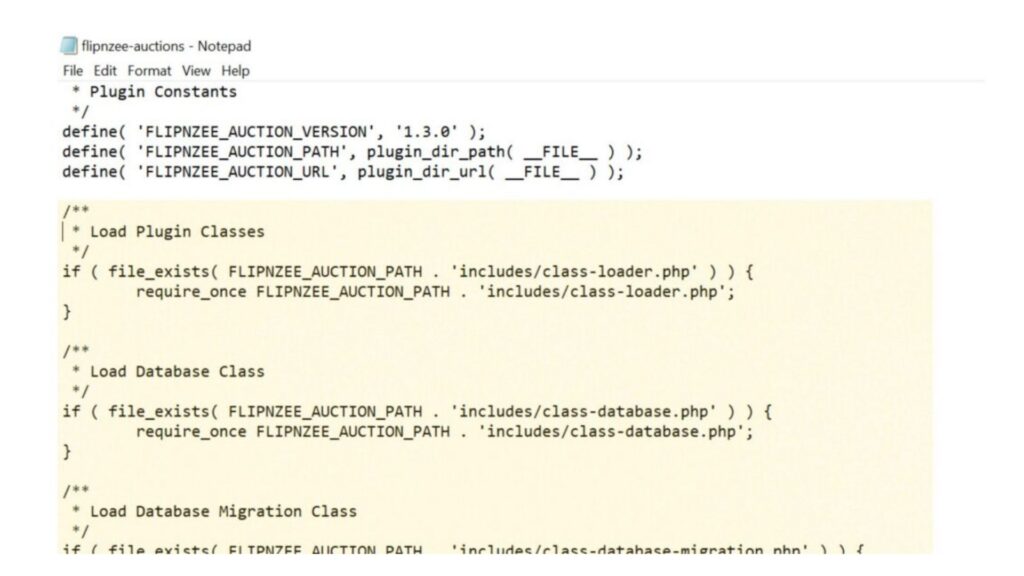
The largest portion of the bootstrap is responsible for loading the PHP classes that power the plugin.

Among them are:

  • Database
  • Database Migration
  • Auction Manager
  • Bid Manager
  • Payment Manager
  • Activity Log
  • Transaction Manager
  • Watchlist Manager
  • Buyer Dashboard
  • Notification Manager
  • Transfer Manager

…along with numerous administrative classes.

Why does this exist?

Before WordPress can execute any plugin functionality, PHP must know where those classes are located.

The bootstrap acts like a librarian—it gathers every required class before the plugin begins working.

Notice that some files are loaded after checking file_exists(), while others are included directly with require_once. This difference is an architectural observation that we’ll revisit in a future Plugin Engineering lesson.


Section 5 – Notification Initialization

After loading the notification manager class, the bootstrap immediately calls:

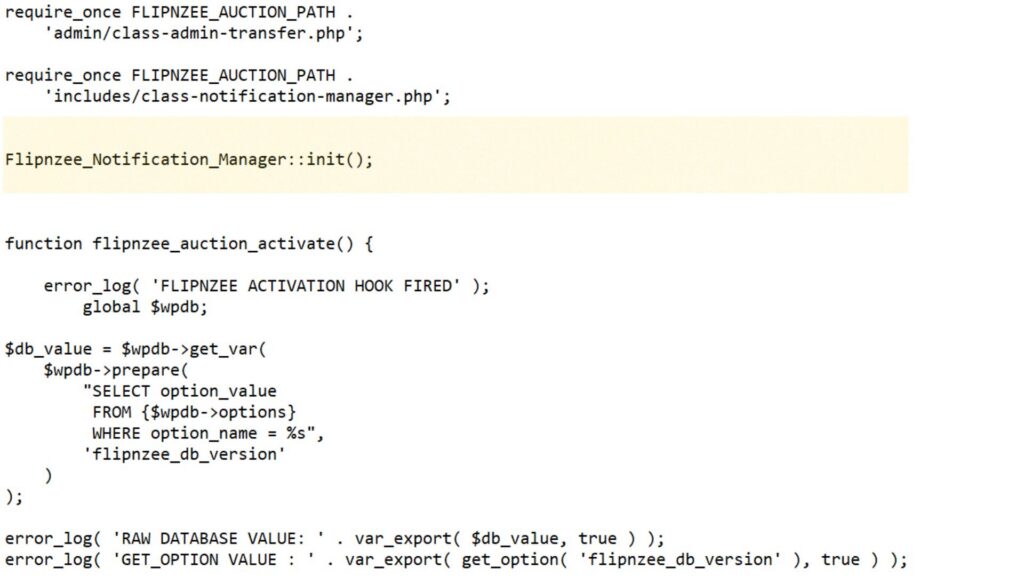
Flipnzee_Notification_Manager::init();

Unlike many other classes that are instantiated later using the new keyword, this class exposes a static init() method.

Why does this exist?

The notification manager needs to perform startup tasks as soon as it becomes available, such as registering its own hooks or preparing notification services.

This also introduces an interesting engineering question:

Why do some classes use new, while others use a static init() method?

We’ll explore different initialization patterns later in this series.


Section 6 – Activation and Deactivation

The bootstrap also contains the plugin’s activation and deactivation functions.

The activation function:

  • checks the stored database version,
  • creates database tables for new installations,
  • performs database migrations during upgrades,
  • and contains several debug log statements that were helpful during development.

The deactivation function removes the scheduled maintenance event before the plugin is disabled.

One interesting observation is that the activation hook is registered, while the deactivation function currently exists without a corresponding register_deactivation_hook() call in this file. We’ll revisit this during our engineering review rather than changing it immediately.


Section 7 – Registering WordPress Hooks

One of the bootstrap’s most important responsibilities is connecting Flipnzee Auctions to WordPress.

For example, the plugin registers an activation hook:

register_activation_hook(
    __FILE__,
    'flipnzee_auction_activate'
);

It also registers actions for:

  • scheduled maintenance,
  • frontend asset loading,
  • transaction updates,
  • payment status updates,
  • and admin asset loading.

Why are hooks important?

WordPress is an event-driven system.

Instead of constantly checking whether something has happened, the plugin simply tells WordPress:

“When this event occurs, call my function.”

This keeps the plugin efficient and allows WordPress to control the execution flow.


Section 8 – Frontend Assets

The bootstrap also loads the plugin’s frontend resources.

These include:

  • the main frontend stylesheet,
  • the auction countdown JavaScript,
  • the watchlist JavaScript,
  • and localized AJAX data containing the AJAX endpoint and security nonce.

Why doesn’t the plugin simply print <script> tags?

WordPress provides the enqueue system so plugins can:

  • avoid duplicate loading,
  • manage script dependencies,
  • support cache busting through version numbers,
  • and remain compatible with themes and other plugins.

The localized AJAX data also allows JavaScript to communicate with WordPress securely without hardcoding URLs.


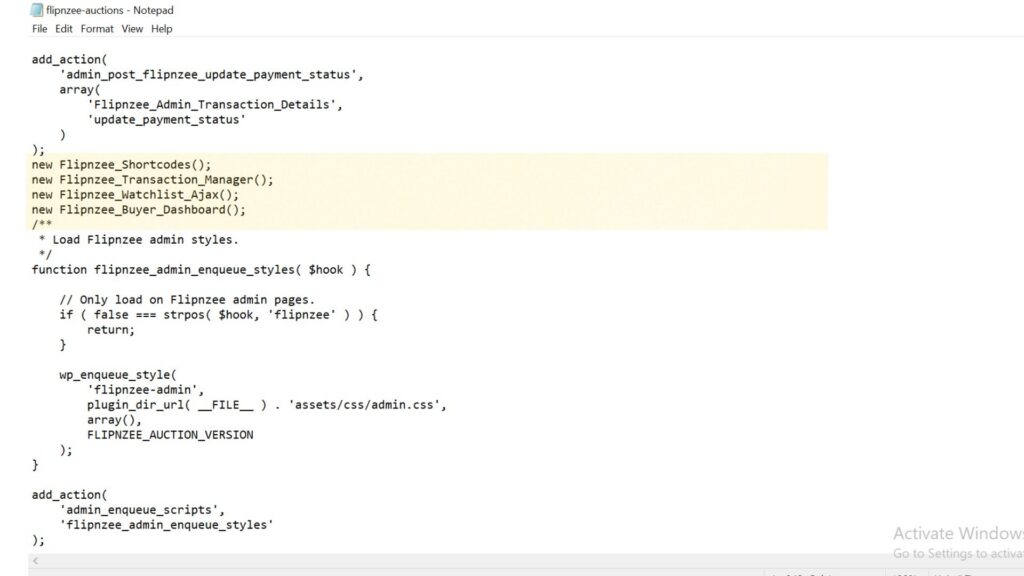
Section 9 – Instantiating Core Objects

Near the end of the bootstrap, several objects are created.

Examples include:

  • Flipnzee_Shortcodes
  • Flipnzee_Transaction_Manager
  • Flipnzee_Watchlist_Ajax
  • Flipnzee_Buyer_Dashboard

Why are these objects created here?

Creating these objects allows their constructors to register hooks, initialize services, or prepare functionality required while WordPress is running.

Notice the contrast with the earlier Flipnzee_Notification_Manager::init() call. Different initialization strategies are being used, and understanding those differences will be an important part of our Plugin Engineering journey.


Engineering Observations

Professional engineers learn to observe before they modify.

While reviewing the bootstrap, we noticed several architectural characteristics:

  • The bootstrap coordinates many different responsibilities.
  • Most class loading is grouped together.
  • Multiple initialization patterns are used.
  • Different file-loading styles appear throughout the bootstrap.
  • Some debugging statements remain from earlier development.
  • One file is loaded more than once.

These observations are not criticisms—they simply reflect how the plugin evolved over many lessons.

Understanding them is the first step toward thoughtful refactoring.


Testing

No code has been modified.

Therefore:

  • Plugin activation should behave exactly as before.
  • Frontend functionality should remain unchanged.
  • Admin functionality should remain unchanged.

This lesson focuses entirely on understanding the existing architecture.


Git

No Git commit is required because no source code was modified.


Key Takeaways

In this lesson, we shifted our perspective from reading PHP line by line to understanding the architecture of the Flipnzee Auctions bootstrap.

We discovered that the bootstrap is responsible for:

  • protecting the plugin,
  • defining shared configuration,
  • loading the application’s classes,
  • initializing core components,
  • registering WordPress hooks,
  • loading frontend resources,
  • and starting the plugin.

Most importantly, we learned that effective Plugin Engineering begins with understanding. Before we refactor code, we must first understand why it exists and what responsibility it serves.


Looking Ahead

In Lesson 111, we’ll evaluate the bootstrap using the Single Responsibility Principle (SRP). We’ll examine whether each responsibility belongs in the bootstrap or whether some can eventually be delegated to dedicated classes, laying the groundwork for our first architectural refactoring.

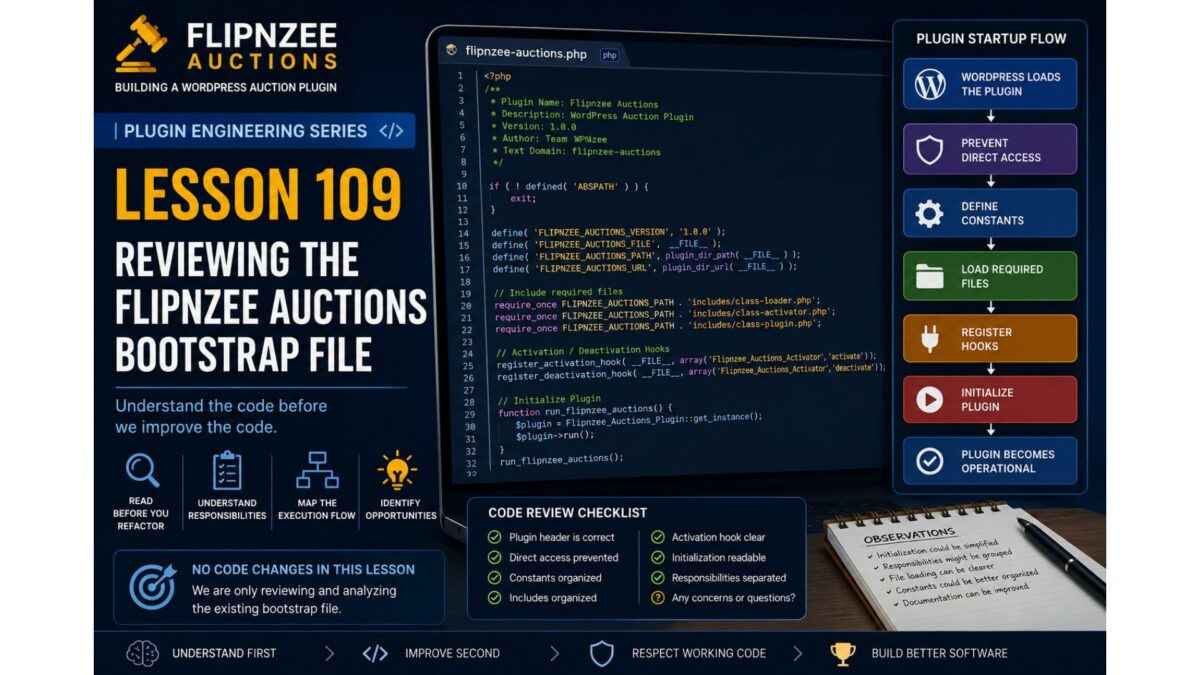
Lesson 109: Reviewing the Flipnzee Auctions Bootstrap File

Series: Building Flipnzee Auctions → Plugin Engineering
Lesson: 109
Difficulty: Beginner to Intermediate
Prerequisites: Lesson 108 – Understanding the Plugin Bootstrap and Execution Flow
Code Changes: None (Analysis & Code Review)


Introduction

In Lesson 108, we learned how WordPress loads plugins and why understanding execution flow is the first step toward professional software engineering.

In this lesson, we finally open the Flipnzee Auctions bootstrap file—the file that WordPress executes whenever the plugin is loaded.

Our goal is not to change anything yet.

Instead, we will carefully study what the bootstrap currently does, identify its responsibilities, and decide whether each responsibility belongs there.

Professional developers spend a significant amount of time reading code before modifying it. That habit reduces bugs and results in better architectural decisions.


Learning Objectives

By the end of this lesson, you will understand:

  • What the Flipnzee Auctions bootstrap file does.
  • Why WordPress starts execution from this file.
  • Which responsibilities belong inside a bootstrap.
  • Which responsibilities should eventually move elsewhere.
  • How to review existing code without immediately refactoring it.

Why Review Existing Code First?

Many beginner developers immediately start rewriting code whenever they think they see an improvement.

Experienced developers do something different.

They ask questions like:

  • Why was this written?
  • Does it already work correctly?
  • Is there hidden functionality?
  • Will changing this break something else?
  • Can this responsibility be better organized?

Only after answering these questions do they begin making changes.

Our objective is understanding, not criticism.


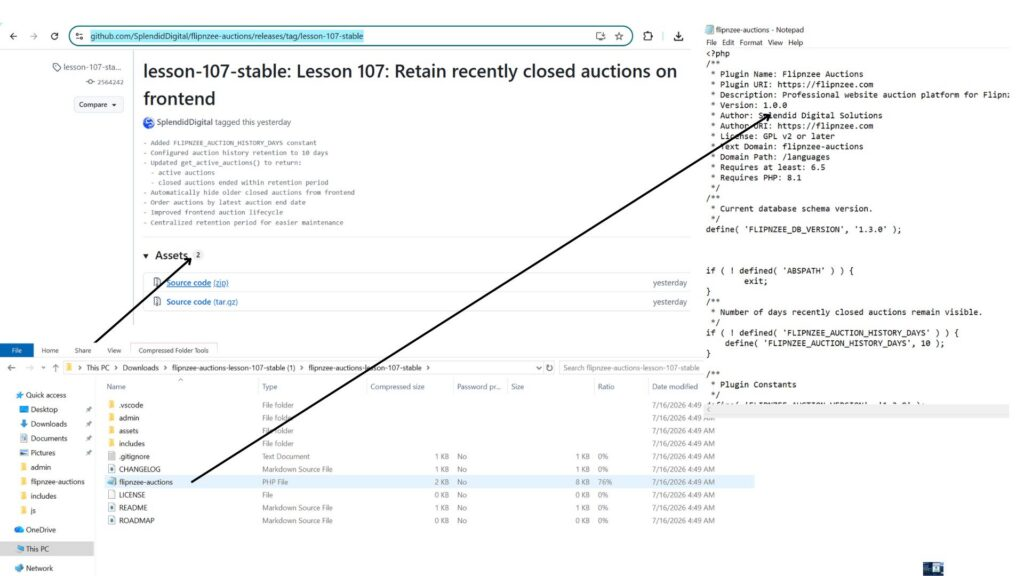
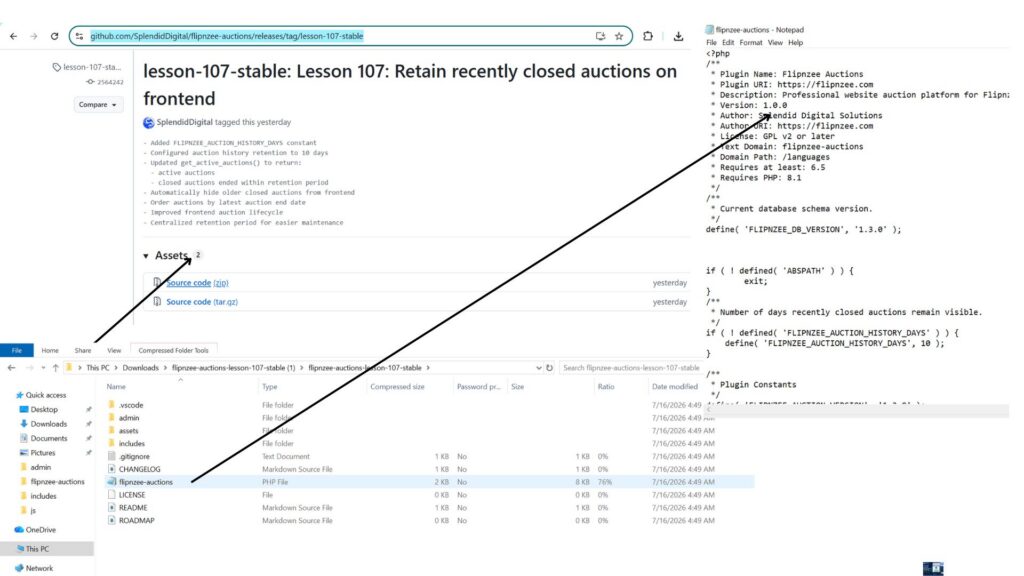
What Is the Bootstrap File?

The bootstrap file is the plugin’s entry point.

For Flipnzee Auctions, it is:

flipnzee-auctions.php
Figure 1. Starting Point for the Plugin Engineering Series
GitHub Release
lesson-107-stable
Starting Point for Plugin Engineering

Every request begins here.

Think of it as the reception desk of a company.

Visitors arrive here first.

The receptionist doesn’t perform accounting, legal work, or engineering.

Instead, the receptionist directs each visitor to the correct department.

A good bootstrap behaves the same way.

It coordinates.

It does not perform business logic.


Typical Responsibilities of a Bootstrap

A clean WordPress bootstrap usually performs responsibilities such as:

  • Plugin metadata
  • Prevent direct access
  • Define constants
  • Load required files
  • Register activation hook
  • Register deactivation hook
  • Load translations
  • Initialize the plugin

Notice what is missing.

A bootstrap should not:

  • Process bids
  • Create transactions
  • Query auctions
  • Render frontend HTML
  • Execute payment logic
  • Perform transfer workflows

Those belong elsewhere.


Reviewing the Flipnzee Auctions Bootstrap

As we examine our bootstrap file, ask yourself the following questions.

1. Does it have a single responsibility?

Is it primarily responsible for starting the plugin?

Or is it doing too much?


2. Is the execution flow easy to follow?

Can another developer understand the startup sequence within a few minutes?

Or must they jump between many unrelated sections?


3. Are constants grouped together?

Constants should be easy to find.

Examples include:

  • Version
  • Plugin path
  • Plugin URL
  • Asset paths

These values are typically defined early because many other classes depend on them.


4. Are dependencies loaded clearly?

Does the bootstrap make it obvious:

  • which files are required,
  • why they are required,
  • and in what order?

A predictable loading sequence makes debugging much easier.


5. Does it initialize one central plugin class?

A common professional pattern looks like this:

Bootstrap
        │
        ▼
Main Plugin Class
        │
        ▼
Services
        │
        ▼
Features

Instead of creating dozens of objects directly inside the bootstrap, one central class coordinates the rest of the plugin.

We’ll evaluate whether Flipnzee Auctions already follows this pattern or whether it can be improved.


Understanding the Current Startup Sequence

Although every plugin is different, the startup sequence generally looks like this:

WordPress loads plugin
        │
        ▼
Plugin header is read
        │
        ▼
Prevent direct access
        │
        ▼
Define constants
        │
        ▼
Load required files
        │
        ▼
Register activation hooks
        │
        ▼
Initialize plugin
        │
        ▼
Register WordPress hooks
        │
        ▼
Plugin becomes operational

As we inspect the Flipnzee Auctions bootstrap, we will map each section to one of these responsibilities.


Code Review Checklist

During this lesson, create a simple checklist.

QuestionStatus
Plugin header is correct
Direct access prevented
Constants organizedReview
Includes organizedReview
Activation hook clearReview
Initialization readableReview
Responsibilities separatedReview

This checklist becomes the foundation for future refactoring.


Engineering Notes

One important principle throughout this series is:

Working code deserves respect.

Just because code can be improved does not mean it was poorly written.

Most software evolves over time.

Every version reflects the knowledge and priorities of the project at that moment.

Our goal is to improve the code while preserving its working behavior.


No Refactoring Yet

You may already notice opportunities to improve the bootstrap.

Resist the temptation.

One of the easiest ways to introduce bugs is to refactor before fully understanding the code.

Instead, maintain a list of observations.

For example:

  • Initialization could be simplified.
  • Responsibilities might be grouped differently.
  • File loading may become more readable.
  • Constants could be organized together.
  • Documentation could be improved.

These observations become candidates for future lessons.


Testing

Since we are only reviewing code:

  • No functionality should change.
  • Plugin behavior should remain identical.
  • Existing features should continue working.

This lesson is purely analytical.


Git

Because no code changes were made, there is nothing to commit.

If you took notes separately, you may commit documentation only.

Otherwise, proceed directly to Lesson 110.


Key Takeaways

In this lesson, we learned that professional engineering begins with careful observation.

We identified the responsibilities of a plugin bootstrap, discussed what belongs there and what does not, and established a framework for reviewing the Flipnzee Auctions startup sequence.

Most importantly, we adopted an engineering mindset:

  • Understand before changing.
  • Respect working code.
  • Identify responsibilities.
  • Record observations.
  • Refactor deliberately.

Looking Ahead

In Lesson 110, we will perform our first real code walkthrough of the flipnzee-auctions.php bootstrap file.

We’ll examine each section line by line, trace the execution path through the plugin, and build an execution-flow diagram based on the actual code. Only after fully understanding the implementation will we decide whether and how to refactor it.


Discussion

Before moving on, consider these questions:

  1. Why should a bootstrap file avoid business logic?
  2. Which startup responsibilities belong in the bootstrap, and which belong elsewhere?
  3. Why is reviewing working code often more valuable than immediately rewriting it?
  4. If you opened a plugin for the first time, what information would you look for in its bootstrap file?

Share your thoughts in the comments. In the next lesson, we’ll replace theory with practice by tracing the real execution flow of Flipnzee Auctions from its bootstrap file.