Lesson 121: Designing the Escrow Provider Engine

Series: Building Flipnzee Auctions – From Prototype to Production
Lesson: 121


Introduction

One of the primary objectives of Flipnzee Auctions has always been to facilitate the sale of valuable digital assets such as websites, domains, SaaS applications, WordPress plugins, and online businesses.

Unlike physical products, transferring ownership of a digital business involves several coordinated steps:

  • Buyer submits payment
  • Seller receives confirmation
  • Website files are transferred
  • Database is migrated
  • Domain ownership changes
  • Buyer verifies successful delivery

For transactions involving significant amounts of money, both parties require confidence that the process is secure and fair.

This is precisely the problem that professional escrow services solve.

In this lesson, Flipnzee Auctions begins integrating with external escrow providers by introducing a dedicated Escrow Provider Engine.

Rather than hardcoding support for a single provider, the plugin will establish a generic architecture capable of supporting multiple external transaction providers in the future.


Why Not Hardcode Escrow?

A common mistake during plugin development is embedding provider-specific code directly into payment or transaction managers.

For example:

if provider == Escrow.com
    ...
else if provider == Stripe
    ...
else if provider == PayPal
    ...

As additional providers are added, the code becomes increasingly difficult to maintain.

Instead, Flipnzee Auctions will treat every provider as an interchangeable component.


The Provider Architecture

The plugin already includes an External Provider Manager introduced in previous lessons.

Lesson 121 builds upon that foundation.

The architecture becomes:

Auction

↓

Transaction

↓

Transaction State

↓

External Provider Manager

↓

Escrow Provider

↓

Escrow.com

Instead of communicating directly with Escrow.com, the transaction lifecycle communicates with the External Provider Manager.

The manager then delegates responsibility to the appropriate provider.


Responsibilities of the Escrow Provider

The Escrow Provider will eventually manage tasks such as:

  • Creating an escrow transaction
  • Recording provider references
  • Tracking escrow status
  • Updating transaction states
  • Storing escrow URLs
  • Synchronizing payment progress
  • Logging provider activity

The provider should never contain business rules unrelated to Escrow.

Its responsibility is simply translating Flipnzee Auctions’ workflow into the language understood by the external provider.


Separation of Responsibilities

Each component now has a clear responsibility.

Transaction Lifecycle Manager

Determines when an external provider should be invoked.


Transaction State Manager

Tracks the current lifecycle stage.


External Provider Manager

Determines which provider should handle the transaction.


Escrow Provider

Knows how to communicate with Escrow.com.


This separation dramatically improves maintainability.


Future Providers

Although Lesson 121 focuses on Escrow, the architecture is intentionally generic.

Future providers may include:

  • Escrow.com
  • Stripe
  • PayPal
  • Wise
  • Payoneer
  • Coinbase Commerce
  • Binance Pay
  • Manual Bank Transfer

Every provider should expose a consistent interface while implementing its own communication logic.


Benefits of a Provider Engine

By introducing a provider engine instead of provider-specific code, Flipnzee Auctions gains several advantages:

  • Cleaner architecture
  • Easier testing
  • Reduced coupling
  • Better extensibility
  • Simpler maintenance
  • Multiple payment workflows
  • Enterprise-ready integrations

Perhaps most importantly, administrators will eventually be able to switch providers without modifying the underlying transaction workflow.


Preparing for Real Escrow Integration

Initially, the provider engine will simulate interactions with Escrow.com.

This allows the plugin architecture to mature before introducing:

  • Authentication
  • API credentials
  • Webhooks
  • Callback verification
  • Live transaction synchronization
  • Production error handling

Once these foundations are complete, replacing simulated responses with real API calls becomes significantly easier.


Looking Ahead

In the implementation lesson, we will begin constructing the Escrow Provider Engine by:

  • creating a dedicated Escrow Provider class
  • registering it with the External Provider Manager
  • simulating escrow transaction creation
  • storing provider references
  • connecting provider creation to transaction lifecycle events
  • preparing the plugin for future API communication

This marks the beginning of one of the most significant functional additions to Flipnzee Auctions: secure third-party transaction management through professional escrow services.
Lesson 120 Implementation: Building the Transaction State Machine

Series: Building Flipnzee Auctions – From Prototype to Production
Lesson: 120 (Implementation)


Overview

In the previous lesson, we introduced the concept of a transaction state machine and explained why representing a transaction’s current state is more scalable than relying solely on events.

This implementation focuses on laying the architectural foundation for persistent transaction states.


What We Built

This lesson introduces a new class:

Flipnzee_Transaction_State_Manager

Its responsibility is to define the lifecycle of every transaction within the plugin.

Instead of scattering state strings across multiple files, all transaction states are centralized in one location.


State Constants

The following constants were added:

PAYMENT_PENDING

PAYMENT_SUBMITTED

PAYMENT_COMPLETED

FILES_TRANSFER

DATABASE_TRANSFER

DOMAIN_TRANSFER

BUYER_VERIFICATION

COMPLETED

These constants eliminate duplicated string literals and provide a single source of truth throughout the plugin.


Human-Readable Labels

A helper method was added to convert internal state identifiers into administrator-friendly labels.

Examples include:

payment_pending

↓

Payment Pending

and

database_transfer

↓

Database Transfer

This keeps presentation logic separate from business logic.


Ordered Transaction Lifecycle

The state manager now exposes the complete transaction lifecycle in a predictable order.

This makes future features—such as determining the next valid state—much easier to implement.

Rather than relying on complex conditional logic, the plugin can iterate over a centralized lifecycle definition.


Active and Terminal States

Two helper methods were introduced:

  • is_active()
  • is_terminal()

These methods allow other components to determine whether a transaction is still progressing or has reached its final destination.

This abstraction will become increasingly valuable as future terminal states (such as cancelled or refunded) are introduced.


Lifecycle Integration

The Transaction Lifecycle Manager was updated to work with the new state architecture.

When payment is completed, the lifecycle manager now:

  • recognizes the current transaction state
  • logs the state transition
  • continues creating the ownership transfer workflow

Although states are not yet fully persisted, the lifecycle manager now thinks in terms of transaction states rather than isolated events.


Database Preparation

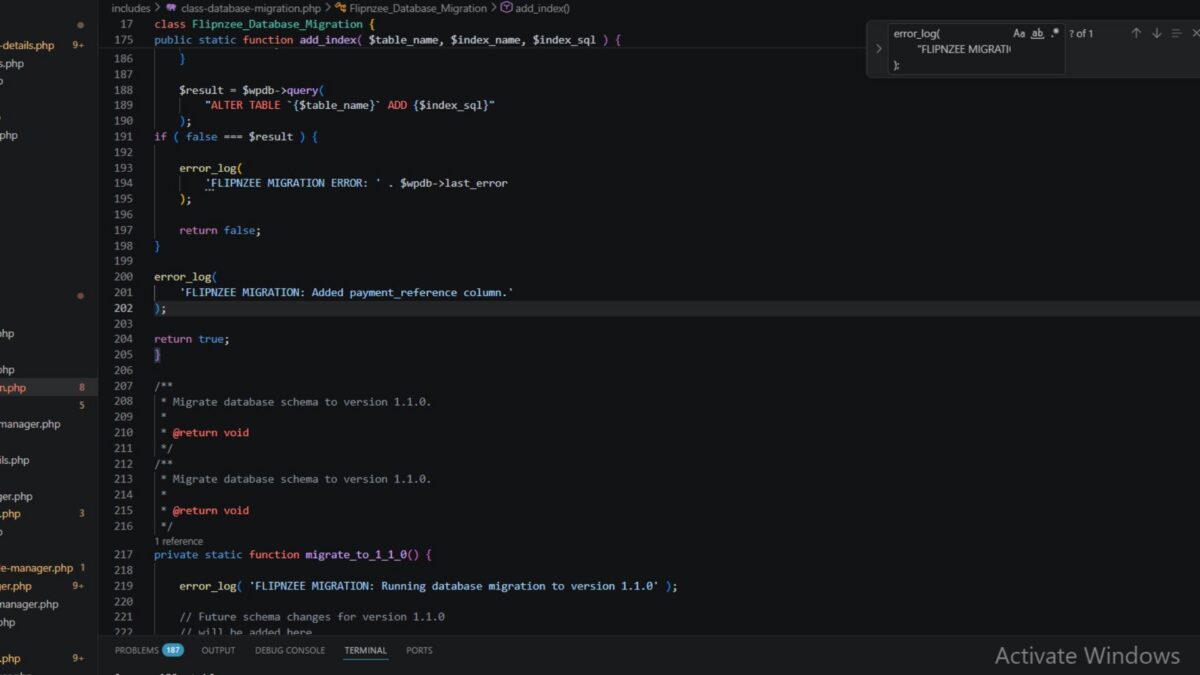
The lesson also prepares the database for persistent transaction states through a new migration targeting version 1.4.0.

The migration introduces a dedicated state column within the transactions table.

Once applied, every transaction will permanently record its current position in the workflow.


Refactoring Existing Migrations

While extending the migration system, several improvements were made:

  • corrected logging messages
  • cleaned migration sequencing
  • prepared a dedicated migration for transaction states
  • continued following versioned database upgrades

These improvements make future schema changes easier to maintain.


Architectural Impact

Before this lesson, the transaction workflow looked like this:

Payment

↓

Transfer

↓

Completion

After Lesson 120, the architecture evolves into:

Payment

↓

Lifecycle Manager

↓

Transaction State

↓

Transfer Manager

↓

Completion

The transaction state now becomes the central reference point for every future workflow.


Why This Matters

This lesson may not introduce visible frontend changes, but it represents one of the most important architectural improvements in the project.

Upcoming features—including:

  • Escrow.com integration
  • multiple payment providers
  • automated notifications
  • buyer dashboards
  • transaction timelines
  • dispute handling

will all depend on a reliable transaction state machine.

By completing this refactoring now, future lessons can focus on business functionality instead of continually restructuring the underlying architecture.


Looking Ahead

With the state machine in place, the plugin is now ready to persist transaction states and allow external providers to react to state transitions.

The next lessons will leverage this foundation to integrate Escrow workflows, ensuring that every payment and ownership transfer follows a consistent, extensible lifecycle.

https://github.com/SplendidDigital/flipnzee-auctions/releases/tag/lesson-120-stable

Lesson 120: Designing a Transaction State Machine for Flipnzee Auctions

Series: Building Flipnzee Auctions – From Prototype to Production
Lesson: 120


Introduction

Over the previous lessons, the Flipnzee Auctions plugin has gained several important capabilities. It can create auctions, record winning bids, manage transactions, process payments, and guide administrators through ownership transfers.

Although these features work together, they currently rely on individual events rather than a centralized workflow. A payment completion triggers one action, an ownership transfer triggers another, and each component makes decisions independently.

As the plugin grows to support Escrow.com, additional payment providers, automated notifications, and buyer dashboards, this approach becomes increasingly difficult to maintain.

In this lesson, the plugin takes another significant architectural step by introducing a Transaction State Machine.

Instead of asking:

What event just happened?

the system will begin asking:

What is the current state of this transaction?

This subtle change lays the foundation for a much more scalable and maintainable architecture.


Why a State Machine?

Consider the complete journey of a website sale.

Auction Won

↓

Payment Pending

↓

Payment Completed

↓

Website Files Transfer

↓

Database Transfer

↓

Domain Transfer

↓

Buyer Verification

↓

Completed

Previously, these stages existed only as business knowledge in the administrator’s mind.

The plugin itself had no single place describing where a transaction currently stood.

A transaction state machine changes that.

Every transaction now progresses through a defined sequence of states that represent its lifecycle.


Problems Without States

Without a state machine, different parts of the plugin ask different questions.

The payment manager asks:

Has payment completed?

The transfer manager asks:

Which transfer steps are finished?

The notification system asks:

Which email should I send?

The Escrow integration will eventually ask:

Should Escrow.com be created now?

Each component ends up making its own assumptions.

Eventually those assumptions become inconsistent.


A Better Architecture

Instead of every component deciding independently, every component will consult the same source of truth.

Transaction

↓

Current State

↓

Business Logic

↓

Actions

Examples:

payment_pending

Display payment instructions


payment_completed

Create ownership transfer


database_transfer

Show migration progress


completed

Archive transaction


State vs Event

This distinction is extremely important.

An event describes something that happened.

Payment Completed

A state describes where the transaction is now.

Payment Verified

Events are temporary.

States persist.

Events trigger transitions between states.


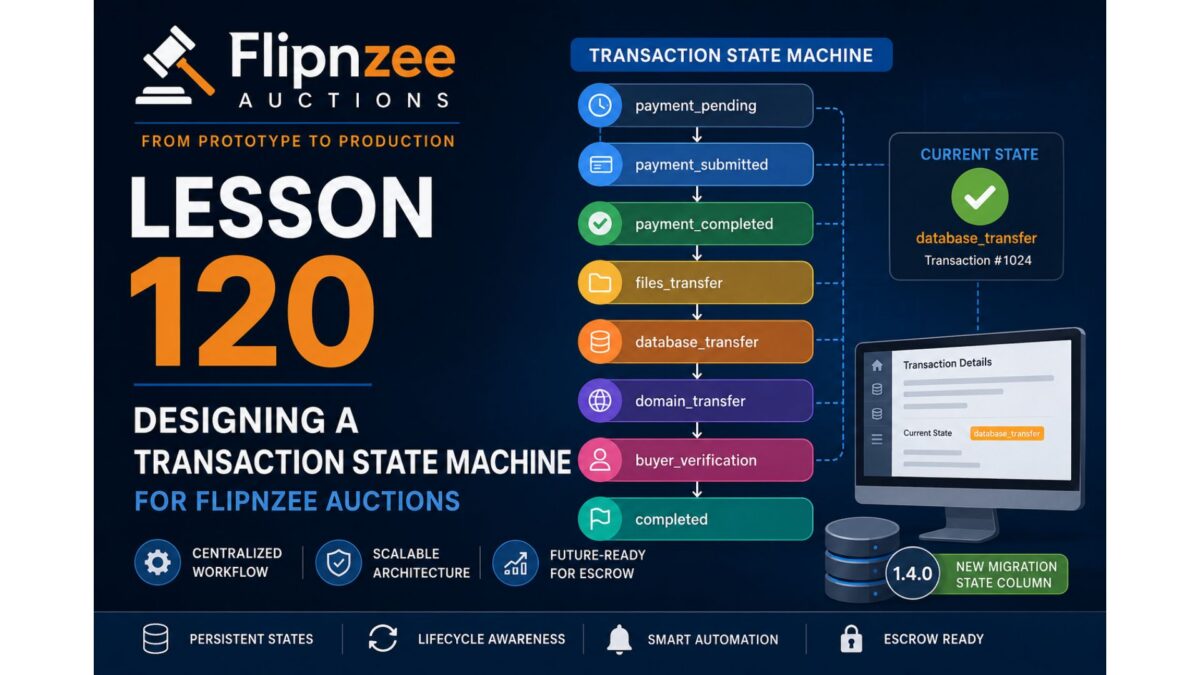
Initial Transaction States

The first version of the state machine introduces the following lifecycle.

payment_pending

↓

payment_submitted

↓

payment_completed

↓

files_transfer

↓

database_transfer

↓

domain_transfer

↓

buyer_verification

↓

completed

Additional states such as:

  • cancelled
  • refunded
  • disputed
  • escrow_pending

can be added later without redesigning the plugin.


Centralizing State Definitions

Rather than scattering strings throughout dozens of PHP files, Lesson 120 introduces a dedicated class responsible for transaction states.

For example:

Flipnzee_Transaction_State_Manager::PAYMENT_PENDING

Flipnzee_Transaction_State_Manager::PAYMENT_COMPLETED

Flipnzee_Transaction_State_Manager::COMPLETED

This provides:

  • one authoritative location
  • fewer typing mistakes
  • easier refactoring
  • future localization support

Preparing for Escrow

One of the main goals of this refactoring project is preparing Flipnzee Auctions for external providers such as Escrow.com.

Escrow workflows are inherently state-based.

For example:

Auction Won

↓

Escrow Created

↓

Buyer Funded Escrow

↓

Seller Delivered Website

↓

Buyer Accepted

↓

Escrow Released

Rather than hardcoding Escrow logic into payment pages, the provider will simply observe state transitions.

That is only possible because the plugin now has a formal transaction state machine.


Benefits

By the end of this lesson, Flipnzee Auctions will gain:

  • centralized transaction states
  • reusable state labels
  • helper methods
  • lifecycle awareness
  • cleaner business logic
  • stronger preparation for Escrow integration

Most importantly, the plugin will move away from isolated procedural actions toward a genuine workflow engine.


Coming Next

In the implementation lesson, the plugin will:

  • create a Transaction State Manager
  • define state constants
  • centralize state labels
  • provide helper methods
  • introduce version 1.4.0 database migration
  • prepare persistent transaction states
  • connect the Lifecycle Manager to the new architecture

The result will be a much more maintainable transaction workflow that future lessons can build upon.


Lesson 119 Implementation – Introducing Transaction Lifecycle Events in Flipnzee Auctions

In the previous lesson, the plugin gained a complete ownership transfer workflow. Although that feature worked well, the implementation revealed an architectural issue: the payment update screen was becoming responsible for triggering multiple business processes.

This lesson introduces a cleaner, more extensible architecture by adopting WordPress action hooks as lifecycle events.


Why This Change Was Needed

Originally, when an administrator marked a payment as Completed, the payment update method was expected to:

  • Update the payment status
  • Create an ownership transfer record
  • Record activity logs
  • Trigger notifications
  • Potentially communicate with Escrow.com
  • Perform any future post-payment tasks

As the plugin grows, this approach would lead to a large method that becomes increasingly difficult to maintain.

Instead, the payment module should simply announce that a payment has been completed and allow other parts of the system to respond independently.


Existing Flow

Previously, the workflow looked like this:

Admin Updates Payment
        │
        ▼
update_payment_status()
        │
        ├── Update database
        ├── Create transfer
        ├── Send notifications
        ├── Escrow processing
        └── More future code...

Every new feature would require modifying the payment update method.


New Event-Driven Flow

The payment screen now performs only its own responsibility.

Admin Updates Payment
        │
        ▼
update_payment_status()
        │
        ▼
do_action(
    'flipnzee_payment_completed'
)
        │
        ▼
Transaction Lifecycle Manager
        │
        ├── Create ownership transfer
        ├── Future email notifications
        ├── Future Escrow integration
        ├── Future analytics
        └── Future automation

This separates responsibilities while allowing the plugin to grow without constantly modifying the payment module.


Creating the Transaction Lifecycle Manager

A new class was introduced:

includes/
    class-transaction-lifecycle-manager.php

This class becomes responsible for listening to important transaction lifecycle events.

Its initial responsibilities include:

  • Registering lifecycle hooks
  • Responding to completed payments
  • Coordinating transfer creation
  • Serving as the central point for future transaction automation

Registering the Lifecycle Event

During plugin initialization, the lifecycle manager registers a listener for completed payments.

flipnzee_payment_completed

Whenever this event is fired, the lifecycle manager automatically begins the ownership transfer workflow.


Publishing the Event

Instead of directly creating transfer records, the payment update process now publishes an event:

do_action(
    'flipnzee_payment_completed',
    $transaction_id
);

The payment module no longer needs to know what happens next.

Its responsibility ends after announcing that the payment has been completed.


Responding to the Event

The lifecycle manager receives the transaction ID and performs the required business logic.

Currently, it automatically:

  • Creates an ownership transfer record (if one does not already exist)

Future versions will expand this handler to include:

  • Buyer notifications
  • Seller notifications
  • Escrow.com processing
  • CRM integrations
  • Analytics events
  • Audit logging
  • Additional automation

Benefits of Event-Driven Design

This approach offers several important advantages.

Single Responsibility

The payment module focuses exclusively on payment management.

Loose Coupling

The payment module no longer depends directly on the transfer manager.

Extensibility

New features can subscribe to lifecycle events without modifying existing code.

Easier Maintenance

Each component performs one clearly defined responsibility.

Better Testing

Lifecycle handlers can be tested independently of the payment interface.


Real-World Example

After this lesson, marking a payment as Completed automatically performs the following sequence:

Administrator
        │
        ▼
Payment Updated
        │
        ▼
Lifecycle Event Published
        │
        ▼
Transaction Lifecycle Manager
        │
        ▼
Ownership Transfer Created
        │
        ▼
Transfer appears in
Transfer Management

No additional code is required inside the payment update screen.


Result

After implementing this lesson:

  • Payment completion automatically creates ownership transfer records.
  • The payment module no longer contains transfer-specific logic.
  • A reusable lifecycle architecture is now available.
  • Future integrations can subscribe to lifecycle events without modifying existing functionality.

Looking Ahead

With lifecycle events in place, the next step is to formalize the overall transaction workflow.

Rather than treating transactions as isolated status updates, the plugin will begin managing them as a sequence of well-defined states—from auction completion through payment, ownership transfer, and final closure.

This state-based approach will provide a stronger foundation for Escrow.com integration and future automation while keeping the plugin organized as it continues to evolve.

https://github.com/SplendidDigital/flipnzee-auctions/releases/tag/lesson-119-stable

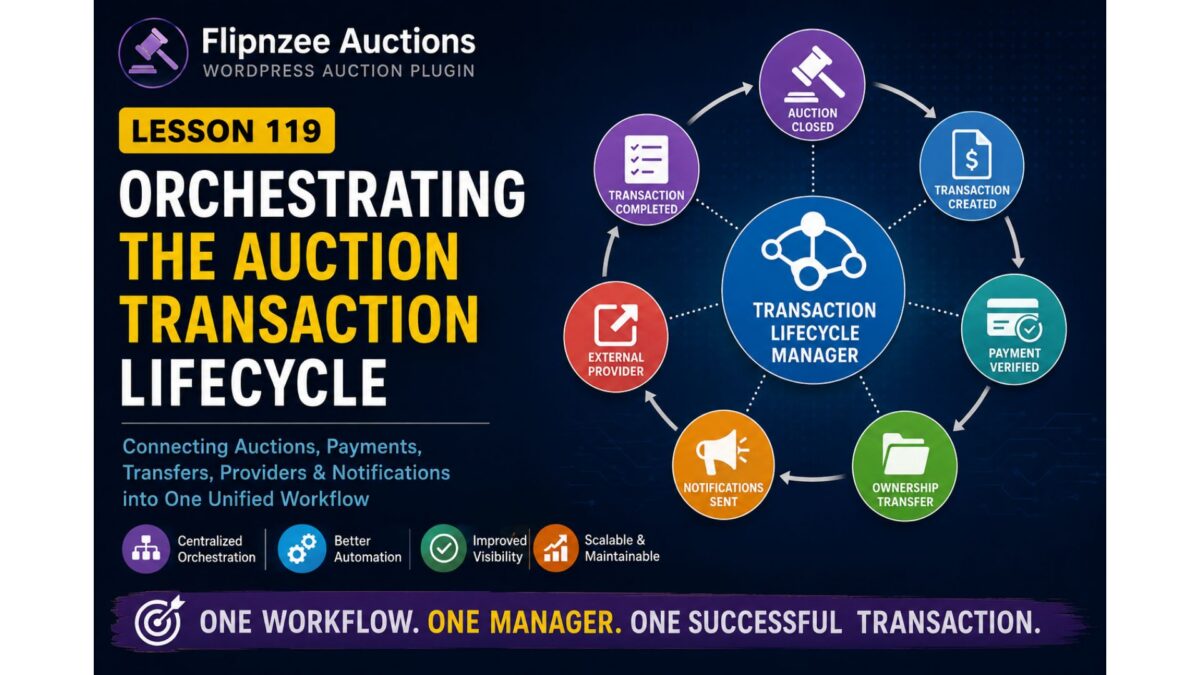
Lesson 119: Orchestrating the Auction Transaction Lifecycle


Objective

Build a central Transaction Lifecycle Manager that coordinates the various managers responsible for an auction after it closes.


Why This Lesson?

Currently, several managers know about parts of the workflow:

Auction Manager
Payment Manager
Transaction Manager
Transfer Manager
External Provider Manager
Activity Log
Notification Manager

Each performs its own task.

However, there is no single class responsible for the overall business process.

This means workflow logic is currently scattered across multiple classes.


Current Flow

Auction Ends
      │
      ▼
Winner Determined
      │
      ▼
Transaction Created
      │
      ▼
Payment Submitted
      │
      ▼
Payment Verified
      │
      ▼
Ownership Transfer
      │
      ▼
Transaction Completed

Every step currently triggers another manually.


Proposed Architecture

Introduce a new class:

Flipnzee_Transaction_Lifecycle_Manager

Its responsibility is orchestration—not storage.

Think of it as the project manager of the plugin.


Responsibilities

The Lifecycle Manager will coordinate:

Auction Closed
        │
        ▼
Create Transaction
        │
        ▼
Notify Winner
        │
        ▼
Wait For Payment
        │
        ▼
Verify Payment
        │
        ▼
Create Transfer Record
        │
        ▼
Notify Seller
        │
        ▼
Ownership Transfer
        │
        ▼
Complete Transaction
        │
        ▼
Notify Buyer

Notice that it doesn’t replace the other managers.

It simply tells them when to perform their work.


New Responsibilities

The Lifecycle Manager may call methods such as:

Transaction_Manager::create()

Payment_Manager::create()

Transfer_Manager::create_transfer()

Notification_Manager::send()

Activity_Log::log()

External_Provider_Manager::create_provider()

Each manager remains focused on its own domain.


Benefits

Instead of this:

Auction Manager
     │
     ├── calls Payment
     ├── calls Transfer
     ├── calls Activity Log
     ├── calls Notifications

we move to:

Auction Manager
        │
        ▼
Lifecycle Manager
        │
        ├── Transaction
        ├── Payment
        ├── Transfer
        ├── Activity Log
        ├── Notifications
        └── External Provider

This greatly reduces coupling.


Design Principle

This lesson introduces an important software engineering principle:

Managers should perform work. Coordinators should orchestrate work.

The Lifecycle Manager is a coordinator.

The other managers remain specialists.


Future Expansion

Once this class exists, adding features becomes much easier.

For example:

Escrow.com

↓

Lifecycle Manager

↓

Transfer Manager

or

Stripe Webhook

↓

Lifecycle Manager

↓

Payment Verified

↓

Transfer Manager

No existing managers need major changes.


What We’ll Build

During Lesson 119 we’ll implement:

  • Flipnzee_Transaction_Lifecycle_Manager
  • Lifecycle orchestration methods
  • Central workflow entry points
  • Manager-to-manager coordination
  • Cleaner separation of responsibilities
  • Improved maintainability for future integrations

Learning Objectives

By the end of Lesson 119, readers will understand:

  • The difference between coordination and business logic
  • Why orchestration classes are useful in large plugins
  • How to reduce coupling between components
  • How to design a scalable workflow architecture for complex WordPress plugins

Lesson 118: Implementing an Ownership Transfer Workflow in the Flipnzee Auctions Plugin

In the previous lesson, payment verification marked the financial completion of an auction transaction. However, for website and domain sales, receiving payment is only part of the process. The actual ownership of the digital asset still needs to be transferred from the seller to the buyer.

In this lesson, we implement a dedicated ownership transfer workflow that tracks every stage of the handover process. Rather than relying on manual notes or external spreadsheets, the plugin now provides a structured transfer management system directly inside WordPress.


Why an Ownership Transfer Workflow?

Selling a website is very different from shipping a physical product. A successful transfer often involves multiple independent tasks:

  • Confirming payment
  • Delivering website files
  • Delivering the database
  • Transferring the domain
  • Receiving buyer confirmation

These steps rarely happen simultaneously, and each may require communication between both parties. A dedicated workflow makes the entire process transparent and auditable.


Designing the Transfer Lifecycle

The plugin now models ownership transfer as a sequence of stages.

Auction Ends
        │
        ▼
Payment Verified
        │
        ▼
Website Files Delivered
        │
        ▼
Database Delivered
        │
        ▼
Domain Transfer Completed
        │
        ▼
Buyer Verification
        │
        ▼
Transaction Completed

Each stage can be tracked independently, allowing administrators to immediately identify where a transfer currently stands.


Creating a Dedicated Transfer Manager

Instead of embedding transfer logic throughout the plugin, a dedicated Flipnzee_Transfer_Manager class is responsible for:

  • Creating transfer records
  • Retrieving transfer information
  • Updating transfer progress
  • Calculating completion percentage
  • Determining the overall transfer status
  • Automatically completing transactions

This keeps transfer-related responsibilities isolated from payment, auction, and transaction management.


Recording Individual Transfer Stages

Each transaction stores the status of every transfer stage independently.

Current fields include:

payment_status
files_status
database_status
domain_status
buyer_status
notes

Each stage can be:

  • Pending
  • Completed

This design also makes future status values such as In Progress, Rejected, or Awaiting Buyer straightforward to introduce.


Calculating Progress Automatically

The Transfer Manager now counts completed stages and calculates transfer progress.

For example:

Completed Stages: 3
Total Stages: 5

Progress:
60%

This calculation drives both the numerical progress indicator and the visual progress bar displayed within the administration interface.


Overall Transfer Status

Rather than requiring administrators to manually determine whether a transfer is complete, the plugin now derives an overall status automatically.

Possible values include:

Pending

In Progress

Completed

This status updates automatically as individual stages are completed.


Transaction Details Integration

The Transaction Details page has become the primary workspace for managing ownership transfers.

Administrators can now:

  • Review payment information
  • View payment proof
  • Update payment status
  • Track ownership transfer
  • Update every transfer stage
  • Record transfer notes

This centralises all post-auction management into a single interface.


Transfer Progress Dashboard

A visual progress section has been added to the Transaction Details screen displaying:

  • Progress counter
  • Progress percentage
  • Progress bar
  • Overall transfer status

This provides immediate insight into the current state of every website sale.


Saving Transfer Information

Administrators can update all ownership transfer fields using a dedicated form.

The plugin stores:

  • Website file delivery
  • Database delivery
  • Domain transfer
  • Buyer confirmation
  • Administrative notes

All information is saved into the transfer table for future reference.


Automatic Transaction Completion

One of the most useful improvements introduced in this lesson is automatic transaction completion.

Once all transfer stages have been marked as completed:

Payment
✓

Website Files
✓

Database
✓

Domain
✓

Buyer Confirmation
✓

the plugin automatically updates the associated transaction status to:

Completed

This removes repetitive administrative work while ensuring transactions accurately reflect the real-world ownership transfer process.


Transfer Management Dashboard

A dedicated Transfer Management page now provides an overview of all ownership transfers.

Administrators can quickly see:

  • Transaction ID
  • Overall status
  • Progress
  • Individual stage status
  • Administrative notes
  • Direct link to transaction details

This creates a central dashboard for monitoring every website handover.


Improving Plugin Architecture

This lesson also involved refactoring several areas of the codebase.

Responsibilities are now better separated:

  • Auction Manager manages auctions.
  • Payment Manager manages payments.
  • Transaction Manager manages transactions.
  • Transfer Manager manages ownership transfer.

This clearer separation improves maintainability while making future enhancements easier to implement.


Preparing for External Providers

Although ownership transfers are currently managed manually, the new workflow establishes the foundation for integrating external providers such as Escrow.com.

Future versions can automatically update transfer progress based on provider events while continuing to use the same internal workflow.


What We Achieved

By the end of this lesson, the Flipnzee Auctions plugin now supports:

  • Dedicated ownership transfer records
  • Multi-stage transfer workflow
  • Progress calculation
  • Overall transfer status
  • Progress indicators
  • Transfer notes
  • Transaction Details integration
  • Transfer Management dashboard
  • Automatic transaction completion
  • Cleaner separation of responsibilities

Conclusion

Ownership transfer is a critical part of selling websites, domains, and other digital assets. By introducing a structured transfer workflow, the Flipnzee Auctions plugin now manages not only the auction itself but also the operational process that follows payment.

The result is a more complete marketplace solution that provides better visibility, improved administration, and a stronger foundation for future automation through external escrow and payment providers.

In the next lesson, we will begin connecting this workflow with external providers, allowing payment, escrow, and ownership transfer to operate as a unified transaction lifecycle.

https://github.com/SplendidDigital/flipnzee-auctions/releases/tag/lesson-118-stable

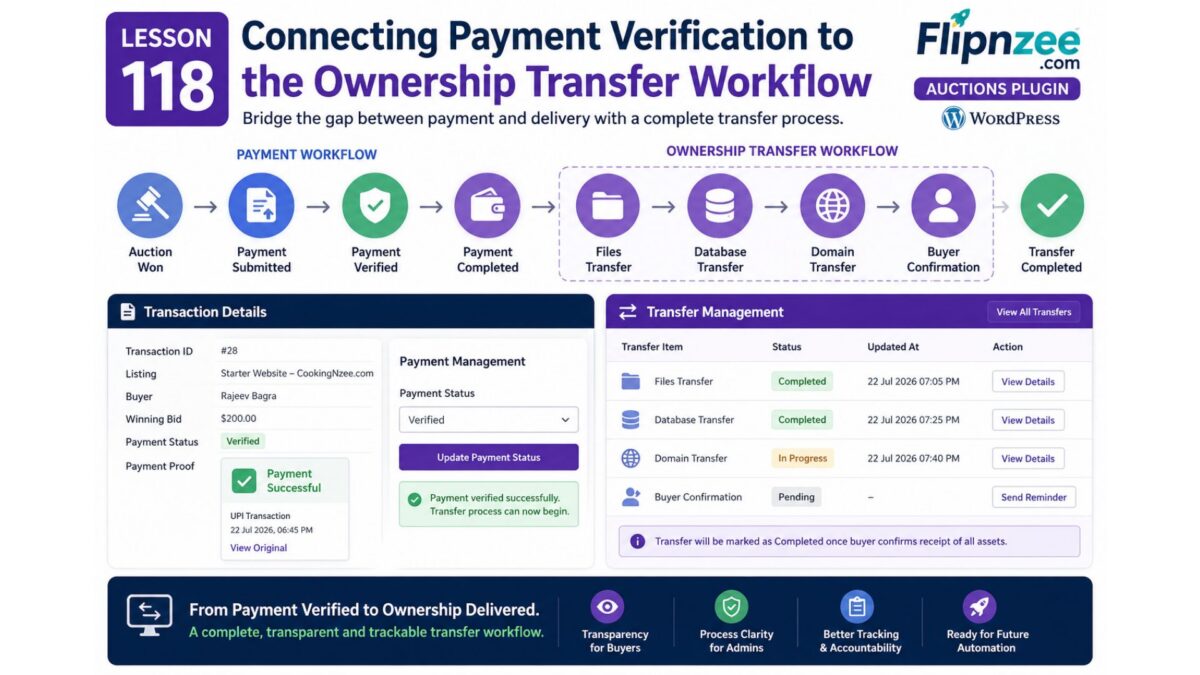
Lesson 118: Connecting Payment Verification to the Ownership Transfer Workflow

In the previous lesson, the Flipnzee Auctions plugin introduced a complete payment verification workflow. Buyers can upload payment proof, administrators can review the submission, and the payment progresses through a structured lifecycle from Pending to Submitted, Verified, and finally Completed.

Although this completes the payment process, a website sale does not end when payment is received. The actual ownership transfer still needs to take place.

This lesson focuses on bridging the gap between payment management and website transfer management.


Why a Transfer Workflow?

Unlike physical products, websites consist of multiple digital assets that must be transferred individually.

A successful website sale may include:

  • Website files
  • Database
  • Domain name
  • Hosting credentials
  • Administrator accounts
  • Email accounts
  • Documentation

Completing payment simply authorizes the beginning of this process.


Current Workflow

After Lesson 117, the payment lifecycle looks like this:

Auction Won
      │
      ▼
Pending
      │
      ▼
Payment Submitted
      │
      ▼
Payment Verified
      │
      ▼
Payment Completed

While technically correct, this skips one of the most important business processes.


Introducing Ownership Transfer

Instead of ending the transaction after payment, we’ll introduce a dedicated transfer phase.

The revised workflow becomes:

Auction Won
      │
      ▼
Payment Submitted
      │
      ▼
Payment Verified
      │
      ▼
Ownership Transfer
      │
      ▼
Transaction Completed

This separates financial completion from operational completion.


The Transfer Dashboard

The Flipnzee Auctions plugin already includes a Transfer Management page.

Rather than creating another administration interface, this page will evolve into the central dashboard for tracking every ownership transfer.

Each transfer will contain multiple independent tasks.


Transfer Components

Instead of a single “Transferred” flag, the workflow will track individual stages.

For example:

Files
───────────────
Pending
In Progress
Completed
Database
────────────────
Pending
In Progress
Completed
Domain
───────────────
Pending
In Progress
Completed
Buyer Confirmation
──────────────────────
Pending
Completed

Tracking each component independently provides administrators with much greater visibility into the progress of a transaction.


Why Separate Payment and Transfer?

Although payment and ownership transfer are related, they represent different business processes.

Payment answers one question:

Has the buyer paid?

Transfer answers another:

Has the buyer actually received ownership of the website?

Separating these workflows reduces ambiguity and more accurately reflects how website acquisitions are managed.


Triggering a Transfer

Once an administrator verifies a payment, the plugin can automatically prepare the transfer process.

The simplified workflow becomes:

Payment Verified
        │
        ▼
Transfer Record Ready
        │
        ▼
Files
Database
Domain
Buyer Confirmation

Administrators no longer need to manually create transfer records.


Administrative Workflow

The administrator’s responsibilities now expand beyond payment approval.

A typical transaction becomes:

Review Payment Proof
        │
        ▼
Verify Payment
        │
        ▼
Transfer Website Files
        │
        ▼
Transfer Database
        │
        ▼
Transfer Domain
        │
        ▼
Buyer Confirms Receipt
        │
        ▼
Complete Transaction

This mirrors the practical workflow followed by agencies and marketplace operators when transferring ownership of digital assets.


Buyer Experience

The buyer also benefits from a more transparent process.

Instead of seeing only:

Payment Completed

they can eventually follow the transfer itself.

Example:

Payment Verified

Website Transfer

✓ Files

✓ Database

✓ Domain

Waiting for Buyer Confirmation

This reduces uncertainty and provides confidence that the transaction is progressing.


Foundation for Future Automation

Designing transfer management as its own workflow opens the door to future enhancements.

Potential additions include:

  • Automatic transfer record creation
  • Progress tracking
  • Email notifications
  • Buyer acknowledgements
  • Transfer checklists
  • Internal notes
  • Document uploads
  • Completion certificates

Because the transfer system is independent of payment processing, these features can be added without changing the payment workflow.


Lessons Learned

Real-world business processes often consist of multiple related workflows rather than a single sequence of events.

By separating payment verification from ownership transfer, the Flipnzee Auctions plugin becomes easier to maintain while better representing the lifecycle of a website sale.

This modular approach also keeps the codebase extensible as additional transfer features are introduced.


Conclusion

Lesson 118 marks the transition from payment management to operational ownership transfer. Instead of treating payment as the end of the transaction, the plugin now recognizes it as the beginning of the website handover process.

With a dedicated Transfer Management workflow already in place, the next lessons will focus on automating transfer creation, tracking progress across multiple transfer stages, and providing administrators and buyers with a clearer view of each transaction from payment verification through final ownership transfer.

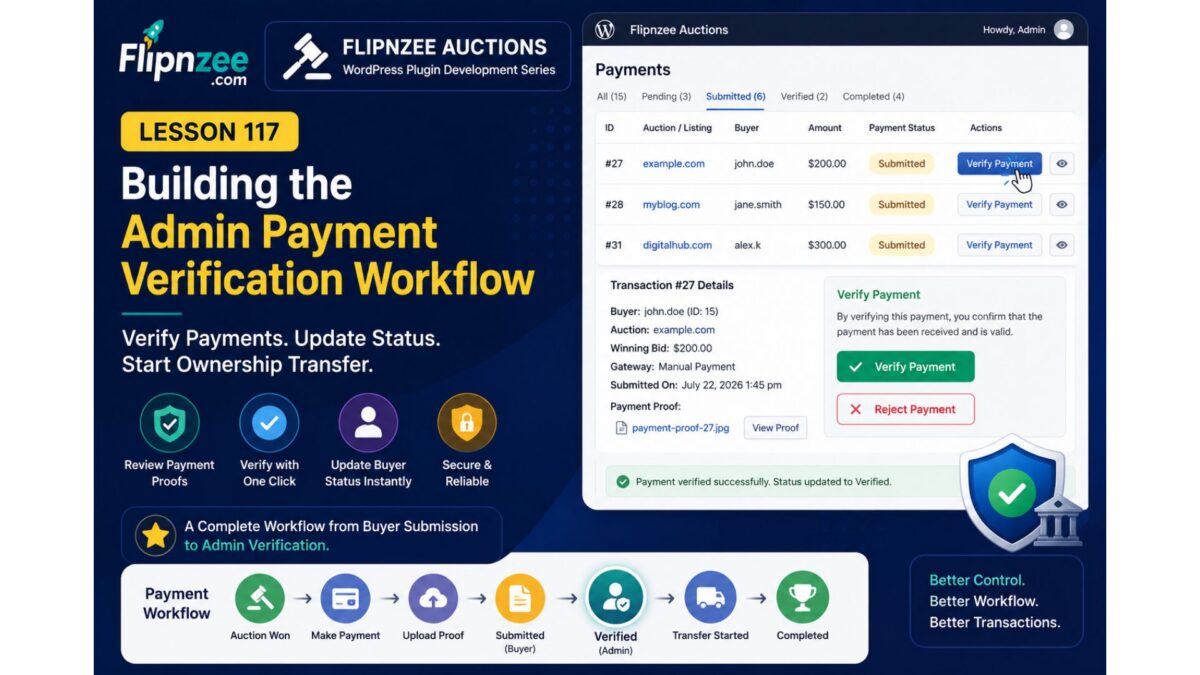
Lesson 117: Building the Admin Payment Verification Workflow

In the previous lesson, the buyer payment page was refactored into a clean, state-driven architecture. Buyers can now submit payment proof, and the interface automatically reflects the payment status.

However, one important piece of the workflow is still missing.

Once a buyer uploads proof of payment, an administrator needs a way to verify it before ownership transfer can begin.

In this lesson, we’ll implement the Payment Verification Workflow in the WordPress admin panel.


Where We Left Off

Our payment lifecycle currently looks like this:

Auction Won
        │
        ▼
Pending
        │
        ▼
Manual Payment
        │
        ▼
Upload Payment Proof
        │
        ▼
Submitted

At this point, the buyer has completed everything required.

The next step belongs to the administrator.


Current Problem

Although payment proofs are stored successfully, administrators cannot yet:

  • verify the payment
  • reject incorrect payment proofs
  • begin ownership transfer
  • update the buyer’s payment status

The transaction simply remains in the Submitted state.


Goal of This Lesson

We’ll extend the Admin Payments screen so administrators can manage submitted payments directly.

Each submitted transaction should display actions such as:

Verify Payment

Later lessons will add:

Reject Payment

Mark Transfer Started

Complete Transfer

New Payment Workflow

The buyer and administrator will now share responsibility for the payment lifecycle.

Buyer
──────────────

Win Auction
↓

Choose Payment Method
↓

Upload Payment Proof
↓

Submitted


Administrator
────────────────────────

Review Payment Proof
↓

Verify Payment
↓

Ownership Transfer
↓

Completed

Why Verify Instead of Mark Paid?

Payment verification represents a business decision rather than simply changing a status.

The administrator confirms that:

  • payment amount is correct
  • payment reference matches
  • uploaded proof is valid
  • payment has actually been received

Only after these checks should ownership transfer begin.


State Transition

We’ll introduce our first administrator-driven state transition.

Submitted
      │
      ▼
Verified

Later:

Verified
      │
      ▼
Completed

Because the buyer page is already state-driven, changing a single database value automatically changes the buyer experience.


Updating the Admin Payments Table

For submitted payments, we’ll add a new action button.

Example:

Transaction #27

Status:
Submitted

[ Verify Payment ]

Once clicked, the plugin will:

  • validate the request
  • verify the nonce
  • update payment status
  • refresh the admin screen

Database Changes

The database already stores the payment status.

No schema changes are required.

We’ll simply update:

payment_status

from

submitted

to

verified

This is one advantage of designing the payment system around discrete states.


Buyer Experience

The buyer does not need to perform any additional action.

Once the administrator verifies the payment, the payment page will automatically switch from:

Payment Submitted

to

Payment Verified

Ownership transfer has started.

No additional templates or pages are required.


Security Considerations

Administrative actions should always include:

  • capability checks
  • nonce verification
  • transaction validation
  • status validation

For example, only payments currently marked as Submitted should be eligible for verification.

Attempting to verify an already completed transaction should simply be ignored.


Benefits of This Design

Separating buyer actions from administrator actions keeps responsibilities clear.

Buyers can:

  • choose payment methods
  • upload payment proof
  • monitor progress

Administrators can:

  • verify payment
  • initiate ownership transfer
  • complete transactions

This separation also makes future integrations with automated gateways much easier.


What We’ll Build

By the end of this lesson, administrators will be able to:

  • view submitted payments
  • verify payments with one click
  • update the payment status
  • immediately update the buyer-facing payment page

Next Steps

Once payment verification is complete, the plugin will be ready for the next major milestone:

  • Ownership Transfer Workflow
  • Transaction Completion
  • Email Notifications
  • Additional Payment Gateways
  • Escrow.com Integration
  • Audit Logging

The payment system is gradually evolving from a simple upload form into a complete transaction management workflow that mirrors how real-world website sales are handled.

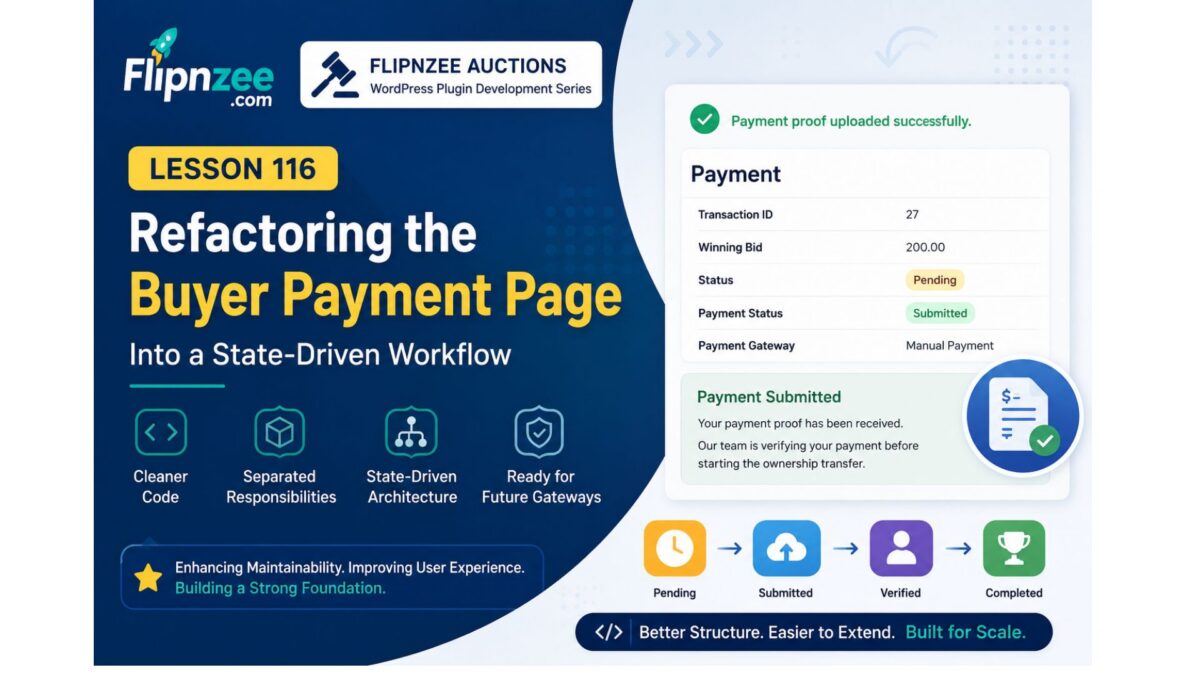
Lesson 116: Refactoring the Buyer Payment Page into a State-Driven Workflow

As the Flipnzee Auctions plugin continues to mature, the buyer payment page has evolved beyond a simple form. It now manages multiple stages of a transaction—from selecting a payment method to uploading payment proof and tracking verification status. As additional payment gateways and workflows are planned, maintaining everything inside a single method would quickly become difficult.

In this lesson, the payment page is refactored into a cleaner, state-driven architecture while preserving the existing functionality.


Why Refactor?

The original implementation mixed several responsibilities inside one method:

  • Validating the transaction
  • Handling payment gateway selection
  • Uploading payment proof
  • Displaying transaction details
  • Rendering different payment states
  • Showing payment instructions

Although functional, this structure made future enhancements increasingly difficult.

The objective was to separate these responsibilities into focused methods that each perform one task.


Design Goals

The refactoring focused on four principles:

  • Smaller, easier-to-read methods
  • Separation of business logic and presentation
  • State-driven rendering
  • A scalable foundation for future payment gateways

This approach aligns more closely with object-oriented design and WordPress coding standards.


Simplifying render()

The render() method now serves primarily as the controller for the page.

Its responsibilities are limited to:

  • Validating the request
  • Loading the transaction
  • Processing payment proof uploads
  • Delegating payment actions
  • Rendering the appropriate payment state

Instead of containing hundreds of lines of mixed logic, it now orchestrates the workflow through dedicated helper methods.


Extracting Payment Submission Logic

Payment gateway processing was moved into its own method:

private static function handle_payment_submission()

This method now handles:

  • nonce validation
  • selected gateway validation
  • gateway routing
  • unsupported gateway messaging

The result is a much cleaner entry point that will make future integrations significantly easier.


Introducing a State Machine

Rather than scattering conditional statements throughout the page, the buyer interface now behaves like a simple state machine.

Current payment states include:

  • Pending
  • Submitted
  • Verified
  • Completed

A single controller determines which section should be displayed.

render_payment_state()

Internally it delegates to dedicated rendering methods for each state.


Dedicated Rendering Methods

Instead of one large template, each payment state now has its own renderer.

Examples include:

  • render_pending_state()
  • render_submitted_state()
  • render_verified_state()
  • render_completed_state()

Each method focuses on presenting one stage of the payment lifecycle.

This improves readability while making future UI enhancements much safer.


Payment Proof Upload

The payment proof upload process remains fully functional after the refactor.

The workflow now becomes:

  1. Buyer selects Manual Payment.
  2. Payment instructions are displayed.
  3. Buyer uploads proof of payment.
  4. The proof is stored.
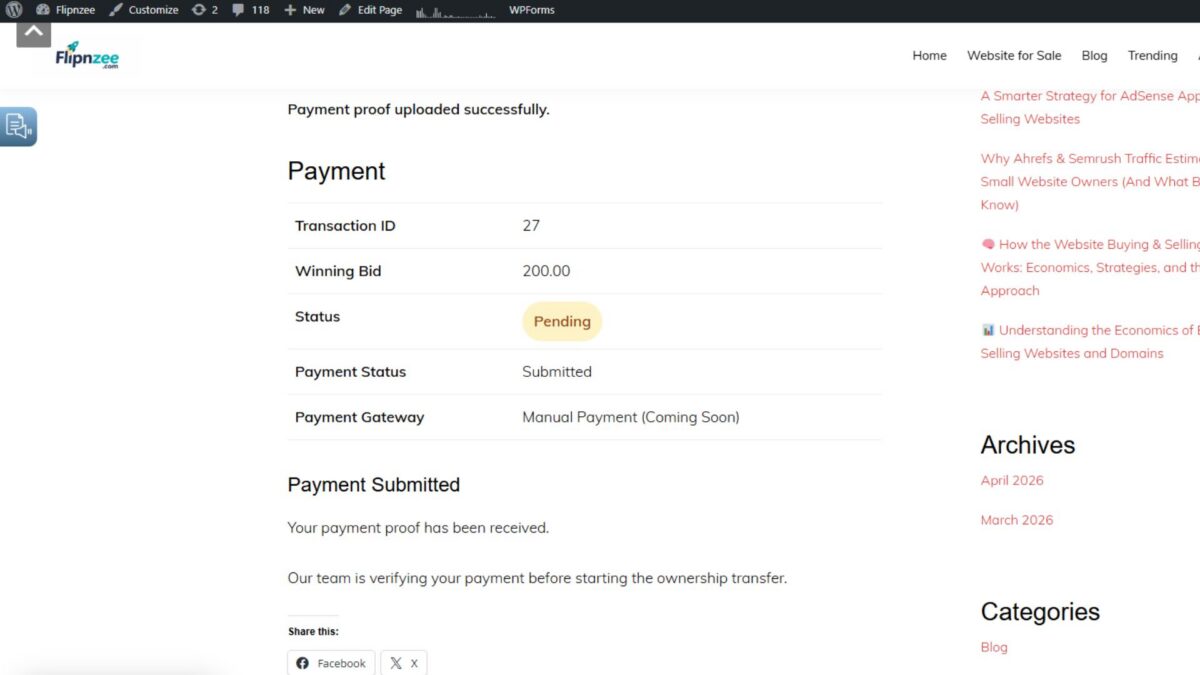
  5. Payment status changes to Submitted.
  6. The buyer now sees a confirmation message instead of the upload form.

This creates a much clearer user experience while preventing duplicate uploads.


Transaction Summary

The transaction summary has also been isolated into its own renderer.

It displays:

  • Transaction ID
  • Winning Bid
  • Transaction Status
  • Payment Status
  • Selected Payment Gateway

Keeping this component separate makes future additions—such as payment timestamps or invoice numbers—straightforward.


Benefits of the Refactor

Compared to the previous implementation, the payment page is now:

  • Easier to read
  • Easier to debug
  • Easier to test
  • Easier to extend
  • Better aligned with object-oriented design

Future payment gateways such as Escrow.com, Stripe, PayPal, Wise, and cryptocurrency integrations can now be added with minimal impact on the rest of the codebase.


Lessons Learned

One important takeaway from this refactor is that working code is not always well-structured code.

As software grows, periodically revisiting earlier implementations helps improve maintainability without changing the user-facing behaviour.

By separating responsibilities into focused methods, the payment page becomes easier to understand today while reducing technical debt for future development.


Current Payment Lifecycle

The buyer payment workflow now follows a clear sequence:

Auction Won
        │
        ▼
Pending Payment
        │
        ▼
Select Payment Gateway
        │
        ▼
View Payment Instructions
        │
        ▼
Upload Payment Proof
        │
        ▼
Submitted
        │
        ▼
Verified (Admin)
        │
        ▼
Ownership Transfer
        │
        ▼
Completed

Conclusion

Although this lesson introduces very few visible changes to the buyer interface, it represents an important architectural milestone for the Flipnzee Auctions plugin. The payment page has been transformed from a monolithic implementation into a modular, state-driven workflow that is easier to maintain and extend.

With this foundation in place, the next lessons can focus on the administrative side of the payment lifecycle, including payment verification, ownership transfer, transaction completion, and integration with additional payment gateways, all without requiring major structural changes to the buyer-facing code.

https://github.com/SplendidDigital/flipnzee-auctions/releases/tag/lesson-116-payment-page-refactor

Lesson 116 – Designing a State-Driven Buyer Payment Workflow


Introduction

In the previous lesson, the Buy Now workflow became fully functional. When a buyer purchases a website, the auction is closed, a winner is declared, a transaction is created, an external provider record is initialized, and a transfer record is prepared. Finally, the buyer is redirected to the payment page.

Although the backend workflow is now complete, the payment page itself still behaves like a prototype. Every payment option is displayed, buttons remain visible regardless of transaction status, and the interface does not yet guide buyers through the payment process.

In this lesson, the focus shifts from backend infrastructure to user experience. Rather than treating the payment page as a static form, it will evolve into a workflow that changes based on the current state of the transaction.


Why this lesson is important

A payment page should answer one simple question:

“What should the buyer do next?”

Instead of always displaying the same controls, the interface should respond to the transaction’s current status.

For example:

  • Before payment, buyers should choose a payment method.
  • After payment submission, buyers should see confirmation instead of payment options.
  • Once payment is verified, they should see transfer progress.
  • After transfer completion, they should receive ownership confirmation.

This creates a guided experience instead of presenting every possible action at once.


Current Workflow

Listing
        │
        ▼
Place Bid / Buy Now
        │
        ▼
Auction Closed
        │
        ▼
Winner Determined
        │
        ▼
Transaction Created
        │
        ▼
External Provider Created
        │
        ▼
Transfer Record Created
        │
        ▼
Buyer Payment Page

The backend now reaches the payment page successfully.


Proposed Workflow

Instead of one static page:

Pending Payment
        │
        ▼
Select Payment Method
        │
        ▼
Manual Payment Instructions
        │
        ▼
Upload Proof
        │
        ▼
Payment Submitted
        │
        ▼
Admin Verification
        │
        ▼
Payment Verified
        │
        ▼
Transfer Started
        │
        ▼
Ownership Delivered

Each state presents only the actions that are relevant at that moment.


Planned UI States

State 1 — Pending Payment

Display:

  • Transaction summary
  • Winning bid
  • Payment methods
  • Continue to Payment

State 2 — Manual Payment

Display:

  • Bank details
  • Payment instructions
  • Upload payment proof

Hide all unnecessary payment options.


State 3 — Payment Submitted

Display:

✔ Payment Submitted

Our team has received your payment proof.

Status:
Awaiting Verification

No payment buttons should remain visible.


State 4 — Payment Verified

Display:

✔ Payment Verified

Preparing ownership transfer...

Show transfer progress instead of payment controls.


State 5 — Transfer Complete

Display:

✔ Congratulations!

The website has been transferred successfully.

Offer download links or ownership instructions if applicable.


Why State-Driven Interfaces Matter

Large marketplaces rarely present every possible action simultaneously.

Instead, the interface adapts according to the transaction.

Benefits include:

  • Less confusion
  • Cleaner interface
  • Better user guidance
  • Reduced accidental actions
  • Easier maintenance
  • Simpler future payment gateway integration

Lesson Objectives

By the end of this lesson, readers will understand:

  • Why payment pages should be workflow-driven
  • How transaction status determines the interface
  • How payment and transfer states relate
  • Why state-driven design scales better as new gateways are added

Looking Ahead

The backend payment architecture is now in place. Future lessons will focus on polishing the buyer experience by hiding irrelevant controls, presenting clear payment instructions, and progressively revealing the next action as the transaction advances through its lifecycle.


Previous Lesson: Lesson 115 – Completing the Buy Now Transaction Pipeline and External Provider Integration

Next Lesson: Lesson 116 Implementation – Building a State-Driven Buyer Payment Interface