Lesson 34 – Display Auction Schedule in the Admin List


Objective

In the previous lesson, we added support for scheduling auctions. However, administrators still need to open each auction to see when it starts or ends.

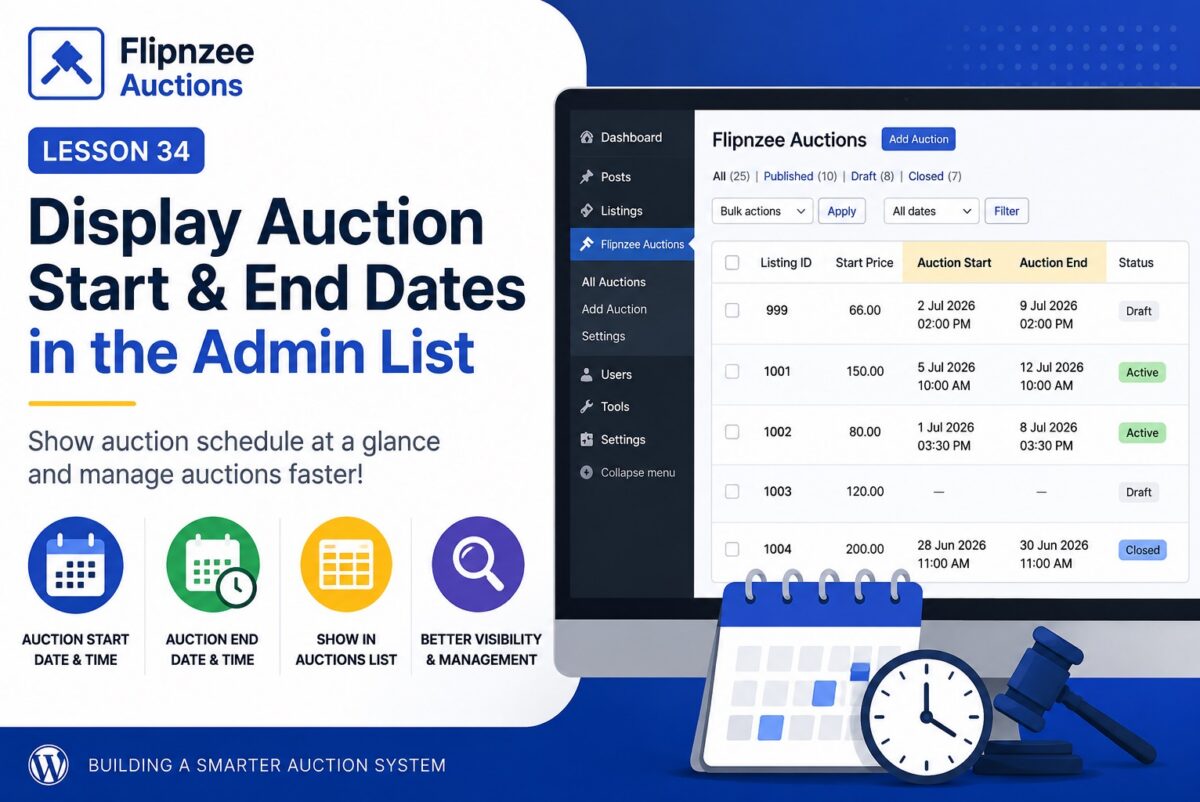
In this lesson, we’ll improve the All Auctions page by displaying the auction schedule directly in the table.

By the end of this lesson, administrators will be able to see:

  • Auction Start
  • Auction End

for every auction without opening the edit screen.


What You’ll Learn

During this lesson you’ll learn how to:

  • Add new columns to a WP_List_Table
  • Display custom database fields
  • Format date and time values
  • Improve the usability of an admin interface

Why This Matters

Imagine having hundreds of auctions.

Without these columns you would need to:

  • Open Auction 1
  • Check its dates
  • Return
  • Open Auction 2
  • Check its dates
  • Repeat…

Displaying the schedule directly in the list makes auction management much faster.


Final Result

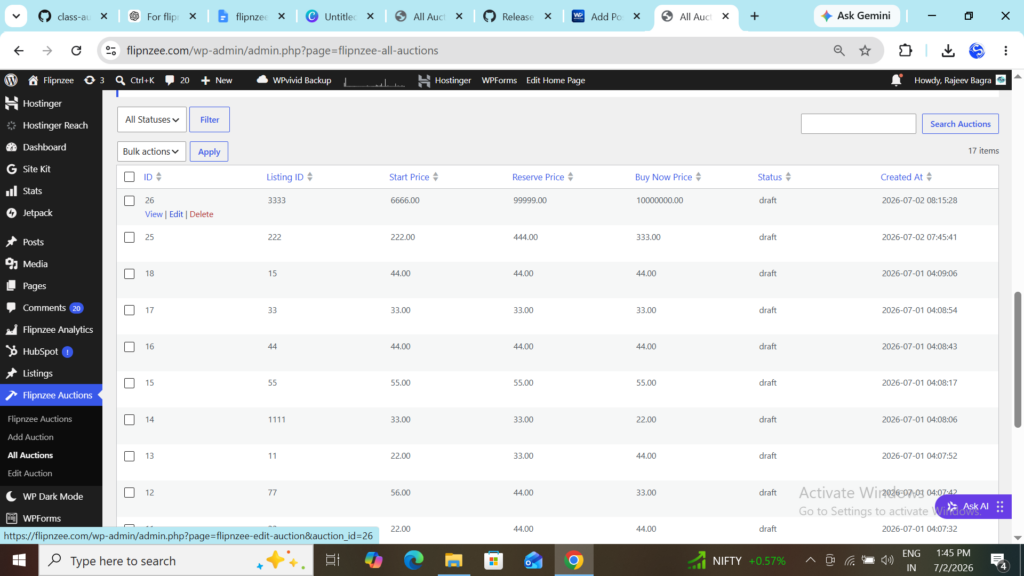
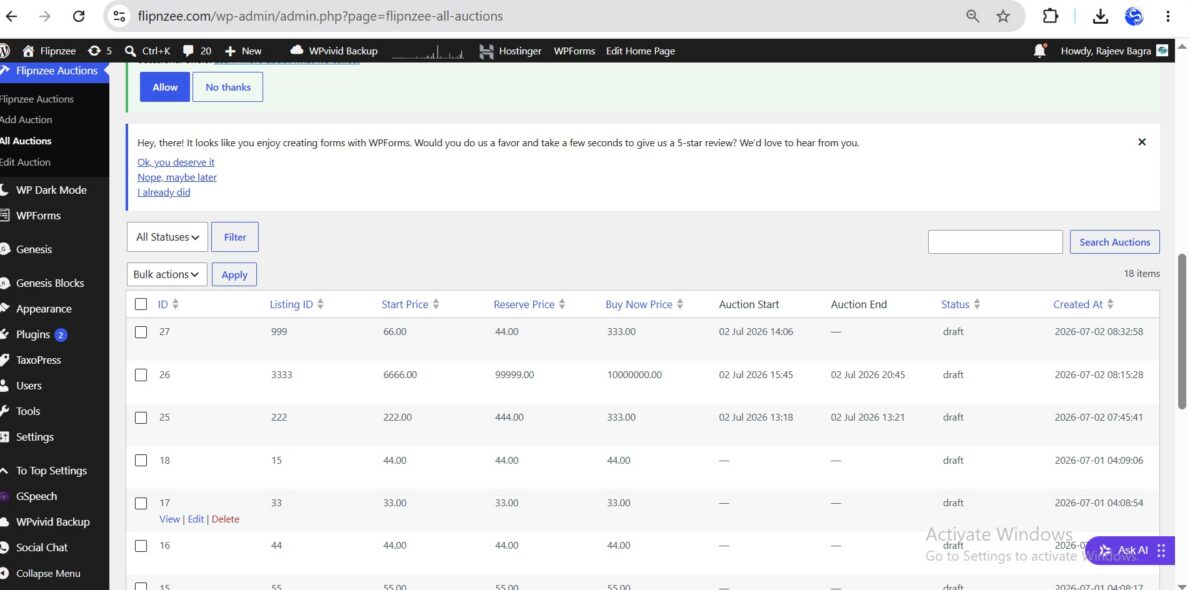
The All Auctions page will look similar to:

ListingStart PriceAuction StartAuction EndStatus
99966.002 Jul 2026 2:00 PM9 Jul 2026 2:00 PMDraft
1001150.005 Jul 2026 10:00 AM12 Jul 2026 10:00 AMActive

Implementation Plan

Step 1

Add two new columns to the auction table:

  • Auction Start
  • Auction End

Step 2

Populate both columns with values from the database.


Step 3

Format empty values nicely.

Instead of showing:

0000-00-00 00:00:00

or a blank SQL value,

display something more user-friendly:

—

or

Not Scheduled

Step 4

Format the dates for administrators.

Instead of displaying:

2026-07-02 14:30:00

display:

2 Jul 2026
2:30 PM

This is much easier to scan.


Step 5

Test sorting, searching and filtering to ensure the new columns don’t affect the existing functionality.


What You’ll Gain

After this lesson, your plugin will support:

  • ✅ Creating auctions
  • ✅ Editing auctions
  • ✅ Scheduling auctions
  • ✅ Viewing schedules directly from the auction list

This is another important step toward a production-ready auction system.

Implementation Lesson 34: Display Auction Start and End Dates in the Auctions Table


Looking Ahead

After Lesson 34, the next logical milestone is Lesson 35: Automatic Auction Lifecycle, where we’ll begin implementing the logic that automatically changes auction statuses based on the current date and time (for example, moving a scheduled auction from draft to active when its start time arrives, and from active to closed when its end time passes). This will move the plugin beyond simply storing dates and into actually using them to control auction behavior.
Lesson 35: Automatically Activate Auctions When Their Start Time Arrives

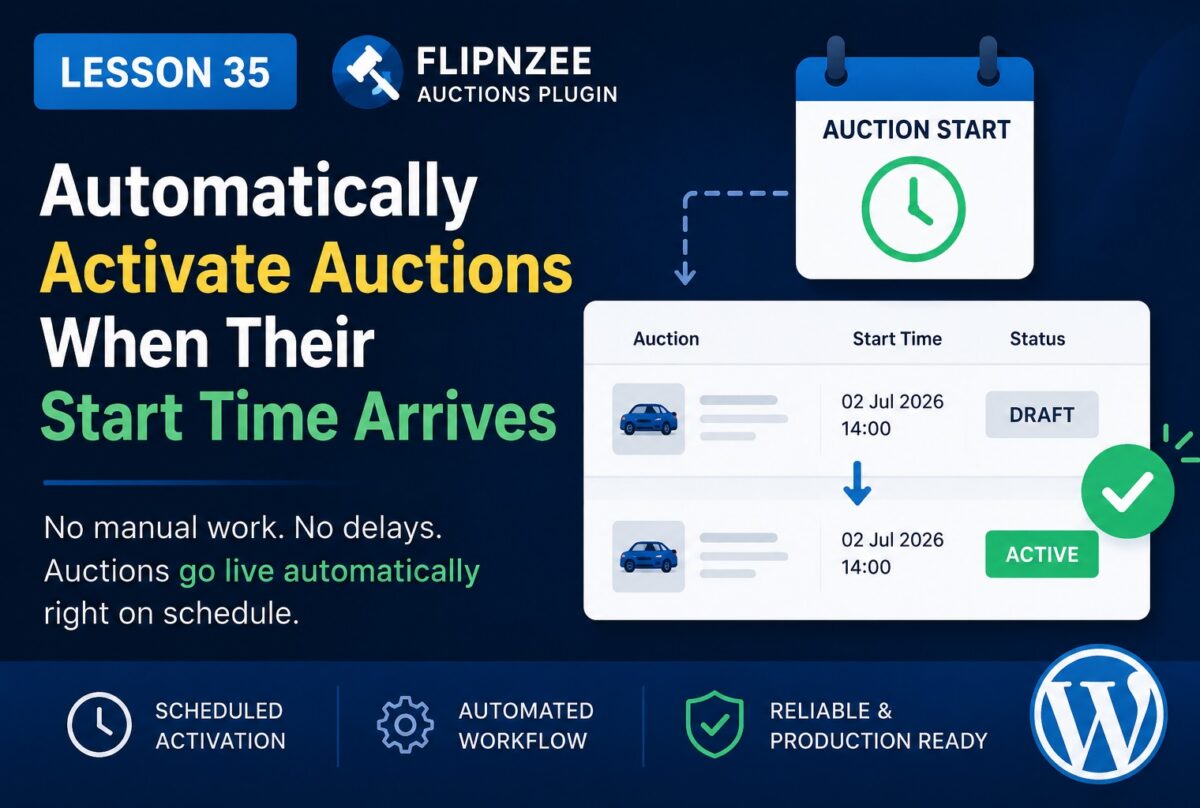
Over the past few lessons, we’ve transformed Flipnzee Auctions from a simple CRUD plugin into something that feels much closer to a production-ready auction system. Auctions can now store start and end dates, and those dates are visible throughout the admin interface.

However, there is still one important limitation.

Even if an auction’s scheduled start time has already passed, it remains in Draft status until an administrator manually edits it and changes the status to Active.

In a real auction platform, this would quickly become unmanageable. Administrators should not need to monitor dozens or hundreds of auctions throughout the day.

In this lesson, we’ll begin automating the auction lifecycle.


What We’ll Build

By the end of this lesson, Flipnzee Auctions will automatically activate auctions when:

  • the auction is currently Draft
  • a valid Auction Start date exists
  • the scheduled start time has already passed

No manual intervention will be required.


Why This Matters

Automation is one of the defining characteristics of a professional auction platform.

Instead of relying on administrators to remember when auctions should begin, the software makes the decision automatically.

Benefits include:

  • fewer administrative tasks
  • fewer human errors
  • auctions always start on time
  • improved buyer confidence

Understanding the Workflow

Current workflow:

Create Auction
      ↓
Status = Draft
      ↓
Administrator edits auction
      ↓
Changes status to Active

After this lesson:

Create Auction
      ↓
Status = Draft
      ↓
Scheduled start time arrives
      ↓
Plugin activates auction automatically

How WordPress Makes This Possible

WordPress includes a scheduling system called WP-Cron.

Rather than requiring access to the server’s operating system scheduler, WordPress performs scheduled tasks whenever someone visits the website.

Examples include:

  • publishing scheduled posts
  • clearing caches
  • sending emails
  • updating plugin data

We’ll use the same idea for auctions.


Our Strategy

Instead of checking every second, we’ll create a function that periodically searches for auctions that meet all of these conditions:

Status = Draft

AND

Auction Start <= Current Time

For every matching auction:

Draft
      ↓
Active

Simple, reliable, and scalable.


SQL Logic

Conceptually, our database query will look something like:

SELECT *
FROM wp_flipnzee_auctions
WHERE status = 'draft'
AND auction_start <= CURRENT_TIME;

Each returned auction will then be updated to:

status = active

Where We’ll Add the Code

To keep the plugin organized, we’ll place this functionality inside the auction manager rather than mixing business logic into the admin interface.

That keeps responsibilities separated:

  • Database → stores auction data
  • Auction Manager → controls auction lifecycle
  • Admin Pages → display forms and tables

Testing Strategy

We’ll create a draft auction with:

Start Time:
2 minutes from now

Then we’ll wait until that time passes.

Expected result:

Before:

Status
Draft

↓

After:

Status
Active

without editing the auction manually.


Future Improvements

This lesson lays the foundation for additional automation.

In upcoming lessons we’ll also automate:

  • closing auctions automatically
  • determining winners
  • preventing bids after auction ends
  • countdown timers
  • bid history
  • email notifications
  • Escrow.com integration

Each of these features will build upon the scheduling mechanism introduced here.


What You’ll Learn

In this lesson, you’ll learn how to:

  • use scheduled tasks in WordPress
  • automate changes based on time
  • update auction status programmatically
  • separate business logic from presentation logic
  • build a more production-ready auction platform

Conclusion

Manually changing auction statuses may work during early development, but it doesn’t scale for a real marketplace. By introducing automatic activation based on the scheduled start time, Flipnzee Auctions becomes significantly more autonomous and dependable.

In the next lesson, we’ll build on this automation by automatically closing auctions when their end time is reached, bringing the auction lifecycle one step closer to a fully hands-free experience.

Implementation Lesson 34: Display Auction Start and End Dates in the Auctions Table

In the previous lesson, we added Auction Start and Auction End fields to the Add Auction and Edit Auction forms. However, administrators still could not see these values from the All Auctions page.

In this implementation lesson, we’ll enhance the auction management table by displaying both dates in a clean, human-readable format. We’ll also ensure that missing or invalid dates are handled gracefully.


What We’ll Build

By the end of this lesson, the All Auctions table will display:

  • Auction Start
  • Auction End
  • Properly formatted dates
  • A dash (—) whenever no date has been configured

Instead of displaying raw database values such as:

2026-07-02 14:06:00

the table will display:

02 Jul 2026 14:06

which is much easier for administrators to read.


Step 1: Add the New Columns

Open:

admin/class-auctions-table.php

Locate the get_columns() method.

Add two new columns:

'auction_start' => 'Auction Start',
'auction_end'   => 'Auction End',

Your auctions table will now include two additional headings.


Step 2: Format the Dates

Locate the column_default() method.

Instead of returning the raw database value, we’ll format the dates using WordPress’ wp_date() function.

For the Auction Start column:

case 'auction_start':

    $timestamp = strtotime( $item->auction_start );

    if (
        empty( $item->auction_start ) ||
        '0000-00-00 00:00:00' === $item->auction_start ||
        false === $timestamp
    ) {
        return '—';
    }

    return wp_date(
        'd M Y H:i',
        $timestamp
    );

Repeat the same logic for the Auction End column:

case 'auction_end':

    $timestamp = strtotime( $item->auction_end );

    if (
        empty( $item->auction_end ) ||
        '0000-00-00 00:00:00' === $item->auction_end ||
        false === $timestamp
    ) {
        return '—';
    }

    return wp_date(
        'd M Y H:i',
        $timestamp
    );

Why Use wp_date()?

Although PHP provides the date() function, WordPress recommends using wp_date() because it:

  • Respects the site’s configured timezone
  • Produces consistent output across WordPress
  • Follows WordPress coding standards
  • Makes plugins more portable

Step 3: Handle Missing Dates Gracefully

Many auctions may not yet have a configured start or end time.

Instead of showing confusing values like:

0000-00-00 00:00:00

or

30 Nov -0001 00:00

our implementation simply displays:

—

This creates a much cleaner interface for administrators.


Step 4: Make the Columns Sortable

To improve usability, add the new columns to the sortable columns list.

Inside get_sortable_columns():

'auction_start' => array( 'auction_start', false ),
'auction_end'   => array( 'auction_end', false ),

Then update the list of allowed database columns inside:

includes/class-auction-manager.php

Add:

'auction_start',
'auction_end',

to the $allowed_columns array.

This allows administrators to sort auctions by either start or end date.


Step 5: Test the Implementation

Create a few auctions with different schedules.

Verify that:

  • Auction Start displays correctly.
  • Auction End displays correctly.
  • Empty dates display as —.
  • Clicking the column headings sorts the table.
  • Existing auctions without dates continue to work normally.

Final Result

The All Auctions page now provides administrators with immediate visibility into the auction schedule without opening each auction individually.

The table is easier to scan, easier to sort, and provides a much more professional management experience.


Troubleshooting Tips

If you encounter unexpected date values:

  • Verify that the database contains valid DATETIME values.
  • Use wp_date() instead of date().
  • Check that strtotime() returns a valid timestamp.
  • Display — whenever the date is empty, invalid, or equal to 0000-00-00 00:00:00.

A quick syntax check can also help before packaging the plugin:

php -l admin/class-auctions-table.php

If the command reports:

No syntax errors detected

your PHP syntax is valid.


What We Learned

In this lesson, we learned how to:

  • Extend a custom WP_List_Table
  • Add new columns to an admin table
  • Format database dates for display
  • Use wp_date() following WordPress best practices
  • Handle empty and invalid dates gracefully
  • Make custom columns sortable

These improvements make the Flipnzee Auctions plugin feel much closer to a polished, production-ready WordPress plugin while laying the groundwork for future features such as automatic auction activation, countdown timers, and bid management.

Download Source Code

Download the starting version of the plugin before the lesson:

Download the completed version after this lesson:

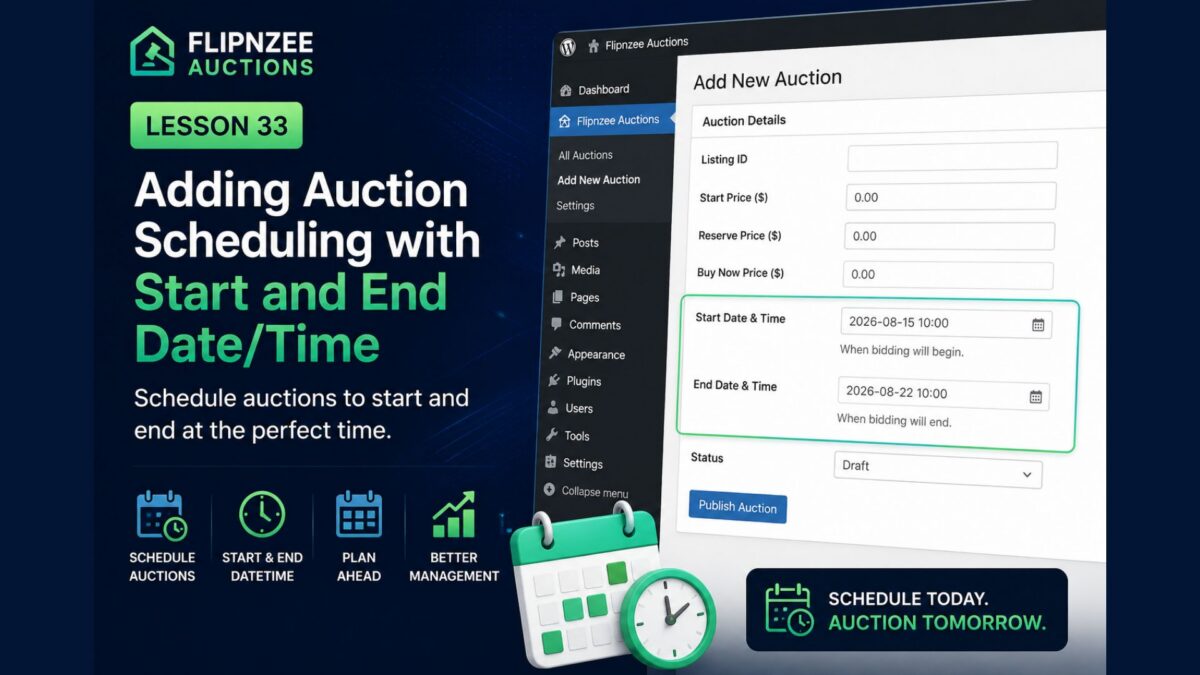
Lesson 33 – Adding Auction Scheduling with Start and End Date/Time


Series: Building the Flipnzee Auctions WordPress Plugin
Lesson: 33
Difficulty: Intermediate


Introduction

Up to this point, our Flipnzee Auctions plugin allows administrators to create, edit, search, filter, and manage auctions from the WordPress dashboard. However, every auction becomes active immediately after it is created.

In a real-world marketplace, auctions usually begin and end at specific times. Sellers may wish to schedule an auction several days in advance, while buyers expect to know exactly when bidding starts and when it closes.

In this lesson, we’ll extend our auction system by adding Start Date/Time and End Date/Time fields. These scheduling options will become the foundation for many future features, including countdown timers, automatic activation, automatic closing, winner selection, and Escrow.com integration.


What You’ll Learn

After completing this lesson, you’ll know how to:

  • Add datetime fields to the auction database.
  • Update the database schema safely.
  • Modify auction forms to support scheduling.
  • Store start and end times securely.
  • Display scheduling information in the admin table.
  • Prepare the plugin for automatic auction management.

Why Auction Scheduling Matters

Without scheduling, every auction becomes active as soon as it is created.

This creates several limitations:

  • Sellers cannot prepare future auctions.
  • Buyers do not know when bidding begins.
  • Auctions cannot close automatically.
  • Countdown timers are impossible.
  • Escrow workflows cannot be triggered automatically.

Scheduling solves all of these problems.


Real-World Example

Imagine a premium website is scheduled for auction.

Instead of starting immediately, the seller configures:

Auction Starts:
15 August 2026
10:00 AM

Auction Ends:
22 August 2026
10:00 AM

Visitors can view the auction before it starts, while bidding automatically opens at the scheduled time and closes exactly one week later.


Files We’ll Modify

During this lesson we’ll update:

includes/class-database.php
includes/class-auction-manager.php
admin/class-admin.php
admin/class-auctions-table.php

Database Changes

We’ll extend the auctions table by adding two new columns:

start_datetime

and

end_datetime

Both fields will store the auction schedule using MySQL’s DATETIME data type.


Admin Form Changes

The Add Auction screen will include two new fields:

  • Start Date & Time
  • End Date & Time

The Edit Auction screen will also allow administrators to update the auction schedule whenever necessary.


Auction List Improvements

The All Auctions table will display:

  • Start Date
  • End Date

This allows administrators to quickly see when each auction begins and ends without opening the edit screen.


Data Validation

We’ll also introduce validation rules such as:

  • End date cannot be earlier than the start date.
  • Both fields must use valid date/time values.
  • Empty schedules should be handled gracefully.

These checks help prevent invalid auction configurations.


Future Features Enabled

Although this lesson focuses only on scheduling, it lays the groundwork for several upcoming capabilities.

Upcoming lessons will build upon these fields to implement:

  • Automatic auction activation.
  • Automatic auction closing.
  • Live countdown timers.
  • Winner selection.
  • Email notifications.
  • Escrow.com transaction creation.

Expected Result

After completing this lesson, administrators will be able to:

  • Schedule auctions in advance.
  • Specify exact opening and closing times.
  • Edit auction schedules.
  • View auction schedules from the listing table.

The plugin will be one major step closer to becoming a production-ready auction platform.


Security Considerations

Throughout this lesson we’ll continue following WordPress best practices by:

  • Sanitizing all user input.
  • Validating date and time values.
  • Escaping output before displaying it.
  • Updating the database safely without affecting existing auction records.

Conclusion

Auction scheduling is one of the most important features of any professional auction platform. Rather than activating auctions immediately, administrators can now define exactly when bidding begins and when it ends.

This enhancement not only improves the user experience but also establishes the technical foundation for automation throughout the remainder of the project.

With scheduling in place, Flipnzee Auctions will be ready for features such as automatic status changes, countdown timers, winner selection, and seamless Escrow.com integration.

Lesson 33 Implementation: Adding Auction Scheduling (Start & End Date/Time)


In the Next Lesson

In Lesson 34, we’ll use the newly added scheduling fields to automatically determine the auction status. Instead of manually choosing between Draft, Active, or Closed, the plugin will calculate whether an auction is Scheduled, Active, or Ended based on the current date and time, bringing the system one step closer to a fully automated auction marketplace.

Lesson 33 Implementation: Adding Auction Scheduling (Start & End Date/Time)

In Lesson 33, we transformed the Flipnzee Auctions plugin from a basic auction management system into one capable of supporting scheduled auctions.

Instead of auctions existing only in a draft, active, or closed state, administrators can now define exact start and end dates. This lays the foundation for future automation, where auctions will open and close automatically without manual intervention.


What We Implemented

During this lesson we added support for:

  • Auction Start Date & Time
  • Auction End Date & Time
  • Saving schedule information while creating auctions
  • Editing scheduled auctions
  • Updating the schedule after creation
  • Database support for scheduling

This is a major step toward building a production-ready auction platform.


Step 1 – Extend the Database

The first task was updating the auction table to store scheduling information.

Inside includes/class-database.php we added two new columns:

auction_start DATETIME NULL,
auction_end DATETIME NULL,

These fields allow every auction to have:

  • Start date
  • End date

Both fields are optional, making the feature flexible.


Step 2 – Update the Add Auction Form

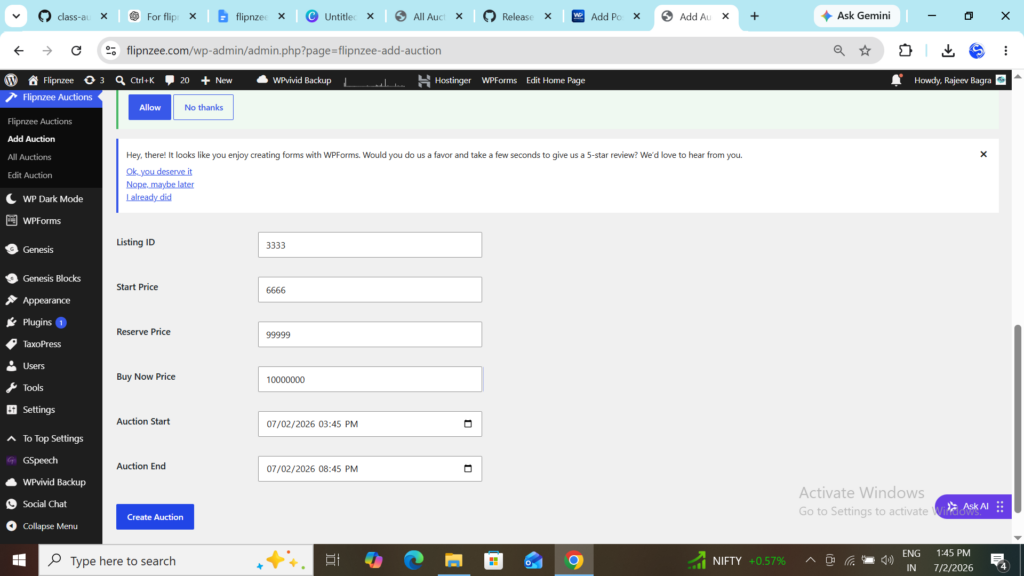
Next we modified the Add Auction screen.

Two new fields were added:

  • Auction Start
  • Auction End

Both use HTML5’s built-in datetime picker.

<input type="datetime-local">

Benefits:

  • Native browser calendar
  • Native time selector
  • No JavaScript library required

Step 3 – Save the Schedule

Adding form fields is not enough.

We also updated:

admin/class-admin-posts.php

to read:

$_POST['auction_start']
$_POST['auction_end']

The values are sanitized using:

sanitize_text_field()

before being sent to the Auction Manager.


Step 4 – Update create_auction()

The next task was modifying:

Flipnzee_Auction_Manager::create_auction()

Its function signature changed from:

create_auction(
    $listing_id,
    $start_price,
    $reserve_price,
    $buy_now_price
)

to:

create_auction(
    $listing_id,
    $start_price,
    $reserve_price,
    $buy_now_price,
    $auction_start,
    $auction_end
)

The SQL INSERT statement now stores:

'auction_start'
'auction_end'

alongside the other auction fields.


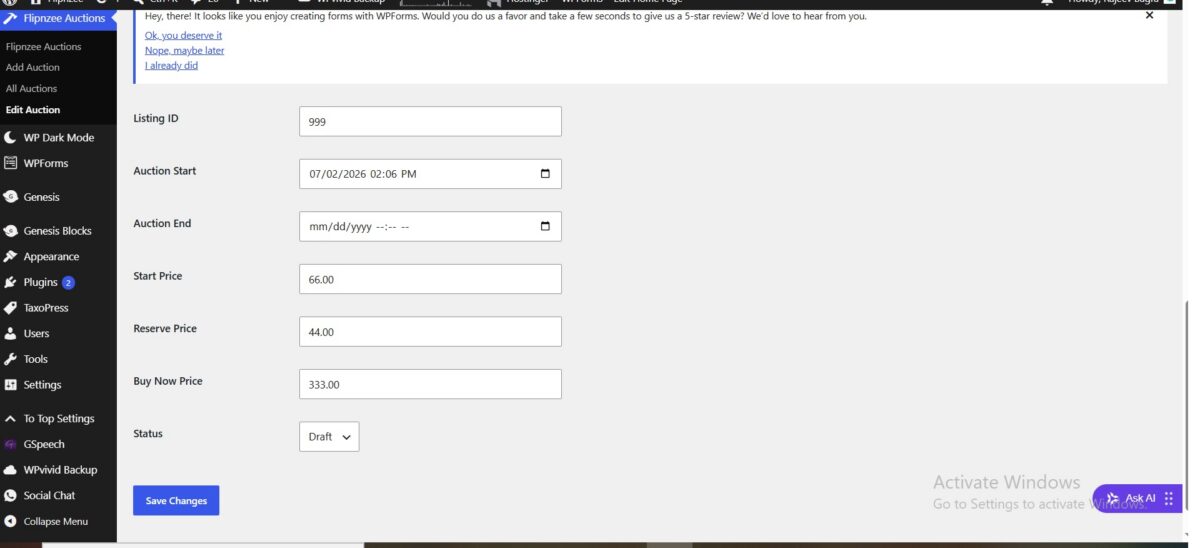
Step 5 – Update the Edit Auction Screen

Once scheduling could be saved, administrators also needed the ability to edit it.

Inside:

admin/class-admin.php

we added two additional form fields:

  • Auction Start
  • Auction End

The stored values are displayed using:

str_replace(
    ' ',
    'T',
    $auction->auction_start
)

This converts the MySQL format:

2026-07-02 14:30:00

into the format expected by HTML5:

2026-07-02T14:30

Without this conversion, the datetime picker would appear empty.


Step 6 – Update update_auction()

The update method also required changes.

Its function signature was expanded to accept:

$auction_start
$auction_end

The SQL UPDATE statement now saves:

'auction_start'
'auction_end'

along with:

  • Listing ID
  • Prices
  • Status

This allows administrators to modify auction schedules after creation.


Step 7 – Verify Everything

After completing the implementation we tested:

Creating Auctions

✔ Auction created successfully.

Editing Auctions

✔ Auction Start displayed correctly.

✔ Auction End displayed correctly.

Saving Changes

✔ Updated schedule persisted successfully.

No PHP syntax errors were reported during testing.


What We Learned

This lesson introduced several useful concepts:

  • Extending existing database tables
  • Working with HTML5 datetime inputs
  • Handling date/time values safely
  • Updating SQL INSERT statements
  • Updating SQL UPDATE statements
  • Passing additional parameters between classes
  • Displaying MySQL datetime values inside HTML forms

Current Progress

The plugin now supports:

  • Creating auctions
  • Editing auctions
  • Searching auctions
  • Sorting auctions
  • Status filtering
  • Bulk deletion
  • Auction scheduling

The scheduling functionality is now fully functional from an administrator’s perspective.

Download Source Code

Download the starting version of the plugin before the lesson:

Download the completed version after this lesson:

What’s Next?

In the next lesson, we’ll complete the scheduling feature by displaying Auction Start and Auction End directly in the All Auctions table. This will allow administrators to view an auction’s schedule at a glance without opening the edit screen.

After that, we’ll be ready to begin implementing automatic auction opening and closing, bringing the plugin one step closer to a production-ready auction platform.

Lesson 32 Implementation – Adding a Fully Functional Status Filter to the Auctions Table

In the previous lesson, we added the Status dropdown above the auctions table. Although the user interface looked complete, the filter was only partially functional. Selecting a status displayed filtered results, but the search box and pagination count did not always stay synchronized.

In this lesson, we’ll complete the implementation by making the Status Filter, Search Box, and Pagination work together seamlessly.


Prerequisites

Before starting, ensure you have completed:

  • Lesson 29 – Bulk Actions
  • Lesson 30 – Bulk Delete
  • Lesson 31 – Adding a Status Filter Dropdown

Step 1 – Read the Selected Status

Open:

admin/class-auctions-table.php

Inside the prepare_items() method, read the selected status.

$status = isset( $_GET['status'] )
	? sanitize_text_field(
		wp_unslash( $_GET['status'] )
	)
	: '';

Using sanitize_text_field() and wp_unslash() follows WordPress coding standards and safely processes user input.


Step 2 – Pass the Status to the Count Query

Previously we counted auctions using only the search keyword.

Replace:

$total_items = Flipnzee_Auction_Manager::count_auctions(
	$search
);

with:

$total_items = Flipnzee_Auction_Manager::count_auctions(
	$search,
	$status
);

Now the pagination count knows which status is currently selected.


Step 3 – Pass Status to get_all_auctions()

Next, update the method call that loads auction records.

Replace:

$this->items = Flipnzee_Auction_Manager::get_all_auctions(
	$per_page,
	$offset,
	$search,
	$orderby,
	$order
);

with:

$this->items = Flipnzee_Auction_Manager::get_all_auctions(
	$per_page,
	$offset,
	$search,
	$status,
	$orderby,
	$order
);

The status value is now available inside the database query.


Step 4 – Update get_all_auctions()

Open:

includes/class-auction-manager.php

Modify the function signature.

Replace:

public static function get_all_auctions(
	$per_page = 20,
	$offset = 0,
	$search = '',
	$orderby = 'created_at',
	$order = 'DESC'
)

with:

public static function get_all_auctions(
	$per_page = 20,
	$offset = 0,
	$search = '',
	$status = '',
	$orderby = 'created_at',
	$order = 'DESC'
)

The function can now receive the selected status.


Step 5 – Filter by Status

Inside get_all_auctions(), add SQL logic that filters records when a status is selected.

For example:

  • Draft → Draft auctions only
  • Active → Active auctions only
  • Closed → Closed auctions only

When no status is selected, the original query continues to return all auctions.


Step 6 – Support Search and Status Together

One important improvement is allowing both filters to work simultaneously.

Instead of choosing between Search or Status, the query now supports both.

Example:

SearchStatusResult
20DraftDraft auction containing “20”
LaptopActiveActive Laptop auctions
EmptyClosedAll Closed auctions
EmptyEmptyAll auctions

This creates a much better user experience.


Step 7 – Update count_auctions()

Next, update the counting method.

Change the function signature from:

public static function count_auctions(
	$search = ''
)

to:

public static function count_auctions(
	$search = '',
	$status = ''
)

Now the counting function receives the selected status as well.


Step 8 – Count Filtered Records Correctly

Update the SQL inside count_auctions() so it supports:

  • Search only
  • Status only
  • Search + Status
  • No filters

This ensures the total number of auctions displayed above the table always matches the records shown.

Without this change, the table could display five Draft auctions while the pagination still reported the total number of auctions in the database.


Step 9 – Test the Feature

Verify the following scenarios:

  • All Statuses
  • Draft
  • Active
  • Closed
  • Search only
  • Search + Draft
  • Search + Active
  • Search + Closed

Also verify that pagination continues to display the correct number of filtered records.


Final Result

After completing this lesson, the Auctions table supports:

  • ✅ Status filtering
  • ✅ Search
  • ✅ Search + Status
  • ✅ Pagination
  • ✅ Sorting
  • ✅ Bulk Actions
  • ✅ Bulk Delete

The Auctions management screen now behaves much more like WordPress core list tables, providing administrators with a smoother and more intuitive experience.


What We Learned

In this lesson, we learned how to:

  • Read filter values securely from the URL.
  • Pass filter values through multiple application layers.
  • Extend database methods with additional parameters.
  • Combine multiple filtering conditions safely.
  • Keep pagination synchronized with filtered data.
  • Build a more professional WordPress admin experience.

Download Source Code

Download the starting version of the plugin before the lesson:

Download the completed version after this lesson:

Next Lesson

In Lesson 33, we’ll extend our auction system by adding Start Date/Time and End Date/Time fields. These scheduling options will become the foundation for many future features, including countdown timers, automatic activation, automatic closing, winner selection, and Escrow.com integration.

Lesson 32 — Implementing a Fully Functional Status Filter in the Auctions Table

Series: Building the Flipnzee Auctions WordPress Plugin
Lesson: 32
Difficulty: Intermediate


Introduction

In the previous lesson, we added a Status dropdown above the Auctions table. The user interface was complete, but selecting a status did not yet change the displayed records.

In this lesson, we’ll connect the status filter to the database so that it becomes fully functional. Administrators will be able to display only Draft, Active, or Closed auctions while continuing to use searching, sorting, pagination, and bulk actions.

By the end of this lesson, the Status filter will work exactly as expected in a professional WordPress administration screen.


What You’ll Learn

After completing this lesson, you’ll know how to:

  • Extend existing manager methods with additional filter parameters.
  • Build dynamic SQL queries based on optional filters.
  • Combine multiple filters within a single query.
  • Keep pagination synchronized with filtered results.
  • Preserve compatibility with searching, sorting, and bulk actions.
  • Follow WordPress database best practices.

Why Finish the Status Filter?

The previous lesson introduced the user interface, but administrators still could not actually filter auction records.

A fully functional status filter allows administrators to quickly answer questions such as:

  • Which auctions are currently active?
  • Which auctions are still drafts?
  • Which auctions have already closed?

Instead of manually browsing dozens or hundreds of records, administrators can focus on only the auctions they need.


Files We’ll Modify

During this lesson, we’ll update:

admin/class-auctions-table.php
includes/class-auction-manager.php

Implementation Overview

We’ll complete the feature in several small steps.


Step 1

Update get_all_auctions() to accept a new parameter:

$status

Step 2

Modify the SQL query so it supports four situations:

  • No search + No status
  • Search only
  • Status only
  • Search + Status

Step 3

Use prepared statements to safely build the SQL query.


Step 4

Update count_auctions() so pagination reflects only the filtered records.


Step 5

Ensure searching and status filtering work together.

Example:

Search:

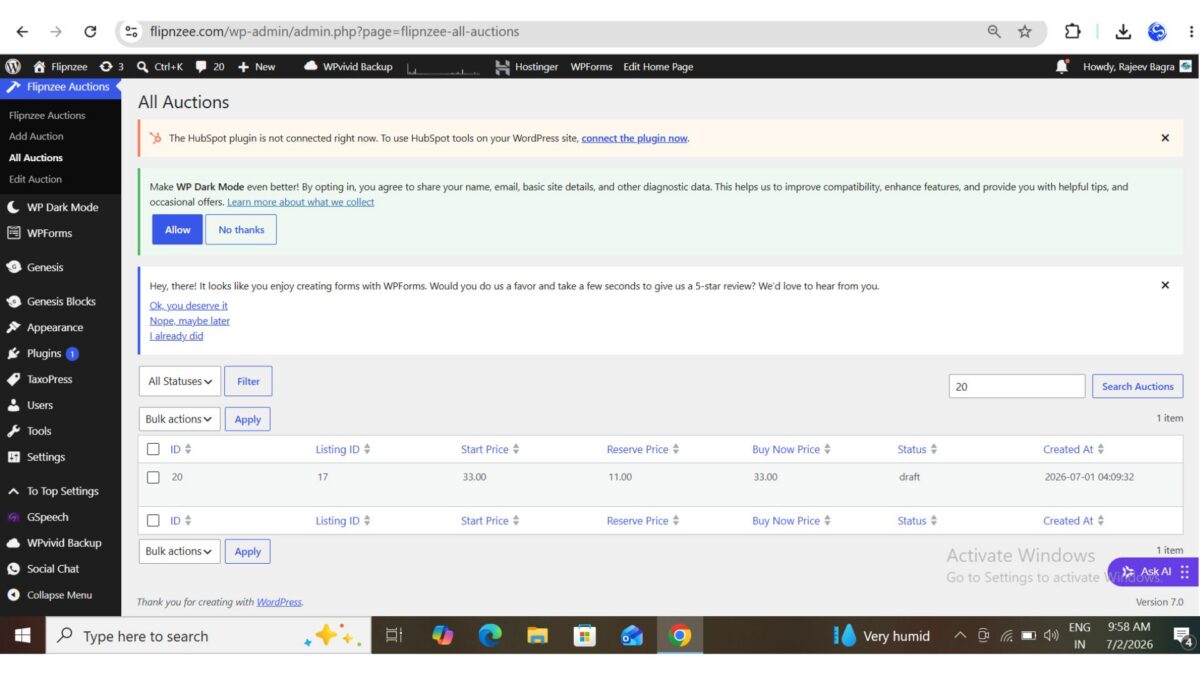
Listing ID = 25

Status:

Draft

Expected result:

Only matching Draft auctions with Listing ID 25 should appear.


Step 6

Ensure sorting continues working.

After filtering:

  • Click Start Price
  • Click Created At
  • Click Listing ID

The filtered records should still sort correctly.


Step 7

Verify pagination.

When a filter reduces the number of matching auctions:

  • Page count should update automatically.
  • Only matching records should be counted.
  • Navigation should remain accurate.

Step 8

Test every possible combination.

Examples include:

SearchStatusExpected Result
NoneAllEvery auction
NoneDraftDraft auctions only
NoneActiveActive auctions only
NoneClosedClosed auctions only
Listing IDAllMatching listing
Listing IDDraftMatching Draft listing
Listing IDActiveMatching Active listing

Security Considerations

Throughout this lesson we’ll continue using WordPress security best practices.

User input should always be sanitized before use.

The implementation should continue using:

  • sanitize_text_field()
  • sanitize_key()
  • wp_unslash()
  • $wpdb->prepare()
  • $wpdb->esc_like()

No SQL values should be inserted directly into queries.


Expected Result

After completing this lesson, administrators will be able to:

  • View all auctions.
  • Filter only Draft auctions.
  • Filter only Active auctions.
  • Filter only Closed auctions.
  • Search within filtered results.
  • Sort filtered results.
  • Paginate filtered results.
  • Continue using bulk actions.

The auction management screen will now provide a much more efficient way to work with large datasets.


Conclusion

Completing the Status filter transforms it from a simple user interface element into a fully functional management tool.

Together with pagination, searching, sortable columns, and bulk actions, the Flipnzee Auctions plugin now offers an administration experience that closely resembles the native WordPress dashboard.

This lesson also demonstrates an important software engineering principle: user interface elements are only valuable when they are correctly connected to the underlying application logic.

Lesson 31 Implementation: Adding Status Filters to the Flipnzee Auctions Plugin


In the Next Lesson

We’ll extend our auction system by adding Start Date/Time and End Date/Time fields. These scheduling options will become the foundation for many future features, including countdown timers, automatic activation, automatic closing, winner selection, and Escrow.com integration.

Lesson 31 Implementation: Adding Status Filters to the Flipnzee Auctions Plugin

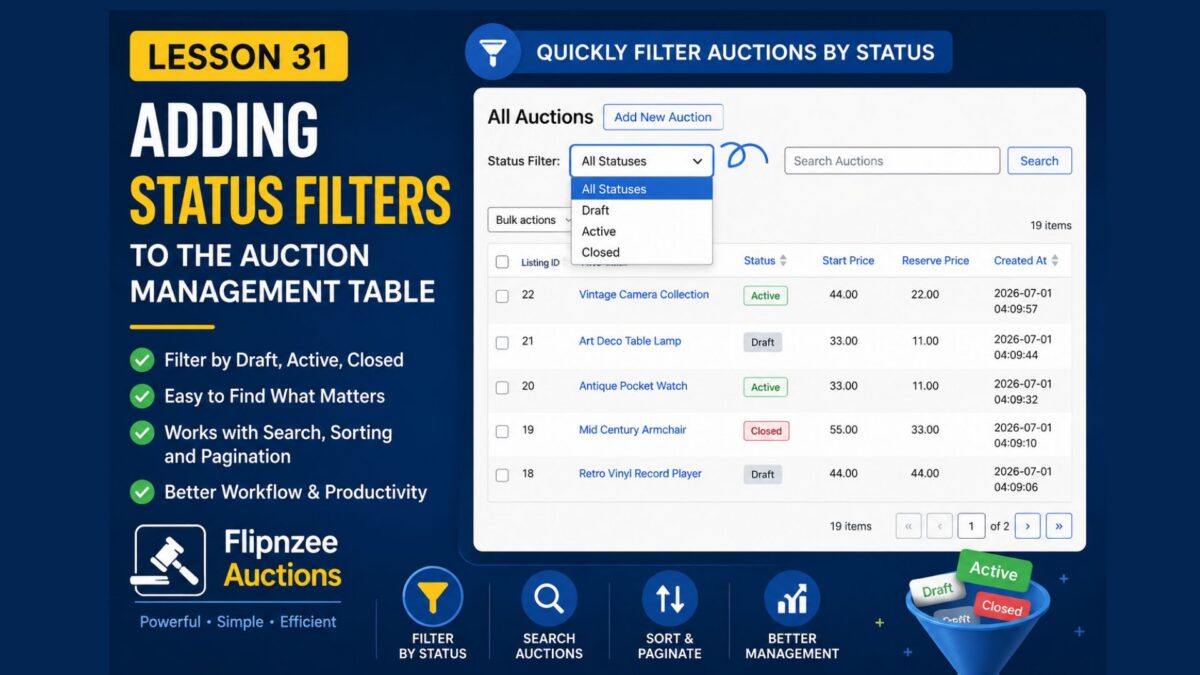
In the previous lessons, we enhanced the auction management table with searching, pagination, sortable columns, and bulk actions. As the number of auctions grows, administrators need an easier way to view only auctions in a particular state.

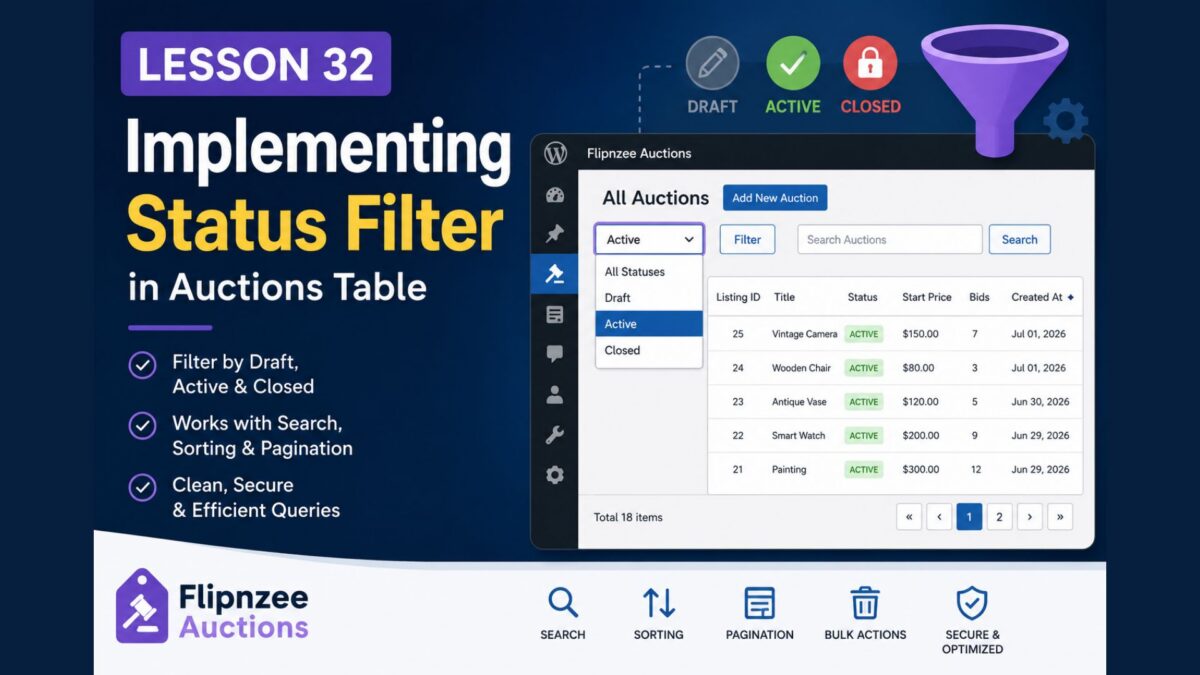
In this lesson, we’ll add a Status Filter that allows administrators to display only Draft, Active, or Closed auctions.


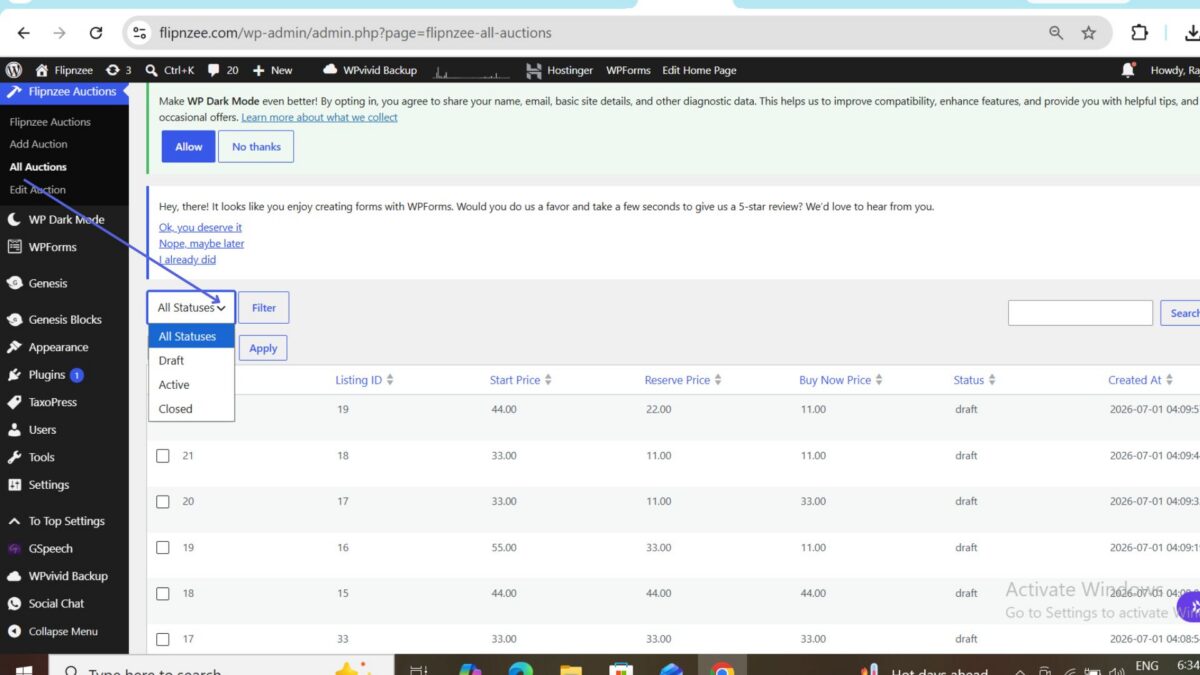
Step 1: Add a Status Filter Dropdown

The first step is to add a filter control above the auction table.

Open:

admin/class-admin.php

Locate the all_auctions_page() method and add a dropdown before the search box.

$status = isset( $_GET['status'] )
	? sanitize_text_field(
		wp_unslash( $_GET['status'] )
	)
	: '';
?>

<select name="status">

	<option value="">All Statuses</option>

	<option
		value="draft"
		<?php selected( $status, 'draft' ); ?>
	>
		Draft
	</option>

	<option
		value="active"
		<?php selected( $status, 'active' ); ?>
	>
		Active
	</option>

	<option
		value="closed"
		<?php selected( $status, 'closed' ); ?>
	>
		Closed
	</option>

</select>

<?php

submit_button(
	'Filter',
	'secondary',
	'',
	false
);

This creates a familiar WordPress-style filter that remembers the selected option after the page reloads.


Step 2: Read the Selected Status

Next, the selected status needs to be available while preparing the table data.

Open:

admin/class-auctions-table.php

Inside the prepare_items() method, read the selected status.

$status = isset( $_REQUEST['status'] )
	? sanitize_text_field(
		wp_unslash( $_REQUEST['status'] )
	)
	: '';

The filter value is sanitized before being used anywhere else in the plugin.


Step 3: Pass the Filter to the Manager Class

The manager class is responsible for retrieving auction records from the database.

Update the method calls inside prepare_items().

$total_items = Flipnzee_Auction_Manager::count_auctions(
	$search,
	$status
);

Likewise, update the method that retrieves the auction list.

$this->items = Flipnzee_Auction_Manager::get_all_auctions(
	$per_page,
	$offset,
	$search,
	$status,
	$orderby,
	$order
);

This allows the selected filter to travel from the user interface to the database layer.


Step 4: Update the Manager Method Signatures

Open:

includes/class-auction-manager.php

Update the method definitions to accept the new $status parameter.

public static function get_all_auctions(
	$per_page = 20,
	$offset = 0,
	$search = '',
	$status = '',
	$orderby = 'created_at',
	$order = 'DESC'
)

Similarly, update the counting method.

public static function count_auctions(
	$search = '',
	$status = ''
)

Step 5: Apply the Status Filter to Database Queries

Modify the SQL queries so that they include the selected status whenever a filter has been chosen.

For example, if the administrator selects Draft, only auctions whose status is draft should be returned.

If All Statuses is selected, the query should continue returning every auction.

This approach keeps the filtering logic entirely inside the manager class.


Step 6: Update the Pagination Count

Pagination should display the number of filtered results instead of the total number of auctions.

For example:

  • 8 Draft auctions
  • 5 Active auctions
  • 12 Closed auctions

Each filtered view should have its own correct page count.


Step 7: Test the Feature

After uploading the updated plugin:

  1. Open Flipnzee Auctions → All Auctions.
  2. Select Draft from the Status dropdown.
  3. Click Filter.
  4. Confirm that only Draft auctions appear.
  5. Repeat the process for Active and Closed.
  6. Finally, choose All Statuses to display every auction again.

Also verify that:

  • Searching continues to work.
  • Sorting still functions correctly.
  • Pagination remains accurate.
  • Bulk actions continue working as expected.

Final Result

The auction management screen now includes a convenient Status filter that allows administrators to quickly narrow the list of auctions.

Instead of manually searching through every record, administrators can instantly display:

  • Draft auctions
  • Active auctions
  • Closed auctions
  • All auctions

This greatly improves usability, especially as the number of auction records grows.


What We Learned

In this lesson, we learned how to:

  • Add a custom filter control to a WordPress admin page.
  • Read filter values from user input safely.
  • Pass filter values through different layers of the plugin.
  • Update manager methods to support filtering.
  • Modify database queries based on selected filters.
  • Keep pagination accurate when filters are applied.
  • Preserve compatibility with searching, sorting, and bulk actions.

The Flipnzee Auctions plugin now provides an even more professional administration experience by allowing auction records to be filtered by status with just a few clicks.

Download Source Code

Download the starting version of the plugin before the lesson:

Download the completed version after this lesson:

Lesson 31 — Adding Status Filters to the Auction Management Table


Introduction

As the number of auctions grows, searching by keywords alone is often not enough. Administrators frequently need to view only auctions in a particular state, such as active auctions currently accepting bids or closed auctions that have already ended.

In this lesson, we’ll enhance the All Auctions page by adding status filters above the table. Administrators will be able to quickly filter the auction list by Draft, Active, or Closed without manually searching through every record.

By the end of this lesson, your auction management screen will feel even closer to the professional interfaces found throughout the WordPress admin area.


What You’ll Learn

After completing this lesson, you’ll know how to:

  • Add custom filter controls to a WP_List_Table
  • Read filter values from the URL
  • Sanitize incoming request parameters
  • Filter database queries dynamically
  • Preserve filters during pagination and searching
  • Display only matching auction records

Why Status Filters Matter

When managing a large number of auctions, administrators often need answers such as:

  • Which auctions are currently active?
  • Which auctions are still drafts?
  • Which auctions have already closed?

Without filters, administrators must search manually or scroll through multiple pages.

Status filters provide several advantages:

  • Faster administration
  • Improved usability
  • Cleaner workflow
  • Reduced scrolling
  • Better organization of auction records

Files We’ll Modify

During this lesson we’ll update the following files:

admin/class-auctions-table.php
admin/class-admin.php
includes/class-auction-manager.php

Implementation Overview

We’ll complete this feature in several small steps.

Step 1

Add a Status dropdown above the auction table.


Step 2

Read the selected status from the request.


Step 3

Modify the database query to filter results.


Step 4

Update the total record count for pagination.


Step 5

Preserve the selected filter when navigating between pages.


Step 6

Combine filtering with searching and sortable columns.


Expected Result

After completing this lesson, administrators will be able to:

  • View all auctions
  • View only Draft auctions
  • View only Active auctions
  • View only Closed auctions
  • Combine status filtering with keyword searching
  • Continue using pagination and sortable columns while filters remain active

Final Thoughts

Status filters are a common feature in professional WordPress plugins because they allow administrators to quickly focus on the records that matter most.

In this lesson, you’ll learn how to integrate custom filters into your existing WP_List_Table while preserving compatibility with searching, sorting, pagination, and bulk actions.

By the end of the lesson, the Flipnzee Auctions plugin will provide an even more polished and efficient administrative experience, making it easier to manage growing numbers of auction listings.

Lesson 30 — Bulk Delete Functionality in the WordPress Admin Table


Introduction

In the previous lesson, we added checkbox selection and a Bulk Actions dropdown to our custom WP_List_Table. Although the interface looked complete, selecting auctions and clicking Apply did not actually perform any action.

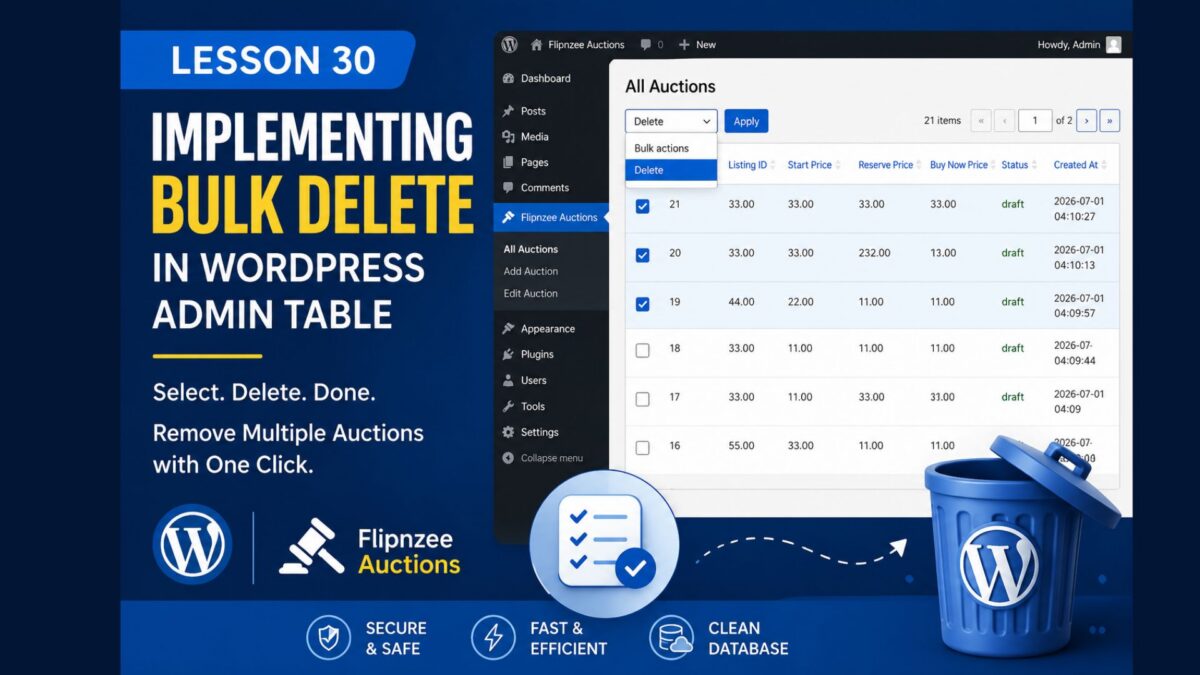
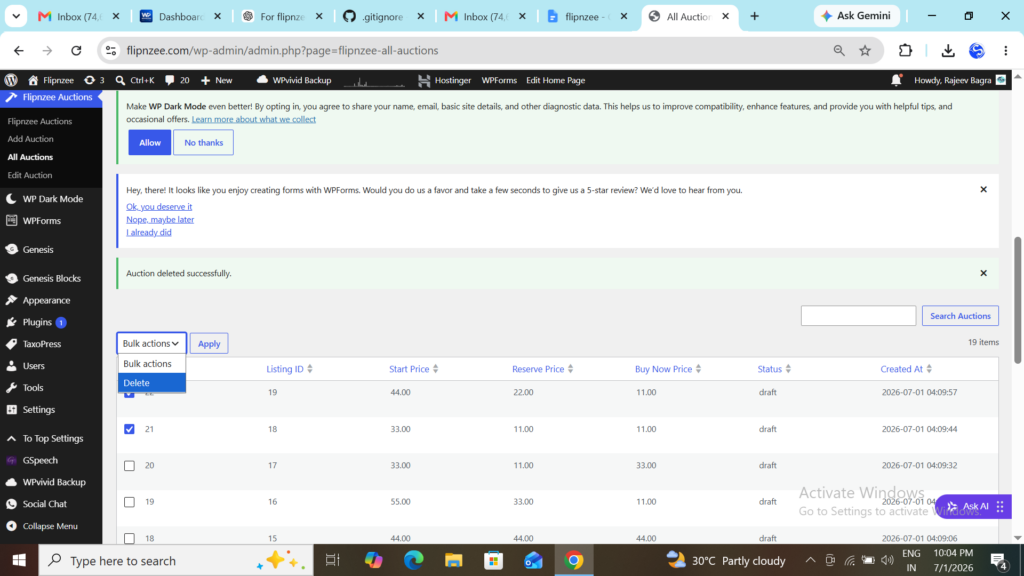
In this lesson, we’ll implement the backend logic required to process bulk deletion securely. We’ll learn how WordPress submits bulk actions, how to retrieve selected record IDs, and how to delete multiple database records efficiently while following WordPress coding standards.

By the end of this lesson, administrators will be able to select multiple auctions and remove them with a single click.


What You’ll Learn

After completing this lesson, you’ll know how to:

  • Process bulk actions submitted by WP_List_Table
  • Detect which bulk action was selected
  • Retrieve multiple selected auction IDs safely
  • Sanitize and validate submitted IDs
  • Delete multiple database records using a loop
  • Display success messages after bulk deletion
  • Follow WordPress security best practices

Why Bulk Delete Matters

Deleting one auction at a time quickly becomes inefficient when managing dozens or hundreds of auctions.

Bulk deletion provides several benefits:

  • Saves administrator time
  • Reduces repetitive clicks
  • Matches WordPress core behaviour
  • Makes the plugin feel professional
  • Improves usability for large datasets

Files We’ll Modify

During this lesson we’ll update the following files:

admin/class-auctions-table.php
admin/class-admin.php
includes/class-auction-manager.php

Implementation Overview

We’ll complete the feature in several small steps:

Step 1

Detect when the administrator selects a bulk action.


Step 2

Retrieve all selected auction IDs.


Step 3

Validate and sanitize every submitted ID.


Step 4

Delete each auction from the database.


Step 5

Redirect back to the auction list.


Step 6

Display a success notice showing the operation completed.


Expected Result

After completing this lesson:

  • ✔ Multiple auctions can be selected
  • ✔ Clicking Delete removes every selected auction
  • ✔ The table refreshes automatically
  • ✔ A success message confirms the deletion
  • ✔ The plugin behaves similarly to the built-in WordPress Posts screen

Final Thoughts

This lesson introduces one of the most useful administrative features in any WordPress plugin: processing bulk actions.

You’ll learn how WP_List_Table communicates selected rows to your plugin and how to process those requests securely. The same approach can later be extended to bulk activation, bulk closing of auctions, exporting records, changing statuses, and many other administrative operations.

In the next lesson, we’ll continue improving the auction management interface by adding additional professional features and refining the administrator experience.