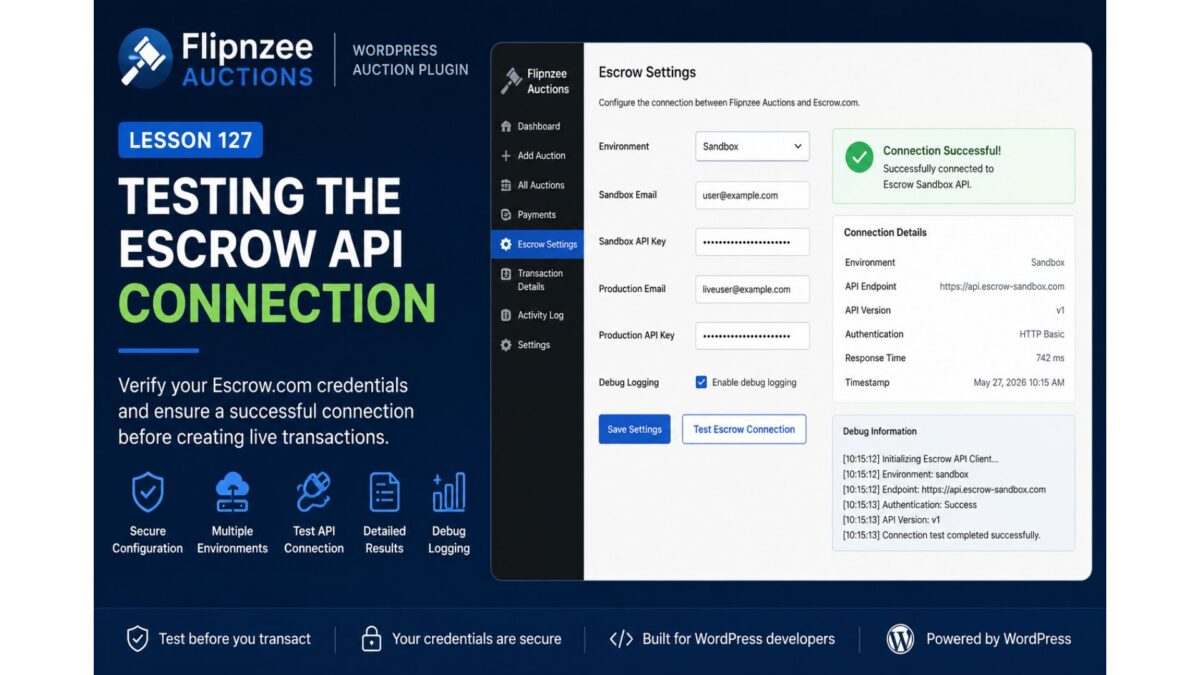
Lesson 127 — Testing the Escrow API Connection

Introduction

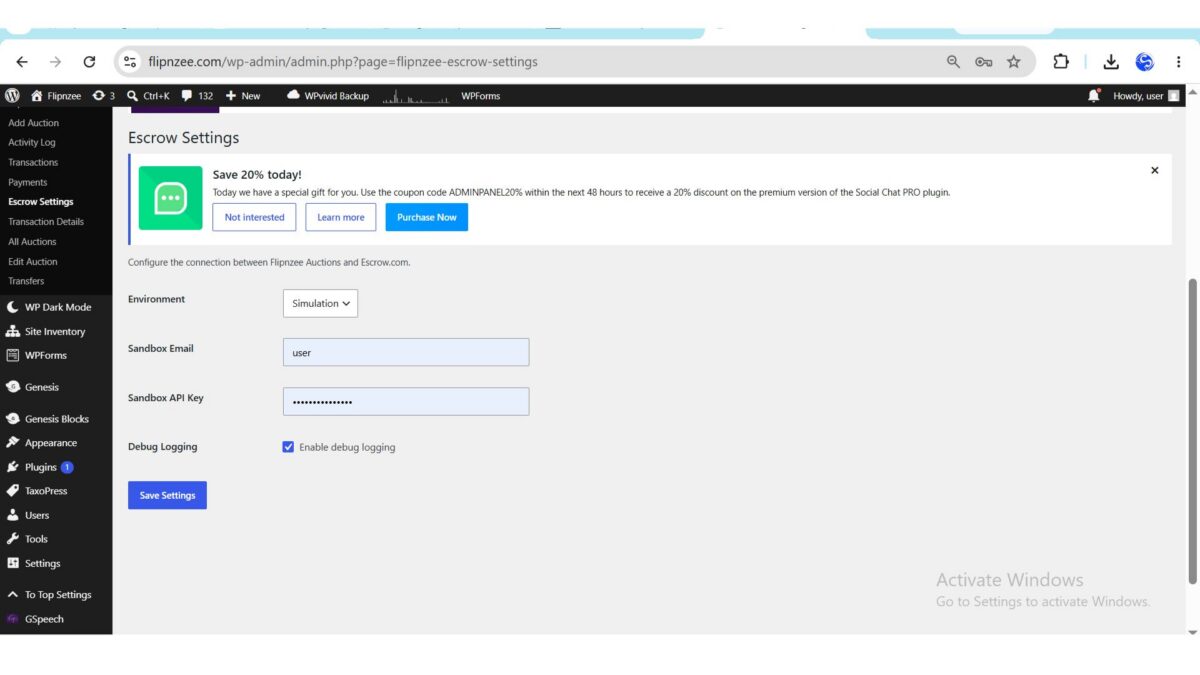
In the previous lesson, we implemented a dedicated Escrow Settings administration page, allowing administrators to securely configure the plugin without modifying source code. Those settings now provide the foundation for interacting with the Escrow.com API.

However, before the plugin can create transactions or manage escrow payments, it is important to verify that the supplied credentials are valid and that communication with the selected environment is functioning correctly.

In this lesson, we will implement a Test Escrow Connection feature that allows administrators to verify connectivity directly from the WordPress dashboard.


Why Test the Connection?

Many integration problems occur long before the first API request is made.

Examples include:

  • Incorrect API credentials
  • Wrong environment selected
  • Network connectivity issues
  • Invalid API endpoints
  • Authentication failures

Rather than discovering these problems during a live auction, administrators should be able to verify their configuration beforehand.


Lesson Objectives

By the end of this lesson, the plugin will:

  • Add a Test Escrow Connection button.
  • Read configuration from the Escrow Settings page.
  • Initialize the Escrow API Client.
  • Determine the selected environment.
  • Attempt a connection.
  • Display the connection result to the administrator.
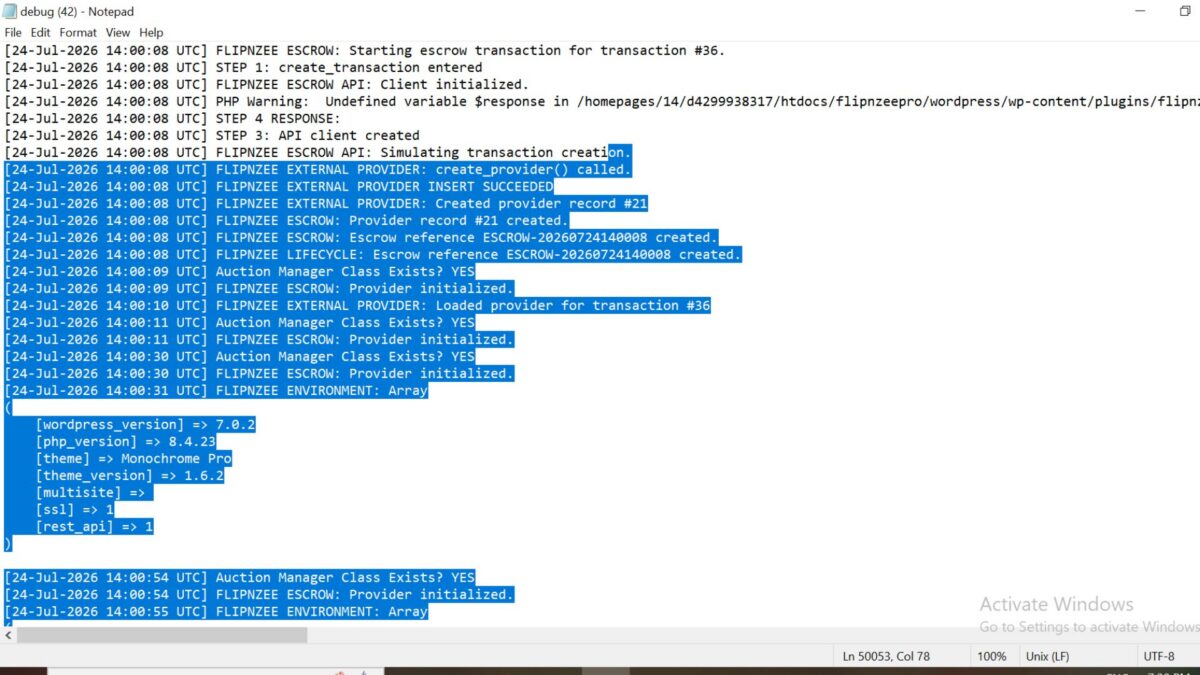
  • Record diagnostic information when debug logging is enabled.

Current Architecture

The plugin currently looks like this:

Administrator
        │
        ▼
Escrow Settings Page
        │
        ▼
WordPress Options API
        │
        ▼
Escrow API Client

This lesson extends the final stage by allowing the administrator to verify that communication with Escrow.com is working.


Reading Stored Configuration

The API client should no longer rely on hard-coded values.

Instead, it should retrieve configuration from the settings saved in Lesson 126.

Typical values include:

  • Environment
  • Sandbox Email
  • Sandbox API Key
  • Production Email
  • Production API Key
  • Debug Logging

This keeps the plugin flexible and makes switching environments as simple as changing a dropdown selection.


Initializing the API Client

The Test Connection action will instantiate the existing Flipnzee_Escrow_API_Client and configure it using the stored settings.

The client should automatically determine which endpoint to use based on the selected environment.

For example:

  • Simulation
  • Sandbox
  • Production

Keeping this logic inside the API client avoids duplicating environment selection throughout the plugin.


Simulation Mode

During development, many developers may not yet have Sandbox credentials.

To support plugin development, the existing Simulation mode remains useful.

Instead of making an external HTTP request, the plugin simply returns a simulated successful response.

Example:

✓ Simulation Mode Active

No external API request was performed.

This allows developers to continue building other parts of the plugin without depending on a live service.


Sandbox Connection

When Sandbox mode is selected, the plugin should:

  1. Validate the stored credentials.
  2. Build the appropriate request.
  3. Contact the Escrow Sandbox endpoint.
  4. Capture the response.
  5. Report the outcome.

A successful response confirms that the configuration is ready for development and testing.


Production Connection

Production mode follows the same workflow but communicates with the live Escrow.com environment.

Because Production interacts with live services, administrators should verify that:

  • Correct credentials are being used.
  • The intended environment is selected.
  • Debug logging is configured appropriately.

No financial transaction should be created during the connection test.

The purpose is only to confirm connectivity and authentication.


Displaying Results

After testing the connection, the administration page should present a clear status message.

Examples include:

Successful:

✓ Connected successfully.

Environment:
Sandbox

API Version:
Available

Authentication:
Successful

Simulation:

✓ Simulation Mode Active

No remote connection required.

Failure:

Connection Failed

Reason:
Authentication failed.

Please verify your API credentials.

Providing meaningful feedback helps administrators diagnose configuration issues without consulting server logs.


Debug Logging

If Debug Logging is enabled, the plugin should record useful diagnostic information.

Examples include:

  • Environment selected
  • Endpoint used
  • Request start time
  • Response received
  • HTTP status code
  • Error messages

Sensitive information such as API keys or passwords should never be written to logs.


Error Handling

External services are not always available.

The implementation should gracefully handle situations such as:

  • Invalid credentials
  • HTTP errors
  • Timeout exceptions
  • SSL problems
  • Unexpected API responses

Administrators should receive clear messages while detailed diagnostics remain available through debug logging.


Security Considerations

The Test Connection action should follow the same security practices established in previous lessons.

This includes:

  • WordPress nonce verification
  • Administrator capability checks
  • Sanitized user input
  • Escaped output
  • No exposure of API secrets

Maintaining consistent security practices is essential when interacting with third-party services.


Expected Workflow

Administrator
      │
      ▼
Clicks Test Connection
      │
      ▼
Load Saved Settings
      │
      ▼
Initialize API Client
      │
      ▼
Select Environment
      │
      ▼
Attempt Connection
      │
      ▼
Receive Response
      │
      ▼
Display Status Message
      │
      ▼
Optional Debug Log

Files Likely to be Updated

admin/class-admin-escrow-settings.php

includes/class-escrow-api-client.php

includes/class-logger.php (if required)

The exact implementation may vary, but the objective is to keep responsibilities clearly separated while reusing the API client introduced in earlier lessons.


What You’ll Learn

This lesson introduces several practical concepts commonly found in production WordPress plugins:

  • Testing third-party API connectivity.
  • Reading configuration from the WordPress Options API.
  • Environment-aware application design.
  • Graceful error handling.
  • Diagnostic logging.
  • Secure administrator actions.
  • Integrating existing classes rather than duplicating functionality.

These patterns are applicable to many WordPress integrations beyond Escrow.com.


Conclusion

With a dedicated settings page now in place, the next logical step is to verify that the plugin can successfully communicate with the configured Escrow environment. Implementing a Test Connection feature provides administrators with immediate feedback, reduces configuration errors, and lays the groundwork for future features such as transaction creation, status synchronization, and payment management.

In the next implementation lesson, we will build the Test Escrow Connection feature and connect it to the Flipnzee_Escrow_API_Client, completing the first end-to-end interaction between the plugin and the configured Escrow environment.
Lesson 126 Implementation — Building the Escrow Settings Administration Page

In the previous lesson, we created the foundation for communicating with Escrow.com by introducing a dedicated API client. Before that client can establish a connection, however, the plugin needs a secure and flexible way to store configuration details.

In this lesson, we implement a dedicated Escrow Settings administration page. This page allows administrators to configure the plugin without editing source code and prepares the foundation for Sandbox and Production integrations in future lessons.


Why This Lesson Is Important

One of the hallmarks of a well-designed WordPress plugin is that it separates configuration from application logic. Rather than embedding credentials directly in PHP files, configuration should be managed through the WordPress administration interface.

This approach offers several benefits:

  • Better security
  • Easier maintenance
  • Environment flexibility
  • Cleaner codebase
  • Improved user experience

It also makes the plugin suitable for deployment across multiple websites without requiring code modifications.


Objectives

By the end of this lesson, the plugin will:

  • Add an Escrow Settings page to the WordPress admin area.
  • Store configuration using the WordPress Options API.
  • Support multiple operating environments.
  • Allow Sandbox credentials to be managed from the dashboard.
  • Enable or disable debug logging.
  • Protect settings using WordPress nonce verification.

Creating the Administration Class

A new class was introduced to encapsulate all Escrow configuration functionality.

admin/
└── class-admin-escrow-settings.php

Instead of placing settings inside the main administration class, a dedicated class was created to keep responsibilities focused and improve maintainability.

The class is responsible for:

  • Rendering the settings page
  • Loading stored configuration
  • Saving administrator changes
  • Displaying the configuration interface

Loading the Class

The new class was registered during plugin initialization.

The plugin bootstrap now loads the class before it is referenced by the administration menu.

This small but essential step ensures that WordPress can instantiate the settings page without encountering class loading errors.


Registering the Menu

A new submenu was added beneath the existing Flipnzee Auctions menu.

Flipnzee Auctions
    ├── Dashboard
    ├── Auctions
    ├── Payments
    └── Escrow Settings

Keeping the page within the existing administration structure provides a familiar experience for administrators.


Building the User Interface

The page follows standard WordPress administration conventions using a familiar settings table layout.

The current interface includes:

  • Environment selector
  • Sandbox Email
  • Sandbox API Key
  • Debug Logging option
  • Save Settings button

Following WordPress UI conventions ensures the page feels consistent with the rest of the dashboard.


Supporting Multiple Environments

Different deployment stages require different Escrow environments.

The plugin now supports:

EnvironmentPurpose
SimulationInternal testing without contacting Escrow.com
SandboxEscrow.com’s testing environment
ProductionLive transactions

During development, Simulation mode allows the rest of the plugin to be implemented without relying on external API availability.


Saving Configuration

Instead of creating a custom database table, this lesson uses the WordPress Options API.

Configuration is stored under a single option, allowing WordPress to handle serialization and retrieval automatically.

The implementation uses:

  • get_option()
  • update_option()
  • wp_parse_args()

This keeps the code concise while remaining fully compatible with WordPress standards.


Security

Administrative settings should never trust submitted data.

The implementation therefore includes several important security measures.

Nonce Verification

Every settings submission includes a WordPress nonce to protect against Cross-Site Request Forgery (CSRF).

Sanitization

Submitted values are sanitized before storage.

Examples include:

  • sanitize_email()
  • sanitize_text_field()

Escaping Output

Values displayed back to administrators are escaped before rendering to prevent unintended HTML output.

These practices are fundamental to secure WordPress plugin development.


Object-Oriented Structure

The settings page follows the same object-oriented design used throughout the Flipnzee Auctions plugin.

Flipnzee_Admin_Escrow_Settings
│
├── render_page()
├── save_settings()
└── get_settings()

Each method performs a single responsibility, making the class easier to understand, test, and extend.


Debugging During Development

While implementing the feature, a few issues were encountered and resolved.

These included:

  • Missing class loading during plugin initialization.
  • Callback registration errors.
  • Admin page rendering failures.
  • Validation of plugin bootstrap order.
  • Incremental rebuilding of the settings page after isolating the source of a critical error.

Although these issues were temporary, resolving them improved the plugin’s architecture and highlighted the importance of testing each component as it is introduced.


Testing

The completed implementation was tested to verify that:

  • The Escrow Settings page loads successfully.
  • The submenu appears correctly.
  • Settings can be saved.
  • Stored values persist after page refresh.
  • The selected environment is retained.
  • Sandbox credentials are stored correctly.
  • Debug logging preferences are preserved.
  • WordPress nonce protection functions as expected.

Integration with Previous Lessons

The plugin architecture now looks like this:

Flipnzee_Admin_Escrow_Settings
            │
            ▼
 WordPress Options API
            │
            ▼
 Escrow Configuration
            │
            ▼
Flipnzee_Escrow_API_Client

Future API requests will retrieve configuration directly from these stored settings instead of relying on hard-coded values.


Files Added and Updated

admin/
└── class-admin-escrow-settings.php

admin/
└── class-admin.php

flipnzee-auctions.php

These changes establish the administrative infrastructure required for future Escrow integration.


What We Learned

This lesson demonstrated several important WordPress development concepts:

  • Creating dedicated administration classes.
  • Registering custom admin menus.
  • Using the WordPress Options API.
  • Designing secure administration forms.
  • Implementing nonce verification.
  • Sanitizing and escaping user input.
  • Structuring plugin code using object-oriented principles.

These techniques are applicable to many types of WordPress plugins beyond auction systems.


Conclusion

The Flipnzee Auctions plugin now includes a dedicated administration page for configuring its Escrow integration. By separating configuration from application logic and leveraging the WordPress Options API, the plugin becomes easier to deploy, maintain, and extend.

This implementation provides a solid foundation for the next phase of development, where the stored configuration will be used to establish communication with the Escrow.com API.

https://github.com/SplendidDigital/flipnzee-auctions/releases/tag/lesson-126-stable


Next Lesson

In Lesson 127, we will integrate the Escrow API Client with the stored settings and implement a Test Escrow Connection feature. This will allow administrators to verify connectivity to the selected Simulation, Sandbox, or Production environment before initiating real escrow transactions.

Lesson 125: Building an Escrow API Client Architecture for Future Live Integration

One of the biggest goals of Flipnzee Auctions has always been to support a professional transaction workflow for buying and selling websites. While previous lessons introduced the External Provider Manager and simulated Escrow transactions, the plugin was still tightly coupled to a single provider implementation.

In this lesson, the architecture takes an important step forward by introducing a dedicated Escrow API Client. Although it currently operates in simulation mode, it establishes the same separation of responsibilities used by production software and prepares the plugin for future communication with the live Escrow.com REST API.


Why Introduce an API Client?

Earlier lessons allowed the Escrow Provider to simulate transaction creation directly. While functional, that approach meant the provider class was responsible for both business logic and external communication.

As the project grows, this becomes increasingly difficult to maintain.

By introducing an API client, responsibilities become much clearer:

  • Escrow Provider
    • Handles auction payment workflow.
    • Decides when an escrow transaction should be created.
    • Stores provider information in the database.
  • Escrow API Client
    • Handles all communication with Escrow.com.
    • Manages API endpoints.
    • Prepares authentication.
    • Builds request payloads.
    • Parses API responses.

This separation makes each component easier to understand, test and replace.


Studying the Escrow.com API

Before writing any code, the official Escrow.com developer documentation was reviewed to understand how their software works.

The research focused on:

  • Sandbox environment
  • Live API endpoint
  • REST request structure
  • Authentication model
  • Transaction lifecycle
  • Status values
  • Buyer and seller roles

Rather than attempting to integrate every feature immediately, the goal of Lesson 125 is to establish the architecture that future lessons will expand.


Creating the Escrow API Client

A new class was introduced:

includes/class-escrow-api-client.php

This class becomes the single location responsible for interacting with Escrow.com.

Instead of allowing multiple classes to communicate directly with the API, every request will eventually pass through this client.

The class currently contains:

  • Sandbox endpoint
  • Live endpoint
  • API version
  • Simulation mode
  • Transaction creation method

Although responses are simulated today, replacing them with real HTTP requests later will require minimal changes elsewhere in the plugin.


Simulation Mode

During development it is undesirable to create real escrow transactions.

Instead, the client currently returns realistic responses such as:

  • success
  • provider reference
  • status
  • timestamps

This allows every surrounding component to behave exactly as it would during a live transaction without contacting the Escrow.com servers.


Refactoring the Escrow Provider

The existing provider no longer creates references itself.

Instead it now delegates that responsibility:

Escrow Provider
        ↓
Escrow API Client
        ↓
Response
        ↓
External Provider Manager

The provider now simply:

  1. Creates the API client.
  2. Requests a transaction.
  3. Receives the response.
  4. Stores provider details.
  5. Returns the reference.

This greatly reduces complexity inside the provider.


Provider Persistence

After receiving the simulated response, the provider stores:

  • Transaction ID
  • Provider name
  • Escrow reference
  • Provider status
  • Notes
  • Created date
  • Updated date

using the existing External Provider Manager introduced in previous lessons.

This ensures the transaction history remains identical whether responses originate from simulation mode or the live API in future versions.


Logging Improvements

Additional logging was added throughout the workflow.

Typical log output now resembles:

FLIPNZEE ESCROW: Starting escrow transaction...
FLIPNZEE API CLIENT: Simulation mode enabled.
FLIPNZEE API CLIENT: Returning simulated response.
FLIPNZEE EXTERNAL PROVIDER INSERT SUCCEEDED
FLIPNZEE ESCROW: Provider record created.
FLIPNZEE ESCROW: Escrow reference created.

These logs provide a complete picture of the transaction lifecycle and make debugging considerably easier.


Benefits of This Architecture

Introducing the API client provides several advantages:

  • Cleaner separation of responsibilities.
  • Easier testing.
  • Simpler debugging.
  • Reduced coupling.
  • Future API integration requires minimal changes.
  • Other payment providers can adopt the same pattern.

Most importantly, the remainder of the plugin no longer needs to know whether responses come from simulation mode or from the real Escrow.com servers.


Looking Ahead

With the architecture now in place, the plugin is ready to move beyond simulation.

Future lessons will focus on:

  • API authentication
  • Secure credential storage
  • Real HTTP requests using the WordPress HTTP API
  • Creating live Escrow.com transactions
  • Synchronizing provider status
  • Automatic transaction updates
  • Webhook support where available
  • Improved administrative monitoring

By establishing the API client first, these enhancements can be introduced incrementally without rewriting the payment workflow.


Conclusion

Lesson 125 represents an important architectural milestone for Flipnzee Auctions. Rather than jumping directly into live API integration, the plugin now adopts a layered design that separates business logic from external communication. This makes the codebase easier to maintain, easier to test, and well positioned for future integration with the Escrow.com REST API while preserving the existing transaction workflow.

https://github.com/SplendidDigital/flipnzee-auctions/releases/tag/lesson-125-stable

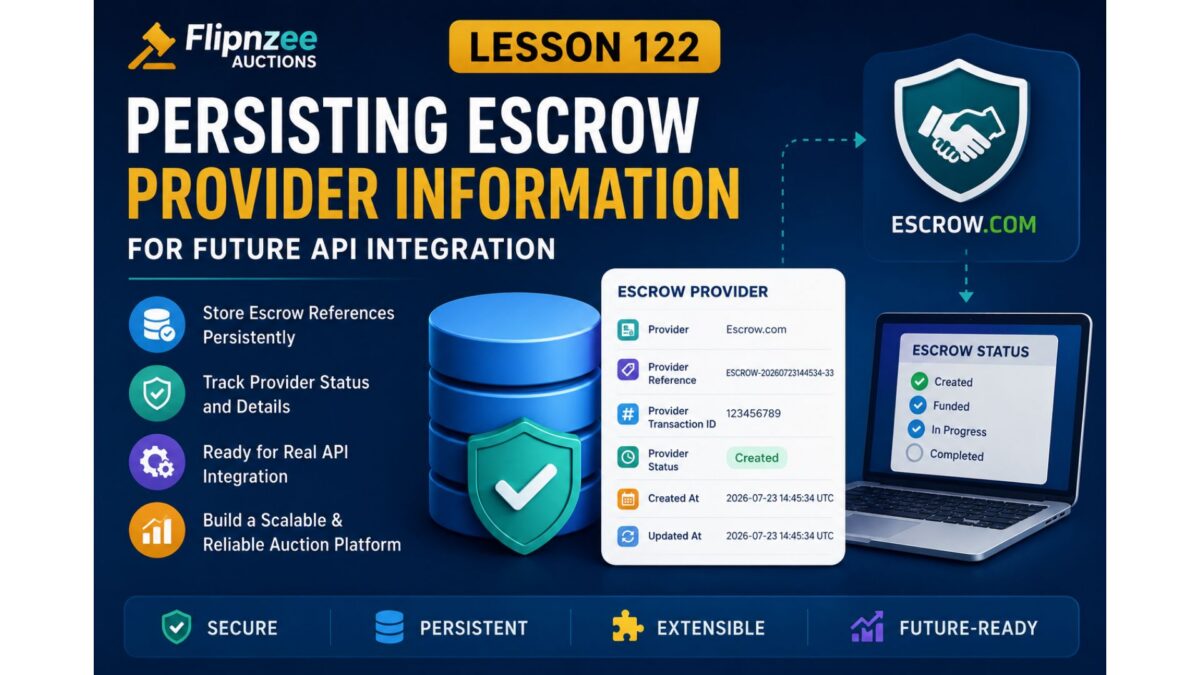
Lesson 122: Persisting Escrow Provider Information for Future API Integration

In the previous lesson, Flipnzee Auctions introduced its first Escrow Provider Engine. Payment completion automatically created a simulated escrow transaction and generated a unique escrow reference.

While that proved the event-driven architecture worked, the generated reference only existed during execution. Once the request finished, there was no permanent record of the escrow transaction.

In this lesson, the plugin takes the next step by designing a persistent storage strategy for external providers.


Why Store Escrow Information?

Real-world escrow services return much more than a reference number.

An external provider may return:

  • Provider transaction ID
  • Escrow reference
  • Current escrow status
  • Creation timestamp
  • Last update timestamp
  • API response details
  • Provider-specific metadata

Without storing this information, the plugin would have no way to:

  • check escrow progress
  • synchronize status
  • reopen existing escrow transactions
  • display escrow details inside the admin panel

Persistence is therefore essential.


Objectives

By the end of this lesson the plugin architecture will support:

  • persistent escrow references
  • provider-specific transaction identifiers
  • provider status tracking
  • future API synchronization
  • support for multiple external providers

Thinking Beyond Escrow.com

Although Flipnzee Auctions is initially designed around Escrow.com, the architecture should never assume only one provider exists.

Instead of storing fields like:

escrow_reference
escrow_status

the plugin adopts more generic terminology.

For example:

provider
provider_reference
provider_transaction_id
provider_status

This makes the database independent of any specific vendor.

Future providers could include:

  • Escrow.com
  • custom enterprise escrow
  • regional payment escrow services
  • internal manual escrow workflows

Extending the Transaction Model

The transaction lifecycle now grows beyond internal auction information.

Auction
        │
        ▼
Transaction
        │
        ▼
External Provider
        │
        ▼
Escrow Workflow

Instead of treating external services as an afterthought, they become a first-class component of the transaction architecture.


Recommended Provider Fields

A professional transaction record may eventually include:

FieldPurpose
providerName of the provider
provider_referenceHuman-readable reference
provider_transaction_idExternal system ID
provider_statusCurrent provider status
provider_created_atProvider creation time
provider_updated_atLast synchronization
provider_responseRaw API response (optional)

Not every provider will use every field, but the structure remains flexible.


Keeping Responsibilities Separate

The Transaction Manager remains responsible for:

  • internal auction transactions
  • payment information
  • ownership workflow

The Escrow Provider becomes responsible for:

  • creating provider records
  • communicating with external APIs
  • interpreting provider responses
  • tracking provider-specific statuses

This clear separation keeps the plugin easier to maintain.


Future Synchronization

Creating an escrow transaction is only the beginning.

Eventually the plugin should support periodic synchronization.

Escrow Created
        │
        ▼
Store Provider Details
        │
        ▼
Scheduled Status Check
        │
        ▼
Retrieve Latest Status
        │
        ▼
Update Local Database

This enables administrators to see real-time escrow progress without manually checking the provider website.


Benefits of Persistent Storage

Persisting provider information allows administrators to:

  • search escrow transactions
  • troubleshoot failed payments
  • view escrow references
  • synchronize provider status
  • audit completed transactions
  • generate financial reports

These capabilities become increasingly valuable as transaction volume grows.


Preparing for API Integration

Most modern payment and escrow APIs follow a similar lifecycle:

  1. Create transaction
  2. Receive external reference
  3. Store the response
  4. Poll or receive status updates
  5. Finalize the transaction

Because Flipnzee Auctions now separates provider logic from transaction logic, integrating a live API becomes a matter of implementing provider-specific communication rather than rewriting the auction system.


Architectural Benefits

This lesson strengthens several important software engineering principles:

  • Separation of concerns
  • Single responsibility
  • Provider abstraction
  • Extensibility
  • Maintainability

By treating external providers as independent services, the plugin becomes easier to evolve as new payment technologies emerge.


What We Accomplished

In this lesson we:

  • designed a persistent model for external provider information
  • separated provider data from transaction data
  • prepared the database for long-term escrow tracking
  • laid the groundwork for status synchronization
  • ensured future provider integrations remain modular
  • continued evolving Flipnzee Auctions into a production-ready architecture

Looking Ahead

With provider persistence planned, the next stage is to build the synchronization layer that keeps local transaction records aligned with external escrow providers.

This will allow Flipnzee Auctions to automatically monitor escrow progress, refresh statuses, and provide administrators with an accurate, real-time view of every transaction without relying on manual updates.

Lesson 121: Building an Escrow Provider Engine for Flipnzee Auctions

As the Flipnzee Auctions plugin matures, the payment workflow is becoming more structured and event-driven. In previous lessons, payment completion triggered the transaction lifecycle, and ownership transfer records were automatically created.

In this lesson, the next major component is introduced: an Escrow Provider Engine.

Although this lesson uses a simulated provider instead of connecting to a real escrow service, it establishes the architecture required for integrating providers such as Escrow.com in the future.


Why an Escrow Provider?

High-value website and domain transactions require trust between buyers and sellers.

Rather than immediately transferring funds or ownership, an escrow service acts as a trusted intermediary by:

  • Holding buyer funds securely
  • Waiting until transfer conditions are satisfied
  • Releasing funds to the seller after successful delivery

Instead of hardcoding a specific provider throughout the plugin, Flipnzee Auctions now introduces an abstraction layer dedicated to escrow providers.


Objectives

By the end of this lesson the plugin will:

  • create an escrow transaction automatically after payment completion
  • generate a unique escrow reference
  • isolate escrow logic into its own provider class
  • keep transaction lifecycle independent from any specific provider
  • prepare the plugin for future Escrow.com API integration

Creating the Escrow Provider

A new provider class was introduced:

includes/
└── class-escrow-provider.php

The provider is intentionally lightweight.

Its responsibility is simply to manage escrow-related operations without affecting the transaction manager or ownership transfer logic.

Initialization is handled through:

Flipnzee_Escrow_Provider::init();

This keeps provider-specific functionality separated from the rest of the plugin.


Simulating Escrow Creation

Rather than connecting to a live API, the provider currently generates an internal escrow reference.

Example:

ESCROW-20260723144534-33

This combines:

  • current UTC timestamp
  • transaction ID

The resulting reference behaves similarly to what an external escrow provider would return after successfully opening an escrow transaction.


Connecting Escrow to the Transaction Lifecycle

Previously, payment completion created an ownership transfer record.

The workflow has now been extended.

Payment Completed
        │
        ▼
Transaction Lifecycle
        │
        ├────────► Create Ownership Transfer
        │
        ▼
Create Escrow Transaction
        │
        ▼
Generate Escrow Reference

This means escrow creation becomes an automatic consequence of payment completion.

No administrator intervention is required.


Event-Driven Architecture

One of the biggest improvements in this lesson is reinforcing an event-driven design.

Instead of directly calling escrow code from the payment page, the plugin continues using WordPress actions.

Payment Updated
        │
        ▼
flipnzee_payment_completed
        │
        ▼
Transaction Lifecycle Manager
        │
        ├────────► Transfer Manager
        │
        └────────► Escrow Provider

This approach offers several advantages:

  • lower coupling
  • easier testing
  • simpler future extensions
  • better maintainability

Why This Design Matters

Imagine replacing the simulated provider with:

  • Escrow.com
  • Stripe Escrow (if available)
  • custom enterprise escrow
  • another regional escrow service

The transaction lifecycle would remain unchanged.

Only the provider implementation would need to change.

That separation makes the architecture considerably more flexible.


Debugging the Workflow

During implementation, extensive logging was added to verify each stage of the lifecycle.

The logs confirmed:

Payment status updated

↓

Payment completed action fired

↓

Transaction lifecycle started

↓

Ownership transfer created

↓

Escrow provider invoked

↓

Escrow reference generated

This confirmed that the entire workflow executes exactly as intended.

After validation, temporary debugging hooks were removed while retaining useful lifecycle logging for development.


Current Escrow Flow

The payment pipeline now behaves as follows:

Buyer submits payment
        │
        ▼
Administrator verifies payment
        │
        ▼
Payment Completed
        │
        ▼
Transaction Lifecycle Manager
        │
        ├────────► Ownership Transfer
        │
        └────────► Escrow Provider
                        │
                        ▼
              Escrow Reference Created

This creates a clean foundation for integrating real external services.


What We Accomplished

In this lesson we successfully:

  • created the Escrow Provider class
  • initialized the provider during plugin bootstrap
  • integrated escrow creation into the transaction lifecycle
  • generated simulated escrow references
  • maintained loose coupling through WordPress actions
  • validated the complete workflow using event-driven architecture
  • prepared the plugin for real escrow provider integration

Looking Ahead

The current provider generates simulated escrow transactions.

In the next lessons, the plugin will evolve further by storing provider information in the database, tracking escrow status, and eventually communicating with real escrow APIs.

By introducing the provider abstraction now, future integrations can be added without restructuring the payment lifecycle.

This is one of the key architectural milestones in transforming Flipnzee Auctions from a simple auction plugin into a professional platform for buying and selling websites, domains, and digital assets.

https://github.com/SplendidDigital/flipnzee-auctions/releases/tag/lesson-121-stable

Lesson 121: Designing the Escrow Provider Engine

Series: Building Flipnzee Auctions – From Prototype to Production
Lesson: 121


Introduction

One of the primary objectives of Flipnzee Auctions has always been to facilitate the sale of valuable digital assets such as websites, domains, SaaS applications, WordPress plugins, and online businesses.

Unlike physical products, transferring ownership of a digital business involves several coordinated steps:

  • Buyer submits payment
  • Seller receives confirmation
  • Website files are transferred
  • Database is migrated
  • Domain ownership changes
  • Buyer verifies successful delivery

For transactions involving significant amounts of money, both parties require confidence that the process is secure and fair.

This is precisely the problem that professional escrow services solve.

In this lesson, Flipnzee Auctions begins integrating with external escrow providers by introducing a dedicated Escrow Provider Engine.

Rather than hardcoding support for a single provider, the plugin will establish a generic architecture capable of supporting multiple external transaction providers in the future.


Why Not Hardcode Escrow?

A common mistake during plugin development is embedding provider-specific code directly into payment or transaction managers.

For example:

if provider == Escrow.com
    ...
else if provider == Stripe
    ...
else if provider == PayPal
    ...

As additional providers are added, the code becomes increasingly difficult to maintain.

Instead, Flipnzee Auctions will treat every provider as an interchangeable component.


The Provider Architecture

The plugin already includes an External Provider Manager introduced in previous lessons.

Lesson 121 builds upon that foundation.

The architecture becomes:

Auction

↓

Transaction

↓

Transaction State

↓

External Provider Manager

↓

Escrow Provider

↓

Escrow.com

Instead of communicating directly with Escrow.com, the transaction lifecycle communicates with the External Provider Manager.

The manager then delegates responsibility to the appropriate provider.


Responsibilities of the Escrow Provider

The Escrow Provider will eventually manage tasks such as:

  • Creating an escrow transaction
  • Recording provider references
  • Tracking escrow status
  • Updating transaction states
  • Storing escrow URLs
  • Synchronizing payment progress
  • Logging provider activity

The provider should never contain business rules unrelated to Escrow.

Its responsibility is simply translating Flipnzee Auctions’ workflow into the language understood by the external provider.


Separation of Responsibilities

Each component now has a clear responsibility.

Transaction Lifecycle Manager

Determines when an external provider should be invoked.


Transaction State Manager

Tracks the current lifecycle stage.


External Provider Manager

Determines which provider should handle the transaction.


Escrow Provider

Knows how to communicate with Escrow.com.


This separation dramatically improves maintainability.


Future Providers

Although Lesson 121 focuses on Escrow, the architecture is intentionally generic.

Future providers may include:

  • Escrow.com
  • Stripe
  • PayPal
  • Wise
  • Payoneer
  • Coinbase Commerce
  • Binance Pay
  • Manual Bank Transfer

Every provider should expose a consistent interface while implementing its own communication logic.


Benefits of a Provider Engine

By introducing a provider engine instead of provider-specific code, Flipnzee Auctions gains several advantages:

  • Cleaner architecture
  • Easier testing
  • Reduced coupling
  • Better extensibility
  • Simpler maintenance
  • Multiple payment workflows
  • Enterprise-ready integrations

Perhaps most importantly, administrators will eventually be able to switch providers without modifying the underlying transaction workflow.


Preparing for Real Escrow Integration

Initially, the provider engine will simulate interactions with Escrow.com.

This allows the plugin architecture to mature before introducing:

  • Authentication
  • API credentials
  • Webhooks
  • Callback verification
  • Live transaction synchronization
  • Production error handling

Once these foundations are complete, replacing simulated responses with real API calls becomes significantly easier.


Looking Ahead

In the implementation lesson, we will begin constructing the Escrow Provider Engine by:

  • creating a dedicated Escrow Provider class
  • registering it with the External Provider Manager
  • simulating escrow transaction creation
  • storing provider references
  • connecting provider creation to transaction lifecycle events
  • preparing the plugin for future API communication

This marks the beginning of one of the most significant functional additions to Flipnzee Auctions: secure third-party transaction management through professional escrow services.

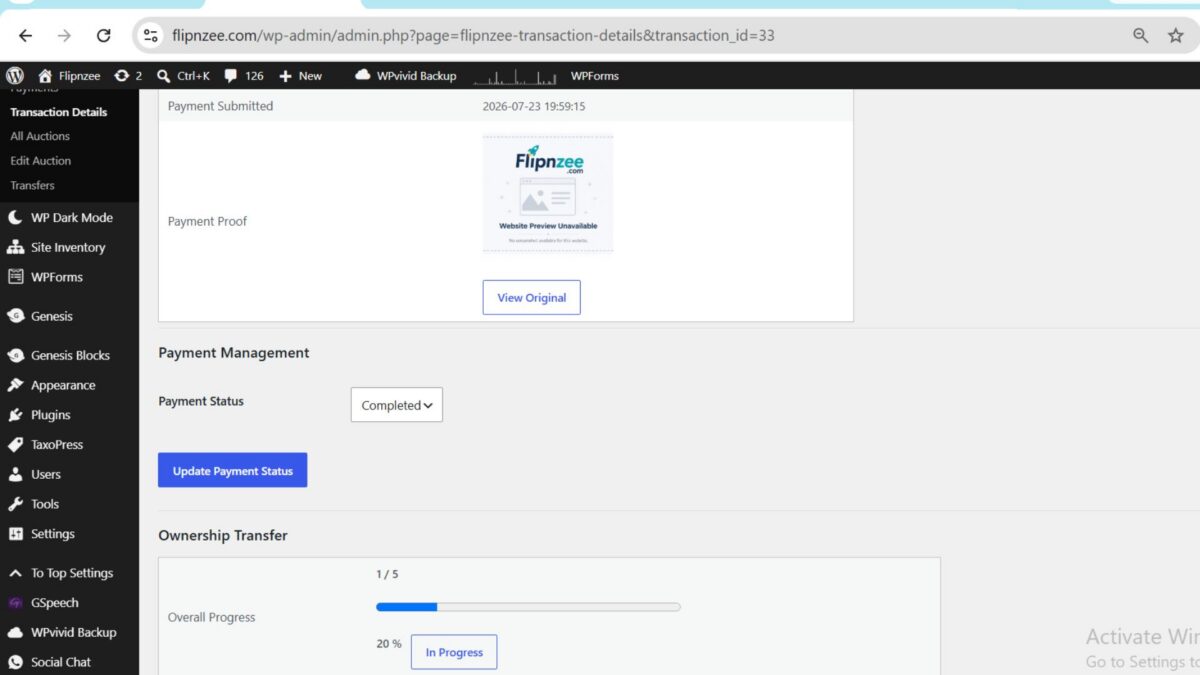
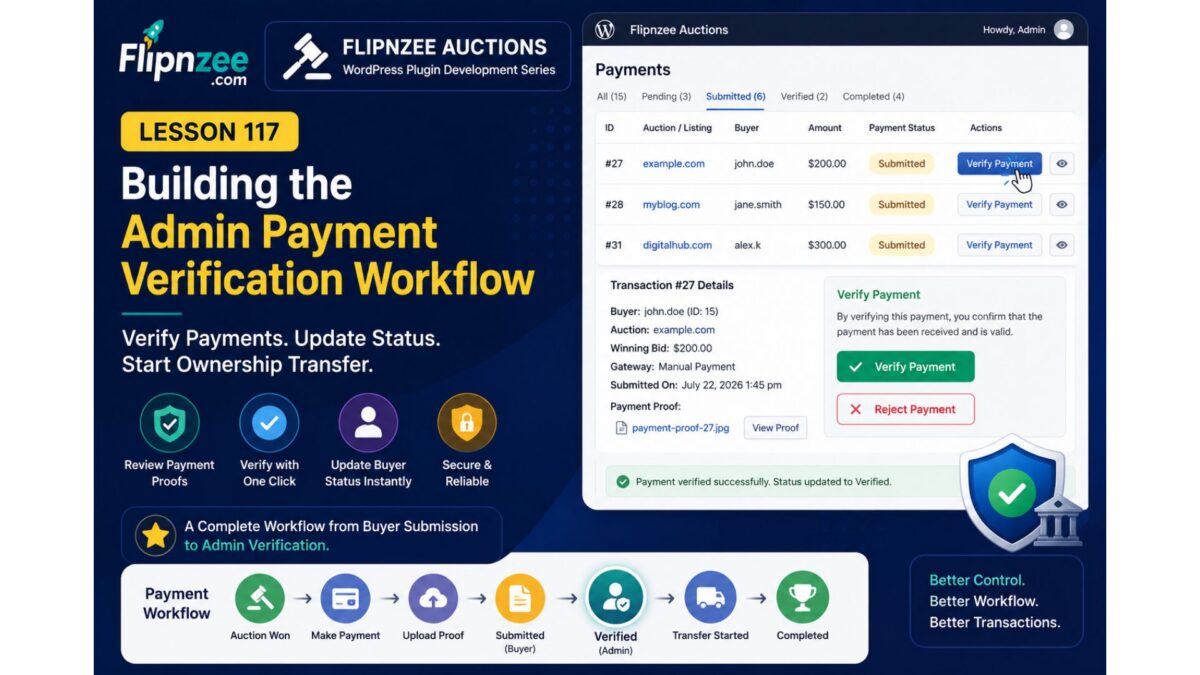
Lesson 117: Building the Admin Payment Verification Workflow

In the previous lesson, the buyer payment page was refactored into a clean, state-driven architecture. Buyers can now submit payment proof, and the interface automatically reflects the payment status.

However, one important piece of the workflow is still missing.

Once a buyer uploads proof of payment, an administrator needs a way to verify it before ownership transfer can begin.

In this lesson, we’ll implement the Payment Verification Workflow in the WordPress admin panel.


Where We Left Off

Our payment lifecycle currently looks like this:

Auction Won
        │
        ▼
Pending
        │
        ▼
Manual Payment
        │
        ▼
Upload Payment Proof
        │
        ▼
Submitted

At this point, the buyer has completed everything required.

The next step belongs to the administrator.


Current Problem

Although payment proofs are stored successfully, administrators cannot yet:

  • verify the payment
  • reject incorrect payment proofs
  • begin ownership transfer
  • update the buyer’s payment status

The transaction simply remains in the Submitted state.


Goal of This Lesson

We’ll extend the Admin Payments screen so administrators can manage submitted payments directly.

Each submitted transaction should display actions such as:

Verify Payment

Later lessons will add:

Reject Payment

Mark Transfer Started

Complete Transfer

New Payment Workflow

The buyer and administrator will now share responsibility for the payment lifecycle.

Buyer
──────────────

Win Auction
↓

Choose Payment Method
↓

Upload Payment Proof
↓

Submitted


Administrator
────────────────────────

Review Payment Proof
↓

Verify Payment
↓

Ownership Transfer
↓

Completed

Why Verify Instead of Mark Paid?

Payment verification represents a business decision rather than simply changing a status.

The administrator confirms that:

  • payment amount is correct
  • payment reference matches
  • uploaded proof is valid
  • payment has actually been received

Only after these checks should ownership transfer begin.


State Transition

We’ll introduce our first administrator-driven state transition.

Submitted
      │
      ▼
Verified

Later:

Verified
      │
      ▼
Completed

Because the buyer page is already state-driven, changing a single database value automatically changes the buyer experience.


Updating the Admin Payments Table

For submitted payments, we’ll add a new action button.

Example:

Transaction #27

Status:
Submitted

[ Verify Payment ]

Once clicked, the plugin will:

  • validate the request
  • verify the nonce
  • update payment status
  • refresh the admin screen

Database Changes

The database already stores the payment status.

No schema changes are required.

We’ll simply update:

payment_status

from

submitted

to

verified

This is one advantage of designing the payment system around discrete states.


Buyer Experience

The buyer does not need to perform any additional action.

Once the administrator verifies the payment, the payment page will automatically switch from:

Payment Submitted

to

Payment Verified

Ownership transfer has started.

No additional templates or pages are required.


Security Considerations

Administrative actions should always include:

  • capability checks
  • nonce verification
  • transaction validation
  • status validation

For example, only payments currently marked as Submitted should be eligible for verification.

Attempting to verify an already completed transaction should simply be ignored.


Benefits of This Design

Separating buyer actions from administrator actions keeps responsibilities clear.

Buyers can:

  • choose payment methods
  • upload payment proof
  • monitor progress

Administrators can:

  • verify payment
  • initiate ownership transfer
  • complete transactions

This separation also makes future integrations with automated gateways much easier.


What We’ll Build

By the end of this lesson, administrators will be able to:

  • view submitted payments
  • verify payments with one click
  • update the payment status
  • immediately update the buyer-facing payment page

Next Steps

Once payment verification is complete, the plugin will be ready for the next major milestone:

  • Ownership Transfer Workflow
  • Transaction Completion
  • Email Notifications
  • Additional Payment Gateways
  • Escrow.com Integration
  • Audit Logging

The payment system is gradually evolving from a simple upload form into a complete transaction management workflow that mirrors how real-world website sales are handled.

Lesson 114 – Refactoring the Buyer Payment Page with a State-Driven Interface

One of the goals of the Flipnzee Auctions project is to continuously improve the codebase while keeping the plugin functional at every stage. Rather than adding new features immediately, this lesson focuses on improving the buyer payment experience by making the interface respond to the current payment status.

Instead of always displaying payment options regardless of the transaction state, the payment page now renders different views depending on where the buyer is in the payment process.


Project Goals

In previous lessons, the payment workflow allowed buyers to:

  • View transaction details
  • Choose a payment gateway
  • View manual payment instructions
  • Upload payment proof

Although functional, the payment page continued to display payment controls even after payment proof had already been submitted. This could confuse buyers and encourage duplicate submissions.

The objective of this lesson was to make the payment page aware of the payment lifecycle.


Problems with the Previous Implementation

Previously, the payment page always rendered:

  • Transaction summary
  • Gateway selector
  • Payment buttons

regardless of whether the buyer had already submitted payment proof.

This produced an interface similar to:

Transaction Summary

↓

Payment Gateway Selection

↓

Manual Payment Instructions

↓

Upload Proof

↓

Payment Gateway Selection (still visible)

The buyer could continue interacting with payment controls that were no longer relevant.


Design Objective

The payment page should automatically display information that matches the transaction’s current state.

Instead of asking the buyer what to do next, the interface should guide them naturally through the workflow.


State-Driven Rendering

A new rendering controller was introduced:

self::render_payment_state(
    $transaction,
    $gateways
);

Instead of directly rendering the gateway selector, the payment page now delegates rendering to a state-aware method.


Payment States

The renderer evaluates the current payment status.

switch ( strtolower( $transaction->payment_status ) ) {

    case 'submitted':
        ...
        break;

    case 'verified':
        ...
        break;

    case 'completed':
        ...
        break;

    default:
        ...
}

Each payment status now has its own dedicated renderer.


Pending State

Pending transactions continue using the existing payment workflow.

private static function render_pending_state(
    $transaction,
    $gateways
) {

    self::render_gateway_selector(
        $gateways
    );

}

From the buyer’s perspective, nothing changes until payment has actually been submitted.


Submitted State

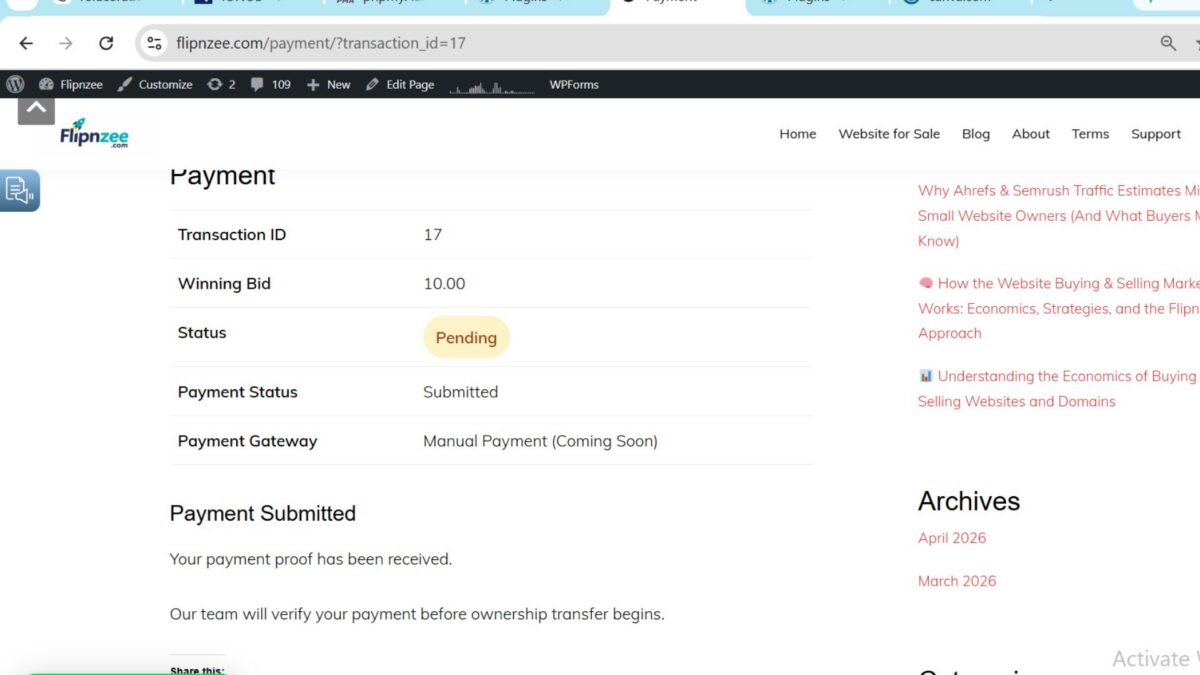
After payment proof is uploaded, the page now replaces the gateway selector with a confirmation message.

Example:

Payment Submitted

Your payment proof has been received.

Our team will verify your payment before ownership transfer begins.

This prevents unnecessary duplicate uploads while reassuring the buyer that their submission has been received.


Verified State

Future lessons will allow administrators to verify payments.

Once verification occurs, buyers will see a confirmation such as:

Payment Verified

Ownership transfer has started.

No additional payment actions are displayed.


Completed State

When ownership transfer has been completed, the payment page will display a completion message instead of payment controls.

Example:

Transaction Completed

Ownership has been transferred successfully.

This provides a natural end to the purchase workflow.


Transaction Summary

The transaction summary remains available throughout every stage.

Information displayed includes:

  • Transaction ID
  • Winning Bid
  • Transaction Status
  • Payment Status
  • Selected Payment Gateway

This allows buyers to monitor the progress of their purchase without losing important transaction details.


User Experience Improvements

Before this lesson:

Payment Summary

↓

Gateway Selection

↓

Manual Payment

↓

Upload Proof

↓

Gateway Selection still visible

After this lesson:

Payment Summary

↓

Pending

↓

Gateway Selection

↓

Upload Proof

↓

Submitted

↓

Waiting for Verification

↓

Verified

↓

Ownership Transfer

↓

Completed

The payment page now behaves more like a modern checkout portal, displaying only the actions that are appropriate for the buyer’s current stage.


Architectural Benefits

Although this lesson introduced only a small visible change, it significantly improved the overall design.

Benefits include:

  • State-driven rendering
  • Reduced UI clutter
  • Clear buyer guidance
  • Easier maintenance
  • Better separation between transaction information and payment workflow
  • Foundation for future payment gateways

Lessons Learned

One important lesson during development was recognizing the difference between refactoring and rewriting.

Several attempts were made to extract large portions of the payment processing logic into separate methods. While architecturally appealing, making too many structural changes at once introduced unnecessary complexity during debugging.

The final implementation adopted a more conservative approach by refactoring only the rendering layer while preserving the existing payment processing logic. This resulted in a cleaner user interface without risking regressions in the working payment workflow.

This incremental strategy is often preferable in production software, where maintaining stability is just as important as improving code quality.


Conclusion

Lesson 114 transformed the Buyer Payment Page from a static form into a state-driven interface that responds intelligently to the payment lifecycle.

While the underlying payment processing remains unchanged, buyers now receive a clearer and more intuitive experience, and the architecture is better prepared for future enhancements such as administrator payment verification and automated ownership transfers.

In the next lesson, we will build the Admin Payment Verification Workflow, allowing administrators to approve submitted payments and advance transactions to the ownership transfer stage.

lesson-114-stable: Lesson 114: Refactor buyer payment page with state-driven rendering

Lesson 113: Building the Payment Workflow Foundation

In the previous lessons, auctions could successfully determine a winner and create a transaction. However, there was still no mechanism for the buyer to complete payment or for the marketplace to track payment progress.

This lesson introduces the payment workflow foundation for Flipnzee Auctions.

Rather than integrating directly with a payment provider immediately, the plugin now establishes a flexible payment architecture capable of supporting multiple providers in future releases while already allowing manual payment submissions.


Objectives

This lesson aimed to:

  • Create a buyer payment page
  • Support multiple payment providers
  • Introduce an External Provider architecture
  • Allow manual payment submissions
  • Upload payment proof
  • Prepare the plugin for Escrow.com integration
  • Preserve compatibility with future gateways

External Provider Architecture

Instead of embedding payment provider logic directly inside the transaction manager, the plugin now introduces an independent provider layer.

Auction
    │
    ▼
Transaction
    │
    ▼
External Provider
    │
    ▼
Transfer

This separation keeps responsibilities clear.

Transactions continue to represent marketplace events, while external providers maintain information about third-party payment services.


Database Changes

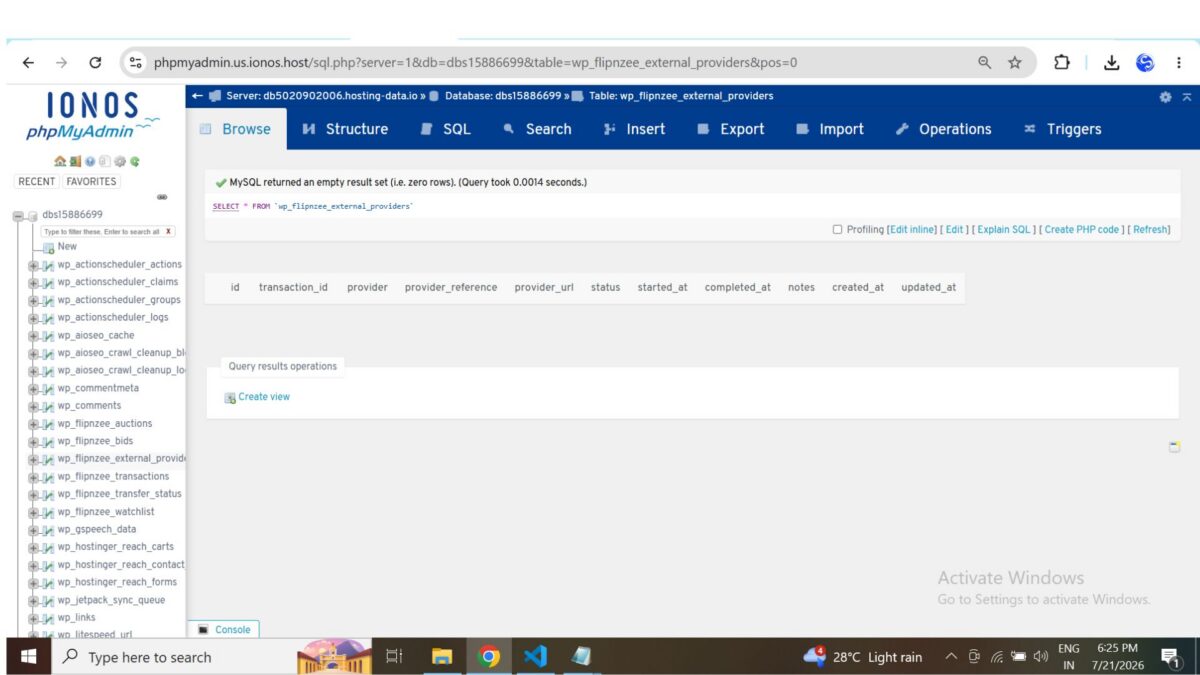
Lesson 113 introduces a dedicated table for provider-specific information.

wp_flipnzee_external_providers

The table stores:

  • Transaction ID
  • Provider name
  • External reference
  • External URL
  • Provider status
  • Notes
  • Timestamps

This allows each transaction to maintain its own provider lifecycle independently of the payment record itself.


Buyer Payment Page

A new frontend payment page was implemented.

The page now:

  • Displays transaction information
  • Shows the winning bid
  • Displays payment status
  • Displays the selected payment gateway

The payment page retrieves transactions securely using the transaction ID passed through the URL.


Supported Payment Providers

The gateway selector was designed from the beginning to support multiple providers.

Current options include:

  • Escrow.com (recommended)
  • Manual Payment
  • Stripe
  • PayPal
  • Razorpay
  • Cryptocurrency (USDT)

Only Manual Payment is currently active.

The remaining gateways are intentionally displayed as “Coming Soon,” allowing the interface to remain stable while future integrations are developed.


Manual Payment Workflow

The first complete payment workflow now exists.

After selecting Manual Payment, buyers receive:

  • Payment instructions
  • Reference number
  • Amount due
  • Payment status
  • Important reminders

The workflow is intentionally simple while providing a complete end-to-end payment process.


Uploading Payment Proof

Buyers can upload payment evidence directly from the payment page.

Supported formats include:

  • JPG
  • JPEG
  • PNG
  • PDF

Uploads are handled using the standard WordPress Media Library APIs rather than creating a custom upload system.

Once uploaded, the attachment ID is stored against the transaction for later verification.


Transaction Improvements

Several improvements were made to transaction handling.

The payment page now:

  • Retrieves transactions using the correct transaction ID
  • Reloads transactions after updates
  • Displays current payment information
  • Handles missing transactions gracefully

During development, a bug caused older transactions to appear because of confusion between multiple transaction records. This was resolved by ensuring that payment pages always retrieve the exact transaction referenced in the URL.


Debugging Improvements

Lesson 113 also included several reliability improvements.

These included fixing:

  • Object versus array access errors
  • Transaction retrieval bugs
  • Payment page rendering issues
  • Upload state refresh
  • Gateway display consistency

Additional logging was temporarily introduced during development to validate the payment workflow before being cleaned up.


Why This Architecture Matters

Although only Manual Payment is currently operational, the underlying architecture was designed for long-term extensibility.

Future payment providers can now plug into the same workflow without redesigning the payment page.

This makes it possible to introduce services such as Escrow.com, Stripe, PayPal, or cryptocurrency while keeping a consistent buyer experience.


Files Added

  • includes/class-external-provider-manager.php

Major Files Updated

  • includes/class-payment-page.php
  • includes/class-payment-manager.php
  • includes/class-transaction-manager.php
  • includes/class-database.php
  • includes/class-database-migration.php
  • flipnzee-auctions.php

What Comes Next

With the payment foundation complete, the next lesson will shift from adding functionality to improving architecture.

Lesson 114 will refactor the payment page into a state-driven workflow, allowing each payment stage—Pending, Submitted, Verified, and Completed—to present only the actions relevant to that stage. This will simplify future integrations with Escrow.com, admin verification, and automated ownership transfers.


Git Tag Recommendation

lesson-113-stable

I recommend tagging this release as lesson-113-stable. It represents the first complete payment workflow in Flipnzee Auctions and establishes the architecture that future payment providers and transfer features will build upon.

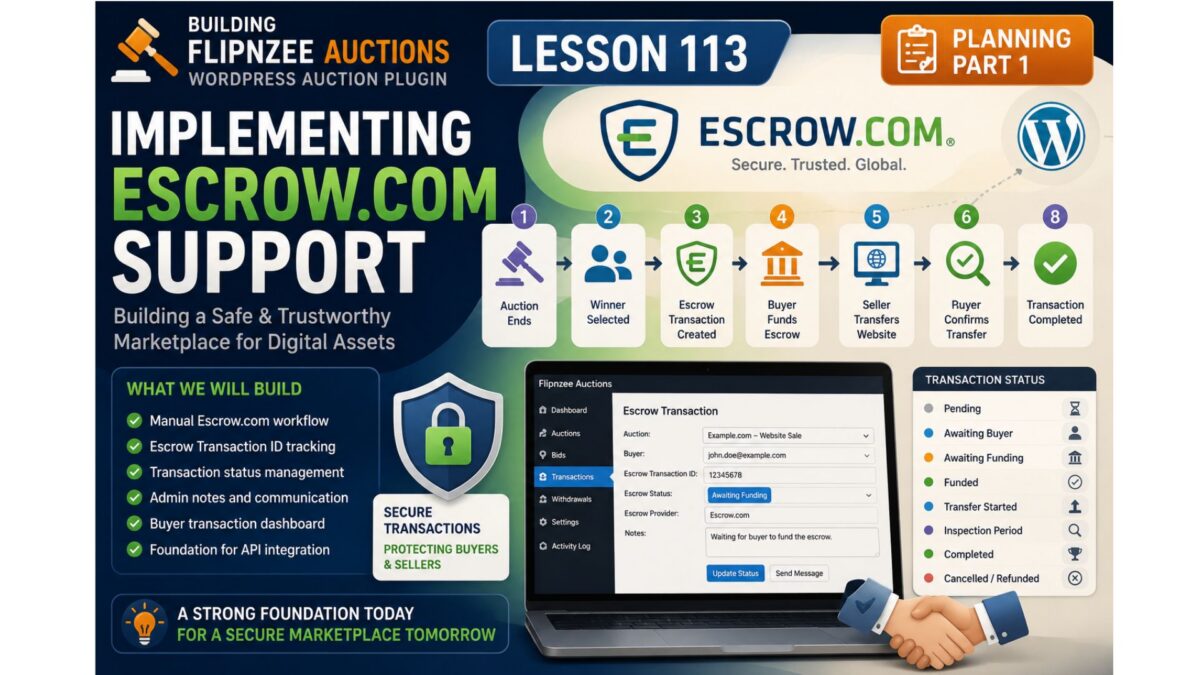
Building Flipnzee Auctions – Lesson 113 (Planning) – Implementing Escrow.com Support (Part 1)


Objective

In this lesson we’ll build the foundation for external transaction management.

Instead of trying to duplicate Escrow.com’s workflow, Flipnzee Auctions will simply track that an auction has entered an external transaction process.

This makes the plugin simpler, easier to maintain, and ready for future providers.


Philosophy

The plugin is responsible for:

✅ Auction

✅ Winner

✅ Transaction Record

✅ External Provider

✅ Completion Status

The plugin is not responsible for:

❌ collecting payment

❌ holding funds

❌ inspection

❌ disputes

❌ fee calculation

❌ releasing payment

Those remain the responsibility of the external transaction provider.


New Workflow

Auction Ends
        │
        ▼
Winner Selected
        │
        ▼
Create External Transaction
        │
        ▼
Transaction In Progress
        │
        ▼
Seller Receives Confirmation
        │
        ▼
Mark Transaction Completed
        │
        ▼
Auction Completed

Notice how much cleaner this is.


Database Changes

We’ll extend the existing transaction table.

New columns:

ColumnPurpose
providerEscrow.com
external_transaction_idTransaction reference
external_transaction_urlOptional link
statusIn Progress / Completed
started_atStarted date
completed_atCompletion date
notesInternal notes

No provider-specific columns.


Statuses

Instead of many workflow states we’ll begin with four.

Pending

↓

Initiated

↓

In Progress

↓

Completed

Simple.

Reliable.

Expandable.


Provider Architecture

Instead of

Escrow Manager

we’ll build

External Transaction

↓

Provider

↓

Escrow.com

Later we can support

Escrow.com

Escrow Europe

Sedo

Afternic

Dan.com

Manual Transfer

without changing the architecture.


Administration Screen

Each transaction will eventually contain something similar to:

Auction

Website.com

Winner

[email protected]

Provider

Escrow.com

External Transaction ID

E48329844

Started

21 July 2026

Status

In Progress

Notes

Buyer funded transaction.
Waiting for completion.

[Mark Completed]

Nothing more is needed.


Why We Aren’t Tracking Every Step

A common temptation is to mirror every stage of the escrow process.

For example:

Buyer Paid

↓

Funds Verified

↓

Seller Transfers

↓

Buyer Inspection

↓

Funds Released

Although these stages are useful within Escrow.com, they are not controlled by Flipnzee Auctions.

Attempting to reproduce them inside the plugin would require manual updates, duplicate information already maintained by the escrow provider, and increase the risk of inconsistencies.

Instead, Flipnzee Auctions records only what it can reliably know:

  • when an external transaction begins
  • which provider is being used
  • the provider’s transaction reference
  • whether the transaction is still in progress or has been completed

This keeps responsibilities clearly separated between the marketplace and the external escrow service.


Future API Integration

When we eventually integrate with the Escrow.com API, this design will remain unchanged.

Instead of an administrator manually updating the transaction status, the plugin will retrieve the latest information from the provider automatically.

Because the underlying architecture is provider-independent, future integrations with additional services will require minimal changes.


What We’ll Build in This Lesson

Rather than making isolated edits throughout the plugin, we’ll implement the feature as a cohesive unit.

The implementation will include:

  • Extending the transaction database schema with provider-independent fields.
  • Enhancing the Transaction Manager to create and manage external transaction records.
  • Updating the Payment Manager to recognise external providers.
  • Adding administrator controls for recording provider information, transaction references, and notes.
  • Displaying transaction progress within the existing administration interface.
  • Preparing the codebase for future API integration without introducing provider-specific dependencies.

Expected Result

After completing this lesson, a finished auction will be able to move into an external transaction workflow.

Administrators will be able to record the transaction provider, store the provider’s reference number, monitor whether the transaction is still in progress, and mark it as completed once the provider confirms that the sale has successfully concluded.

Although the financial transaction itself remains under the supervision of the external provider, Flipnzee Auctions will maintain an accurate record of every completed marketplace sale.


Git Commit

Lesson 113

Implement external transaction tracking

• extend transaction schema
• support external transaction providers
• add transaction references
• add transaction tracking
• prepare for Escrow.com integration

Before we write the code

I also want to make one additional architectural improvement, and I believe you’ll appreciate it.

At the moment, your plugin has Payment Manager and Transaction Manager. Once we introduce external transaction tracking, those responsibilities become distinct:

  • Payment Manager → Responsible for available payment methods (Escrow.com, Stripe, Manual, etc.).
  • Transaction Manager → Responsible for recording and managing the lifecycle of a completed auction transaction.

This separation follows the Single Responsibility Principle and will make future enhancements—such as API integrations or support for multiple providers—much easier to implement. Since we’re moving quickly toward a production-ready plugin, I recommend making this distinction now rather than after additional features have been added.