Lesson 43: Displaying Dynamic Auction Status Badges

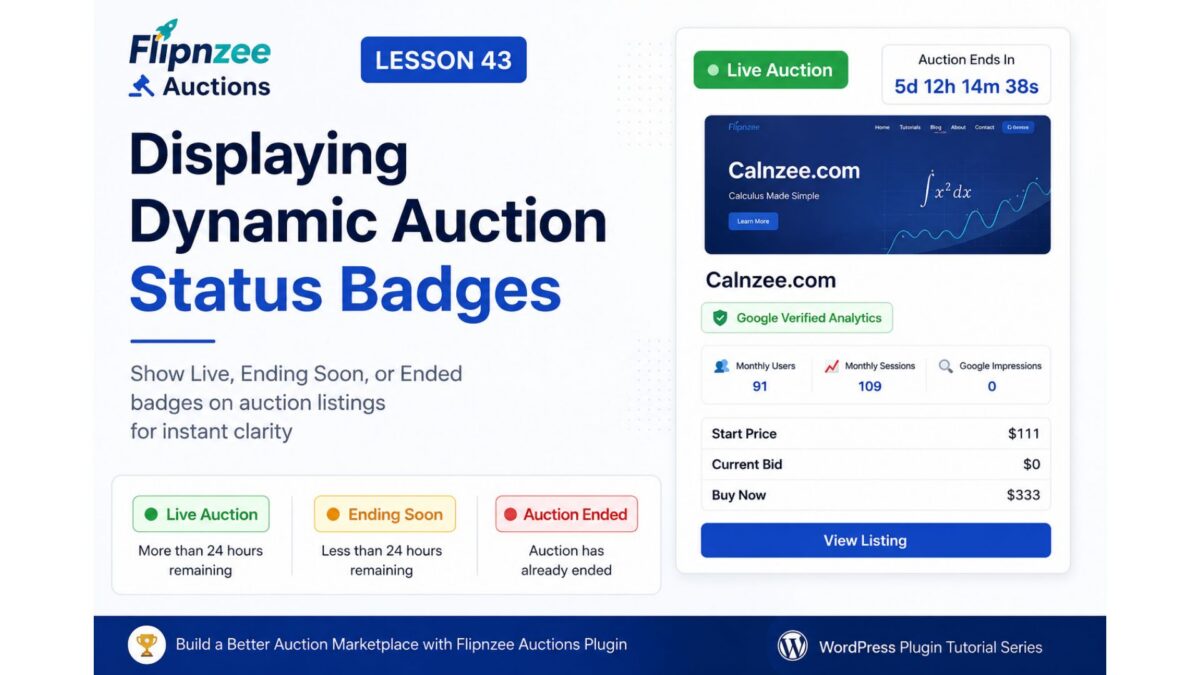
As the Flipnzee Auctions plugin continues to evolve, the auction cards are becoming much more than simple listings. Visitors can already see verified analytics, pricing information, and a live countdown timer. In this lesson, we’ll make the auction status even more obvious by introducing dynamic status badges.

Instead of requiring buyers to read the countdown or auction dates, a color-coded badge will immediately indicate whether an auction is currently active, approaching its end, or has already closed.


Why Status Badges Matter

People naturally respond to visual indicators faster than text.

Imagine browsing dozens of auction listings.

Without status badges, every listing appears similar.

With status badges, visitors can instantly identify auctions that deserve immediate attention.

For example:

🟢 Live Auction

🟡 Ending Soon

🔴 Auction Ended

These simple indicators improve usability and create a more engaging marketplace.


What You Will Learn

By the end of this lesson, you’ll know how to:

  • Compare auction end dates with the current time.
  • Determine the current auction status.
  • Display different badges based on auction status.
  • Apply different CSS styles for each badge.
  • Keep the logic reusable for future enhancements.

Badge Rules

For the first implementation, we’ll use three simple conditions.

Live Auction

Displayed when the auction is active and has more than 24 hours remaining.

Example:

🟢 Live Auction

Ending Soon

Displayed when less than 24 hours remain before the auction closes.

Example:

🟡 Ending Soon

This helps attract attention to auctions that are approaching their deadline.


Auction Ended

Displayed once the countdown reaches zero.

Example:

🔴 Auction Ended

This clearly communicates that bidding is no longer available.


Why Use Color?

The badges use colors that visitors already understand intuitively.

  • Green → Safe / Active
  • Yellow → Warning / Limited Time
  • Red → Closed / Expired

This allows buyers to recognize the auction state without reading additional text.


Planned Implementation

We’ll build this feature step by step.

Step 1

Determine the current auction status using PHP.

Step 2

Create a reusable badge variable.

Step 3

Display the badge above the auction title.

Step 4

Style each badge using CSS.

Step 5

Test all three auction states.


Expected Result

Each auction card will begin with a prominent status badge.

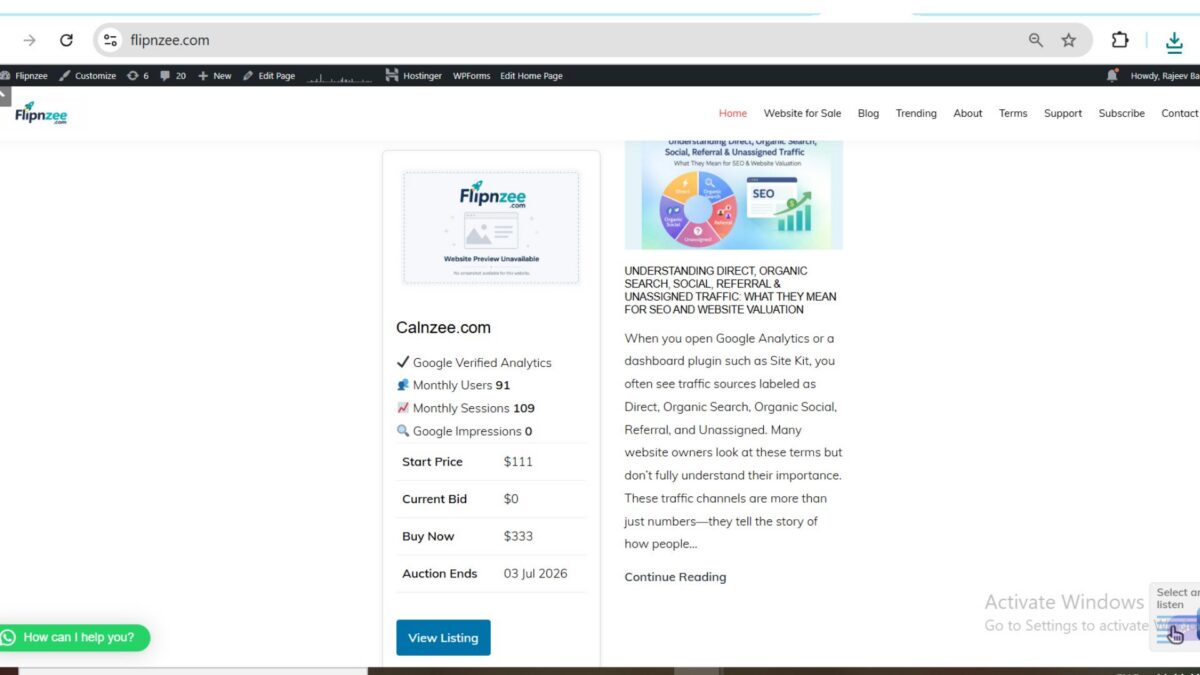
Example:

🟢 Live Auction

[ Featured Image ]

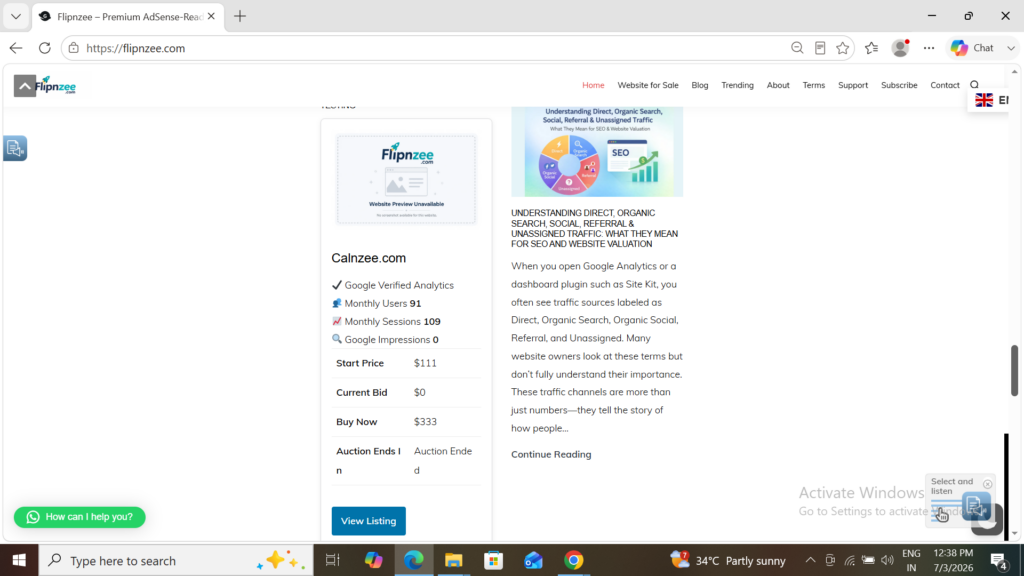
Calnzee.com

✔ Google Verified Analytics

👥 Monthly Users
📈 Monthly Sessions
🔍 Google Impressions

Start Price
Current Bid
Buy Now

Auction Ends In

5d 12h 14m 38s

View Listing

If the auction has less than one day remaining:

🟡 Ending Soon

If it has already expired:

🔴 Auction Ended

Looking Ahead

These badges are only the beginning.

Future versions of Flipnzee Auctions could introduce additional indicators such as:

  • ⭐ Featured Auction
  • 🔥 Popular Auction
  • 💰 Reserve Met
  • 🆕 Newly Listed
  • 🏆 Highest Bid Reached

Because the badge system will be reusable, new statuses can be added without redesigning the auction card.


What You’ll Gain

Status badges provide immediate visual feedback, helping buyers scan listings more efficiently and focus on auctions that require attention.

Combined with verified analytics, pricing, and the live countdown timer implemented in previous lessons, these badges move Flipnzee Auctions another step closer to becoming a polished, professional website marketplace.


Source Code

Available after implementation.


Next Lesson

In Lesson 43 (Implementation), we’ll calculate the auction status in PHP, display the appropriate badge on each auction card, and style it using CSS so that buyers can instantly distinguish between live, ending soon, and ended auctions.
Lesson 42 Implementation: Adding a Live JavaScript Auction Countdown to Flipnzee Auctions

One of the key characteristics of any modern auction website is a live countdown timer. Instead of showing visitors only the auction end date, a countdown creates urgency and helps buyers know exactly how much time remains before bidding closes.

In this lesson, the Flipnzee Auctions plugin was enhanced by replacing the static auction end date with a live JavaScript countdown timer that updates every second.


Objective

Convert this:

Auction Ends
03 Jul 2026

into something like:

Auction Ends In
5d 14h 32m 08s

and automatically display:

Auction Ended

once the auction expires.


What Was Implemented

The countdown feature required changes in three different areas of the plugin.

Step 1 — Create a JavaScript Countdown File

A new file was created:

assets/js/countdown.js

This script:

  • Finds every countdown on the page
  • Reads the auction end date
  • Calculates the remaining time
  • Updates every second
  • Automatically displays “Auction Ended” when time runs out

Step 2 — Pass the Auction End Date to JavaScript

Inside the shortcode output, the auction end date was stored inside a custom HTML data attribute.

Example:

<span
class="flipnzee-countdown"
data-end="2026-07-03 06:29:00">
Loading...
</span>

This allows JavaScript to read the date without embedding PHP inside the script.


Step 3 — Enqueue the JavaScript File

The plugin originally loaded only the frontend CSS.

It was updated to also load the countdown script.

Example:

wp_enqueue_script(
    'flipnzee-countdown',
    FLIPNZEE_AUCTION_URL . 'assets/js/countdown.js',
    array(),
    FLIPNZEE_AUCTION_VERSION,
    true
);

Loading the script in the footer ensures the HTML has already been generated before JavaScript executes.


Step 4 — Update the Countdown Every Second

JavaScript calculates the remaining:

  • Days
  • Hours
  • Minutes
  • Seconds

and refreshes the display every second using:

setInterval(updateCountdown, 1000);

The visitor therefore always sees an accurate countdown without refreshing the page.


Step 5 — Display “Auction Ended”

When the remaining time reaches zero, the script automatically changes the display to:

Auction Ended

instead of showing negative numbers.


Step 6 — Add Visual Styling

The countdown text was styled using CSS.

Normal countdown:

  • Blue text
  • Semi-bold

Expired auction:

  • Red text
  • Bold

Example CSS:

.flipnzee-countdown {
    color: #1d4ed8;
    font-weight: 600;
}

.flipnzee-countdown.ended {
    color: #dc2626;
    font-weight: 700;
}

This makes expired auctions immediately obvious to visitors.


Final Result

Each auction listing now displays:

✔ Google Verified Analytics

👥 Monthly Users
📈 Monthly Sessions
🔍 Google Impressions

Start Price
Current Bid
Buy Now

Auction Ends In
5d 08h 16m 42s

View Listing

Once the timer reaches zero, it automatically changes to:

Auction Ends In
Auction Ended

with the expired status highlighted in red.


What Was Learned

During this lesson, several important WordPress development concepts were covered:

  • Creating and organizing external JavaScript files
  • Loading JavaScript properly using wp_enqueue_script()
  • Passing PHP data to JavaScript through HTML data attributes
  • Using setInterval() to update content dynamically
  • Calculating countdown timers with JavaScript date functions
  • Enhancing user experience with conditional CSS classes

Why This Feature Matters

A live countdown is a standard feature on professional auction platforms because it creates urgency and encourages users to act before time runs out. Even without refreshing the page, visitors always know exactly how much time remains.

With this enhancement, the Flipnzee Auctions plugin feels significantly more interactive and professional, bringing it one step closer to a production-ready auction solution.


Download Source Code

Download the starting version of the plugin before the lesson:

Download the completed version after this lesson:

Complete Source Code

The complete source code for this lesson is available in the Flipnzee Auctions GitHub repository and reflects the changes made to implement the live JavaScript auction countdown.

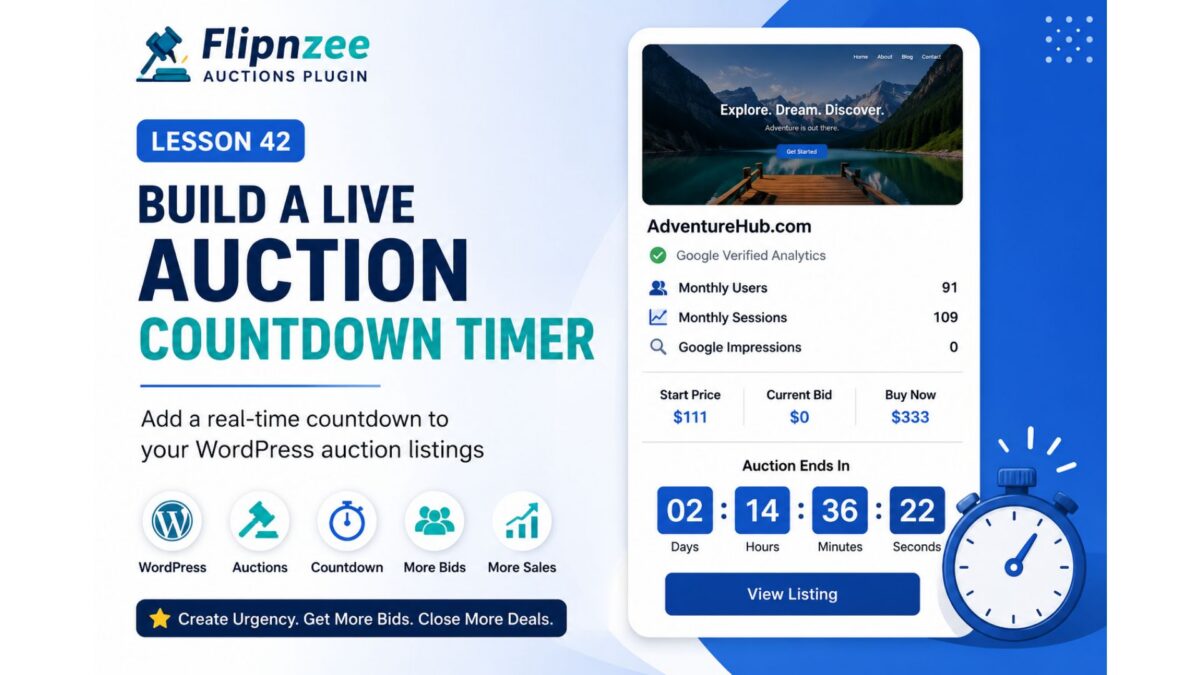
Lesson 42: Build a Live Auction Countdown Timer in Your WordPress Auction Plugin

One of the defining features of any auction platform is a live countdown timer. Buyers naturally pay more attention when they can see exactly how much time remains before an auction closes. A countdown also creates urgency, encouraging users to place bids before time runs out.

In this lesson, we’ll enhance the Flipnzee Auctions plugin by replacing the static auction end date with a dynamic countdown timer that updates every second.


What You Will Build

Instead of displaying:

Auction Ends
03 Jul 2026

the auction card will display something like:

Auction Ends In

2 Days
14 Hours
36 Minutes
22 Seconds

When the auction expires, the countdown will automatically change to:

Auction Ended

without requiring the page to reload.


Why This Feature Matters

A live countdown provides several advantages:

  • Creates urgency among buyers.
  • Makes auctions feel active and dynamic.
  • Reduces confusion about auction closing time.
  • Improves user engagement.
  • Gives Flipnzee a more professional marketplace appearance.

Nearly every successful auction platform uses countdown timers because they encourage participation during the final hours of an auction.


What You Will Learn

In this lesson, you’ll learn how to:

  • Pass PHP date values to JavaScript.
  • Create HTML placeholders for dynamic content.
  • Write JavaScript countdown logic.
  • Calculate days, hours, minutes, and seconds.
  • Update the display every second.
  • Handle expired auctions gracefully.
  • Keep the implementation lightweight without external libraries.

Implementation Plan

We will complete this lesson in several small steps:

Step 1

Create a countdown placeholder inside the auction card.

Step 2

Pass the auction end time into a data attribute.

Step 3

Create a JavaScript file for countdown functionality.

Step 4

Calculate the remaining time.

Step 5

Refresh the timer every second.

Step 6

Display “Auction Ended” when time reaches zero.

Step 7

Style the countdown using CSS.


Expected Result

Every Flipnzee auction listing will display a real-time countdown similar to:

✔ Google Verified Analytics

👥 Monthly Users        91
📈 Monthly Sessions    109
🔍 Google Impressions    0

Start Price          $111
Current Bid            $0
Buy Now             $333

Auction Ends In

2d 14h 36m 22s

[ View Listing ]

As time passes, the countdown updates automatically without refreshing the page.


Developer Tips

  • Keep countdown calculations in JavaScript instead of PHP.
  • Use setInterval() to update once per second.
  • Always calculate using Unix timestamps to avoid formatting issues.
  • Stop the timer after the auction ends to reduce unnecessary processing.
  • Use CSS classes instead of inline styles for easier maintenance.
  • Ensure the timer respects the visitor’s local time zone by passing a standard date format such as ISO 8601.

Source Code

Available after implementation.


Coming Up Next

In Lesson 43, we’ll make the auction cards even more engaging by adding color-coded auction status badges such as:

  • 🟢 Live Auction
  • 🟡 Ending Soon
  • 🔴 Auction Ended

These visual indicators will help buyers instantly recognize the current state of every auction listing before opening the full listing page.

Lesson 41 Implementation: Adding a Verified Analytics Summary to Auction Cards


One of Flipnzee’s biggest goals is to help buyers make informed decisions. Instead of relying only on seller-provided information, auction cards should display trusted website metrics generated by the Flipnzee Analytics plugin.

In this lesson, the auction card was enhanced with a compact analytics summary that appears above the pricing information.

What was implemented

1. Added a “Google Verified Analytics” section

A new analytics block was inserted into the auction card layout. It retrieves analytics data from the Flipnzee Analytics plugin and displays it directly inside each auction listing.

The summary currently includes:

  • Monthly Users
  • Monthly Sessions
  • Google Impressions

This allows buyers to evaluate website performance without opening the full listing page.


2. Prevented PHP errors

During testing, a critical error occurred when analytics data was unavailable.

To make the shortcode more reliable, checks were added before accessing transient data so that missing analytics now safely display as zero instead of generating errors.

Example:

is_array( $main ) ? ( $main['users'] ?? 0 ) : 0

This makes the shortcode much more robust.


3. Improved terminology

Instead of generic labels, the metrics were renamed to better match buyer expectations.

Old labels:

  • Users
  • Sessions
  • Impressions

New labels:

  • Monthly Users
  • Monthly Sessions
  • Google Impressions

These names immediately communicate what the numbers represent.


4. Formatted values

Several presentation improvements were made:

  • Auction prices now display with a $ currency symbol.
  • Numeric values use WordPress number formatting functions.
  • Auction end dates are formatted into a clean, readable style instead of showing raw database values.

Example:

03 Jul 2026

instead of

2026-07-03 06:29:00

5. Styled the analytics section

A dedicated stylesheet was added for the analytics summary.

Visual improvements include:

  • Light blue background
  • Rounded corners
  • Consistent spacing
  • Professional typography
  • Improved alignment of labels and values

The “Google Verified Analytics” badge was also updated to better match Flipnzee’s branding.


Challenges encountered

While implementing the feature, several issues had to be resolved.

Browser and server caching

Initially, CSS changes appeared to have no effect. After investigation, the issue turned out to be cached styles rather than incorrect code.


CSS duplication

During testing, duplicate CSS rules accumulated inside frontend.css.

Although this did not break functionality, identifying duplicate rules helped keep the stylesheet cleaner for future development.


Defensive coding

The analytics block originally assumed that transient data always existed.

Adding validation around analytics arrays made the shortcode much safer and prevented runtime errors.


Result

Auction cards now present much more than just prices.

Each listing immediately communicates important website metrics before the visitor even opens the full listing page.

The card now combines:

  • Website preview
  • Verified analytics
  • Auction pricing
  • Auction end date
  • Call-to-action button

This creates a much stronger first impression for buyers and moves Flipnzee closer to becoming a marketplace that emphasizes verified website quality, not just website availability.

Download Source Code

Download the starting version of the plugin before the lesson:

Download the completed version after this lesson:


Key takeaway

A website buyer is purchasing more than a domain name—they are evaluating traffic, audience, and search visibility. By integrating verified analytics directly into auction cards, Flipnzee provides meaningful context that traditional website marketplaces often require users to discover manually.


Next Lesson: Lesson 42 – Adding a Live Auction Countdown Timer

In the next lesson, we’ll implement a dynamic countdown timer that shows exactly how much time remains before an auction ends, creating urgency and improving the overall auction experience.

Lesson 41: Displaying Verified Analytics on Auction Cards

One of Flipnzee’s biggest advantages over traditional website marketplaces is that every listing can display verified Google Analytics and Google Search Console data. Instead of asking buyers to trust screenshots or seller claims, Flipnzee can present real performance metrics directly from the website owner.

In this lesson, we’ll begin displaying selected analytics directly on each auction card, giving buyers valuable insights before they even open the full listing page.


Why Show Analytics on the Auction Card?

Most website marketplaces display only basic information:

  • Website name
  • Asking price
  • Category
  • Description

A buyer must open each listing individually before discovering whether the website actually has visitors.

Flipnzee can do better.

Since each listing already has verified analytics available through the Flipnzee Analytics plugin, we can surface the most important metrics directly within the marketplace.


The Buyer Experience

Imagine browsing dozens of websites for sale.

Instead of seeing this:

Calnzee.com

Start Price: $111
Current Bid: $0
Buy Now: $333

buyers will see something like:

Calnzee.com

✔ Google Verified Analytics

👥 Users...............210
📈 Sessions...........443
🔍 Impressions.......555

Start Price..........$111
Current Bid...........$0
Buy Now..............$333

Within seconds, buyers can identify listings that are already attracting visitors.


Why This Is Different

Many marketplace platforms rely entirely on information entered manually by the seller.

That means buyers often wonder:

  • Are these traffic numbers genuine?
  • Were the screenshots edited?
  • Is the data recent?

Flipnzee takes a different approach.

Analytics are pulled automatically from the connected Google Analytics and Google Search Console properties, helping reduce reliance on manually entered statistics.


Which Metrics Should Be Displayed?

The goal is not to overwhelm visitors with dozens of statistics.

Instead, show only a few headline metrics.

A good starting point is:

  • Users
  • Sessions
  • Google Impressions

These three values provide a quick overview of a website’s activity and search visibility.

The complete analytics dashboard remains available on the individual listing page.


Keep the Auction Card Simple

Think of the auction card as a preview.

It should answer one question:

“Is this listing worth opening?”

If the answer is yes, the visitor clicks View Listing to explore the complete analytics dashboard.

This creates a natural flow:

Marketplace

↓

Auction Card

↓

Listing Page

↓

Verified Analytics

↓

Place Bid

Avoid Information Overload

Showing every available metric on the auction card would make it difficult to scan.

For example, displaying all of these at once would quickly become cluttered:

  • Users
  • Sessions
  • Returning Visitors
  • Average Session Duration
  • Pages per User
  • Live Users
  • Countries
  • Cities
  • Keywords
  • Traffic Sources
  • Impressions
  • Clicks
  • Indexed Pages

Instead, the marketplace should provide a concise summary, while the listing page remains the place for detailed analysis.


Future Enhancements

As Flipnzee evolves, additional indicators can be introduced without overcrowding the card.

Examples include:

  • Google Verified badge
  • Live visitors indicator
  • Growth percentage
  • Auction ending soon badge
  • Recently updated analytics timestamp
  • Mobile-friendly metric icons

These enhancements can gradually enrich the browsing experience while keeping the interface clean.


What We Learned

One of Flipnzee’s strongest competitive advantages is its ability to present verified website performance, not just seller-provided descriptions.

By displaying a few key analytics directly on the auction card, buyers can evaluate listings more quickly and confidently, while the full listing page continues to provide comprehensive insights.

This approach helps transform the marketplace from a simple directory of websites into a data-driven platform where informed decisions can be made at a glance.


Next Lesson

In Lesson 41 (Implementation), we’ll modify the auction card shortcode to retrieve selected metrics from the connected Flipnzee Analytics plugin and display them alongside the auction details, creating the first analytics-powered marketplace cards.

Lesson 40 (Implementation): Improving Auction Card Readability with Better Formatting


In the previous lesson, the auction card displayed all the required information, but the layout looked more like raw data than a professional marketplace listing. In this implementation, the auction card was refined to improve readability and give visitors a cleaner browsing experience.


What We Wanted to Improve

The original auction card displayed:

  • Prices without a currency symbol
  • Auction end date in raw database format (YYYY-MM-DD HH:MM:SS)
  • Labels and values that were difficult to scan quickly

The objective was to make the card resemble a professional online marketplace.


Step 1: Improve the Auction Details Layout

The auction details were converted into a definition list (<dl>), making the labels and values much easier to align.

Instead of using several independent paragraphs, the HTML now groups related information together.

Example:

<dl class="flipnzee-auction-meta">

    <dt>Start Price</dt>
    <dd>...</dd>

    <dt>Current Bid</dt>
    <dd>...</dd>

    <dt>Buy Now</dt>
    <dd>...</dd>

    <dt>Auction Ends</dt>
    <dd>...</dd>

</dl>

This produces a much cleaner appearance.


Step 2: Format Currency Values

Instead of printing plain numbers such as

111
333
0

the values are now formatted using WordPress’s localization function.

Example:

<?php echo esc_html( '$' . number_format_i18n( $auction['start_price'], 0 ) ); ?>

Similarly,

<?php echo esc_html( '$' . number_format_i18n( $auction['current_bid'], 0 ) ); ?>

and

<?php echo esc_html( '$' . number_format_i18n( $auction['buy_now_price'], 0 ) ); ?>

Now the auction card displays

$111
$0
$333

which immediately looks more professional.


Step 3: Display a Friendly Auction End Date

Previously, the auction end date appeared exactly as stored in the database.

Example:

2026-07-03 06:29:00

A visitor does not need to see the database timestamp.

Instead, the value is formatted before displaying it.

<?php
echo esc_html(
    date_i18n(
        'd M Y',
        strtotime( $auction['auction_end'] )
    )
);
?>

The visitor now sees

03 Jul 2026

which is much easier to read.


Step 4: Style the Definition List

CSS was added to create two neat columns.

Example:

.flipnzee-auction-meta {
    display: grid;
    grid-template-columns: 1fr auto;
    gap: 12px 20px;
}

.flipnzee-auction-meta dt {
    font-weight: 600;
}

.flipnzee-auction-meta dd {
    margin: 0;
    text-align: right;
}

This aligns every label with its corresponding value.


Step 5: Keep the Call-to-Action Prominent

The View Listing button remains at the bottom of the card, giving visitors a clear next step.

The wording is intentional.

Rather than taking users directly to the website being sold, the button takes them to the listing page where they can review:

  • Verified analytics
  • Traffic statistics
  • Pricing
  • Auction details
  • Future bidding functionality

This avoids any confusion about where the visitor is being directed.


Result

The auction card now provides a much cleaner presentation.

Before:

  • Raw prices
  • Raw timestamps
  • Basic formatting

After:

  • Dollar-formatted prices
  • Human-readable auction dates
  • Better aligned labels and values
  • Improved visual hierarchy
  • More professional marketplace appearance

What We Learned

Small formatting improvements can significantly enhance the perceived quality of a marketplace.

Visitors usually decide within a few seconds whether a listing looks trustworthy. Clear prices, readable dates, and a well-organized layout contribute to a better user experience and help build confidence in the platform.


Source Code

The primary changes were made in:

  • includes/class-shortcodes.php
  • assets/css/frontend.css

Download Source Code

Download the completed version after this lesson:


Next Lesson

In Lesson 41, we’ll begin integrating Flipnzee Analytics into the auction cards themselves, displaying key verified metrics such as Users, Sessions, and Google Impressions directly on the marketplace. This will highlight one of Flipnzee’s unique advantages: allowing buyers to evaluate website performance before even opening the full listing page.

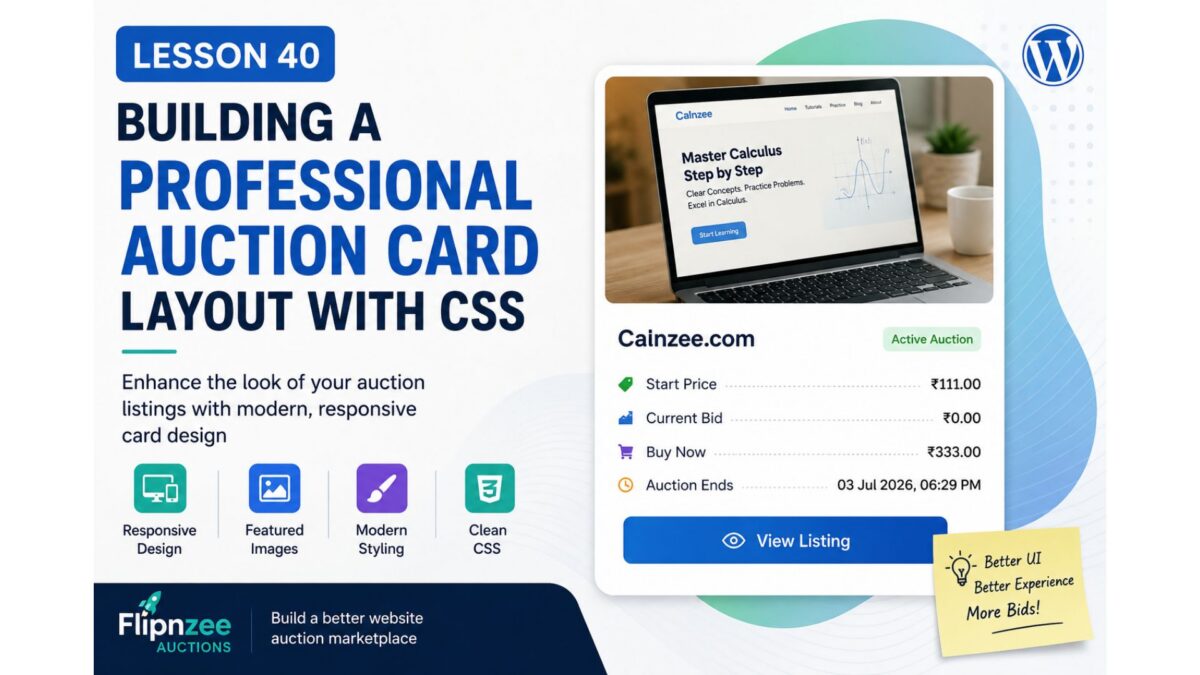
Lesson 40: Building a Professional Auction Card Layout with CSS

In the previous lesson, we transformed our auction listings from plain database records into meaningful website listings by displaying the Listing title, featured image, placeholder image, and a direct link to the Listing page.

Although the auction now contains all the essential information, its appearance is still fairly basic. The next logical step is to improve the user interface so visitors can browse auctions more comfortably and the marketplace begins to resemble a modern website sales platform.

In this lesson, we’ll focus entirely on presentation by styling our auction cards with CSS while keeping the underlying PHP logic unchanged.


What You’ll Learn

By the end of this lesson, you’ll know how to:

  • Style plugin output using a dedicated CSS file.
  • Improve the appearance of auction cards.
  • Make featured images responsive.
  • Add spacing and padding for better readability.
  • Create modern card layouts using borders, shadows, and rounded corners.
  • Improve typography and button styling.
  • Build a responsive layout that works well on desktops, tablets, and mobile devices.

Why This Matters

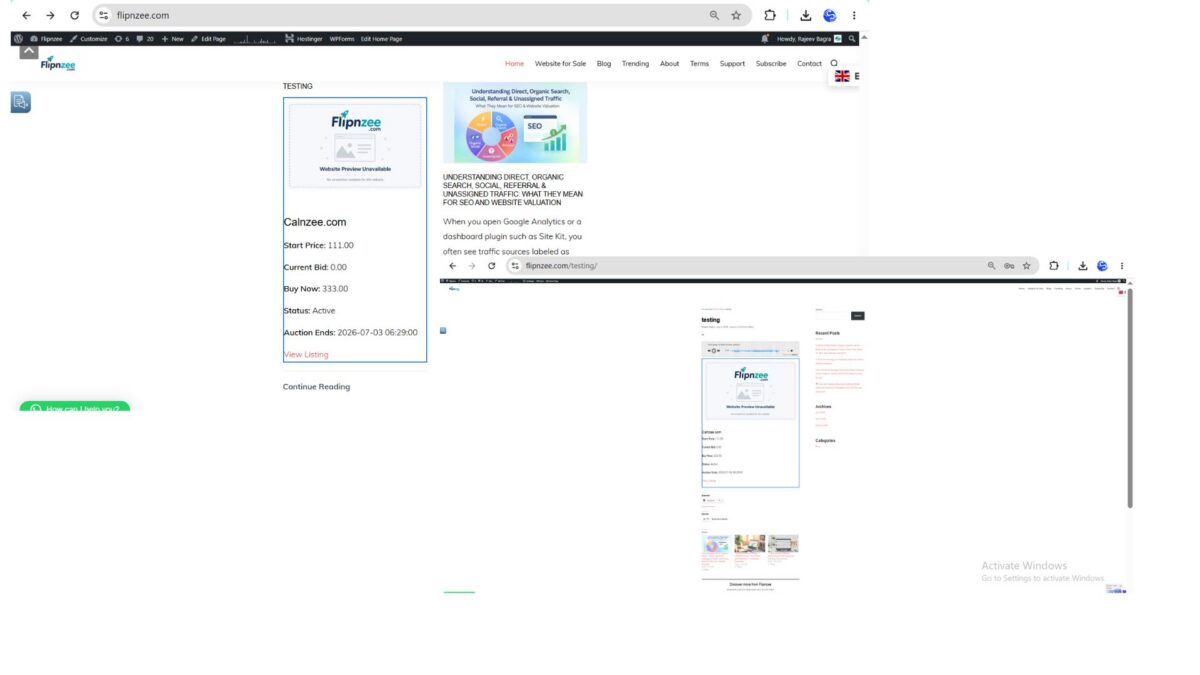
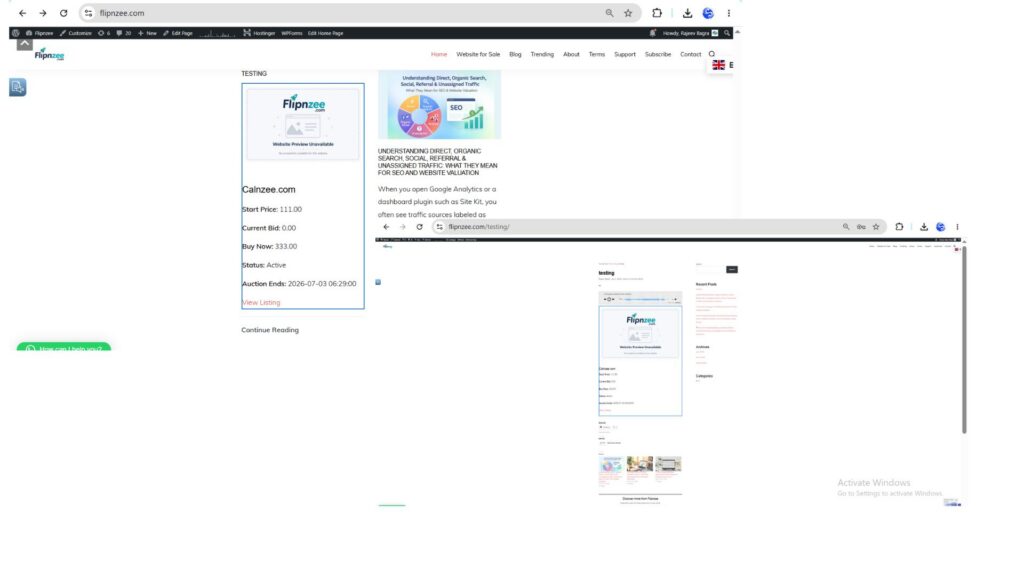
At the moment, an auction looks something like this:

+--------------------------------------+
| Screenshot                           |
|                                      |
| Calnzee.com                          |
|                                      |
| Start Price: ₹111                    |
| Current Bid: ₹0                      |
| Buy Now: ₹333                        |
| Status: Active                       |
| Auction Ends: 03 Jul 2026            |
|                                      |
| View Listing                         |
+--------------------------------------+

While functional, this still resembles a collection of HTML elements rather than a professional marketplace.

After completing this lesson, the goal is to achieve something closer to:

+--------------------------------------------------+
|               Website Screenshot                 |
|                                                  |
| Calnzee.com                                      |
|--------------------------------------------------|
| Start Price .............. ₹111                 |
| Current Bid .............. ₹0                   |
| Buy Now .................. ₹333                 |
| Auction Ends ............. 03 Jul 2026          |
|                                                  |
|            [ View Listing ]                      |
+--------------------------------------------------+

The cleaner presentation improves readability and creates a much stronger first impression for potential buyers.


Concepts Covered

During this lesson we’ll explore:

  • CSS organization for WordPress plugins
  • Responsive images
  • Card-based layouts
  • Padding and margins
  • Borders and border radius
  • Box shadows
  • Typography improvements
  • Button styling
  • Responsive design fundamentals

Implementation Steps

We’ll implement the lesson gradually:

  1. Style the auction card container.
  2. Make featured images responsive.
  3. Improve spacing between elements.
  4. Style headings and auction details.
  5. Enhance the “View Listing” button.
  6. Remove unnecessary visual clutter.
  7. Improve alignment of auction information.
  8. Add responsive styling for smaller screens.
  9. Test the layout on different devices.

Files We’ll Modify

assets/css/frontend.css

Only minor HTML adjustments may be made if required.

No database changes are required.


Difficulty Level

Intermediate

This lesson focuses primarily on frontend development and demonstrates how separating presentation from business logic leads to cleaner, more maintainable plugins.


Best Practices

Throughout this lesson we’ll continue following WordPress development best practices:

  • Keep PHP focused on generating HTML.
  • Place all presentation rules inside CSS.
  • Use reusable CSS classes.
  • Avoid inline styles.
  • Design with responsiveness in mind.
  • Improve the user experience without changing plugin functionality.

What You’ll Gain

After completing this lesson, your auction listings will no longer look like simple collections of database fields. Instead, they’ll resemble professional marketplace cards that are visually appealing, easier to browse, and ready for future enhancements such as countdown timers, bidding buttons, analytics badges, and seller information.

This lesson also establishes the visual foundation for future integration between the Flipnzee Auctions plugin and the Flipnzee Analytics plugin, allowing auction cards to evolve into rich previews of each website while keeping the detailed analytics available on the corresponding Listing page.

In the implementation that follows, we’ll enhance the stylesheet step by step and transform our auction cards into a polished marketplace interface without altering the underlying auction logic.

Lesson 39 Implementation – Display Listing Titles, Featured Images, Placeholder Images & View Listing Button

After creating the frontend auction shortcode in Lesson 38, visitors could finally see active auctions on the website. However, each auction was still presented as a simple list of database values. Instead of displaying a meaningful website title and image, the shortcode only showed the Listing ID, making the marketplace feel more like a database report than a professional auction platform.

In this implementation, we significantly improved the frontend by connecting our custom auction records with the existing Listing custom post type. This allows each auction to display the actual website title, featured image, and a direct link to its Listing page. We also laid the groundwork for future frontend styling by introducing a dedicated stylesheet and logical HTML structure.


What We Implemented

During this lesson we completed the following improvements:

  • Retrieved the associated Listing post using listing_id.
  • Verified the Listing exists before displaying it.
  • Replaced the Listing ID with the Listing title.
  • Displayed the Listing’s featured image.
  • Added a branded placeholder image when no featured image exists.
  • Created a dedicated assets/images folder.
  • Created a dedicated assets/css folder.
  • Added a frontend stylesheet.
  • Loaded the stylesheet using wp_enqueue_style().
  • Organized the HTML into thumbnail and content sections.
  • Added a View Listing button linking to the Listing page.

Step 1 – Retrieve the Listing Post

Our auction table stores only the Listing ID. To display information about the website, we first retrieved the corresponding WordPress post.

$listing = get_post( $auction['listing_id'] );

if ( ! $listing ) {
	continue;
}

If the Listing no longer exists, the shortcode simply skips that auction instead of generating errors.


Step 2 – Display the Website Title

Previously the shortcode displayed something similar to:

Listing #2222

We replaced this with:

echo esc_html( get_the_title( $listing ) );

Visitors now see the actual website title, for example:

Calnzee.com

This immediately makes the auction easier to understand.


Step 3 – Display the Featured Image

Each Listing already supports WordPress featured images.

We used:

has_post_thumbnail()

and

get_the_post_thumbnail()

to display the website screenshot above the title.

This transforms the auction from plain text into a visual listing.


Step 4 – Add a Placeholder Image

Not every Listing has a featured image.

Instead of leaving an empty space, we created:

assets/
└── images/
    └── placeholder.png

Whenever no featured image exists, the shortcode now displays this branded placeholder.

This keeps every auction card visually consistent.


Step 5 – Organize the HTML

Rather than placing everything directly inside the auction card, we separated the content into logical sections.

Thumbnail section:

flipnzee-auction-thumbnail

Content section:

flipnzee-auction-content

Although visitors won’t immediately notice this change, it makes future styling much easier.


Step 6 – Create a Frontend Stylesheet

To keep presentation separate from functionality, we created:

assets/
└── css/
    └── frontend.css

Instead of mixing inline styles with PHP, all future frontend styling will now be maintained inside this stylesheet.


Step 7 – Enqueue the Stylesheet

Creating a CSS file alone isn’t enough.

We registered it using:

wp_enqueue_style()

inside the main plugin file.

Because we had already defined:

FLIPNZEE_AUCTION_URL

and

FLIPNZEE_AUCTION_VERSION

loading the stylesheet became straightforward while following WordPress best practices.


Step 8 – Add a View Listing Button

Finally, we connected the Auctions plugin with our Listing pages.

Using:

get_permalink( $listing )

we generated a link directly to the Listing.

Visitors can now move from the auction summary to the complete Listing page where they can view:

  • Website description
  • Screenshots
  • Flipnzee Analytics dashboard
  • Traffic statistics
  • Additional website information

This creates a much smoother browsing experience.


Project Structure After This Lesson

Our plugin now contains the following frontend assets:

flipnzee-auctions/

assets/
│
├── css/
│   └── frontend.css
│
└── images/
    └── placeholder.png

includes/
└── class-shortcodes.php

This organization keeps the plugin scalable and easier to maintain.


Why This Implementation Matters

One of the biggest improvements in this lesson wasn’t simply displaying an image or title—it was establishing the relationship between two independent systems.

Our Auctions plugin stores only the Listing ID in its custom database table. Whenever the shortcode runs, it retrieves the corresponding WordPress Listing post to display additional information.

This approach avoids duplicating data and allows us to take advantage of WordPress features such as:

  • Post titles
  • Featured images
  • Permalinks
  • Future custom fields

By building on top of the Listing custom post type rather than storing duplicate information in the auction table, the plugin remains cleaner, more flexible, and easier to extend.


Tips & Best Practices

  • Store only the Listing ID in the custom auction table.
  • Always verify the Listing exists before displaying it.
  • Escape all output using WordPress escaping functions.
  • Keep images inside the plugin instead of relying on external placeholders.
  • Separate HTML structure from CSS styling.
  • Use WordPress constants for plugin paths and URLs.
  • Organize frontend assets into dedicated css and images folders.

What We Learned

This lesson demonstrated how a custom database table can work together with native WordPress posts.

Instead of treating auctions as isolated records, we linked each auction to its corresponding Listing, allowing us to reuse existing WordPress functionality while keeping the database simple.

The result is a much more professional-looking marketplace and a solid foundation for future enhancements.


Looking Ahead

In the next lesson, we’ll continue improving the frontend by transforming these functional auction cards into a polished marketplace interface. We’ll refine the layout, improve spacing and typography, make the cards responsive, and prepare the design for future features such as bidding buttons, countdown timers, and deeper integration with the Flipnzee Analytics plugin.

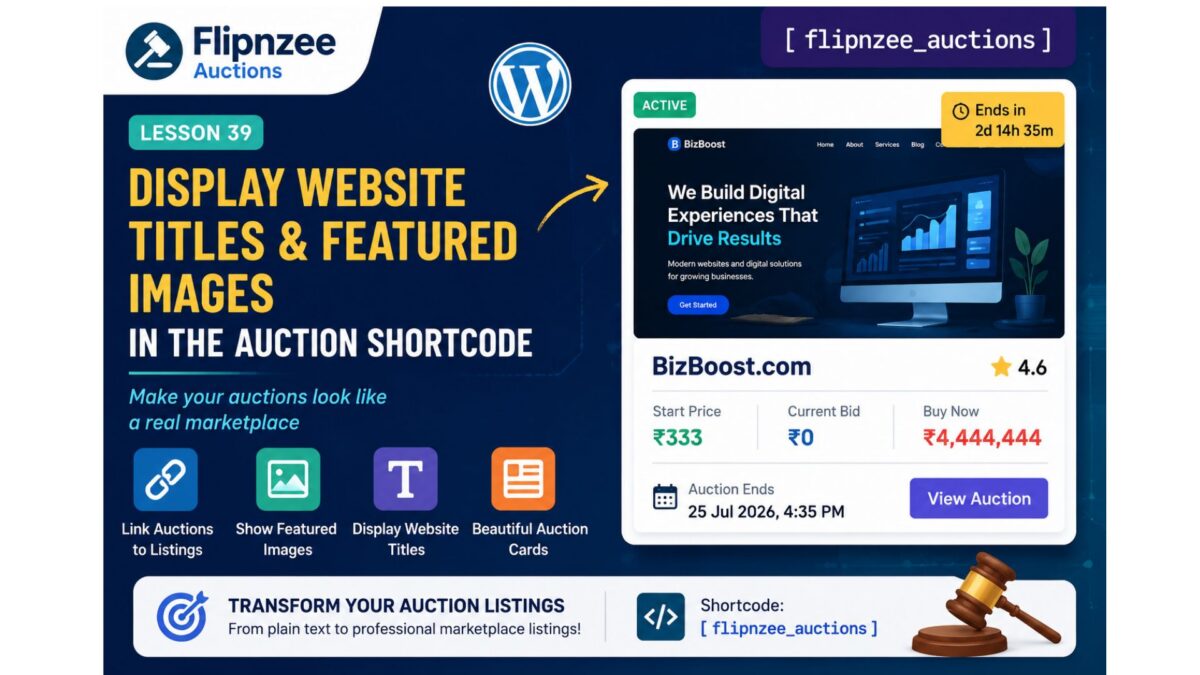
Lesson 39: Display Website Titles and Featured Images in the Auction Shortcode

After successfully displaying active auctions on the frontend in Lesson 38, our auction listings are still very plain. Visitors only see the Listing ID and auction details, which isn’t how a professional marketplace should look.

In this lesson, we’ll connect each auction to its corresponding WordPress Listing post and display the website’s title and featured image. This is an important milestone because our auction page will begin to resemble a real website marketplace instead of a simple database report.


What You’ll Learn

By the end of this lesson, you’ll know how to:

  • Retrieve the Listing post associated with an auction.
  • Display the website title instead of the Listing ID.
  • Show the Listing’s featured image.
  • Handle missing images gracefully.
  • Improve the overall appearance of the auction listing.

Why This Matters

Currently, visitors see something like:

Listing #2222

Start Price: ₹333

Current Bid: ₹0

Buy Now: ₹4,444,444

A professional marketplace should instead display something like:

+-------------------------------------------+
| [Featured Image]                          |
|                                           |
| MyBusinessSite.com                        |
|                                           |
| Start Price: ₹333                         |
| Current Bid: ₹0                           |
| Buy Now: ₹4,444,444                       |
| Auction Ends: 25 Jul 2026                 |
+-------------------------------------------+

This makes the auction much easier to browse.


Concepts Covered

In this lesson we’ll learn about:

  • get_post()
  • get_the_title()
  • has_post_thumbnail()
  • get_the_post_thumbnail()
  • Escaping output
  • Building reusable HTML

Implementation Steps

We will implement the lesson step by step:

  1. Retrieve the Listing post using listing_id.
  2. Verify the Listing exists.
  3. Display the website title.
  4. Display the featured image.
  5. Keep auction information below the image.
  6. Add basic HTML structure.
  7. Test the shortcode.

Expected Output

Instead of this:

Listing #2222
Start Price: 333
Current Bid: 0

Visitors will see something like:

[ Website Screenshot ]

MyBusinessSite.com

Start Price: ₹333
Current Bid: ₹0
Buy Now: ₹4,444,444
Auction Ends: 25 Jul 2026

Files We’ll Modify

  • includes/class-shortcodes.php

No database changes are required in this lesson.


Difficulty Level

Intermediate

This lesson introduces interaction between custom database tables and native WordPress posts, a common pattern in WordPress plugin development.


What You’ll Gain

By completing this lesson, you’ll move beyond simply displaying raw auction data. Your shortcode will start presenting auctions as attractive website listings, laying the foundation for future enhancements such as bidding buttons, countdown timers, reserve price indicators, seller information, and responsive auction cards.

In the next implementation, we’ll enhance the frontend so each auction begins to look like a polished marketplace listing rather than a collection of database fields.

Implementing Lesson 38: Creating Your First Frontend Auction Shortcode in the Flipnzee Auctions Plugin

After completing the backend auction management features in previous lessons, it was time to make our auction data visible to website visitors. In this lesson, we created our first frontend shortcode that retrieves active auctions from the database and displays them on any WordPress page or post.

Although the first version is intentionally simple, it establishes the foundation for building a professional auction marketplace.


What We Built

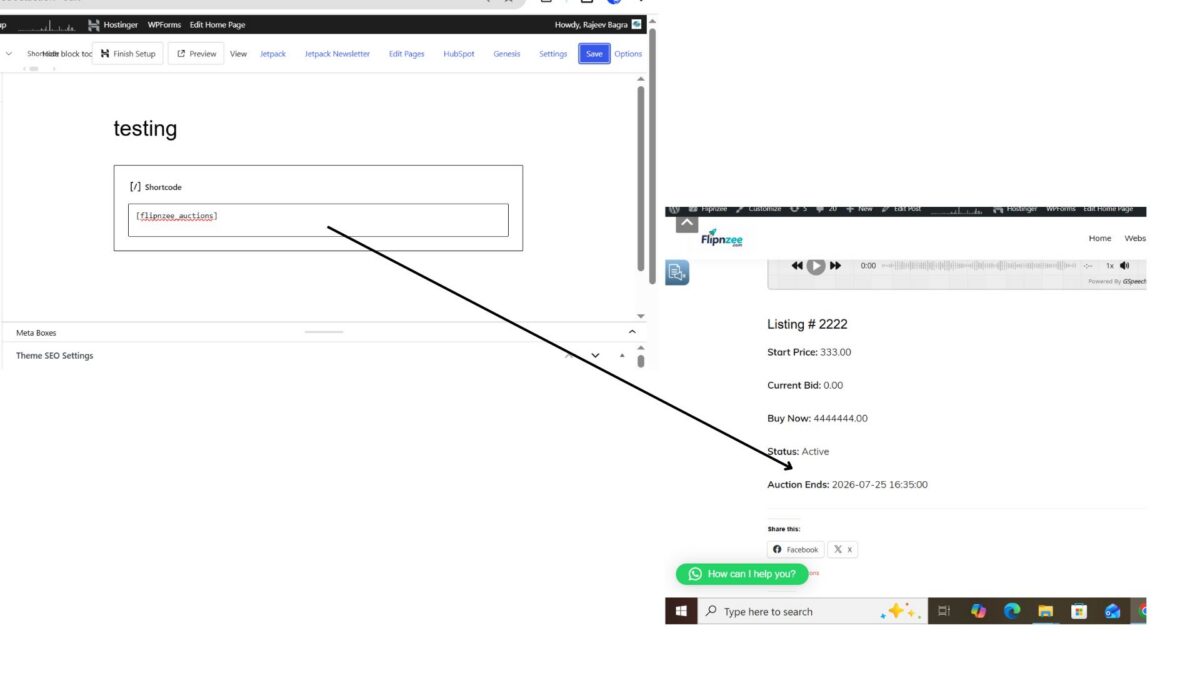
At the end of this lesson, visitors can insert the following shortcode into any page or post:

[flipnzee_auctions]

When the page is viewed, the plugin automatically retrieves all active auctions and displays information such as:

  • Listing ID
  • Start Price
  • Current Bid
  • Buy Now Price
  • Auction Status
  • Auction End Time

Step 1: Create a Shortcodes Class

Instead of placing shortcode logic inside the main plugin file, we created a dedicated class.

File created:

includes/class-shortcodes.php

This keeps the plugin organized and makes future shortcode development much easier.


Step 2: Register the Shortcode

Inside the class constructor we registered our shortcode.

add_shortcode(
    'flipnzee_auctions',
    array( $this, 'auction_list_shortcode' )
);

Now WordPress knows which function to execute whenever it encounters:

[flipnzee_auctions]

Step 3: Load the Shortcodes Class

Next, we loaded the new class from the main plugin file.

require_once FLIPNZEE_AUCTION_PATH . 'includes/class-shortcodes.php';

Then initialized it.

new Flipnzee_Shortcodes();

Without these two steps, WordPress would never register the shortcode.


Step 4: Retrieve Active Auctions

Inside the shortcode callback, we called the Auction Manager.

$auctions = Flipnzee_Auction_Manager::get_active_auctions();

This keeps all database operations inside the Auction Manager instead of mixing SQL with presentation logic.

Keeping responsibilities separate makes the plugin much easier to maintain.


Step 5: Handle Empty Results

If no active auctions exist, the shortcode returns a friendly message.

if ( empty( $auctions ) ) {

    return '<p>No active auctions found.</p>';
}

This provides a much better user experience than displaying an empty page.


Step 6: Loop Through Auctions

The shortcode loops through every active auction.

Example:

foreach ( $auctions as $auction ) {

    // Display auction details.
}

For each auction we displayed several fields stored in the database.


Step 7: Display Auction Information

The first version displays:

  • Listing ID
  • Start Price
  • Current Bid
  • Buy Now Price
  • Status
  • Auction End Date

Although simple, it proves that our shortcode successfully retrieves data from the database.


Step 8: Test the Shortcode

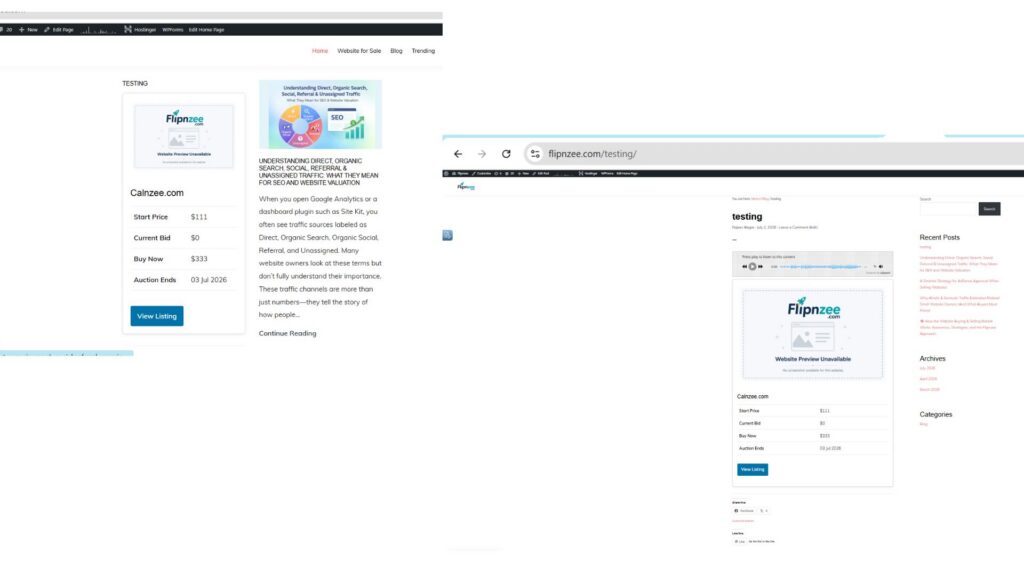
We created a temporary WordPress post named:

testing

Inside the post we inserted:

[flipnzee_auctions]

Initially the page displayed:

No active auctions found.

This was expected because every auction in the database still had the status:

draft

Step 9: Activate an Auction

For testing purposes, we manually changed one auction in phpMyAdmin.

status

draft
↓

active

After refreshing the page, the shortcode immediately displayed the auction.

This confirmed that:

  • the shortcode was registered correctly,
  • the database query worked,
  • the Auction Manager returned the correct records,
  • and the frontend output functioned as expected.

Final Result

The completed shortcode successfully displayed information similar to:

Listing #2222

Start Price: 333.00

Current Bid: 0.00

Buy Now: 4444444.00

Status: Active

Auction Ends:
2026-07-25 16:35:00

This marks the first working frontend feature of the Flipnzee Auctions plugin.


Lessons Learned

During this implementation, several important WordPress concepts became clearer:

  • Create dedicated classes for related functionality.
  • Register shortcodes using add_shortcode().
  • Keep database queries inside manager classes.
  • Separate business logic from presentation.
  • Always handle empty results gracefully.
  • Test shortcodes with real database records.

Tips for Beginners

  • Always build the simplest working version before focusing on appearance.
  • Test with actual database records rather than assuming the code is wrong.
  • If a shortcode displays “No active auctions found,” first verify the database contains records with status = 'active'.
  • Keeping your code modular now will make future features much easier to add.

Download Source Code

Download the starting version of the plugin before the lesson:

Download the completed version after this lesson:


What’s Next?

Our shortcode works, but it still displays plain text. In the next lesson, we’ll start transforming this output into attractive auction cards by showing website titles, featured images, and better formatting so the frontend begins to resemble a real website marketplace.

Every professional marketplace starts with a simple data listing. By completing this lesson, you’ve built the foundation on which all future frontend auction features will be added.