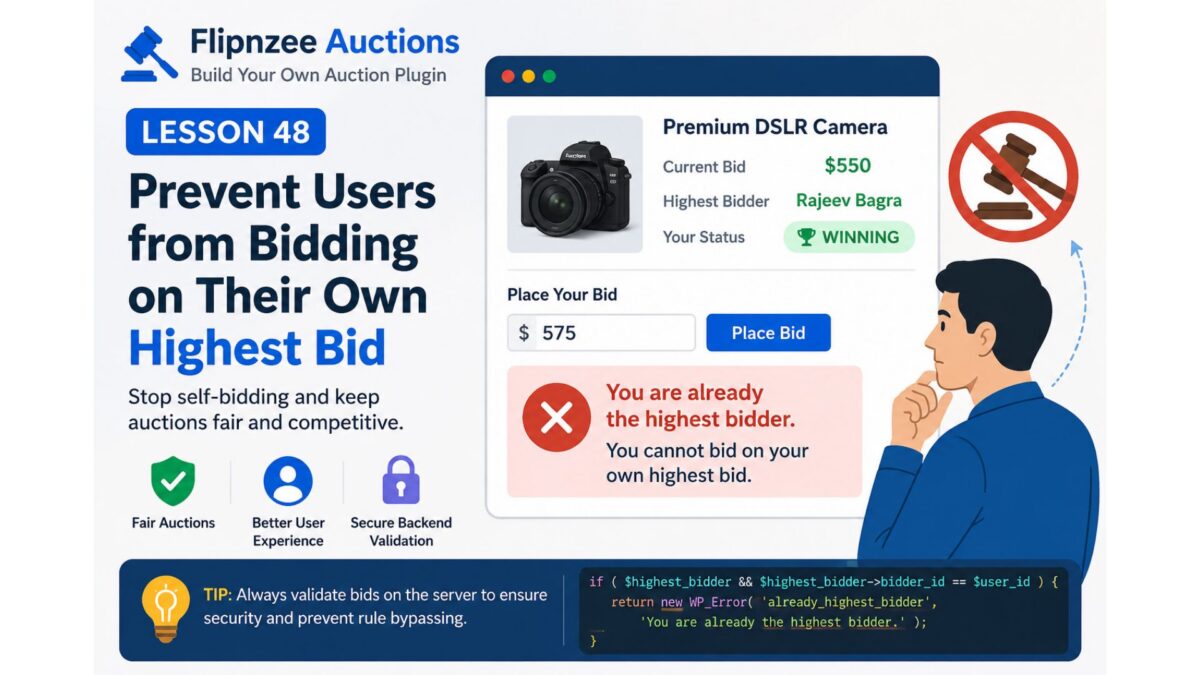
Lesson 48: Prevent Users from Bidding on Their Own Highest Bid

In the previous lesson, we showed users whether they are currently winning or have been outbid. However, there is still one issue with our auction system:

A user who is already the highest bidder can continue placing higher bids against themselves.

Real-world auction platforms like eBay don’t allow this because it serves no purpose. In this lesson, we’ll prevent users from bidding again if they already hold the highest bid.


Why Is This Important?

Imagine this scenario:

  • Rajeev bids $500
  • Rajeev is now the highest bidder
  • Rajeev accidentally bids $550
  • Nobody else has bid yet

The auction price increases without any competition.

Preventing this keeps auctions fair and avoids unnecessary price inflation.


The Solution

Before accepting a bid, we need to determine:

  1. Who is currently the highest bidder?
  2. Is the logged-in user the same person?
  3. If yes, reject the bid.

This validation belongs in the bid processing logic, not just the frontend.


Step 1: Retrieve the Highest Bidder

Inside the bid placement function, retrieve the current highest bidder.

$highest_bidder =
    self::get_highest_bidder(
        $auction_id
    );

Step 2: Compare User IDs

Check whether the logged-in user already owns the highest bid.

if (
    $highest_bidder &&
    (int) $highest_bidder->bidder_id === (int) $bidder_id
) {
    return new WP_Error(
        'already_highest_bidder',
        __( 'You are already the highest bidder.', 'flipnzee-auctions' )
    );
}

Step 3: Stop Processing

If this condition is true:

  • No new bid is inserted.
  • Current bid remains unchanged.
  • Bid history remains unchanged.

The function exits immediately.


Step 4: Display the Error

Instead of silently failing, redirect back to the auction page with an error message such as:

You are already the highest bidder.

This provides immediate feedback to the user.


Why Backend Validation Matters

Some developers disable the bid button on the frontend and think the problem is solved.

It isn’t.

A malicious user could still:

  • submit the form manually
  • use browser developer tools
  • send a POST request directly

That’s why validation must happen inside the PHP bid processing code.


Example Flow

Current Auction

BidderAmount
Rajeev$500

Rajeev clicks Place Bid again.

Server checks:

Current Highest Bidder = Rajeev

Current User = Rajeev

Match = TRUE

Result:

❌ Bid rejected.

Another user bids:

BidderAmount
Rajeev$500
Amit$550

Now Rajeev is allowed to bid again because he is no longer the highest bidder.


Benefits

Implementing this validation provides several advantages:

  • Prevents self-bidding
  • Makes auctions behave like professional auction websites
  • Prevents accidental price increases
  • Protects users from unnecessary mistakes
  • Keeps auction history meaningful
  • Enforces rules securely on the server

What You’ll Learn Next

In Lesson 49, we’ll improve the bidding experience further by displaying success and error notifications after a bid is submitted, so users receive clear feedback such as:

  • ✅ Bid placed successfully.
  • ❌ Bid is too low.
  • ❌ You are already the highest bidder.
  • ❌ Auction has ended.

This will make the auction workflow much more user-friendly and professional.
Lesson 47 Implementation – Display the Highest Bidder and Show Winning/Outbid Status

In the previous lesson, we created the method to retrieve the highest bidder from the database. In this implementation lesson, we integrate that functionality into the auction page so visitors can immediately see who is currently leading the auction.

Additionally, logged-in bidders receive a visual message telling them whether they are currently winning or have been outbid.

This makes the auction experience much more interactive and similar to professional auction platforms.


Step 1: Retrieve the Highest Bidder

Open:

includes/class-shortcodes.php

Locate the code where bids are loaded for the Bid History section.

It should look like this:

$bids = Flipnzee_Bid_Manager::get_bids(
    $auction['id']
);

Immediately after it, add:

$highest_bidder =
    Flipnzee_Bid_Manager::get_highest_bidder(
        $auction['id']
    );

The final code becomes:

$bids = Flipnzee_Bid_Manager::get_bids(
    $auction['id']
);

$highest_bidder =
    Flipnzee_Bid_Manager::get_highest_bidder(
        $auction['id']
    );

This retrieves the highest bid record from the database and stores it for use throughout the auction page.


Step 2: Display the Highest Bidder

Locate the auction details table.

Replace the existing Highest Bidder row with:

<tr>

    <th>Highest Bidder</th>

    <td>

        <?php

        if ( $highest_bidder ) {

            echo esc_html(
                $highest_bidder->display_name
            );

        } else {

            esc_html_e(
                'No bids yet',
                'flipnzee-auctions'
            );

        }

        ?>

    </td>

</tr>

Now the auction page displays the current leading bidder instead of the placeholder text.


Step 3: Show the Winning/Outbid Status

After the auction details table closes:

</table>

add:

<?php if ( is_user_logged_in() && $highest_bidder ) : ?>

    <?php if (
        get_current_user_id()
        === (int) $highest_bidder->bidder_id
    ) : ?>

        <div class="flipnzee-bid-status flipnzee-winning">
            🏆 You are currently the highest bidder.
        </div>

    <?php else : ?>

        <div class="flipnzee-bid-status flipnzee-outbid">
            ⚠️ You have been outbid.
        </div>

    <?php endif; ?>

<?php endif; ?>

Because this block is placed outside the table, it produces valid HTML and displays correctly.


Step 4: Add CSS Styling

Open:

assets/css/frontend.css

Add:

.flipnzee-bid-status {

    margin: 15px 0;

    padding: 12px 15px;

    border-radius: 6px;

    font-weight: 600;

}

.flipnzee-winning {

    background: #e9f8ef;

    color: #0b6b35;

    border-left: 4px solid #2ecc71;

}

.flipnzee-outbid {

    background: #fff3f3;

    color: #b30000;

    border-left: 4px solid #e74c3c;

}

This makes the notification visually stand out and improves the overall user experience.


Step 5: Test the Feature

Create two WordPress user accounts.

Log in as the first user and place a bid.

You should see:

🏆 You are currently the highest bidder.

Log in as the second user and place a higher bid.

Now:

  • User 2 sees:
🏆 You are currently the highest bidder.
  • User 1 sees:
⚠️ You have been outbid.

The Highest Bidder row also updates automatically after refreshing the page.


Complete Source Code

Loading the Highest Bidder

$bids = Flipnzee_Bid_Manager::get_bids(
    $auction['id']
);

$highest_bidder =
    Flipnzee_Bid_Manager::get_highest_bidder(
        $auction['id']
    );

Highest Bidder Row

<tr>

    <th>Highest Bidder</th>

    <td>

        <?php

        if ( $highest_bidder ) {

            echo esc_html(
                $highest_bidder->display_name
            );

        } else {

            esc_html_e(
                'No bids yet',
                'flipnzee-auctions'
            );

        }

        ?>

    </td>

</tr>

Winning / Outbid Message

<?php if ( is_user_logged_in() && $highest_bidder ) : ?>

    <?php if (
        get_current_user_id()
        === (int) $highest_bidder->bidder_id
    ) : ?>

        <div class="flipnzee-bid-status flipnzee-winning">
            🏆 You are currently the highest bidder.
        </div>

    <?php else : ?>

        <div class="flipnzee-bid-status flipnzee-outbid">
            ⚠️ You have been outbid.
        </div>

    <?php endif; ?>

<?php endif; ?>

CSS

.flipnzee-bid-status {

    margin: 15px 0;

    padding: 12px 15px;

    border-radius: 6px;

    font-weight: 600;

}

.flipnzee-winning {

    background: #e9f8ef;

    color: #0b6b35;

    border-left: 4px solid #2ecc71;

}

.flipnzee-outbid {

    background: #fff3f3;

    color: #b30000;

    border-left: 4px solid #e74c3c;

}

Download Source Code

Download the starting version of the plugin before the lesson:

Download the completed version after this lesson:


What We Achieved

By completing this implementation:

  • Displayed the current highest bidder on every auction.
  • Replaced the placeholder text with real bidder information from the database.
  • Added personalized Winning and Outbid notifications for logged-in users.
  • Styled the notifications for a more professional appearance.
  • Improved the auction experience by giving bidders immediate feedback on their current status.

With Lesson 47 complete, Flipnzee Auctions now provides real-time auction context that helps users quickly understand whether they are leading the auction or need to place a higher bid.

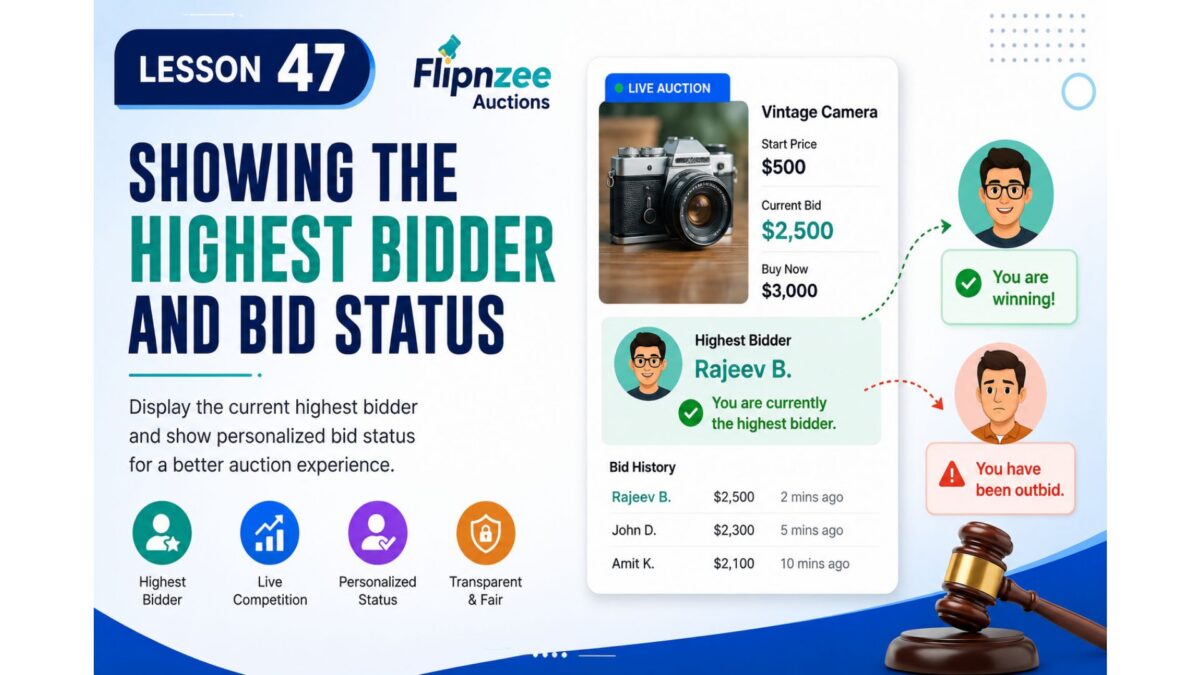
Lesson 47: Showing the Highest Bidder and Bid Status

Now that our auction system records bids, validates minimum bid increments, and displays bid history, it’s time to improve the user experience.

One of the first things bidders want to know after placing a bid is:

  • Am I currently winning?
  • Who is the highest bidder?
  • Has someone outbid me?

In this lesson, we’ll enhance Flipnzee Auctions by displaying the current highest bidder and showing personalized bid status messages.


Why Is This Important?

Imagine placing a bid and seeing only this:

Current Bid: $2,500

You have no idea whether:

  • you are winning,
  • someone else has already outbid you,
  • or you are still the highest bidder.

Professional auction platforms always provide this information.


What We’ll Build

After this lesson, the auction page will display something like:

Current Bid
$2,500

Highest Bidder
Rajeev B.

✔ You are currently the highest bidder.

Or, if another user submits a higher bid:

Current Bid
$2,700

Highest Bidder
John D.

⚠ You have been outbid.

Step 1: Identify the Highest Bid

Since our bids are already stored in the database, we’ll retrieve the latest highest bid for the auction.

Conceptually:

SELECT *
FROM wp_flipnzee_bids
WHERE auction_id = ?
ORDER BY bid_amount DESC
LIMIT 1;

Step 2: Retrieve the Bidder

Once the highest bid is known, we’ll obtain the bidder’s WordPress user information.

Example:

$user = get_userdata( $highest_bid->bidder_id );

This allows us to display:

  • Display Name
  • Username
  • Or an anonymized version

Step 3: Display the Highest Bidder

The auction details will gain a new row.

Example:

Current Bid      $2,500
Highest Bidder   Rajeev B.
Buy Now          $3,000

This immediately makes the auction more engaging.


Step 4: Detect the Logged-in User

If the visitor is logged in, we can compare:

Current User ID

vs

Highest Bidder ID

If they match:

✔ You are currently the highest bidder.

Otherwise:

⚠ You have been outbid.

Step 5: Improve Privacy

Some auction websites display full names.

Others show only initials.

For example:

Instead of:

Rajeev Bagra

display:

Rajeev B.

or

R*** B***

This balances transparency with user privacy.


Step 6: Handle Auctions Without Bids

When no bids exist, the page should gracefully display:

Highest Bidder

No bids yet.

instead of leaving the section blank.


Expected Result

Before:

Current Bid
$2,500

Bid History
...

After:

Current Bid
$2,500

Highest Bidder
Rajeev B.

✔ You are currently the highest bidder.

Bid History
...

What We’ll Learn

In this lesson you’ll learn how to:

  • Query the highest bid from the database.
  • Retrieve WordPress user information.
  • Compare bidder IDs.
  • Display personalized auction messages.
  • Improve auction transparency.
  • Handle edge cases where no bids exist.

Why This Matters

Displaying the highest bidder transforms the auction from a simple list of numbers into a live, competitive experience. Visitors immediately understand who is leading, and bidders receive instant feedback about whether they are winning or have been outbid.

These small usability improvements make the plugin feel much closer to a production-ready auction platform.


Assignment

Before moving to Lesson 48, try to:

  • Display the current highest bidder.
  • Show “You are currently the highest bidder” when appropriate.
  • Show “You have been outbid” when another user places a higher bid.
  • Display “No bids yet” when an auction has received no bids.

In the next lesson, we’ll build on this by introducing automatic auction closing, so auctions can end on schedule and no longer accept bids after their closing time.

Implementing Lesson 46: Enforcing a Minimum Bid Increment in Flipnzee Auctions

In the previous lesson, we discussed why every professional auction system should require a minimum increase over the current highest bid. In this implementation lesson, we’ll modify the Flipnzee Auctions plugin so that users cannot place insignificant bids and always know the minimum amount required.

By the end of this implementation, the plugin will:

  • Reject bids that are too low.
  • Display the minimum allowed bid.
  • Guide users with browser-side validation.
  • Improve the overall auction experience.

Step 1: Define the Minimum Increment

Open:

includes/class-bid-manager.php

Locate the section where the current highest bid is retrieved.

Immediately afterwards, add:

/*
 * Minimum bid increment.
 */
$minimum_increment = 10;

$minimum_allowed_bid =
    (float) $current_bid +
    $minimum_increment;

This calculates the lowest amount that can be accepted.

For example:

Current Bid:      $444
Minimum Increment $10
Minimum Bid:      $454

Step 2: Validate Incoming Bids

Find the existing validation:

if ( $bid_amount <= (float) $current_bid ) {
    return false;
}

Replace it with:

/*
 * Validate minimum bid.
 */
if ( $bid_amount < $minimum_allowed_bid ) {
    return false;
}

Now every new bid must be at least Current Bid + $10.

Examples:

Current BidSubmitted BidResult
$444$445❌ Rejected
$444$450❌ Rejected
$444$454✅ Accepted
$444$500✅ Accepted

Step 3: Display the Minimum Bid

Open:

includes/class-shortcodes.php

Locate the auction details table.

Immediately below the Current Bid row, insert:

<tr>
    <th>Minimum Bid</th>
    <td>
        <?php
        $minimum_bid =
            (float) $auction['current_bid'] + 10;

        echo esc_html(
            '$' . number_format_i18n(
                $minimum_bid,
                0
            )
        );
        ?>
    </td>
</tr>

The auction information now becomes:

Start Price      $111
Current Bid      $444
Minimum Bid      $454
Buy Now          $333

Visitors immediately know the next valid bid amount.


Step 4: Restrict the Bid Input

Still in:

includes/class-shortcodes.php

Locate the bid input field.

Replace it with:

<?php
$minimum_bid =
    (float) $auction['current_bid'] + 10;
?>

<input
    type="number"
    step="10"
    min="<?php echo esc_attr( $minimum_bid ); ?>"
    value="<?php echo esc_attr( $minimum_bid ); ?>"
    name="bid_amount"
    placeholder="Your Bid"
    required
>

This provides three improvements:

  • min prevents smaller values from being submitted.
  • value pre-fills the next valid bid.
  • step increases or decreases by $10 using the spinner controls.

Testing the Feature

After refreshing the auction page, the auction details should resemble:

Current Bid      $999
Minimum Bid      $1009

Your Bid
[1009]

[ Place Bid ]

Testing results:

BidExpected
1000❌ Rejected
1005❌ Rejected
1009✅ Accepted
1019✅ Accepted

Browser Validation

Modern browsers also assist users before the form is submitted.

Attempting to enter a value below the minimum now displays a validation message similar to:

Value must be greater than or equal to 1009.

This improves usability by informing users immediately rather than after submission.


Files Modified

During this implementation, only two files required changes:

includes/class-bid-manager.php
includes/class-shortcodes.php

Keeping the modifications localized makes the feature easier to maintain and extend.


Result

After completing this implementation, Flipnzee Auctions now provides a more professional bidding experience by:

  • Enforcing a minimum bid increment on the server.
  • Displaying the minimum allowed bid to visitors.
  • Preventing invalid bids through browser validation.
  • Reducing unnecessary or insignificant bid increases.

These enhancements make the auction process clearer, fairer, and more intuitive for bidders.

Download Source Code

Download the starting version of the plugin before the lesson:

Download the completed version after this lesson:


What’s Next?

In the next lesson, we’ll continue improving the auction experience by adding more intelligent bidding features, making Flipnzee Auctions feel even closer to a production-ready auction platform.

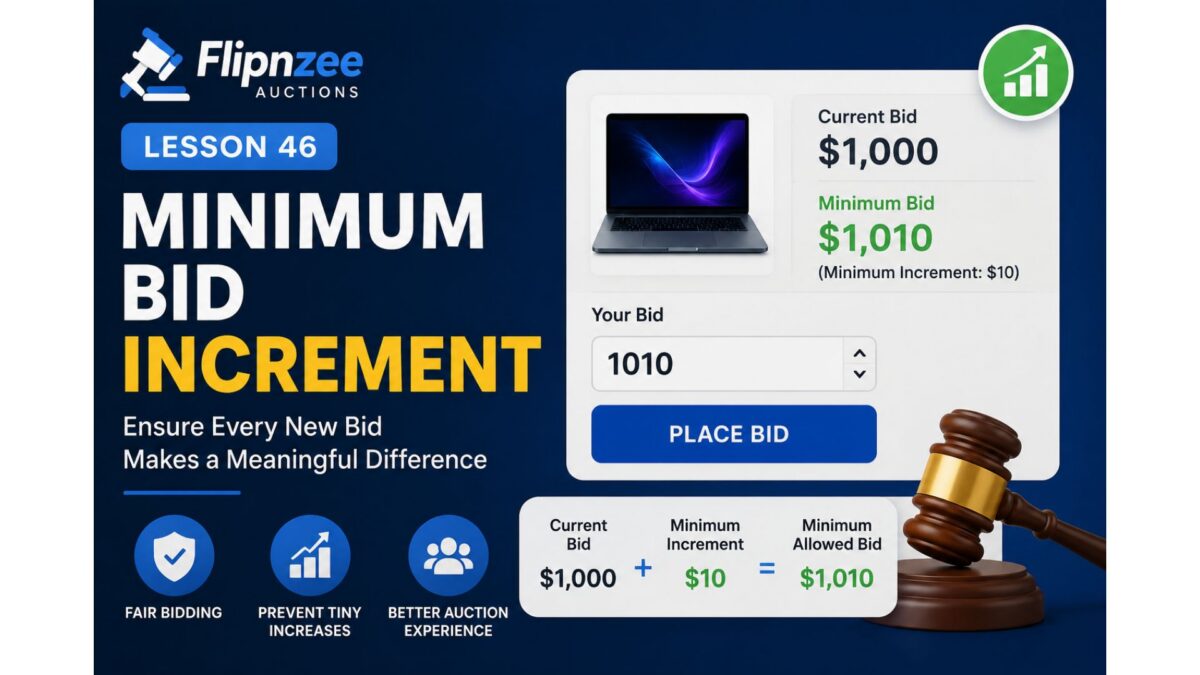
Lesson 46: Enforcing a Minimum Bid Increment in Flipnzee Auctions

One of the easiest ways to improve an auction system is by preventing bidders from increasing the current price by tiny amounts. On professional auction platforms like eBay, each new bid must exceed the current bid by a minimum increment.

In this lesson, we’ll implement the same concept in our Flipnzee Auctions plugin by introducing a Minimum Bid Increment. This ensures every new bid is meaningful and keeps the auction moving smoothly.


Why Is a Minimum Bid Increment Important?

Imagine an auction with a current bid of $1,000.

Without validation, users could place bids like:

  • $1,000.01
  • $1,000.02
  • $1,000.03

Technically, each bid is higher, but they barely advance the auction. This can frustrate bidders and unnecessarily prolong the bidding process.

By requiring a minimum increment—for example, $10—the next valid bid would have to be at least $1,010.


What We’ll Build

At the end of this lesson, bidders will only be allowed to submit bids that satisfy:

New Bid >= Current Bid + Minimum Increment

For example:

Current BidMinimum IncrementMinimum Allowed Bid
$100$5$105
$250$25$275
$1,000$50$1,050

Step 1: Define a Minimum Increment

We’ll begin with a fixed increment.

$minimum_increment = 10;

Later, we’ll make this configurable from the WordPress admin.


Step 2: Calculate the Minimum Allowed Bid

Instead of checking only whether the bid is greater than the current bid, we’ll calculate the next valid amount.

Example:

$minimum_allowed_bid =
    $current_bid +
    $minimum_increment;

Step 3: Validate the Bid

The bidding logic will reject bids below the minimum requirement.

Conceptually:

if (
    $bid_amount <
    $minimum_allowed_bid
) {

    return false;

}

Step 4: Show a Helpful Error Message

Instead of silently rejecting the bid, inform the user why it failed.

Example:

Your bid must be at least $1,010.

Helpful validation messages create a much better user experience.


Step 5: Display the Minimum Bid

Near the bid input box, we’ll display information such as:

Minimum Bid:
$1,010

This tells visitors exactly what they need to bid.


Step 6: Prevent Invalid Form Submission

We’ll add HTML attributes so users cannot enter values below the minimum amount.

For example:

<input
type="number"
min="1010"
step="10">

This provides immediate feedback before the form is even submitted.


Expected Result

Instead of allowing any value above the current bid:

Current Bid:
$1,000

Your Bid:
1001 ❌

Place Bid

Visitors will see:

Current Bid:
$1,000

Minimum Bid:
$1,010

Your Bid:
1010 ✔

Place Bid

What We’ll Learn

In this lesson, you’ll learn how to:

  • Calculate dynamic minimum bid values
  • Validate bids on the server
  • Improve user experience with meaningful validation messages
  • Add client-side validation using HTML attributes
  • Prepare the plugin for configurable bidding rules

Why This Matters

Professional auction platforms don’t simply accept any higher bid—they enforce bidding rules that keep auctions fair, competitive, and easy to follow.

By adding a minimum bid increment, Flipnzee Auctions becomes significantly more professional and prevents users from placing trivial bid increases.


Assignment

Before moving to Lesson 47, try the following:

  • Set the minimum increment to $10.
  • Verify that bids below the required amount are rejected.
  • Confirm that valid bids are still accepted and saved.
  • Display the minimum required bid below the current bid so visitors always know the next valid amount.

In the next lesson, we’ll take this a step further by making the minimum bid increment configurable from the WordPress admin, allowing different auction strategies without changing any code.

Implementing Lesson 45: Displaying Bid History in Flipnzee Auctions

In Lesson 45, we transformed our auction system from simply displaying the current highest bid into a much more transparent platform by introducing Bid History.

Instead of showing only the latest bid amount, visitors can now see every bid placed on an auction, who placed it, and when it was submitted. This feature is common on professional auction platforms because it builds trust and encourages competitive bidding.

In this implementation post, we’ll walk through the complete code used to build the Bid History feature.


Step 1: Create a Method to Retrieve Bids

The first step is to retrieve all bids for a particular auction from the database.

Open:

includes/class-bid-manager.php

Add the following method inside the Flipnzee_Bid_Manager class.

/**
 * Get all bids for an auction.
 *
 * @param int $auction_id Auction ID.
 *
 * @return array
 */
public static function get_bids( $auction_id ) {

	global $wpdb;

	$bid_table = $wpdb->prefix . 'flipnzee_bids';

	return $wpdb->get_results(
		$wpdb->prepare(
			"SELECT *
			FROM {$bid_table}
			WHERE auction_id = %d
			ORDER BY bid_amount DESC,
			         created_at DESC",
			$auction_id
		)
	);

}

What this code does

  • Retrieves every bid for the selected auction
  • Uses prepared SQL statements for security
  • Orders bids from highest to lowest
  • Displays newer bids first if two bids have the same amount

Step 2: Retrieve Bid History Inside the Shortcode

Open:

includes/class-shortcodes.php

Locate the auction details table.

Immediately after the closing </table> tag, retrieve all bids.

<?php
$bids = Flipnzee_Bid_Manager::get_bids(
	$auction['id']
);
?>

This gives us all bids belonging to the currently displayed auction.


Step 3: Display the Bid History Heading

If bids exist, display a heading.

<h3>Bid History</h3>

Step 4: Handle Auctions With No Bids

Before creating the table, check whether any bids exist.

<?php if ( empty( $bids ) ) : ?>

<p>No bids have been placed yet.</p>

<?php else : ?>

This provides a better user experience than displaying an empty table.


Step 5: Create the Bid History Table

Now create the HTML table.

<table class="flipnzee-bid-history">

<thead>

<tr>

<th>Bidder</th>

<th>Amount</th>

<th>Time</th>

</tr>

</thead>

<tbody>

Step 6: Display Every Bid

Loop through all bids.

<?php foreach ( $bids as $bid ) : ?>

<?php
$user = get_userdata(
	$bid->bidder_id
);
?>

<tr>

<td>

<?php
echo esc_html(
	$user
	? $user->display_name
	: 'Unknown'
);
?>

</td>

<td>

<?php
echo '$' .
	number_format_i18n(
		$bid->bid_amount,
		2
	);
?>

</td>

<td>

<?php
echo esc_html(
	wp_date(
		'd M Y g:i A',
		strtotime(
			$bid->created_at
		)
	)
);
?>

</td>

</tr>

<?php endforeach; ?>

This code displays:

  • Bidder name
  • Bid amount
  • Bid date and time

Step 7: Close the Table

Finish the table.

</tbody>

</table>

<?php endif; ?>

Step 8: Improve the Table Appearance

Open:

assets/css/frontend.css

Add the following styles.

.flipnzee-bid-history{
	width:100%;
	border-collapse:collapse;
	margin:20px 0;
}

.flipnzee-bid-history th,
.flipnzee-bid-history td{
	padding:10px;
	border-bottom:1px solid #ddd;
	text-align:left;
	white-space:nowrap;
}

.flipnzee-bid-history th{
	background:#f5f5f5;
	font-weight:600;
}

This produces a cleaner and more professional table.


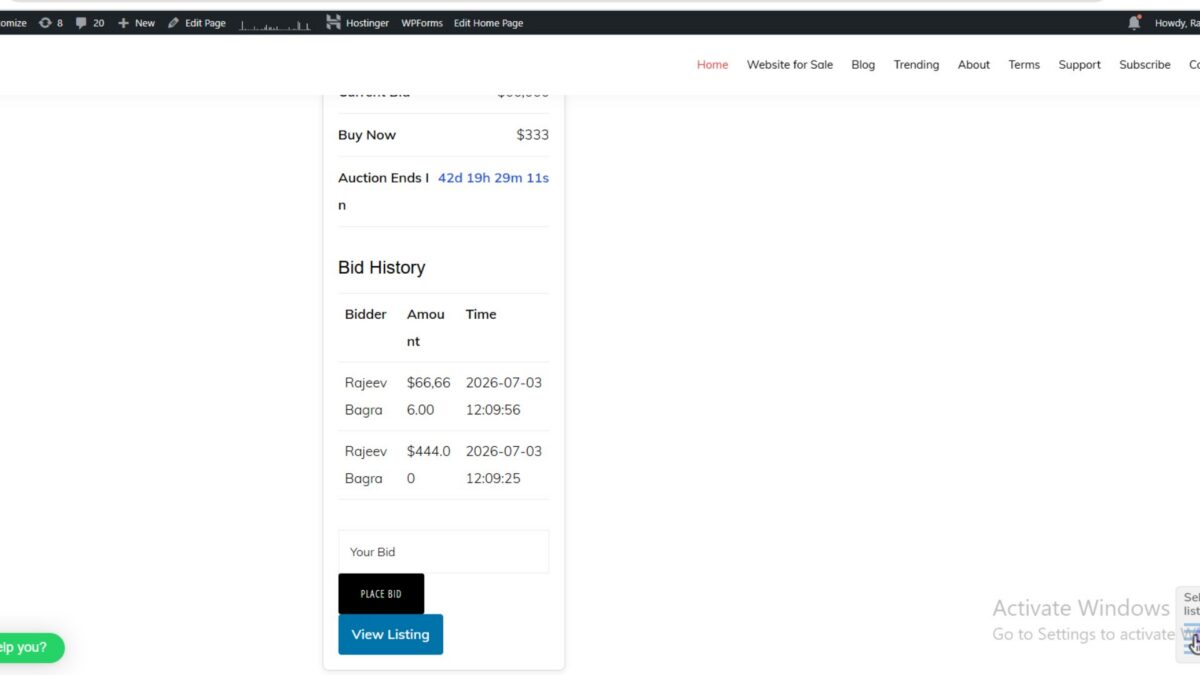
Final Result

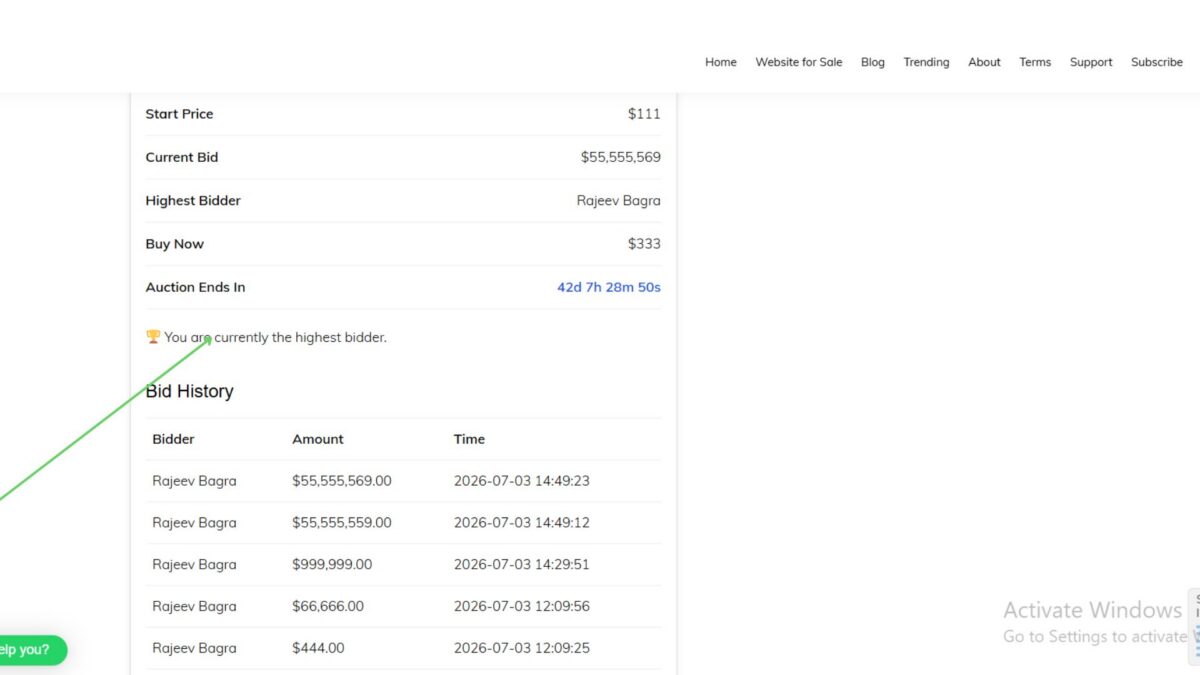
After completing this lesson, each auction page now displays something like:

BidderAmountTime
Rajeev Bagra$66,666.0003 Jul 2026 12:09 PM
Rajeev Bagra$444.0003 Jul 2026 12:09 PM

Visitors can immediately understand:

  • Who is bidding
  • How the auction has progressed
  • When bids were placed
  • The current competition

Troubleshooting During Development

While implementing this feature, a few issues were encountered and resolved:

  • Initially, the page displayed “No bids have been placed yet.” even though bids existed in the database.
  • A temporary debug statement was added to display the current auction ID, confirming that the correct auction (Auction ID: 31) was being queried.
  • After verifying the auction ID and database records, the bid history displayed correctly.
  • The bid amount column initially wrapped because of the narrow card layout; this was improved using CSS with white-space: nowrap.
  • The raw database timestamp was replaced with a more readable format using wp_date().

These small debugging steps are a normal part of plugin development and highlight the importance of verifying data flow before assuming the query itself is incorrect.


What We Achieved

By the end of this implementation, Flipnzee Auctions gained another feature found in professional auction platforms:

  • ✅ Secure database retrieval of bid history
  • ✅ Display bidder names
  • ✅ Display bid amounts
  • ✅ Display bid timestamps
  • ✅ Graceful handling of auctions with no bids
  • ✅ Clean, responsive frontend table
  • ✅ Increased transparency and trust for bidders

Download Source Code

Download the starting version of the plugin before the lesson:

Download the completed version after this lesson:

In the next lesson, we’ll enhance the bidding engine further by introducing Minimum Bid Increment Validation, ensuring that every new bid must exceed the current highest bid by a configurable minimum amount.

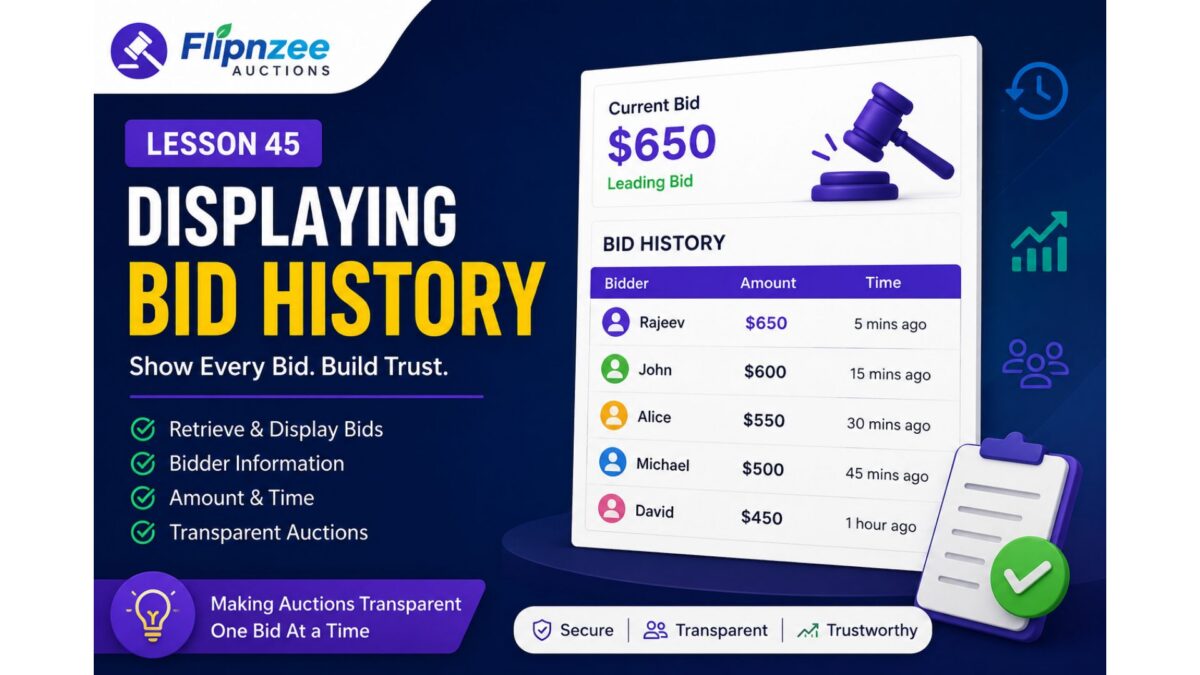
Lesson 45: Displaying Bid History in Flipnzee Auctions


In the previous lesson, we built the core bidding engine that allows logged-in users to place bids on an auction. Every successful bid is securely stored in the database and the current highest bid is updated automatically.

However, a real auction is about more than just the latest bid. Participants want to see the competition, understand how the auction has progressed, and gain confidence that the bidding process is transparent.

In this lesson, we’ll build a Bid History feature that displays every bid placed on an auction.


What You’ll Learn

By the end of this lesson you will know how to:

  • Retrieve auction bids from the database
  • Sort bids from highest to lowest
  • Display bidder information
  • Show bid timestamps
  • Build a frontend bid history table
  • Gracefully handle auctions with no bids

Why Bid History Matters

Imagine visiting an auction where only the highest bid is visible.

Questions immediately arise:

  • How many people are bidding?
  • When was the last bid placed?
  • Has the auction been active?
  • Is the current price increasing steadily?

Displaying bid history answers all these questions and makes the auction feel much more trustworthy.


What We Will Build

Each auction page will display something similar to this:

BidderAmountTime
Rajeev$6505 mins ago
John$60015 mins ago
Alice$55030 mins ago

Visitors can immediately understand the progress of the auction.


New Functionality

We’ll enhance our plugin by adding:

  • A database query to fetch bids
  • Bid history retrieval method
  • Frontend HTML table
  • User name lookup
  • Proper currency formatting
  • Date and time formatting

User Experience Improvements

If no bids exist, instead of showing an empty table, visitors will see a friendly message such as:

No bids have been placed yet. Be the first bidder!

This small detail greatly improves usability.


Security Considerations

While displaying bids, we’ll ensure:

  • All output is properly escaped
  • User data is sanitized
  • Only public information is displayed
  • SQL queries use prepared statements

Following WordPress coding standards remains a priority.


Skills You’ll Practice

During this lesson you’ll gain experience with:

  • Database retrieval using $wpdb
  • Looping through database results
  • Fetching WordPress user information
  • Formatting frontend tables
  • Escaping output correctly
  • Improving frontend user experience

Expected Outcome

After completing this lesson, every auction page will show:

  • Current highest bid
  • Complete bid history
  • Bidder names
  • Bid amounts
  • Bid timestamps

The auction will feel much more interactive and transparent.


Coming Up Next

After implementing bid history, we’ll continue improving the auction system with features such as:

  • Minimum bid increments
  • Automatic auction closing
  • Declaring the winning bidder
  • Buy Now functionality
  • Auction status badges
  • Email notifications

Each lesson will move Flipnzee Auctions closer to becoming a fully featured marketplace plugin.

Lesson 44 Implementation: Building the First Working Bidding System

One of the biggest milestones in the Flipnzee Auctions project was transforming auctions from static listings into interactive auctions where visitors can actually place bids. In this lesson, the bidding engine was implemented from scratch, allowing authenticated users to compete for auction listings in real time.

What We Built

By the end of this lesson, the plugin supports:

  • Creating a dedicated database table for bids
  • Recording every bid placed by users
  • Updating the current highest bid automatically
  • Displaying a bid form on the frontend
  • Validating that new bids are higher than the existing bid
  • Persisting bid history in the database

This is the first version of a fully functional auction engine.


Step 1: Creating the Bid Database Table

A new database table named wp_flipnzee_bids was introduced.

The table stores:

  • Auction ID
  • Bidder ID
  • Bid Amount
  • Timestamp

Each bid is preserved permanently, creating a complete bidding history for every auction.

Unlike simply updating a single value, storing individual bids allows future features such as:

  • Bid history
  • Highest bidder tracking
  • Auction analytics
  • Winner determination
  • Escrow integration

Step 2: Building the Bid Manager

A brand-new class called:

Flipnzee_Bid_Manager

was created.

This class became responsible for all bidding operations, including:

  • Receiving new bids
  • Checking the current highest bid
  • Rejecting invalid bids
  • Saving successful bids
  • Updating the auction’s current bid

Separating bidding logic into its own class keeps the plugin modular and much easier to maintain.


Step 3: Saving Bids

When a visitor submits a bid:

  1. The auction is identified.
  2. The existing highest bid is retrieved.
  3. The new amount is compared against the current bid.
  4. Valid bids are inserted into the bids table.
  5. The auction record is updated with the new highest bid.

This ensures that the auction table always reflects the latest highest bid while preserving every historical bid.


Step 4: Adding the Frontend Bid Form

The auction card on the frontend was enhanced with a simple bidding interface.

Visitors who are logged in can now enter a bid amount and submit it directly from the auction listing.

If the visitor is not logged in, the interface instead prompts them to sign in before participating.

This provides a clean foundation for future enhancements without complicating the user experience.


Step 5: Processing Bid Requests

A new request handler was added to process submitted bids securely.

The handler performs several important tasks:

  • Verifies the WordPress nonce
  • Ensures the user is authenticated
  • Sanitizes user input
  • Calls the Bid Manager
  • Redirects the visitor back to the auction page

Using WordPress admin-post actions keeps the implementation aligned with WordPress coding standards.


Step 6: Testing the Complete Workflow

The implementation was verified through several tests.

The following scenarios were successfully completed:

  • Bid form displayed correctly
  • Bid submitted successfully
  • Bid stored in the database
  • Current bid updated automatically
  • Multiple bids recorded correctly
  • Frontend reflected the new highest bid

Database verification confirmed that both the wp_flipnzee_bids and wp_flipnzee_auctions tables were updated correctly after each successful bid.


Challenges Encountered

Several implementation issues were encountered during development, including:

  • Loading the new Bid Manager class correctly
  • Registering new WordPress action hooks
  • Resolving PHP syntax errors after adding new functionality
  • Ensuring database tables were created properly
  • Confirming that current bids updated after inserts
  • Troubleshooting bid submission until the complete workflow functioned correctly

These debugging sessions reinforced an important lesson:

Building new features often involves more time spent integrating and testing than writing the original code.


Why This Matters

This lesson transformed the plugin from a simple auction display into a genuine auction platform.

Before this lesson, visitors could only view auction information.

After this lesson, they can actively participate by placing bids that are securely stored and reflected immediately as the current highest bid.

Many advanced features now become possible because this foundation exists.

Download Source Code

Download the starting version of the plugin before the lesson:

Download the completed version after this lesson:


What’s Next?

In the next lesson, we’ll improve the bidding experience by introducing features such as:

  • Displaying bid history
  • Validating minimum bid increments
  • Preventing bids after auctions end
  • Better user feedback after bid submission
  • Additional auction rules and safeguards

These improvements will make the auction system more robust while preparing it for future features such as automatic winner selection and escrow integration.


Key Takeaways

  • Separate functionality into dedicated manager classes.
  • Store every bid instead of only the highest bid.
  • Always validate user input before writing to the database.
  • Use WordPress nonces and admin-post handlers for secure form processing.
  • Test every database operation thoroughly to verify the entire workflow.

Lesson Outcome: By the end of Lesson 44, Flipnzee Auctions supports real bid placement with database persistence and automatic highest-bid tracking, laying the groundwork for a complete online auction platform.

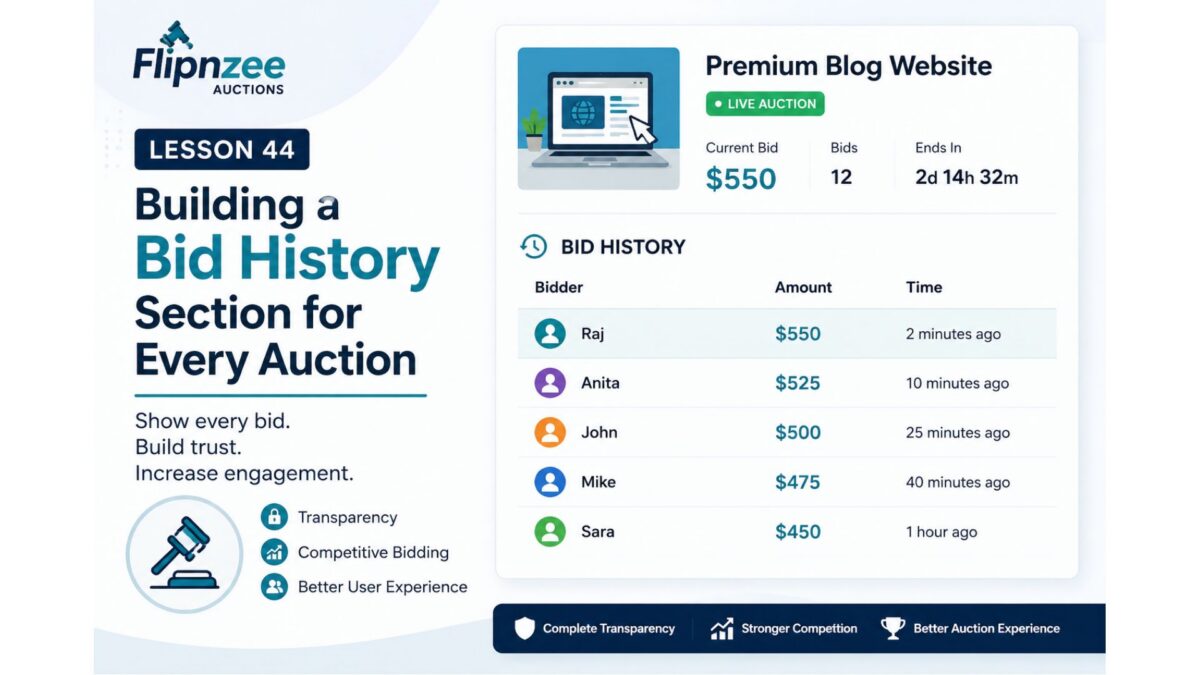
Lesson 44: Building a Bid History Section for Every Auction

Objective

In this lesson, we will add a Bid History section to every auction page.

Instead of only showing the current highest bid, visitors will be able to see the progression of bidding throughout the auction.


Why This Feature Matters

Every successful auction platform provides transparency.

A visible bid history helps users:

  • Build confidence in the auction
  • See bidding activity
  • Understand how quickly prices are increasing
  • Encourage competitive bidding
  • Increase engagement

Without bid history, visitors only know the current highest bid.

With bid history, they can see the auction’s journey.


What We Will Build

Each auction page will include a new section:

Bid History

-----------------------------------
Bidder         Amount        Time
-----------------------------------
Raj            $550         2 mins ago
Anita          $525         10 mins ago
John           $500         25 mins ago
-----------------------------------

Initially, we can display:

  • Bid amount
  • Date & time

Later, when user accounts are fully integrated, we can add bidder names (or anonymised usernames).


Features We’ll Implement

1. Create a Bid History Table

We’ll create a new custom database table to store every bid.

Example fields:

  • Bid ID
  • Auction ID
  • User ID
  • Bid Amount
  • Bid Time

2. Record Every Bid

Instead of simply replacing the current bid, every bid will be stored permanently.

This creates a complete bidding history.


3. Retrieve Bid History

We’ll build helper functions to retrieve bids ordered by:

Newest First

or

Highest First

depending on the display requirement.


4. Display Bid History on the Frontend

Each auction card (or single auction page) will include:

Latest Bids

beneath the auction details.


5. Format Dates

Instead of displaying raw database timestamps, we’ll use WordPress date formatting functions.

Example:

Instead of:

2026-07-03 15:30:00

display

3 July 2026
3:30 PM

or

5 minutes ago

for recent bids.


6. Empty State

If no bids exist yet:

No bids have been placed yet.

Be the first bidder!

What You’ll Learn

By completing this lesson, you’ll gain experience with:

  • Creating another custom database table
  • Database relationships
  • One-to-many data structures
  • Retrieving ordered records
  • Displaying dynamic lists
  • Formatting dates and times
  • Improving auction transparency

Why This Is an Important Milestone

Until now, the plugin has focused primarily on auction setup and presentation.

With bid history, we begin adding the interactive elements that make an auction platform feel alive. It also lays the foundation for future features such as:

  • Highest bidder tracking
  • Automatic winner selection
  • User bidding dashboards
  • Email notifications
  • Auction analytics
  • Escrow integration after auction completion

Each of these features will build naturally on the bid history system.


End Result

After Lesson 44, every auction will not only display its current price but also the complete story of how bidding has progressed, making the Flipnzee Auctions plugin more transparent, engaging, and closer to a production-ready auction platform.

Lesson 44 Implementation: Building the First Working Bidding System

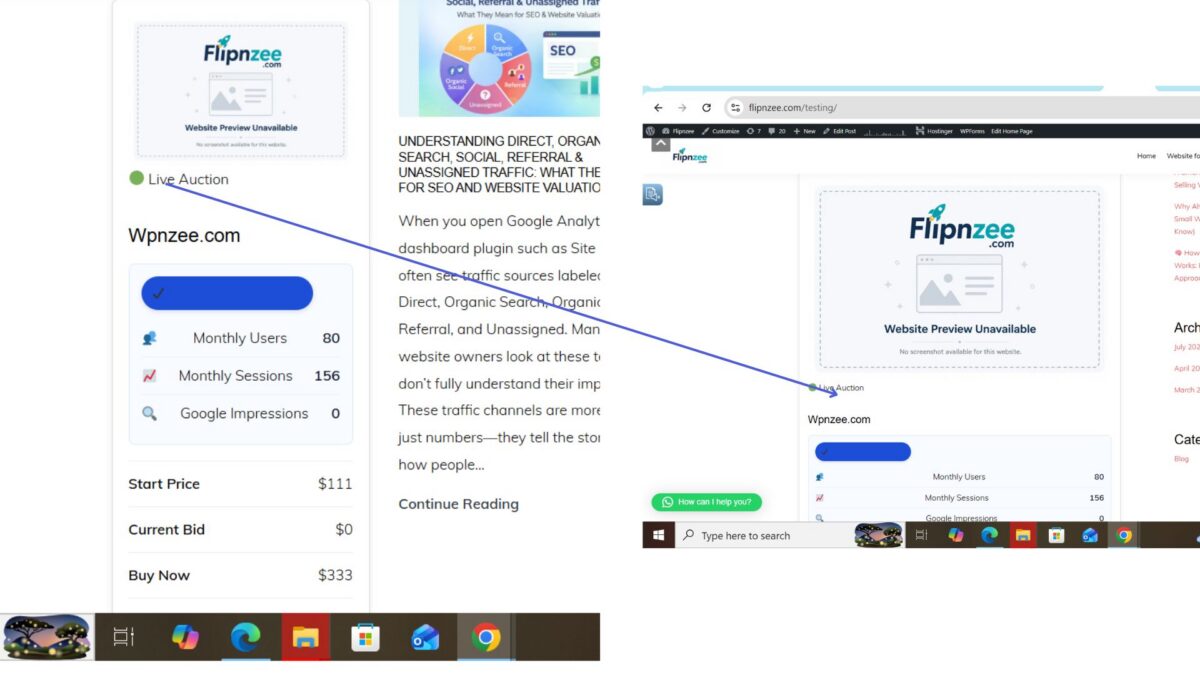
Lesson 43: Implementing Dynamic Auction Status Badges in the Flipnzee Auctions Plugin


In the previous lesson, we designed the concept of dynamic auction status badges to provide visitors with a quick visual indication of an auction’s current state. In this lesson, we implemented that functionality in the Flipnzee Auctions plugin and integrated it into the frontend auction cards.

Instead of requiring visitors to interpret countdown timers or auction dates, the plugin now displays a clear, color-coded status badge that updates automatically based on the auction’s current status.


Why Auction Status Badges Matter

When visitors browse multiple auctions, they should be able to identify their status instantly.

A simple badge helps answer questions like:

  • Is this auction currently active?
  • Has it already ended?
  • Is it scheduled to begin later?
  • Has it been cancelled?

Providing this information visually improves usability and creates a more professional marketplace experience.


Badge States

The plugin now supports displaying badges for various auction states, including:

  • 🟢 Active
  • 🔴 Auction Ended
  • 🟡 Scheduled
  • ⚪ Draft
  • ⚫ Cancelled (for future use)

Each badge uses a distinct color and label, making the auction status immediately understandable.


Implementing the Badge

The auction card template was updated to output a badge based on the auction’s status.

Instead of hardcoding text, the badge is generated dynamically using the auction record stored in the database.

This keeps the display synchronized with the auction’s actual state.


Styling the Badge

Custom CSS was added to improve the appearance of the badges.

The styling includes:

  • rounded corners
  • background color
  • readable text color
  • padding
  • spacing from surrounding elements

The result is a compact status indicator that integrates naturally into the auction card design.


Improving the User Experience

Visitors no longer need to calculate whether an auction has ended by reading dates and times.

The badge communicates the auction status immediately.

This small enhancement significantly improves the browsing experience, particularly when multiple auctions are displayed on the same page.


Testing the Feature

After implementing the badges, different auction records were tested to verify that:

  • Active auctions displayed the correct badge.
  • Ended auctions showed an “Auction Ended” badge.
  • Badge styling remained consistent across listings.
  • The status updated correctly based on the auction data.

Challenges During Development

While implementing this lesson, development naturally expanded into improving the auction management workflow.

This led to the beginning of an Edit Auction feature, allowing administrators to modify auction details from the WordPress dashboard. During this process, several unexpected issues arose—particularly with updating auction start and end dates—which required extensive debugging.

One important takeaway was that implementing a feature is only part of development; carefully tracing data from the form, through WordPress, and into the database is equally important when diagnosing unexpected behavior.


What I Learned

This lesson reinforced several practical WordPress development concepts:

  • Displaying dynamic frontend content
  • Using database values to control the user interface
  • Writing reusable conditional logic
  • Improving user experience through visual indicators
  • Enhancing plugin design with simple CSS styling

Tips for Plugin Developers

  • Use colors consistently throughout your plugin.
  • Display important information visually whenever possible.
  • Keep frontend status indicators synchronized with backend data.
  • Small UI improvements often have a significant impact on usability.
  • Test every possible status to ensure the correct badge is displayed.

Final Thoughts

Dynamic auction status badges are a small feature that greatly improves the overall professionalism of an auction website. Rather than relying solely on dates or countdown timers, visitors receive an immediate visual cue about each auction’s current state.

Download Source Code

Download the starting version of the plugin before the lesson:

Download the completed version after this lesson: