
Lesson 38: Display Live Auctions on the Frontend Using a WordPress Shortcode


So far, every feature we’ve built has been available only to WordPress administrators.
In a real auction marketplace, however, the most important audience is not the administrator—it’s the buyers.
Visitors need a simple way to browse active auctions directly from the website.
In this lesson, we’ll create our first frontend auction shortcode.
What You’ll Build
By the end of this lesson, you’ll have a shortcode like:
[flipnzee_auctions]
that displays all active auctions on any WordPress page.
What Visitors Will See
Each auction will display:
- Listing ID
- Starting Price
- Current Bid
- Buy Now Price
- Auction Status
- Auction End Date
- View Auction button
Example:
---------------------------------------
Listing #105

Current Bid
₹52,000

Buy Now
₹75,000

Ends
12 Jul 2026

Status
Active

[ View Auction ]
---------------------------------------
Why Use a Shortcode?
Shortcodes are one of the simplest ways to expose plugin functionality on the frontend.
Advantages include:
- Works with Gutenberg
- Works with Classic Editor
- Works with Genesis
- Can be inserted anywhere
- Easy to extend later
Our First Frontend Query
Instead of retrieving every auction, we’ll display only:
Status = Active
This keeps the marketplace clean and prevents visitors from seeing:
- Draft auctions
- Closed auctions
Architecture
Visitor
      │
      ▼
Shortcode
      │
      ▼
Auction Manager
      │
      ▼
Database
      │
      ▼
Active Auctions
      │
      ▼
HTML Output
Notice how we’re reusing our Auction Manager instead of writing SQL directly inside the shortcode.
Files We’ll Modify
includes/class-auction-manager.php
includes/class-shortcodes.php
(new file)
flipnzee-auctions.php
New Shortcode
We’ll register:
[flipnzee_auctions]
Later we’ll extend it with parameters like:
[flipnzee_auctions limit="12"]
Trending
| Start Price | $400 |
|---|---|
| Current Bid | $0 |
| Highest Bidder | No bids yet |
| Buy Now | $2,000 |
| Auction Ends In | Loading... |
Bid History
No bids have been placed yet.
Please log in to place a bid.
Trending
| Start Price | $400 |
|---|---|
| Current Bid | $0 |
| Highest Bidder | No bids yet |
| Buy Now | $2,000 |
| Auction Ends In | Loading... |
Bid History
No bids have been placed yet.
Please log in to place a bid.
Design Goals
Initially we’ll keep the layout simple.
Each auction will appear inside a clean card showing:
- Listing ID
- Prices
- Status
- End Date
Styling will be improved in future lessons.
Production Benefits
Adding a frontend shortcode is an important milestone because it transforms the plugin from an administrative tool into a real auction platform.
For the first time:
- Administrators create auctions.
- Visitors can discover them.
- The auction system becomes visible on the public website.
What You’ll Learn
In this lesson you’ll learn how to:
- Register WordPress shortcodes
- Retrieve database records for the frontend
- Generate HTML safely
- Escape output correctly
- Separate business logic from presentation
- Prepare your plugin for bidding functionality
What’s Next?
In the next lesson, we’ll build the Single Auction View, where visitors can click View Auction to see detailed information, a live countdown timer, bid history, and eventually place bids.
This will be the foundation for the public-facing bidding experience and the future Escrow.com transaction workflow.
Implementation Lesson 37: Automating Auction Maintenance with WordPress Cron
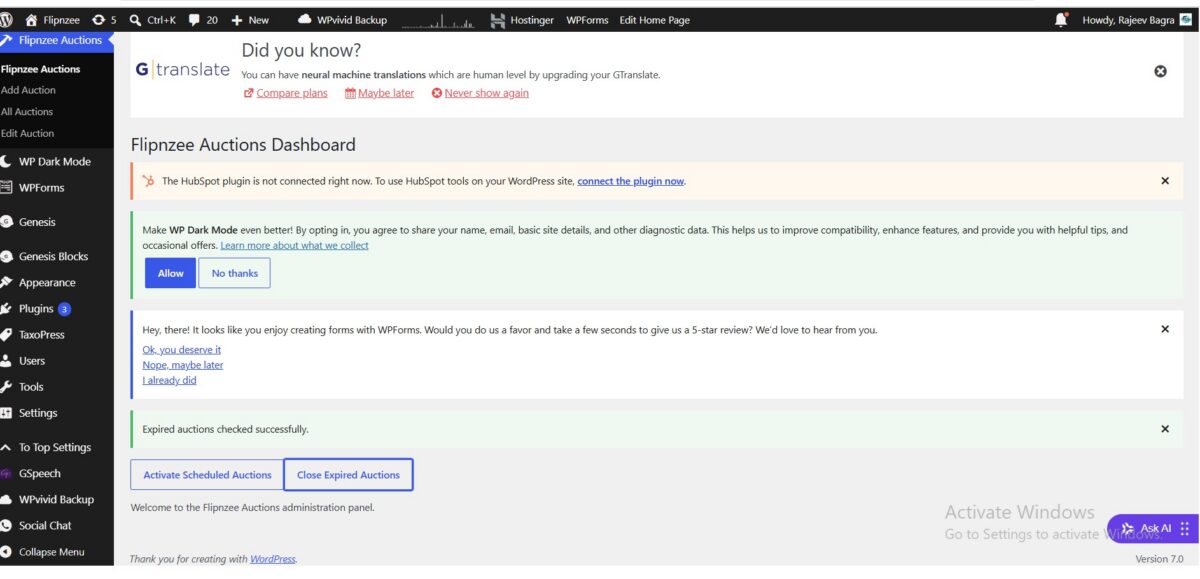
In the previous two lessons, we added the ability to manually activate scheduled auctions and manually close expired auctions. Those features worked correctly, but they still required an administrator to click buttons from the dashboard.
In this implementation lesson, we’ll take the next logical step by allowing WordPress to perform these maintenance tasks automatically using WP-Cron.
By the end of this lesson, Flipnzee Auctions will periodically check auction schedules in the background without administrator intervention.
Starting Point
Before beginning this lesson, ensure you have completed:
- Lesson 35 – Activate Scheduled Auctions
- Lesson 36 – Close Expired Auctions
Why WP-Cron?
Unlike a traditional Linux cron job, WordPress includes its own scheduling system called WP-Cron.
Instead of relying on server-level scheduled tasks, WordPress executes scheduled events whenever someone visits the website.
Many popular plugins use WP-Cron for tasks such as:
- Publishing scheduled posts
- Sending email notifications
- Clearing expired caches
- Running maintenance jobs
We’ll use the same mechanism for auction management.
Step 1: Create a Central Maintenance Method
Inside:
includes/class-auction-manager.php
we created a new method:
public static function run_scheduled_maintenance() {

	self::activate_scheduled_auctions();

	self::close_expired_auctions();
}
Rather than scheduling multiple background events, we created one maintenance method responsible for the complete auction lifecycle.
This keeps the plugin architecture simple and easier to extend.
Step 2: Register a Custom Cron Hook
Inside:
flipnzee-auctions.php
we registered a custom WordPress action.
add_action(
	'flipnzee_auction_maintenance',
	array(
		'Flipnzee_Auction_Manager',
		'run_scheduled_maintenance',
	)
);
Whenever WordPress executes the custom hook, our maintenance method is called automatically.
Step 3: Schedule the Event During Plugin Activation
Next, we modified the plugin activation routine.
function flipnzee_auction_activate() {

	Flipnzee_Database::create_tables();

	if ( ! wp_next_scheduled( 'flipnzee_auction_maintenance' ) ) {

		wp_schedule_event(
			time(),
			'hourly',
			'flipnzee_auction_maintenance'
		);
	}
}
The plugin now schedules a recurring hourly event when activated.
Using wp_next_scheduled() prevents duplicate scheduled events from being created if the plugin is activated multiple times.
Step 4: Remove the Scheduled Event on Deactivation
Good WordPress plugins clean up after themselves.
We therefore added a deactivation routine.
function flipnzee_auction_deactivate() {

	$timestamp = wp_next_scheduled(
		'flipnzee_auction_maintenance'
	);

	if ( $timestamp ) {

		wp_unschedule_event(
			$timestamp,
			'flipnzee_auction_maintenance'
		);
	}
}
This ensures WordPress no longer runs auction maintenance after the plugin has been deactivated.
Step 5: Register Activation and Deactivation Hooks
Finally, we registered both hooks.
register_activation_hook(
	__FILE__,
	'flipnzee_auction_activate'
);

register_deactivation_hook(
	__FILE__,
	'flipnzee_auction_deactivate'
);
WordPress now automatically schedules the maintenance event during activation and removes it during deactivation.
Plugin Architecture
Our maintenance workflow now looks like this:
Plugin Activated
        │
        ▼
Schedule Hourly Event
        │
        ▼
WordPress Cron
        │
        ▼
flipnzee_auction_maintenance
        │
        ▼
run_scheduled_maintenance()
        │
        ├───────────────┐
        ▼               ▼
Activate Auctions   Close Auctions
Using a single maintenance method keeps the code organized and simplifies future enhancements.
Testing During Development
Although the plugin now supports automatic scheduling, we intentionally kept the two dashboard buttons:
- Activate Scheduled Auctions
- Close Expired Auctions
These manual tools remain extremely valuable because they allow developers to test the maintenance logic immediately without waiting for the next scheduled Cron execution.
Keeping manual maintenance actions available is a practical approach during development and troubleshooting.
Debugging Along the Way
During implementation, we temporarily inserted debugging statements such as:
wp_die();
and displayed the number of rows updated by SQL queries.
These temporary diagnostics helped confirm:
- Dashboard buttons were submitting correctly.
- Nonce verification was successful.
- Maintenance methods were being executed.
- SQL queries were running as expected.
- WordPress time handling influenced scheduling behaviour.
Once testing was complete, all debugging statements were removed to ensure Cron jobs could run silently in the background.
Lessons Learned
This implementation introduced several important WordPress development concepts:
- Creating custom Cron hooks
- Scheduling recurring events
- Preventing duplicate scheduled events
- Cleaning up scheduled tasks during plugin deactivation
- Organizing background processes into a single maintenance method
- Using temporary debugging techniques while developing background tasks
These concepts are widely used in production-quality WordPress plugins.
Final Result
At the end of this lesson, Flipnzee Auctions is capable of:
- Scheduling recurring background maintenance
- Automatically activating scheduled auctions
- Automatically closing expired auctions
- Cleaning up scheduled events during plugin deactivation
This marks a significant milestone in the project’s evolution from an administrative CRUD plugin to an intelligent, self-managing auction platform.
Download Source Code
Download the starting version of the plugin before the lesson:
Download the completed version after this lesson:
What’s Next?
In Lesson 38, we’ll begin implementing the frontend auction experience, allowing visitors to view live auctions, auction details, countdown timers, and bidding information directly from the website. This will shift the focus from administrator tools to the public-facing auction marketplace.
Lesson 37: Automatically Run Auction Maintenance Using WordPress Cron
What You’ll Learn
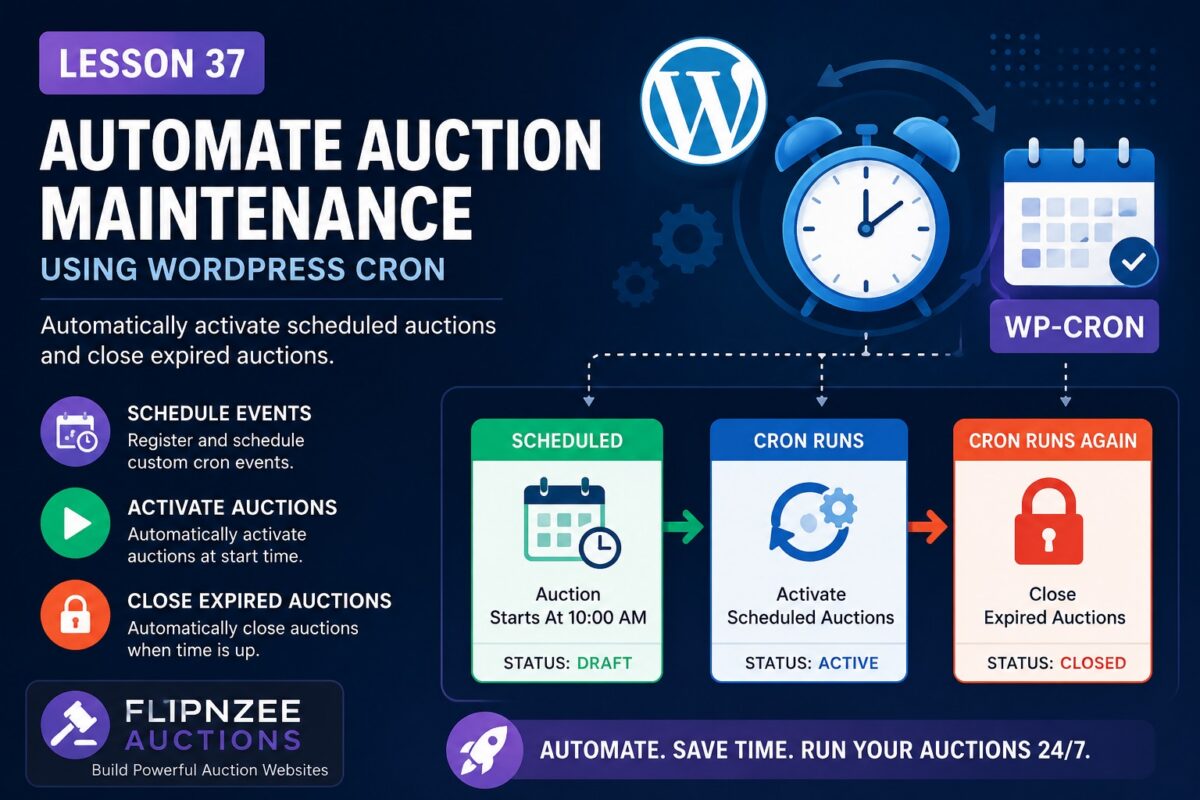
In this lesson, you’ll replace the manual workflow with automatic background processing using WordPress’s built-in Cron system.
By the end of this lesson, your plugin will:
- Register a custom scheduled event on plugin activation.
- Schedule the event if it doesn’t already exist.
- Execute auction maintenance automatically every few minutes (or hourly in production).
- Activate scheduled auctions automatically.
- Close expired auctions automatically.
- Unschedule the event when the plugin is deactivated.
Topics Covered
- Understanding WP-Cron
- Registering scheduled events
- Using
wp_next_scheduled() - Using
wp_schedule_event() - Creating custom cron hooks
- Hooking your auction manager into the scheduler
- Cleaning up scheduled events on plugin deactivation
Files We’ll Modify
flipnzee-auctions.php
includes/class-loader.php
includes/class-auction-manager.php
New Features
Instead of clicking:
Activate Scheduled Auctions
or
Close Expired Auctions
the plugin will quietly do this itself whenever WordPress Cron runs.
Administrators will simply create auctions and let the plugin manage their lifecycle automatically.
Expected Workflow
Auction Created
        │
        ▼
Status = Draft
        │
        ▼
Scheduled Start Time Arrives
        │
        ▼
WordPress Cron Runs
        │
        ▼
Status → Active
        │
        ▼
Auction End Time Arrives
        │
        ▼
WordPress Cron Runs Again
        │
        ▼
Status → Closed
This is the same architecture used by many production WordPress plugins that perform background maintenance.
Prerequisites
Before starting this lesson, ensure you have completed:
- ✅ Lesson 35 – Activate Scheduled Auctions
- ✅ Lesson 36 – Close Expired Auctions
Estimated Difficulty
⭐⭐⭐⭐☆ (Intermediate)
This lesson introduces WordPress Cron, one of the most useful APIs for background processing in plugin development.
What You’ll Build
By the end of Lesson 37, your plugin will automatically:
- Activate scheduled auctions.
- Close expired auctions.
- Run without administrator intervention.
- Prepare the project for future features such as automatic bid processing, email notifications, and auction reminders.
Implementation Lesson 37: Automating Auction Maintenance with WordPress Cron
Implementation Lesson 36: Automatically Close Expired Auctions in Flipnzee Auctions
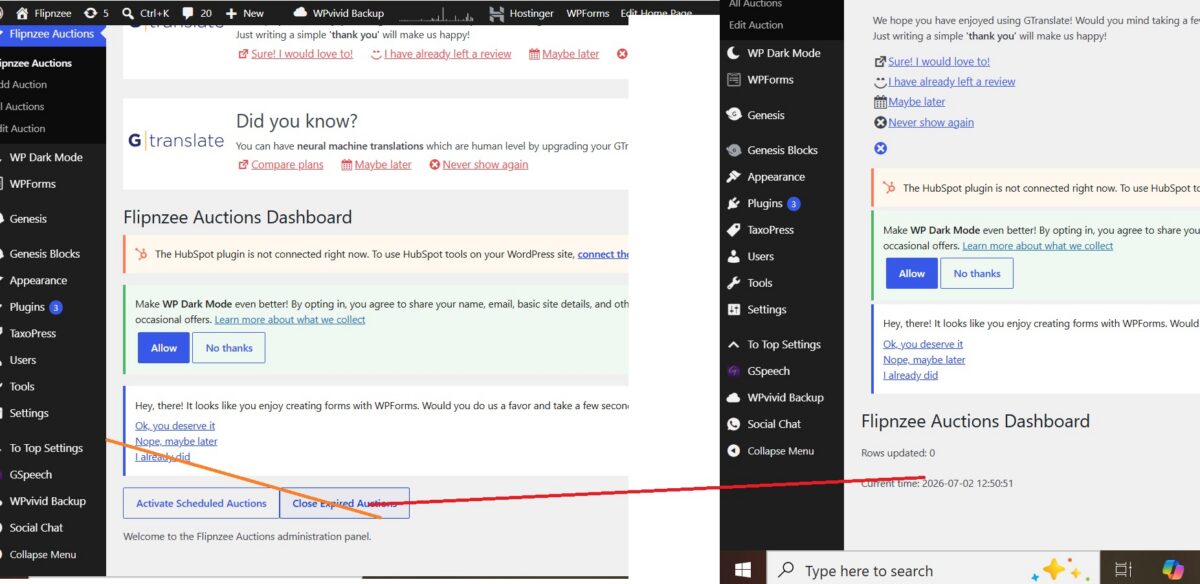
In the previous lesson, we added the ability to manually activate scheduled auctions. In this lesson, we build another important piece of auction lifecycle management by implementing the ability to automatically close auctions once their end time has passed.
Although the feature is currently triggered manually from the dashboard for testing purposes, the underlying logic is exactly the same as what will later be executed automatically by WordPress Cron.
What We Will Build
At the end of this lesson, the plugin will be able to:
- Detect auctions whose end time has already passed.
- Change their status from Active to Closed.
- Execute the update using a single SQL query.
- Allow administrators to manually trigger the check from the Dashboard.
- Protect the action using WordPress nonces.
Starting Point
Download the plugin completed in the previous lesson.
↓ Download Plugin (After Lesson 35)
Step 1: Create the Auction Closing Method
Open:
includes/class-auction-manager.php
Add a new static method.
public static function close_expired_auctions() {

	global $wpdb;

	$table = $wpdb->prefix . 'flipnzee_auctions';

	$current_time = current_time( 'mysql' );

	$wpdb->query(
		$wpdb->prepare(
			"UPDATE {$table}
			SET status = %s
			WHERE status = %s
			AND auction_end IS NOT NULL
			AND auction_end <= %s",
			'closed',
			'active',
			$current_time
		)
	);
}
Instead of loading every auction into PHP, this query updates every expired auction directly inside MySQL, making it fast even for large numbers of auctions.
Step 2: Add a Dashboard Button
Open:
admin/class-admin.php
Inside the dashboard form, add another submit button.
submit_button(
	'Close Expired Auctions',
	'secondary',
	'flipnzee_close_now',
	false
);
The dashboard now contains two management tools:
- Activate Scheduled Auctions
- Close Expired Auctions
Step 3: Process the Button Submission
Still inside the dashboard page, add another POST handler.
if ( isset( $_POST['flipnzee_close_now'] ) ) {

	check_admin_referer(
		'flipnzee_activate_now',
		'flipnzee_activate_nonce'
	);

	Flipnzee_Auction_Manager::close_expired_auctions();

	?>

	<div class="notice notice-success is-dismissible">
		<p>Expired auctions checked successfully.</p>
	</div>

	<?php
}
When the administrator clicks the button, the plugin securely executes the closing routine.
Step 4: Protect the Form
The dashboard form already contained a nonce from the previous lesson.
wp_nonce_field(
	'flipnzee_activate_now',
	'flipnzee_activate_nonce'
);
Since both dashboard buttons belong to the same form, the same nonce can safely protect both actions.
Step 5: Test the Feature
Create an auction that:
- has status Active
- has an auction end time in the past
Click:
Close Expired Auctions
The auction should immediately change its status to:
closed
Debugging During Development
During implementation, we temporarily added debugging statements such as:
wp_die();
and
Rows updated: X
These simple debugging techniques helped verify several important points:
- the dashboard button was submitting correctly
- nonce verification succeeded
- the function was being executed
- the SQL query was running
- the number of updated rows matched expectations
After confirming everything worked, the temporary debugging code was removed from the final implementation.
Why Use a Single SQL UPDATE?
Instead of writing code like this:
foreach ($auctions as $auction) {

    if (...) {

        update_database();

    }

}
we execute one SQL statement.
Advantages include:
- Faster execution
- Less PHP memory usage
- Fewer database operations
- Better scalability
This is a common optimization technique in professional WordPress plugin development.
What We Learned
In this lesson we learned how to:
- update multiple database records using SQL
- automatically detect expired auctions
- change auction status programmatically
- execute administrative actions from the dashboard
- secure form submissions using nonces
- debug SQL updates using temporary diagnostic output
Final Result
The Flipnzee Auctions plugin can now manage both ends of an auction lifecycle:
- Lesson 35: Activate scheduled auctions.
- Lesson 36: Close expired auctions.
Together, these features lay the foundation for fully automated auction scheduling in future lessons using WordPress Cron.
Download Source Code
Download the starting version of the plugin before the lesson:
Download the completed version after this lesson:
What’s Next?
In Lesson 37, we’ll begin moving these manual processes toward full automation by integrating them with WordPress’s scheduling system, reducing the need for administrators to manually trigger auction state changes.
Lesson 36: Automatically Close Expired Auctions in the Flipnzee Auctions Plugin
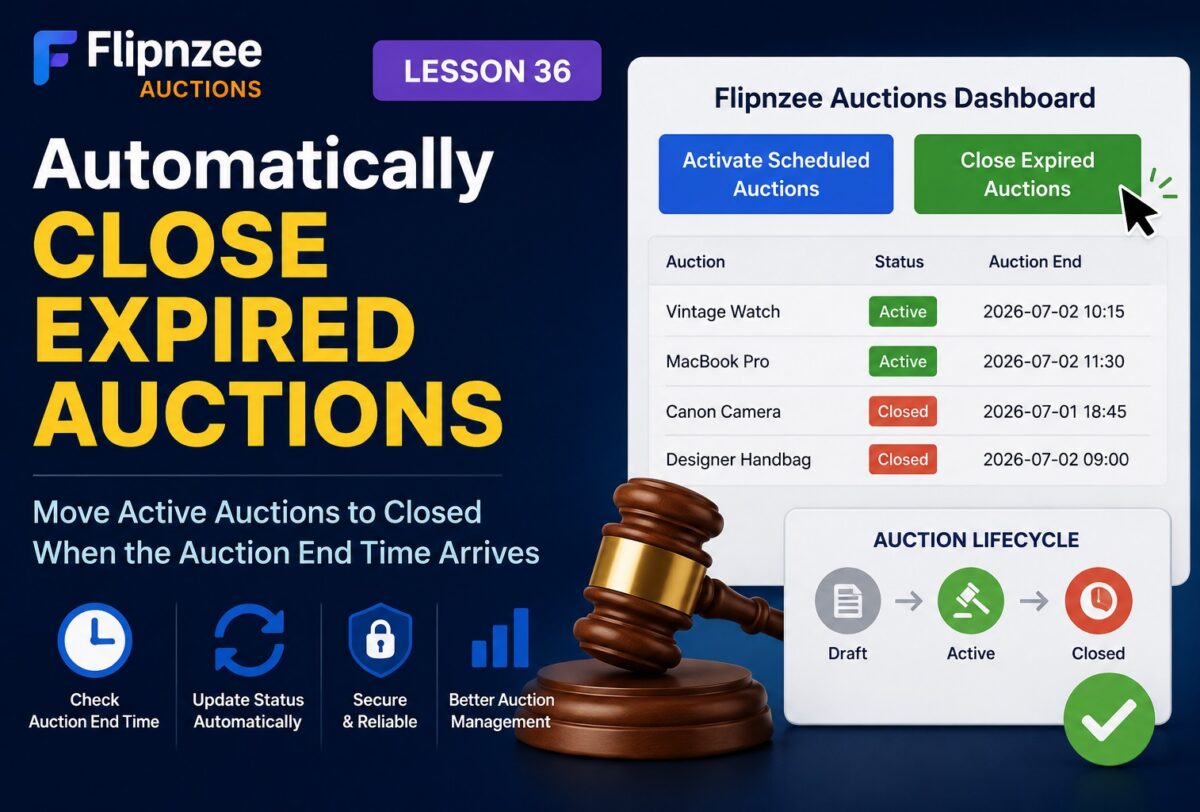
In the previous lesson, we implemented the ability to manually activate auctions whose scheduled start time had arrived. That completed the first half of the auction lifecycle.
Now it’s time to implement the second half.
When an auction reaches its scheduled end time, it should no longer accept bids. Instead, it should automatically move from Active to Closed.
In this lesson, we’ll build the first version of that functionality using a manual administrator action. Later, we’ll automate the entire process using WP-Cron.
What You Will Learn
By the end of this lesson, you will know how to:
- Create a function to close expired auctions.
- Update multiple auctions using a single SQL query.
- Add a “Close Expired Auctions” button to the dashboard.
- Secure administrator actions using WordPress nonces.
- Display success messages after processing.
- Prepare your plugin for automatic auction management.
Why Closing Auctions Matters
Every auction platform needs a clearly defined lifecycle.
Draft
   │
   ▼
Active
   │
Auction End Reached
   ▼
Closed
Once an auction is closed:
- No more bids should be accepted.
- The winner can be determined.
- Escrow payment can begin.
- Ownership transfer can be initiated.
Without a closing mechanism, auctions would remain active indefinitely.
What We Will Build
We’ll implement a new manager function:
Flipnzee_Auction_Manager::close_expired_auctions();
This function will:
- Find auctions where:
- Status = Active
- Auction End has passed
- Update their status to:
closed
Dashboard Improvements
The Flipnzee Auctions dashboard will receive another administrator tool.
Activate Scheduled Auctions

Close Expired Auctions
This allows administrators to manually manage the auction lifecycle during development.
Security
Like previous admin actions, this feature will include:
- Capability checks
- WordPress nonces
- Safe redirects
- Administrator-only access
Following WordPress security best practices keeps the plugin production-ready.
Why Manual Closing First?
Eventually, this process should happen automatically.
However, implementing manual closing first offers several advantages:
- Easier debugging
- Faster testing
- Immediate verification
- No dependency on scheduled cron events
This incremental approach reduces complexity while ensuring each component works correctly.
Database Changes
No database changes are required.
We already have everything needed:
- Auction Status
- Auction End
- Current WordPress time
We’ll simply update qualifying rows.
Expected Workflow
Administrator clicks

Close Expired Auctions
        │
        ▼
Plugin checks all auctions
        │
        ▼
Auction End <= Current Time?
        │
      Yes
        │
        ▼
Status changes:
Active → Closed
Production Benefits
By completing this lesson, the plugin will support nearly the entire auction lifecycle:
- ✅ Draft auctions
- ✅ Scheduled auctions
- ✅ Active auctions
- ✅ Closed auctions
This is another major milestone toward transforming Flipnzee Auctions into a production-grade marketplace plugin.
Implementation Lesson 36: Automatically Close Expired Auctions in Flipnzee Auctions
What Comes Next?
In the next lesson, we’ll improve the administrator experience by adding auction statistics to the dashboard, including:
- Total Auctions
- Draft Auctions
- Active Auctions
- Closed Auctions
- Scheduled Auctions
These live statistics will give administrators an instant overview of marketplace activity and prepare the dashboard for future analytics and reporting.
Implementation Lesson 35: Manually Activate Scheduled Auctions in the Flipnzee Auctions Plugin
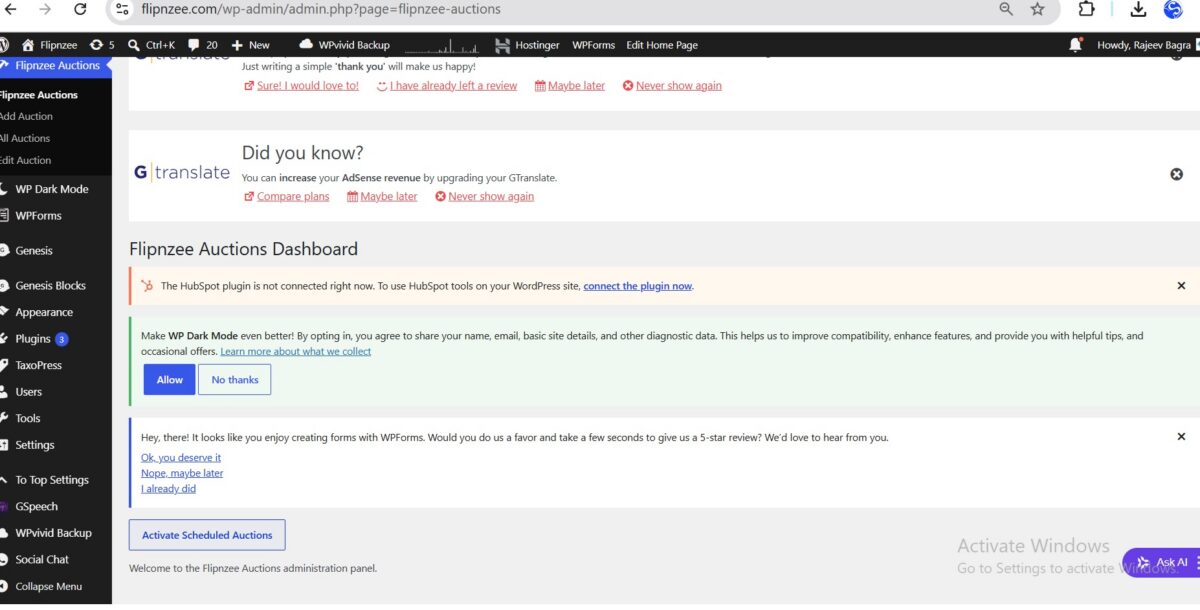
In the previous lesson, we added Auction Start and Auction End scheduling fields to our auctions. However, simply storing these dates in the database is not enough. The plugin also needs a mechanism to activate auctions when their scheduled start time arrives.
In this implementation lesson, we built the first version of that mechanism by adding a Manual Auction Activation feature.
Although the final version will eventually run automatically using WordPress Cron, implementing a manual activation tool first makes development, testing, and debugging much easier.
What We Built
By the end of this lesson, our plugin can:
- Store scheduled auction start dates.
- Compare scheduled start dates with the current WordPress time.
- Activate eligible auctions.
- Provide an administrator button to run the activation process manually.
- Lay the foundation for future automation.
Step 1: Create the Activation Function
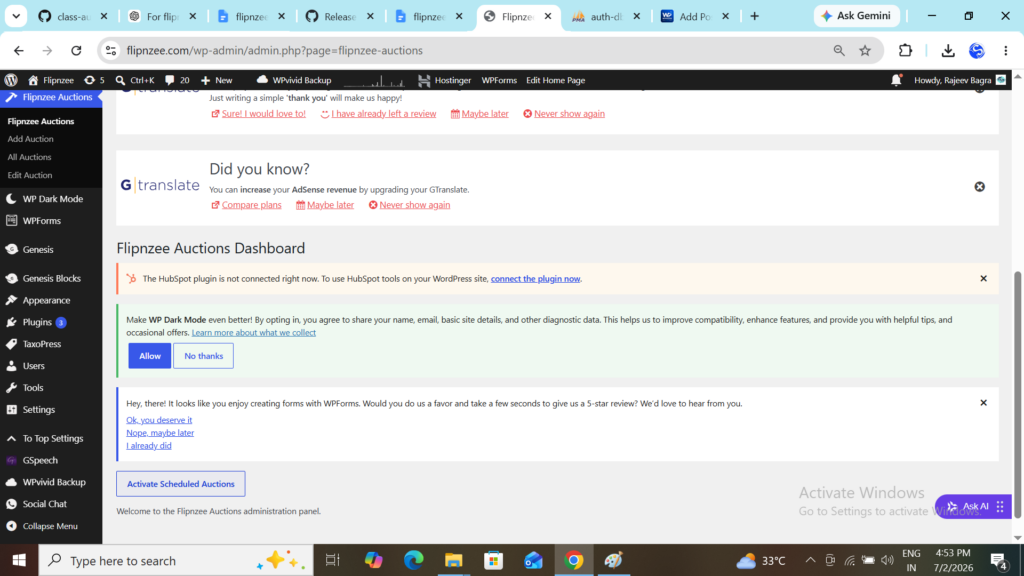
Inside class-auction-manager.php, we created a new method:
public static function activate_scheduled_auctions()
This method:
- Retrieves the current WordPress time.
- Searches for auctions whose:
- status is draft
- Auction Start has passed
- Updates their status to:
active
Step 2: Use a Single SQL UPDATE Query
Instead of loading every auction into PHP, we used one efficient SQL query.
The query updates every matching auction in one operation.
Benefits include:
- Better performance
- Cleaner code
- Easier maintenance
- Scales well for hundreds or thousands of auctions
Step 3: Add a Dashboard Button
Inside the Flipnzee Auctions dashboard, we added a new button:
Activate Scheduled Auctions
Clicking this button executes the activation process immediately.
This allows us to verify our scheduling logic before introducing automatic background processing.
Step 4: Register a Secure Admin Action
We registered a custom admin action using:
admin_post_flipnzee_activate_scheduled_auctions
The handler performs several important tasks:
- Capability check
- Nonce verification
- Calls the activation function
- Redirects back to the dashboard
This follows standard WordPress security practices.
Step 5: Add Nonce Protection
Every activation request includes a WordPress nonce.
Before processing, the plugin verifies that the request originated from the WordPress administration area.
This prevents Cross-Site Request Forgery (CSRF) attacks.
Step 6: Test the Feature
Testing involved:
- Creating multiple auctions
- Assigning different Auction Start dates
- Saving them
- Clicking Activate Scheduled Auctions
- Verifying database values using phpMyAdmin
This confirmed that our activation logic was executing correctly.
Debugging an Unexpected Issue
During testing, auctions were not changing from Draft to Active, even though their scheduled start times had already passed.
Instead of assuming the SQL query was incorrect, we debugged the process step by step.
Checking the Database
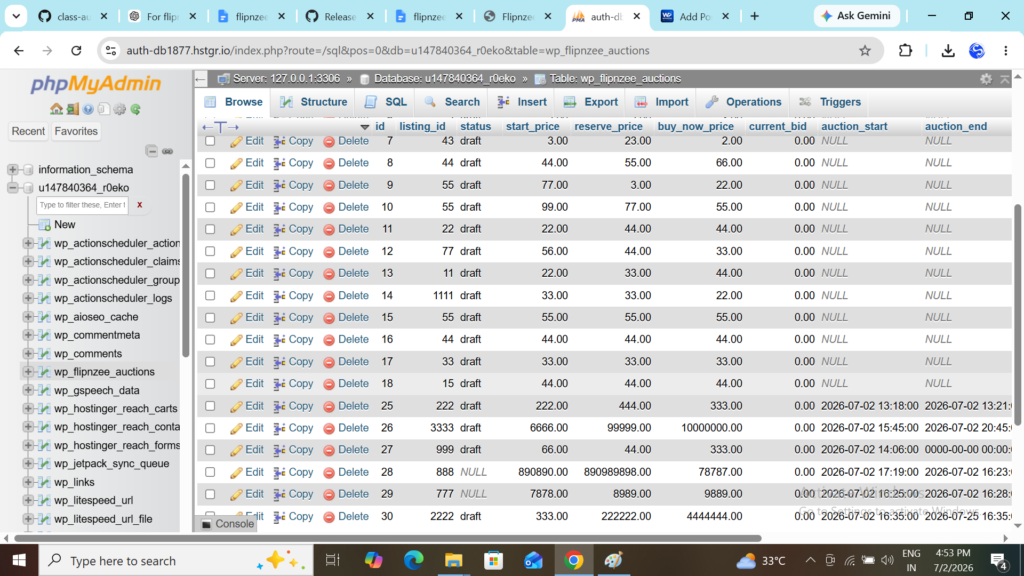
Using phpMyAdmin, we verified that:
- Auction Start values were stored correctly.
- Auction End values were stored correctly.
- Auction status remained draft.
This confirmed that the data itself was not the problem.
Verifying the SQL Logic
Next, we reviewed the SQL UPDATE statement.
The query correctly selected auctions where:
- status = draft
- auction_start <= current WordPress time
No issues were found in the SQL itself.
Inspecting the Current WordPress Time
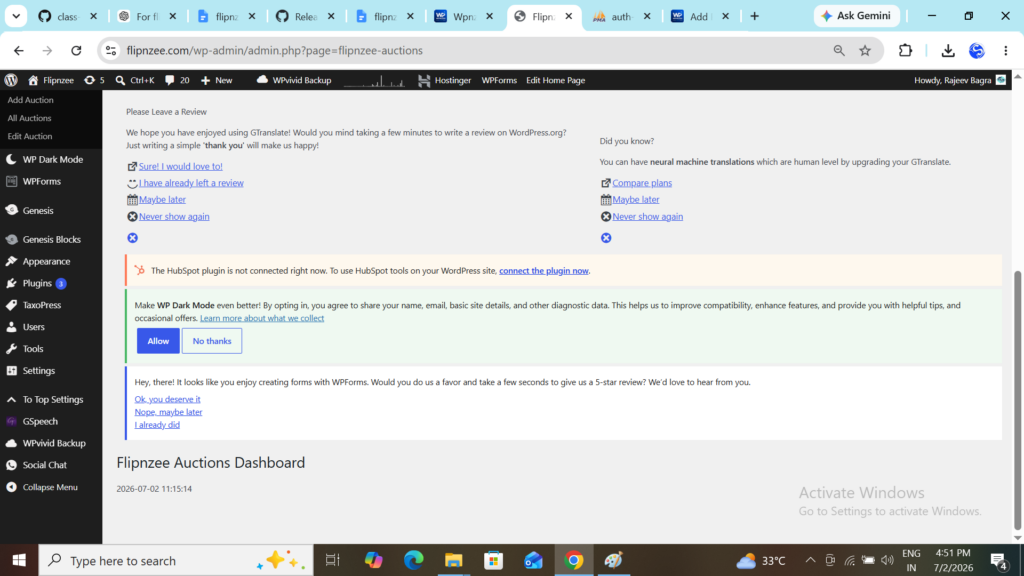
To isolate the issue, we temporarily added:
wp_die( current_time( 'mysql' ) );
This allowed us to display the exact time that WordPress was using during the activation process.
The output revealed that WordPress was using a different timezone than expected.
Root Cause
The activation logic depended on:
current_time( 'mysql' )
while the stored auction schedule had been entered using local time.
As a result:
- Auction Start appeared to be in the future.
- The SQL condition never matched.
- No auctions were activated.
The activation function itself was working correctly.
Lessons Learned
This debugging session reinforced several important development principles.
Instead of immediately changing the SQL query, we:
- Verified the stored database values.
- Confirmed the SQL logic.
- Checked the current application time.
- Identified the real source of the problem.
This systematic approach saved considerable time and prevented unnecessary code changes.
Why We Built Manual Activation First
Eventually, auctions should activate automatically.
However, during development, a manual activation tool provides several advantages:
- Easier debugging
- Immediate testing
- No dependency on WP-Cron
- Faster development cycle
Once the activation logic has been thoroughly tested, replacing the manual button with automatic scheduling becomes straightforward.
What’s Next?
In the next lesson, we’ll complete the scheduling workflow by implementing Manual Auction Closing.
Auctions whose scheduled end time has passed will automatically transition from Active to Closed, laying another important foundation for a production-ready auction platform.
Download Source Code
Download the starting version before this lesson:
Download the completed version after implementing this lesson:
Lesson 35: Automatically Activate Auctions When Their Start Time Arrives
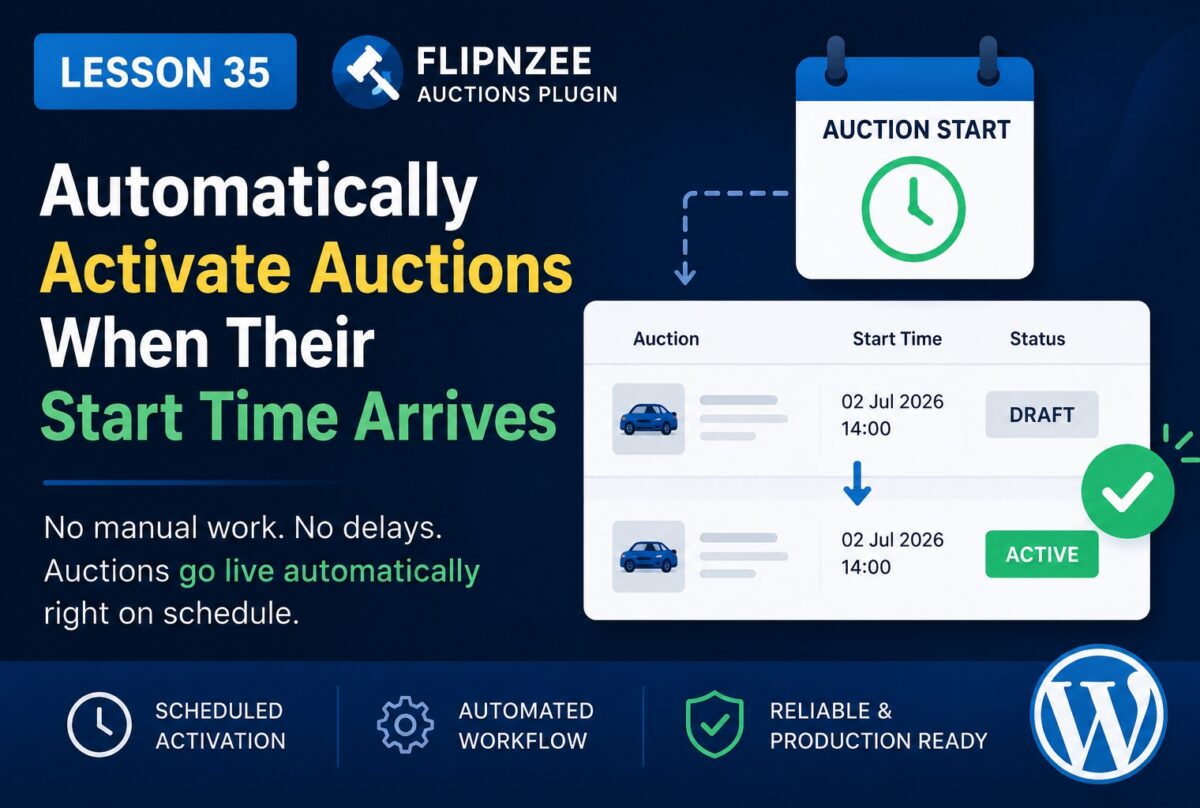
Over the past few lessons, we’ve transformed Flipnzee Auctions from a simple CRUD plugin into something that feels much closer to a production-ready auction system. Auctions can now store start and end dates, and those dates are visible throughout the admin interface.
However, there is still one important limitation.
Even if an auction’s scheduled start time has already passed, it remains in Draft status until an administrator manually edits it and changes the status to Active.
In a real auction platform, this would quickly become unmanageable. Administrators should not need to monitor dozens or hundreds of auctions throughout the day.
In this lesson, we’ll begin automating the auction lifecycle.
What We’ll Build
By the end of this lesson, Flipnzee Auctions will automatically activate auctions when:
- the auction is currently Draft
- a valid Auction Start date exists
- the scheduled start time has already passed
No manual intervention will be required.
Why This Matters
Automation is one of the defining characteristics of a professional auction platform.
Instead of relying on administrators to remember when auctions should begin, the software makes the decision automatically.
Benefits include:
- fewer administrative tasks
- fewer human errors
- auctions always start on time
- improved buyer confidence
Understanding the Workflow
Current workflow:
Create Auction
      ↓
Status = Draft
      ↓
Administrator edits auction
      ↓
Changes status to Active
After this lesson:
Create Auction
      ↓
Status = Draft
      ↓
Scheduled start time arrives
      ↓
Plugin activates auction automatically
How WordPress Makes This Possible
WordPress includes a scheduling system called WP-Cron.
Rather than requiring access to the server’s operating system scheduler, WordPress performs scheduled tasks whenever someone visits the website.
Examples include:
- publishing scheduled posts
- clearing caches
- sending emails
- updating plugin data
We’ll use the same idea for auctions.
Our Strategy
Instead of checking every second, we’ll create a function that periodically searches for auctions that meet all of these conditions:
Status = Draft

AND

Auction Start <= Current Time
For every matching auction:
Draft
      ↓
Active
Simple, reliable, and scalable.
SQL Logic
Conceptually, our database query will look something like:
SELECT *
FROM wp_flipnzee_auctions
WHERE status = 'draft'
AND auction_start <= CURRENT_TIME;
Each returned auction will then be updated to:
status = active
Where We’ll Add the Code
To keep the plugin organized, we’ll place this functionality inside the auction manager rather than mixing business logic into the admin interface.
That keeps responsibilities separated:
- Database → stores auction data
- Auction Manager → controls auction lifecycle
- Admin Pages → display forms and tables
Testing Strategy
We’ll create a draft auction with:
Start Time:
2 minutes from now
Then we’ll wait until that time passes.
Expected result:
Before:

Status
Draft

↓

After:

Status
Active
without editing the auction manually.
Future Improvements
This lesson lays the foundation for additional automation.
In upcoming lessons we’ll also automate:
- closing auctions automatically
- determining winners
- preventing bids after auction ends
- countdown timers
- bid history
- email notifications
- Escrow.com integration
Each of these features will build upon the scheduling mechanism introduced here.
What You’ll Learn
In this lesson, you’ll learn how to:
- use scheduled tasks in WordPress
- automate changes based on time
- update auction status programmatically
- separate business logic from presentation logic
- build a more production-ready auction platform
Conclusion
Manually changing auction statuses may work during early development, but it doesn’t scale for a real marketplace. By introducing automatic activation based on the scheduled start time, Flipnzee Auctions becomes significantly more autonomous and dependable.
In the next lesson, we’ll build on this automation by automatically closing auctions when their end time is reached, bringing the auction lifecycle one step closer to a fully hands-free experience.
Implementation Lesson 34: Display Auction Start and End Dates in the Auctions Table
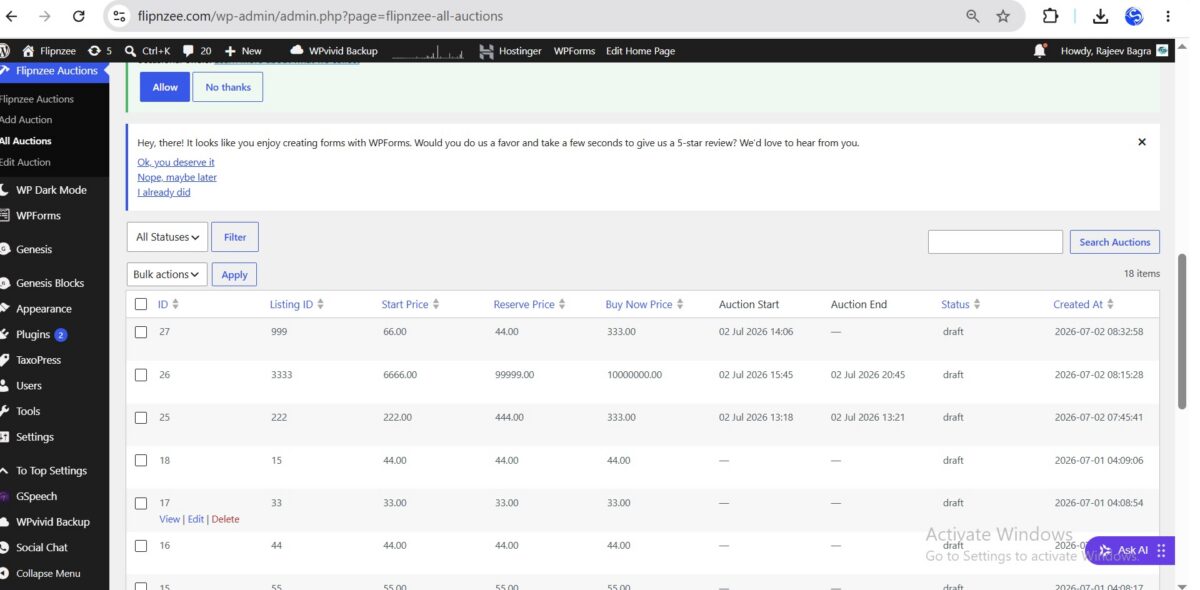
In the previous lesson, we added Auction Start and Auction End fields to the Add Auction and Edit Auction forms. However, administrators still could not see these values from the All Auctions page.
In this implementation lesson, we’ll enhance the auction management table by displaying both dates in a clean, human-readable format. We’ll also ensure that missing or invalid dates are handled gracefully.
What We’ll Build
By the end of this lesson, the All Auctions table will display:
- Auction Start
- Auction End
- Properly formatted dates
- A dash (
—) whenever no date has been configured
Instead of displaying raw database values such as:
2026-07-02 14:06:00
the table will display:
02 Jul 2026 14:06
which is much easier for administrators to read.
Step 1: Add the New Columns
Open:
admin/class-auctions-table.php
Locate the get_columns() method.
Add two new columns:
'auction_start' => 'Auction Start',
'auction_end'   => 'Auction End',
Your auctions table will now include two additional headings.
Step 2: Format the Dates
Locate the column_default() method.
Instead of returning the raw database value, we’ll format the dates using WordPress’ wp_date() function.
For the Auction Start column:
case 'auction_start':

    $timestamp = strtotime( $item->auction_start );

    if (
        empty( $item->auction_start ) ||
        '0000-00-00 00:00:00' === $item->auction_start ||
        false === $timestamp
    ) {
        return '—';
    }

    return wp_date(
        'd M Y H:i',
        $timestamp
    );
Repeat the same logic for the Auction End column:
case 'auction_end':

    $timestamp = strtotime( $item->auction_end );

    if (
        empty( $item->auction_end ) ||
        '0000-00-00 00:00:00' === $item->auction_end ||
        false === $timestamp
    ) {
        return '—';
    }

    return wp_date(
        'd M Y H:i',
        $timestamp
    );
Why Use wp_date()?
Although PHP provides the date() function, WordPress recommends using wp_date() because it:
- Respects the site’s configured timezone
- Produces consistent output across WordPress
- Follows WordPress coding standards
- Makes plugins more portable
Step 3: Handle Missing Dates Gracefully
Many auctions may not yet have a configured start or end time.
Instead of showing confusing values like:
0000-00-00 00:00:00
or
30 Nov -0001 00:00
our implementation simply displays:
—
This creates a much cleaner interface for administrators.
Step 4: Make the Columns Sortable
To improve usability, add the new columns to the sortable columns list.
Inside get_sortable_columns():
'auction_start' => array( 'auction_start', false ),
'auction_end'   => array( 'auction_end', false ),
Then update the list of allowed database columns inside:
includes/class-auction-manager.php
Add:
'auction_start',
'auction_end',
to the $allowed_columns array.
This allows administrators to sort auctions by either start or end date.
Step 5: Test the Implementation
Create a few auctions with different schedules.
Verify that:
- Auction Start displays correctly.
- Auction End displays correctly.
- Empty dates display as
—. - Clicking the column headings sorts the table.
- Existing auctions without dates continue to work normally.
Final Result
The All Auctions page now provides administrators with immediate visibility into the auction schedule without opening each auction individually.
The table is easier to scan, easier to sort, and provides a much more professional management experience.
Troubleshooting Tips
If you encounter unexpected date values:
- Verify that the database contains valid DATETIME values.
- Use
wp_date()instead ofdate(). - Check that
strtotime()returns a valid timestamp. - Display
—whenever the date is empty, invalid, or equal to0000-00-00 00:00:00.
A quick syntax check can also help before packaging the plugin:
php -l admin/class-auctions-table.php
If the command reports:
No syntax errors detected
your PHP syntax is valid.
What We Learned
In this lesson, we learned how to:
- Extend a custom
WP_List_Table - Add new columns to an admin table
- Format database dates for display
- Use
wp_date()following WordPress best practices - Handle empty and invalid dates gracefully
- Make custom columns sortable
These improvements make the Flipnzee Auctions plugin feel much closer to a polished, production-ready WordPress plugin while laying the groundwork for future features such as automatic auction activation, countdown timers, and bid management.
Download Source Code
Download the starting version of the plugin before the lesson:
Download the completed version after this lesson:
Lesson 34 – Display Auction Schedule in the Admin List
Objective
In the previous lesson, we added support for scheduling auctions. However, administrators still need to open each auction to see when it starts or ends.
In this lesson, we’ll improve the All Auctions page by displaying the auction schedule directly in the table.
By the end of this lesson, administrators will be able to see:
- Auction Start
- Auction End
for every auction without opening the edit screen.
What You’ll Learn
During this lesson you’ll learn how to:
- Add new columns to a
WP_List_Table - Display custom database fields
- Format date and time values
- Improve the usability of an admin interface
Why This Matters
Imagine having hundreds of auctions.
Without these columns you would need to:
- Open Auction 1
- Check its dates
- Return
- Open Auction 2
- Check its dates
- Repeat…
Displaying the schedule directly in the list makes auction management much faster.
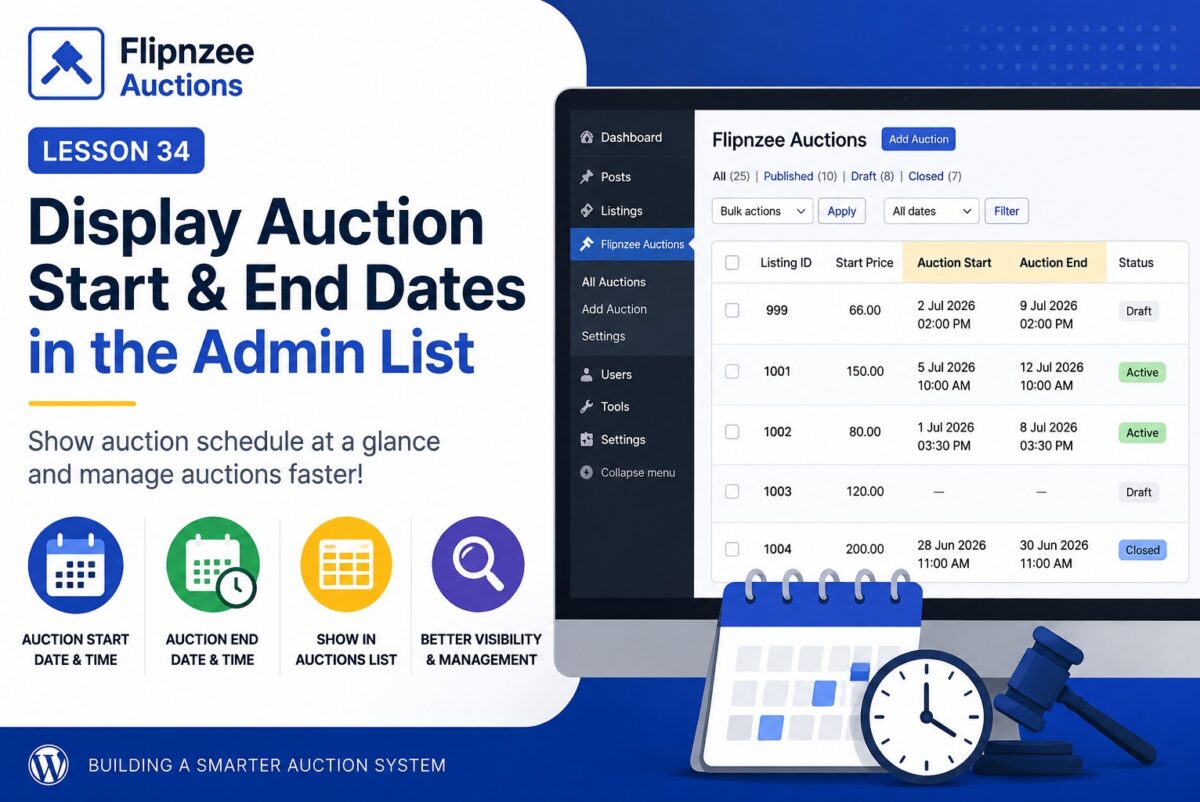
Final Result
The All Auctions page will look similar to:
| Listing | Start Price | Auction Start | Auction End | Status |
|---|---|---|---|---|
| 999 | 66.00 | 2 Jul 2026 2:00 PM | 9 Jul 2026 2:00 PM | Draft |
| 1001 | 150.00 | 5 Jul 2026 10:00 AM | 12 Jul 2026 10:00 AM | Active |
Implementation Plan
Step 1
Add two new columns to the auction table:
- Auction Start
- Auction End
Step 2
Populate both columns with values from the database.
Step 3
Format empty values nicely.
Instead of showing:
0000-00-00 00:00:00
or a blank SQL value,
display something more user-friendly:
—
or
Not Scheduled
Step 4
Format the dates for administrators.
Instead of displaying:
2026-07-02 14:30:00
display:
2 Jul 2026
2:30 PM
This is much easier to scan.
Step 5
Test sorting, searching and filtering to ensure the new columns don’t affect the existing functionality.
What You’ll Gain
After this lesson, your plugin will support:
- ✅ Creating auctions
- ✅ Editing auctions
- ✅ Scheduling auctions
- ✅ Viewing schedules directly from the auction list
This is another important step toward a production-ready auction system.
Implementation Lesson 34: Display Auction Start and End Dates in the Auctions Table
Looking Ahead
After Lesson 34, the next logical milestone is Lesson 35: Automatic Auction Lifecycle, where we’ll begin implementing the logic that automatically changes auction statuses based on the current date and time (for example, moving a scheduled auction from draft to active when its start time arrives, and from active to closed when its end time passes). This will move the plugin beyond simply storing dates and into actually using them to control auction behavior.
Lesson 33 Implementation: Adding Auction Scheduling (Start & End Date/Time)
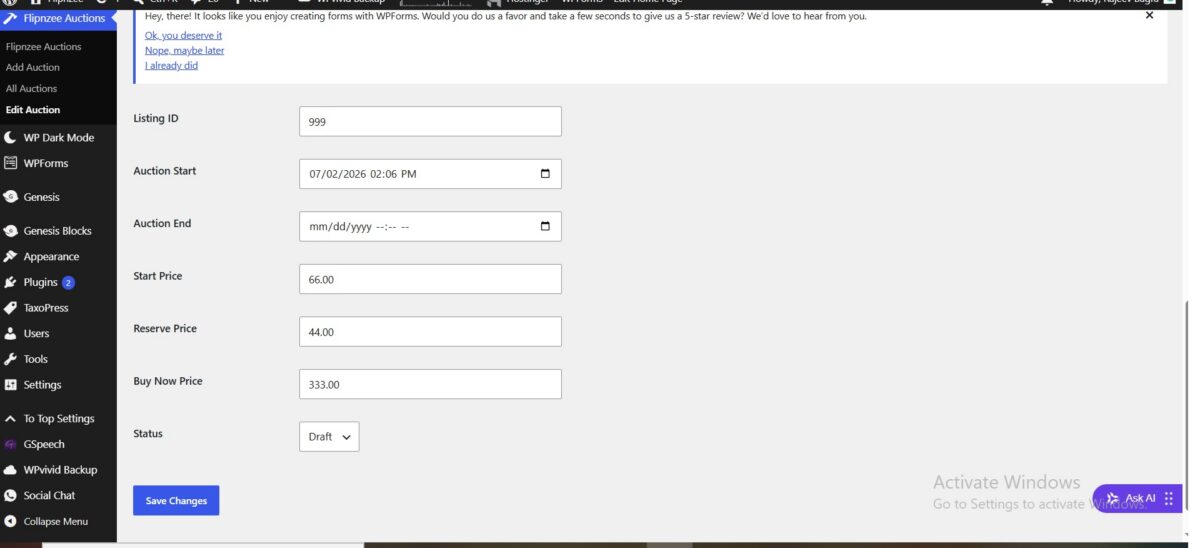
In Lesson 33, we transformed the Flipnzee Auctions plugin from a basic auction management system into one capable of supporting scheduled auctions.
Instead of auctions existing only in a draft, active, or closed state, administrators can now define exact start and end dates. This lays the foundation for future automation, where auctions will open and close automatically without manual intervention.
What We Implemented
During this lesson we added support for:
- Auction Start Date & Time
- Auction End Date & Time
- Saving schedule information while creating auctions
- Editing scheduled auctions
- Updating the schedule after creation
- Database support for scheduling
This is a major step toward building a production-ready auction platform.
Step 1 – Extend the Database
The first task was updating the auction table to store scheduling information.
Inside includes/class-database.php we added two new columns:
auction_start DATETIME NULL,
auction_end DATETIME NULL,
These fields allow every auction to have:
- Start date
- End date
Both fields are optional, making the feature flexible.
Step 2 – Update the Add Auction Form
Next we modified the Add Auction screen.
Two new fields were added:
- Auction Start
- Auction End
Both use HTML5’s built-in datetime picker.
<input type="datetime-local">
Benefits:
- Native browser calendar
- Native time selector
- No JavaScript library required
Step 3 – Save the Schedule
Adding form fields is not enough.
We also updated:
admin/class-admin-posts.php
to read:
$_POST['auction_start']
$_POST['auction_end']
The values are sanitized using:
sanitize_text_field()
before being sent to the Auction Manager.
Step 4 – Update create_auction()
The next task was modifying:
Flipnzee_Auction_Manager::create_auction()
Its function signature changed from:
create_auction(
    $listing_id,
    $start_price,
    $reserve_price,
    $buy_now_price
)
to:
create_auction(
    $listing_id,
    $start_price,
    $reserve_price,
    $buy_now_price,
    $auction_start,
    $auction_end
)
The SQL INSERT statement now stores:
'auction_start'
'auction_end'
alongside the other auction fields.
Step 5 – Update the Edit Auction Screen
Once scheduling could be saved, administrators also needed the ability to edit it.
Inside:
admin/class-admin.php
we added two additional form fields:
- Auction Start
- Auction End
The stored values are displayed using:
str_replace(
    ' ',
    'T',
    $auction->auction_start
)
This converts the MySQL format:
2026-07-02 14:30:00
into the format expected by HTML5:
2026-07-02T14:30
Without this conversion, the datetime picker would appear empty.
Step 6 – Update update_auction()
The update method also required changes.
Its function signature was expanded to accept:
$auction_start
$auction_end
The SQL UPDATE statement now saves:
'auction_start'
'auction_end'
along with:
- Listing ID
- Prices
- Status
This allows administrators to modify auction schedules after creation.
Step 7 – Verify Everything
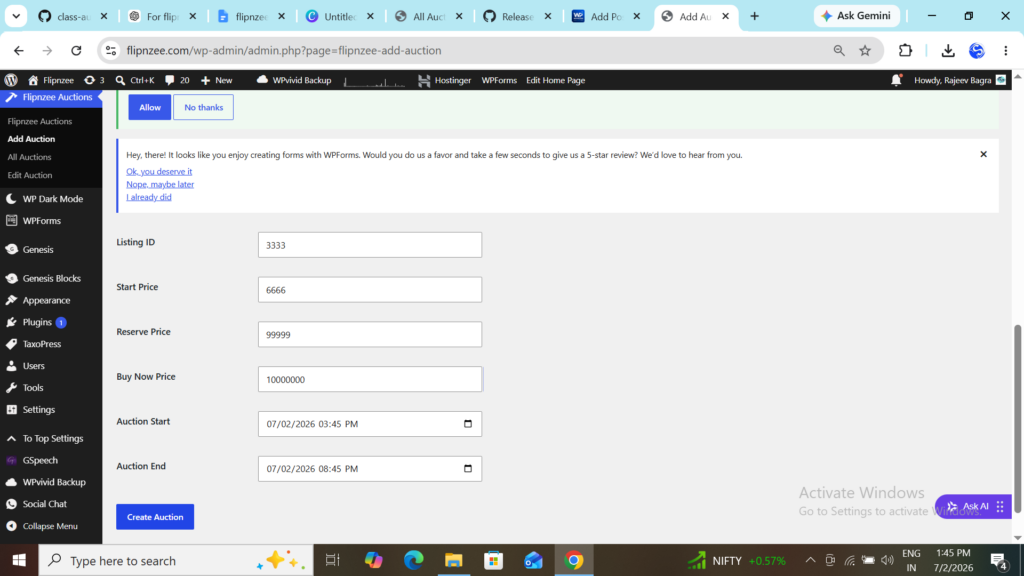
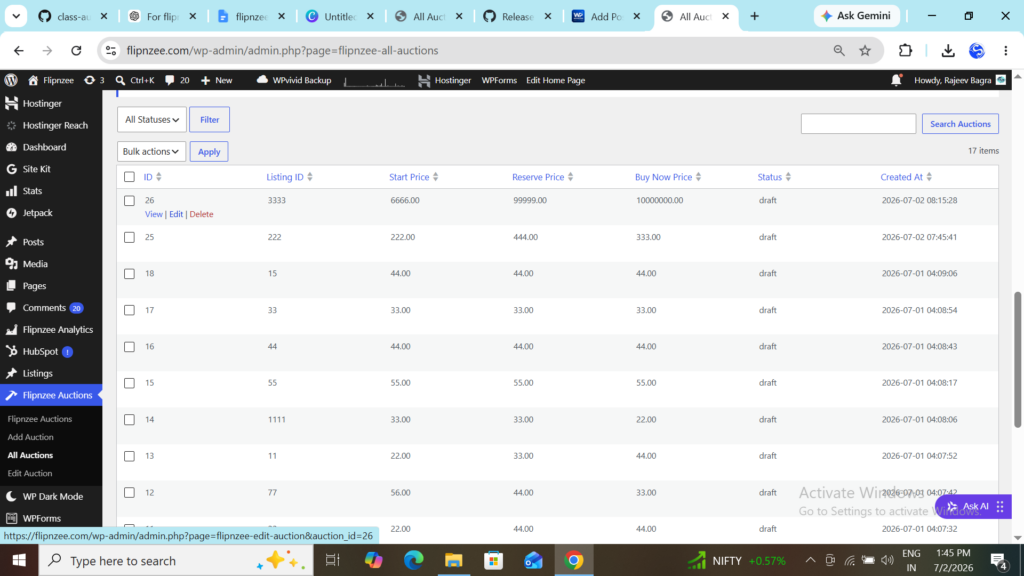
After completing the implementation we tested:
Creating Auctions
✔ Auction created successfully.
Editing Auctions
✔ Auction Start displayed correctly.
✔ Auction End displayed correctly.
Saving Changes
✔ Updated schedule persisted successfully.
No PHP syntax errors were reported during testing.
What We Learned
This lesson introduced several useful concepts:
- Extending existing database tables
- Working with HTML5 datetime inputs
- Handling date/time values safely
- Updating SQL INSERT statements
- Updating SQL UPDATE statements
- Passing additional parameters between classes
- Displaying MySQL datetime values inside HTML forms
Current Progress
The plugin now supports:
- Creating auctions
- Editing auctions
- Searching auctions
- Sorting auctions
- Status filtering
- Bulk deletion
- Auction scheduling
The scheduling functionality is now fully functional from an administrator’s perspective.
Download Source Code
Download the starting version of the plugin before the lesson:
Download the completed version after this lesson:
What’s Next?
In the next lesson, we’ll complete the scheduling feature by displaying Auction Start and Auction End directly in the All Auctions table. This will allow administrators to view an auction’s schedule at a glance without opening the edit screen.
After that, we’ll be ready to begin implementing automatic auction opening and closing, bringing the plugin one step closer to a production-ready auction platform.