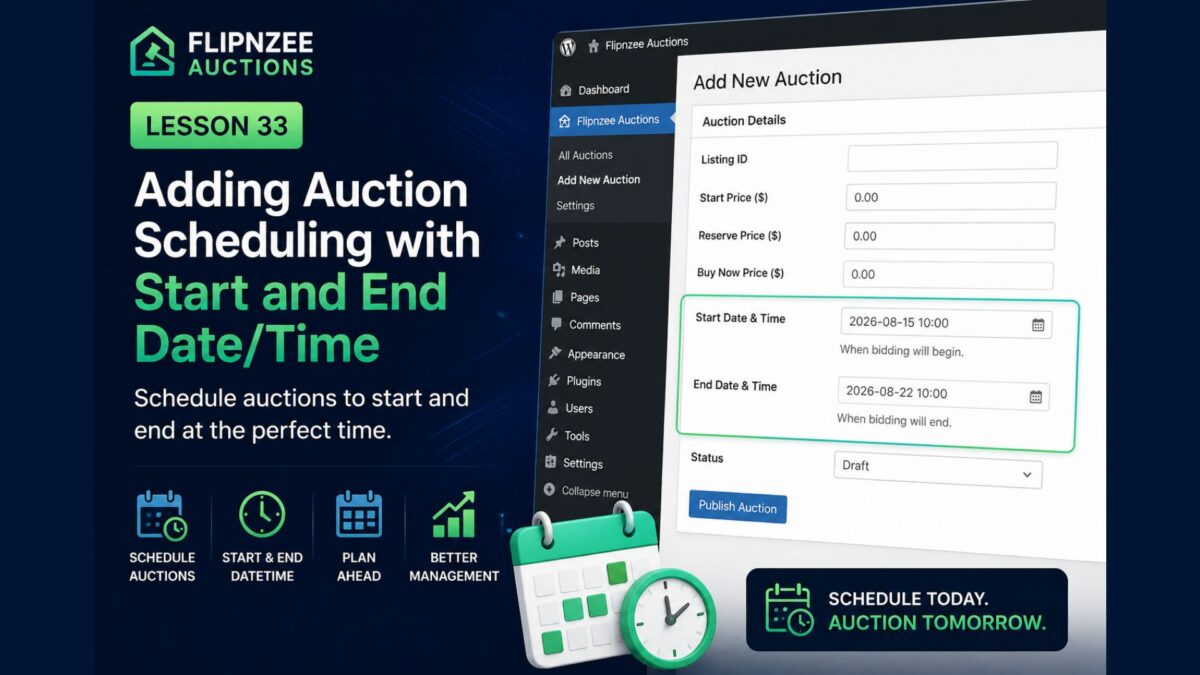
Lesson 33 – Adding Auction Scheduling with Start and End Date/Time


Series: Building the Flipnzee Auctions WordPress Plugin
Lesson: 33
Difficulty: Intermediate


Introduction

Up to this point, our Flipnzee Auctions plugin allows administrators to create, edit, search, filter, and manage auctions from the WordPress dashboard. However, every auction becomes active immediately after it is created.

In a real-world marketplace, auctions usually begin and end at specific times. Sellers may wish to schedule an auction several days in advance, while buyers expect to know exactly when bidding starts and when it closes.

In this lesson, we’ll extend our auction system by adding Start Date/Time and End Date/Time fields. These scheduling options will become the foundation for many future features, including countdown timers, automatic activation, automatic closing, winner selection, and Escrow.com integration.


What You’ll Learn

After completing this lesson, you’ll know how to:

  • Add datetime fields to the auction database.
  • Update the database schema safely.
  • Modify auction forms to support scheduling.
  • Store start and end times securely.
  • Display scheduling information in the admin table.
  • Prepare the plugin for automatic auction management.

Why Auction Scheduling Matters

Without scheduling, every auction becomes active as soon as it is created.

This creates several limitations:

  • Sellers cannot prepare future auctions.
  • Buyers do not know when bidding begins.
  • Auctions cannot close automatically.
  • Countdown timers are impossible.
  • Escrow workflows cannot be triggered automatically.

Scheduling solves all of these problems.


Real-World Example

Imagine a premium website is scheduled for auction.

Instead of starting immediately, the seller configures:

Auction Starts:
15 August 2026
10:00 AM

Auction Ends:
22 August 2026
10:00 AM

Visitors can view the auction before it starts, while bidding automatically opens at the scheduled time and closes exactly one week later.


Files We’ll Modify

During this lesson we’ll update:

includes/class-database.php
includes/class-auction-manager.php
admin/class-admin.php
admin/class-auctions-table.php

Database Changes

We’ll extend the auctions table by adding two new columns:

start_datetime

and

end_datetime

Both fields will store the auction schedule using MySQL’s DATETIME data type.


Admin Form Changes

The Add Auction screen will include two new fields:

  • Start Date & Time
  • End Date & Time

The Edit Auction screen will also allow administrators to update the auction schedule whenever necessary.


Auction List Improvements

The All Auctions table will display:

  • Start Date
  • End Date

This allows administrators to quickly see when each auction begins and ends without opening the edit screen.


Data Validation

We’ll also introduce validation rules such as:

  • End date cannot be earlier than the start date.
  • Both fields must use valid date/time values.
  • Empty schedules should be handled gracefully.

These checks help prevent invalid auction configurations.


Future Features Enabled

Although this lesson focuses only on scheduling, it lays the groundwork for several upcoming capabilities.

Upcoming lessons will build upon these fields to implement:

  • Automatic auction activation.
  • Automatic auction closing.
  • Live countdown timers.
  • Winner selection.
  • Email notifications.
  • Escrow.com transaction creation.

Expected Result

After completing this lesson, administrators will be able to:

  • Schedule auctions in advance.
  • Specify exact opening and closing times.
  • Edit auction schedules.
  • View auction schedules from the listing table.

The plugin will be one major step closer to becoming a production-ready auction platform.


Security Considerations

Throughout this lesson we’ll continue following WordPress best practices by:

  • Sanitizing all user input.
  • Validating date and time values.
  • Escaping output before displaying it.
  • Updating the database safely without affecting existing auction records.

Conclusion

Auction scheduling is one of the most important features of any professional auction platform. Rather than activating auctions immediately, administrators can now define exactly when bidding begins and when it ends.

This enhancement not only improves the user experience but also establishes the technical foundation for automation throughout the remainder of the project.

With scheduling in place, Flipnzee Auctions will be ready for features such as automatic status changes, countdown timers, winner selection, and seamless Escrow.com integration.

Lesson 33 Implementation: Adding Auction Scheduling (Start & End Date/Time)


In the Next Lesson

In Lesson 34, we’ll use the newly added scheduling fields to automatically determine the auction status. Instead of manually choosing between Draft, Active, or Closed, the plugin will calculate whether an auction is Scheduled, Active, or Ended based on the current date and time, bringing the system one step closer to a fully automated auction marketplace.
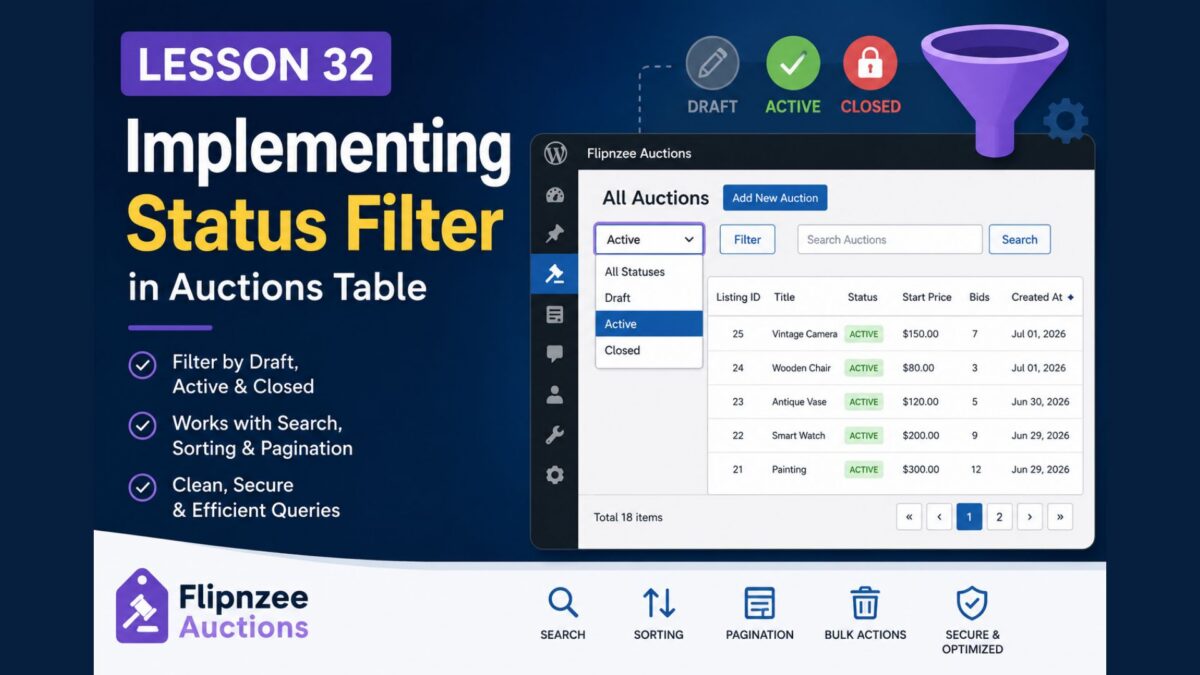
Lesson 32 Implementation – Adding a Fully Functional Status Filter to the Auctions Table

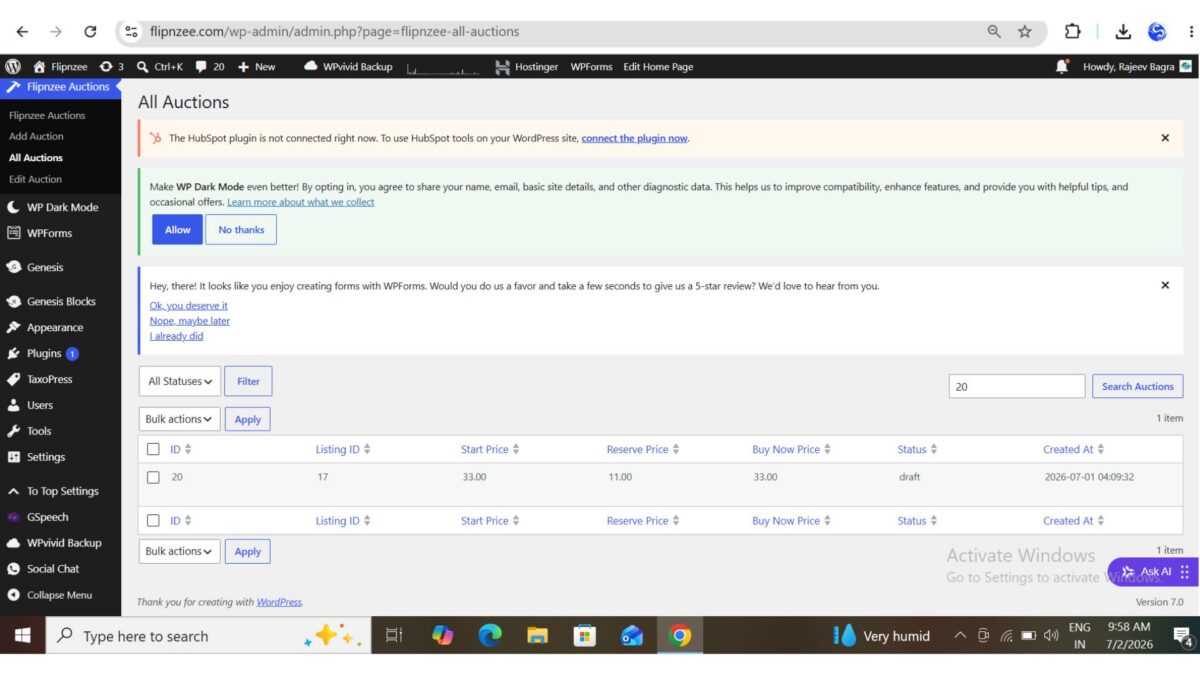
In the previous lesson, we added the Status dropdown above the auctions table. Although the user interface looked complete, the filter was only partially functional. Selecting a status displayed filtered results, but the search box and pagination count did not always stay synchronized.

In this lesson, we’ll complete the implementation by making the Status Filter, Search Box, and Pagination work together seamlessly.


Prerequisites

Before starting, ensure you have completed:

  • Lesson 29 – Bulk Actions
  • Lesson 30 – Bulk Delete
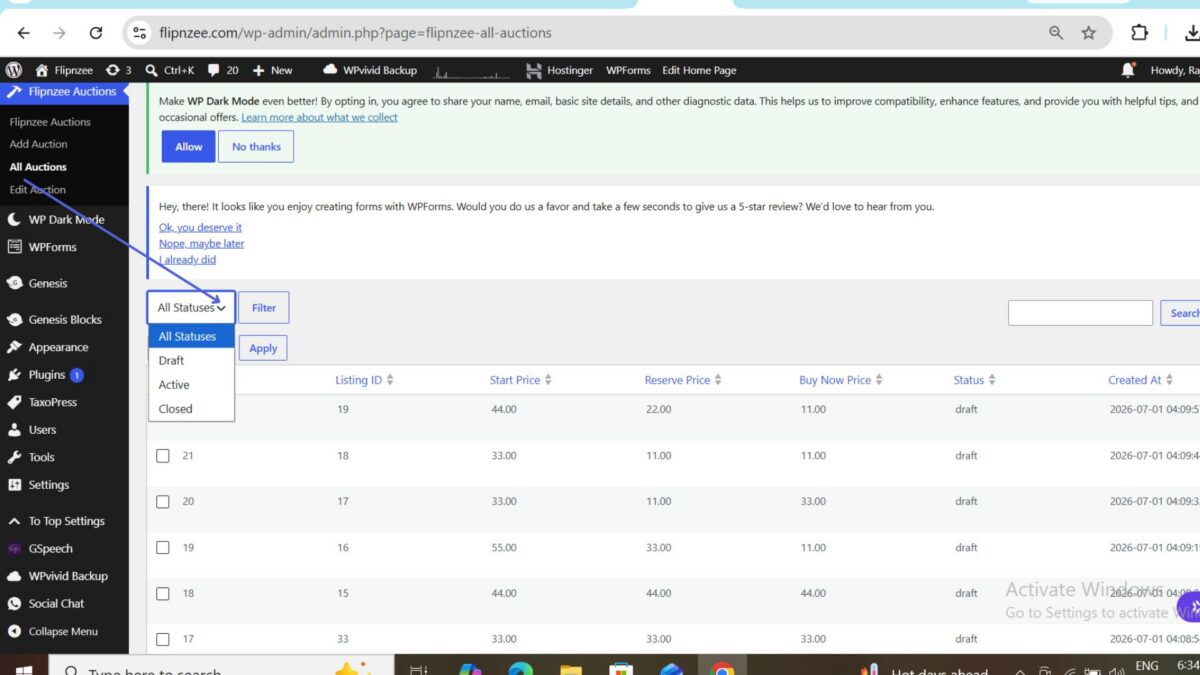
  • Lesson 31 – Adding a Status Filter Dropdown

Step 1 – Read the Selected Status

Open:

admin/class-auctions-table.php

Inside the prepare_items() method, read the selected status.

$status = isset( $_GET['status'] )
	? sanitize_text_field(
		wp_unslash( $_GET['status'] )
	)
	: '';

Using sanitize_text_field() and wp_unslash() follows WordPress coding standards and safely processes user input.


Step 2 – Pass the Status to the Count Query

Previously we counted auctions using only the search keyword.

Replace:

$total_items = Flipnzee_Auction_Manager::count_auctions(
	$search
);

with:

$total_items = Flipnzee_Auction_Manager::count_auctions(
	$search,
	$status
);

Now the pagination count knows which status is currently selected.


Step 3 – Pass Status to get_all_auctions()

Next, update the method call that loads auction records.

Replace:

$this->items = Flipnzee_Auction_Manager::get_all_auctions(
	$per_page,
	$offset,
	$search,
	$orderby,
	$order
);

with:

$this->items = Flipnzee_Auction_Manager::get_all_auctions(
	$per_page,
	$offset,
	$search,
	$status,
	$orderby,
	$order
);

The status value is now available inside the database query.


Step 4 – Update get_all_auctions()

Open:

includes/class-auction-manager.php

Modify the function signature.

Replace:

public static function get_all_auctions(
	$per_page = 20,
	$offset = 0,
	$search = '',
	$orderby = 'created_at',
	$order = 'DESC'
)

with:

public static function get_all_auctions(
	$per_page = 20,
	$offset = 0,
	$search = '',
	$status = '',
	$orderby = 'created_at',
	$order = 'DESC'
)

The function can now receive the selected status.


Step 5 – Filter by Status

Inside get_all_auctions(), add SQL logic that filters records when a status is selected.

For example:

  • Draft → Draft auctions only
  • Active → Active auctions only
  • Closed → Closed auctions only

When no status is selected, the original query continues to return all auctions.


Step 6 – Support Search and Status Together

One important improvement is allowing both filters to work simultaneously.

Instead of choosing between Search or Status, the query now supports both.

Example:

SearchStatusResult
20DraftDraft auction containing “20”
LaptopActiveActive Laptop auctions
EmptyClosedAll Closed auctions
EmptyEmptyAll auctions

This creates a much better user experience.


Step 7 – Update count_auctions()

Next, update the counting method.

Change the function signature from:

public static function count_auctions(
	$search = ''
)

to:

public static function count_auctions(
	$search = '',
	$status = ''
)

Now the counting function receives the selected status as well.


Step 8 – Count Filtered Records Correctly

Update the SQL inside count_auctions() so it supports:

  • Search only
  • Status only
  • Search + Status
  • No filters

This ensures the total number of auctions displayed above the table always matches the records shown.

Without this change, the table could display five Draft auctions while the pagination still reported the total number of auctions in the database.


Step 9 – Test the Feature

Verify the following scenarios:

  • All Statuses
  • Draft
  • Active
  • Closed
  • Search only
  • Search + Draft
  • Search + Active
  • Search + Closed

Also verify that pagination continues to display the correct number of filtered records.


Final Result

After completing this lesson, the Auctions table supports:

  • ✅ Status filtering
  • ✅ Search
  • ✅ Search + Status
  • ✅ Pagination
  • ✅ Sorting
  • ✅ Bulk Actions
  • ✅ Bulk Delete

The Auctions management screen now behaves much more like WordPress core list tables, providing administrators with a smoother and more intuitive experience.


What We Learned

In this lesson, we learned how to:

  • Read filter values securely from the URL.
  • Pass filter values through multiple application layers.
  • Extend database methods with additional parameters.
  • Combine multiple filtering conditions safely.
  • Keep pagination synchronized with filtered data.
  • Build a more professional WordPress admin experience.

Download Source Code

Download the starting version of the plugin before the lesson:

Download the completed version after this lesson:

Next Lesson

In Lesson 33, we’ll extend our auction system by adding Start Date/Time and End Date/Time fields. These scheduling options will become the foundation for many future features, including countdown timers, automatic activation, automatic closing, winner selection, and Escrow.com integration.

Lesson 32 — Implementing a Fully Functional Status Filter in the Auctions Table

Series: Building the Flipnzee Auctions WordPress Plugin
Lesson: 32
Difficulty: Intermediate


Introduction

In the previous lesson, we added a Status dropdown above the Auctions table. The user interface was complete, but selecting a status did not yet change the displayed records.

In this lesson, we’ll connect the status filter to the database so that it becomes fully functional. Administrators will be able to display only Draft, Active, or Closed auctions while continuing to use searching, sorting, pagination, and bulk actions.

By the end of this lesson, the Status filter will work exactly as expected in a professional WordPress administration screen.


What You’ll Learn

After completing this lesson, you’ll know how to:

  • Extend existing manager methods with additional filter parameters.
  • Build dynamic SQL queries based on optional filters.
  • Combine multiple filters within a single query.
  • Keep pagination synchronized with filtered results.
  • Preserve compatibility with searching, sorting, and bulk actions.
  • Follow WordPress database best practices.

Why Finish the Status Filter?

The previous lesson introduced the user interface, but administrators still could not actually filter auction records.

A fully functional status filter allows administrators to quickly answer questions such as:

  • Which auctions are currently active?
  • Which auctions are still drafts?
  • Which auctions have already closed?

Instead of manually browsing dozens or hundreds of records, administrators can focus on only the auctions they need.


Files We’ll Modify

During this lesson, we’ll update:

admin/class-auctions-table.php
includes/class-auction-manager.php

Implementation Overview

We’ll complete the feature in several small steps.


Step 1

Update get_all_auctions() to accept a new parameter:

$status

Step 2

Modify the SQL query so it supports four situations:

  • No search + No status
  • Search only
  • Status only
  • Search + Status

Step 3

Use prepared statements to safely build the SQL query.


Step 4

Update count_auctions() so pagination reflects only the filtered records.


Step 5

Ensure searching and status filtering work together.

Example:

Search:

Listing ID = 25

Status:

Draft

Expected result:

Only matching Draft auctions with Listing ID 25 should appear.


Step 6

Ensure sorting continues working.

After filtering:

  • Click Start Price
  • Click Created At
  • Click Listing ID

The filtered records should still sort correctly.


Step 7

Verify pagination.

When a filter reduces the number of matching auctions:

  • Page count should update automatically.
  • Only matching records should be counted.
  • Navigation should remain accurate.

Step 8

Test every possible combination.

Examples include:

SearchStatusExpected Result
NoneAllEvery auction
NoneDraftDraft auctions only
NoneActiveActive auctions only
NoneClosedClosed auctions only
Listing IDAllMatching listing
Listing IDDraftMatching Draft listing
Listing IDActiveMatching Active listing

Security Considerations

Throughout this lesson we’ll continue using WordPress security best practices.

User input should always be sanitized before use.

The implementation should continue using:

  • sanitize_text_field()
  • sanitize_key()
  • wp_unslash()
  • $wpdb->prepare()
  • $wpdb->esc_like()

No SQL values should be inserted directly into queries.


Expected Result

After completing this lesson, administrators will be able to:

  • View all auctions.
  • Filter only Draft auctions.
  • Filter only Active auctions.
  • Filter only Closed auctions.
  • Search within filtered results.
  • Sort filtered results.
  • Paginate filtered results.
  • Continue using bulk actions.

The auction management screen will now provide a much more efficient way to work with large datasets.


Conclusion

Completing the Status filter transforms it from a simple user interface element into a fully functional management tool.

Together with pagination, searching, sortable columns, and bulk actions, the Flipnzee Auctions plugin now offers an administration experience that closely resembles the native WordPress dashboard.

This lesson also demonstrates an important software engineering principle: user interface elements are only valuable when they are correctly connected to the underlying application logic.

Lesson 31 Implementation: Adding Status Filters to the Flipnzee Auctions Plugin


In the Next Lesson

We’ll extend our auction system by adding Start Date/Time and End Date/Time fields. These scheduling options will become the foundation for many future features, including countdown timers, automatic activation, automatic closing, winner selection, and Escrow.com integration.

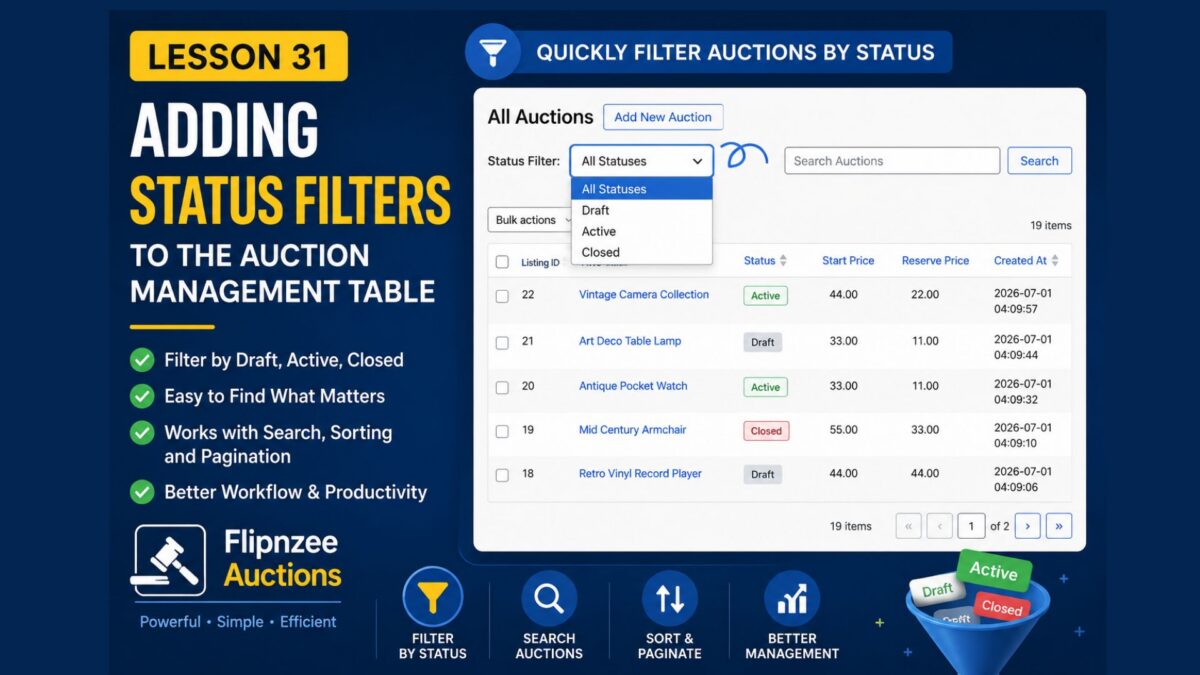
Lesson 31 Implementation: Adding Status Filters to the Flipnzee Auctions Plugin

In the previous lessons, we enhanced the auction management table with searching, pagination, sortable columns, and bulk actions. As the number of auctions grows, administrators need an easier way to view only auctions in a particular state.

In this lesson, we’ll add a Status Filter that allows administrators to display only Draft, Active, or Closed auctions.


Step 1: Add a Status Filter Dropdown

The first step is to add a filter control above the auction table.

Open:

admin/class-admin.php

Locate the all_auctions_page() method and add a dropdown before the search box.

$status = isset( $_GET['status'] )
	? sanitize_text_field(
		wp_unslash( $_GET['status'] )
	)
	: '';
?>

<select name="status">

	<option value="">All Statuses</option>

	<option
		value="draft"
		<?php selected( $status, 'draft' ); ?>
	>
		Draft
	</option>

	<option
		value="active"
		<?php selected( $status, 'active' ); ?>
	>
		Active
	</option>

	<option
		value="closed"
		<?php selected( $status, 'closed' ); ?>
	>
		Closed
	</option>

</select>

<?php

submit_button(
	'Filter',
	'secondary',
	'',
	false
);

This creates a familiar WordPress-style filter that remembers the selected option after the page reloads.


Step 2: Read the Selected Status

Next, the selected status needs to be available while preparing the table data.

Open:

admin/class-auctions-table.php

Inside the prepare_items() method, read the selected status.

$status = isset( $_REQUEST['status'] )
	? sanitize_text_field(
		wp_unslash( $_REQUEST['status'] )
	)
	: '';

The filter value is sanitized before being used anywhere else in the plugin.


Step 3: Pass the Filter to the Manager Class

The manager class is responsible for retrieving auction records from the database.

Update the method calls inside prepare_items().

$total_items = Flipnzee_Auction_Manager::count_auctions(
	$search,
	$status
);

Likewise, update the method that retrieves the auction list.

$this->items = Flipnzee_Auction_Manager::get_all_auctions(
	$per_page,
	$offset,
	$search,
	$status,
	$orderby,
	$order
);

This allows the selected filter to travel from the user interface to the database layer.


Step 4: Update the Manager Method Signatures

Open:

includes/class-auction-manager.php

Update the method definitions to accept the new $status parameter.

public static function get_all_auctions(
	$per_page = 20,
	$offset = 0,
	$search = '',
	$status = '',
	$orderby = 'created_at',
	$order = 'DESC'
)

Similarly, update the counting method.

public static function count_auctions(
	$search = '',
	$status = ''
)

Step 5: Apply the Status Filter to Database Queries

Modify the SQL queries so that they include the selected status whenever a filter has been chosen.

For example, if the administrator selects Draft, only auctions whose status is draft should be returned.

If All Statuses is selected, the query should continue returning every auction.

This approach keeps the filtering logic entirely inside the manager class.


Step 6: Update the Pagination Count

Pagination should display the number of filtered results instead of the total number of auctions.

For example:

  • 8 Draft auctions
  • 5 Active auctions
  • 12 Closed auctions

Each filtered view should have its own correct page count.


Step 7: Test the Feature

After uploading the updated plugin:

  1. Open Flipnzee Auctions → All Auctions.
  2. Select Draft from the Status dropdown.
  3. Click Filter.
  4. Confirm that only Draft auctions appear.
  5. Repeat the process for Active and Closed.
  6. Finally, choose All Statuses to display every auction again.

Also verify that:

  • Searching continues to work.
  • Sorting still functions correctly.
  • Pagination remains accurate.
  • Bulk actions continue working as expected.

Final Result

The auction management screen now includes a convenient Status filter that allows administrators to quickly narrow the list of auctions.

Instead of manually searching through every record, administrators can instantly display:

  • Draft auctions
  • Active auctions
  • Closed auctions
  • All auctions

This greatly improves usability, especially as the number of auction records grows.


What We Learned

In this lesson, we learned how to:

  • Add a custom filter control to a WordPress admin page.
  • Read filter values from user input safely.
  • Pass filter values through different layers of the plugin.
  • Update manager methods to support filtering.
  • Modify database queries based on selected filters.
  • Keep pagination accurate when filters are applied.
  • Preserve compatibility with searching, sorting, and bulk actions.

The Flipnzee Auctions plugin now provides an even more professional administration experience by allowing auction records to be filtered by status with just a few clicks.

Download Source Code

Download the starting version of the plugin before the lesson:

Download the completed version after this lesson:

Lesson 31 — Adding Status Filters to the Auction Management Table


Introduction

As the number of auctions grows, searching by keywords alone is often not enough. Administrators frequently need to view only auctions in a particular state, such as active auctions currently accepting bids or closed auctions that have already ended.

In this lesson, we’ll enhance the All Auctions page by adding status filters above the table. Administrators will be able to quickly filter the auction list by Draft, Active, or Closed without manually searching through every record.

By the end of this lesson, your auction management screen will feel even closer to the professional interfaces found throughout the WordPress admin area.


What You’ll Learn

After completing this lesson, you’ll know how to:

  • Add custom filter controls to a WP_List_Table
  • Read filter values from the URL
  • Sanitize incoming request parameters
  • Filter database queries dynamically
  • Preserve filters during pagination and searching
  • Display only matching auction records

Why Status Filters Matter

When managing a large number of auctions, administrators often need answers such as:

  • Which auctions are currently active?
  • Which auctions are still drafts?
  • Which auctions have already closed?

Without filters, administrators must search manually or scroll through multiple pages.

Status filters provide several advantages:

  • Faster administration
  • Improved usability
  • Cleaner workflow
  • Reduced scrolling
  • Better organization of auction records

Files We’ll Modify

During this lesson we’ll update the following files:

admin/class-auctions-table.php
admin/class-admin.php
includes/class-auction-manager.php

Implementation Overview

We’ll complete this feature in several small steps.

Step 1

Add a Status dropdown above the auction table.


Step 2

Read the selected status from the request.


Step 3

Modify the database query to filter results.


Step 4

Update the total record count for pagination.


Step 5

Preserve the selected filter when navigating between pages.


Step 6

Combine filtering with searching and sortable columns.


Expected Result

After completing this lesson, administrators will be able to:

  • View all auctions
  • View only Draft auctions
  • View only Active auctions
  • View only Closed auctions
  • Combine status filtering with keyword searching
  • Continue using pagination and sortable columns while filters remain active

Final Thoughts

Status filters are a common feature in professional WordPress plugins because they allow administrators to quickly focus on the records that matter most.

In this lesson, you’ll learn how to integrate custom filters into your existing WP_List_Table while preserving compatibility with searching, sorting, pagination, and bulk actions.

By the end of the lesson, the Flipnzee Auctions plugin will provide an even more polished and efficient administrative experience, making it easier to manage growing numbers of auction listings.

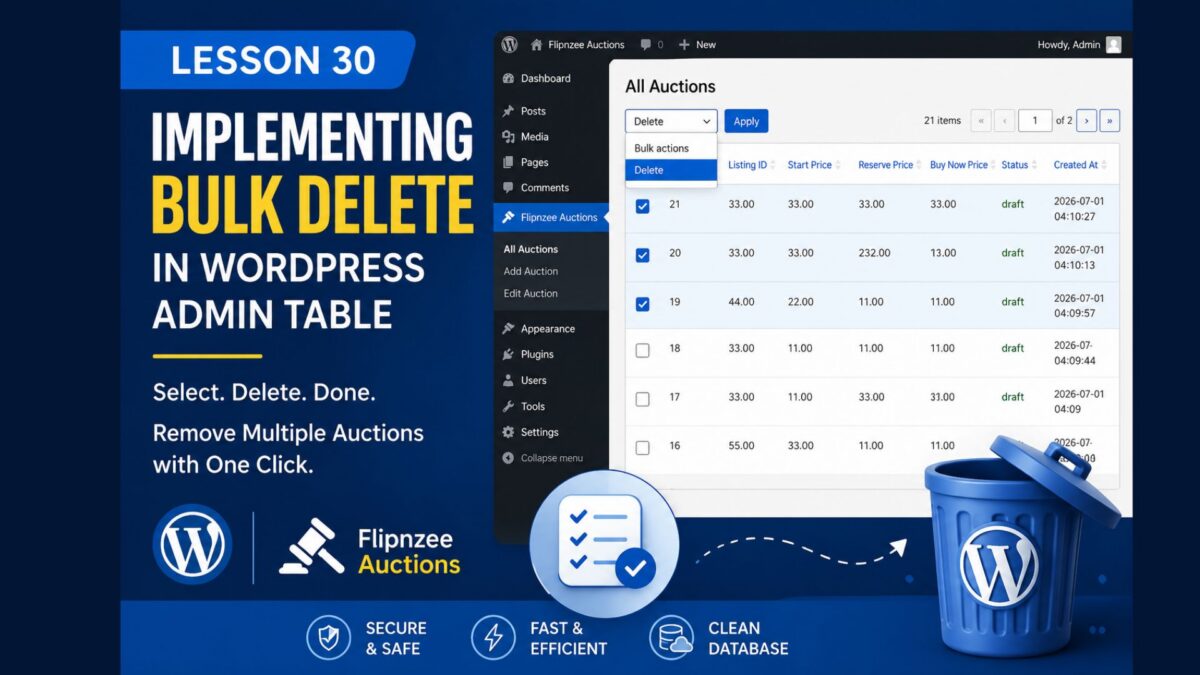
Lesson 30 Implementation: Adding Bulk Delete Functionality to the Flipnzee Auctions Plugin

In Lesson 29, we added checkboxes and a Bulk Actions dropdown to the auction management table. Although the interface looked complete, selecting auctions and clicking Apply did not actually perform any action.

In this implementation, we’ll connect the user interface to the database so administrators can securely delete multiple auction records with a single click.


Step 1: Create a Method to Delete Multiple Auctions

The first task was to create a reusable method responsible for deleting multiple auction records from the database.

Inside includes/class-auction-manager.php, a new method named delete_multiple_auctions() was added.

public static function delete_multiple_auctions( $auction_ids ) {

	global $wpdb;

	$table = $wpdb->prefix . 'flipnzee_auctions';

	foreach ( $auction_ids as $auction_id ) {

		$wpdb->delete(
			$table,
			array(
				'id' => absint( $auction_id ),
			),
			array( '%d' )
		);
	}
}

Each submitted auction ID is sanitized using absint() before being passed to $wpdb->delete(), ensuring only valid numeric IDs are processed.


Step 2: Register a Bulk Action Processor

Next, the plugin needed a way to detect when an administrator clicks the Apply button.

Inside the constructor of admin/class-admin.php, a new action hook was registered.

add_action(
	'admin_init',
	array( $this, 'process_bulk_actions' )
);

The admin_init hook executes during every admin request, making it an ideal place to process submitted bulk actions before the page is rendered.


Step 3: Create the Bulk Action Handler

A new method named process_bulk_actions() was then added to the admin class.

The method performs several validation checks before deleting any records.

It verifies:

  • The current user has permission to manage auctions.
  • A bulk action has actually been submitted.
  • The selected action is Delete.
  • At least one auction has been selected.

If any of these conditions fail, the method immediately exits without making changes.


Step 4: Protect the Request with a WordPress Nonce

Security is an essential part of WordPress plugin development.

A nonce field was added to the bulk action form.

wp_nonce_field(
	'flipnzee_bulk_delete',
	'flipnzee_bulk_nonce'
);

This hidden field generates a unique security token that WordPress can later verify.


Step 5: Verify the Nonce

Inside process_bulk_actions(), the submitted nonce is validated before processing any deletion.

if (
	! isset( $_POST['flipnzee_bulk_nonce'] ) ||
	! wp_verify_nonce(
		sanitize_text_field(
			wp_unslash( $_POST['flipnzee_bulk_nonce'] )
		),
		'flipnzee_bulk_delete'
	)
) {
	return;
}

This prevents Cross-Site Request Forgery (CSRF) attacks by ensuring the request originated from the plugin’s own administration page.


Step 6: Retrieve the Selected Auction IDs

The selected auction IDs are submitted as an array.

Each value is sanitized before use.

$auction_ids = array_map(
	'absint',
	wp_unslash( $_POST['auction_ids'] )
);

Using array_map() ensures every submitted value becomes a valid integer.


Step 7: Delete the Selected Auctions

After validation, the manager method is called.

Flipnzee_Auction_Manager::delete_multiple_auctions(
	$auction_ids
);

This loops through every selected auction and removes it from the custom database table.


Step 8: Redirect Back to the Auction List

After completing the deletion, the administrator is redirected back to the auction listing page.

wp_safe_redirect(
	admin_url(
		'admin.php?page=flipnzee-all-auctions&message=deleted'
	)
);

exit;

Using wp_safe_redirect() prevents accidental duplicate submissions if the page is refreshed.


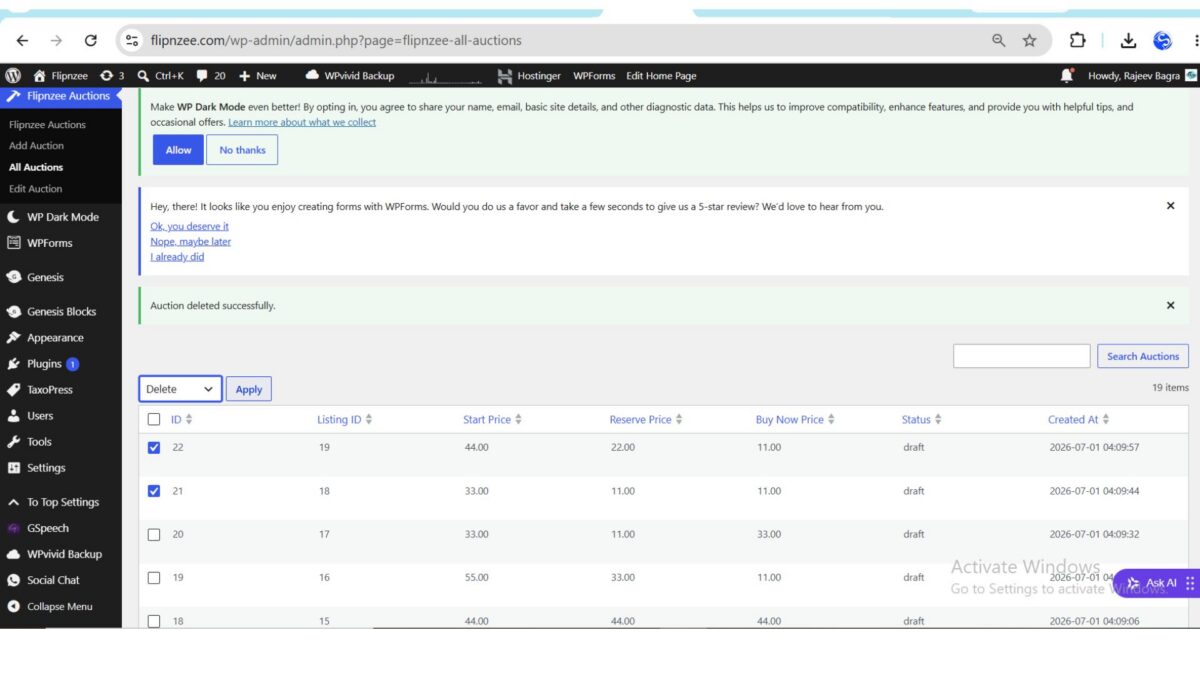
Step 9: Display a Success Message

The existing success notification on the All Auctions page automatically detects the message=deleted query parameter and displays a confirmation message.

Auction deleted successfully.

This provides immediate feedback that the operation completed successfully.


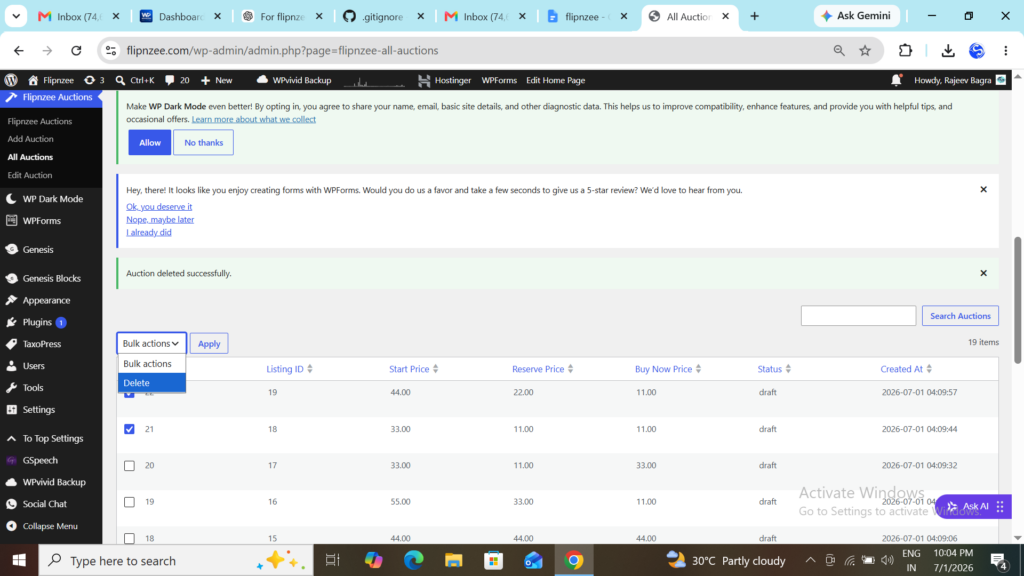
Step 10: Test the Feature

After rebuilding and uploading the plugin, the feature was tested by:

  1. Selecting multiple auctions.
  2. Choosing Delete from the Bulk Actions dropdown.
  3. Clicking Apply.
  4. Confirming that the selected auctions disappeared.
  5. Verifying that the success message appeared.

The implementation worked exactly as expected.


Final Result

The auction management screen now supports professional bulk operations similar to WordPress core.

Administrators can:

  • Select one or many auctions.
  • Delete multiple records with a single action.
  • Receive immediate confirmation after deletion.
  • Benefit from WordPress nonce protection against unauthorized requests.

Combined with pagination, searching, sorting, and row actions implemented in previous lessons, the auction management screen now offers a polished administrative experience.


What We Learned

By completing this implementation, we learned how to:

  • Create reusable database methods for bulk operations.
  • Process submitted bulk actions in the WordPress admin area.
  • Register custom admin hooks.
  • Secure forms using WordPress nonces.
  • Sanitize arrays of submitted IDs.
  • Delete multiple database records safely.
  • Redirect after processing to prevent duplicate submissions.
  • Display success notifications following bulk operations.

With bulk deletion complete, the Flipnzee Auctions plugin now includes one of the most commonly used productivity features found in professional WordPress plugins.

Download Source Code

Download the starting version of the plugin before the lesson:

Download the completed version after this lesson:


Lesson 30 — Bulk Delete Functionality in the WordPress Admin Table


Introduction

In the previous lesson, we added checkbox selection and a Bulk Actions dropdown to our custom WP_List_Table. Although the interface looked complete, selecting auctions and clicking Apply did not actually perform any action.

In this lesson, we’ll implement the backend logic required to process bulk deletion securely. We’ll learn how WordPress submits bulk actions, how to retrieve selected record IDs, and how to delete multiple database records efficiently while following WordPress coding standards.

By the end of this lesson, administrators will be able to select multiple auctions and remove them with a single click.


What You’ll Learn

After completing this lesson, you’ll know how to:

  • Process bulk actions submitted by WP_List_Table
  • Detect which bulk action was selected
  • Retrieve multiple selected auction IDs safely
  • Sanitize and validate submitted IDs
  • Delete multiple database records using a loop
  • Display success messages after bulk deletion
  • Follow WordPress security best practices

Why Bulk Delete Matters

Deleting one auction at a time quickly becomes inefficient when managing dozens or hundreds of auctions.

Bulk deletion provides several benefits:

  • Saves administrator time
  • Reduces repetitive clicks
  • Matches WordPress core behaviour
  • Makes the plugin feel professional
  • Improves usability for large datasets

Files We’ll Modify

During this lesson we’ll update the following files:

admin/class-auctions-table.php
admin/class-admin.php
includes/class-auction-manager.php

Implementation Overview

We’ll complete the feature in several small steps:

Step 1

Detect when the administrator selects a bulk action.


Step 2

Retrieve all selected auction IDs.


Step 3

Validate and sanitize every submitted ID.


Step 4

Delete each auction from the database.


Step 5

Redirect back to the auction list.


Step 6

Display a success notice showing the operation completed.


Expected Result

After completing this lesson:

  • ✔ Multiple auctions can be selected
  • ✔ Clicking Delete removes every selected auction
  • ✔ The table refreshes automatically
  • ✔ A success message confirms the deletion
  • ✔ The plugin behaves similarly to the built-in WordPress Posts screen

Final Thoughts

This lesson introduces one of the most useful administrative features in any WordPress plugin: processing bulk actions.

You’ll learn how WP_List_Table communicates selected rows to your plugin and how to process those requests securely. The same approach can later be extended to bulk activation, bulk closing of auctions, exporting records, changing statuses, and many other administrative operations.

In the next lesson, we’ll continue improving the auction management interface by adding additional professional features and refining the administrator experience.

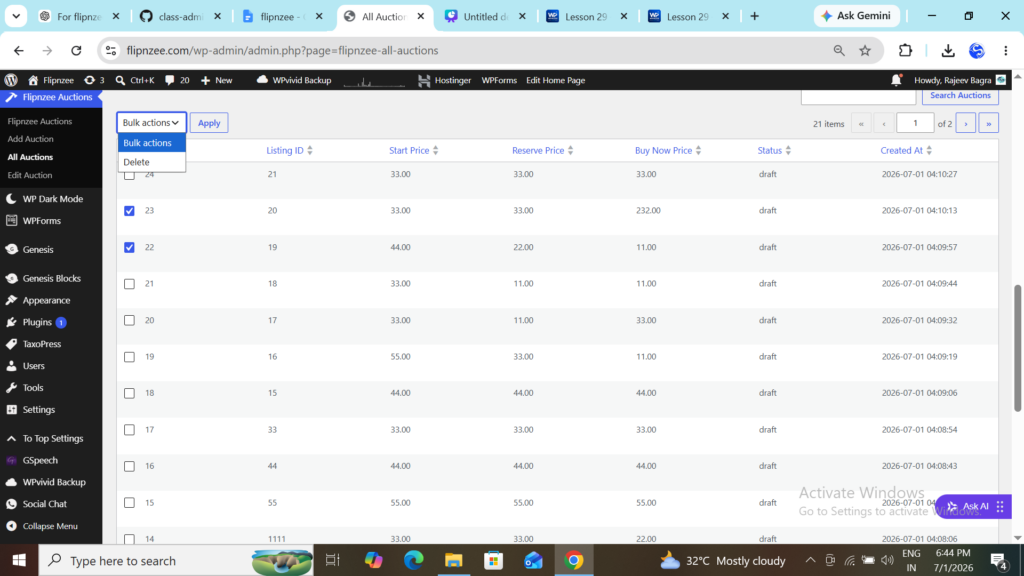
Lesson 29 Implementation: Bulk Actions with WP_List_Table

Implementation Walkthrough

In this lesson, the goal was to allow administrators to select multiple auctions at once using checkboxes and prepare the table for bulk operations such as deleting multiple auctions simultaneously. WordPress provides built-in support for bulk actions in WP_List_Table, making this feature straightforward to implement.

Step 1: Add a Checkbox Column

The first step was to add a new checkbox column to the table.

Inside the get_columns() method of admin/class-auctions-table.php, a new column named cb was added as the first column.

public function get_columns() {

	return array(
		'cb'             => '<input type="checkbox" />',
		'id'             => 'ID',
		'listing_id'     => 'Listing ID',
		'start_price'    => 'Start Price',
		'reserve_price'  => 'Reserve Price',
		'buy_now_price'  => 'Buy Now Price',
		'status'         => 'Status',
		'created_at'     => 'Created At',
	);
}

The header checkbox allows administrators to quickly select or deselect every row displayed on the current page.


Step 2: Register the Bulk Actions

Next, the available bulk actions were registered by creating the get_bulk_actions() method.

public function get_bulk_actions() {

	return array(
		'delete' => 'Delete',
	);
}

At this stage only one action—Delete—was added, but additional actions such as Activate, Close Auction, or Export could easily be added later.


Step 3: Display a Checkbox for Every Auction

After registering the bulk actions, a new column_cb() method was added.

public function column_cb( $item ) {

	return sprintf(
		'<input type="checkbox" name="auction_ids[]" value="%d" />',
		absint( $item->id )
	);
}

This method tells WP_List_Table how to render the checkbox for each auction row.

Each checkbox stores the auction’s database ID, making it available when the administrator submits the bulk action form.


Step 4: Verify the Table Still Works

Before uploading the plugin, the PHP syntax was checked.

php -l admin/class-auctions-table.php

The output confirmed that no syntax errors existed.


Step 5: Upload the Updated Plugin

The plugin ZIP was rebuilt and uploaded to WordPress.

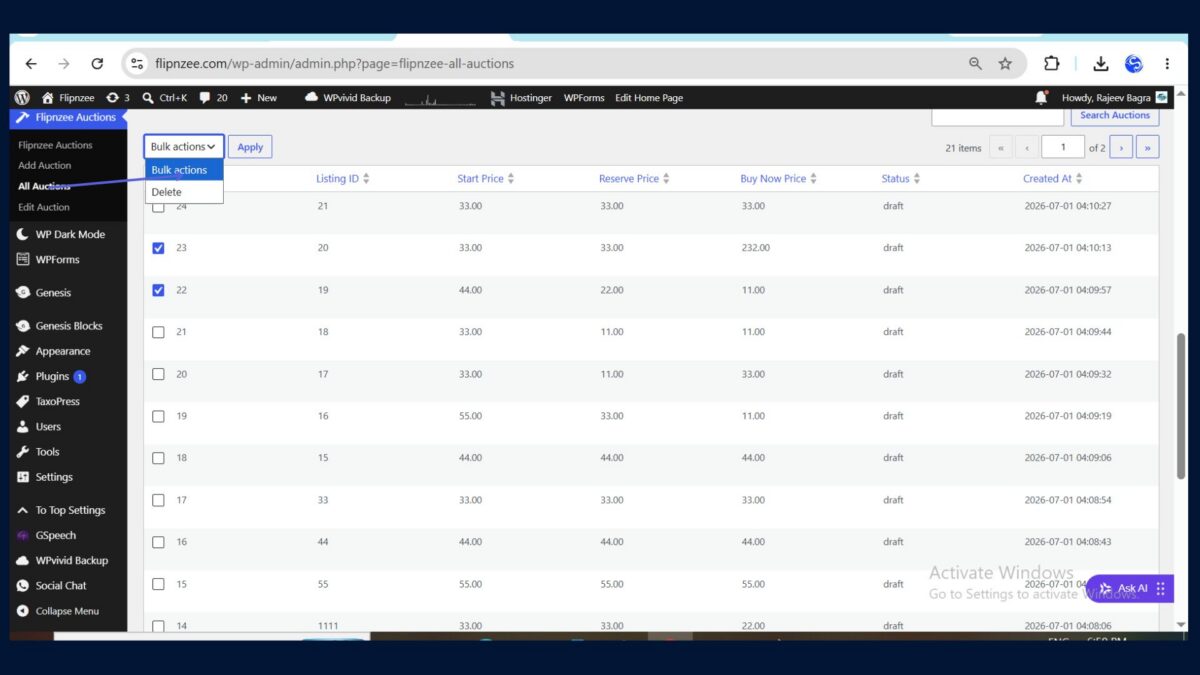
After activation, the All Auctions page immediately displayed:

  • A checkbox beside every auction
  • A “Select All” checkbox in the table header
  • A Bulk Actions dropdown
  • An Apply button

At this stage the Delete action did not yet perform any operation—it simply prepared the interface for the next lesson.


Result

The auction management screen now behaves much more like WordPress’ built-in Posts, Pages, and Media screens.

Administrators can:

  • Select one auction
  • Select multiple auctions
  • Select all auctions on the current page
  • Choose a bulk action from the dropdown
  • Prepare to process multiple records with a single click

Although the Delete option is not functional yet, the user interface is now fully prepared for implementing bulk deletion in the next lesson.


What We Learned

By completing this lesson, we learned how to:

  • Add a checkbox column to a WP_List_Table
  • Register custom bulk actions
  • Create row checkboxes with column_cb()
  • Integrate WordPress’ built-in Bulk Actions dropdown
  • Prepare an admin table for processing multiple records efficiently

With this foundation in place, the next lesson will focus on processing the selected auctions and implementing a secure Bulk Delete feature using WordPress nonces and best practices.

Download Source Code

Download the starting version of the plugin before the lesson:

Download the completed version after this lesson:

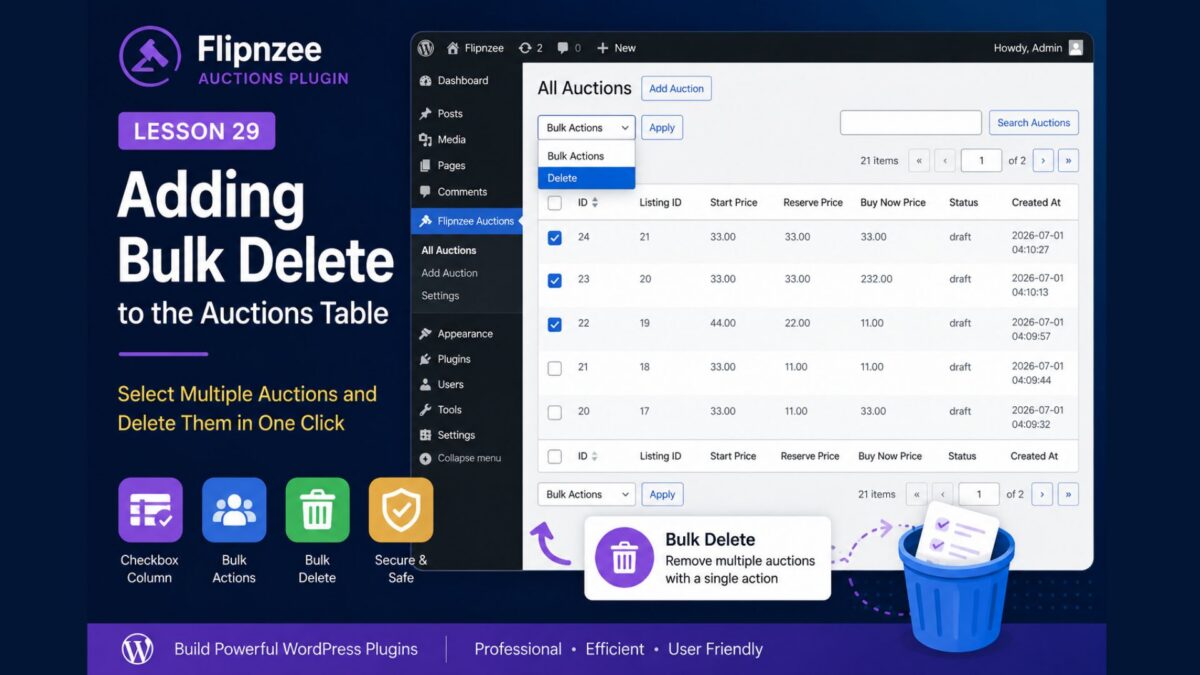
Lesson 29 — Adding Bulk Delete to the Auctions Table Using WP_List_Table


Introduction

As the number of auctions grows, deleting them one at a time becomes inefficient. WordPress solves this problem by allowing administrators to select multiple rows and perform an action on all of them simultaneously.

In this lesson, we’ll add Bulk Delete to our custom WP_List_Table. Administrators will be able to select multiple auctions using checkboxes and delete them all with a single action, just like on the Posts or Pages screens.

By the end of this lesson, your Auctions table will feel even more like a native WordPress admin screen.


What You Will Learn

In this lesson, you will learn how to:

  • Add a checkbox column to WP_List_Table
  • Display a checkbox for each auction
  • Register bulk actions
  • Detect which bulk action the user selected
  • Process multiple selected auctions
  • Secure the operation using WordPress nonces
  • Display a success message after bulk deletion

Why Bulk Actions Matter

Imagine managing hundreds of auctions.

Deleting them individually would require:

  • Click Delete
  • Confirm deletion
  • Wait for the page to reload
  • Repeat the process dozens of times

Bulk actions allow administrators to remove many auctions in a single operation, improving productivity and creating a much better user experience.


Files We Will Modify

During this lesson, we will update:

admin/class-auctions-table.php

and

admin/class-admin-posts.php

We will also make a small update to:

admin/class-admin.php

to display an appropriate success notice after the bulk action completes.


New WordPress Concepts

This lesson introduces several important WP_List_Table methods:

  • column_cb()
  • get_bulk_actions()
  • process_bulk_action()
  • current_action()

These methods are used by many WordPress core administration screens.


Expected Result

After completing this lesson, the Auctions table will include:

  • A checkbox beside every auction
  • A “Select All” checkbox in the table header
  • A Bulk Actions dropdown
  • A Delete option
  • A single-click way to delete multiple auctions

The feature will closely resemble the familiar bulk actions available on the WordPress Posts screen.


Before You Start

Make sure your plugin already includes:

  • ✅ Working Add Auction page
  • ✅ Edit Auction page
  • ✅ Delete Auction action
  • ✅ Pagination
  • ✅ Search
  • ✅ Sortable columns

These features were implemented in the previous lessons and will be used throughout this exercise.


What Comes Next

In the implementation article, we’ll build this feature step by step by:

  1. Adding the checkbox column.
  2. Creating the Bulk Actions dropdown.
  3. Processing selected auctions.
  4. Deleting multiple records safely.
  5. Displaying a success message after completion.
  6. Testing the feature thoroughly.

Implementing Lesson 28 — Adding Sortable Columns to the Auctions Table (Step by Step)


Difficulty: Intermediate
Project: Flipnzee Auctions Plugin
Lesson Implemented: Lesson 28


Introduction

In the previous lessons, we transformed our custom Auctions page into a professional WordPress administration screen by adding pagination and search functionality.

Although administrators could now search for auctions, they still could not sort the table by different columns. WordPress users expect to be able to click column headings like ID, Start Price, or Created At to sort data.

In this implementation, we enhanced our custom WP_List_Table by making its columns sortable.


Step 1 — Define the Sortable Columns

The first step was to tell WordPress which columns should be sortable.

Inside:

admin/class-auctions-table.php

we added a new method:

public function get_sortable_columns() {

	return array(
		'id'            => array( 'id', true ),
		'listing_id'    => array( 'listing_id', false ),
		'start_price'   => array( 'start_price', false ),
		'reserve_price' => array( 'reserve_price', false ),
		'buy_now_price' => array( 'buy_now_price', false ),
		'status'        => array( 'status', false ),
		'created_at'    => array( 'created_at', false ),
	);
}

Each array entry tells WordPress which database column should be used for sorting.


Step 2 — Enable Sorting in prepare_items()

Defining sortable columns alone is not enough.

Inside prepare_items(), we updated the column headers:

From:

$this->_column_headers = array(
	$this->get_columns(),
	array(),
	array(),
);

To:

$this->_column_headers = array(
	$this->get_columns(),
	array(),
	$this->get_sortable_columns(),
);

This small change tells WP_List_Table to convert the column headings into clickable links.


Step 3 — Read Sorting Parameters

Next, we needed to determine which column the administrator clicked.

Inside prepare_items(), we added:

$orderby = isset( $_GET['orderby'] )
	? sanitize_key(
		wp_unslash( $_GET['orderby'] )
	)
	: 'created_at';

$order = isset( $_GET['order'] )
	? strtoupper(
		sanitize_text_field(
			wp_unslash( $_GET['order'] )
		)
	)
	: 'DESC';

Why?

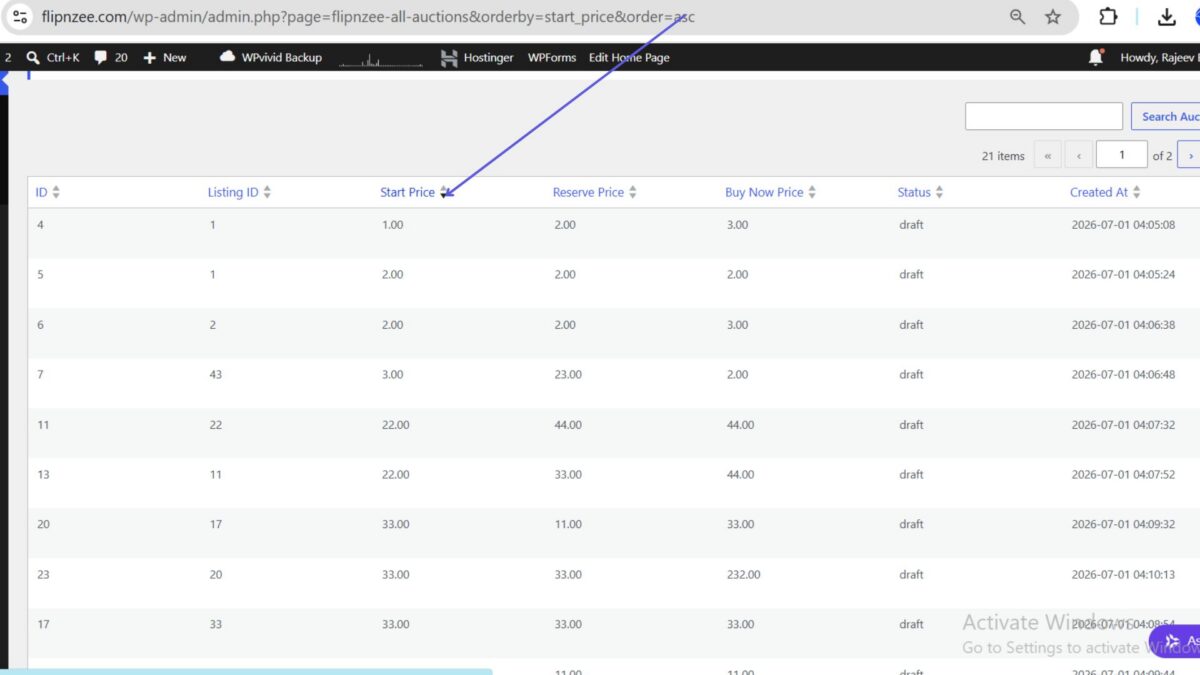
When a user clicks a sortable column, WordPress automatically appends parameters such as:

orderby=start_price
order=ASC

We safely read these values before using them.


Step 4 — Pass Sorting Information to the Database Layer

Previously, our manager class received only:

  • page size
  • offset
  • search term

We extended the call to include:

Flipnzee_Auction_Manager::get_all_auctions(
	$per_page,
	$offset,
	$search,
	$orderby,
	$order
);

Now the database query knows exactly how to sort the results.


Step 5 — Update the Manager Method

Inside:

includes/class-auction-manager.php

we modified the method signature:

public static function get_all_auctions(
	$per_page = 20,
	$offset = 0,
	$search = '',
	$orderby = 'created_at',
	$order = 'DESC'
)

This allows sorting preferences to be passed from the table class.


Step 6 — Validate the Column Name

Unlike values, SQL column names cannot be protected using prepared statements.

Instead, we created a whitelist:

$allowed_columns = array(
	'id',
	'listing_id',
	'start_price',
	'reserve_price',
	'buy_now_price',
	'status',
	'created_at',
);

We then verified the requested column:

if ( ! in_array( $orderby, $allowed_columns, true ) ) {
	$orderby = 'created_at';
}

This prevents invalid or malicious column names from being used.


Step 7 — Validate the Sort Direction

We also limited the sort direction:

$order = ( 'ASC' === strtoupper( $order ) )
	? 'ASC'
	: 'DESC';

Only two values are accepted:

  • ASC
  • DESC

Anything else automatically falls back to descending order.


Step 8 — Update the SQL Query

Previously, every query ended with:

ORDER BY created_at DESC

We replaced it with:

ORDER BY {$orderby} {$order}

Both the search query and the default query were updated so that sorting works in every situation.


Step 9 — Test the Feature

After uploading the updated plugin, we verified that:

  • ID became clickable
  • Listing ID became clickable
  • Start Price became clickable
  • Reserve Price became clickable
  • Buy Now Price became clickable
  • Status became clickable
  • Created At became clickable

Clicking a column heading automatically updated the URL and changed the sort order.


Challenges Encountered

This lesson involved several small debugging tasks before everything worked correctly.

Some of the issues included:

  • Accidentally duplicating the search query inside get_all_auctions().
  • Forgetting to replace ORDER BY created_at DESC with the dynamic sorting variables.
  • Leaving the third element of _column_headers empty, which prevented WordPress from displaying clickable column headings.

By resolving these issues one by one, the sortable table behaved exactly as expected.


What We Learned

This implementation introduced several important WordPress concepts:

  • Using get_sortable_columns()
  • Registering sortable columns with WP_List_Table
  • Reading URL parameters safely
  • Passing sorting information between classes
  • Validating SQL identifiers using a whitelist
  • Restricting sort directions
  • Building flexible SQL queries while maintaining security

These are common techniques used in professional WordPress plugins that display tabular data.


Final Result

After completing this implementation, the Flipnzee Auctions plugin now provides a much more user-friendly administration interface.

Administrators can click any supported column heading to reorder the table, making it easier to analyse auction data and locate important records.

Combined with the search and pagination features implemented in earlier lessons, the Auctions page now closely resembles the polished interfaces found throughout the WordPress admin dashboard.


Download Source Code

Download the starting version of the plugin before implementing sortable columns:

Download the completed version containing fully functional sortable columns: