Lesson 74 Implementation: Displaying Professional Manual Payment Instructions on the Payment Page

After completing the payment gateway selection workflow in the previous lessons, the next improvement was making the payment page more informative for buyers who choose Manual Payment.

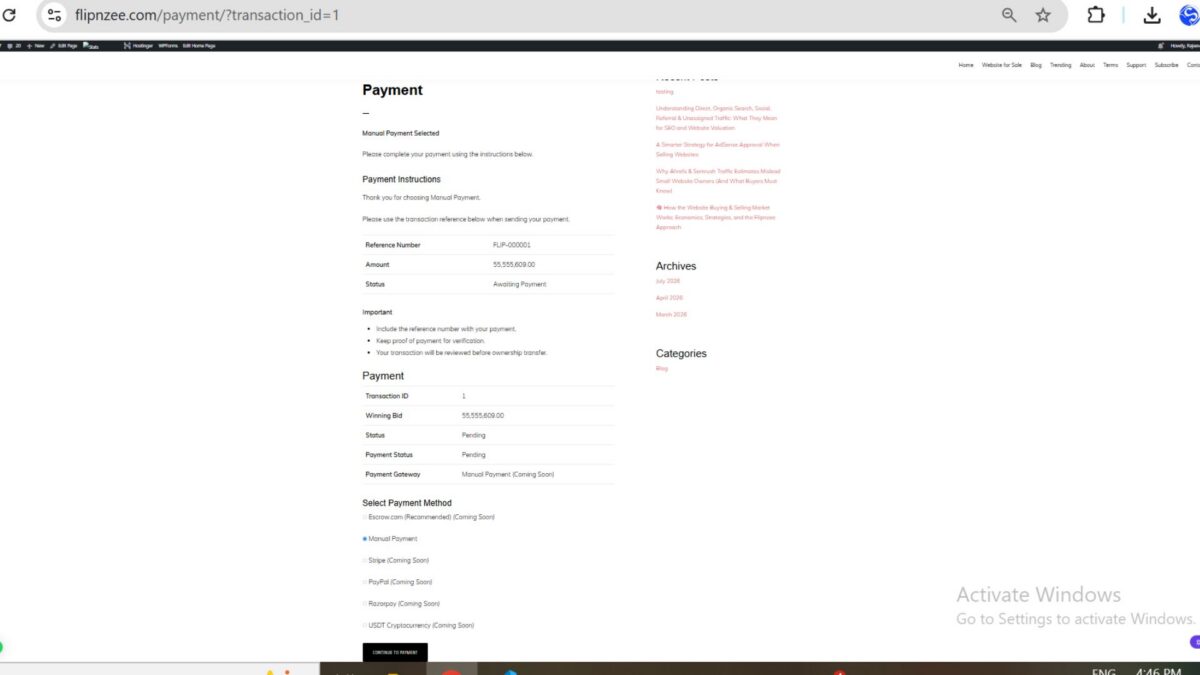
Previously, selecting Manual Payment only displayed a simple confirmation message. In this lesson, the payment page was enhanced to show a professional payment instruction section containing a unique payment reference, payment amount, current status, and important guidance for the buyer.


What We Built

The payment page now displays a dedicated Payment Instructions section whenever the buyer selects Manual Payment.

The section includes:

  • Unique payment reference number
  • Winning bid amount
  • Current payment status
  • Important payment instructions
  • Existing transaction details remain visible below

This provides buyers with the information they need before sending payment.


Step 1 – Detect Manual Payment Selection

After validating the form submission and selected gateway, the payment page checks which payment method the buyer selected.

switch ( $selected_gateway ) {

    case 'manual':

        // Display manual payment instructions.

        break;

    default:

        // Unsupported gateway.

        break;
}

This structure prepares the plugin for adding more gateways like Escrow.com, Stripe, PayPal and USDT in future lessons.


Step 2 – Create the Manual Payment Instruction Section

Inside the Manual Payment case, a dedicated container was added.

<div class="flipnzee-manual-payment">

    <h3>Payment Instructions</h3>

    <p>
        Thank you for choosing Manual Payment.
    </p>

    <p>
        Please use the transaction reference below when sending your payment.
    </p>

</div>

This creates a clear visual separation between payment instructions and transaction information.


Step 3 – Generate a Unique Payment Reference

Instead of using only the transaction ID, a formatted payment reference was generated.

<?php

echo esc_html(

    'FLIP-' . str_pad(

        $transaction->id,

        6,

        '0',

        STR_PAD_LEFT

    )

);

?>

Example:

FLIP-000001

Using a formatted reference looks much more professional and is easier for buyers to include in payment notes.


Step 4 – Display Important Payment Information

A table was created to display the essential payment information.

<table class="widefat striped">

<tr>

    <th>Reference Number</th>

    <td>

        <?php

        echo esc_html(
            'FLIP-' . str_pad(
                $transaction->id,
                6,
                '0',
                STR_PAD_LEFT
            )
        );

        ?>

    </td>

</tr>

<tr>

    <th>Amount</th>

    <td>

        <?php

        echo esc_html(
            number_format_i18n(
                $transaction->winning_bid,
                2
            )
        );

        ?>

    </td>

</tr>

<tr>

    <th>Status</th>

    <td>

        Awaiting Payment

    </td>

</tr>

</table>

This gives buyers an organized summary before making payment.


Step 5 – Add Important Buyer Instructions

An instruction list was added below the payment summary.

<h4>Important</h4>

<ul>

    <li>
        Include the reference number with your payment.
    </li>

    <li>
        Keep proof of payment for verification.
    </li>

    <li>
        Your transaction will be reviewed before ownership transfer.
    </li>

</ul>

These reminders help reduce payment mistakes and prepare buyers for the verification process.


Final Result

After selecting Manual Payment, buyers now see:

  • Professional payment instruction heading
  • Payment reference number
  • Winning amount
  • Awaiting payment status
  • Important payment reminders
  • Original transaction details below

The payment page now feels much closer to a production-ready marketplace instead of a placeholder page.


What I Learned

This lesson demonstrated that payment pages should do much more than simply display transaction details. Buyers need clear instructions, a recognizable payment reference, and confirmation of the amount and status before making payment.

Generating a formatted reference number and presenting information in a structured table significantly improves usability and prepares the payment workflow for future enhancements.

Download Source Code

Download the starting version of the plugin before the lesson:

Download the completed version after this lesson:


What’s Next?

In Lesson 75, we will build the Payment Proof Upload feature, allowing buyers to submit proof of payment after completing a manual transfer. This will move the Flipnzee payment workflow one step closer to a complete marketplace transaction process.
Lesson 73 Implementation: Processing Payment Gateway Selection Securely in Flipnzee

In the previous lesson, the payment page displayed multiple payment gateways dynamically. However, clicking Continue to Payment did not actually process the buyer’s selection.

In this lesson, the payment page was enhanced to securely process the selected payment gateway using WordPress security best practices. This establishes the routing architecture that future payment integrations such as Escrow.com, Stripe, PayPal, Razorpay, and USDT Cryptocurrency will use.


What Was Implemented

The payment page now:

  • Processes the submitted payment form
  • Verifies the WordPress nonce
  • Sanitizes user input
  • Validates the selected gateway
  • Routes requests using a switch statement
  • Displays gateway-specific responses
  • Prepares the plugin for future payment integrations

This completes the payment gateway routing layer.


Step 1: Detect Form Submission

The payment page first checks whether the buyer has submitted the payment form.

if ( isset( $_POST['flipnzee_continue_payment'] ) ) {

    // Process payment

}

This ensures the processing code only runs after the buyer clicks Continue to Payment.


Step 2: Verify the WordPress Nonce

Before processing any submitted data, the request is verified using a WordPress nonce.

if (
    ! isset( $_POST['flipnzee_payment_nonce'] ) ||
    ! wp_verify_nonce(
        sanitize_text_field(
            wp_unslash( $_POST['flipnzee_payment_nonce'] )
        ),
        'flipnzee_payment_action'
    )
) {
    return '<p>Security check failed.</p>';
}

Why?

This protects the payment page from:

  • CSRF attacks
  • Forged form submissions
  • External malicious requests

Using nonces is a standard WordPress security practice.


Step 3: Sanitize the Selected Gateway

The selected payment gateway is retrieved safely.

$selected_gateway = '';

if ( isset( $_POST['payment_gateway'] ) ) {

    $selected_gateway = sanitize_text_field(
        wp_unslash( $_POST['payment_gateway'] )
    );

}

This removes unsafe input before it reaches the application logic.


Step 4: Validate the Gateway

Before routing, the submitted gateway is checked against the list of available gateways.

if ( ! isset( $gateways[ $selected_gateway ] ) ) {

    return '<p>Invalid payment gateway selected.</p>';

}

This prevents invalid or manipulated gateway values from being processed.


Step 5: Route Using a Switch Statement

The payment gateway router directs each gateway to its own processing block.

switch ( $selected_gateway ) {

    case 'manual':
        ?>
        <div class="notice notice-success">
            <p>
                Manual Payment selected.
                Payment instructions will be displayed in the next lesson.
            </p>
        </div>
        <?php
        break;

    case 'escrow':
        ?>
        <div class="notice notice-info">
            <p>
                Escrow.com integration will be available in a future release.
            </p>
        </div>
        <?php
        break;

    case 'stripe':
    case 'paypal':
    case 'razorpay':
    case 'crypto':
        ?>
        <div class="notice notice-warning">
            <p>
                This payment gateway is not yet available.
            </p>
        </div>
        <?php
        break;

    default:
        ?>
        <div class="notice notice-error">
            <p>Unknown payment gateway.</p>
        </div>
        <?php
        break;
}

This routing structure keeps each payment provider isolated, making future integrations straightforward.


Testing the Implementation

After updating the payment page:

  1. Open the buyer payment page.
  2. Select Manual Payment.
  3. Click Continue to Payment.

The page now displays:

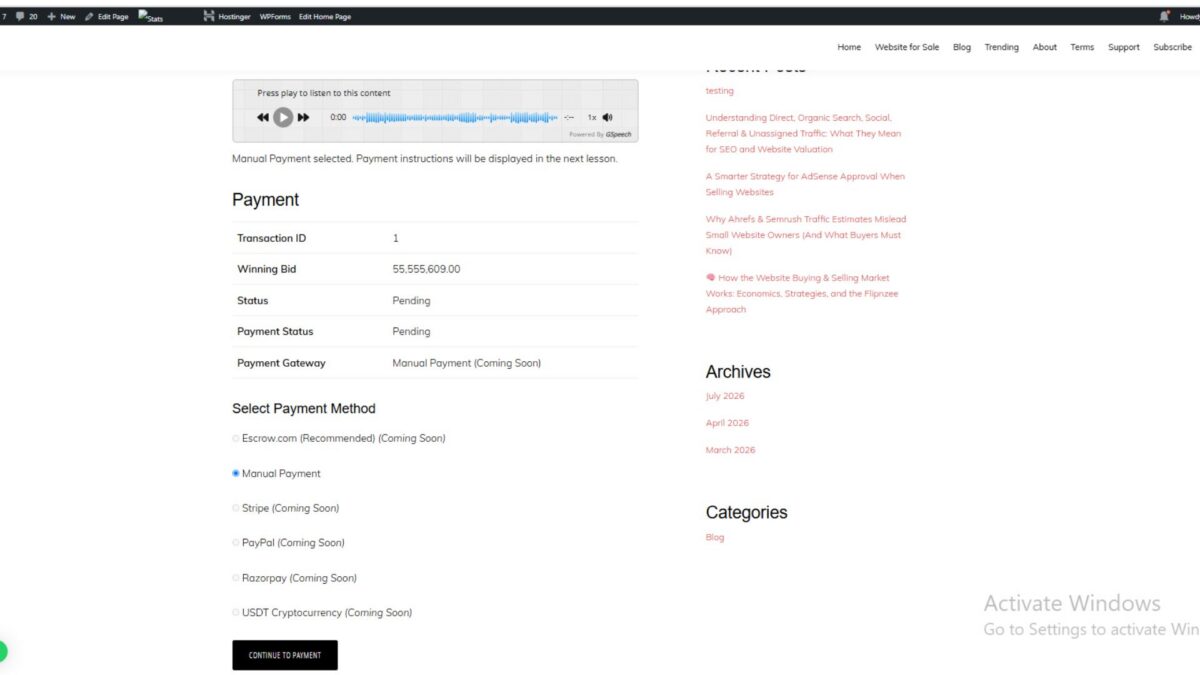
Manual Payment selected. Payment instructions will be displayed in the next lesson.

The transaction information remains visible, confirming that the form was processed successfully.


Why This Design Matters

Instead of embedding payment logic directly into the page, a routing layer has been introduced.

This provides several advantages:

  • Cleaner code organization
  • Easier maintenance
  • Independent gateway implementations
  • Better scalability
  • Simpler testing
  • Future extensibility

When additional gateways are implemented, each will simply receive its own case inside the existing router without affecting the others.


Lessons Learned

During implementation, several improvements were made:

  • Used WordPress nonces to secure form submissions.
  • Sanitized all user-submitted values before processing.
  • Validated gateway IDs against the registered gateway list.
  • Built a centralized gateway routing mechanism.
  • Kept the payment architecture flexible for future integrations.
  • Successfully tested Manual Payment routing without affecting existing transaction data.

Current Payment Flow

Buyer Opens Payment Page
           │
           ▼
Select Payment Gateway
           │
           ▼
Continue to Payment
           │
           ▼
Verify WordPress Nonce
           │
           ▼
Sanitize User Input
           │
           ▼
Validate Gateway
           │
           ▼
Gateway Router (switch)
           │
 ┌─────────┼───────────────┐
 │         │               │
 ▼         ▼               ▼
Manual   Escrow        Future Gateways
Payment  (Coming Soon) (Stripe, PayPal,
                         Razorpay, USDT)

Download Source Code

Download the starting version of the plugin before the lesson:

Download the completed version after this lesson:


Conclusion

Lesson 73 transformed the payment page from a static gateway selector into a secure routing system capable of processing buyer selections. By combining nonce verification, input sanitization, gateway validation, and switch-based routing, Flipnzee now has a solid payment processing foundation. Future lessons can build upon this architecture to implement real payment instructions, proof-of-payment submission, and live integrations with services such as Escrow.com, Stripe, PayPal, Razorpay, and USDT Cryptocurrency.

Lesson 72 Implementation: Building a Future-Ready Payment Gateway Selection Interface

As the Flipnzee Auctions plugin continues to evolve into a professional website marketplace, one of the most important architectural decisions is how payment gateways will be integrated. Rather than hardcoding a single payment provider, this lesson introduces a flexible gateway selection system that can easily support multiple payment methods in the future.

Although no real payment gateways are connected yet, the plugin now provides a scalable framework for adding Escrow.com, Stripe, PayPal, Razorpay, cryptocurrency payments, and other providers without redesigning the payment page.


Why This Lesson Was Needed

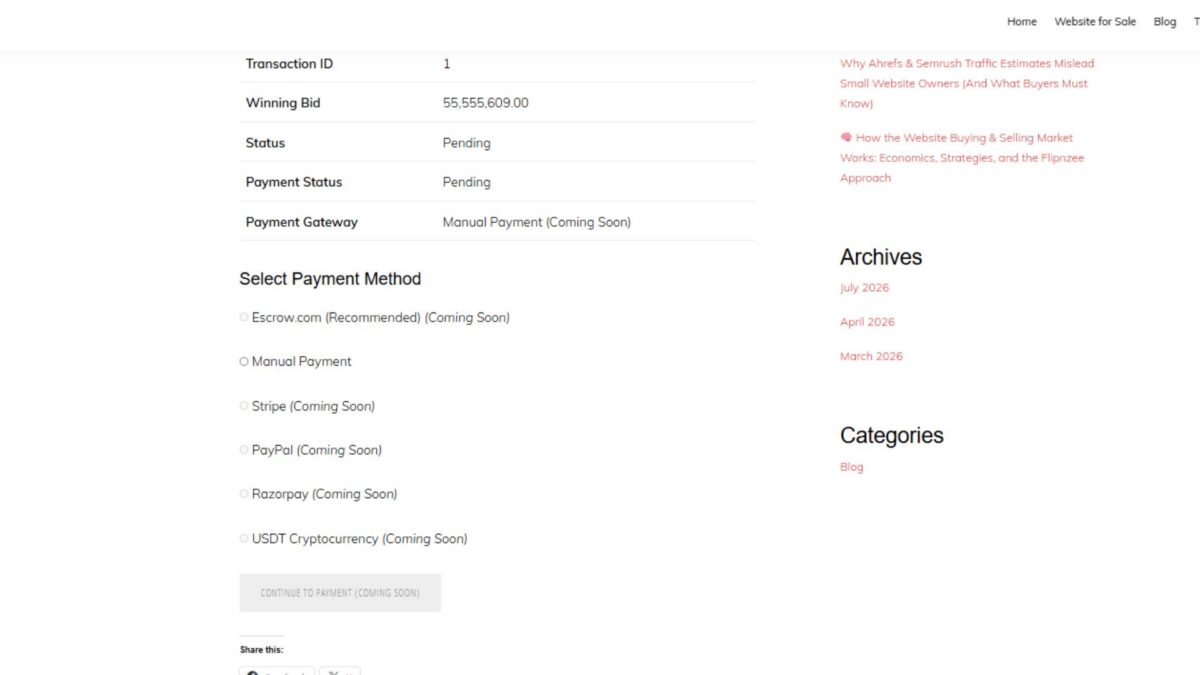
Until the previous lesson, buyers could only see the transaction details and a placeholder payment gateway.

While functional, that approach wasn’t scalable. Every time a new payment provider was added, the payment page would need to be rewritten.

Instead, the payment page should simply ask:

“Which payment gateways are currently available?”

The Payment Manager should answer that question.

This separation of responsibilities makes the code easier to maintain and extend.


Objectives

In this lesson we:

  • Centralized payment gateway definitions
  • Added a helper method to retrieve available gateways
  • Introduced Escrow.com as the planned primary marketplace payment method
  • Generated the payment method list dynamically
  • Displayed future gateways as disabled
  • Added a disabled “Continue to Payment” button
  • Prepared the plugin for future payment gateway integrations

Step 1 – Centralizing Available Payment Gateways

Inside:

includes/class-payment-manager.php

a new helper method was introduced:

/**
 * Get available payment gateways.
 *
 * @return array
 */
public static function get_available_gateways() {

    return array(

        'escrow' => array(
            'label'   => 'Escrow.com (Recommended)',
            'enabled' => false,
        ),

        'manual' => array(
            'label'   => 'Manual Payment',
            'enabled' => true,
        ),

        'stripe' => array(
            'label'   => 'Stripe',
            'enabled' => false,
        ),

        'paypal' => array(
            'label'   => 'PayPal',
            'enabled' => false,
        ),

        'razorpay' => array(
            'label'   => 'Razorpay',
            'enabled' => false,
        ),

        'crypto' => array(
            'label'   => 'USDT Cryptocurrency',
            'enabled' => false,
        ),

    );

}

Instead of hardcoding gateway names inside the payment page, all available gateways are now managed from a single location.


Step 2 – Loading Gateways in the Payment Page

After validating the transaction, the payment page now requests the available gateways from the Payment Manager.

$gateways = Flipnzee_Payment_Manager::get_available_gateways();

This keeps the page independent from payment logic and allows new gateways to be introduced without modifying the frontend.


Step 3 – Rendering Gateway Options Dynamically

The payment page now loops through the available gateways to generate the interface.

<h3>Select Payment Method</h3>

<div class="flipnzee-payment-gateways">

<?php foreach ( $gateways as $gateway_id => $gateway ) : ?>

    <p>

        <label>

            <input
                type="radio"
                name="payment_gateway"
                value="<?php echo esc_attr( $gateway_id ); ?>"
                <?php checked( $gateway['enabled'] ); ?>
                <?php disabled( ! $gateway['enabled'] ); ?>
            >

            <?php echo esc_html( $gateway['label'] ); ?>

            <?php if ( ! $gateway['enabled'] ) : ?>

                <em>(Coming Soon)</em>

            <?php endif; ?>

        </label>

    </p>

<?php endforeach; ?>

</div>

This approach automatically displays every configured gateway without manually writing HTML for each payment provider.


Step 4 – Adding a Checkout Placeholder

Since actual payment processing has not yet been implemented, a disabled button was added.

<p class="flipnzee-payment-actions">

    <button
        type="button"
        class="button button-primary"
        disabled
    >
        Continue to Payment (Coming Soon)
    </button>

</p>

The button clearly communicates that payment processing will be introduced in a future lesson while maintaining a professional checkout layout.


Why Escrow.com Appears First

During implementation, the payment architecture was adjusted to better reflect Flipnzee’s purpose.

Instead of treating Stripe or PayPal as the primary payment method, the gateway list now starts with:

  • Escrow.com (Recommended)
  • Manual Payment
  • Stripe
  • PayPal
  • Razorpay
  • USDT Cryptocurrency

Since Flipnzee is designed as a marketplace for buying and selling websites, Escrow.com is expected to become the primary payment solution once its API integration is implemented.

Until then, it remains disabled and marked as “Coming Soon.”


Testing

After implementing the changes:

  • The Payment page continued displaying transaction information correctly.
  • Payment gateways were loaded dynamically.
  • Manual Payment appeared as the only selectable option.
  • Future gateways appeared disabled.
  • Escrow.com was displayed as the recommended marketplace payment solution.
  • The “Continue to Payment” button appeared in a disabled state.

No PHP syntax errors were encountered during testing.


Lessons Learned

This lesson reinforced several important software design principles:

  • Business logic should be separated from presentation logic.
  • Payment providers should be managed centrally.
  • Dynamic rendering reduces future maintenance.
  • Building a scalable architecture early simplifies later integrations.
  • Placeholder interfaces help guide future development while keeping the application stable.

Current Progress

The Flipnzee Auctions plugin now includes:

  • Auction management
  • Transaction creation
  • Purchase history
  • Individual purchase details
  • Dedicated payment page
  • Payment gateway architecture
  • Dynamic gateway selection interface
  • Escrow-ready payment framework

Although real payment processing has not yet been added, the plugin now has a solid architectural foundation that will make future integrations significantly easier.

Download Source Code

Download the starting version of the plugin before the lesson:

Download the completed version after this lesson:


Next Lesson

In Lesson 73, we’ll move beyond the static gateway list and begin building the actual payment flow by allowing buyers to submit their selected payment method, validating their choice, storing it with the transaction, and preparing the plugin to route users toward the appropriate payment handler. This will transform the current placeholder interface into the first stage of a working checkout process.

Lesson 71 Implementation: Introducing the Payment Manager for Transaction Validation

After successfully creating the buyer payment page in the previous lesson, the next logical improvement was to separate payment-related business logic from the presentation layer. Instead of allowing the payment page to directly decide whether a transaction could be paid, a dedicated Payment Manager class was introduced.

This lesson focuses on improving the plugin architecture while preparing the foundation for future payment gateway integrations such as Stripe, PayPal, Razorpay, or manual bank transfer.


Objective

The goals of this lesson were to:

  • Create a dedicated Flipnzee_Payment_Manager class.
  • Centralize payment validation logic.
  • Validate transactions before displaying the payment page.
  • Prepare a placeholder method for future payment gateway integrations.
  • Keep the payment page clean and easier to maintain.

Why This Refactoring Was Needed

In Lesson 70, the payment page displayed transaction details directly after fetching the transaction.

As more features are added, such as:

  • payment expiry
  • completed payments
  • cancelled transactions
  • multiple payment gateways

placing all validation logic inside the page would quickly become difficult to maintain.

Instead, all payment-related decisions should live inside a dedicated manager.

This follows the Single Responsibility Principle, where each class has one clear responsibility.


Step 1 — Creating the Payment Manager

A new file was created:

includes/class-payment-manager.php

The initial class structure:

<?php

if ( ! defined( 'ABSPATH' ) ) {
    exit;
}

class Flipnzee_Payment_Manager {

}

This class will eventually become the central place for everything related to buyer payments.


Step 2 — Registering the New Class

The loader was updated so WordPress loads the new class automatically.

Example:

require_once FLIPNZEE_AUCTIONS_PLUGIN_DIR . 'includes/class-payment-manager.php';

Step 3 — Moving Validation into the Manager

Instead of checking the transaction status directly inside the payment page, a reusable validation method was created.

public static function can_pay( $transaction ) {

    if ( ! $transaction ) {
        return false;
    }

    if ( strtolower( trim( $transaction->status ) ) !== 'pending' ) {
        return false;
    }

    return true;
}

Why strtolower()?

During testing, it was discovered that database values may use different capitalization.

Examples:

Pending
pending
PENDING

Using:

strtolower( trim( $transaction->status ) )

ensures all of these are treated consistently.


Step 4 — Validating the Transaction

The payment page now retrieves the transaction:

$transaction = Flipnzee_Payment_Manager::get_transaction(
    $transaction_id
);

If nothing is found:

if ( ! $transaction ) {
    return '<p>Transaction not found.</p>';
}

Then the Payment Manager determines whether payment is still allowed.

if ( ! Flipnzee_Payment_Manager::can_pay( $transaction ) ) {
    return '<p>This transaction is no longer available for payment.</p>';
}

This keeps the page itself very clean.


Step 5 — Preparing Gateway Support

Since payment gateways will be implemented in future lessons, a placeholder method was added.

public static function get_gateway_name( $transaction ) {

    return 'Manual Payment (Coming Soon)';
}

The payment page simply calls:

echo esc_html(
    Flipnzee_Payment_Manager::get_gateway_name( $transaction )
);

Later, this method will automatically return:

  • Manual Bank Transfer
  • Stripe
  • Razorpay
  • PayPal

without changing the payment page.


Debugging Along the Way

During implementation, a few useful issues were discovered.

1. Transaction Status Case Sensitivity

Initially the validation checked:

$transaction->status !== 'Pending'

However, the database stored:

pending

As a result, every payment was incorrectly rejected.

The validation was updated to:

strtolower( trim( $transaction->status ) ) !== 'pending'

making it much more reliable.


2. Missing Payment Gateway Column

An attempt was made to display:

$transaction->payment_gateway

This produced an undefined property warning because the database table does not yet contain a payment_gateway column.

Instead of adding a temporary workaround, the gateway display was moved into:

Flipnzee_Payment_Manager::get_gateway_name()

which currently returns a placeholder while the database schema is prepared in a future lesson.


Testing

Several scenarios were tested.

✅ Existing transaction loads correctly.

✅ Pending transaction is accepted.

✅ Invalid transaction ID displays:

Transaction not found.

✅ Placeholder payment gateway displays:

Manual Payment (Coming Soon)

No PHP warnings remain.


Final Result

The payment page now displays:

  • Transaction ID
  • Winning Bid
  • Status
  • Payment Status
  • Payment Gateway

with validation handled entirely by the Payment Manager.

The interface remains clean while the underlying architecture becomes much more maintainable.

Download Source Code

Download the starting version of the plugin before the lesson:

Download the completed version after this lesson:


What Was Learned

This lesson demonstrated the value of separating business logic from presentation.

Instead of embedding validation throughout the payment page, all payment-related decisions are now centralized in a dedicated manager. This approach makes the code easier to read, easier to test, and far simpler to extend as new payment gateways and payment workflows are introduced.

It also highlighted the importance of real-world debugging—such as handling inconsistent database values (e.g., Pending vs. pending) and recognizing when a database schema needs to evolve rather than patching around missing fields.

With the Flipnzee_Payment_Manager now in place, the plugin has a solid foundation for implementing gateway-specific payment processing in upcoming lessons while keeping the payment page itself clean and focused.

Lesson 70: Building a Dedicated Payment Page for Flipnzee Auctions

After completing the buyer purchase history and purchase details pages in the previous lesson, the next logical step was to create a dedicated payment page. Instead of redirecting buyers to a non-existent URL after clicking “Pay Now”, the plugin now provides a proper payment page that serves as the foundation for future payment gateway integration.

Although no payment gateway is connected yet, this lesson establishes the complete page architecture that future lessons will build upon.


Objective

The goal of this lesson was to:

  • Create a dedicated payment page.
  • Register a new shortcode for the payment page.
  • Display transaction information securely.
  • Ensure only logged-in users can access the page.
  • Prepare the plugin for Stripe, PayPal and other payment integrations.

What We Built

The payment workflow now looks like this:

Completed Auction
        │
        ▼
Transaction Created
        │
        ▼
Buyer clicks "Pay Now"
        │
        ▼
/payment/?transaction_id=1
        │
        ▼
Payment Page
        │
        ▼
(Future)
Stripe / PayPal / Crypto Payment

Step 1 — Create a New Payment Page Class

A new file was created:

includes/class-payment-page.php

The file begins with the standard WordPress security check.

<?php

if ( ! defined( 'ABSPATH' ) ) {
    exit;
}

class Flipnzee_Payment_Page {

    public static function render() {

        if ( ! is_user_logged_in() ) {
            return '<p>Please log in to continue.</p>';
        }

        ob_start();

        $transaction_id = isset( $_GET['transaction_id'] )
            ? absint( $_GET['transaction_id'] )
            : 0;

        // Display payment information here.

        return ob_get_clean();
    }
}

Step 2 — Register a New Shortcode

The shortcode registry inside

includes/class-shortcodes.php

was extended with a new shortcode.

add_shortcode(
    'flipnzee_payment_page',
    array(
        'Flipnzee_Payment_Page',
        'render'
    )
);

This allows WordPress pages to render the payment interface using:

[flipnzee_payment_page]

Step 3 — Load the Payment Page Class

The plugin loader was updated so the new class becomes available throughout the plugin.

Example:

require_once FLIPNZEE_PLUGIN_PATH . 'includes/class-payment-page.php';

Without loading the class, WordPress would be unable to locate the shortcode callback.


Step 4 — Retrieve the Transaction ID

The page accepts the transaction through the URL.

Example:

/payment/?transaction_id=1

The transaction ID is safely extracted using:

$transaction_id = isset( $_GET['transaction_id'] )
    ? absint( $_GET['transaction_id'] )
    : 0;

Using absint() ensures only positive integer IDs are accepted.


Step 5 — Fetch Transaction Details

Using the transaction ID, the plugin queries the transaction table.

Example:

global $wpdb;

$table = $wpdb->prefix . 'flipnzee_transactions';

$transaction = $wpdb->get_row(
    $wpdb->prepare(
        "SELECT * FROM {$table} WHERE id = %d",
        $transaction_id
    )
);

This returns the complete transaction record for display.


Step 6 — Display Payment Information

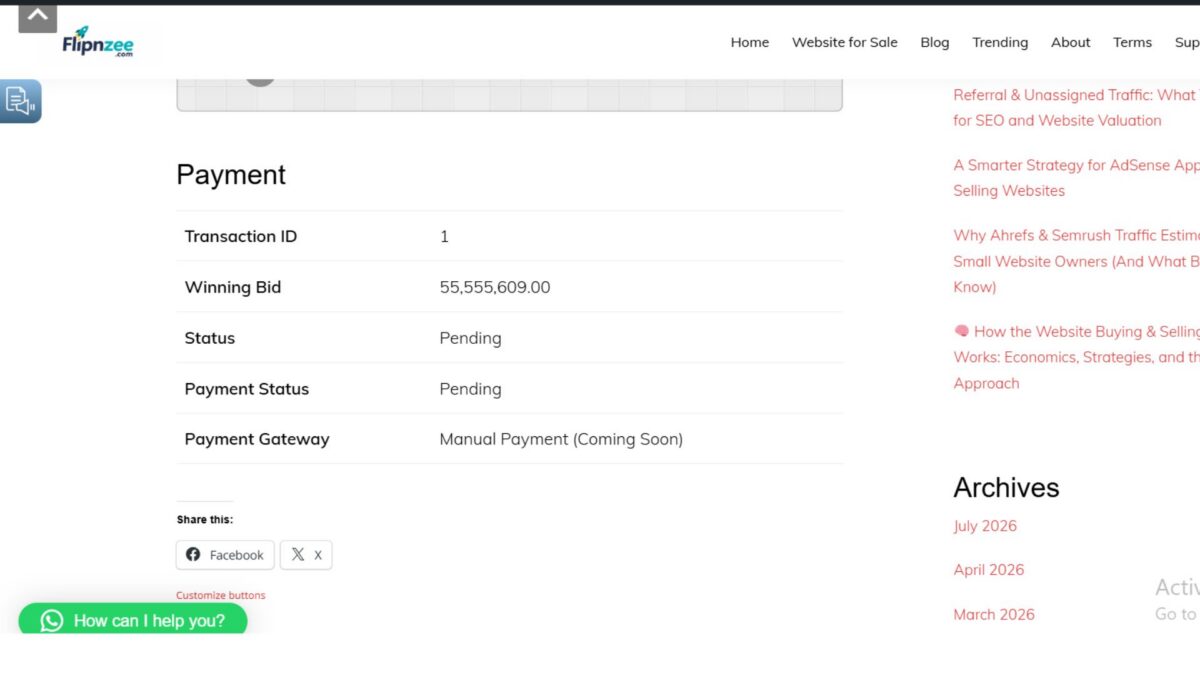
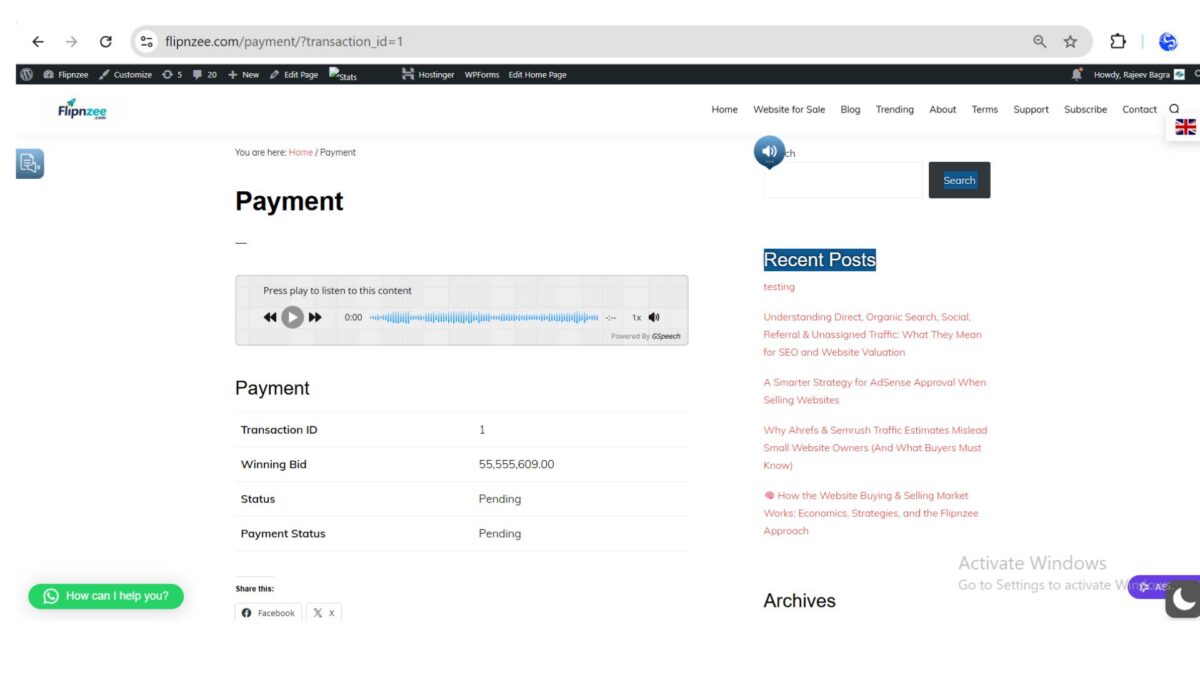
The page currently displays essential information including:

  • Transaction ID
  • Winning Bid
  • Transaction Status
  • Payment Status

Example output:

Payment

Transaction ID     1
Winning Bid        ₹55,555,609
Status             Pending
Payment Status     Pending

This provides buyers with confirmation that the transaction exists before payment processing is added.


Step 7 — Create a WordPress Payment Page

A new WordPress page was created:

Payment

The page content contains only the shortcode:

[flipnzee_payment_page]

This keeps presentation separate from business logic, making the system easier to maintain.


Testing

The payment page was tested by visiting:

/payment/?transaction_id=1

The page correctly displayed:

  • Transaction ID
  • Winning Bid
  • Pending Status
  • Pending Payment Status

The previous 404 Not Found error was successfully resolved.


Files Modified

includes/class-payment-page.php (new)
includes/class-shortcodes.php
includes/class-loader.php (or plugin loader)

Download Source Code

Download the starting version of the plugin before the lesson:

Download the completed version after this lesson:


Lessons Learned

During implementation, several important WordPress plugin development concepts were reinforced:

  • Create reusable functionality using dedicated classes.
  • Register features using WordPress shortcodes.
  • Load new classes through the plugin loader.
  • Validate user input using absint().
  • Protect pages by requiring user authentication.
  • Use output buffering (ob_start() / ob_get_clean()) for shortcode rendering.
  • Keep page layout separate from business logic.

Current Workflow

Auction Ends
      │
      ▼
Winner Determined
      │
      ▼
Transaction Created
      │
      ▼
"My Purchases"
      │
      ▼
Pay Now
      │
      ▼
Payment Page
      │
      ▼
(Future)
Payment Gateway Integration

What’s Next?

With the payment page now in place, the plugin is ready for the next phase of development. Future lessons will focus on transforming this informational page into a fully functional checkout by adding payment gateway integration, order summaries, payment processing, status updates, and buyer/seller notifications.

Lesson 70 establishes the foundation that all future payment functionality will build upon.

Lesson 71: Preparing the Payment Gateway Architecture for Future Integrations

Introduction

With a dedicated buyer payment page now operational, the next step is to prepare the plugin for actual payment gateway integration. Rather than immediately connecting to a provider like Stripe or PayPal, it is better to first build a clean, reusable architecture that allows multiple payment gateways to be added later without rewriting the auction workflow.

In this lesson, we’ll introduce a centralized payment manager that becomes responsible for generating payment requests, validating transactions, and routing buyers to the selected payment gateway. Although no real payment processing will occur yet, this lesson lays the foundation for supporting Stripe, PayPal, Razorpay, cryptocurrency payments, and additional gateways in future releases.


Learning Objectives

By the end of this lesson, you will learn how to:

  • Design a scalable payment architecture.
  • Separate payment logic from page rendering.
  • Create a dedicated Payment Manager class.
  • Validate transactions before initiating payment.
  • Prepare the plugin for multiple payment gateways.
  • Keep the codebase modular and maintainable.

Why This Lesson Is Important

A common mistake is embedding payment code directly inside the payment page shortcode. That approach quickly becomes difficult to maintain when additional gateways are introduced.

Instead, we’ll separate responsibilities:

  • Payment Page → displays information to the buyer.
  • Payment Manager → handles payment processing logic.
  • Gateway Classes (future lessons) → communicate with Stripe, PayPal, Razorpay, crypto wallets, etc.

This layered architecture follows good software engineering principles and makes the plugin easier to extend.


What We’ll Build

At the end of this lesson, the payment flow will look like this:

Buyer
   │
   ▼
Payment Page
   │
   ▼
Payment Manager
   │
   ▼
Selected Gateway
   │
   ├── Stripe (future)
   ├── PayPal (future)
   ├── Razorpay (future)
   └── Crypto (future)

Planned Implementation

During this lesson we will:

Step 1

Create

includes/class-payment-manager.php

Step 2

Move payment-related business logic into this class.


Step 3

Add a function to validate a transaction before payment begins.


Step 4

Create a placeholder method that returns the payment URL for the selected gateway.


Step 5

Update the payment page so it requests payment information from the Payment Manager instead of containing all business logic itself.


Step 6

Register and load the new class using the plugin loader.


Expected Folder Structure

includes/

class-payment-manager.php
class-payment-page.php
class-transaction-manager.php
class-my-purchases.php
class-my-purchase-details.php

Benefits

After completing this lesson, the plugin will have:

  • Better separation of concerns.
  • Easier maintenance.
  • Cleaner code.
  • Support for multiple gateways.
  • Simpler testing.
  • Future-proof architecture.

Skills You’ll Learn

  • Object-Oriented Programming (OOP)
  • Separation of Concerns
  • WordPress Plugin Architecture
  • Business Logic vs Presentation
  • Designing Extensible Systems
  • Preparing APIs for Third-Party Integrations

What Comes Next?

With the Payment Manager in place, the next lessons can focus on implementing real payment gateways without modifying the auction or transaction workflow.

A possible roadmap is:

  • Lesson 72: Creating the Payment Manager and Transaction Validation
  • Lesson 73: Adding a Gateway Interface and Default Gateway Selection
  • Lesson 74: Integrating the First Payment Gateway (e.g., Stripe or Razorpay Sandbox)
  • Lesson 75: Handling Payment Callbacks and Updating Transaction Status

By first building the architecture rather than jumping straight into gateway code, the Flipnzee Auctions plugin will remain clean, scalable, and capable of supporting multiple payment providers as the marketplace grows.

Lesson 70: Building the Payment Page Foundation for Completed Auctions


Introduction

After successfully completing the auction lifecycle in the previous lessons, the next logical step is to allow auction winners to complete their purchase.

By the end of Lesson 69, Flipnzee Auctions was already capable of:

  • Creating and managing auctions
  • Automatically closing expired auctions
  • Determining the winning bidder
  • Recording transactions
  • Displaying transactions in the WordPress admin
  • Showing buyers their purchases
  • Displaying purchase details
  • Providing a Pay Now button for unpaid purchases

Although the Pay Now button existed, clicking it resulted in a 404 Page Not Found error because the payment page itself had not yet been implemented.

Lesson 70 focuses on solving this problem by creating the foundation of the payment workflow.


Why This Lesson Is Important

Every online marketplace requires a secure payment flow after an auction ends.

Instead of jumping directly into integrating a payment gateway like Stripe or PayPal, it is better to build the underlying architecture first.

This lesson concentrates on creating the page that receives the transaction, validates it, and displays the purchase before any actual payment processing takes place.

Building the foundation first makes later gateway integration much cleaner and easier.


Objectives

In this lesson we will:

  • Create the Payment Page shortcode
  • Build a dedicated Payment Page class
  • Register the shortcode with the plugin loader
  • Display transaction information
  • Validate transaction IDs
  • Handle missing or invalid transactions gracefully
  • Prepare the page for future payment gateway integration

Planned Workflow

To keep development safe and manageable, this lesson will be completed in several small checkpoints.

Checkpoint 1

Create the Payment Page class.


Checkpoint 2

Register the payment shortcode.


Checkpoint 3

Display transaction information.


Checkpoint 4

Handle invalid transactions.


Checkpoint 5

Test the page using existing auction transactions.


Checkpoint 6

Commit the completed lesson to Git.


Expected User Flow

Auction Ends
        │
        ▼
Winner Determined
        │
        ▼
Transaction Created
        │
        ▼
Buyer Visits "My Purchases"
        │
        ▼
Clicks "Pay Now"
        │
        ▼
Payment Page Opens
        │
        ▼
Transaction Validated
        │
        ▼
Ready for Payment Gateway

Development Strategy

One important improvement in our workflow is the use of small Git checkpoints.

At the beginning of this lesson, the entire project was restored to the stable Lesson 69 state and committed to GitHub. This provides a reliable rollback point before introducing the payment workflow.

Rather than implementing the complete payment system in one attempt, each stage will be developed, tested, and committed separately. This incremental approach reduces risk, simplifies debugging, and ensures that any issues can be isolated without affecting previously completed features.


What We’ll Build Next

By the end of Lesson 70, clicking the Pay Now button should no longer produce a 404 error. Instead, buyers will be taken to a dedicated payment page displaying the transaction details, confirming the amount due, and preparing the auction purchase for payment processing in the upcoming lessons.


Next Lesson: Implementing the Payment Page and Connecting the “Pay Now” Workflow.

Lesson 69: Adding a Payment Page and Payment Links for Auction Winners in the Flipnzee Auctions Plugin

As the Flipnzee Auctions plugin continues to evolve, one of the next logical improvements was to guide auction winners toward completing their purchase. In previous lessons, buyers could view their purchases and transaction details, but there was no dedicated page to begin the payment process.

In this lesson, a frontend payment page was introduced along with contextual payment links, creating a smoother purchasing experience for buyers.


Objective

The goal of this lesson was to:

  • Create a dedicated Payment page.
  • Add a new payment shortcode.
  • Display a Pay Now action for pending purchases.
  • Keep View Details available for completed purchases.
  • Build the foundation for integrating real payment gateways in future lessons.

Step 1: Created the Payment Page Class

A new file was added:

includes/class-payment-page.php

This class is responsible for rendering the payment page using a shortcode.

It retrieves the transaction ID from the URL, validates the request, and prepares the page for displaying payment-related information.


Step 2: Loaded the New Class

The main plugin file was updated to load the payment page class.

require_once FLIPNZEE_AUCTION_PATH .
    'includes/class-payment-page.php';

This ensures the payment functionality becomes available whenever the plugin loads.


Step 3: Registered a New Shortcode

A new shortcode was registered for the payment page.

Example:

[flipnzee_payment]

This shortcode can be placed on any WordPress page to create a dedicated payment screen.


Step 4: Created the Payment Page

Inside WordPress, a new page named:

Payment

was created.

Its content simply contains:

[flipnzee_payment]

This allows buyers to visit:

https://example.com/payment/

and access their payment page.


Step 5: Added Dynamic Payment Links

The My Purchases table was enhanced with conditional action links.

If a purchase is still pending:

Pay Now

is displayed.

If payment has already been completed:

View Details

is displayed.

This creates a cleaner and more intuitive workflow for buyers.


Step 6: Passed the Transaction ID

When the buyer clicks Pay Now, the transaction ID is automatically included in the URL.

Example:

/payment/?transaction_id=5

The payment page then knows exactly which purchase is being processed.


Step 7: Improved User Experience

Originally, the purchase details shortcode displayed:

Invalid transaction.

when no transaction ID was present.

This was changed so that the shortcode quietly returns nothing instead.

As a result:

  • The My Purchases page remains clean.
  • Purchase details only appear after selecting a specific transaction.

Step 8: Displayed Both Actions for Pending Purchases

To make the interface more useful, pending purchases now display both actions.

Pay Now

View Details

This allows buyers to review their purchase before completing payment.


Testing Performed

The following scenarios were successfully tested:

  • Plugin activation
  • Payment page loading
  • Payment shortcode rendering
  • Pending purchases displaying Pay Now
  • Paid purchases displaying View Details
  • Purchase Details page opening correctly
  • Transaction IDs passed correctly through URLs
  • No PHP syntax errors
  • No fatal errors after implementation

Result

The buyer journey has now become much more complete.

Auction Listing
        ↓
Place Bid
        ↓
Auction Ends
        ↓
Transaction Created
        ↓
My Purchases
        ↓
Pay Now
        ↓
Purchase Details

Although the payment page currently serves as a placeholder, it establishes the structure required for integrating payment gateways such as Stripe, Razorpay, PayPal, or WooCommerce Payments in future lessons.

Download Source Code

Download the starting version of the plugin before the lesson:

Download the completed version after this lesson:


What I Learned

This lesson demonstrated several important WordPress plugin development concepts:

  • Creating additional frontend components using shortcodes.
  • Passing data securely through URL parameters.
  • Building conditional user interfaces based on transaction status.
  • Improving usability by displaying context-sensitive actions.
  • Designing a scalable workflow that can later support real payment gateways.

Conclusion

Lesson 69 transformed the Flipnzee Auctions plugin from simply tracking purchases into guiding buyers through the next stage of the auction process. By introducing a dedicated payment page and dynamic action links, the plugin now provides a more complete end-to-end purchasing experience while laying the groundwork for future payment gateway integration.

Lesson 69: Build the Buyer Payment Page


Why This Lesson?

A buyer can now:

  • Browse auctions.
  • Place bids.
  • Win an auction.
  • View purchases.
  • View transaction details.

The next logical step is allowing the buyer to proceed to payment.

Although payment gateways (Stripe, Razorpay, PayPal, etc.) will be integrated later, we should first build the payment page and workflow.


What We Will Build

A new frontend shortcode:

[flipnzee_payment]

This page will display:

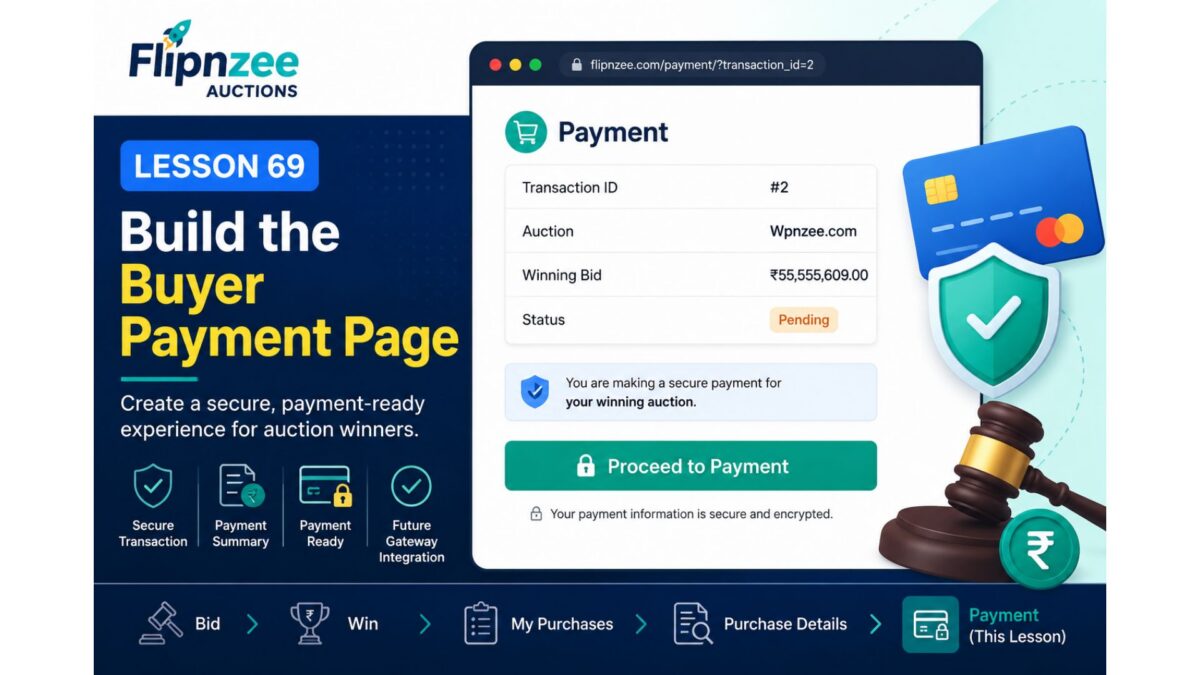
Payment

Auction:
Wpnzee.com

Transaction ID:
#2

Winning Bid:
₹55,555,609.00

Status:
Pending

------------------------------------------------

Proceed to Payment

Initially, the button will simply display a placeholder message.

In later lessons it will connect to:

  • Stripe
  • Razorpay
  • PayPal

without redesigning the page.


New Workflow

My Purchases
      │
      ▼
View Details
      │
      ▼
Purchase Details
      │
      ▼
Proceed to Payment

Features

During this lesson we will:

  • Create a Payment shortcode.
  • Verify the buyer owns the transaction.
  • Retrieve transaction details.
  • Display payment summary.
  • Show a “Proceed to Payment” button.
  • Hide the button once the transaction is already marked as Paid.

Files Expected to Change

includes/class-payment.php
includes/class-shortcodes.php
flipnzee-auctions.php
includes/class-my-purchase-details.php

New Shortcode

[flipnzee_payment]

Payment Summary

The page will display:

FieldExample
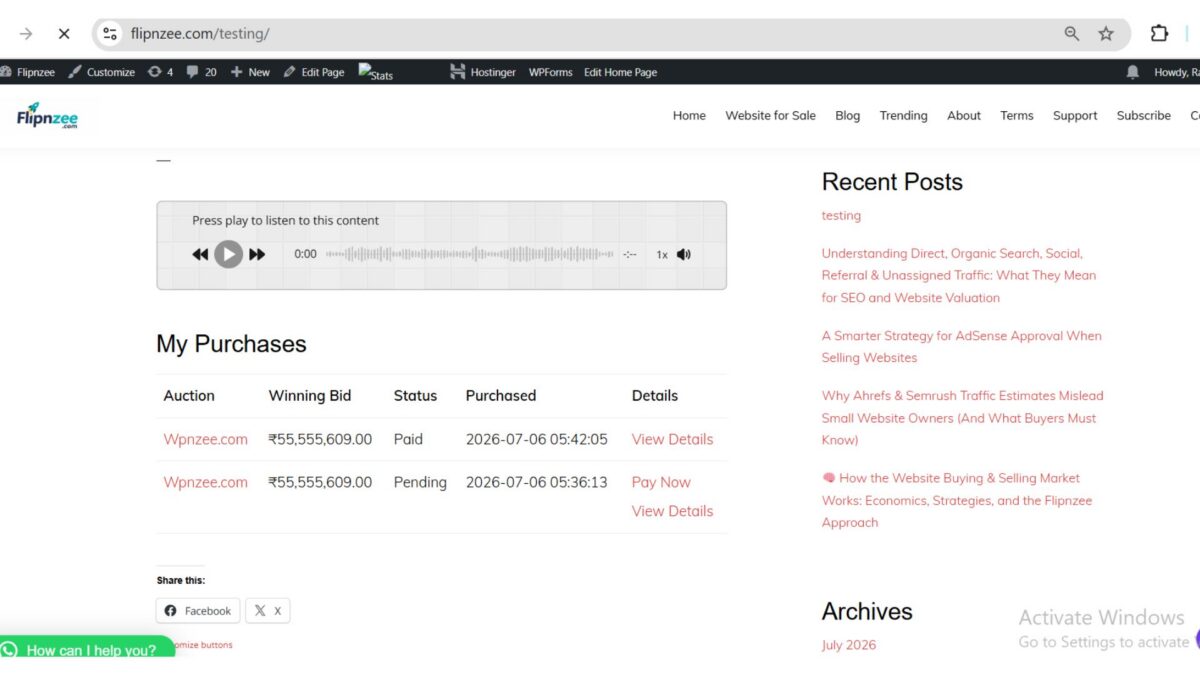
Transaction ID#2
AuctionWpnzee.com
Winning Bid₹55,555,609.00
StatusPending

Button Behaviour

If:

Status = Pending

display

Proceed to Payment

If:

Status = Paid

display

✓ Payment Received

This provides immediate visual feedback and prevents duplicate payment attempts.


Skills You’ll Learn

During this lesson you’ll learn how to:

  • Build another reusable frontend shortcode.
  • Reuse secure transaction validation.
  • Conditionally display interface elements.
  • Create a payment-ready architecture.
  • Design pages that can later integrate with payment gateways without major refactoring.

Expected Outcome

By the end of Lesson 69, Flipnzee Auctions will have a complete post-purchase navigation flow:

Auction
      │
      ▼
Bid
      │
      ▼
Winner
      │
      ▼
My Purchases
      │
      ▼
Purchase Details
      │
      ▼
Payment Page

Although no real payment will be processed yet, the platform will be structurally ready for payment gateway integration in subsequent lessons.


Why this is a good next step

Instead of postponing payment until the end of development, we’re building the user journey in the same order a real buyer experiences it. When you later integrate Stripe, Razorpay, or another gateway, you’ll only need to replace the placeholder button action rather than redesign the buyer workflow. This keeps the development incremental and makes Version 1 feel complete from a user’s perspective.

Lesson 68 Implementation: Building a Secure Buyer Purchase Details Page in Flipnzee Auctions

In the previous lesson, buyers gained access to a My Purchases dashboard where they could see every website they had won through Flipnzee Auctions. While that was a major improvement, buyers still had no way to inspect an individual transaction.

Lesson 68 addresses this by introducing a dedicated Purchase Details page. Buyers can now click a transaction from their purchase history and securely view its complete details.


What We Built

During this lesson, a new frontend component was created specifically for buyers.

The new class:

Flipnzee_My_Purchase_Details

is responsible for displaying the details of a single purchase.

The page is powered by a new shortcode:

[flipnzee_purchase_details]

Creating the Purchase Details Class

A new file was added to the plugin:

includes/class-my-purchase-details.php

Initially, the class simply:

  • Prevented direct access.
  • Checked whether the visitor was logged in.
  • Displayed a placeholder heading.

Building the page incrementally allowed each stage to be tested before adding more functionality.


Loading the Class

The new class was loaded inside the main plugin file.

require_once FLIPNZEE_AUCTION_PATH .
	'includes/class-my-purchase-details.php';

After every modification, syntax was verified using:

php -l flipnzee-auctions.php

Registering the Shortcode

Next, the shortcode was registered inside the shortcode manager.

[flipnzee_purchase_details]

This allows the purchase details page to be inserted on any WordPress page using a shortcode, keeping the implementation flexible and reusable.


Reading the Transaction ID

Unlike the purchase history page, the details page must know which transaction to display.

The transaction ID is retrieved from the URL.

Example:

https://flipnzee.com/purchase-details/?transaction_id=2

The value is sanitised using:

absint()

If no transaction ID is supplied, a friendly error message is shown instead of attempting a database query.


Secure Database Lookup

One of the most important parts of this lesson was securing access to transaction data.

Instead of loading a transaction using only its ID, the query verifies both:

  • Transaction ID
  • Logged-in Buyer ID

The SQL query therefore ensures buyers can only access their own purchases.

Even if someone manually changes:

?transaction_id=1

to

?transaction_id=50

they cannot view another user’s transaction unless they are the rightful buyer.

This is an essential security practice for any marketplace application.


Building the Purchase Details Page

Once the transaction is retrieved successfully, the page displays a professional summary.

Information shown includes:

  • Transaction ID
  • Auction Title
  • Winning Bid
  • Transaction Status
  • Purchase Date

Instead of returning plain HTML strings, PHP output buffering was used.

ob_start();
...
return ob_get_clean();

This keeps the template much easier to read and maintain.


Adding Navigation from My Purchases

The purchase history table was then enhanced with a brand new Details column.

Each purchase now contains a View Details link.

Clicking the link automatically opens the Purchase Details page for the selected transaction.

The navigation flow now becomes:

My Purchases
      │
      ▼
View Details
      │
      ▼
Purchase Details

This creates a far more natural user experience than requiring buyers to manually edit URLs.


Testing

Several scenarios were tested during implementation.

Missing Transaction ID

Without a transaction ID:

/testing/

the page correctly displayed:

Invalid transaction.

Valid Transaction

When a valid transaction was supplied:

/testing/?transaction_id=2

the page successfully displayed the transaction details.


Invalid Transaction

Using an invalid transaction ID correctly returned:

Transaction not found.

This confirms the validation logic is working correctly.


Final Result

The completed Purchase Details page now displays information similar to:

FieldValue
Transaction ID2
AuctionWpnzee.com
Winning Bid₹55,555,609.00
StatusPaid
Purchased2026-07-06 05:42:05

The page is accessible directly from the buyer’s purchase history through the View Details link.


Lessons Learned

This lesson reinforced several important WordPress development concepts.

  • Building reusable shortcode-based pages.
  • Reading and sanitising URL parameters.
  • Using $wpdb->prepare() for secure database queries.
  • Verifying ownership before displaying private information.
  • Using output buffering to generate HTML templates.
  • Creating navigation between frontend pages.
  • Improving usability through contextual links.

Download Source Code

Download the starting version of the plugin before the lesson:

Download the completed version after this lesson:


Why This Feature Matters

Lesson 68 completes the buyer transaction workflow within Flipnzee Auctions.

Previously, buyers could only see a list of purchases. They can now drill down into individual transactions and review important information without needing administrator assistance.

Combined with the My Purchases dashboard introduced in Lesson 67, buyers now have a professional frontend experience that mirrors the functionality commonly found in commercial marketplace platforms.

As Flipnzee evolves, this page can be expanded further with payment confirmations, downloadable invoices, escrow status, support requests, digital asset delivery, and other post-purchase features. It provides a strong and secure foundation for the buyer experience while bringing the Flipnzee Auctions plugin another significant step closer to a production-ready Version 1 release.