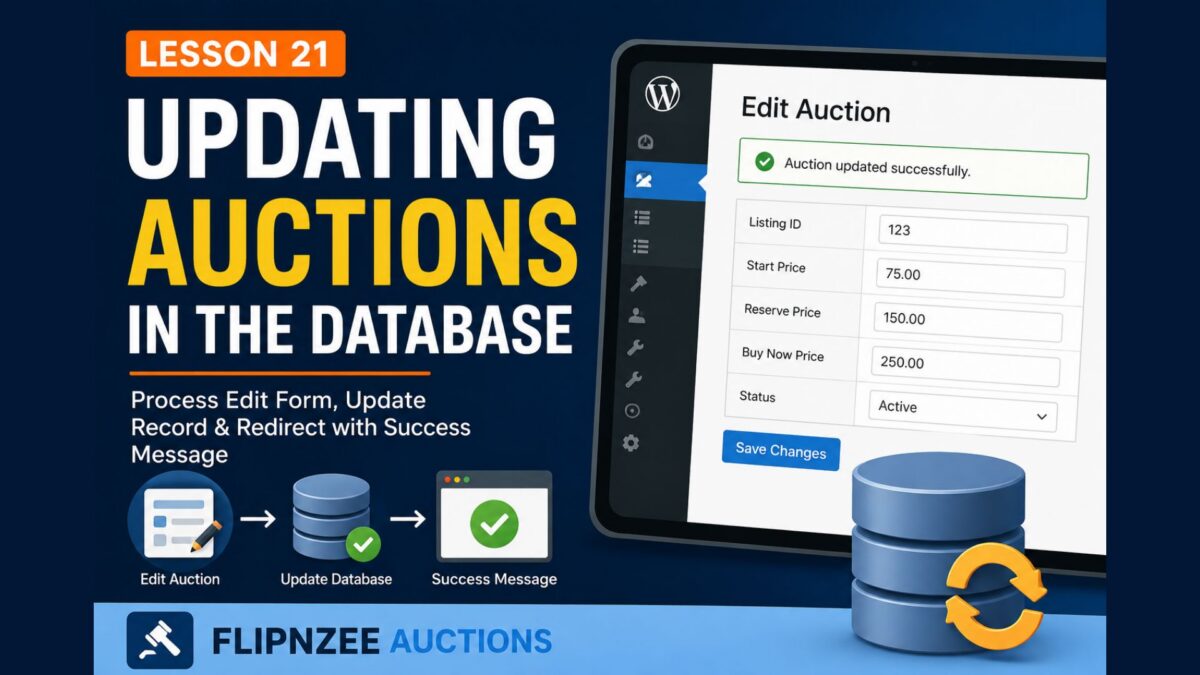
Lesson 21: Updating Auctions in the Database

In the previous lesson, we transformed our Edit Auction page into a fully editable form. Administrators can now modify auction values such as the listing ID, prices, and status.

However, clicking Save Changes currently results in a blank page because our plugin does not yet know how to process the submitted form.

In this lesson, we’ll complete the editing workflow by processing the form submission, updating the database, and redirecting the administrator back to the Edit Auction page with a success message.


Learning Objectives

By the end of this lesson you will be able to:

  • Register a new WordPress admin_post action.
  • Process an Edit Auction form securely.
  • Verify nonces before updating the database.
  • Sanitize user input.
  • Update an existing database record using $wpdb->update().
  • Redirect back to the Edit page with a success message.

Current Workflow

At the moment our workflow looks like this:

Edit Auction
      ↓
Modify Fields
      ↓
Click Save Changes
      ↓
Blank Screen

After this lesson it will become:

Edit Auction
      ↓
Modify Fields
      ↓
Click Save Changes
      ↓
Update Database
      ↓
Redirect Back
      ↓
Success Message

Step 1 – Register a New Admin Action

Open:

admin/class-admin-posts.php

Inside the constructor, add another action:

add_action(
	'admin_post_flipnzee_update_auction',
	array( $this, 'handle_update_auction' )
);

Your constructor should now contain both actions:

public function __construct() {

	add_action(
		'admin_post_flipnzee_create_auction',
		array( $this, 'handle_create_auction' )
	);

	add_action(
		'admin_post_flipnzee_update_auction',
		array( $this, 'handle_update_auction' )
	);
}

Step 2 – Create the Update Handler

Inside the same class, add:

public function handle_update_auction() {

	check_admin_referer(
		'flipnzee_update_auction',
		'flipnzee_nonce'
	);

	$auction_id = absint( $_POST['auction_id'] );

	$listing_id = absint( $_POST['listing_id'] );

	$start_price = floatval( $_POST['start_price'] );

	$reserve_price = floatval( $_POST['reserve_price'] );

	$buy_now_price = floatval( $_POST['buy_now_price'] );

	$status = sanitize_text_field(
		wp_unslash( $_POST['status'] )
	);

	$updated = Flipnzee_Auction_Manager::update_auction(
		$auction_id,
		$listing_id,
		$start_price,
		$reserve_price,
		$buy_now_price,
		$status
	);

	$message = $updated
		? 'updated'
		: 'error';

	wp_safe_redirect(

		admin_url(

			'admin.php?page=flipnzee-edit-auction&auction_id=' .
			$auction_id .
			'&message=' .
			$message
		)

	);

	exit;
}

Notice how every value is sanitized before being passed to the Auction Manager.


Step 3 – Add the Update Method

Open:

includes/class-auction-manager.php

Add the following method beneath create_auction():

public static function update_auction(
	$auction_id,
	$listing_id,
	$start_price,
	$reserve_price,
	$buy_now_price,
	$status
) {

	global $wpdb;

	$table = $wpdb->prefix . 'flipnzee_auctions';

	$result = $wpdb->update(

		$table,

		array(

			'listing_id'    => $listing_id,
			'start_price'   => $start_price,
			'reserve_price' => $reserve_price,
			'buy_now_price' => $buy_now_price,
			'status'        => $status,

		),

		array(
			'id' => $auction_id,
		),

		array(
			'%d',
			'%f',
			'%f',
			'%f',
			'%s',
		),

		array(
			'%d',
		)

	);

	return false !== $result;
}

This method updates only the selected auction.


Step 4 – Display a Success Message

Open:

admin/class-admin.php

Inside edit_auction_page(), immediately after the <h1> heading, add:

<?php

$message = isset( $_GET['message'] )
	? sanitize_text_field(
		wp_unslash( $_GET['message'] )
	)
	: '';

if ( 'updated' === $message ) :
?>

	<div class="notice notice-success is-dismissible">
		<p>Auction updated successfully.</p>
	</div>

<?php elseif ( 'error' === $message ) : ?>

	<div class="notice notice-error is-dismissible">
		<p>Unable to update auction.</p>
	</div>

<?php endif; ?>

Now the administrator receives immediate feedback after saving changes.


Step 5 – Test the Plugin
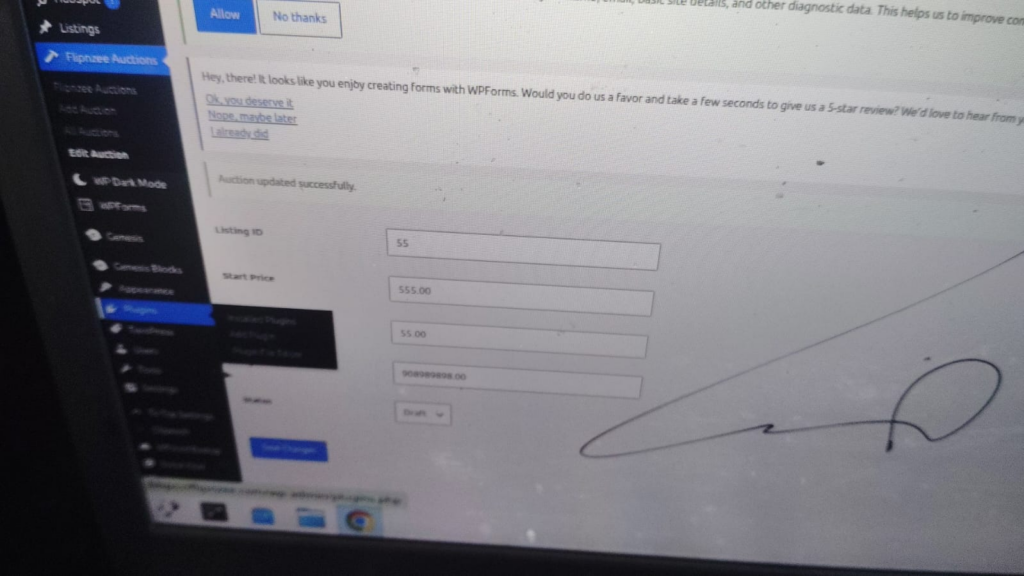
Create a fresh ZIP and upload the updated plugin.

Go to:

Flipnzee Auctions → All Auctions

Click Edit.

Change one or more values.

Click Save Changes.

You should now:

  • Return to the Edit page.
  • See a success message.
  • See the updated values displayed in the form.

Why Redirect Instead of Printing a Message?

Professional WordPress plugins generally follow the POST → Redirect → GET pattern.

Instead of displaying output immediately after processing a form, they redirect back to the appropriate page.

Benefits include:

  • Preventing duplicate form submissions.
  • Cleaner browser history.
  • Easier refresh behaviour.
  • Better user experience.

Lesson Summary

In this lesson we completed the Edit Auction workflow.

The plugin now processes form submissions securely, validates the nonce, sanitizes user input, updates the database, and redirects the administrator back to the Edit Auction page with an appropriate success or error message.

This represents another major milestone because the plugin now supports both creating and updating auction records.


Key Takeaways

  • Register a dedicated admin_post action for each form.
  • Always verify nonces before processing requests.
  • Sanitize every submitted value.
  • Use $wpdb->update() to modify existing database rows.
  • Redirect after processing forms.

Common Mistakes

  • Forgetting to register the new admin_post action.
  • Omitting nonce verification.
  • Forgetting to sanitize submitted values.
  • Redirecting before calling exit.
  • Returning output instead of redirecting.

Git Commands Used

git add .

git commit -m "Lesson 21: Update auctions"

git push

Testing Checklist

Before moving to the next lesson, verify that:

  • ✅ Edit page opens correctly.
  • ✅ Auction values can be modified.
  • ✅ Clicking Save Changes updates the database.
  • ✅ Success message appears.
  • ✅ Refreshing the page does not resubmit the form.
  • ✅ No PHP warnings or notices appear.

Project Status

✅ Dashboard

✅ Add Auction

✅ Save Auction

✅ View Auctions

✅ WP_List_Table

✅ Row Actions

✅ Edit Auction Form

✅ Update Auction

⬜ Delete Auction

⬜ Auction Scheduling

⬜ Bid Engine

⬜ Escrow Workflow

Developer’s Notebook

WordPress encourages developers to separate the user interface from business logic. In this lesson, the form is responsible only for collecting user input, while the admin_post handler processes and validates the request before delegating the database update to the Auction Manager. This separation of responsibilities makes the plugin easier to test, maintain, and extend in future lessons.
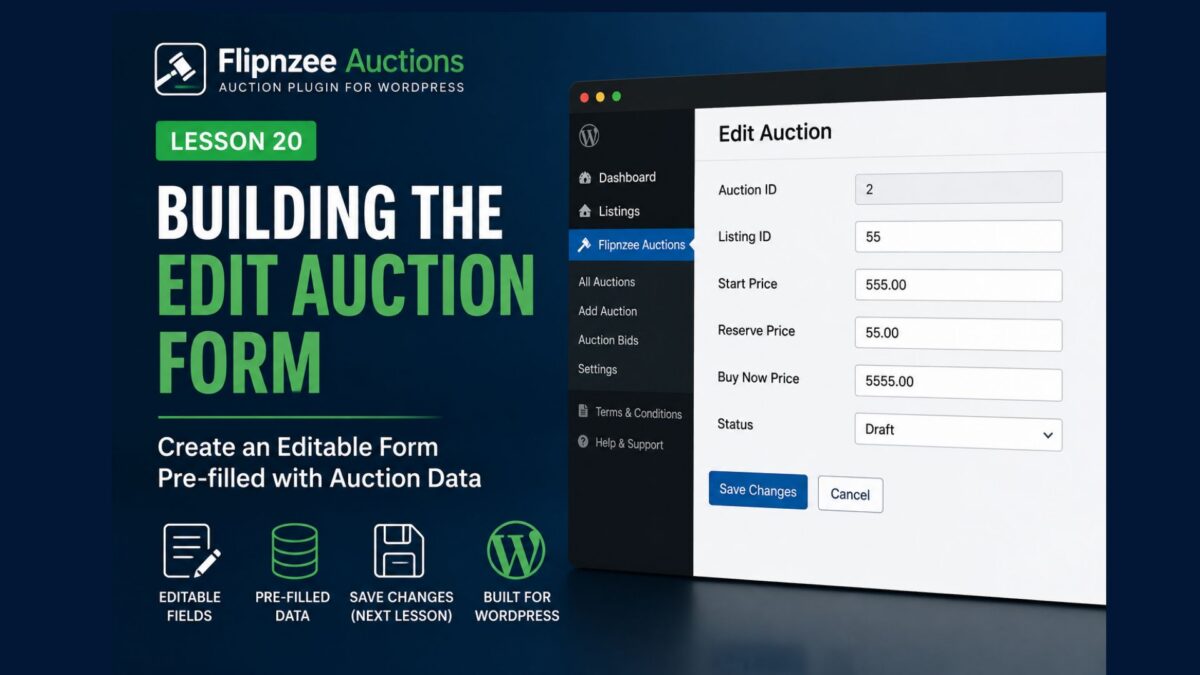
Lesson 20: Building the Edit Auction Form

In the previous lesson, we successfully created an Edit Auction page and retrieved the selected auction from the database. When an administrator clicked the Edit link, the plugin displayed the auction’s current information.

Although this proved that our retrieval logic worked correctly, the page was still read-only. In this lesson, we’ll replace the information table with a fully editable form whose fields are automatically populated with the auction’s existing values.

This approach mirrors how WordPress edits posts, pages, users, and many other objects. Administrators see the current values, make changes, and then save them.


Learning Objectives

By the end of this lesson you will be able to:

  • Build an editable administration form.
  • Pre-populate form fields with database values.
  • Display existing auction information inside HTML inputs.
  • Create the foundation for updating auctions in the next lesson.

Current Workflow

Our current workflow is:

All Auctions
      ↓
Click Edit
      ↓
Retrieve Auction
      ↓
Display Read-only Table

After today’s lesson it becomes:

All Auctions
      ↓
Click Edit
      ↓
Retrieve Auction
      ↓
Editable Form
      ↓
Save Changes (Next Lesson)

Step 1 – Locate the Edit Auction Page

Open:

admin/class-admin.php

Locate the method:

public function edit_auction_page()

Inside the method you’ll find a table displaying the auction details.


Step 2 – Replace the Table with a Form

Replace the existing table with the following form:

<form method="post">

	<table class="form-table">

		<tr>

			<th scope="row">
				<label for="listing_id">Listing ID</label>
			</th>

			<td>
				<input
					type="number"
					id="listing_id"
					name="listing_id"
					value="<?php echo esc_attr( $auction->listing_id ); ?>"
					required
					class="regular-text"
				>
			</td>

		</tr>

		<tr>

			<th scope="row">
				<label for="start_price">Start Price</label>
			</th>

			<td>
				<input
					type="number"
					step="0.01"
					id="start_price"
					name="start_price"
					value="<?php echo esc_attr( $auction->start_price ); ?>"
					class="regular-text"
				>
			</td>

		</tr>

		<tr>

			<th scope="row">
				<label for="reserve_price">Reserve Price</label>
			</th>

			<td>
				<input
					type="number"
					step="0.01"
					id="reserve_price"
					name="reserve_price"
					value="<?php echo esc_attr( $auction->reserve_price ); ?>"
					class="regular-text"
				>
			</td>

		</tr>

		<tr>

			<th scope="row">
				<label for="buy_now_price">Buy Now Price</label>
			</th>

			<td>
				<input
					type="number"
					step="0.01"
					id="buy_now_price"
					name="buy_now_price"
					value="<?php echo esc_attr( $auction->buy_now_price ); ?>"
					class="regular-text"
				>
			</td>

		</tr>

		<tr>

			<th scope="row">
				<label for="status">Status</label>
			</th>

			<td>

				<select
					name="status"
					id="status"
				>

					<option value="draft" <?php selected( $auction->status, 'draft' ); ?>>
						Draft
					</option>

					<option value="active" <?php selected( $auction->status, 'active' ); ?>>
						Active
					</option>

					<option value="closed" <?php selected( $auction->status, 'closed' ); ?>>
						Closed
					</option>

				</select>

			</td>

		</tr>

	</table>

	<?php submit_button( 'Save Changes' ); ?>

</form>

Notice that every input field uses the current auction value. This allows administrators to modify existing information instead of re-entering everything.


Step 3 – Test the Plugin

Create a fresh ZIP and upload the updated plugin.

Navigate to:

Flipnzee Auctions → All Auctions

Click Edit.

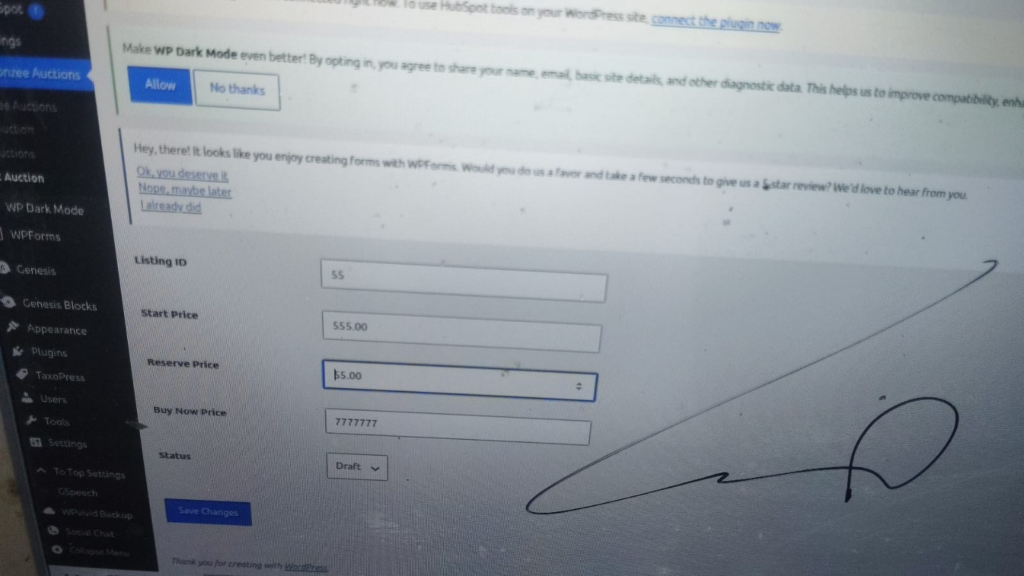
Instead of a read-only table you should now see an editable form containing:

  • Listing ID
  • Start Price
  • Reserve Price
  • Buy Now Price
  • Status

The Save Changes button will appear but won’t update the database yet. We’ll implement that functionality in the next lesson.


Why Build the Form First?

Professional software development often separates the user interface from the data processing logic.

Today’s lesson focuses entirely on presenting editable fields.

The next lesson will focus on validating user input and updating the database.

Separating these concerns makes the code easier to understand, test, and maintain.


Lesson Summary

In this lesson we transformed the Edit Auction page from a read-only display into an editable administration form.

Each input field is automatically populated using data retrieved from the database, allowing administrators to modify auction information without retyping existing values.

Although the Save Changes button is now visible, it does not yet perform any updates. That functionality will be implemented in the next lesson.


Key Takeaways

  • Editable forms improve administrator usability.
  • Existing values should always be pre-populated.
  • esc_attr() safely outputs values inside HTML attributes.
  • Building the interface before processing simplifies development.

Common Mistakes

  • Forgetting to pre-populate form values.
  • Using echo without esc_attr() inside HTML attributes.
  • Omitting the Status dropdown.
  • Trying to update the database before the form is complete.

Git Commands Used

git add .

git commit -m "Lesson 20: Build Edit Auction form"

git push

Testing Checklist

Before moving to the next lesson, verify that:

  • ✅ The plugin activates successfully.
  • ✅ The Edit page opens correctly.
  • ✅ All fields contain the current auction values.
  • ✅ Status is selected correctly.
  • ✅ The Save Changes button appears.
  • ✅ No PHP errors occur.

Project Status

✅ Dashboard

✅ Add Auction

✅ Save Auction

✅ View Auctions

✅ WP_List_Table

✅ Row Actions

✅ Edit Auction Page

✅ Edit Auction Form

⬜ Update Auction

⬜ Delete Auction

⬜ Bid Engine

⬜ Escrow Workflow

Developer’s Notebook

Creating the editing interface before implementing database updates follows a common development pattern. It allows you to verify that data retrieval and presentation work correctly before adding validation and persistence logic. This incremental approach also makes debugging significantly easier because each lesson introduces only one major concept.

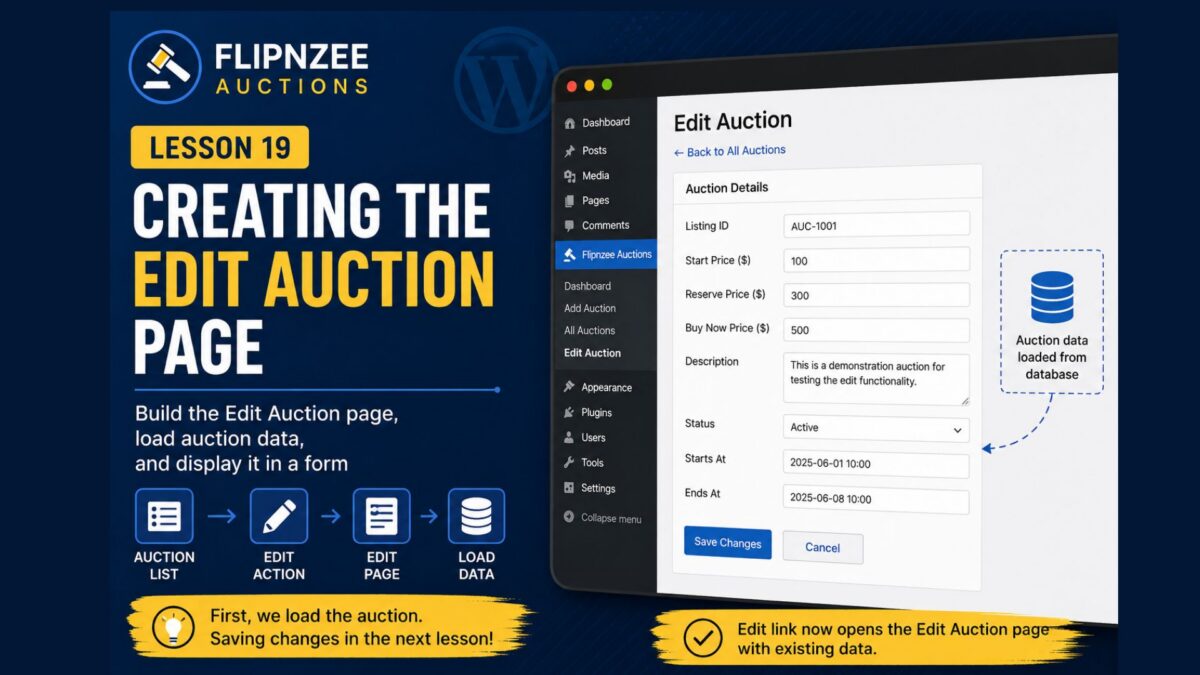
Lesson 19: Creating the Edit Auction Page

Introduction

In the previous lesson, we enhanced our auction list by adding View, Edit, and Delete row actions beneath each Auction ID. Although these links improved the user interface, they were only placeholders.

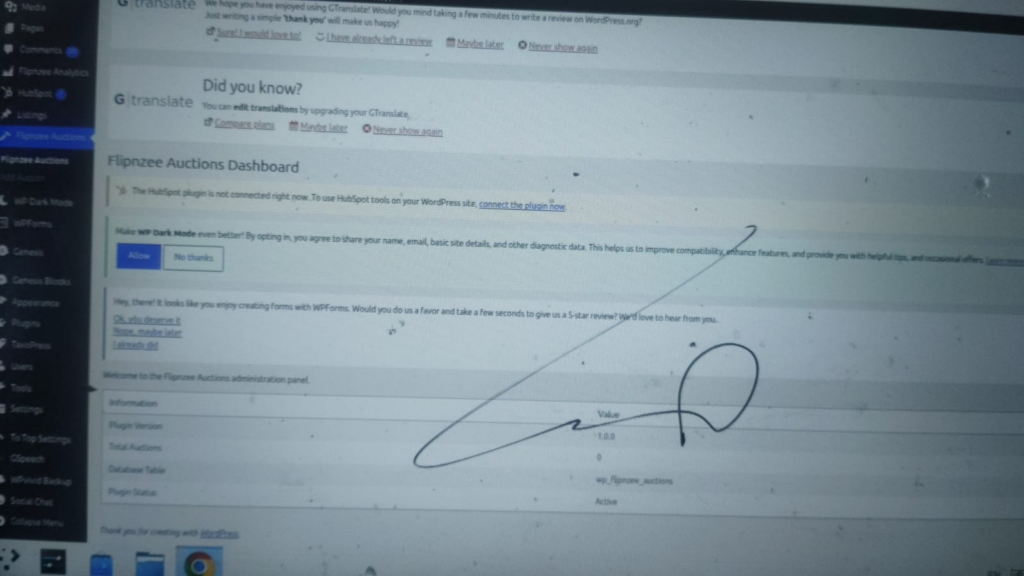
In this lesson, we’ll make the Edit action functional by creating a dedicated Edit Auction page inside the WordPress administration area. Initially, this page will retrieve an auction from the database and display its existing information in a form. We’ll save the changes in the next lesson.

Breaking the workflow into two lessons makes it easier to understand and follows the same incremental approach we’ve used throughout this series.


Learning Objectives

By the end of this lesson, you’ll be able to:

  • Build an Edit Auction administration page.
  • Pass an auction ID through a URL.
  • Retrieve a single auction from the database.
  • Populate a form with existing values.
  • Understand how editing workflows begin in WordPress plugins.

How the Workflow Changes

Our administration flow now becomes:

All Auctions
      ↓
Click Edit
      ↓
Edit Auction Page
      ↓
Retrieve Auction
      ↓
Display Existing Values

Notice that we’re still not saving changes yet. Today’s goal is to display the current data.


Step 1 – Update the Edit Row Action

Open:

admin/class-auctions-table.php

Locate the column_id() method.

Replace the Edit action with:

'edit' => sprintf(
	'<a href="%s">Edit</a>',
	admin_url(
		'admin.php?page=flipnzee-edit-auction&auction_id=' . absint( $item->id )
	)
),

Now every Edit link will open the correct auction.


Step 2 – Register a New Submenu

Open:

admin/class-admin.php

Inside register_menu(), add another submenu:

add_submenu_page(
	'flipnzee-auctions',
	'Edit Auction',
	'Edit Auction',
	'manage_options',
	'flipnzee-edit-auction',
	array( $this, 'edit_auction_page' )
);

This page won’t normally appear in the menu because administrators will access it through the Edit link.


Step 3 – Create the Edit Page

Inside class-admin.php, create:

public function edit_auction_page() {

	$auction_id = isset( $_GET['auction_id'] )
		? absint( $_GET['auction_id'] )
		: 0;

	$auction = Flipnzee_Auction_Manager::get_auction(
		$auction_id
	);

	if ( ! $auction ) {

		echo '<div class="notice notice-error"><p>Auction not found.</p></div>';

		return;
	}

	?>

	<div class="wrap">

		<h1>Edit Auction</h1>

		<p>The auction was loaded successfully.</p>

	</div>

	<?php
}

At this stage, we’re simply verifying that the selected auction can be retrieved.


Step 4 – Test the Plugin

Create a fresh ZIP.

Upload the plugin.

Navigate to:

Flipnzee Auctions → All Auctions

Click Edit beneath any auction.

If everything is working correctly, you’ll see:

Edit Auction

The auction was loaded successfully.

This confirms that:

  • The row action works.
  • The auction ID is passed correctly.
  • The Auction Manager retrieves the correct record.
  • The administration page loads successfully.

Why Stop Here?

Many beginners try to retrieve, display, validate, and save data in a single lesson.

Breaking the process into smaller steps makes debugging much easier.

Today we verify that the correct auction is loaded.

In the next lesson, we’ll build the complete editing form.


Lesson Summary

In this lesson, we transformed the placeholder Edit link into a working navigation path.

Administrators can now select an auction from the list, open an Edit Auction page, and retrieve the corresponding record from the database.

Although editing isn’t complete yet, we’ve successfully implemented the first half of the editing workflow.


Key Takeaways

  • ✓ Row actions can pass record IDs through URLs.
  • ✓ Retrieve individual records using the Auction Manager.
  • ✓ Separate retrieval from saving.
  • ✓ Build editing workflows incrementally.

Common Mistakes

  • Forgetting to sanitize the auction ID.
  • Accessing the database directly instead of using the Auction Manager.
  • Assuming every ID exists.
  • Trying to save changes before displaying the existing values.

Git Commands Used

git add .

git commit -m "Lesson 19: Create Edit Auction page"

git push

Testing Checklist

Before continuing:

  • ✅ Plugin activates successfully.
  • ✅ All Auctions page still loads.
  • ✅ Every Edit link opens a new page.
  • ✅ Correct auction ID is passed.
  • ✅ Auction record is retrieved successfully.
  • ✅ “Auction not found” appears only for invalid IDs.

Project Status

✅ Dashboard

✅ Add Auction

✅ Save Auctions

✅ View Auctions

✅ WP_List_Table

✅ Row Actions

✅ Edit Auction Page

⬜ Edit Auction Form

⬜ Save Edited Auction

⬜ Delete Auction

⬜ Bid Engine

⬜ Escrow Workflow

Project Evolution

With the introduction of the Edit Auction page, Flipnzee Auctions now supports navigation from a list of records to an individual record. This pattern is common in many WordPress plugins and content management systems. By retrieving a single auction before attempting to modify it, we’ve established a clean editing workflow that can be expanded safely in future lessons.

Developer’s Notebook

Professional applications rarely perform retrieval, validation, and persistence in one step. Separating these responsibilities improves readability, simplifies testing, and makes future enhancements much easier. Today’s lesson focuses entirely on retrieving the correct record, allowing the next lesson to concentrate solely on editing and saving changes.

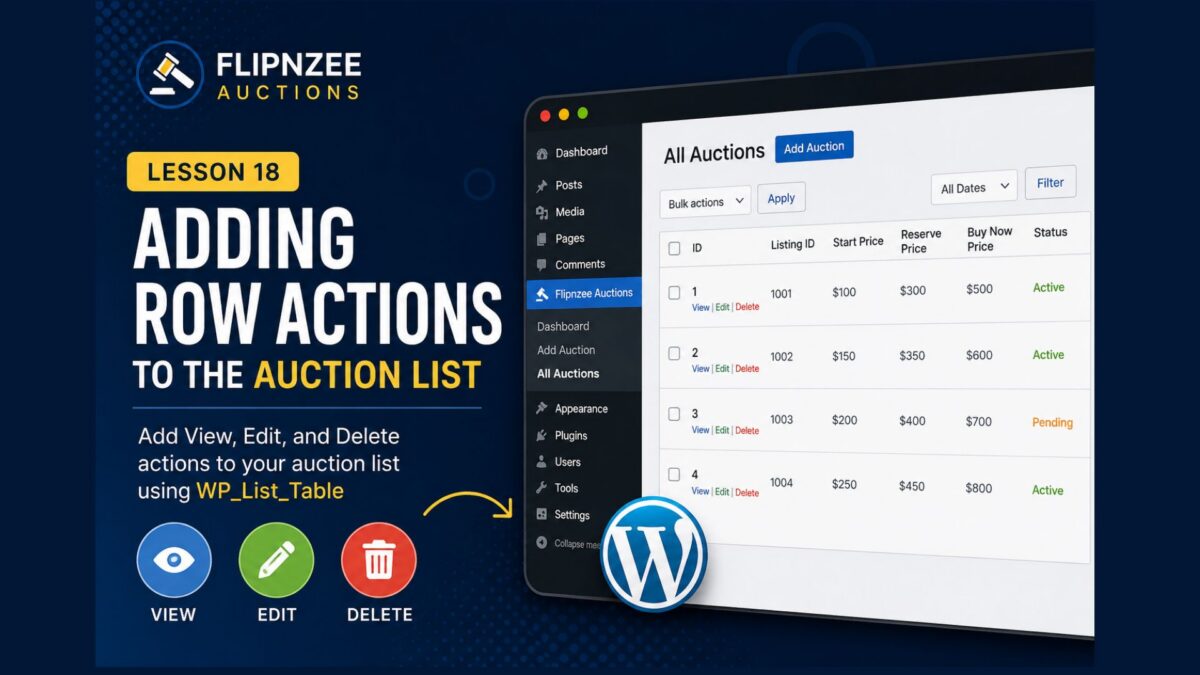
Lesson 18: Adding Row Actions to the Auction List

Introduction

In the previous lesson, we migrated our auction list to WordPress’s WP_List_Table framework.

Although the table now uses WordPress’s native administration interface, each row is still read-only.

Professional WordPress plugins allow administrators to perform actions directly from the list table. Common actions include viewing details, editing records, deleting items, or changing their status.

In this lesson, we’ll add our first row actions to the auction list, preparing the plugin for editing and deleting auctions in the next lessons.


Learning Objectives

By the end of this lesson, you’ll be able to:

  • Understand row actions in WP_List_Table.
  • Override the column_id() method.
  • Add custom row actions.
  • Build administrator-friendly interfaces.
  • Prepare the plugin for editing and deleting auctions.

What Are Row Actions?

When you open the Posts page in WordPress, each post displays actions such as:

Edit | Quick Edit | Trash | View

These are called row actions.

Instead of placing buttons in separate columns, WordPress displays contextual links directly beneath the primary column.

We’ll adopt the same approach.


Step 1 – Choose the Primary Column

For our plugin, the Auction ID will become the primary column.

Every action related to an auction will appear beneath its ID.


Step 2 – Add a Custom Column Method

Open:

admin/class-auctions-table.php

Add the following method inside the class.

public function column_id( $item ) {

	$actions = array(

		'view' => sprintf(
			'<a href="#">View</a>'
		),

		'edit' => sprintf(
			'<a href="#">Edit</a>'
		),

		'delete' => sprintf(
			'<a href="#">Delete</a>'
		),

	);

	return sprintf(
		'%1$s %2$s',
		$item->id,
		$this->row_actions( $actions )
	);
}

Understanding row_actions()

The WordPress base class automatically formats our links into the familiar style used throughout the administration area.

Instead of manually creating HTML, we simply pass an array of actions.

WordPress handles the rest.


Step 3 – Test the Table

Create a fresh ZIP.

Upload the plugin.

Open:

Flipnzee Auctions → All Auctions

Each auction should now display:

1

View | Edit | Delete

directly beneath the Auction ID.

Although these links don’t perform any actions yet, they establish the navigation we’ll build upon in future lessons.

Why Placeholder Links?

You might wonder why the links currently point to #.

This allows us to focus on one concept at a time.

Today’s goal is to understand how row actions are rendered.

In the next lessons, we’ll replace each placeholder with working functionality.


Lesson Summary

In this lesson, we enhanced the auction list by introducing row actions through the column_id() method.

The auction table now follows the same interaction model used throughout the WordPress administration area, giving users familiar controls while preparing the plugin for more advanced features.


Key Takeaways

  • ✓ Row actions belong beneath the primary column.
  • ✓ Override column_id() to customize the first column.
  • ✓ Use row_actions() instead of manually building links.
  • ✓ Keep one lesson focused on one new concept.

Common Mistakes

  • Forgetting to create the column_id() method.
  • Returning only the ID without row actions.
  • Placing action links inside separate columns.
  • Trying to implement edit and delete functionality before creating the row actions.

Git Commands Used

git add .

git commit -m "Lesson 18: Add row actions to auction list"

git push

Testing Checklist

Before moving to the next lesson, verify:

  • ✅ Plugin activates successfully.
  • ✅ Dashboard still loads.
  • ✅ Add Auction still works.
  • ✅ All Auctions page loads correctly.
  • ✅ Every auction displays its ID.
  • View, Edit, and Delete appear beneath each Auction ID.
  • ✅ No PHP warnings or fatal errors.

Project Status

✅ Dashboard

✅ Add Auction

✅ Save Auctions

✅ View Auctions

✅ WP_List_Table

✅ Row Actions

⬜ View Auction

⬜ Edit Auction

⬜ Delete Auction

⬜ Bid Engine

⬜ Escrow Workflow

Project Evolution

Our administration interface is becoming increasingly similar to native WordPress screens. Instead of treating auctions as static records, administrators can now see contextual actions associated with each auction. While the actions are placeholders today, the underlying structure is now in place. Future lessons will simply connect these links to real functionality without redesigning the interface.


Developer’s Notebook

One of the strengths of WP_List_Table is that it encourages consistency across the WordPress administration area. By adopting row actions rather than adding separate action columns, our plugin immediately feels more familiar to WordPress users. This small architectural decision improves usability while reducing unnecessary visual clutter.


Looking Ahead

In Lesson 19, we’ll replace the placeholder Edit link with a fully functional auction editing page. Administrators will be able to modify auction details directly from the dashboard, making Flipnzee Auctions feel even more like a native WordPress application.

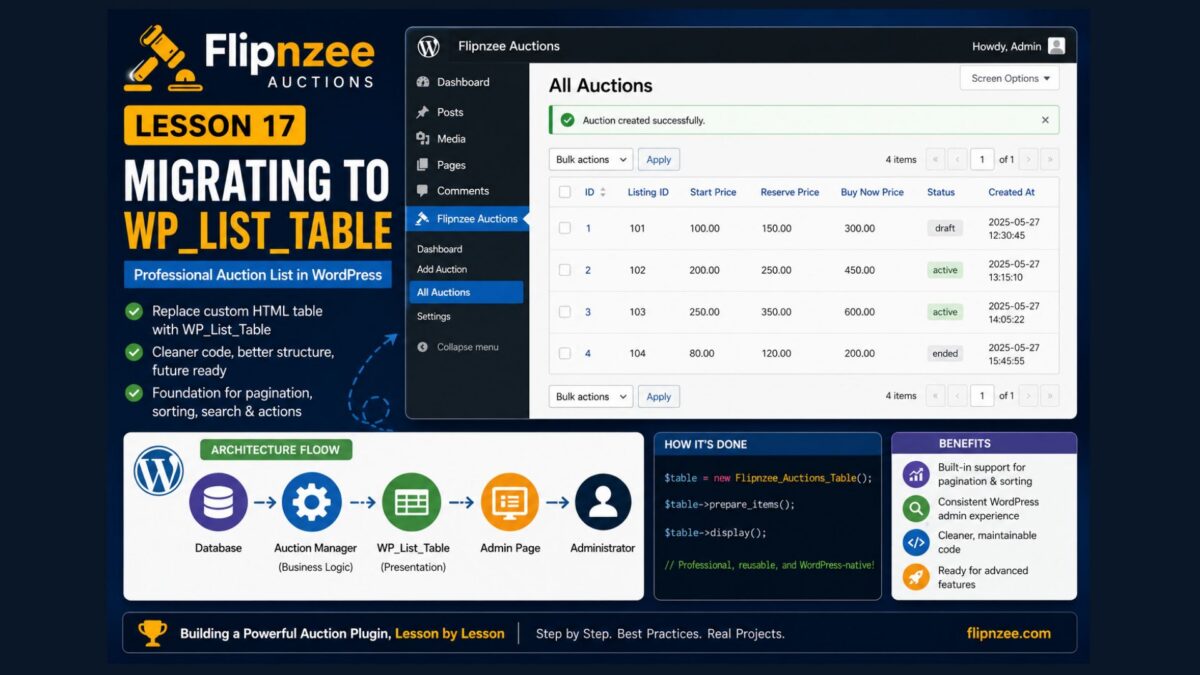
Lesson 17: Migrating the Auction List to WP_List_Table

Introduction

In the previous lesson, we learned what WP_List_Table is and why professional WordPress plugins use it instead of manually building HTML tables.

In this lesson, we’ll complete the migration by creating our own WP_List_Table class, loading it into the plugin, and updating the All Auctions page to use it.

Although the table will initially display the same information as before, the underlying architecture will be much more scalable and will prepare us for pagination, sorting, searching, and row actions in future lessons.


Learning Objectives

By the end of this lesson, you’ll be able to:

  • Create a custom WP_List_Table.
  • Load the new table class into your plugin.
  • Replace a manually created HTML table.
  • Display auction records using WordPress’s native administration framework.

Step 1 – Create the Table Class

Create a new file:

admin/class-auctions-table.php

Copy the complete code from this lesson into the file.

This class extends WordPress’s WP_List_Table and is responsible for displaying auction records.


Step 2 – Load the Table Class

Open:

flipnzee-auctions.php

Immediately below the section that loads the Admin Posts Class, add:

/**
 * Load Auctions Table Class
 */
if ( file_exists( FLIPNZEE_AUCTION_PATH . 'admin/class-auctions-table.php' ) ) {
	require_once FLIPNZEE_AUCTION_PATH . 'admin/class-auctions-table.php';
}

Your loading order should now be:

  1. Loader
  2. Database
  3. Auction Manager
  4. Admin Class
  5. Admin Posts Class
  6. Auctions Table Class

Keeping related classes grouped together makes the plugin easier to maintain.


Step 3 – Update the Admin Page

Open:

admin/class-admin.php

Locate the all_auctions_page() method.

Replace the existing HTML table with:

$table = new Flipnzee_Auctions_Table();

$table->prepare_items();

$table->display();

Your page now becomes responsible only for displaying the page header and calling the table class.


Step 4 – Test the Plugin

Create a fresh ZIP.

Upload it to your WordPress website.

Activate the plugin.

Navigate to:

Flipnzee Auctions → All Auctions

If everything has been configured correctly, your auctions should now be displayed using your custom WP_List_Table.


Understanding the New Architecture

Our plugin now follows this flow:

Database
      ↓
Auction Manager
      ↓
WP_List_Table
      ↓
Admin Page
      ↓
Administrator

Notice that the Admin page no longer knows how to build the table.

Instead, it delegates that responsibility to Flipnzee_Auctions_Table.


Why This Is Better

Compared to our previous implementation:

  • The admin page contains much less code.
  • Table rendering is reusable.
  • Future enhancements become much easier.
  • The plugin follows WordPress conventions more closely.

This architecture will allow us to add pagination, searching, sorting, bulk actions, and row actions without redesigning the administration page.


Lesson Summary

In this lesson, we completed the migration from a manually constructed HTML table to WordPress’s WP_List_Table framework.

Although the interface appears familiar, the plugin now uses a more professional architecture that separates presentation from business logic and prepares the administration area for future enhancements.


Key Takeaways

  • ✓ Create a dedicated WP_List_Table class.
  • ✓ Load the class in flipnzee-auctions.php.
  • ✓ Replace the manual HTML table.
  • ✓ Keep presentation separate from business logic.
  • ✓ Build on WordPress’s native administration framework.

Common Mistakes

  • Forgetting to load class-auctions-table.php.
  • Calling $table->display() without first calling prepare_items().
  • Leaving the old HTML table in class-admin.php.
  • Writing SQL inside the table class.

Git Commands Used

git add .

git commit -m "Lesson 17: Migrate auction list to WP_List_Table"

git push

Project Status

✅ Dashboard

✅ Add Auction

✅ Save Auction

✅ View Auctions

✅ Migrate to WP_List_Table

⬜ Pagination

⬜ Search

⬜ Sorting

⬜ Row Actions

⬜ Edit Auction

⬜ Delete Auction

⬜ Bid Engine

⬜ Escrow Workflow

Developer’s Notebook

One of the advantages of building on WordPress’s native components is that your plugin becomes easier for other WordPress developers to understand. By moving table rendering into a dedicated WP_List_Table class, we’ve reduced the responsibilities of the admin page and laid the foundation for advanced features without changing the overall architecture again.

Lesson 16: Building a Professional Auction List with WP_List_Table

Introduction

In the previous lesson, we displayed all auctions inside a simple HTML table. While this approach works well for learning, professional WordPress plugins usually rely on a built-in class called WP_List_Table.

WP_List_Table powers many of the tables you already use every day in WordPress, including Posts, Pages, Comments, Plugins, Themes, and Users.

In this lesson, we’ll replace our simple table with a WP_List_Table implementation, giving our plugin a more professional and scalable administration interface.


Learning Objectives

By the end of this lesson, you’ll be able to:

  • Understand the purpose of WP_List_Table.
  • Create your first custom table class.
  • Display auction records using WordPress’s native table layout.
  • Prepare the plugin for pagination, searching, sorting, and bulk actions.
  • Build a more professional administration interface.

Why Replace Our HTML Table?

Our current table works:

Database

↓

Auction Manager

↓

HTML Table

However, WordPress already provides a reusable table framework.

Using WP_List_Table, our architecture becomes:

Database

↓

Auction Manager

↓

WP_List_Table

↓

WordPress Admin

This gives us a consistent look and makes future enhancements much easier.


What Is WP_List_Table?

WP_List_Table is an internal WordPress class responsible for rendering tables in the administration area.

It provides support for:

  • Pagination
  • Sorting columns
  • Bulk actions
  • Row actions
  • Search boxes
  • Screen options

Many popular plugins extend this class to create professional management screens.


Step 1 – Create a New File

Create:

admin/class-auctions-table.php

This class will extend WP_List_Table.


Step 2 – Load the WordPress Class

At the top of the file, add:

if ( ! class_exists( 'WP_List_Table' ) ) {
	require_once ABSPATH . 'wp-admin/includes/class-wp-list-table.php';
}

This ensures the base class is available.


Step 3 – Create the Table Class

Begin with:

class Flipnzee_Auctions_Table extends WP_List_Table {

}

Every custom list table extends the WordPress base class.


Step 4 – Define the Columns

Our first version will display:

ColumnDescription
IDAuction ID
ListingListing ID
Start PriceOpening bid
Reserve PriceMinimum acceptable price
Buy NowImmediate purchase price
StatusCurrent auction status

Additional columns will be introduced in later lessons.


Step 5 – Populate the Table

Instead of writing SQL inside the table class, retrieve data using:

Flipnzee_Auction_Manager::get_all_auctions();

The Auction Manager continues to own all database operations.


Step 6 – Replace the Manual Table

The All Auctions page will eventually become as simple as:

$table = new Flipnzee_Auctions_Table();

$table->prepare_items();

$table->display();

Notice how much cleaner the administration page becomes.


Why This Architecture Matters

Rather than mixing HTML, SQL, and business logic together, each layer performs one task.

Database

↓

Auction Manager

↓

WP_List_Table

↓

Admin Page

↓

Administrator

As our plugin grows, this separation will make new features much easier to implement.


Lesson Summary

In this lesson, we introduced the WP_List_Table class, the same framework WordPress uses throughout its administration area.

Although our implementation is still simple, this architectural improvement prepares Flipnzee Auctions for advanced capabilities such as searching, sorting, pagination, row actions, and bulk operations.


Key Takeaways

  • WP_List_Table is WordPress’s standard table framework.
  • ✓ Keep SQL inside the Auction Manager.
  • ✓ Separate presentation from business logic.
  • ✓ Build interfaces using WordPress conventions.
  • ✓ Prepare early for future scalability.

Common Mistakes

  • Writing SQL inside the table class.
  • Duplicating business logic.
  • Mixing HTML with database queries.
  • Ignoring WordPress’s existing UI framework.

Git Commands Used

git add .

git commit -m "Lesson 16: Introduce WP_List_Table"

git push

Project Status

✅ Development environment

✅ Plugin skeleton

✅ Plugin lifecycle

✅ Database layer

✅ Auction Manager

✅ Dashboard

✅ Add Auction

✅ Save auctions

✅ Display auctions

✅ WP_List_Table architecture

⬜ Search auctions

⬜ Sort auctions

⬜ Bulk actions

⬜ Edit auction

⬜ Delete auction

⬜ Bid engine

⬜ Escrow workflow

⬜ Version 1.0

Project Evolution

Until now, our auction list was rendered using a manually constructed HTML table. While that approach is perfectly suitable for learning, it doesn’t take advantage of WordPress’s native administration framework.

By introducing WP_List_Table, we’re aligning Flipnzee Auctions with the same patterns used throughout WordPress itself. This change not only improves consistency but also lays the groundwork for features such as pagination, searching, sorting, row actions, and bulk operations without redesigning the administration interface later.


Developer’s Notebook

One of the strengths of WordPress is that it provides reusable components for common administration tasks. Whenever possible, it’s better to build on those components rather than reinventing them. WP_List_Table is a good example: instead of maintaining our own table system, we can leverage a mature framework that’s already familiar to WordPress users and designed to scale as our plugin grows.


Looking Ahead

In Lesson 17, we’ll make our custom WP_List_Table fully functional by displaying real auction data and introducing row actions such as View, Edit, and Delete, bringing the administration interface even closer to the native WordPress experience.

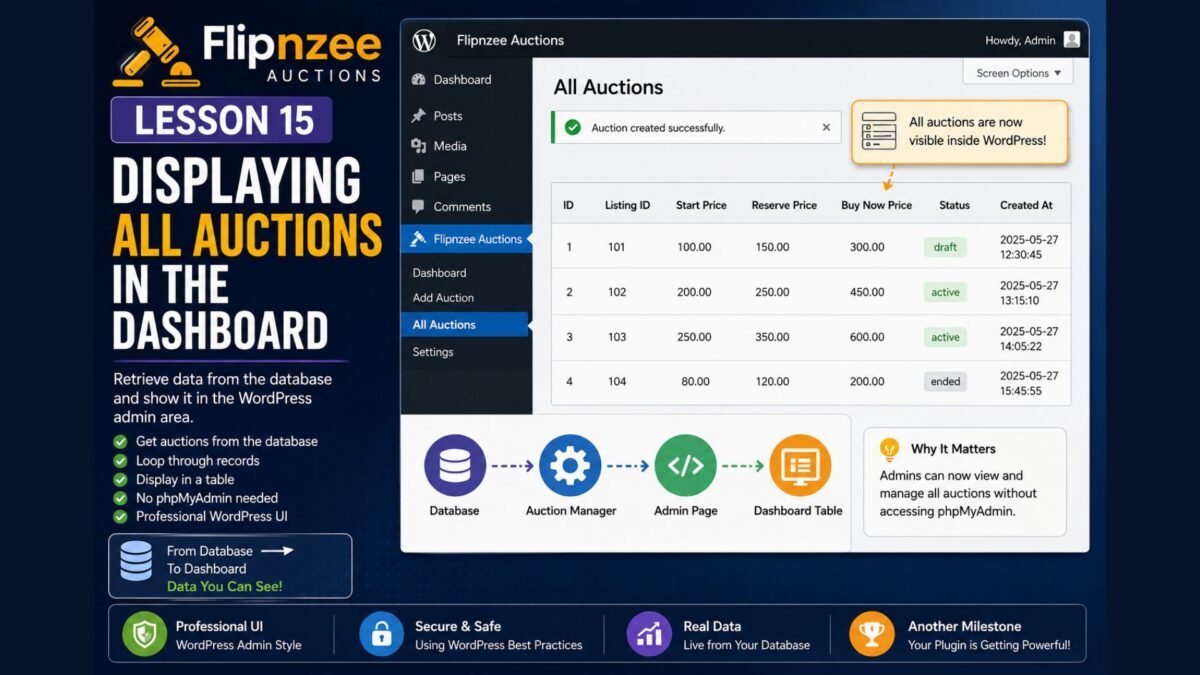
Lesson 15: Displaying All Auctions in the WordPress Dashboard

Introduction

In the previous lesson, we completed our first end-to-end workflow by allowing administrators to create auctions directly from the WordPress Dashboard.

Although the auction is successfully stored in the database, administrators still need phpMyAdmin to verify the record.

Professional plugins display data inside the WordPress Dashboard instead of requiring direct database access.

In this lesson, we’ll create our first Auction List page that retrieves every auction from the database and displays it in a clean WordPress table.


Learning Objectives

By the end of this lesson, you’ll be able to:

  • Create another WordPress admin page.
  • Display data retrieved from the database.
  • Loop through auction records.
  • Build an HTML table using WordPress admin styling.
  • Understand how data flows from the database to the user interface.

What We’ll Build

Our admin menu will now become:

Flipnzee Auctions
│
├── Dashboard
├── Add Auction
└── All Auctions

Instead of checking phpMyAdmin, administrators will browse auctions directly inside WordPress.


Why Create an Auction List?

Applications rarely interact directly with databases.

Instead:

Database

↓

Auction Manager

↓

Admin Page

↓

Administrator

The Auction Manager retrieves the data.

The Admin page displays it.

Each component performs one responsibility.


Step 1 – Add a New Submenu

Open:

admin/class-admin.php

Inside register_menu() add another submenu:

add_submenu_page(
	'flipnzee-auctions',
	'All Auctions',
	'All Auctions',
	'manage_options',
	'flipnzee-all-auctions',
	array( $this, 'all_auctions_page' )
);

Step 2 – Create the Page

Inside the class add:

public function all_auctions_page() {

	$auctions = Flipnzee_Auction_Manager::get_all_auctions();

	?>

	<div class="wrap">

		<h1>All Auctions</h1>

		<table class="widefat striped">

			<thead>

				<tr>

					<th>ID</th>
					<th>Listing</th>
					<th>Start Price</th>
					<th>Reserve</th>
					<th>Buy Now</th>
					<th>Status</th>

				</tr>

			</thead>

			<tbody>

			<?php if ( ! empty( $auctions ) ) : ?>

				<?php foreach ( $auctions as $auction ) : ?>

					<tr>

						<td><?php echo esc_html( $auction->id ); ?></td>

						<td><?php echo esc_html( $auction->listing_id ); ?></td>

						<td><?php echo esc_html( $auction->start_price ); ?></td>

						<td><?php echo esc_html( $auction->reserve_price ); ?></td>

						<td><?php echo esc_html( $auction->buy_now_price ); ?></td>

						<td><?php echo esc_html( ucfirst( $auction->status ) ); ?></td>

					</tr>

				<?php endforeach; ?>

			<?php else : ?>

				<tr>

					<td colspan="6">

						No auctions found.

					</td>

				</tr>

			<?php endif; ?>

			</tbody>

		</table>

	</div>

	<?php
}

Step 3 – Test the Plugin

Create another auction.

Open:

Flipnzee Auctions → All Auctions

You should now see every auction displayed in a professional WordPress table.

You no longer need phpMyAdmin to verify your data.


Understanding the Flow

The page never communicates directly with SQL.

Instead:

Database

↓

Auction Manager

↓

PHP Array

↓

foreach()

↓

HTML Table

This separation keeps the code organized and maintainable.


Lesson Summary

In this lesson, we created our first data listing page.

Administrators can now browse auctions directly inside the WordPress Dashboard without using phpMyAdmin.

This marks another important milestone because the plugin now supports both creating and viewing auctions.


Key Takeaways

  • ✓ Retrieve data through the Auction Manager.
  • ✓ Display records using foreach.
  • ✓ Escape all output with esc_html().
  • ✓ Use WordPress admin table styling.
  • ✓ Keep presentation separate from business logic.

Common Mistakes

  • Writing SQL inside the admin page.
  • Forgetting to escape output.
  • Not handling an empty database.
  • Mixing HTML with business logic unnecessarily.

Git Commands Used

git add .

git commit -m "Lesson 15: Display all auctions"

git push

Project Status

✅ Plugin dashboard

✅ Add Auction

✅ Secure form processing

✅ Save auction

✅ Display all auctions

⬜ View auction details

⬜ Edit auction

⬜ Delete auction

⬜ Bid engine

⬜ Escrow workflow

⬜ Version 1.0

Project Evolution

Our plugin has now reached the point where administrators can both create and browse auction records entirely within the WordPress Dashboard.

As the project continues, we’ll build on this interface by adding actions such as editing, deleting, filtering, sorting, and eventually managing bids and escrow transactions. Each new feature will reuse the architecture we’ve established, making the application easier to maintain and extend.


Developer’s Notebook

Although the HTML table works well for learning purposes, many professional plugins eventually migrate to WordPress’s WP_List_Table class. We’ll continue with a simple table for now because it clearly demonstrates how data is retrieved and displayed. Once the plugin becomes more advanced, we’ll refactor the interface to use WP_List_Table for features such as pagination, bulk actions, sorting, and searching.

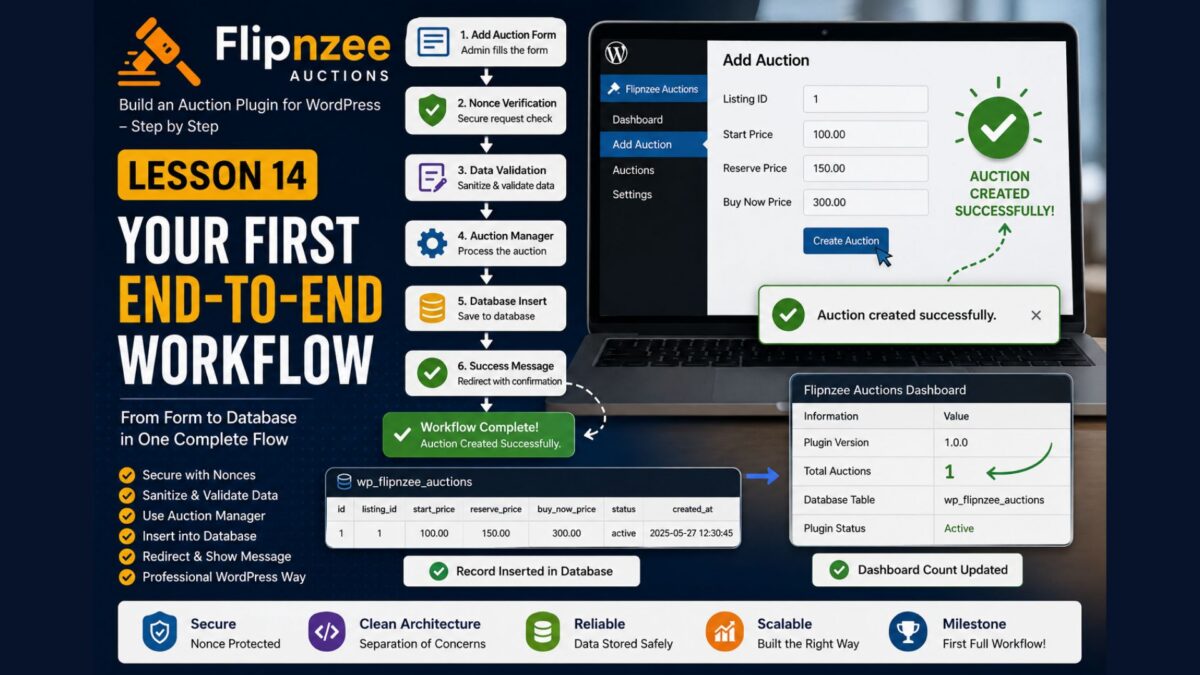
Lesson 14: Completing Your First End-to-End WordPress Plugin Workflow

Introduction

In the previous lesson, we created a dedicated form handler using the WordPress Admin Post API. The form was successfully submitted, the nonce was verified, and WordPress redirected the administrator back to the Add Auction page.

However, no auction was actually created.

In this lesson, we’ll complete the workflow by validating the submitted data, calling the Auction Manager, inserting the auction into the database, and displaying a confirmation message.

This is the first time every layer of our plugin works together.


Learning Objectives

By the end of this lesson, you’ll be able to:

  • Sanitize submitted data.
  • Call the Auction Manager from the form handler.
  • Insert records into the database.
  • Redirect users with status messages.
  • Display confirmation notices.
  • Complete your first end-to-end plugin workflow.

Our Complete Workflow

Administrator

↓

Add Auction Form

↓

admin-post.php

↓

Nonce Verification

↓

Data Validation

↓

Auction Manager

↓

Database

↓

Redirect

↓

Success Message

Every component now has a clearly defined responsibility.


Step 1 – Process Submitted Data

Open:

admin/class-admin-posts.php

Replace the comment:

/*
 * Form processing will be added
 * in Lesson 14.
 */

with:

$listing_id = absint( $_POST['listing_id'] );

$start_price = (float) $_POST['start_price'];

$reserve_price = (float) $_POST['reserve_price'];

$buy_now_price = (float) $_POST['buy_now_price'];

Step 2 – Create the Auction

Immediately below the previous code, add:

$auction_id = Flipnzee_Auction_Manager::create_auction(
	$listing_id,
	$start_price,
	$reserve_price,
	$buy_now_price
);

The Form Handler doesn’t communicate directly with the database.

Instead, it delegates that responsibility to the Auction Manager.


Step 3 – Redirect with Status

Replace:

wp_safe_redirect(
	admin_url( 'admin.php?page=flipnzee-add-auction' )
);

with:

if ( $auction_id ) {

	wp_safe_redirect(
		admin_url(
			'admin.php?page=flipnzee-add-auction&message=success'
		)
	);

} else {

	wp_safe_redirect(
		admin_url(
			'admin.php?page=flipnzee-add-auction&message=error'
		)
	);

}

exit;

Step 4 – Display the Message

Open:

admin/class-admin.php

Inside add_auction_page(), immediately before:

<div class="wrap">

add:

if ( isset( $_GET['message'] ) ) {

	if ( 'success' === $_GET['message'] ) {

		echo '<div class="notice notice-success is-dismissible"><p>Auction created successfully.</p></div>';

	}

	if ( 'error' === $_GET['message'] ) {

		echo '<div class="notice notice-error is-dismissible"><p>Unable to create auction.</p></div>';

	}
}

Step 5 – Test the Plugin

Create a fresh ZIP.

Upload the plugin.

Open:

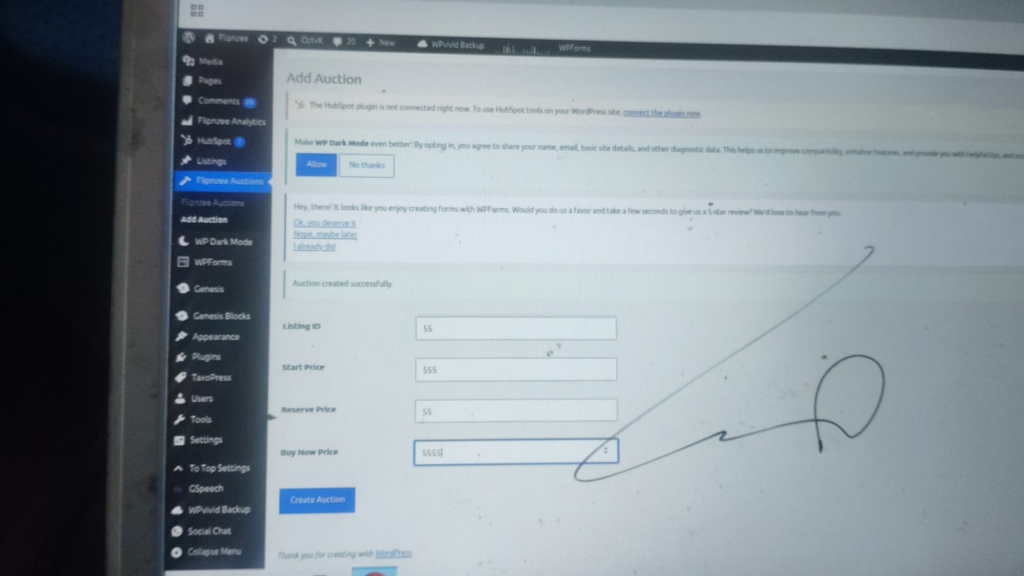
Flipnzee Auctions → Add Auction

Enter:

  • Listing ID: 1
  • Start Price: 100
  • Reserve Price: 150
  • Buy Now Price: 300

Click:

Create Auction

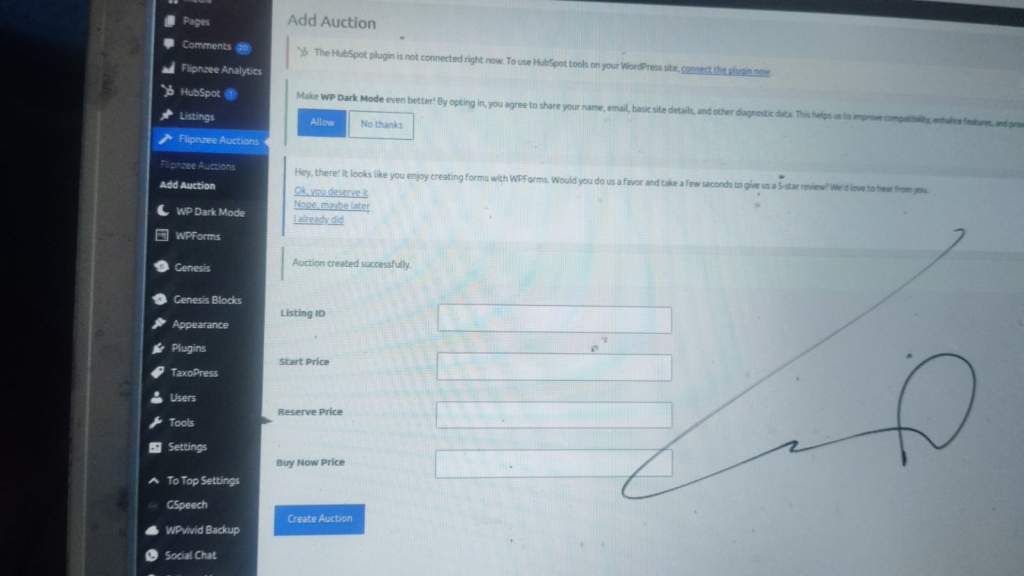
You should now see:

Auction created successfully.

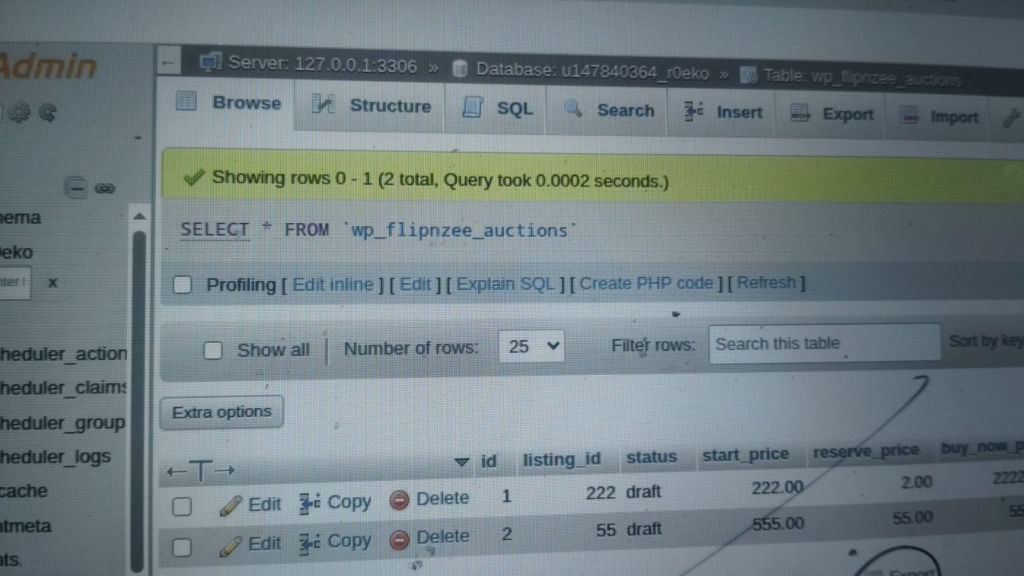
Step 6 – Verify the Database

Open phpMyAdmin.

Browse:

wp_flipnzee_auctions

Instead of zero rows, you should now see your first auction record.

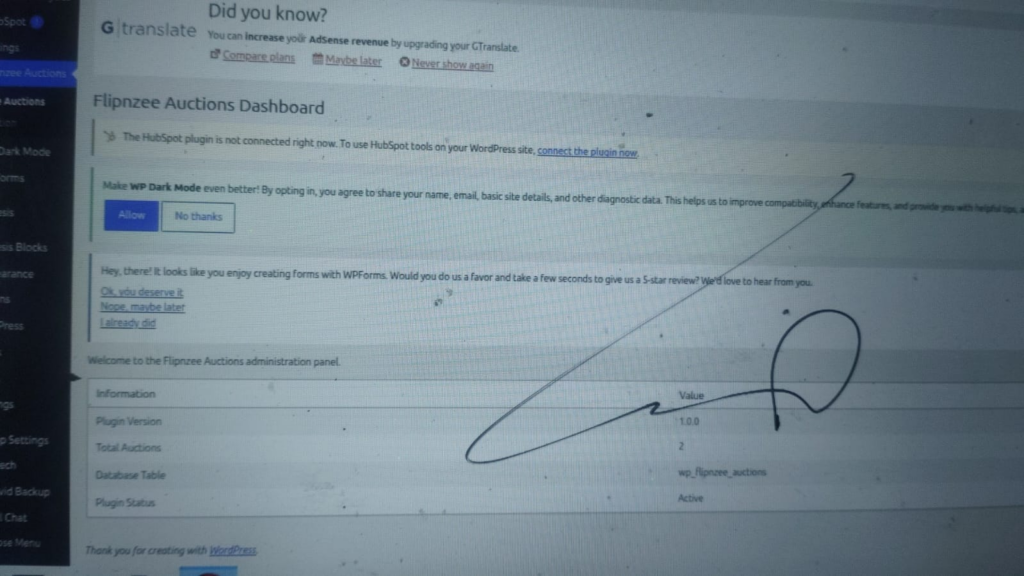
Return to the plugin dashboard.

The Total Auctions counter should now display:

1

Congratulations! Your plugin has completed its first full workflow.


Lesson Summary

In this lesson, we completed the first end-to-end workflow of Flipnzee Auctions.

Administrators can now submit auction information through the WordPress Dashboard. The request is securely processed, validated, passed to the Auction Manager, stored in the database, and confirmed with a success message.

This marks the point where the plugin becomes genuinely functional.


Key Takeaways

  • ✓ Separate form processing from page rendering.
  • ✓ Sanitize submitted data.
  • ✓ Let the Auction Manager handle database operations.
  • ✓ Redirect after processing.
  • ✓ Display administrator-friendly status messages.

Common Mistakes

  • Accessing $_POST without validation.
  • Writing SQL inside the form handler.
  • Forgetting to redirect after processing.
  • Displaying raw database errors to users.

Git Commands Used

git add .

git commit -m "Lesson 14: Complete first end-to-end workflow"

git push

Project Status

✅ Development environment

✅ Plugin skeleton

✅ Plugin installation

✅ Plugin lifecycle

✅ .gitignore

✅ Data architecture

✅ Database table

✅ Auction Manager

✅ Retrieve auction records

✅ WordPress admin menu

✅ Plugin dashboard

✅ Add Auction page

✅ Secure form architecture

✅ Admin Post handler

✅ First end-to-end workflow

⬜ Display all auctions

⬜ Edit auctions

⬜ Delete auctions

⬜ Bid engine

⬜ Escrow workflow

⬜ Version 1.0

Project Evolution

Earlier lessons focused on building the plugin’s foundation. This lesson connects those individual pieces into a complete workflow. The administrator no longer interacts directly with the database; instead, each layer performs a specific role, resulting in a cleaner and more maintainable architecture.

This same pattern will be reused for editing auctions, deleting auctions, managing bids, and handling Escrow.com transactions.


Developer’s Notebook

One of the best indicators of a well-designed application is the separation of responsibilities. In Flipnzee Auctions, the form collects information, the Form Handler processes requests, the Auction Manager performs business logic, and the Database class manages storage. Because these responsibilities are clearly separated, the plugin can continue to grow without becoming difficult to understand or maintain.


Looking Ahead

In Lesson 15, we’ll display all saved auctions inside the WordPress Dashboard using a professional table layout. Instead of checking phpMyAdmin, administrators will be able to browse, review, and eventually edit auction records directly from the plugin interface.

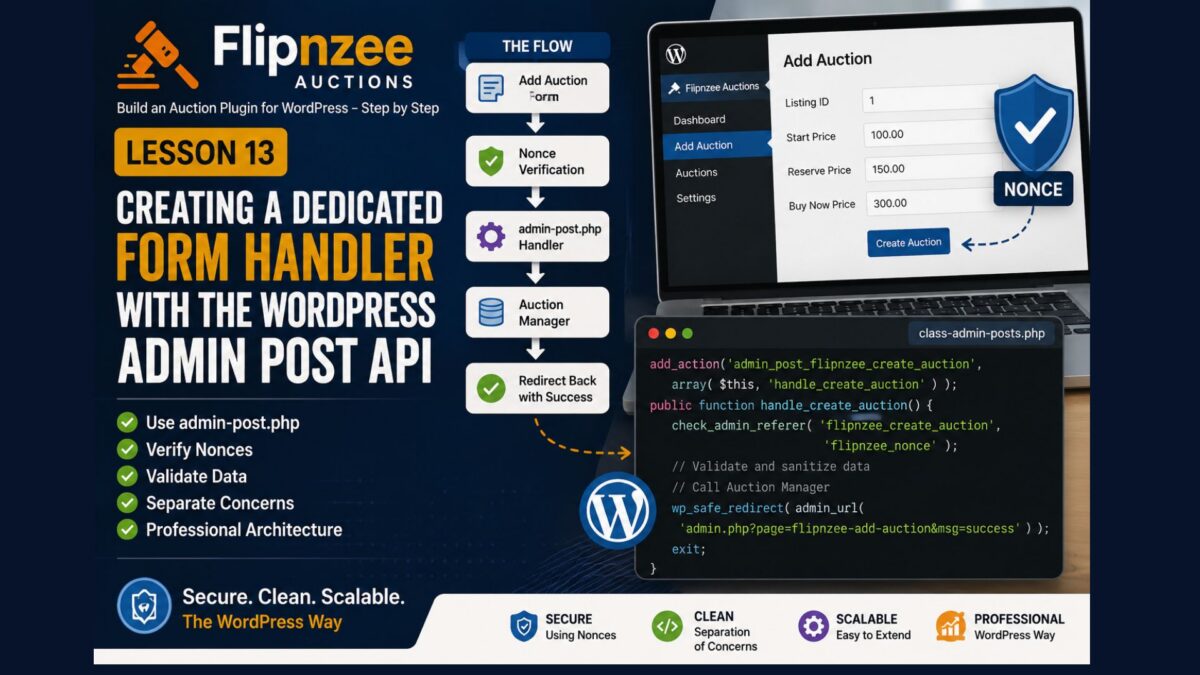
Lesson 13: Creating a Dedicated Form Handler with the WordPress Admin Post API

Introduction

In the previous lesson, we improved the architecture of our Add Auction form by submitting it to WordPress’s admin-post.php endpoint and protecting it with a nonce.

However, there is still no code that actually receives the submitted form.

In this lesson, we’ll create a dedicated Form Handler class. This class will verify the nonce, validate the submitted data, and then call the Auction Manager to create the auction.

By keeping form processing separate from page rendering, we make the plugin cleaner, easier to maintain, and more aligned with WordPress best practices.


Learning Objectives

By the end of this lesson, you’ll be able to:

  • Understand the WordPress Admin Post API.
  • Register custom admin actions.
  • Create a dedicated form handler class.
  • Verify WordPress nonces.
  • Validate submitted form data.
  • Prepare the plugin for database insertion.

Why Create a Form Handler?

Instead of mixing everything together:

Form

↓

SQL

↓

HTML

we’ll separate responsibilities:

Form

↓

Form Handler

↓

Auction Manager

↓

Database

Each component now has one responsibility.


Step 1 – Create a New File

Inside the admin folder create:

class-admin-posts.php

Step 2 – Create the Form Handler

Copy the following code into the file.

<?php

if ( ! defined( 'ABSPATH' ) ) {
	exit;
}

class Flipnzee_Auction_Admin_Posts {

	/**
	 * Constructor.
	 */
	public function __construct() {

		add_action(
			'admin_post_flipnzee_create_auction',
			array( $this, 'handle_create_auction' )
		);
	}

	/**
	 * Handle Add Auction form submission.
	 */
	public function handle_create_auction() {

		// Verify nonce.
		check_admin_referer(
			'flipnzee_create_auction',
			'flipnzee_nonce'
		);

		// Form processing will be added in Lesson 14.

		wp_safe_redirect(
			admin_url( 'admin.php?page=flipnzee-add-auction' )
		);

		exit;
	}
}

new Flipnzee_Auction_Admin_Posts();

Understanding admin_post

WordPress automatically looks for an action matching:

admin_post_{action}

Our form contains:

<input
	type="hidden"
	name="action"
	value="flipnzee_create_auction">

WordPress therefore executes:

admin_post_flipnzee_create_auction

which calls our handler.


Understanding check_admin_referer()

This function verifies the nonce we added in Lesson 12.

If the nonce is invalid:

  • Processing stops immediately.
  • WordPress displays an error.
  • The request is rejected.

This protects our plugin against Cross-Site Request Forgery (CSRF) attacks.


Why Redirect?

After processing the form, we redirect back to the Add Auction page.

This prevents duplicate submissions if the administrator refreshes the page and follows the standard Post/Redirect/Get (PRG) pattern used by professional web applications.


Step 3 – Load the New Class

Open:

flipnzee-auctions.php

Immediately after loading the Admin class, add:

/**
 * Load Admin Posts Class
 */
if ( file_exists( FLIPNZEE_AUCTION_PATH . 'admin/class-admin-posts.php' ) ) {
	require_once FLIPNZEE_AUCTION_PATH . 'admin/class-admin-posts.php';
}

Step 4 – Test the Plugin

Create a new ZIP.

Upload the plugin.

Activate it.

Open:

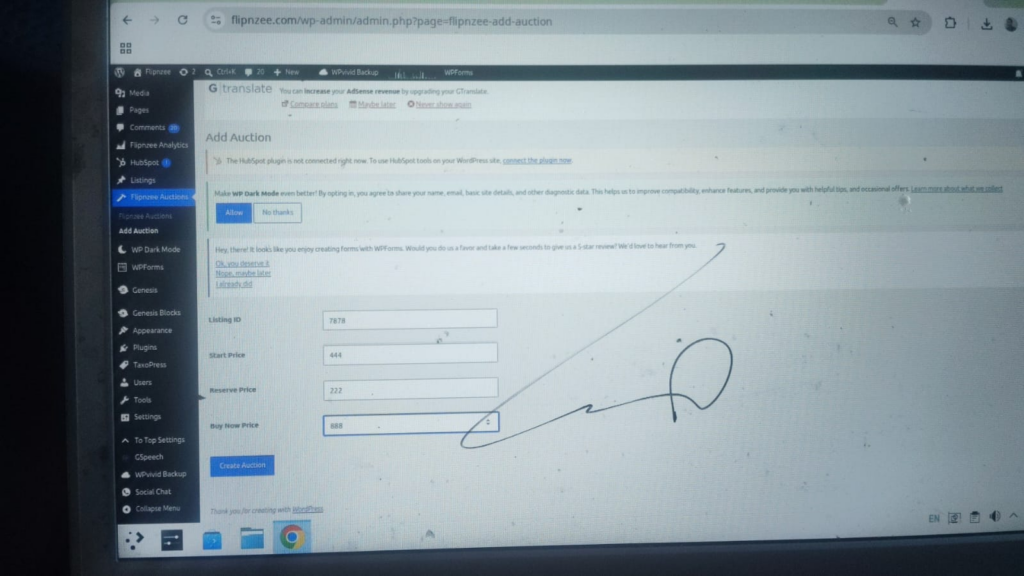
Flipnzee Auctions → Add Auction

Complete the form.

Click:

Create Auction

Nothing will be saved yet.

However, if everything has been configured correctly, the form should redirect back to the Add Auction page without errors.

That’s exactly what we want at this stage.


Lesson Summary

In this lesson, we created a dedicated Form Handler using the WordPress Admin Post API.

Although the handler currently verifies the nonce and redirects the user, it establishes the architecture we’ll use for all future form processing.

In the next lesson, we’ll finally connect this handler to the Auction Manager and insert our first auction into the database.


Key Takeaways

  • ✓ Use admin_post for processing administration forms.
  • ✓ Verify nonces before processing data.
  • ✓ Separate form handling from page rendering.
  • ✓ Redirect after successful processing.
  • ✓ Build applications one layer at a time.

Common Mistakes

  • Forgetting to register the admin_post action.
  • Processing forms inside page-rendering methods.
  • Omitting nonce verification.
  • Forgetting to call exit after wp_safe_redirect().

Git Commands Used

git add .

git commit -m "Lesson 13: Create Admin Post form handler"

git push

Project Status

✅ Plugin dashboard

✅ Add Auction page

✅ Secure form architecture

✅ Admin Post handler

⬜ Save auction

⬜ Display auctions

⬜ Edit auction

⬜ Bid engine

⬜ Escrow workflow

⬜ Version 1.0

Project Evolution

Our plugin now follows a cleaner architecture by separating administration pages from form processing. This makes future features such as editing auctions, deleting auctions, and managing bids much easier to implement because every form can follow the same pattern.

As the project continues to grow, this separation of concerns will keep the codebase organized and easier to maintain.


Developer’s Notebook

One of the defining characteristics of well-designed WordPress plugins is that user interfaces and request processing are kept separate. While beginners often process forms directly inside page-rendering methods, larger plugins typically use dedicated handlers that can be reused, tested, and extended independently. Adopting this pattern early prepares the project for long-term growth and makes the code easier for other developers to understand.

Why WordPress Uses Nonces: Understanding CSRF with a Simple Real-World Example

Many WordPress beginners encounter functions like wp_nonce_field() and check_admin_referer() while developing plugins. At first, these functions can seem unnecessary. After all, if only administrators can access your plugin settings, why add another layer of protection?

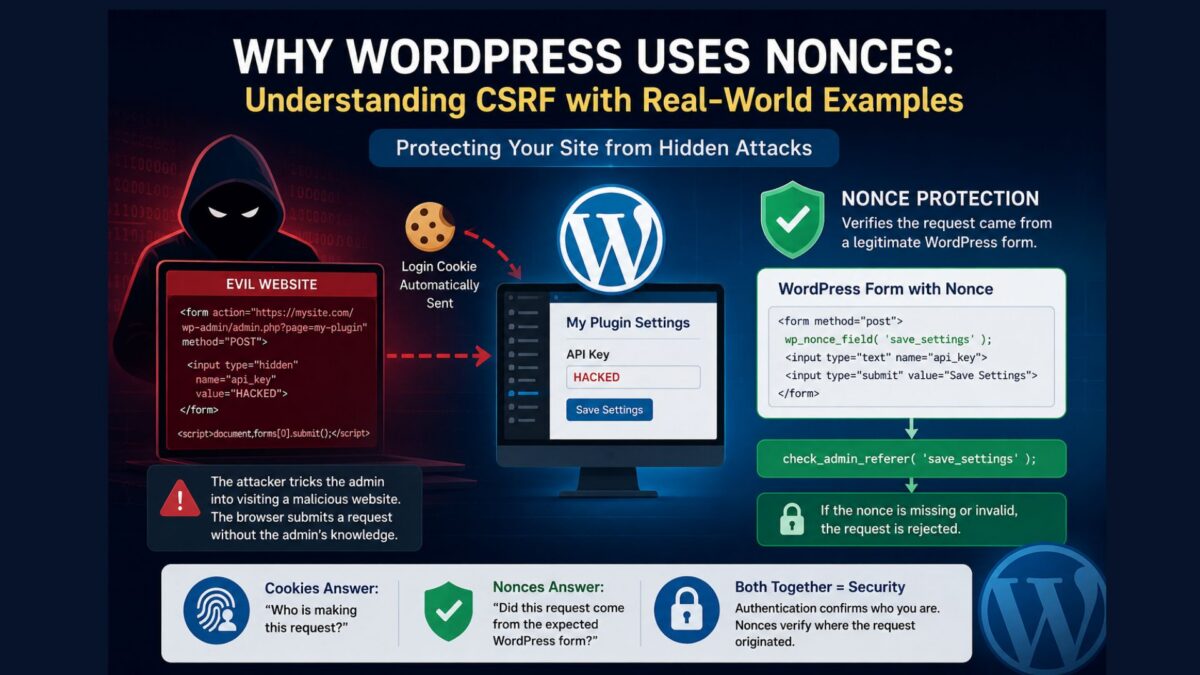
The answer lies in understanding a common web security attack called Cross-Site Request Forgery (CSRF). In this article, we’ll explore how such an attack works, why it is dangerous, and how WordPress nonces help prevent it.

A Simple Plugin Settings Form

Imagine your plugin has a settings page where an administrator can save an API key.

<form method="post">
    <input type="text" name="api_key">
    <input type="submit" value="Save Settings">
</form>

When the administrator submits the form, the plugin stores the value.

update_option(
    'my_plugin_api_key',
    $_POST['api_key']
);

Everything works perfectly during normal use.

The Administrator Is Already Logged In

When an administrator logs into WordPress, the browser stores a login cookie.

Whenever the browser communicates with the WordPress website, this cookie is automatically included with every request.

This allows WordPress to recognize the administrator without asking them to log in again for every page.

The Unexpected Problem

Now imagine the administrator visits another website while still logged into WordPress.

That website appears harmless, but behind the scenes it contains a hidden HTML form.

<form action="https://mysite.com/wp-admin/admin.php?page=my-plugin"
      method="POST">

    <input type="hidden"
           name="api_key"
           value="HACKED">

</form>

<script>
document.forms[0].submit();
</script>

The administrator never sees this form.

The JavaScript immediately submits it in the background.

What Happens Next?

When the browser submits the hidden form to your WordPress website, it automatically includes the administrator’s login cookie.

From WordPress’s perspective, the request looks completely legitimate because it comes from an authenticated administrator.

If your plugin simply executes:

update_option(
    'my_plugin_api_key',
    $_POST['api_key']
);

the malicious value is saved.

The administrator never clicked your plugin’s Save Settings button. Their browser unknowingly performed the action on their behalf.

Why Is This Dangerous?

At first glance, changing a single setting may not seem like a serious problem. However, many administrative actions can be performed through web forms.

Without CSRF protection, an attacker could trick an administrator’s browser into:

  • Changing plugin or theme settings
  • Publishing unwanted posts or announcements
  • Creating a new administrator account
  • Deleting important data
  • Disabling security plugins
  • Importing malicious configuration files
  • Triggering actions that execute harmful code

The attacker never needs to know the administrator’s password.

Instead, they misuse the administrator’s already authenticated browser.

Enter WordPress Nonces

WordPress solves this problem by adding a nonce to forms.

wp_nonce_field( 'save_settings' );

This generates a hidden field similar to:

<input type="hidden"
       name="_wpnonce"
       value="9f8d72e1ab">

When the form is submitted, your plugin verifies the nonce.

check_admin_referer( 'save_settings' );

If the nonce is missing or invalid, WordPress immediately rejects the request.

Why Can’t the Attacker Guess the Nonce?

The nonce is generated by WordPress specifically for the logged-in user and is embedded in the genuine plugin page.

A malicious website cannot simply invent a valid nonce value.

Without the correct nonce, the forged request fails, even though the administrator is logged in.

Cookies and Nonces Serve Different Purposes

It is important to understand that authentication cookies and nonces solve different problems.

The login cookie answers:

Who is making this request?

The nonce answers:

Did this request originate from a legitimate WordPress form?

Both checks are necessary for secure plugin development.

A Real-World Analogy

Imagine entering your office using your employee ID card.

Once inside, someone hands you a sealed envelope and asks you to place it in the manager’s mailbox.

You assume it’s legitimate and deliver it.

Later, the manager discovers the envelope contains a fake resignation letter or an unauthorized payment request.

The manager trusted the envelope because it was delivered by you, even though you never intended to send that message.

A CSRF attack works in much the same way.

The attacker doesn’t steal your identity. Instead, they trick your browser—which WordPress already trusts—into performing actions on your behalf.

Key Takeaways

  • Being logged into WordPress does not automatically protect against CSRF attacks.
  • A malicious website can cause a logged-in browser to submit unwanted requests.
  • WordPress nonces help verify that a request originated from a genuine WordPress page.
  • Every plugin that processes forms should use wp_nonce_field() when generating the form and check_admin_referer() (or check_ajax_referer() for AJAX requests) before processing submitted data.
  • Authentication confirms who is making the request, while nonces help verify where the request came from.

Understanding this distinction is one of the most important milestones in becoming a secure WordPress plugin developer.