Lesson 98: Buyer Dashboard Statistics & Quick Navigation

Introduction

With the Buyer Dashboard foundation established in Lesson 97, the next step is to transform it into a genuinely useful control panel. A dashboard should provide buyers with an immediate overview of their activity instead of simply displaying a welcome message.

In this lesson, we will enhance the Buyer Dashboard by introducing real-time summary statistics and quick navigation cards. These improvements will allow buyers to instantly understand the status of their account and quickly access the most important sections of the Flipnzee Auctions platform.

This lesson focuses on presenting information already available within the plugin rather than introducing new business logic. It also lays the groundwork for future buyer features such as notifications, invoices, escrow tracking, and messaging.


Objectives

By the end of this lesson we will:

  • Enhance the Buyer Dashboard layout.
  • Display summary statistics for the logged-in buyer.
  • Add navigation cards for common buyer actions.
  • Keep the dashboard responsive and mobile friendly.
  • Reuse existing plugin functionality instead of duplicating code.
  • Prepare the dashboard for future widgets.

Features to Implement

1. Dashboard Summary Cards

Instead of showing only a welcome message, display attractive summary cards.

Example:

----------------------------------------
Buyer Dashboard

Welcome, Rajeev

+-----------------------------+
| Purchased Websites      3   |
+-----------------------------+

+-----------------------------+
| Watchlist Auctions      5   |
+-----------------------------+

+-----------------------------+
| Active Bids            2    |
+-----------------------------+

+-----------------------------+
| Pending Payments       1    |
+-----------------------------+

Each card should display:

  • Icon
  • Title
  • Count
  • Link to detailed page

2. Dynamic Statistics

Retrieve statistics for the current user.

Initially display:

  • Total Purchases
  • Watchlist Count
  • Active Bids
  • Pending Payments

These should be calculated directly from the existing plugin tables.


3. Quick Action Section

Add a dedicated “Quick Actions” area.

Example:

Quick Actions

[ Browse Auctions ]

[ My Purchases ]

[ My Watchlist ]

[ Support ]

This makes navigation significantly faster for buyers.


4. Dashboard Layout Improvements

Organize the page into sections.

Example:

Buyer Dashboard

--------------------------------
Summary Cards
--------------------------------

--------------------------------
Quick Actions
--------------------------------

--------------------------------
My Purchases
--------------------------------

This creates a cleaner visual hierarchy.


5. Responsive Design

Update CSS so cards automatically stack on smaller devices.

Desktop:

[ Purchases ][ Watchlist ]

[ Active ][ Pending ]

Mobile:

[ Purchases ]

[ Watchlist ]

[ Active ]

[ Pending ]

6. Dashboard Icons

Each section should have an icon.

Suggested icons:

  • 📦 Purchases
  • ❤️ Watchlist
  • 🔨 Active Bids
  • 💳 Pending Payments

The icons improve usability without requiring additional plugins.


7. Reuse Existing Components

Do not duplicate functionality.

Continue using:

  • My Purchases shortcode/component
  • Watchlist manager
  • Auction manager
  • Transaction manager

The dashboard should serve as a centralized entry point to these existing features.


Files Expected to Change

includes/
    class-buyer-dashboard.php

assets/css/
    frontend.css

includes/
    class-watchlist-manager.php

includes/
    class-transaction-manager.php

includes/
    class-bid-manager.php

Architecture

Buyer Dashboard

│
├── Welcome
│
├── Statistics
│      ├── Purchases
│      ├── Watchlist
│      ├── Active Bids
│      └── Pending Payments
│
├── Quick Actions
│
└── Existing My Purchases Section

Learning Outcomes

After completing Lesson 98, you will understand how to:

  • Design user dashboards in WordPress.
  • Aggregate data from multiple plugin modules.
  • Build reusable dashboard widgets.
  • Create responsive card layouts.
  • Connect independent plugin components into a unified user experience.
  • Improve usability without introducing duplicate logic.

Conclusion

Lesson 98 transforms the Buyer Dashboard from a simple landing page into a functional command center for buyers. By surfacing key statistics and providing quick access to common actions, the dashboard becomes far more valuable while remaining lightweight and extensible.

This lesson also reinforces an important design principle used throughout the Flipnzee Auctions plugin: reuse existing components whenever possible. Rather than rebuilding purchase, watchlist, or transaction functionality, the dashboard intelligently aggregates information from those modules into a single, cohesive interface.

This architecture will make it straightforward to introduce advanced buyer features in future lessons, including notifications, escrow progress, invoices, messaging, and downloadable receipts.
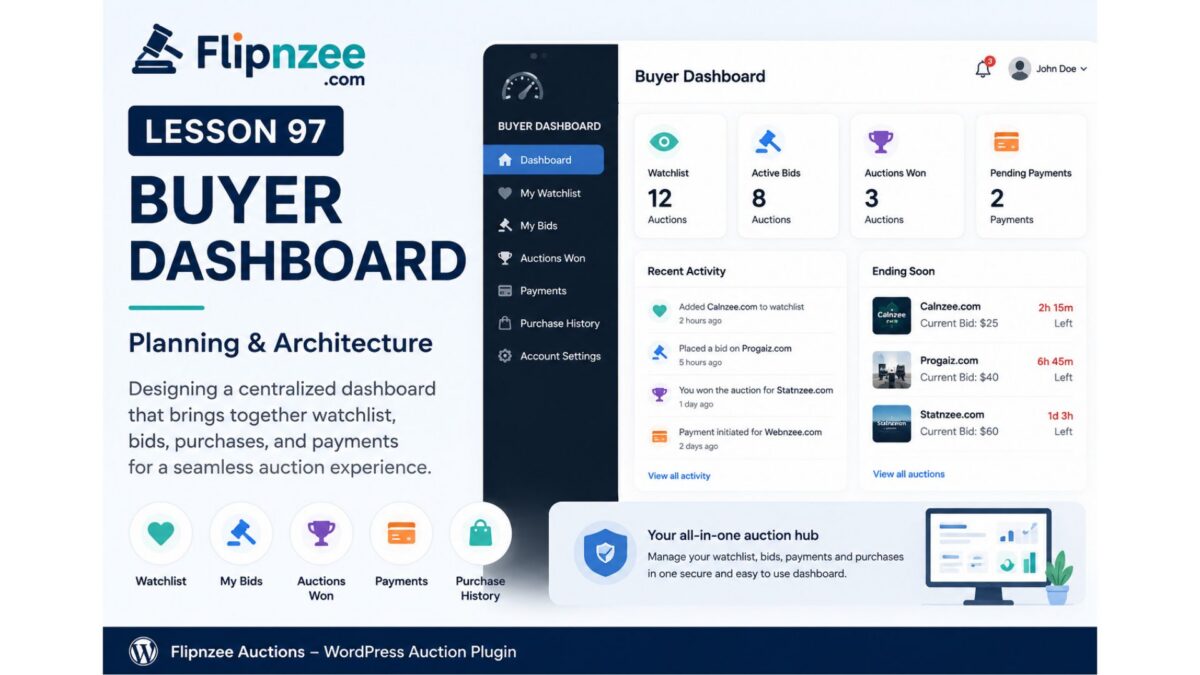
Lesson 97 Implementation: Building the Buyer Dashboard Foundation for Flipnzee Auctions

After completing the Watchlist system in Lesson 96, the next logical milestone was to provide buyers with a centralized location where they can manage their auction activities. Lesson 97 introduces the first version of the Buyer Dashboard, establishing the foundation for future buyer-focused features such as active bids, purchases, watchlists, invoices, and payment tracking.

Rather than implementing every buyer feature at once, this lesson focuses on building a clean, extensible dashboard architecture that future lessons can expand without requiring major refactoring.


Objectives

The primary goals of Lesson 97 were:

  • Create a dedicated Buyer Dashboard class.
  • Register a reusable shortcode for displaying the dashboard.
  • Restrict dashboard access to logged-in users.
  • Display personalized buyer information.
  • Integrate existing purchase information into the dashboard.
  • Prepare the plugin architecture for future buyer-related modules.

Creating a Dedicated Buyer Dashboard Class

A new class was introduced:

includes/class-buyer-dashboard.php

Separating the dashboard into its own class keeps the plugin modular and follows the object-oriented architecture used throughout the Flipnzee Auctions plugin.

The constructor registers a new shortcode:

add_shortcode(
    'flipnzee_buyer_dashboard',
    array( $this, 'render_dashboard' )
);

This allows administrators to place the buyer dashboard anywhere using:

[flipnzee_buyer_dashboard]

Loading the New Module

The new class was loaded from the main plugin bootstrap file:

require_once FLIPNZEE_AUCTION_PATH .
    'includes/class-buyer-dashboard.php';

The dashboard is then initialized alongside the plugin’s other core components:

new Flipnzee_Buyer_Dashboard();

During implementation, a fatal activation error occurred because of a typo in the plugin path constant (FLIPNZEE_AUCTIONS_PATH instead of FLIPNZEE_AUCTION_PATH). After correcting the constant name, the Buyer Dashboard loaded successfully.


Restricting Dashboard Access

Since the Buyer Dashboard contains user-specific information, access is limited to authenticated users.

if ( ! is_user_logged_in() ) {
    return '<p>Please log in to access your Buyer Dashboard.</p>';
}

This prevents visitors from viewing private purchase and account information.


Personalized Welcome Section

Once authenticated, the dashboard greets the logged-in buyer.

Example:

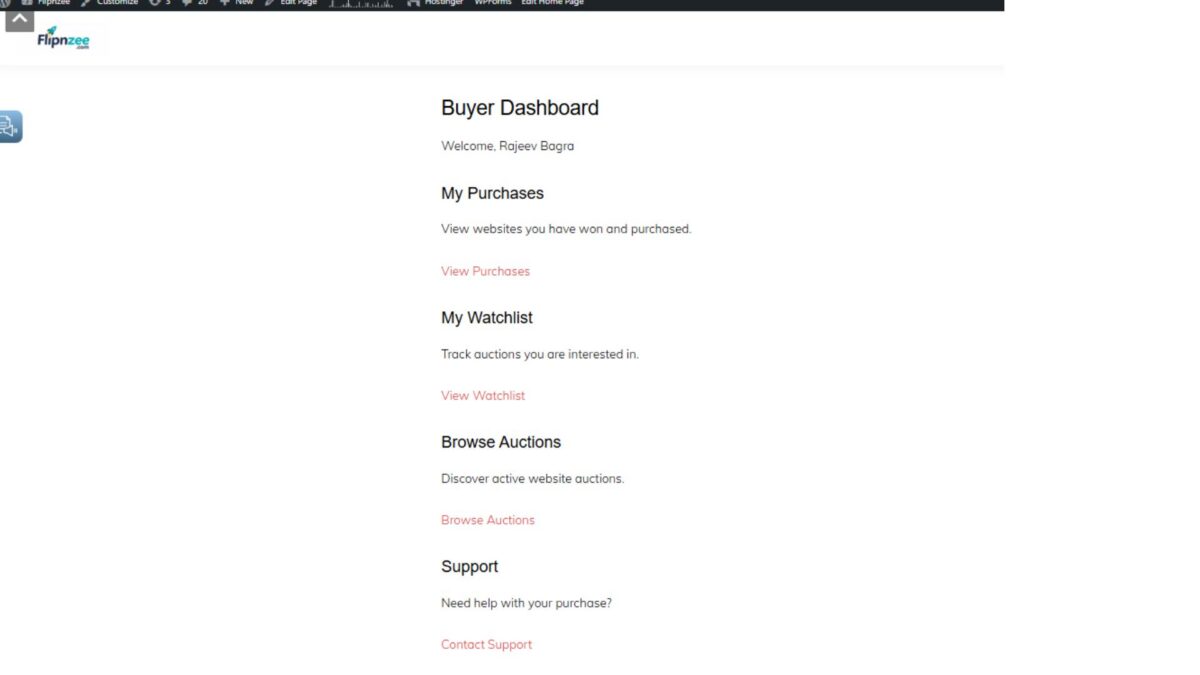
Buyer Dashboard

Welcome, Rajeev Bagra

Displaying the current user’s name creates a more personalized experience and confirms that account-specific information is being shown.


Integrating Existing Purchase Data

Instead of building a completely separate purchase interface, the Buyer Dashboard reuses the purchase functionality implemented in earlier lessons.

The dashboard now displays the existing My Purchases section, allowing buyers to review:

  • Purchased websites
  • Winning bids
  • Purchase status
  • Purchase dates
  • Payment links
  • Transaction details

This reuse of existing functionality avoids duplicate code and keeps future maintenance simpler.


Frontend Result

After implementation, the Buyer Dashboard displays:

  • Buyer Dashboard heading
  • Personalized welcome message
  • Existing purchase information
  • Purchase status
  • Payment actions
  • Purchase detail links

This creates the first centralized buyer experience within the Flipnzee Auctions platform.


Debugging Challenges

Lesson 97 also involved several real-world debugging exercises.

These included:

  • PHP syntax verification using:
php -l includes/class-buyer-dashboard.php
  • Resolving plugin activation failures.
  • Correcting an incorrect plugin path constant.
  • Verifying shortcode registration.
  • Confirming successful class loading.
  • Testing frontend rendering after plugin activation.

These debugging steps reinforced the importance of validating each integration point rather than assuming new classes are loading correctly.


Architectural Benefits

Although the first version of the Buyer Dashboard is intentionally simple, it establishes an important architectural foundation.

Future buyer functionality can now be added without restructuring the plugin.

Upcoming modules can include:

  • Active bids
  • Watchlist summary
  • Pending payments
  • Escrow status
  • Downloadable invoices
  • Buyer notifications
  • Purchase history
  • Account settings

Because all buyer functionality now has a dedicated entry point, future enhancements become significantly easier to organize.


Lessons Learned

Several important development practices were reinforced during this lesson:

  • Keep major features isolated in dedicated classes.
  • Use shortcodes for flexible frontend rendering.
  • Restrict private pages to authenticated users.
  • Reuse existing components whenever possible.
  • Verify plugin loading after introducing new modules.
  • Debug activation errors systematically by checking constants, includes, and class initialization.

Download Source Code

Download the starting version of the plugin before the lesson:

Download the completed version after this lesson:

Conclusion

Lesson 97 marks an important milestone in the evolution of the Flipnzee Auctions plugin. With the introduction of a dedicated Buyer Dashboard, the platform now has a centralized location for buyer-related functionality. While the current dashboard focuses primarily on purchases, its true value lies in the scalable architecture it provides for future lessons.

In the next lesson, this dashboard will evolve from a simple landing page into a fully featured buyer control panel by introducing dynamic statistics, watchlist summaries, active bid information, and additional navigation tools.

Lesson 97 – Buyer Dashboard: Planning and Architecture

Introduction

With the Watchlist system now fully implemented, Flipnzee Auctions has taken an important step toward becoming a complete marketplace for buying and selling websites. Buyers can now save auctions they are interested in and revisit them later. However, as additional buyer-focused features are introduced, users need a central location where they can easily manage all of their auction activities.

In this lesson, we begin designing the Buyer Dashboard.

Rather than requiring users to navigate between multiple pages, the Buyer Dashboard will provide a single interface where buyers can monitor their watchlist, bids, purchases, payments, and auction activity.


Why a Buyer Dashboard?

Professional auction platforms such as eBay, Flippa, and GoDaddy Auctions provide dedicated dashboards that allow buyers to monitor their activity from one location.

The Buyer Dashboard serves several purposes:

  • Improves user experience
  • Reduces navigation complexity
  • Encourages buyer engagement
  • Makes future features easier to organize
  • Provides a foundation for additional account functionality

Instead of creating separate pages for every feature, Flipnzee Auctions will gradually integrate them into one dashboard.


Dashboard Roadmap

The Buyer Dashboard will grow over multiple lessons.

Initial sections are planned as follows:

Dashboard Home

A summary page displaying:

  • Total Active Bids
  • Auctions Won
  • Watchlist Count
  • Pending Payments
  • Recent Activity

My Watchlist

Displays auctions the buyer has saved.

Already completed in Lesson 96.

Future improvements may include:

  • Search
  • Sorting
  • Pagination
  • Remove directly from dashboard

My Bids

Displays every auction where the user has placed a bid.

Information may include:

  • Listing Name
  • Current Highest Bid
  • User’s Bid
  • Bid Status
  • Auction Ending Time

Auctions Won

Displays auctions won by the buyer.

Possible information:

  • Website Name
  • Winning Bid
  • Auction Date
  • Payment Status
  • Transfer Status

Payments

Displays payment history.

Examples:

  • Pending Payments
  • Completed Payments
  • Escrow Transactions
  • Refunds

This section will integrate naturally with the Transaction Manager developed in previous lessons.


Purchase History

Displays completed purchases.

Information may include:

  • Website purchased
  • Purchase date
  • Purchase price
  • Transfer completion
  • Invoice download

Profile Summary

Provides buyer information such as:

  • Username
  • Email
  • Registration Date
  • Number of Auctions Won
  • Reputation (future)

Navigation Structure

A left-side dashboard menu is planned.

Example:

Buyer Dashboard

├── Dashboard
├── My Watchlist
├── My Bids
├── Auctions Won
├── Payments
├── Purchase History
└── Account Settings

This modular structure allows new sections to be added without redesigning the interface.


Technical Architecture

The Buyer Dashboard will use a dedicated shortcode.

Example:

[flipnzee_buyer_dashboard]

The shortcode will determine whether a user is logged in before rendering dashboard content.

The implementation will follow the same object-oriented approach used throughout the plugin.

Possible class:

Flipnzee_Buyer_Dashboard

Responsibilities may include:

  • Dashboard rendering
  • Section routing
  • Statistics generation
  • Menu creation
  • Dashboard widgets

Planned File Structure

A new class may be introduced:

includes/
    class-buyer-dashboard.php

Additional assets may include:

assets/css/dashboard.css
assets/js/dashboard.js

This keeps dashboard functionality isolated from other plugin components.


User Experience Considerations

The Buyer Dashboard should be:

  • Responsive
  • Mobile-friendly
  • Lightweight
  • Fast-loading
  • Consistent with Flipnzee branding

Future enhancements may include:

  • Dashboard cards
  • Progress indicators
  • Notification badges
  • Auction countdown timers
  • AJAX-powered widgets

Future Integrations

The Buyer Dashboard is expected to integrate with several existing plugin components:

  • Auction Manager
  • Bid Manager
  • Watchlist Manager
  • Transaction Manager
  • Payment Manager
  • Activity Log

By reusing existing classes, code duplication can be minimized while maintaining a clean architecture.


Development Strategy

The dashboard will be implemented incrementally.

The proposed order is:

  1. Create Buyer Dashboard shortcode
  2. Create dashboard page layout
  3. Build navigation menu
  4. Add Dashboard Home
  5. Integrate My Watchlist
  6. Integrate My Bids
  7. Integrate Auctions Won
  8. Integrate Payments
  9. Integrate Purchase History
  10. Polish styling and responsiveness

This phased approach ensures that each feature is independently testable while progressively building a comprehensive buyer experience.


Conclusion

Lesson 97 marks the beginning of the Buyer Dashboard, an important milestone in the Flipnzee Auctions plugin roadmap. Rather than treating watchlists, bids, purchases, and payments as isolated features, the dashboard will unify them into a single, user-friendly interface. As future lessons are completed, this dashboard will become the central hub for buyers to manage every stage of their auction journey, providing a professional experience comparable to established online auction marketplaces.

Lesson 96 – Implementation: Complete My Watchlist Frontend Integration


Overview

In this lesson, we completed the implementation of the My Watchlist feature for the Flipnzee Auctions plugin. The feature now provides logged-in users with a dedicated page to view and manage all auctions they have saved.

Unlike previous lessons that focused on the AJAX add/remove functionality, this implementation connects the entire workflow—from the watchlist database table to the auction and listing information displayed on the frontend.


Objectives

The objectives of this lesson were to:

  • Retrieve the logged-in user’s watchlist.
  • Load the corresponding auction records.
  • Retrieve the associated WordPress listing posts.
  • Display auction information in a user-friendly layout.
  • Provide direct links back to each listing.
  • Synchronize the Add/Remove Watchlist button state.
  • Eliminate debugging code and prepare the feature for production.

Watchlist Retrieval

The shortcode begins by confirming that the visitor is logged in.

if ( ! is_user_logged_in() ) {
    return '<p>Please log in to view your Watchlist.</p>';
}

After authentication, the current user’s ID is obtained.

$user_id = get_current_user_id();

The watchlist entries are then retrieved using the Watchlist Manager.

$watchlist = Flipnzee_Watchlist_Manager::get_user_watchlist(
    $user_id
);

Auction Lookup

Each watchlist record stores an auction_id.

For every saved item, the shortcode retrieves the corresponding auction.

$auction = Flipnzee_Auction_Manager::get_auction(
    $item['auction_id']
);

Invalid auctions are skipped automatically.

if ( ! $auction ) {
    continue;
}

Listing Retrieval

Every auction references its associated WordPress listing.

$listing = get_post(
    $auction->listing_id
);

If a listing has been deleted or is unavailable, it is skipped gracefully.

if ( ! $listing ) {
    continue;
}

Displaying Auction Information

Each watchlist item now displays:

  • Listing title
  • Auction status
  • Current bid
  • Auction ending date
  • View Listing button
  • Watchlist button

Example:

<h3><?php echo esc_html( get_the_title( $listing ) ); ?></h3>

Current bid:

<?php echo esc_html(
    number_format_i18n(
        $auction->current_bid,
        2
    )
); ?>

Auction end date:

mysql2date(
    'F j, Y g:i A',
    $auction->auction_end
);

Watchlist Button Synchronization

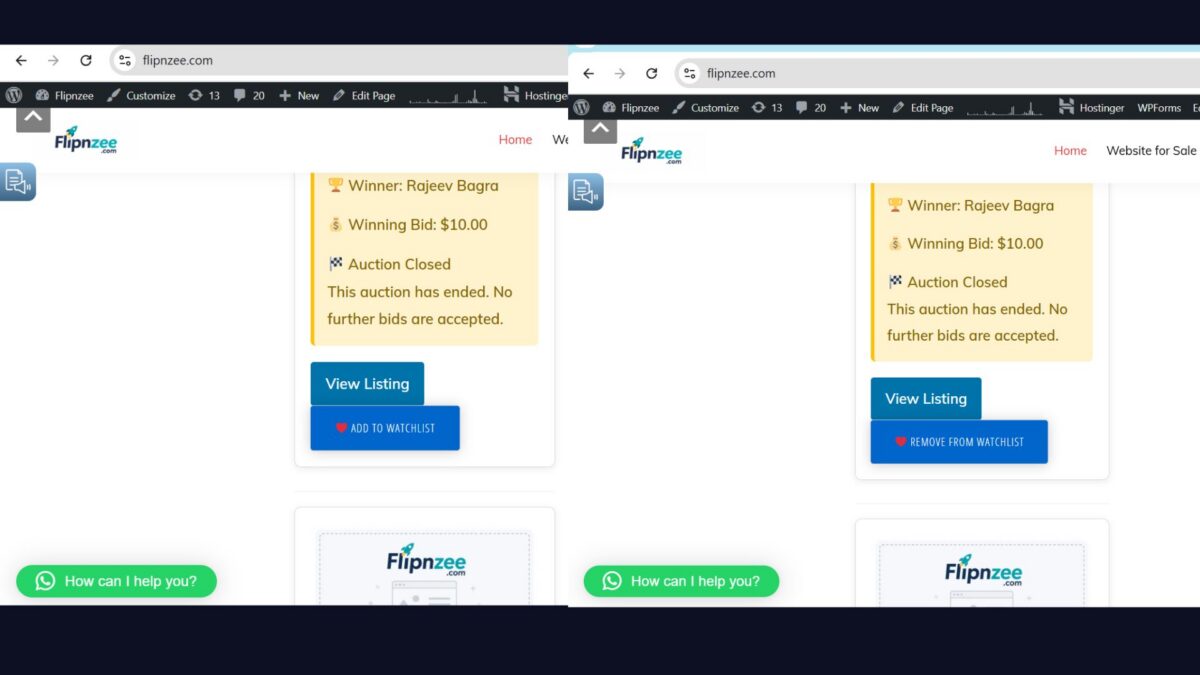
One of the final bugs discovered during development involved the Watchlist button displaying “Add to Watchlist” even when an auction already existed inside the user’s watchlist.

This issue was traced to the button state logic and corrected so that the frontend accurately reflects whether an auction is already saved.

Users now immediately see the correct button state without inconsistent behaviour.


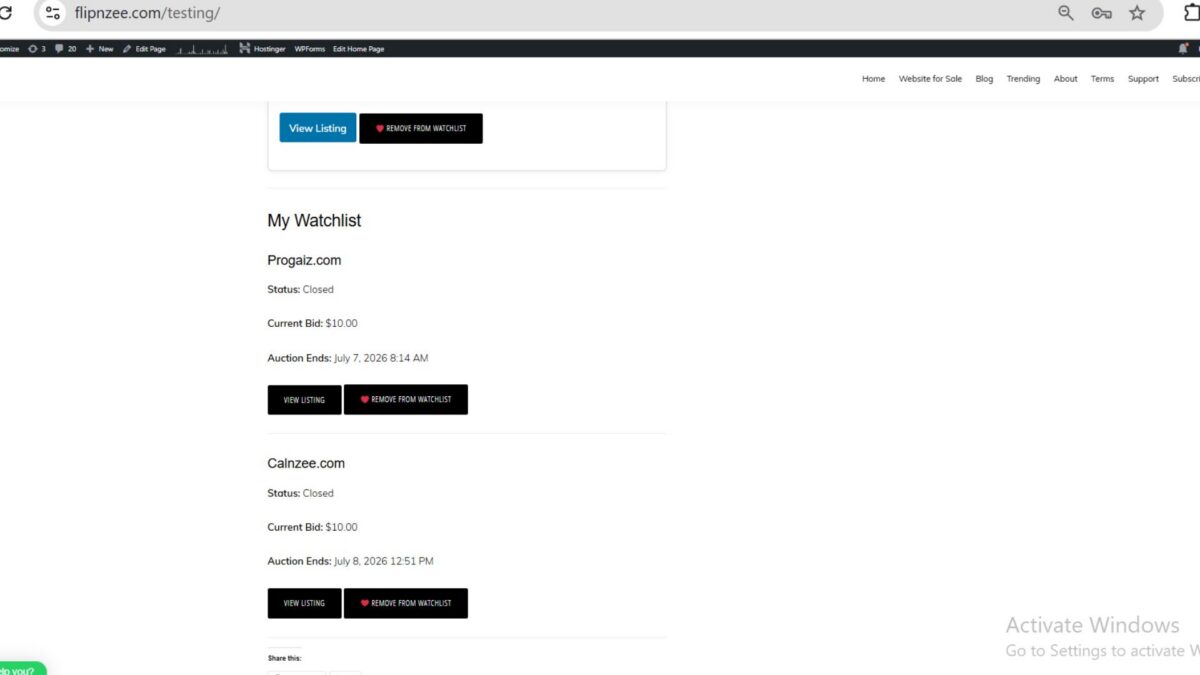
Frontend Result

Each watchlist item is rendered in a clean card layout containing:

  • Website title
  • Auction status
  • Current bid
  • Auction end time
  • View Listing button
  • Remove from Watchlist button

This provides buyers with a convenient dashboard for tracking auctions they intend to follow.


Debugging Process

This lesson involved extensive debugging and verification.

During development we verified:

  • Watchlist database records
  • Auction retrieval
  • Listing retrieval
  • WordPress post loading
  • Auction-to-listing relationships
  • Shortcode rendering
  • Frontend output

Temporary debugging statements such as:

  • var_dump()
  • print_r()
  • <pre>
  • diagnostic echo statements

were removed after successful verification.


WordPress Coding Standards

Throughout the implementation we continued following WordPress coding standards by:

  • Escaping all frontend output.
  • Sanitizing user input.
  • Using prepared database queries.
  • Separating business logic into manager classes.
  • Keeping shortcode rendering focused on presentation.

Testing Completed

The completed feature has been tested for:

  • Logged-in users
  • Empty watchlists
  • Multiple watchlist items
  • Invalid auctions
  • Missing listings
  • Add to Watchlist
  • Remove from Watchlist
  • AJAX updates
  • Frontend rendering
  • Button state synchronization

Files Updated

Primary files updated during this lesson include:

includes/class-shortcodes.php
includes/class-watchlist-manager.php
includes/class-watchlist-ajax.php
assets/js/watchlist.js

Download Source Code

Download the starting version of the plugin before the lesson:

Download the completed version after this lesson:


Outcome

Lesson 96 completes the My Watchlist feature for Flipnzee Auctions.

Users can now save auctions, revisit them later, monitor their progress, and quickly navigate back to the corresponding listing page. This feature significantly improves buyer engagement and lays the foundation for future buyer dashboard functionality.


Git Commit

Lesson 96: Complete My Watchlist frontend integration and production-ready Watchlist system

This marks another major milestone in the Flipnzee Auctions plugin roadmap, with the buyer-facing Watchlist feature now fully functional and ready for production use.

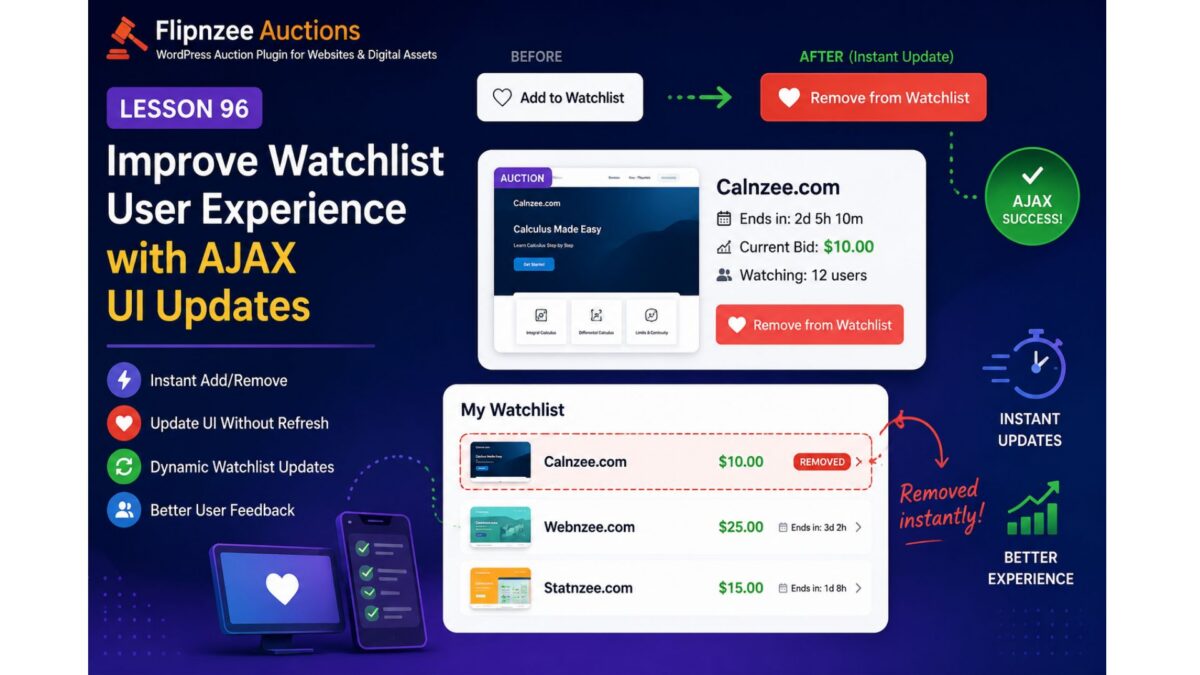
Lesson 96: Improve Watchlist User Experience with AJAX UI Updates

Objective

In Lesson 95, we successfully completed the core Watchlist functionality:

  • Users can add auctions to their Watchlist.
  • Users can remove auctions from their Watchlist.
  • AJAX requests work correctly.
  • The Watchlist shortcode displays saved auctions.
  • Database operations are stable.

However, one usability issue remains.

When a user clicks Add to Watchlist or Remove from Watchlist, the database updates successfully, but the page does not immediately reflect the change. Users must manually refresh the page to see the updated Watchlist.

The goal of Lesson 96 is to make the Watchlist feel like a modern web application by updating the interface immediately after a successful AJAX response.


Why this improvement is needed

Modern users expect instant feedback.

Instead of this workflow:

Click Add
↓

AJAX succeeds
↓

Nothing changes
↓

User refreshes page
↓

Button changes

we want:

Click Add
↓

AJAX succeeds
↓

Button immediately changes to
❤ Remove from Watchlist

↓

Watchlist section updates

Likewise for removal:

Click Remove
↓

AJAX succeeds
↓

Button changes back to
❤ Add to Watchlist

↓

Auction disappears from My Watchlist

No manual refresh should be required.


Planned Improvements

1. Refactor watchlist.js

Clean the JavaScript implementation by separating:

  • Add handler
  • Remove handler
  • UI update methods

instead of one large callback.


2. Update button immediately

Instead of waiting for page refresh:

Current

❤ Add to Watchlist

❤ Remove from Watchlist

or vice versa.


3. Toggle CSS classes

Instead of rebuilding HTML:

button.removeClass(...)
button.addClass(...)

This is cleaner and easier to maintain.


4. Update My Watchlist dynamically

Instead of requiring refresh:

My Watchlist

Auction A
Auction B
Auction C

After removal

My Watchlist

Auction A
Auction C

without reloading the page.


5. Refresh watcher count (future-ready)

Lesson 96 will prepare the JavaScript so we can later update:

Watching:
15 users

instantly after each action.


6. Better user feedback

Instead of silent success:

Display messages like:

✓ Added to Watchlist

or

✓ Removed from Watchlist

These can initially use simple alerts or inline notices, with the option to replace them with WordPress-style notifications in a later lesson.


7. Improve code readability

Break the current callback into smaller functions such as:

toggleWatchlistButton()

updateWatchlistUI()

showMessage()

handleAjaxError()

This will make future enhancements—such as heart icons, badges, or animations—much easier to implement.


Files expected to change

assets/js/watchlist.js

Primary refactoring.

Possibly:

includes/class-watchlist-shortcode.php

if AJAX-generated HTML needs slight adjustments.

Minor updates may also be needed in:

assets/css/frontend.css

for improved button states or visual feedback.


Expected Result

After Lesson 96:

  • ✅ No manual page refresh required.
  • ✅ Watchlist button updates instantly.
  • ✅ My Watchlist reflects changes immediately.
  • ✅ Cleaner JavaScript architecture.
  • ✅ Better user experience.
  • ✅ Foundation prepared for future enhancements such as live watcher counts and real-time notifications.

Learning Outcomes

By completing Lesson 96, we will gain practical experience with:

  • AJAX-driven UI updates
  • DOM manipulation using jQuery
  • Dynamic button state management
  • Refactoring JavaScript for maintainability
  • Improving user experience without additional server requests

This lesson focuses on polishing the Watchlist feature into a smoother, more responsive interface while keeping the underlying architecture modular and ready for future enhancements.

Lesson 95 – Implementing the Watchlist System with AJAX in Flipnzee Auctions


Series: Building the Flipnzee Auctions Plugin
Lesson: 95
Project: Flipnzee Auctions – A WordPress Auction Plugin for Websites & Digital Assets


Introduction

In the previous lesson, we designed the Watchlist feature for Flipnzee Auctions. The objective was to allow registered users to bookmark auctions they are interested in and easily revisit them later from a dedicated My Watchlist page.

This implementation transformed that design into a working feature by introducing a dedicated Watchlist Manager, AJAX-powered interactions, frontend buttons, and a Watchlist shortcode. As with many real-world development tasks, the implementation also involved extensive debugging and refinement to ensure the feature integrates correctly with the rest of the plugin.


Objectives

The primary objectives of this lesson were:

  • Implement a Watchlist Manager for database operations.
  • Allow logged-in users to add auctions to their watchlist.
  • Allow users to remove auctions from their watchlist.
  • Prevent duplicate watchlist entries.
  • Display a personalised Watchlist page.
  • Implement secure AJAX requests using WordPress nonces.
  • Integrate the Watchlist button into auction listings.

Files Added and Updated

New Components

  • includes/class-watchlist-manager.php
  • includes/class-watchlist-ajax.php
  • assets/js/watchlist.js

Updated Components

  • includes/class-shortcodes.php
  • flipnzee-auctions.php

Building the Watchlist Manager

A dedicated manager class was introduced to centralise all watchlist-related database operations.

Its responsibilities include:

  • Initialising database access.
  • Checking whether an auction already exists in a user’s watchlist.
  • Adding auctions.
  • Removing auctions.
  • Retrieving all saved auctions.
  • Counting the number of users watching an auction.

Separating these responsibilities into a dedicated class improves maintainability and follows the plugin’s object-oriented architecture.


Preventing Duplicate Entries

Before inserting a new record, the manager verifies whether the auction has already been saved.

Example:

if ( self::is_in_watchlist( $auction_id, $user_id ) ) {
	return true;
}

This ensures that repeated clicks do not create duplicate database entries.


AJAX Integration

Dedicated AJAX handlers were implemented for both watchlist actions.

The handlers perform:

  • Nonce verification
  • Login validation
  • Input sanitisation
  • Database updates
  • JSON success/error responses

This allows watchlist operations to be performed without navigating away from the current page.


Rendering the Watchlist Button

A reusable Watchlist button renderer was implemented.

Depending on the current state, it automatically displays:

❤ Add to Watchlist

or

❤ Remove from Watchlist

This state is determined dynamically by checking whether the current auction already exists in the logged-in user’s watchlist.


Creating the Watchlist Shortcode

A dedicated shortcode was implemented to display the user’s saved auctions.

The shortcode performs the following steps:

  • Retrieves the current user’s watchlist.
  • Loads each saved auction.
  • Retrieves the associated website listing.
  • Displays auction information.
  • Provides a link back to the listing.

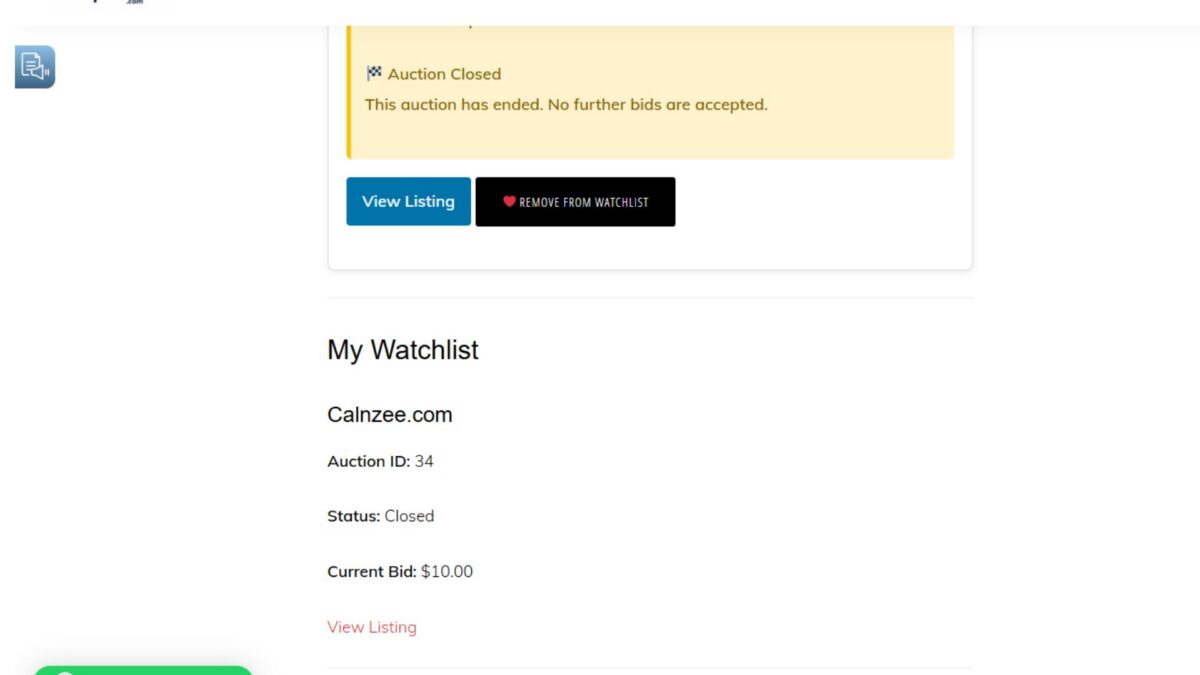
Current output includes:

  • Listing title
  • Auction ID
  • Auction status
  • Current bid
  • Listing link

This provides users with a simple dashboard for managing their saved auctions.


Database Operations

The Watchlist Manager now supports:

  • Adding auctions
  • Removing auctions
  • Checking whether an auction is already saved
  • Retrieving all saved auctions
  • Counting watchers

These methods provide a reusable backend API for future watchlist-related features.


Security Considerations

Several WordPress security practices were implemented throughout this lesson.

These include:

  • Nonce verification using check_ajax_referer()
  • Login verification
  • Sanitising incoming POST values
  • Prepared SQL statements
  • Escaping frontend output
  • Using the WordPress database API

These measures help protect the feature against common attack vectors.


Debugging and Troubleshooting

A considerable portion of this lesson involved debugging and integration testing.

Issues encountered included:

  • Duplicate method declarations
  • Missing manager methods
  • PHP fatal errors
  • AJAX HTTP 500 errors
  • JavaScript event binding problems
  • Cached JavaScript during development
  • Leftover debugging statements
  • Plugin activation failures
  • Watchlist manager integration issues

Resolving these problems reinforced the importance of systematic debugging, incremental testing, and verifying both backend and frontend behaviour throughout development.


Current Functionality

The Watchlist feature now successfully:

  • Adds auctions to a user’s watchlist.
  • Removes auctions from a user’s watchlist.
  • Prevents duplicate entries.
  • Retrieves saved auctions.
  • Displays a personalised Watchlist page.
  • Uses secure AJAX communication.
  • Integrates with the auction interface.

Known Limitation

One frontend enhancement remains.

After adding or removing an auction using AJAX, the underlying database is updated correctly, but the visible page does not immediately reflect the change until the page is refreshed.

The backend functionality is fully operational. The remaining work is limited to improving frontend state synchronisation after successful AJAX requests.

This enhancement will be addressed during a future UI refactoring lesson.


Lessons Learned

This implementation highlighted several important software engineering practices:

  • Keep business logic separate from presentation.
  • Build reusable manager classes.
  • Secure every AJAX endpoint.
  • Prevent duplicate database records.
  • Validate all user input.
  • Test incrementally.
  • Use browser developer tools alongside server logs for debugging.
  • Separate backend functionality from frontend user experience improvements.

Download Source Code

Download the starting version of the plugin before the lesson:

Download the completed version after this lesson: 


Future Roadmap

The Watchlist system provides a strong foundation for several upcoming enhancements, including:

  • Instant UI updates after AJAX operations.
  • Reusable auction card rendering.
  • Watcher counters.
  • Email notifications.
  • Auction alerts.
  • User dashboard improvements.
  • Real-time watchlist interactions.

Conclusion

Lesson 95 marks another significant milestone in the development of Flipnzee Auctions.

The plugin now includes a functional Watchlist system that enables registered users to save auctions for future reference using secure AJAX-powered interactions.

Although a minor frontend synchronisation enhancement remains, the underlying architecture is complete, extensible, and ready to support future features such as notifications, live updates, and personalised auction management.


Git Commit

Lesson 95: Implement Watchlist system with AJAX, shortcode, and database manager

This lesson also reinforces an important principle of plugin development: building a reliable backend first creates a solid foundation upon which frontend enhancements can be safely and incrementally added.

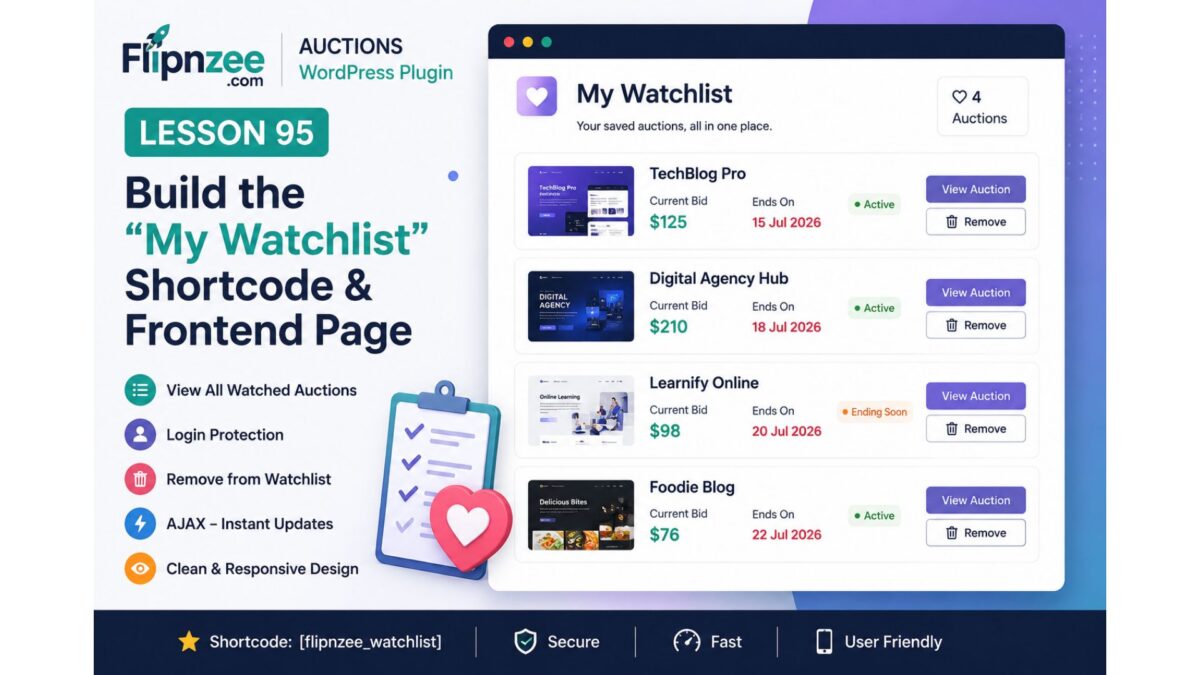
Lesson 95: Build the “My Watchlist” Shortcode and Frontend Page


Overview

In Lesson 95, we will build the first frontend page dedicated to a user’s personal Watchlist.

Instead of requiring users to visit individual auction pages to know what they are watching, Flipnzee Auctions will provide a centralized Watchlist page listing all watched auctions.


Objectives

By the end of this lesson, users will be able to:

  • View all auctions currently in their Watchlist.
  • Access the Watchlist through a shortcode.
  • See essential auction information.
  • Remove auctions directly from the Watchlist.
  • View auction status.
  • Navigate back to individual auction pages.

Why this lesson?

The Watchlist now stores data correctly.

However, users currently have no way to access their saved auctions.

A Watchlist without a dedicated page provides little practical value.

This lesson completes the first full user workflow.


New Features

1. New Shortcode

Create:

[flipnzee_watchlist]

This shortcode will display the current user’s Watchlist.


2. Login Protection

Anonymous visitors should see:

Please log in to view your Watchlist.

instead of an empty page.


3. Empty Watchlist Message

If no auctions have been saved:

You have not added any auctions to your Watchlist yet.

4. Watchlist Layout

Each watched auction should display:

  • Listing title
  • Featured image (if available)
  • Current bid
  • Auction status
  • Auction ending date
  • View Auction button
  • Remove from Watchlist button

Example:

----------------------------------------
Website Name

Current Bid: $125

Ends:
15 July 2026

[View Auction]

[Remove]
----------------------------------------

5. Remove Without Leaving Page

Reuse the existing AJAX endpoint.

Clicking Remove should:

  • delete the auction,
  • remove the card immediately,
  • update the page without refresh.

6. Empty State After Last Removal

If the final auction is removed:

You have not added any auctions to your Watchlist.

should appear automatically.


Architecture

No database changes are required.

We already have:

  • Flipnzee_Watchlist_Manager
  • get_user_watchlist()
  • AJAX Remove
  • Watchlist table

Lesson 95 focuses on presentation.


Files to Modify

Existing

includes/class-shortcodes.php

Register the new shortcode.


includes/class-watchlist-manager.php

Retrieve auctions and prepare output.


assets/js/watchlist.js

Support removing cards from the Watchlist page.


New

assets/css/watchlist.css

Dedicated Watchlist styling.


User Experience

Logged-out Visitor

Please log in to view your Watchlist.

Empty Watchlist

You haven't added any auctions yet.

Browse Auctions

Populated Watchlist

Cards displaying watched auctions with quick actions.


WordPress Concepts Covered

This lesson introduces:

  • Frontend shortcodes
  • User-specific content
  • Conditional rendering
  • Empty-state design
  • AJAX DOM updates
  • Card-based layouts
  • Secure user data retrieval

Testing Checklist

  • Logged-out visitor sees login message.
  • Logged-in user with no auctions sees empty state.
  • Watchlist displays saved auctions.
  • Remove button works.
  • Card disappears immediately.
  • Last removal shows empty message.
  • View Auction opens correct listing.
  • No PHP warnings.
  • No JavaScript errors.

What Comes Next

After Lesson 95, we’ll continue enhancing the user experience:

  • Lesson 96: Watchlist Counter in Header/Menu
  • Lesson 97: Email Notifications for Watched Auctions
  • Lesson 98: Dashboard Widget (“Recently Watched Auctions”)
  • Lesson 99: Auction Ending Soon Notifications
  • Lesson 100: User Dashboard & Activity Center

Why I think this is the right Lesson 95

Looking at the project as a whole, we’ve now completed the data layer (database), business logic (manager), and interaction layer (AJAX). The natural next step is the presentation layer.

This follows a clean progression:

  • Lesson 93: Create the Watchlist functionality.
  • Lesson 94: Make the Watchlist interactive with AJAX.
  • Lesson 95: Give users a dedicated place to manage their Watchlist.

That completes the first full Watchlist feature set and provides a solid foundation for future enhancements like notifications and personalized dashboards.

Lesson 94 Implementation: Building a Dynamic AJAX Watchlist Toggle for Flipnzee Auctions

Lesson 94 Implementation: Building a Dynamic AJAX Watchlist Toggle for Flipnzee Auctions

In the previous lesson, the Flipnzee Auctions plugin introduced the foundation of the Watchlist feature, allowing authenticated users to add auctions to their personal watchlists using AJAX. While the backend functionality was working correctly, the user experience still required significant refinement.

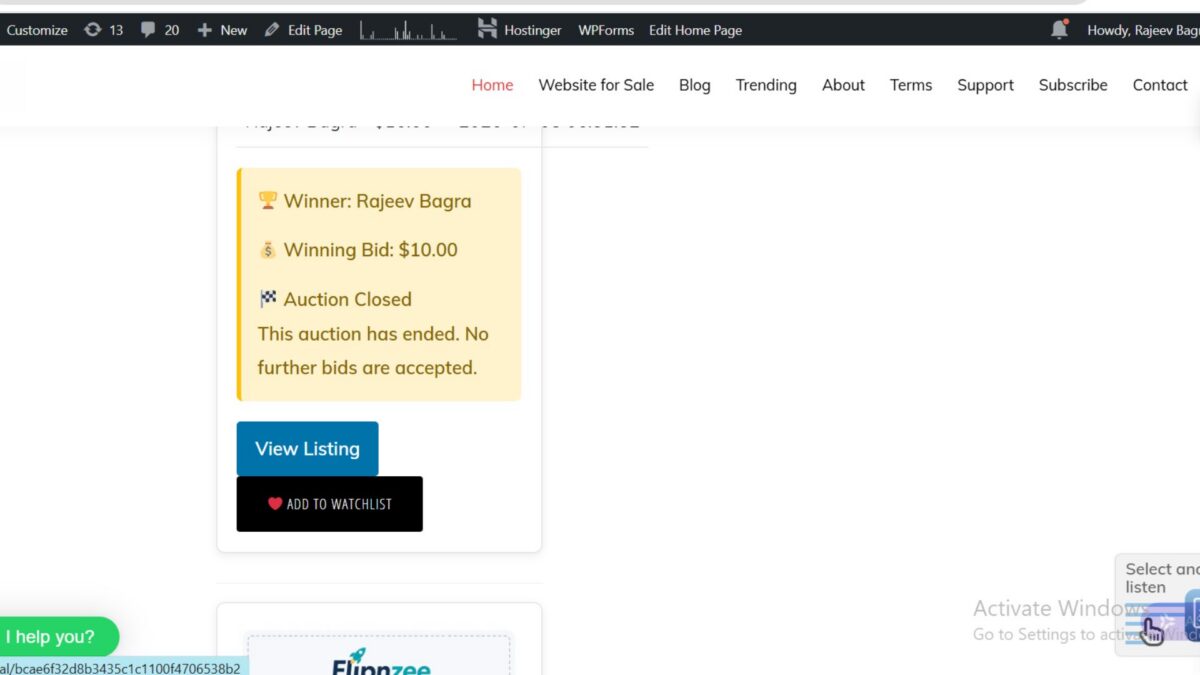
The Watchlist button always displayed “Add to Watchlist”, regardless of whether the auction had already been added to the user’s watchlist. Furthermore, there was no support for removing auctions from the watchlist using the same interface.

Lesson 94 focused on transforming the Watchlist into a fully interactive feature by introducing a dynamic AJAX-powered toggle button that automatically switches between Add to Watchlist and Remove from Watchlist while keeping the user interface synchronized with the database.


Lesson Objectives

The primary objectives of this lesson were:

  • Display the correct Watchlist state when an auction page loads.
  • Determine whether an auction is already present in the logged-in user’s watchlist.
  • Convert the Watchlist button into a dynamic toggle.
  • Support both Add and Remove operations using AJAX.
  • Update the interface instantly without refreshing the page.
  • Improve the user experience.
  • Refactor the JavaScript implementation for improved readability.
  • Display the Watchlist feature only to authenticated users.

Reviewing the Existing Watchlist

Before beginning this lesson, the plugin already supported:

  • Watchlist database table
  • AJAX Add to Watchlist
  • Duplicate entry prevention
  • Watchlist Manager
  • Watchlist AJAX Controller
  • Nonce verification
  • Logged-in user validation

However, every auction page still displayed the same button:

❤ Add to Watchlist

even when the auction had already been added by the current user.


Rendering the Correct Initial State

The first improvement was made within the Watchlist Manager.

Instead of rendering a fixed button, the plugin now determines whether the current auction already exists in the logged-in user’s watchlist.

$is_watchlisted = self::is_in_watchlist(
	$auction_id,
	get_current_user_id()
);

Based on the result, the button is rendered appropriately.

When the auction is already being watched:

❤ Remove from Watchlist

Otherwise:

❤ Add to Watchlist

This ensures that the user interface accurately reflects the database before any JavaScript is executed.


Restricting the Watchlist to Logged-in Users

During testing, an important usability issue was discovered.

Anonymous visitors could still see the Watchlist button even though the feature required authentication. Clicking the button initiated an AJAX request that ultimately failed because the visitor was not logged in.

Instead of presenting a button that anonymous visitors could not use, the implementation was simplified by rendering the Watchlist button only for authenticated users.

A guard clause was introduced near the beginning of the rendering method.

if ( ! is_user_logged_in() ) {
	return;
}

This approach provides several advantages:

  • Eliminates unnecessary AJAX requests
  • Prevents user confusion
  • Simplifies the interface
  • Improves overall user experience

Future versions of the plugin may replace the hidden button with a dedicated “Log in to use Watchlist” link or notification, but the current implementation provides a cleaner experience for both visitors and registered users.


Using a CSS Class to Track State

Rather than maintaining additional JavaScript variables, the Watchlist button itself became the source of truth.

If an auction already exists in the user’s watchlist, the rendered button receives the CSS class:

watchlisted

The JavaScript simply checks:

const isWatchlisted = button.hasClass( 'watchlisted' );

This eliminates unnecessary complexity while keeping the implementation easy to understand.


Selecting the Appropriate AJAX Action

Instead of maintaining separate click handlers for adding and removing auctions, Lesson 94 introduced a single dynamic toggle.

The JavaScript determines which AJAX action should be executed.

const ajaxAction = isWatchlisted
	? 'flipnzee_remove_from_watchlist'
	: 'flipnzee_add_to_watchlist';

The same button can now perform both operations without duplicating code.


Completing the Remove Watchlist AJAX Handler

While Lesson 93 implemented the Add to Watchlist functionality, Lesson 94 completed the remaining AJAX workflow for removing auctions.

The Remove handler performs the same security validations as the Add handler.

These include:

  • Nonce verification
  • Logged-in user validation
  • Auction ID validation
  • Database deletion
  • JSON success or error response

Maintaining identical validation logic for both operations keeps the AJAX architecture consistent throughout the plugin.


Updating the Interface Without Reloading

One of the most visible improvements introduced during this lesson was updating the button immediately after a successful AJAX request.

When an auction is added:

button
	.addClass( 'watchlisted' )
	.text( '❤ Remove from Watchlist' );

When removed:

button
	.removeClass( 'watchlisted' )
	.text( '❤ Add to Watchlist' );

Users now receive immediate visual feedback without refreshing the page.


Refactoring the JavaScript

Throughout development, several temporary debugging statements were introduced while troubleshooting AJAX requests, browser caching, and response handling.

After verifying that the implementation worked correctly, all temporary debugging code was removed.

The resulting JavaScript became considerably cleaner.

The overall workflow now follows a simple sequence:

  1. User clicks the Watchlist button.
  2. Determine current Watchlist state.
  3. Select the appropriate AJAX action.
  4. Send the AJAX request.
  5. Update the button after a successful response.

Keeping the implementation concise improves readability while making future maintenance much easier.


Development Challenges

Lesson 94 proved to be one of the most educational lessons completed so far.

During implementation several issues had to be investigated, including:

  • Browser caching of JavaScript files
  • AJAX response validation
  • Logged-out user behavior
  • Dynamic button rendering
  • JavaScript refactoring
  • Watchlist state synchronization

Rather than attempting to continuously patch the implementation, the project was rolled back to the stable Lesson 93 Git tag.

The feature was then rebuilt incrementally, validating every small improvement before introducing the next enhancement.

This iterative approach produced a significantly cleaner and more reliable implementation.


Lessons Learned

Several valuable software engineering principles were reinforced during this lesson.

Build on Stable Foundations

Rolling back to a known working version proved much more efficient than attempting to repair increasingly complex code.

Version control once again demonstrated its importance throughout the development process.


Small Changes Reduce Complexity

Implementing one improvement at a time made debugging significantly easier.

Small, testable changes reduced uncertainty while simplifying troubleshooting.


Use Guard Clauses

Introducing an early return for anonymous visitors simplified the rendering logic.

Instead of nesting multiple conditional statements, the method now exits immediately whenever the user is not authenticated.

This improves readability while reducing unnecessary processing.


Separate Responsibilities

The Watchlist implementation now follows clear architectural boundaries.

Watchlist Manager

  • Business logic
  • Database operations
  • Button rendering

Watchlist AJAX Controller

  • AJAX request processing
  • Security validation
  • JSON responses

watchlist.js

  • User interaction
  • AJAX communication
  • Dynamic interface updates

This separation will simplify future enhancements.


User Experience Is Just As Important

Although the backend functionality already existed, the feature felt incomplete until the interface accurately reflected user actions.

Small improvements to user experience often have a significant impact on the perceived quality of software.


Testing

After completing the implementation, the following functionality was successfully verified.

Logged-in Users

  • Add to Watchlist
  • Remove from Watchlist
  • Dynamic button updates
  • Correct initial Watchlist state
  • AJAX communication
  • Database synchronization
  • Duplicate prevention

Logged-out Visitors

  • Watchlist button no longer displayed
  • No unnecessary AJAX requests
  • Cleaner interface
  • Consistent user experience

Looking Ahead

With the Watchlist now functioning as a complete AJAX-powered toggle, the Flipnzee Auctions plugin continues moving toward a production-ready auction platform.

Possible future enhancements include:

  • My Watchlist page
  • Watchlist shortcode
  • User dashboard integration
  • Email notifications
  • Auction ending reminders
  • Watchlist statistics
  • Login prompt for anonymous visitors
  • Gutenberg block integration

Download Source Code

Download the starting version of the plugin before the lesson:

Download the completed version after this lesson:


Conclusion

Lesson 94 transformed the Watchlist from a basic AJAX feature into a polished and user-friendly component of the Flipnzee Auctions plugin.

Users can now seamlessly add and remove auctions from their watchlists using a single dynamic button that accurately reflects the current state without requiring a page refresh.

The lesson also reinforced the value of incremental development, disciplined debugging, clean architecture, and thoughtful user experience design. By introducing authenticated rendering, dynamic state management, and cleaner frontend logic, the Watchlist has become a much more intuitive and maintainable feature.

As Flipnzee Auctions continues to evolve, these development practices will remain essential for building a stable, professional, and extensible WordPress auction platform.

Lesson 94: Enhancing the Watchlist User Experience with Dynamic Button States

Series: Building the Flipnzee Auctions WordPress Plugin
Lesson: 94


Introduction

In Lesson 93, we successfully built the backend foundation of the Flipnzee Watchlist system. Users can now securely add auctions to their personal watchlists using AJAX, with data stored in a dedicated database table.

Although the functionality works correctly, the user interface still behaves like a simple button. After clicking Add to Watchlist, nothing visually changes unless the page is refreshed. Modern web applications provide immediate visual feedback, making interactions feel faster and more intuitive.

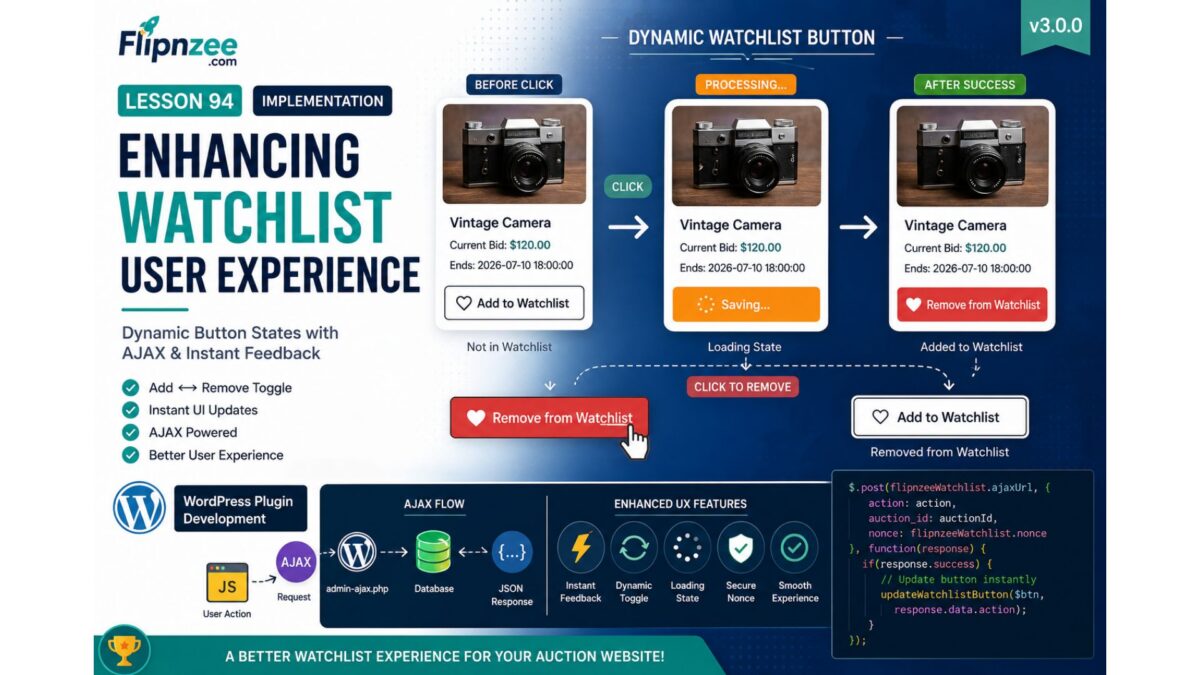
In this lesson, we will significantly improve the user experience by making the Watchlist button dynamic. The button will automatically update its appearance and text after successful AJAX requests, allowing users to instantly see whether an auction is already saved in their watchlist.

By the end of this lesson, the Watchlist feature will feel much closer to what users expect from professional marketplaces like eBay, Etsy, or Facebook Marketplace.


What We Will Build

We will enhance the frontend Watchlist interface by implementing:

  • Dynamic button text updates
  • Automatic icon changes
  • Button state switching
  • Add ↔ Remove Watchlist toggle
  • Visual feedback after successful AJAX requests
  • Loading state while AJAX is processing
  • Prevention of multiple rapid clicks

Current Workflow

Current behavior:

User clicks Add to Watchlist
        │
        ▼
AJAX Request
        │
        ▼
Database Updated
        │
        ▼
Nothing changes on screen

Improved workflow after this lesson:

User clicks Add to Watchlist
        │
        ▼
Loading...
        │
        ▼
AJAX Success
        │
        ▼
♥ Remove from Watchlist

And vice versa:

User clicks Remove
        │
        ▼
AJAX Request
        │
        ▼
Database Updated
        │
        ▼
♡ Add to Watchlist

Concepts Covered

During this lesson we will learn:

  • Building interactive UI with jQuery
  • Updating HTML without refreshing the page
  • Manipulating button classes
  • Handling AJAX success callbacks
  • Creating reusable frontend logic
  • Improving user experience (UX)
  • Preventing duplicate submissions

Files Expected to Change

assets/js/watchlist.js

includes/class-watchlist-manager.php

includes/class-watchlist-ajax.php

assets/css/frontend.css

Planned Enhancements

1. Loading State

Before

♥ Add to Watchlist

While Processing

Saving...

After Success

♥ Remove from Watchlist

2. Dynamic Button Classes

We’ll switch CSS classes dynamically.

Example:

flipnzee-watchlist-button

flipnzee-watchlist-button active

3. Toggle Icons

We’ll switch between:

♡ Add to Watchlist

and

♥ Remove from Watchlist

4. AJAX Response Improvements

Our AJAX handlers will return richer JSON responses, such as:

{
    "success": true,
    "action": "added",
    "message": "Added to Watchlist"
}

and

{
    "success": true,
    "action": "removed",
    "message": "Removed from Watchlist"
}

5. Better User Experience

Users will immediately know:

  • item saved
  • item removed
  • request failed
  • request processing

without refreshing the page.


Learning Outcomes

After completing this lesson, you will understand:

  • AJAX-driven UI updates
  • State-based interface design
  • Dynamic DOM manipulation
  • Frontend/backend synchronization
  • Better WordPress plugin UX design

Roadmap Progress

Completed:

  • ✅ Auction database
  • ✅ Bidding system
  • ✅ Transactions
  • ✅ Purchase workflow
  • ✅ My Purchases
  • ✅ Activity Log
  • ✅ Watchlist database
  • ✅ Watchlist Manager
  • ✅ AJAX Add to Watchlist

Current Lesson:

  • 🔵 Dynamic Watchlist UI

Coming Next:

  • Lesson 95: Displaying the User’s Watchlist (My Watchlist Page & Shortcode)
  • Lesson 96: Removing Items from the Watchlist with AJAX
  • Lesson 97: Watchlist Notifications and Bid Alerts

By the end of Lesson 94, the Watchlist feature will no longer be just functional—it will provide a smooth, responsive, and professional user experience that aligns with modern auction and marketplace applications.

Lesson 93 Implementation: AJAX-Powered Watchlist Functionality

Introduction

In the previous lesson, we designed the foundation of the Watchlist system by creating the database manager and rendering the Watchlist button. In this lesson, we focused on bringing the feature to life by implementing AJAX communication between the frontend and backend. Users can now add auction listings to their personal watchlist without reloading the page, making the bidding experience smoother and more interactive.

Although we encountered a few debugging challenges during development, each issue helped us better understand the interaction between JavaScript, WordPress AJAX, and our database layer.


Objective

Implement a working AJAX-based Watchlist system that:

  • Displays an “Add to Watchlist” button.
  • Sends AJAX requests securely using WordPress nonces.
  • Processes requests in PHP.
  • Stores watchlist entries in the database.
  • Prevents duplicate watchlist entries.
  • Lays the foundation for future Watchlist enhancements.

Files Modified

flipnzee-auctions.php

includes/
    class-watchlist-manager.php
    class-watchlist-ajax.php

assets/js/
    watchlist.js

Step 1 – Loading the Watchlist JavaScript

The first task was loading a dedicated JavaScript file for the Watchlist feature.

wp_enqueue_script(
    'flipnzee-watchlist',
    FLIPNZEE_AUCTION_URL . 'assets/js/watchlist.js',
    array( 'jquery' ),
    FLIPNZEE_AUCTION_VERSION,
    true
);

wp_localize_script(
    'flipnzee-watchlist',
    'flipnzeeWatchlist',
    array(
        'ajaxUrl' => admin_url( 'admin-ajax.php' ),
        'nonce'   => wp_create_nonce( 'flipnzee_watchlist_nonce' ),
    )
);

This provides JavaScript with:

  • AJAX endpoint
  • Security nonce

Step 2 – Building the Watchlist JavaScript

A new JavaScript file was created.

assets/js/watchlist.js

Initially, we verified that the script was loading correctly.

console.log('Flipnzee Watchlist JS Loaded');

Once confirmed, click handling was added.

$(document).on(
    'click',
    '.flipnzee-watchlist-button',
    function (e) {

        e.preventDefault();

        const button = $(this);
        const auctionId = button.data('auction-id');

        console.log('Clicked auction:', auctionId);

    }
);

Step 3 – Sending AJAX Requests

The click handler was expanded to send AJAX requests to WordPress.

$.post(
    flipnzeeWatchlist.ajaxUrl,
    {
        action: 'flipnzee_add_to_watchlist',
        auction_id: auctionId,
        nonce: flipnzeeWatchlist.nonce
    }
);

This sends:

  • auction ID
  • nonce
  • AJAX action

without reloading the page.


Step 4 – Creating the AJAX Handler

A dedicated AJAX controller was created.

includes/class-watchlist-ajax.php

AJAX actions were registered.

add_action(
    'wp_ajax_flipnzee_add_to_watchlist',
    array(
        __CLASS__,
        'add_to_watchlist'
    )
);

Step 5 – Connecting AJAX with the Watchlist Manager

The AJAX controller delegates all database work to the Watchlist Manager.

$result = Flipnzee_Watchlist_Manager::add_to_watchlist(
    $auction_id,
    $user_id
);

This separation keeps responsibilities clear:

  • AJAX Controller → request handling
  • Watchlist Manager → database operations

Step 6 – Rendering the Watchlist Button

The Watchlist Manager renders the frontend button.

<button
    type="button"
    class="flipnzee-watchlist-button"
    data-auction-id="<?php echo esc_attr( $auction_id ); ?>">
    ❤ Add to Watchlist
</button>

The button embeds the auction ID using a data attribute, allowing JavaScript to identify the selected auction.


Step 7 – Database Integration

The Watchlist Manager inserts new records.

self::$wpdb->insert(
    self::$table,
    array(
        'auction_id' => absint( $auction_id ),
        'user_id'    => absint( $user_id ),
        'created_at' => current_time( 'mysql' ),
    ),
    array(
        '%d',
        '%d',
        '%s',
    )
);

Duplicate entries are prevented by checking:

if ( self::is_in_watchlist(
    $auction_id,
    $user_id
) ) {
    return false;
}

Debugging Journey

This lesson involved significant debugging.

Script Loading

Initially the JavaScript file was not executing.

Using Chrome DevTools we confirmed:

  • Script loading
  • Console output
  • AJAX requests

Button Detection

The Watchlist button initially did not appear.

After tracing the rendering logic, we successfully integrated:

Flipnzee_Watchlist_Manager::render_button();

AJAX Communication

Network Inspector confirmed requests reaching:

admin-ajax.php

Payload included:

action
auction_id
nonce

Database Verification

Using phpMyAdmin we confirmed:

wp_flipnzee_watchlist

was successfully populated.

Example:

auction_iduser_id
2222
3572

This confirmed:

  • successful inserts
  • duplicate prevention
  • proper database connectivity

AJAX Response Analysis

An interesting discovery was that the response:

Unable to add to watchlist.

was not always a database error.

In many cases it simply indicated that the selected auction was already present in the user’s watchlist.

This insight will guide improvements in future lessons by distinguishing duplicate entries from genuine database failures.


Testing Performed

The following tests were completed successfully:

  • Plugin activated successfully.
  • Watchlist table detected.
  • JavaScript loaded correctly.
  • Button rendered successfully.
  • Click events detected.
  • AJAX requests reached WordPress.
  • Nonce validation passed.
  • Auction ID transmitted correctly.
  • User ID detected correctly.
  • Watchlist entries stored in database.
  • Duplicate entries prevented.

Challenges Faced

Several valuable debugging sessions helped strengthen the implementation.

Challenges included:

  • JavaScript not initially loading.
  • Locating the correct place to render the Watchlist button.
  • Confirming AJAX endpoint registration.
  • Verifying nonce handling.
  • Investigating AJAX responses.
  • Inspecting Network requests.
  • Validating database inserts using phpMyAdmin.

Each challenge improved our understanding of WordPress AJAX architecture and reinforced a modular plugin design.


Lessons Learned

During this lesson I learned:

  • How to enqueue and localize frontend JavaScript.
  • How WordPress AJAX requests flow from JavaScript to PHP.
  • How to register secure AJAX actions.
  • How to organize plugin logic using dedicated manager classes.
  • How to prevent duplicate database entries.
  • How to debug AJAX using Chrome DevTools.
  • How to verify backend operations directly in phpMyAdmin.
  • The importance of separating business logic from AJAX controllers.

Current Status

The Watchlist feature now includes:

  • ✔ Watchlist database table
  • ✔ Watchlist Manager
  • ✔ AJAX Controller
  • ✔ Frontend JavaScript
  • ✔ Secure nonce validation
  • ✔ Database insertion
  • ✔ Duplicate protection
  • ✔ Watchlist button rendering
  • ✔ AJAX communication pipeline

The foundation is now complete and ready for user interface improvements.

Download Source Code

Download the starting version of the plugin before the lesson:

Download the completed version after this lesson:


Next Lesson Preview

In Lesson 94, we will enhance the Watchlist user experience by implementing:

  • Toggle Watchlist button (Add ↔ Remove)
  • Dynamic button text updates
  • Instant UI feedback after AJAX requests
  • Remove from Watchlist functionality
  • Improved success and error messaging
  • Watchlist state detection on page load

This will transform the Watchlist from a functional backend feature into a polished, user-friendly experience.