Lesson 81: Refactoring the Auction Maintenance System for Cleaner, Maintainable Code


Objective

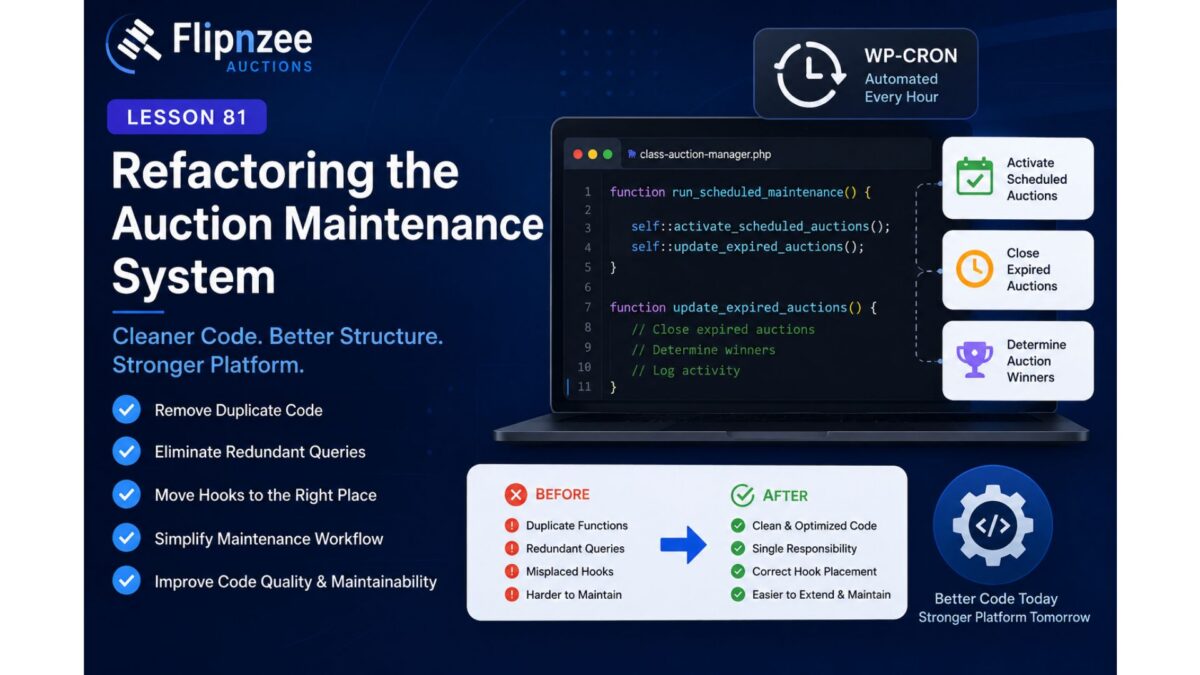
Refactor the auction maintenance system by removing duplicate code, eliminating redundant database queries, relocating hooks to their appropriate locations, and simplifying the auction lifecycle without changing any existing functionality.


Why This Lesson?

As the Flipnzee Auctions plugin has grown, some functionality has evolved through multiple iterations. This has resulted in duplicate methods and repeated SQL queries that can make future maintenance more difficult.

The goal of this lesson is not to add new features, but to improve the internal architecture while keeping the plugin’s behaviour unchanged.


Current Maintenance Flow

WP-Cron
    │
    ▼
run_scheduled_maintenance()
    │
    ├── activate_scheduled_auctions()
    │
    └── update_expired_auctions()
            │
            ├── Close auctions
            ├── Determine winners
            ├── Fire hooks
            └── Activity log

Problems Identified

Duplicate auction-closing methods

The plugin currently contains both:

update_expired_auctions()

and

close_expired_auctions()

Both perform nearly the same responsibility.

Only one should remain.


Duplicate SQL execution

Inside close_expired_auctions() the update query is executed twice.

This increases unnecessary database activity.


Hook placed in the wrong location

The following hook currently appears inside the auction manager:

do_action(
    'flipnzee_auction_winner_determined',
    $auction,
    $winner
);

However:

  • $auction is not defined
  • $winner is not defined

The hook belongs immediately after the winner has actually been determined inside the Bid Manager.


Misleading method

The method

get_active_auctions()

returns:

active
closed

instead of only:

active

The method name and behaviour should match.


Maintenance responsibilities

The auction manager should be responsible for:

  • activating scheduled auctions
  • closing expired auctions
  • invoking winner determination

The Bid Manager should be responsible for:

  • determining winners
  • firing winner-related hooks

This keeps responsibilities separated and improves readability.


Implementation Plan

Step 1

Review the maintenance workflow.

Understand how:

  • activation
  • expiry
  • winner determination

are connected.


Step 2

Remove duplicate SQL from:

close_expired_auctions()

Step 3

Decide which method to keep:

  • update_expired_auctions()
  • close_expired_auctions()

Remove the redundant implementation.


Step 4

Move the winner hook into the Bid Manager.

After the winner has been determined:

do_action(
    'flipnzee_auction_winner_determined',
    $auction,
    $winner
);

should execute there.


Step 5

Simplify

run_scheduled_maintenance()

so that it remains the single entry point for scheduled auction processing.


Step 6

Correct

get_active_auctions()

so it returns only active auctions.


Step 7

Perform regression testing.

Verify:

  • scheduled auctions activate
  • expired auctions close
  • winners are still determined
  • transactions are still created
  • activity logging still works
  • payment workflow remains unaffected

Expected Result

After refactoring:

✔ No duplicate auction-closing methods

✔ No duplicate SQL execution

✔ Cleaner maintenance workflow

✔ Better separation of responsibilities

✔ Easier debugging

✔ Easier future enhancements


What We’ll Learn

During this lesson we’ll practice:

  • code refactoring
  • eliminating duplicate logic
  • applying the Single Responsibility Principle
  • organising WordPress plugin architecture
  • improving long-term maintainability

Why This Matters

Refactoring is an important phase in any mature software project. By removing technical debt now, Flipnzee Auctions will have a cleaner foundation for future features such as:

  • email notifications
  • real-time auction updates
  • advanced auction history
  • seller dashboards
  • buyer dashboards
  • marketplace analytics
  • REST API endpoints
  • webhook integrations

Expected Outcome

By the end of Lesson 81, the auction maintenance system will be simpler, cleaner, and easier to extend, while preserving all existing functionality and improving the overall quality of the Flipnzee Auctions codebase.
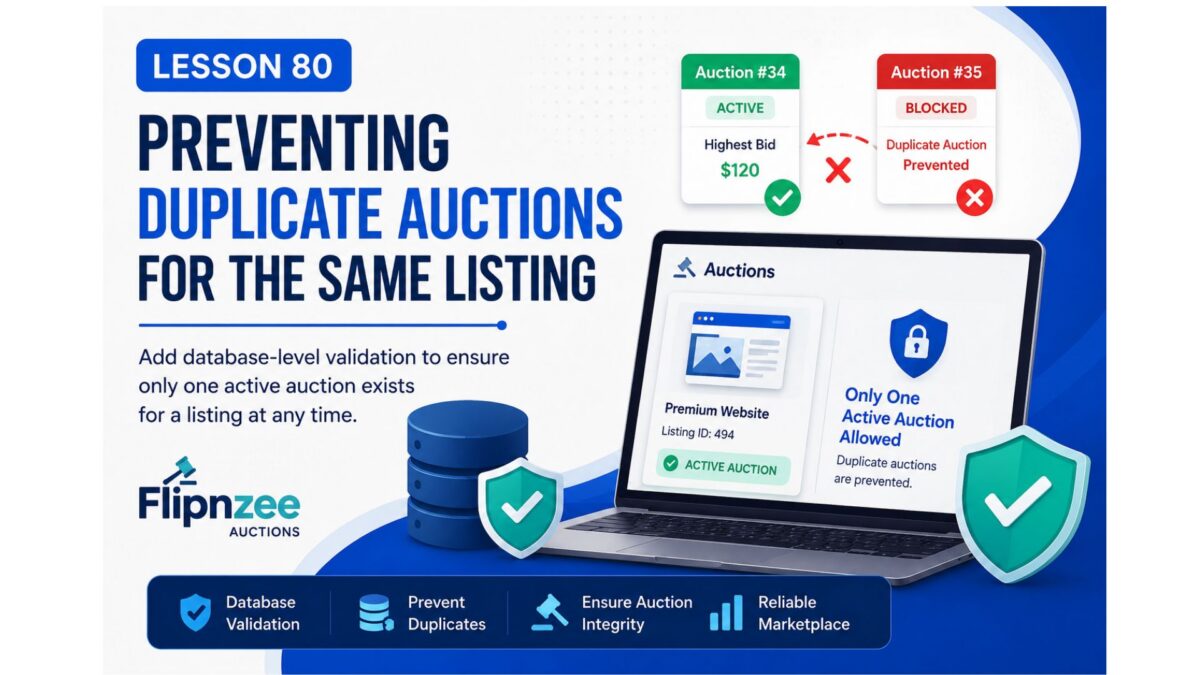
Lesson 80: Preventing Duplicate Auctions for the Same Listing with Database-Level Validation

Introduction

As the Flipnzee Auctions plugin continued to mature, most of the auction workflow had become stable. Earlier lessons introduced automatic auction closing, winner detection, transaction generation, payment management, and duplicate transaction protection.

While reviewing historical auction data, another important question arose:

Can a listing accidentally have more than one active auction?

Although previous improvements had already reduced the possibility of duplicate auctions, adding another layer of protection inside the Auction Manager would make the plugin even more reliable.

This lesson focuses on auditing the auction creation workflow and implementing a final database-level safeguard that prevents multiple active auctions from being created for the same listing.


Why This Improvement Matters

A marketplace should never allow confusion about which auction is currently valid.

Without proper validation, multiple active auctions for the same listing could cause:

  • Multiple bidding interfaces
  • Conflicting highest bids
  • Incorrect winner selection
  • Duplicate transactions
  • Difficult ownership transfer

Even if such situations only occur because of programming mistakes or repeated requests, preventing them is essential.


Current Workflow Review

Before making changes, the existing auction lifecycle should be reviewed.

Listing Created
        │
        ▼
Create Auction
        │
        ▼
Auction Starts
        │
        ▼
Users Place Bids
        │
        ▼
Auction Ends
        │
        ▼
Winner Selected
        │
        ▼
Transaction Created

The only missing safeguard is ensuring that only one active auction can exist for a listing at any given time.


Objectives

In this lesson we will:

  • Audit the auction creation logic.
  • Search where auctions are inserted into the database.
  • Check whether an active auction already exists.
  • Prevent duplicate active auctions.
  • Return the existing auction instead of creating another one.
  • Test the protection with multiple creation attempts.

Implementation Plan

Step 1

Locate the auction creation method.

Search for:

create_auction(

or

$wpdb->insert(

inside

includes/class-auction-manager.php

Step 2

Before inserting a new auction, search for an existing active auction belonging to the same listing.

The validation should resemble:

SELECT id
FROM wp_flipnzee_auctions
WHERE listing_id = ?
AND status = 'active'
LIMIT 1

Step 3

If an active auction exists:

  • do not insert another record
  • return the existing auction ID

Step 4

Only if no active auction exists should the plugin execute:

$wpdb->insert(...)

Step 5

Test using:

  • Add Auction page
  • Edit Auction page
  • phpMyAdmin
  • Frontend listing page

Expected Workflow After Improvement

Create Auction
        │
        ▼
Check Active Auction
        │
   Exists?
    │       │
   Yes      No
    │        │
Return ID  Create Auction

What We Will Learn

This lesson introduces another important software engineering principle:

  • Defensive programming
  • Database validation
  • Idempotent creation methods
  • Marketplace integrity
  • Multi-layer validation
  • Business rule enforcement

Files Expected to Change

Primary file:

includes/class-auction-manager.php

Possible testing files:

admin/class-admin-add-auction.php

admin/class-admin-edit-auction.php

Expected Outcome

After completing Lesson 80:

  • A listing can never have two active auctions.
  • Duplicate auction creation attempts become harmless.
  • Historical auction records remain preserved.
  • Marketplace integrity improves.
  • The auction lifecycle becomes even more robust.

Difficulty

Intermediate


Estimated Time

30–45 minutes


Next Lesson Preview

Lesson 81 – Automatically Archive Completed Auctions and Preserve Historical Records

We’ll enhance the auction lifecycle by introducing an archival mechanism so completed auctions are retained for reporting and auditing while keeping active auction data clean and efficient.

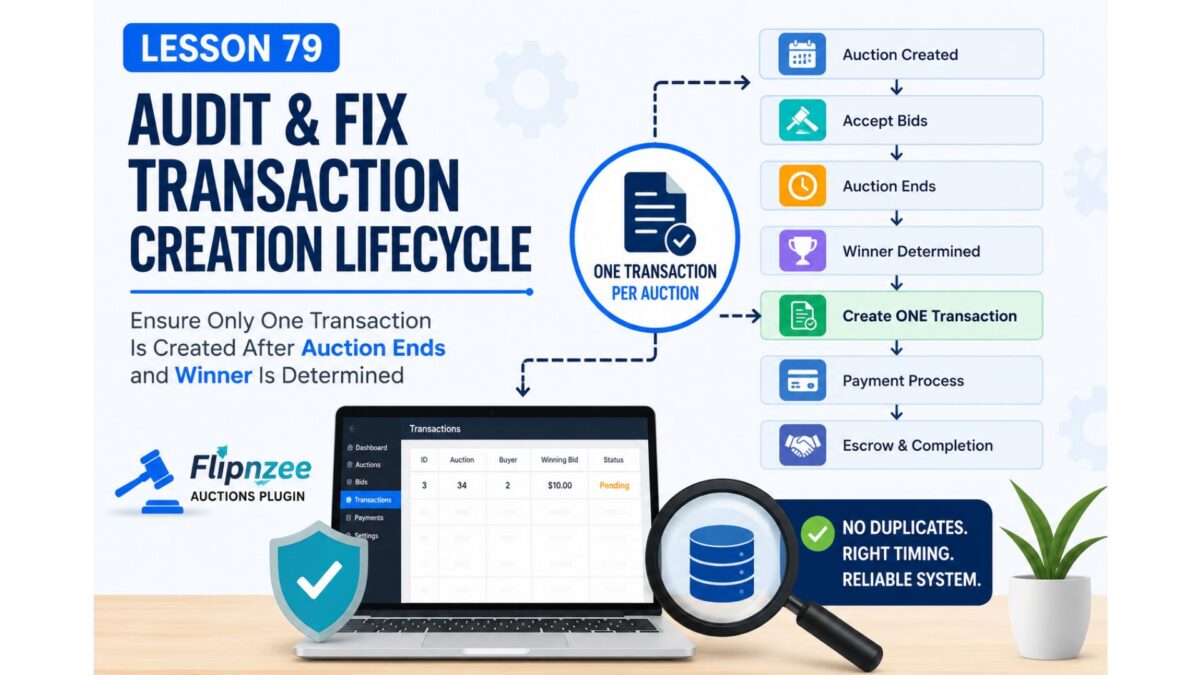
Lesson 79: Auditing and Fixing the Auction Transaction Creation Lifecycle

After successfully implementing manual payment status management in Lesson 78, we noticed an unexpected behavior during testing.

Although payment management was working perfectly, new transactions were being created before an auction had actually finished. This indicated a flaw in the auction workflow rather than in the payment management system.

Before integrating Escrow.com or any payment gateway, it is essential that every auction follows a predictable lifecycle and creates only one transaction, at the correct point in the auction process.

In this lesson, we will audit the entire transaction creation workflow and ensure that transactions are generated only after an auction closes and a winner has been determined.


What We Will Build

By the end of this lesson we will:

  • Trace where transactions are created.
  • Identify every function capable of creating a transaction.
  • Prevent duplicate transaction creation.
  • Ensure transactions are created only once.
  • Verify the transaction lifecycle from auction creation to payment.

The Problem We Discovered

During testing we observed several unexpected behaviors.

  • Transactions were sometimes created immediately after an auction was created.
  • Earlier testing produced duplicate transaction records.
  • Payment management worked correctly, but the transaction lifecycle itself was inconsistent.

Although these issues were corrected temporarily during testing, the underlying workflow still needs a proper audit.


Desired Auction Workflow

A professional auction platform should always follow this sequence.

Auction Created
        │
        ▼
Accept Bids
        │
        ▼
Auction Ends
        │
        ▼
Determine Winner
        │
        ▼
Create ONE Transaction
        │
        ▼
Pending Payment
        │
        ▼
Buyer Payment Submitted
        │
        ▼
Admin Verification
        │
        ▼
Payment Approved
        │
        ▼
Escrow Started
        │
        ▼
Ownership Transfer
        │
        ▼
Auction Completed

Every completed auction should generate exactly one transaction, and that transaction should remain the single source of truth throughout the payment and ownership transfer process.


Lesson Objectives

During this lesson we will:

Step 1

Search the entire plugin for every location that inserts records into:

wp_flipnzee_transactions

Step 2

Identify every function responsible for transaction creation.

Possible examples include:

  • winner determination
  • auction closing
  • bid completion
  • scheduled cron events
  • save handlers

Step 3

Determine which function should have exclusive responsibility for creating transactions.


Step 4

Prevent duplicate transaction creation by checking whether a transaction already exists before inserting a new record.


Step 5

Verify that transaction creation occurs only after:

  • auction end time
  • winner determination
  • successful auction closure

Step 6

Perform end-to-end testing by:

  • creating a new auction
  • placing bids
  • waiting for auction completion
  • confirming exactly one transaction is created

Expected Outcome

After completing this lesson:

  • Every auction will produce only one transaction.
  • Duplicate transactions will be impossible.
  • Transactions will be created only after auction completion.
  • The plugin will have a reliable transaction lifecycle ready for payment gateway and Escrow.com integration.

Why This Matters

Payment gateways, escrow providers, and ownership transfer systems all depend on having a single, reliable transaction record.

Fixing the transaction lifecycle now will make future features significantly easier to implement and reduce the likelihood of data inconsistencies.

This lesson focuses on strengthening the core architecture of the Flipnzee Auctions plugin before moving on to advanced payment and escrow functionality.

Lesson 78: Processing Administrator Payment Status Updates and Beginning Payment Verification

Overview

In the previous lesson, a dedicated Administrator Payments Dashboard was introduced, allowing administrators to view submitted buyer payments, inspect transaction details, and access a payment management interface.

However, the interface was still informational. Although administrators could select a payment status from a dropdown, those changes were not yet saved to the database.

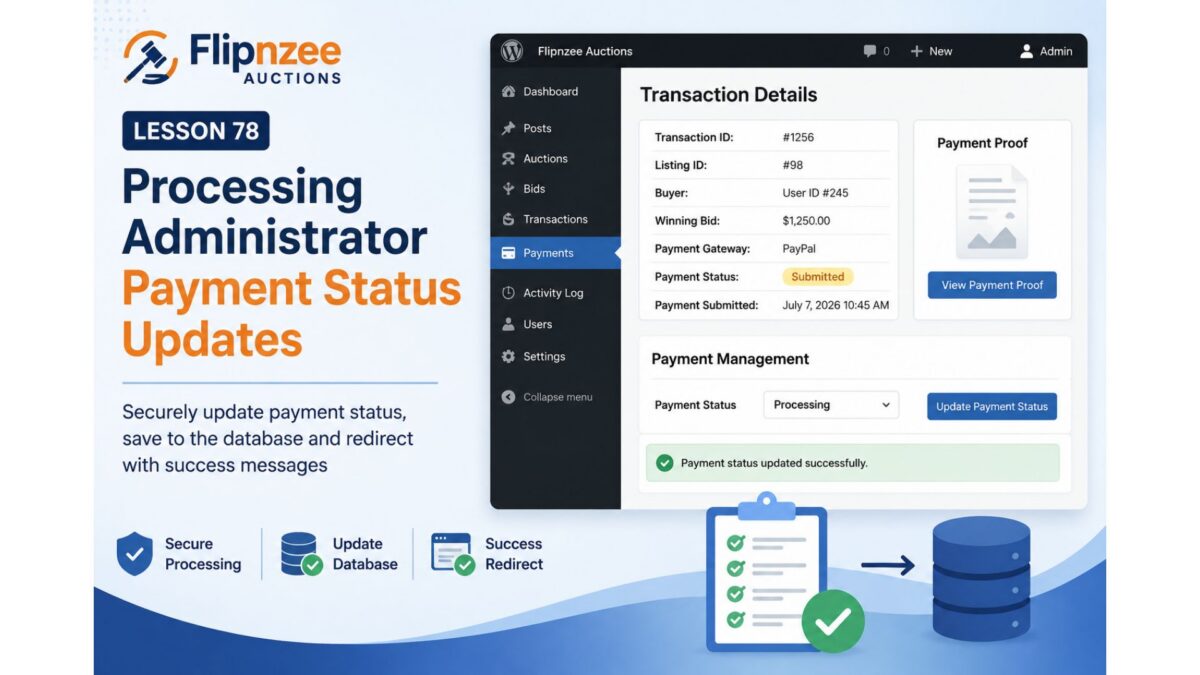
In this lesson, we will connect the user interface to the backend by implementing secure form processing and updating payment records.


Objectives

By the end of this lesson, we will:

  • Register a secure administrator POST action.
  • Process payment status update requests.
  • Verify administrator permissions.
  • Validate WordPress nonces.
  • Update the payment_status field in the database.
  • Redirect administrators with success messages.
  • Prepare the payment verification workflow for future approval actions.

Why This Lesson Is Important

Until now, administrators could only view payment information.

This lesson transforms the payment dashboard into a working management system by allowing administrators to update payment progress after reviewing submitted payment proofs.


Current Workflow

Current administrator workflow:

Buyer Uploads Payment Proof
            │
            ▼
Payment Appears in Dashboard
            │
            ▼
Administrator Opens Details
            │
            ▼
Select Payment Status
            │
            ▼
Nothing Happens ❌

Desired Workflow

After this lesson:

Buyer Uploads Payment Proof
            │
            ▼
Payment Appears in Dashboard
            │
            ▼
Administrator Opens Details
            │
            ▼
Select Payment Status
            │
            ▼
Click Update
            │
            ▼
Database Updated
            │
            ▼
Success Message Displayed

Planned Implementation

1. Register the Admin POST Action

The payment management form already submits to WordPress using admin-post.php.

This lesson will register a dedicated action handler for processing payment updates.


2. Verify Administrator Permissions

Before processing any request, the plugin will confirm that the current user has sufficient privileges.

Only administrators should be allowed to modify payment records.


3. Verify the Nonce

Every request will validate the security nonce before updating the database.

This protects against Cross-Site Request Forgery (CSRF) attacks.


4. Validate Submitted Data

Incoming data will be sanitized and validated before use.

Examples include:

  • Transaction ID
  • Payment Status

This ensures only expected values are processed.


5. Update the Database

The selected payment status will be written to the payment_status column of the transaction table.

Typical status transitions include:

  • Pending
  • Processing
  • Paid
  • Completed
  • Cancelled
  • Refunded

6. Redirect Back to the Transaction

After processing, administrators will be redirected back to the Transaction Details page instead of the generic transactions list.

This provides a smoother workflow.


7. Display Success Notices

Administrators should immediately know whether the update succeeded.

Examples include:

Payment status updated successfully.

or

Unable to update payment status.

8. Prepare for Payment Approval

Although this lesson focuses on updating payment statuses, the implementation prepares the foundation for future verification actions.

Upcoming lessons will introduce dedicated buttons such as:

  • Approve Payment
  • Reject Payment
  • Request New Payment Proof

Database Changes

This lesson will primarily update the following transaction field:

payment_status

Possible values include:

  • pending
  • submitted
  • processing
  • paid
  • completed
  • cancelled
  • refunded

Future lessons may introduce additional verification-specific statuses if needed.


Security Considerations

The payment verification process will follow standard WordPress security practices:

  • Capability checks
  • Nonce verification
  • Data sanitization
  • Safe database updates
  • Secure redirects

Expected Outcome

After completing this lesson:

  • Administrators can update payment status.
  • Database records are updated securely.
  • Transaction details immediately reflect the latest payment state.
  • Payment management becomes fully functional.
  • The administrator workflow becomes suitable for production use.

What You Will Learn

During this lesson, you will learn how to:

  • Process administrator forms using admin-post.php.
  • Secure backend form submissions.
  • Update custom database tables.
  • Redirect users after successful processing.
  • Separate payment management from transaction management.

Looking Ahead

Once payment status updates are working, the Flipnzee Auctions plugin will be ready for the next stage of payment verification.


Next Lesson Preview

Lesson 79: Reviewing Uploaded Payment Proofs and Approving Buyer Payments

In the next lesson, we will enhance the administrator experience by allowing payment proofs to be viewed directly from the Transaction Details page. Administrators will be able to inspect uploaded receipts, preview images or PDFs, and approve or reject payments before initiating the website ownership transfer process.

This will bring Flipnzee one step closer to a complete end-to-end marketplace workflow and lay the groundwork for integrating Escrow.com as the preferred payment gateway for live auctions.

Lesson 72: Building the Payment Gateway Selection Interface

Objective

With the payment architecture now prepared, the next logical step is to give buyers the ability to choose how they would like to pay.

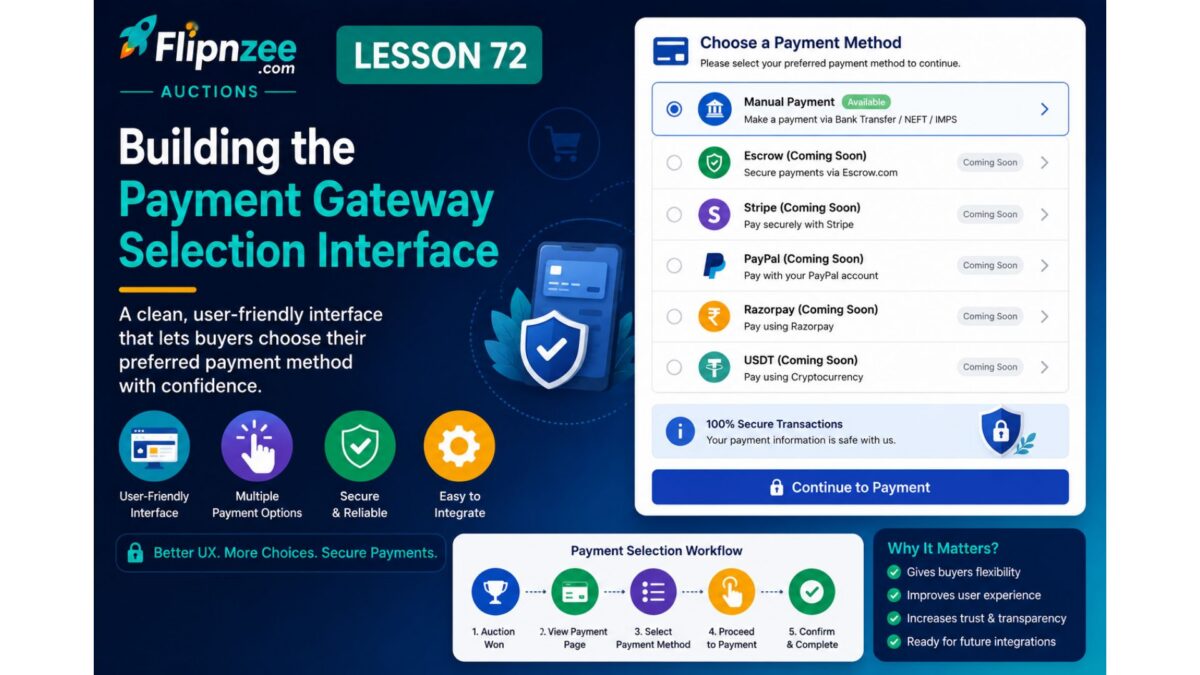
In this lesson, we will introduce a Payment Method Selection section on the Payment page. Although only a placeholder gateway exists today, the interface will be built so future gateways (Stripe, PayPal, Razorpay, Bank Transfer, Crypto, etc.) can be added with almost no changes to the frontend.

This lesson focuses entirely on UI architecture, not actual payment processing.


What We’ll Build

Instead of only showing:

Payment Gateway
Manual Payment (Coming Soon)

the payment page will display something like:

Select Payment Method

(•) Manual Payment (Coming Soon)
( ) Stripe
( ) PayPal
( ) Razorpay
( ) Cryptocurrency (USDT)

[Continue]

Only Manual Payment will be enabled.

The remaining gateways will appear disabled with a “Coming Soon” label.


Why This Lesson Matters

This is an important architectural step because:

  • separates payment UI from payment logic
  • allows new gateways without redesigning pages
  • provides a familiar checkout experience
  • keeps the plugin scalable
  • prepares for future gateway plugins

Files We’ll Modify

Existing

includes/class-payment-page.php

Existing

includes/class-payment-manager.php

(add helper function for available gateways)


New Features

1. Payment Gateway List

Create a helper such as:

Flipnzee_Payment_Manager::get_available_gateways()

which returns an array like

array(
    'manual' => array(
        'label' => 'Manual Payment',
        'enabled' => true,
    ),
    'stripe' => array(
        'label' => 'Stripe',
        'enabled' => false,
    ),
    'paypal' => array(
        'label' => 'PayPal',
        'enabled' => false,
    ),
    'razorpay' => array(
        'label' => 'Razorpay',
        'enabled' => false,
    ),
    'crypto' => array(
        'label' => 'USDT Cryptocurrency',
        'enabled' => false,
    ),
);

2. Display Gateway Choices

Show all gateways as radio buttons.

Only enabled gateways are selectable.

Disabled gateways display:

Coming Soon

3. Continue Button

Display

Continue to Payment

No payment processing yet.


4. Clean HTML Structure

Wrap the section in

<div class="flipnzee-payment-gateways">

for future styling.


User Experience

Current page:

Transaction Details

Gateway:
Manual Payment

New page:

Transaction Details

Select Payment Method

○ Stripe
○ PayPal
● Manual Payment
○ Razorpay
○ Crypto

Continue

Benefits

After this lesson the plugin will have:

  • scalable payment architecture
  • configurable gateway list
  • reusable gateway rendering
  • future-ready checkout interface
  • no dependency on a specific payment provider

What We Won’t Build Yet

To keep the project stable, we are not implementing:

  • Stripe API
  • PayPal API
  • Razorpay API
  • Crypto payments
  • Order confirmation
  • Payment verification

Those will come in later lessons.


Expected Outcome

By the end of Lesson 72, buyers will see a professional payment method selection interface with a working placeholder for Manual Payment and clearly marked future payment options, laying the foundation for integrating real payment gateways in the upcoming lessons.

Lesson 73: Capturing and Validating the Buyer’s Selected Payment Method

Objective

In the previous lesson, we introduced a dynamic payment gateway selection interface. Buyers can now see the available payment methods, but their selection is not yet processed.

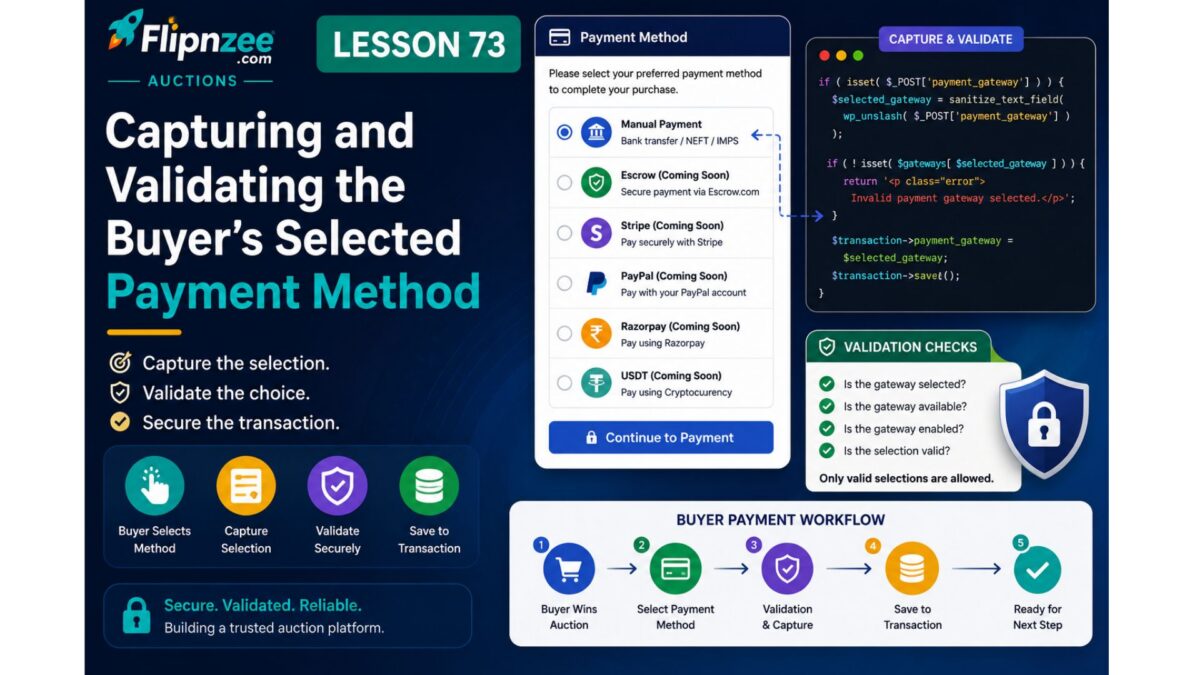
In this lesson, we’ll begin building the actual checkout workflow by wrapping the gateway list inside a form, capturing the selected payment method, validating it on submission, and preparing the plugin for gateway-specific payment processing.

Although real payment gateways are still not connected, this lesson establishes the core workflow that every future payment provider will use.


Why This Lesson Matters

A payment page is only useful if it can process the buyer’s choice.

Instead of immediately integrating Stripe, PayPal, or Escrow.com APIs, we first need a common checkout workflow that:

  • accepts the selected gateway
  • validates user input
  • prevents invalid gateway selections
  • prepares the transaction for payment
  • redirects to the appropriate payment handler

Once this workflow exists, every new payment provider can plug into it.


What We’ll Build

The payment page will evolve from:

○ Escrow.com
● Manual Payment
○ Stripe
○ PayPal

[Continue (Disabled)]

into:

○ Escrow.com
● Manual Payment
○ Stripe
○ PayPal

[Continue to Payment]

When the buyer clicks the button:

  1. The selected gateway is submitted.
  2. The selection is validated.
  3. Disabled gateways cannot be submitted.
  4. Manual Payment continues to the next step.
  5. Future gateways display an informative placeholder message.

Files We’ll Modify

Existing

includes/class-payment-page.php

Existing

includes/class-payment-manager.php

Features to Implement

1. Wrap Gateway Selection Inside a Form

Convert the payment gateway section into a proper HTML form.

The form will submit the selected gateway using the POST method.


2. Enable the Continue Button

Replace the disabled placeholder button with an active submit button.

Example:

Continue to Payment

3. Capture Buyer Selection

Read the submitted gateway using:

$_POST['payment_gateway']

Sanitize the value before processing.


4. Validate the Selected Gateway

Verify that:

  • the gateway exists
  • the gateway is currently enabled

If validation fails, display a user-friendly error message.


5. Prepare Gateway Routing

Rather than processing payments directly, create routing logic similar to:

if Manual Payment
    continue to manual payment workflow

if Escrow
    placeholder

if Stripe
    placeholder

if PayPal
    placeholder

This architecture allows future lessons to implement each gateway independently.


User Experience

Current:

Choose Gateway

Manual Payment

Continue (disabled)

After Lesson 73:

Choose Gateway

Manual Payment

Continue to Payment

Upon submission:

Selected Gateway:
Manual Payment

or

Escrow.com integration is coming soon.

depending on the selected gateway.


Architecture Improvement

Before Lesson 73:

Payment Page

↓

Display Gateways

After Lesson 73:

Payment Page

↓

Capture Form

↓

Validate Gateway

↓

Route to Selected Payment Method

↓

Future Gateway Handler

This creates a reusable payment flow that every payment provider will follow.


Benefits

By the end of this lesson, Flipnzee Auctions will have:

  • Functional payment selection form
  • Gateway validation
  • Secure handling of buyer input
  • Centralized routing logic
  • Foundation for integrating Escrow.com, Stripe, PayPal, Razorpay, and cryptocurrency payments

What We Won’t Build Yet

To keep the implementation stable, we are not implementing:

  • Escrow.com API
  • Stripe Checkout
  • PayPal Checkout
  • Razorpay API
  • Cryptocurrency payments
  • Payment confirmation
  • Webhooks
  • Automatic transaction updates

Those will be introduced in future lessons after the payment workflow has been completed.


Expected Outcome

By the end of Lesson 73, the Payment page will evolve from a static gateway selection interface into the first stage of a real checkout process. Buyers will be able to submit their chosen payment method, the plugin will validate the selection securely, and the architecture will be ready to hand control to the appropriate payment gateway implementation in future lessons.

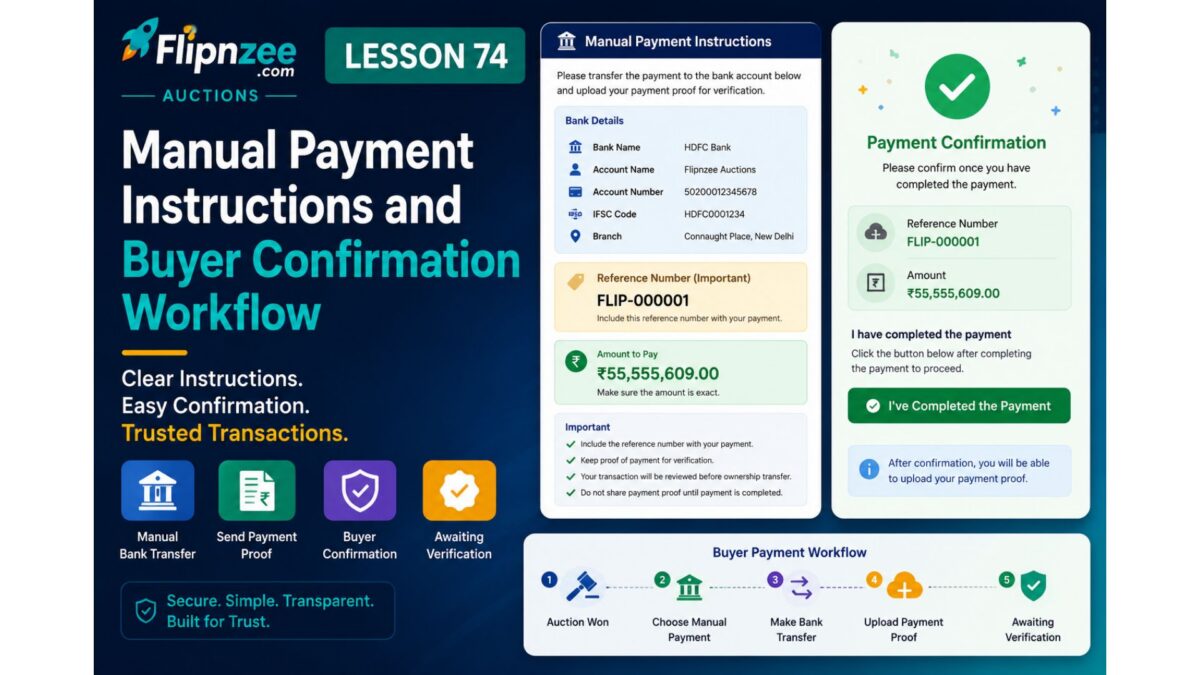
Lesson 74: Manual Payment Instructions and Buyer Confirmation Workflow

Introduction

With the payment gateway routing architecture completed in the previous lessons, buyers can now securely select their preferred payment method. However, selecting Manual Payment currently only displays a placeholder message.

In this lesson, we’ll implement the first real payment workflow in Flipnzee Auctions by displaying manual payment instructions after the buyer selects the Manual Payment gateway.

Rather than integrating a live payment processor immediately, we’ll build a professional workflow that guides buyers through the payment process while preparing the plugin for future automation.


What We’ll Build

After selecting Manual Payment and clicking Continue to Payment, the buyer will see:

  • A payment confirmation notice
  • Transaction reference number
  • Amount to be paid
  • Payment instructions
  • Placeholder bank/account details
  • Buyer checklist
  • “I’ve Completed Payment” button
  • Architecture ready for payment verification in future lessons

Why This Matters

Many marketplace platforms begin with manual payments before integrating payment gateways.

This approach allows:

  • Faster marketplace launch
  • Manual verification by administrators
  • Easy transition to automated gateways later
  • Reusable payment workflow

The same workflow will later support:

  • Escrow.com
  • Stripe
  • PayPal
  • Razorpay
  • USDT Cryptocurrency

Learning Objectives

By the end of this lesson you will:

  • Display professional payment instructions
  • Generate a transaction reference for buyers
  • Show payment amount clearly
  • Build a buyer payment confirmation interface
  • Prepare the plugin for payment verification
  • Create a reusable payment workflow

Planned User Experience

Instead of seeing only:

Manual Payment selected.

The buyer will see something similar to:

Manual Payment

Transaction Reference:
FLIP-000001

Amount:
₹55,555,609.00

Payment Instructions

✓ Transfer the exact amount.

✓ Use the reference number.

✓ Keep your payment receipt.

✓ Click "I've Completed Payment" after payment.

[ I've Completed Payment ]

What We’ll Implement

Step 1

Replace the temporary success message with a real payment instruction section.


Step 2

Generate a payment reference number using the transaction ID.

Example:

FLIP-000001

Step 3

Display the winning bid amount prominently.


Step 4

Display manual payment instructions.


Step 5

Add a buyer checklist before payment.


Step 6

Add an I’ve Completed Payment button.

Initially this button will not update the database.

It simply prepares the workflow for the next lesson.


Files We’ll Modify

Primary file:

includes/class-payment-page.php

Possible future updates:

includes/class-payment-manager.php

Skills You’ll Learn

  • Building multi-step payment workflows
  • Creating reusable payment interfaces
  • Improving user experience
  • Structuring payment pages
  • Preparing for payment verification
  • Designing scalable payment architecture

Expected Result

By the end of Lesson 74, buyers will experience a much more realistic payment process instead of a placeholder message. They’ll receive clear payment instructions, a unique transaction reference, the payment amount, and a confirmation button that prepares the marketplace for the payment verification workflow introduced in the next lesson.


Coming Next

Lesson 75: Recording Buyer Payment Confirmation and Updating Transaction Status

In the next lesson, clicking I’ve Completed Payment will begin updating the transaction status (for example, to Awaiting Verification) and lay the groundwork for seller/admin payment verification.

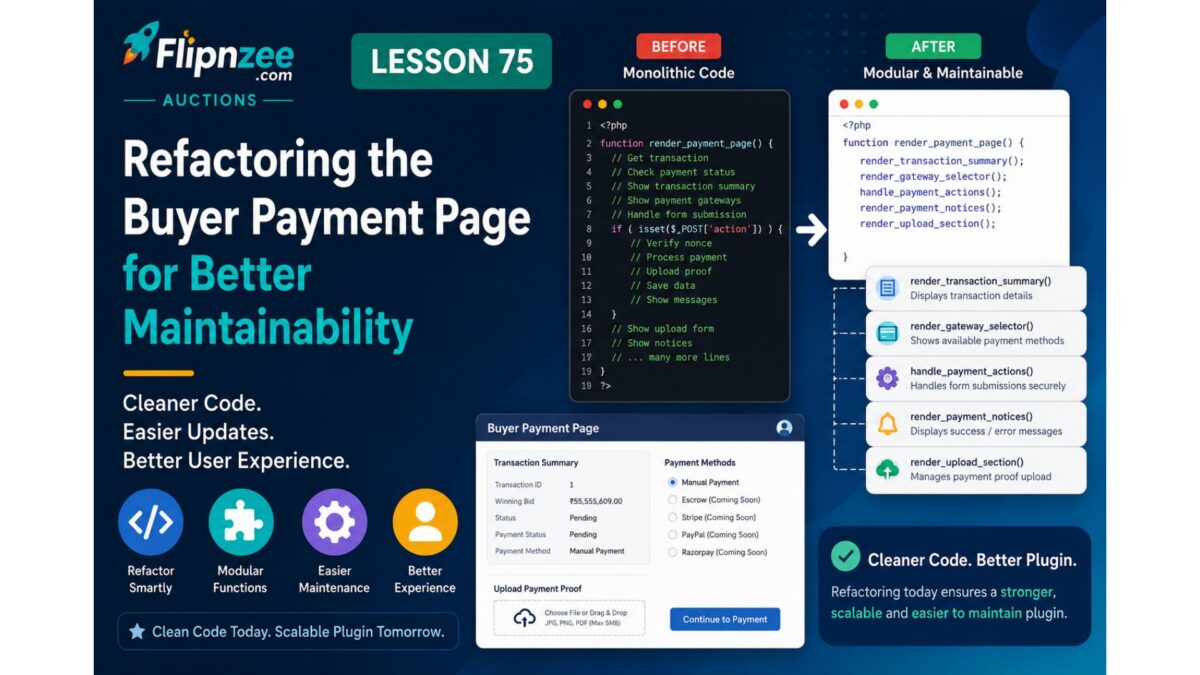
Lesson 75: Refactoring the Buyer Payment Page for Better Maintainability

Introduction

As new payment features were added in previous lessons, the class-payment-page.php file began taking on multiple responsibilities. It was loading transactions, processing form submissions, rendering payment instructions, displaying transaction summaries, and generating the payment gateway interface.

Before adding more complex features such as payment proof uploads, transaction status updates, and administrator verification, it became important to reorganize the code into smaller, reusable methods.

In this lesson, we refactor the Buyer Payment Page without changing its functionality. The goal is to improve readability, maintainability, and prepare the payment architecture for future enhancements.


Why Refactor?

Rather than allowing one method to grow indefinitely, we separate different responsibilities into dedicated helper methods.

Benefits include:

  • Cleaner code
  • Easier debugging
  • Better readability
  • Improved reusability
  • Simpler future development
  • Better alignment with object-oriented programming principles

What We Refactored

1. Transaction Summary

The payment summary table was moved into its own method:

private static function render_transaction_summary( $transaction )

This isolates all transaction display logic from the main rendering workflow.


2. Gateway Selection

The payment gateway form was extracted into:

private static function render_gateway_selector( $gateways )

This method now handles:

  • Gateway radio buttons
  • WordPress nonce
  • Payment action buttons

3. Manual Payment Instructions

The manual payment instructions were extracted into:

private static function render_manual_payment( $transaction )

This keeps all manual payment presentation in one place and makes future enhancements (payment proof upload, bank details, etc.) much easier.


4. Cleaner Main Render Method

Instead of containing hundreds of lines of mixed HTML and PHP, the main render() method now delegates responsibilities to helper methods, making the overall flow much easier to understand.


Architecture Before Refactoring

render()

├── Transaction Summary
├── Manual Payment HTML
├── Gateway Form
├── Payment Instructions
├── Form Processing
└── Validation

Architecture After Refactoring

render()
│
├── Process Request
│
├── render_manual_payment()
│
├── render_transaction_summary()
│
└── render_gateway_selector()

This modular approach makes each method easier to read, test, and extend.


Files Modified

includes/class-payment-page.php

Skills Learned

During this lesson, we practiced:

  • Refactoring legacy code
  • Separating responsibilities
  • Creating reusable helper methods
  • Improving object-oriented design
  • Preparing a codebase for future expansion

Outcome

Although this lesson did not introduce new user-facing functionality, it significantly improved the internal architecture of the payment system. The Buyer Payment Page is now modular, easier to maintain, and ready for upcoming features such as payment proof uploads, transaction status updates, administrator verification, and future payment gateway integrations.


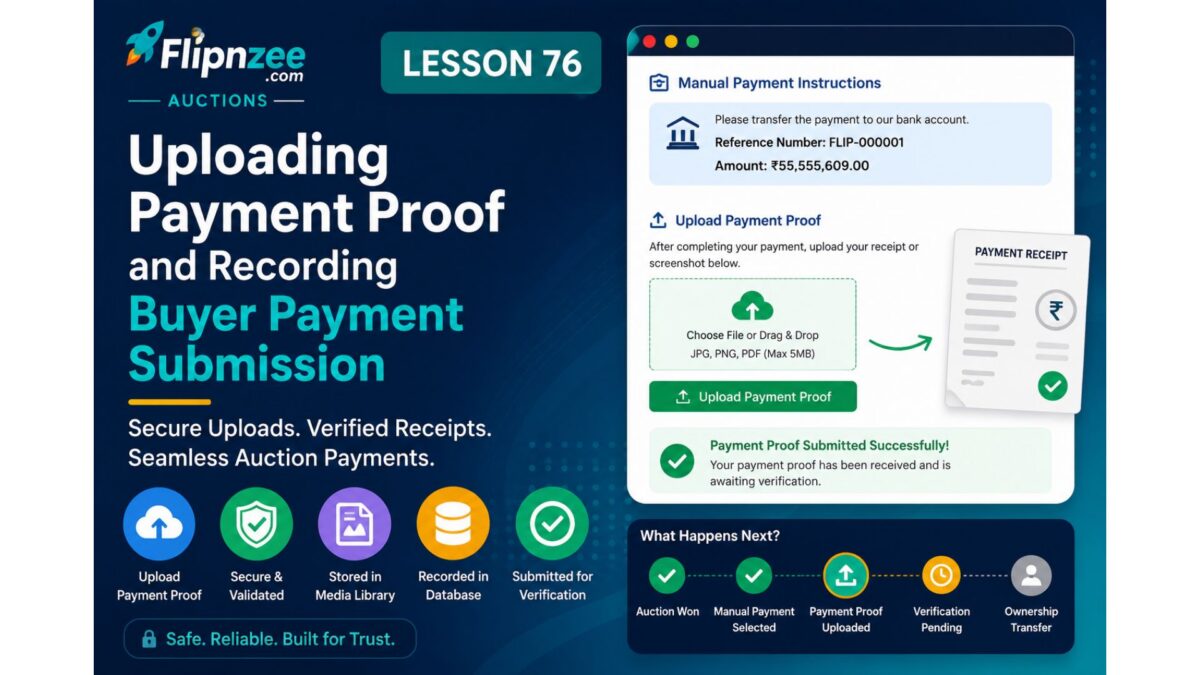
Lesson 76: Uploading Payment Proof and Recording Buyer Payment Submission

Introduction

With the Buyer Payment Page now refactored into modular components, the payment system is ready for its next major milestone.

In previous lessons, buyers could:

  • View their transaction details
  • Select a payment gateway
  • Read manual payment instructions
  • Receive a unique payment reference number

However, after making a payment, there is still no mechanism for buyers to notify the marketplace or provide proof that the payment has been completed.

In this lesson, we will implement the Payment Proof Upload feature. Buyers will be able to upload a payment receipt or screenshot directly from the payment page, and Flipnzee will securely store the uploaded file while associating it with the transaction for later administrator review.

This marks the beginning of the complete manual payment verification workflow.


Why This Feature Is Important

Manual payments require evidence before ownership of a digital asset can be transferred.

Instead of asking buyers to send screenshots through email or messaging apps, Flipnzee will manage everything inside the marketplace.

Benefits include:

  • Centralized payment records
  • Better buyer experience
  • Easier administrator verification
  • Improved transaction tracking
  • Foundation for dispute resolution
  • Scalable payment workflow

What We Will Build

After completing this lesson, buyers will be able to:

  • Upload payment proof directly from the payment page.
  • Submit JPG, PNG, or PDF payment receipts.
  • Securely upload files using WordPress.
  • Associate uploaded proof with the transaction.
  • Receive confirmation that the proof has been submitted.
  • Prepare the transaction for administrator verification.

Learning Objectives

By the end of this lesson, you will learn how to:

  • Create secure file upload forms.
  • Handle multipart form submissions.
  • Validate uploaded files.
  • Upload files to the WordPress Media Library.
  • Store attachment IDs against marketplace transactions.
  • Use WordPress upload APIs safely.
  • Prepare transactions for manual verification.

Implementation Roadmap

Step 1

Extend the payment form to support file uploads.


Step 2

Add a Payment Proof upload section.


Step 3

Allow supported file formats:

  • JPG
  • JPEG
  • PNG
  • PDF

Step 4

Secure the upload using the existing WordPress nonce.


Step 5

Upload the file into the WordPress Media Library.


Step 6

Store the uploaded attachment ID against the payment transaction.


Step 7

Display a success confirmation to the buyer.


Step 8

Prepare the transaction for administrator verification.


Files We’ll Modify

Primary files:

includes/class-payment-page.php
includes/class-payment-manager.php

Depending on your current database schema, we may also update the transaction table to include a field for the uploaded payment proof (for example, an attachment ID or file reference).


Expected Buyer Workflow

Buyer Wins Auction
        │
        ▼
Open Payment Page
        │
        ▼
Choose Manual Payment
        │
        ▼
View Payment Instructions
        │
        ▼
Complete Bank Transfer
        │
        ▼
Upload Payment Proof
        │
        ▼
Payment Proof Stored
        │
        ▼
Awaiting Verification

Skills You’ll Learn

During this lesson, you’ll gain experience with:

  • WordPress file upload handling
  • Media Library integration
  • Secure file validation
  • Transaction file associations
  • Payment workflow design
  • Preparing data for administrator approval

Expected Outcome

By the end of Lesson 76, Flipnzee will support one of the most important features of a marketplace payment system: allowing buyers to submit proof of payment directly within the platform. This removes the need for external communication channels and creates a streamlined, auditable workflow for manual payment verification.


Coming Next

Lesson 77: Administrator Payment Verification Dashboard

In the next lesson, administrators will be able to:

  • Review uploaded payment proofs.
  • View associated transaction details.
  • Approve or reject submitted payments.
  • Update payment and transaction statuses.
  • Notify buyers of verification results.
  • Continue the website ownership transfer process.

This will complete the first end-to-end manual payment workflow in the Flipnzee Auction plugin.

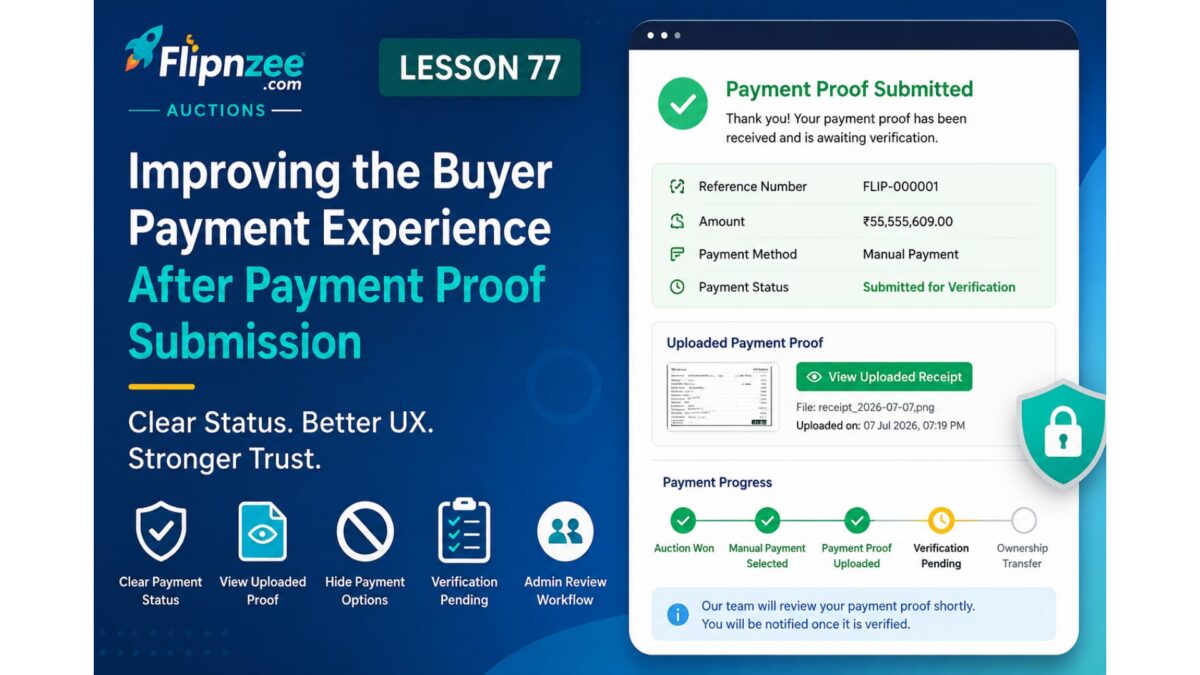
Lesson 77: Improving the Buyer Payment Experience After Payment Proof Submission

Overview

In the previous lesson, buyers gained the ability to upload payment proof securely using WordPress’ Media Library. Uploaded receipts were successfully stored, linked to transactions, and duplicate uploads were prevented.

Although the functionality worked correctly, the user experience could still be improved. After submitting payment proof, buyers continued to see payment options and generic transaction statuses, making it unclear whether their submission had been received successfully.

In this lesson, the focus shifts from functionality to user experience by redesigning the payment page after proof submission.


Objectives

By the end of this lesson, we will:

  • Replace generic Pending messages with clearer payment statuses.
  • Hide payment options after payment proof has been uploaded.
  • Display a professional confirmation message.
  • Add a “View Uploaded Payment Proof” link.
  • Prevent buyers from attempting another payment.
  • Prepare the plugin for administrator verification.

Why This Improvement Matters

Once a buyer uploads payment proof, their next question is usually:

  • Did my upload succeed?
  • Will someone review it?
  • What happens next?

Showing payment options again creates uncertainty.

Instead, the page should reassure buyers that everything has been received and explain the next step.


Current Workflow

Current payment flow:

Auction Won
      │
      ▼
Choose Manual Payment
      │
      ▼
Complete Bank Transfer
      │
      ▼
Upload Payment Proof
      │
      ▼
Success Message
      │
      ▼
Payment Options Still Visible ❌

Desired Workflow

After this lesson:

Auction Won
      │
      ▼
Choose Manual Payment
      │
      ▼
Complete Bank Transfer
      │
      ▼
Upload Payment Proof
      │
      ▼
Payment Submitted
      │
      ▼
Waiting for Admin Verification
      │
      ▼
Payment Options Hidden

Planned Improvements

1. Improve Payment Status

Instead of displaying:

Pending

buyers should see something more meaningful, such as:

Submitted for Verification

or

Awaiting Verification

2. Hide Payment Method Selection

Once payment proof exists, buyers should no longer see:

  • Manual Payment
  • Escrow
  • Stripe
  • PayPal
  • Razorpay
  • USDT

These options are no longer relevant after submission.


3. Hide Action Buttons

Buttons such as:

  • Continue to Payment
  • I’ve Completed Payment

should disappear after payment proof submission.


4. Display a Confirmation Card

Instead of payment controls, buyers should see a professional confirmation message.

Example:

✓ Payment Proof Submitted

Reference:
FLIP-000001

Payment Status:
Submitted for Verification

Thank you.

Our team will review your payment shortly.

Ownership transfer will begin once payment has been verified.

5. Add “View Uploaded Proof”

Since the uploaded receipt already exists in the WordPress Media Library, buyers should be able to confirm exactly what they uploaded.

Example:

View Uploaded Receipt

This will help buyers verify that the correct document was submitted.


6. Improve Transaction Summary

The transaction table should become more informative.

Example:

FieldValue
Transaction1
Winning Bid₹55,555,609
Payment StatusSubmitted for Verification
Payment MethodManual Payment
Payment ProofUploaded ✓

7. Introduce a Timeline

A simple progress indicator makes the payment journey much easier to understand.

✓ Auction Won

✓ Manual Payment Selected

✓ Payment Proof Uploaded

⏳ Verification Pending

□ Ownership Transfer

8. Prepare for Admin Approval

This lesson also prepares the foundation for administrator workflows.

Future lessons will allow administrators to:

  • Review uploaded receipts.
  • Approve payments.
  • Reject invalid payment proofs.
  • Request new payment proof.
  • Notify buyers automatically.

Expected Outcome

After completing this lesson:

  • Buyers clearly understand their payment has been received.
  • Duplicate payment attempts are eliminated.
  • The payment page becomes cleaner and more professional.
  • The plugin is ready for administrator verification features.
  • The overall user experience aligns with real-world marketplace payment workflows.

What You Will Learn

Throughout this lesson, you will learn how to:

  • Render different interfaces based on transaction state.
  • Improve user experience using conditional rendering.
  • Present payment progress more clearly.
  • Separate buyer actions from administrator actions.
  • Design workflows that scale as new payment gateways are added.

Next Lesson Preview

Lesson 78 – Building the Administrator Payment Verification Dashboard

In the next lesson, we will begin the administrator side of the payment system by creating a dashboard where site administrators can:

  • View submitted payment proofs.
  • Open uploaded receipts directly from the Media Library.
  • Approve or reject payments.
  • Update transaction statuses.
  • Trigger the next stage of the website ownership transfer workflow.

This will complete the first full end-to-end manual payment verification process in the Flipnzee Auctions plugin.