In Lesson 67, buyers gained a My Purchases dashboard listing all their purchased websites.
The next logical step is allowing buyers to click a purchase and view complete transaction information, just as administrators can from the WordPress dashboard.
This improves transparency and prepares the platform for payment confirmation, invoices, and future escrow integration.
What We Will Build
Instead of showing only:
Auction
Winning Bid
Status
Purchased
buyers will be able to click View Details and see a dedicated transaction page.
A foundation for future features such as payment receipts, invoices, escrow updates, download links, and support requests.
Why this is a better priority than a Seller Dashboard
Since Flipnzee Version 1 will only list websites sold by your own business, you already manage sales through the WordPress admin:
Listings
Bids
Transactions
Transaction Details
Activity Log
Your buyers, however, have no admin access. Enhancing their experience adds more value for Version 1 and lays the groundwork for future marketplace capabilities.
One of the first features buyers expect after winning an auction is the ability to review their purchases. In Lesson 67, the Flipnzee Auctions plugin gained a dedicated buyer dashboard through a new shortcode called My Purchases.
Instead of forcing buyers to contact the administrator or search through emails, they can now view their completed and pending purchases directly from a WordPress page.
What We Built
During this lesson, a new class named Flipnzee_My_Purchases was created to handle the buyer dashboard.
The class:
Checks whether the visitor is logged in.
Retrieves transactions belonging to the current buyer.
Displays a friendly message if there are no purchases.
Outputs a purchase table using a shortcode.
The new shortcode is:
[flipnzee_my_purchases]
This allows the dashboard to be placed on any WordPress page.
Loading the New Class
A new file was created:
includes/class-my-purchases.php
The class was then loaded inside the main plugin file using require_once, ensuring it is available whenever the plugin loads.
As always, syntax was verified after making the change using:
php -l includes/class-my-purchases.php
Registering the Shortcode
The shortcode was registered inside the shortcode manager.
This makes the following shortcode available throughout WordPress:
[flipnzee_my_purchases]
From this point onwards, any page can become a buyer dashboard simply by inserting this shortcode.
Retrieving Buyer Transactions
The next task was querying the custom transactions table.
Only transactions belonging to the currently logged-in buyer are retrieved.
The query filters records using the current WordPress user ID and orders them from newest to oldest.
If no purchases exist, a friendly message is displayed instead of an empty table.
Displaying Purchase Information
Once the data was retrieved successfully, a responsive HTML table was generated.
Initially the table displayed:
Listing ID
Winning Bid
Status
Purchase Date
Testing confirmed that multiple purchases were displayed correctly.
Improving the User Experience
The Listing ID was later replaced with the actual listing title using WordPress functions.
Instead of displaying:
491
buyers now see something like:
Wpnzee.com
This makes the dashboard far easier to understand.
Making Listings Clickable
The listing title was then converted into a hyperlink.
Buyers can now click directly on the purchased website to revisit the listing page.
This small enhancement greatly improves navigation throughout the marketplace.
Formatting Currency
Winning bid values were originally displayed as raw numbers:
55555609.00
The output was improved using PHP’s number_format() function together with the Rupee symbol.
The dashboard now displays:
₹55,555,609.00
which is much more readable and professional.
Final Result
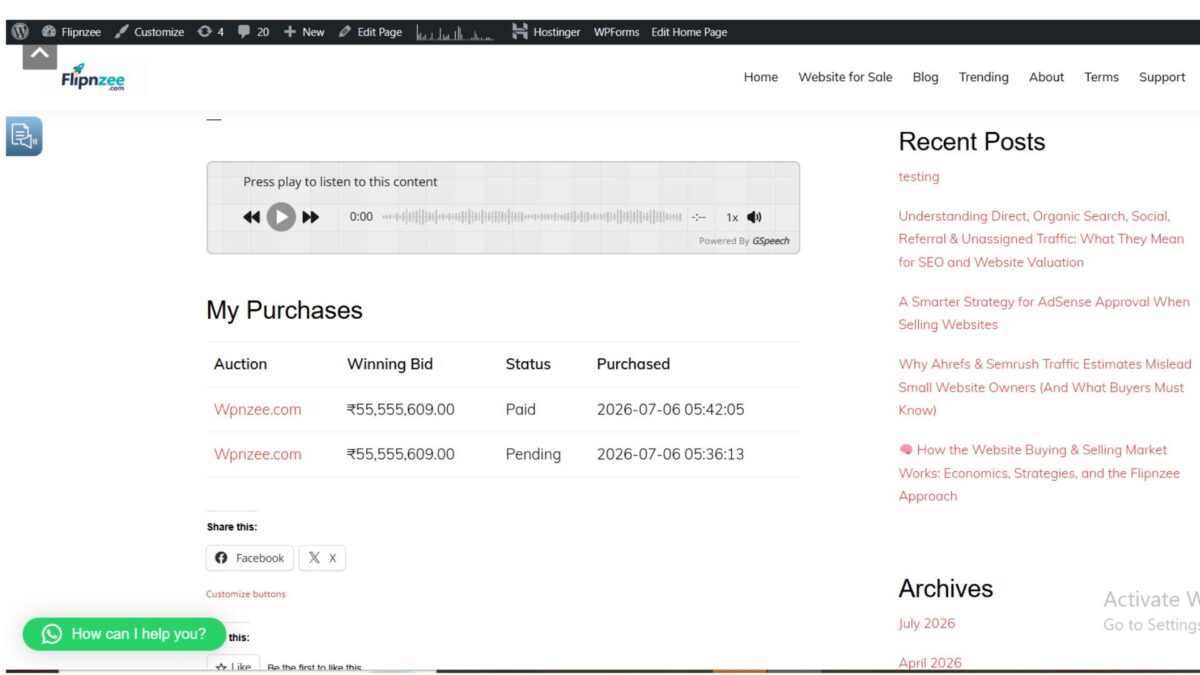
The completed buyer dashboard now displays:
Auction
Winning Bid
Status
Purchased
Wpnzee.com
₹55,555,609.00
Paid
2026-07-06 05:42:05
Wpnzee.com
₹55,555,609.00
Pending
2026-07-06 05:36:13
Each listing title links directly to its auction page.
Lessons Learned
A few important development practices were reinforced during this lesson:
Separate business logic into dedicated classes.
Keep database queries limited to the logged-in user.
Escape all displayed output using esc_html() and esc_url().
Prefer meaningful titles over internal database IDs.
Format monetary values for readability.
Test every incremental change before moving to the next step.
Download Source Code
Download the starting version of the plugin before the lesson:
This lesson marks an important milestone for Flipnzee Auctions.
Until now, most development focused on the administrator’s workflow—creating auctions, recording bids, generating transactions, and managing activity logs.
Lesson 67 introduces the first dedicated buyer-facing dashboard, allowing users to monitor their purchases without administrator assistance.
As the platform grows, this dashboard can be expanded with payment history, downloadable invoices, escrow updates, transaction completion status, and buyer support tools.
Even in its current form, it provides a solid foundation for a professional auction marketplace and brings Flipnzee one step closer to a production-ready Version 1 release.
In the previous lessons, we completed the backend transaction workflow:
Auctions close automatically.
Winners are determined.
Transactions are created.
Administrators can manage transactions.
Administrators can inspect detailed transaction information.
However, buyers currently have no way to see the auctions they have won.
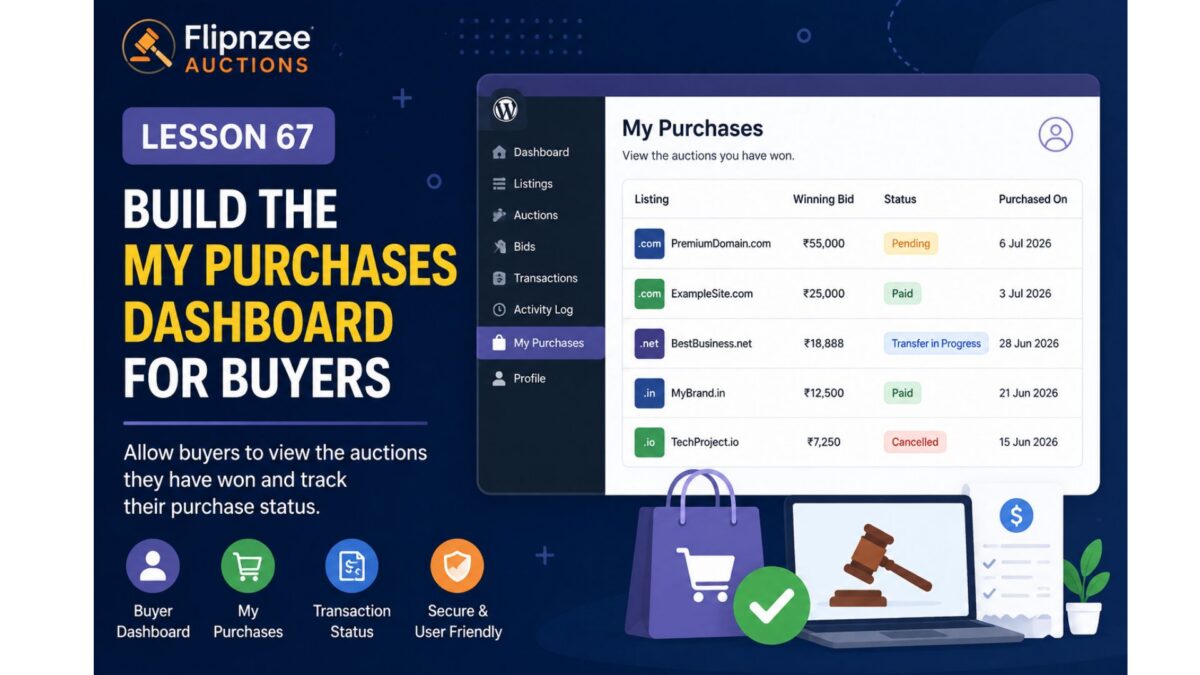
In this lesson, we will build the first user-facing transaction dashboard by introducing a My Purchases page.
Why This Lesson Matters
Imagine winning an auction on Flipnzee.com.
After placing the winning bid, you naturally expect to see:
What did I buy?
What was my winning bid?
Has the seller been notified?
Has payment been received?
Has the domain transfer started?
Without a buyer dashboard, users would need to contact support for every update.
The My Purchases page solves this problem.
Current Workflow
Auction

↓

Winner

↓

Transaction

↓

Administrator
New Workflow
Auction

↓

Winner

↓

Transaction

↓

Buyer Dashboard
What We’ll Build
A new shortcode:
[flipnzee_my_purchases]
When a logged-in buyer visits the page, they’ll see:
Auction
Winning Bid
Status
Purchased
PremiumDomain.com
₹55,000
Pending
6 Jul 2026
ExampleSite.com
₹25,000
Paid
3 Jul 2026
If the visitor is not logged in, they’ll see a friendly message asking them to sign in.
Files We’ll Modify
New
includes/class-my-purchases.php
Modify
flipnzee-auctions.php
Modify
includes/class-shortcodes.php
Reuse
includes/class-transaction-manager.php
Features
Step 1
Create the My Purchases class.
Step 2
Register the shortcode.
Step 3
Verify the user is logged in.
Step 4
Retrieve transactions where:
buyer_id = current_user_id()
Step 5
Display purchases in a WordPress table.
Step 6
Show:
Listing
Winning Bid
Status
Purchase Date
Step 7
Handle empty results gracefully.
Example:
You haven't purchased any auctions yet.
Expected Result
Logged-in buyers will see:
My Purchases

------------------------------------------------

Listing

PremiumDomain.com

Winning Bid

₹55,555

Status

Paid

Purchased

6 July 2026

------------------------------------------------

ExampleSite.com

Winning Bid

₹10,000

Status

Pending

Purchased

5 July 2026
Guests will see:
Please log in to view your purchases.
Future Enhancements
This page is intentionally designed to grow over time. Future lessons can extend it with:
View Transaction link
Escrow progress
Payment confirmation
Domain transfer status
Seller contact (when appropriate)
Transaction timeline
Download invoice
Email history
Skills You’ll Practice
WordPress shortcodes
User authentication
Current user retrieval
Database queries with prepared statements
Frontend table rendering
Secure output escaping
User dashboard design
Difficulty Level
Intermediate
This lesson introduces the first buyer-facing dashboard in the Flipnzee Auctions plugin. It connects the backend transaction system to the frontend, giving buyers immediate visibility into their purchases while establishing a reusable pattern for future user dashboards such as My Sales, My Auctions, and My Bids.
Why This Is the Right Next Step
From a marketplace perspective, this lesson provides immediate value to end users. Administrators already have the tools to manage auctions and transactions, but buyers need confidence that the platform is tracking their purchases. By introducing My Purchases, Flipnzee becomes more than an admin-managed auction system—it begins to function as a true online marketplace where users can monitor their own activity. This also lays the groundwork for future escrow updates, payment tracking, and ownership transfer notifications.
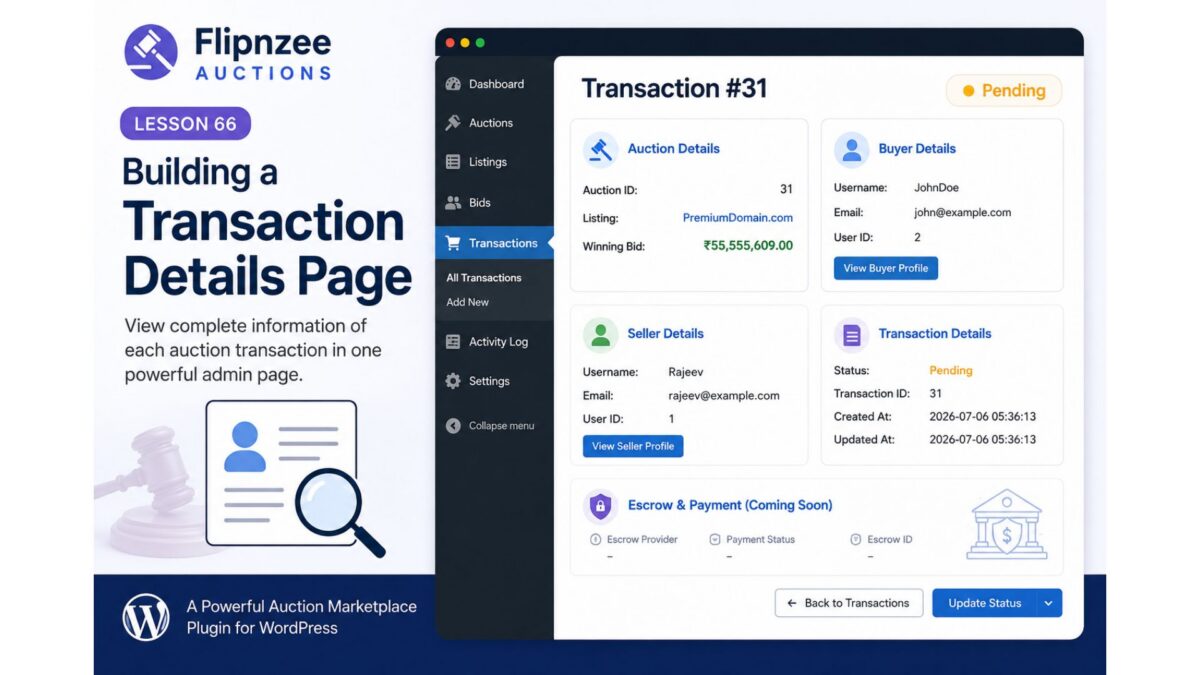
One of the biggest advantages of developing your own WordPress plugin is that you can continuously improve the user experience. In the previous lessons, the Flipnzee Auctions plugin was already creating transactions automatically after an auction ended and displaying them in a Transactions table. However, there was no way to inspect a transaction in detail.
In this lesson, a dedicated Transaction Details page was introduced. This page provides administrators with complete information about an individual auction transaction and lays the foundation for future features such as escrow management, payment verification, domain transfer tracking, and audit logs.
What We Built
Instead of only viewing a transaction inside a table, administrators can now click a View action to open a dedicated page displaying all transaction information.
Current information displayed includes:
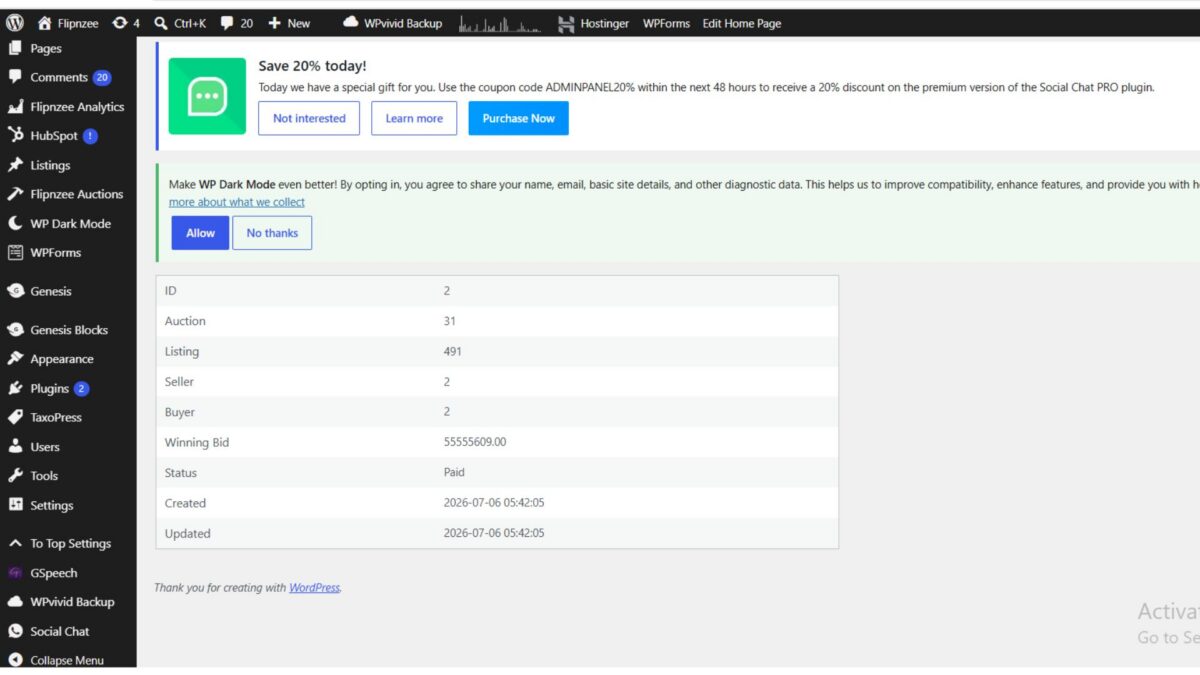
Transaction ID
Auction ID
Listing ID
Seller ID
Buyer ID
Winning Bid
Transaction Status
Created Date
Updated Date
This provides a much cleaner workflow compared to searching through database records manually.
Step 1 – Creating the Transaction Details Admin Page
A new admin class was created:
admin/class-admin-transaction-details.php
This class is responsible for rendering the Transaction Details screen inside the WordPress admin dashboard.
Initially, the page only displayed a placeholder message while the routing and menu registration were tested.
Step 2 – Registering the Admin Page
The new page was registered inside the plugin’s admin menu.
Unlike normal menu pages, this page is hidden from the sidebar because it is accessed directly from the Transactions table using a URL similar to:
During this implementation, several important development practices were reinforced:
Build features incrementally rather than all at once.
Validate user input before querying the database.
Always use prepared SQL statements.
Check for missing records gracefully.
Run PHP syntax checks before uploading changes.
Test every modification immediately to catch errors early.
Use dedicated detail pages instead of overcrowding list tables.
Conclusion
Lesson 66 significantly improves the administrative experience of the Flipnzee Auctions plugin. Instead of viewing transactions only in a summary table, administrators can now inspect individual transactions on a dedicated page with all essential details.
More importantly, this page serves as the foundation for advanced transaction management features planned for future lessons, bringing the plugin another step closer to a production-ready auction platform.
In previous lessons, we built a complete transaction workflow:
Auctions close automatically.
Winners are determined.
Transactions are created automatically.
Administrators can view transactions.
Transaction statuses can be updated.
However, administrators still cannot inspect an individual transaction in detail.
In this lesson, we’ll build a dedicated Transaction Details page where administrators can view every aspect of a completed auction before moving on to escrow, payment, or ownership transfer.
What You Will Learn
In this lesson you will learn how to:
Create an admin details page.
Read a single transaction securely.
Display auction information.
Display buyer and seller information.
Display listing information.
Display winning bid information.
Display transaction timeline.
Prepare the page for escrow integration.
Why This Lesson Matters
Imagine receiving an email from a buyer asking:
“Has my payment been received?”
Currently an administrator would need to search several database tables.
Instead, we’ll provide a dedicated transaction page showing everything in one place.
Escrow Provider

Payment Status

Escrow ID

Release Funds

Release Domain

Complete Transaction
These features will be implemented in later lessons without redesigning the page.
Skills You’ll Practice
WordPress admin pages
Secure URL parameters
Database lookups
WordPress user functions
Data presentation
Preparing for escrow integration
Clean admin UI design
Difficulty Level
Intermediate
This lesson combines custom admin pages, database retrieval, and structured data presentation. It also establishes the administrative workflow that will support escrow services, payment processing, and domain or website transfers in future lessons.
Final Thoughts
Lesson 66 marks another important milestone in the Flipnzee Auctions plugin. Instead of treating transactions as simple database records, administrators will be able to inspect every completed auction from a single screen. This improves usability, simplifies support, and creates the ideal foundation for integrating escrow providers, payment gateways, email notifications, and ownership transfer workflows as the plugin moves closer to powering live auctions on Flipnzee.com.
After building the Transactions dashboard in the previous lesson, the next improvement was to make the transactions interactive. Instead of simply displaying transaction records, administrators should be able to manage the progress of each transaction as the auction moves through its post-sale lifecycle.
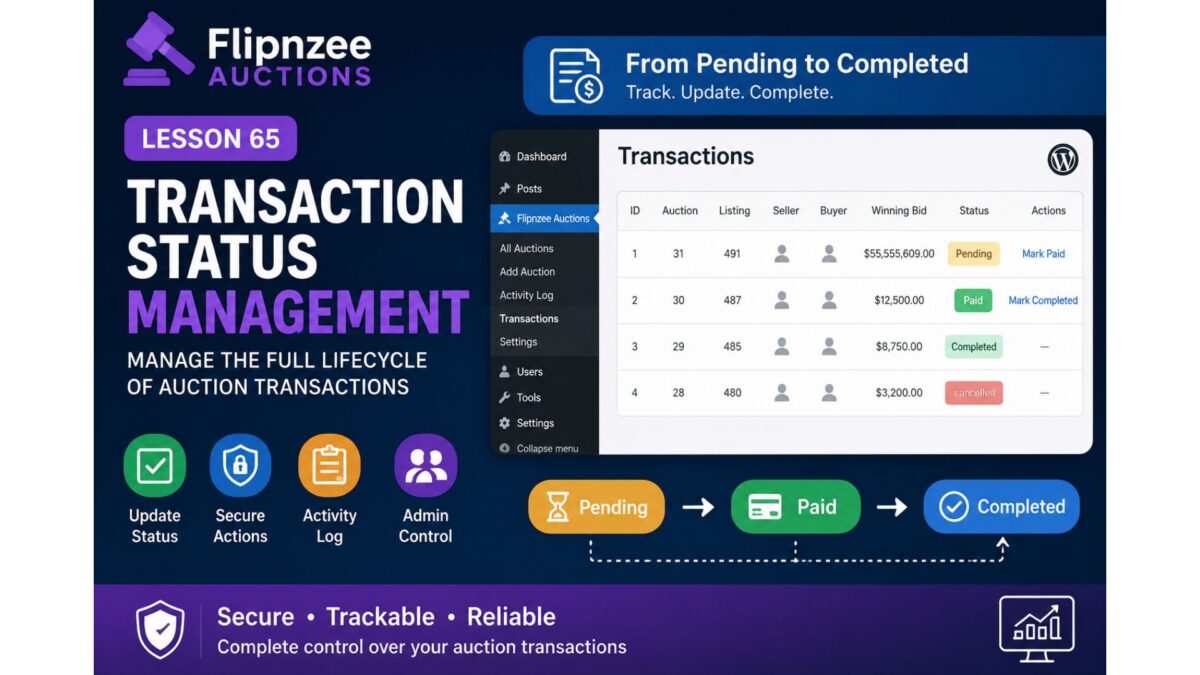
In this lesson, we implemented the foundation for transaction status management, allowing administrators to update transaction statuses securely from the WordPress admin area while recording every status change in the activity log.
Objective
The goal of this lesson was to transform the Transactions page from a read-only report into the beginning of a transaction management system.
Instead of every transaction remaining permanently in a Pending state, administrators can now move transactions through different stages.
Initial Workflow
Before this lesson, every completed auction produced a transaction like this:
Transaction
Status
#1
Pending
#2
Pending
Although transactions were stored correctly, there was no mechanism to update their progress.
Step 1 — Extend the Transaction Manager
The first task was adding a reusable method responsible for updating transaction status.
This introduces workflow-oriented actions directly into the Transactions page.
Step 5 — Testing the Workflow
After uploading the updated plugin, several scenarios were tested.
Successful observations included:
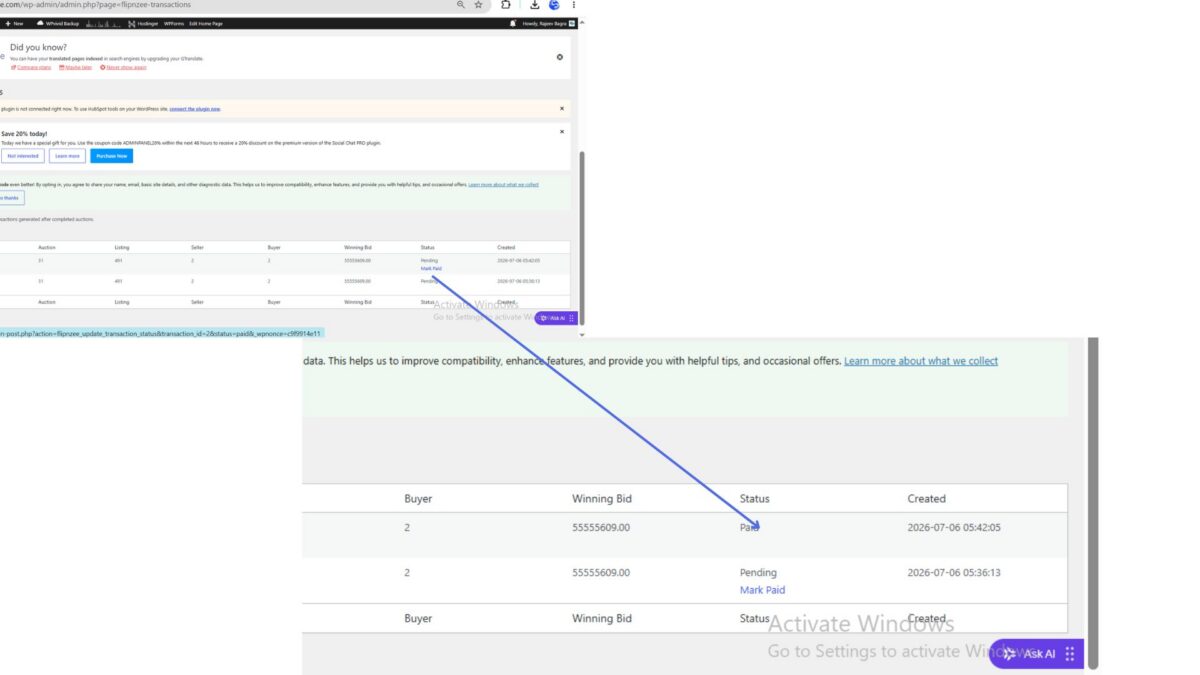
Transaction status changed from Pending to Paid.
The database updated correctly.
The Activity Log recorded the status change.
Administrators were redirected back to the Transactions page after the update.
This confirmed that the backend workflow was functioning as intended.
Challenges Encountered
During implementation, several issues arose that provided valuable learning opportunities.
Duplicate Methods
While extending the Transaction Manager, a duplicate update_status() method was accidentally created, resulting in a fatal PHP error. Removing the duplicate resolved the issue and reinforced the importance of keeping classes organized.
PHP Syntax Errors
While adding new methods, braces were temporarily misplaced, causing syntax errors. Incremental syntax checking with:
php -l includes/class-transaction-manager.php
helped identify and correct these mistakes before deployment.
Transactions Table Rendering
The custom Transactions table successfully displayed transaction data and action links. Status updates from Pending to Paid worked correctly, and the database reflected the changes. However, the “Mark Completed” action did not appear after a transaction entered the Paid state.
This did not affect the underlying transaction workflow or status updates, but highlighted a rendering issue within the current WP_List_Table implementation. Since the core transaction management functionality was already operational, further refinement of the table interface was deferred to a future lesson focused on polishing the admin experience.
Lessons Learned
This lesson demonstrated several important WordPress development practices:
Separate business logic from user interface rendering.
Protect administrative actions with nonces.
Verify user capabilities before processing requests.
By the end of Lesson 65, the Flipnzee Auctions plugin evolved beyond simply storing transactions. Administrators can now begin managing the transaction lifecycle by updating statuses securely through the WordPress admin interface. Although some interface refinements remain for future lessons, the underlying architecture for transaction status management is now in place.
This implementation provides a solid foundation for the next phase of development, where transaction status changes will be connected to buyer and seller notifications, escrow integration, payment workflows, and ownership transfer processes, bringing the plugin closer to supporting real-world online auctions on Flipnzee.com.
In this lesson, you’ll enhance the Transactions page by allowing administrators to change the status of auction transactions directly from the WordPress dashboard.
By the end of this lesson, you’ll be able to:
Display transaction status as a clickable action
Add row actions to each transaction
Update transaction status securely
Use WordPress nonces for protection
Process admin actions with custom handlers
Record status changes in the activity log
Why This Matters
Currently every transaction is stored like this:
ID
Status
1
pending
2
pending
Once payment is received or the website/domain has been transferred, an administrator needs a way to mark the transaction as:
Pending
Paid
Completed
Cancelled
Refunded (future lesson)
Without this capability, the transaction system is read-only.
What We’ll Build
We’ll transform this:
Status
pending
into something like:
Status
Pending

[Mark Paid]
Later:
Status
Paid

[Mark Completed]
Finally:
Status
Completed
Files We’ll Modify
admin/class-admin-transactions.php
includes/class-transaction-manager.php
includes/class-activity-log.php
flipnzee-auctions.php
Features We’ll Implement
Step 1
Create transaction status update method.
Step 2
Add admin action handler.
Step 3
Verify WordPress nonce.
Step 4
Update transaction status in database.
Step 5
Write activity log entry.
Step 6
Display success notice.
Step 7
Add “Mark Paid” row action.
Step 8
Add “Mark Completed” row action.
Step 9
Hide actions once transaction is completed.
Step 10
Test the complete workflow.
Expected Result
Instead of only viewing transactions, administrators will be able to manage their progress:
Transaction #5

Status: Pending

Actions:
✓ Mark Paid
↓
Status: Paid

Actions:
✓ Mark Completed
↓
Status: Completed
Skills You’ll Learn
WordPress admin action handlers
Secure nonce verification
Updating custom database tables
Admin notices
Row actions in WP_List_Table
Activity logging
Transaction workflow design
End Result
After Lesson 65, the Flipnzee Auctions plugin will evolve from simply recording transactions to managing the full transaction lifecycle. Administrators will be able to move transactions through meaningful stages—such as Pending, Paid, and Completed—while every status change is securely processed and automatically recorded in the activity log. This creates a practical workflow for handling completed auctions and prepares the plugin for future enhancements like payment gateway integration, downloadable invoices, email notifications, refunds, and commission tracking.
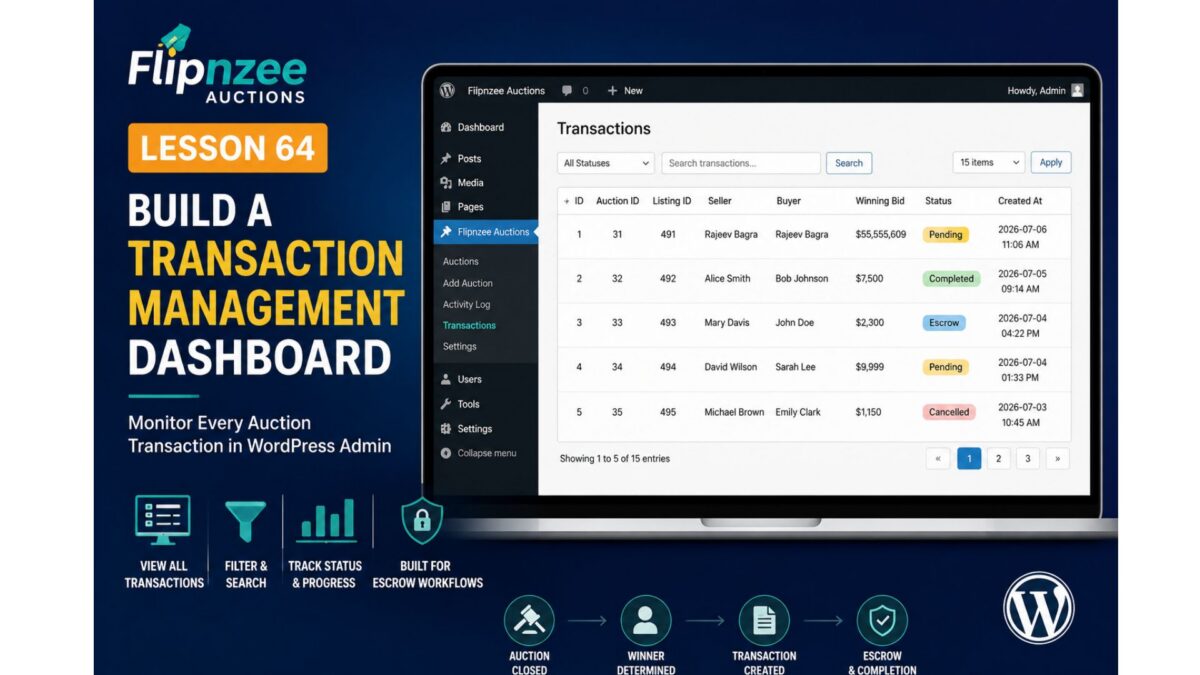
After completing automatic transaction generation in Lesson 63, the next step was to allow administrators to view all completed auction transactions directly from the WordPress dashboard.
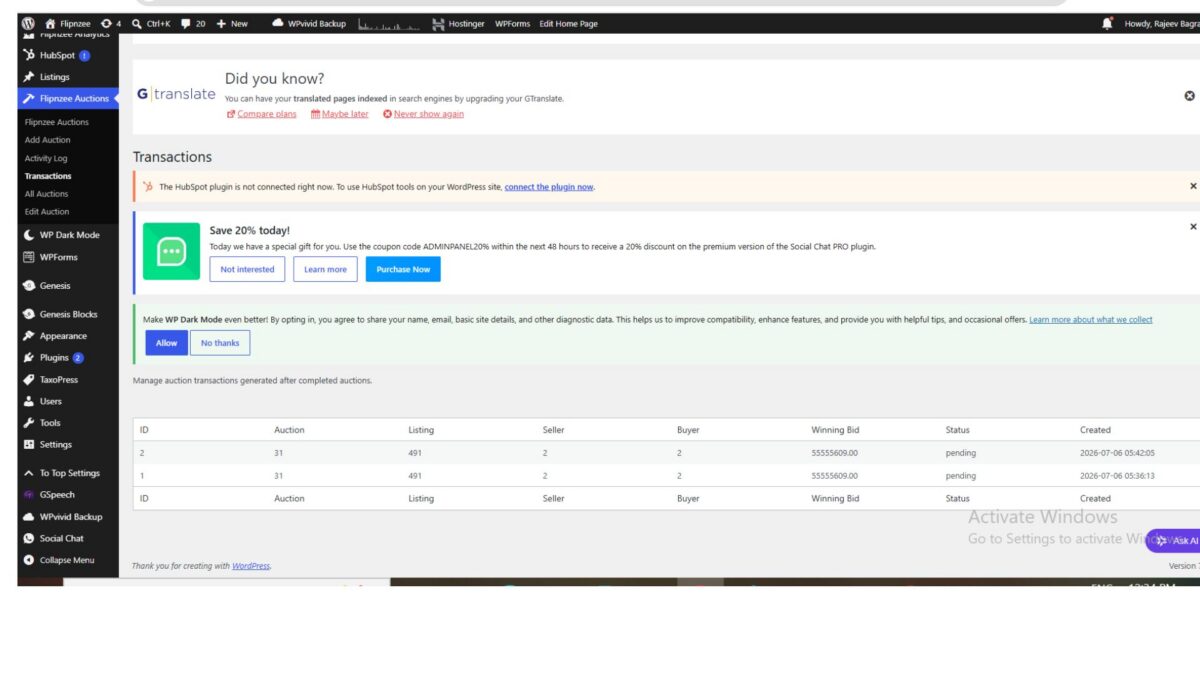
In this lesson, we created a dedicated Transactions admin page that displays every transaction stored in the plugin’s custom database table. This gives administrators a centralized place to monitor completed sales and lays the groundwork for future payment processing, invoices, commissions, refunds, and reporting.
What We Built
By the end of this lesson, the plugin includes:
A new Transactions submenu
A custom admin page
A WP_List_Table based transactions table
Automatic loading of transaction records
Display of important transaction information
Professional WordPress admin interface
Step 1 — Create the Transactions Table Class
Inside the admin folder create:
admin/class-admin-transactions.php
This file is responsible for:
Loading the transactions page
Creating the transactions table
Displaying all stored transactions
Step 2 — Create the Transactions List Table
Inside the same file create a class extending WP_List_Table.
Example:
class Flipnzee_Transactions_Table extends WP_List_Table {

}
This gives us the familiar WordPress admin table interface.
These columns match the structure of the custom transactions database table.
Step 4 — Load Transactions From Database
Inside prepare_items() we queried the database.
global $wpdb;

$table = $wpdb->prefix . 'flipnzee_transactions';

$this->items = $wpdb->get_results(
    "SELECT * FROM {$table} ORDER BY id DESC",
    ARRAY_A
);
The newest transactions now appear first.
Step 5 — Configure Table Headers
Still inside prepare_items() we configured the table headers.
Without this step the Transactions page would never load.
Step 10 — Test the Feature
After activating the updated plugin we verified everything worked correctly.
The Transactions page displayed:
Transaction ID
Auction ID
Listing ID
Seller
Buyer
Winning Bid
Status
Created Date
Every automatically generated transaction appeared successfully.
Result
The Flipnzee Auctions plugin now provides a dedicated Transactions dashboard for administrators.
When an auction ends and a winner is determined, the plugin now has the ability to:
Store the transaction
Display it inside WordPress
Allow administrators to monitor completed sales
This transforms the plugin from simply tracking auctions into managing the entire auction lifecycle.
What We Learned
In this lesson we learned how to:
Create a custom WordPress admin page
Use WP_List_Table
Display custom database records
Load transaction history
Register new admin submenu pages
Build a professional backend interface
Challenges Faced
During implementation we encountered a few issues that are common when building WordPress admin tables:
A misplaced method inside prepare_items() caused PHP syntax errors, which were resolved by moving get_table_classes() outside the method while keeping it inside the class.
Initially, the Transactions menu did not appear because the new admin file had not been included in the main plugin file.
After everything worked, an extra header row appeared at the bottom of the table. This is a cosmetic behavior of the simplified WP_List_Table implementation and does not affect functionality. It will be refined in a future lesson when we enhance sorting, pagination, and table styling.
Working through these issues reinforced the importance of careful class structure, proper file loading, and incremental testing during plugin development.
Download Source Code
Download the starting version of the plugin before the lesson:
By the end of Lesson 64, Flipnzee Auctions includes a fully functional Transactions management page that lists all automatically generated auction transactions. This provides administrators with immediate visibility into completed sales and establishes the foundation for future features such as payment integration, invoices, commissions, refunds, transaction status updates, and downloadable reports.
But administrators cannot actually see or manage transactions.
A transaction dashboard is the natural bridge before adding:
Escrow integration
Payment processing
Buyer/Seller confirmation
Domain transfer workflow
Status updates
Files We’ll Modify
New
admin/class-transactions-table.php
A WordPress list table for transactions.
New
admin/class-admin-transactions.php
Renders the Transactions page.
Modify
admin/class-admin.php
Register the new submenu.
Reuse
includes/class-transaction-manager.php
Read transaction data from the database.
Features
1. Transactions Table
Display:
Transaction ID
Auction ID
Listing ID
Seller
Buyer
Winning Bid
Status
Created Date
2. Pagination
Support large numbers of transactions.
3. Search
Search by:
Auction ID
Listing ID
Buyer
Seller
4. Status Filter
Dropdown:
All
Pending
Escrow
Completed
Cancelled
Refunded
5. Sorting
Allow sorting by:
Date
Winning Bid
Status
6. Future Ready
We’ll design the table so adding action buttons later is easy:
View
Mark Escrow Received
Mark Completed
Cancel
Those buttons won’t do anything yet—they’ll be implemented in later lessons.
What We’ll Learn
During this lesson you’ll practice:
Creating another WP_List_Table
Reading custom database tables
Pagination
Searching
Sorting
Filtering
Secure admin pages
Preparing for escrow workflows
Expected Result
The admin will have a professional Transactions dashboard similar to WordPress Posts or Users.
Example:
-------------------------------------------------------------
 Transactions

 ID   Auction  Buyer      Seller     Winning Bid     Status
-------------------------------------------------------------
 1      31     Rajeev     Rajeev      $55,555,609    Pending
 2      32     Alice      Bob         $7,500         Completed
 3      33     John       Mary        $2,300         Escrow
-------------------------------------------------------------
Why This Is the Right Next Step
This lesson doesn’t just add another admin screen—it creates the control center for everything that happens after an auction ends. Once this dashboard exists, integrating an escrow provider becomes much simpler because every transaction will have a visible lifecycle (Pending → Escrow → Completed).
After Lesson 64, we’ll be in an excellent position to begin the escrow integration itself, keeping your focus on making Flipnzee.com ready to host real auctions.
After completing the database structure in Lesson 62, the next logical step was to automate what happens after an auction successfully ends.
Instead of tightly coupling transaction creation with the auction closing logic, this lesson introduced an event-driven architecture using WordPress hooks. This approach keeps the plugin modular and makes future integrations—such as escrow services, payment gateways, and notifications—much easier.
Objective
Automatically create a transaction record whenever an auction winner is determined.
By the end of this lesson:
Auction winner determination triggers an event.
The Transaction Manager listens for that event.
A transaction is automatically created.
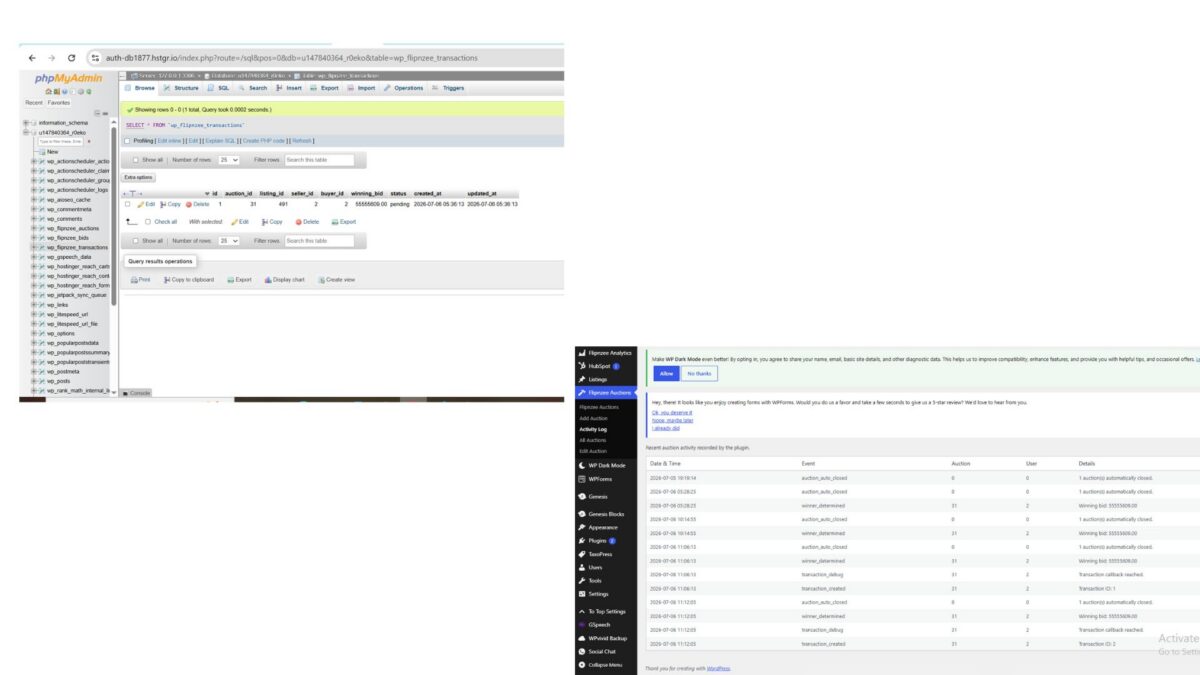
The Activity Log records the transaction creation.
Step 1: Fire an Event After Determining the Winner
Winner determination is handled inside:
includes/class-bid-manager.php
After recording the winner in the Activity Log, add:
During implementation, an important architectural refinement emerged.
Initially, the event hook was placed inside the Auction Manager. However, testing showed that winner determination actually occurs within the Bid Manager. Moving the hook to the correct location ensured that the event is fired exactly when the winning bid is known.
This adjustment resulted in a cleaner and more maintainable design.
Lessons Learned
Several important WordPress development concepts were reinforced:
WordPress hooks can be used to build event-driven systems.
Managers should communicate through actions rather than direct method calls.
By the end of this lesson, the Flipnzee Auctions plugin automatically creates a transaction record whenever an auction successfully determines a winner. The transaction is stored in its own database table and recorded in the Activity Log, providing a reliable foundation for future features such as escrow integration, payment processing, seller confirmation, buyer confirmation, and ownership transfer.
This lesson marks an important architectural milestone, transitioning the plugin toward a scalable, event-driven design that will support the remaining stages of the auction lifecycle.