Implementation Lesson 35: Manually Activate Scheduled Auctions in the Flipnzee Auctions Plugin

In the previous lesson, we added Auction Start and Auction End scheduling fields to our auctions. However, simply storing these dates in the database is not enough. The plugin also needs a mechanism to activate auctions when their scheduled start time arrives.

In this implementation lesson, we built the first version of that mechanism by adding a Manual Auction Activation feature.

Although the final version will eventually run automatically using WordPress Cron, implementing a manual activation tool first makes development, testing, and debugging much easier.


What We Built

By the end of this lesson, our plugin can:

  • Store scheduled auction start dates.
  • Compare scheduled start dates with the current WordPress time.
  • Activate eligible auctions.
  • Provide an administrator button to run the activation process manually.
  • Lay the foundation for future automation.

Step 1: Create the Activation Function
Inside class-auction-manager.php, we created a new method:

public static function activate_scheduled_auctions()

This method:

  • Retrieves the current WordPress time.
  • Searches for auctions whose:
    • status is draft
    • Auction Start has passed
  • Updates their status to:
active

Step 2: Use a Single SQL UPDATE Query

Instead of loading every auction into PHP, we used one efficient SQL query.

The query updates every matching auction in one operation.

Benefits include:

  • Better performance
  • Cleaner code
  • Easier maintenance
  • Scales well for hundreds or thousands of auctions

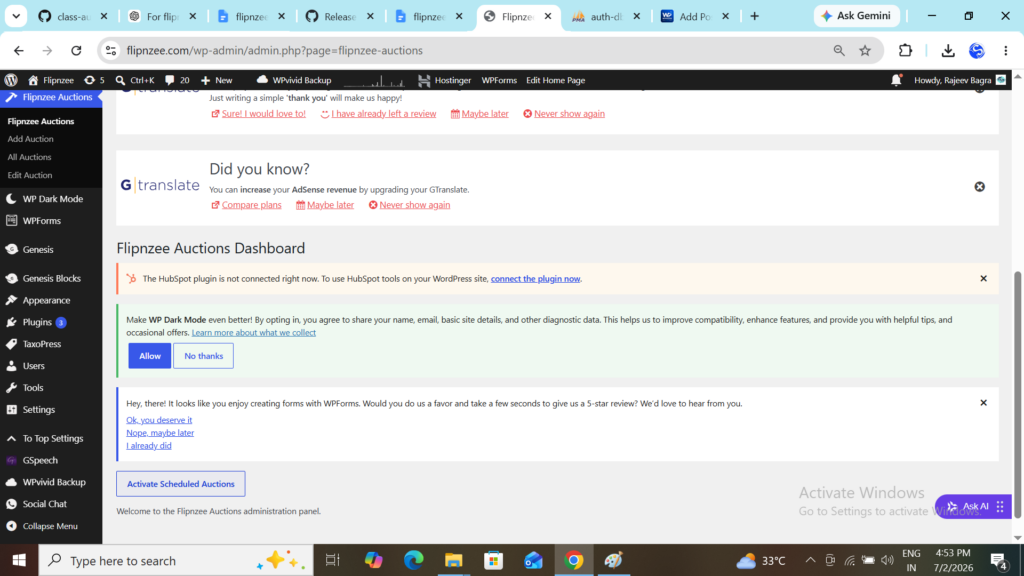
Step 3: Add a Dashboard Button

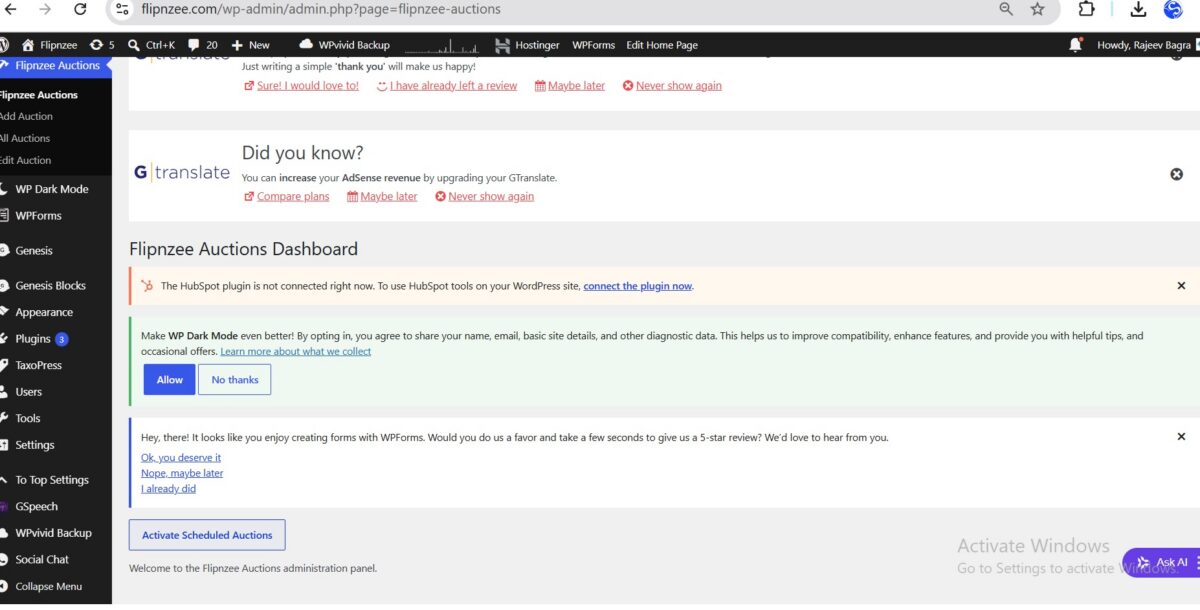
Inside the Flipnzee Auctions dashboard, we added a new button:

Activate Scheduled Auctions

Clicking this button executes the activation process immediately.

This allows us to verify our scheduling logic before introducing automatic background processing.


Step 4: Register a Secure Admin Action

We registered a custom admin action using:

admin_post_flipnzee_activate_scheduled_auctions

The handler performs several important tasks:

  • Capability check
  • Nonce verification
  • Calls the activation function
  • Redirects back to the dashboard

This follows standard WordPress security practices.


Step 5: Add Nonce Protection

Every activation request includes a WordPress nonce.

Before processing, the plugin verifies that the request originated from the WordPress administration area.

This prevents Cross-Site Request Forgery (CSRF) attacks.


Step 6: Test the Feature

Testing involved:

  • Creating multiple auctions
  • Assigning different Auction Start dates
  • Saving them
  • Clicking Activate Scheduled Auctions
  • Verifying database values using phpMyAdmin

This confirmed that our activation logic was executing correctly.


Debugging an Unexpected Issue

During testing, auctions were not changing from Draft to Active, even though their scheduled start times had already passed.

Instead of assuming the SQL query was incorrect, we debugged the process step by step.


Checking the Database
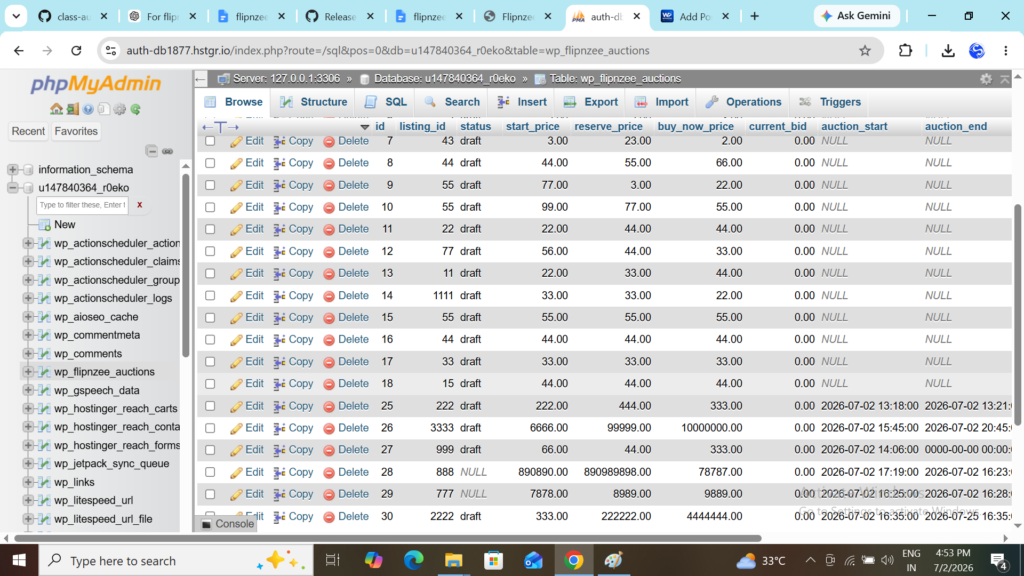
Using phpMyAdmin, we verified that:

  • Auction Start values were stored correctly.
  • Auction End values were stored correctly.
  • Auction status remained draft.

This confirmed that the data itself was not the problem.


Verifying the SQL Logic

Next, we reviewed the SQL UPDATE statement.

The query correctly selected auctions where:

  • status = draft
  • auction_start <= current WordPress time

No issues were found in the SQL itself.


Inspecting the Current WordPress Time
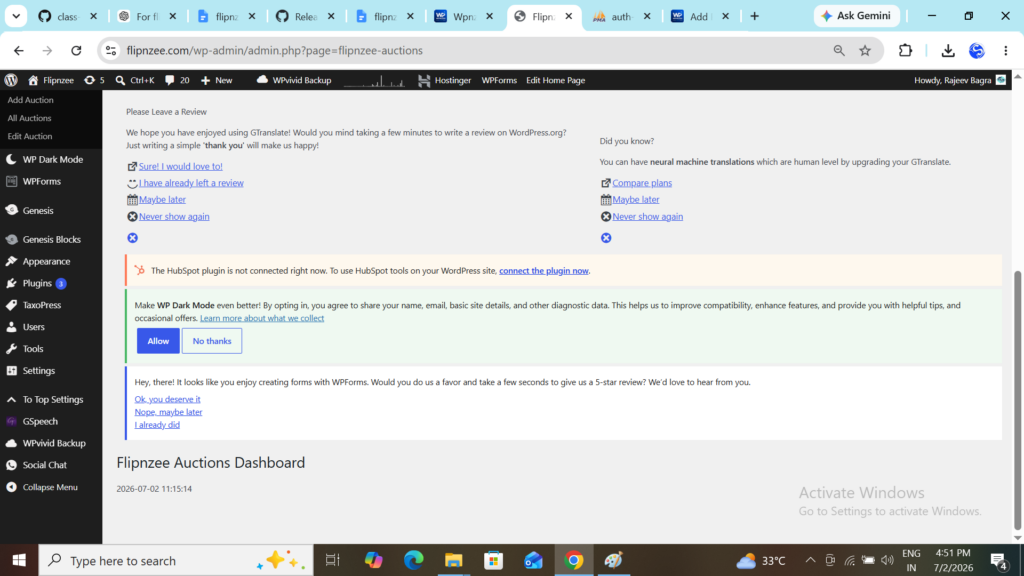
To isolate the issue, we temporarily added:

wp_die( current_time( 'mysql' ) );

This allowed us to display the exact time that WordPress was using during the activation process.

The output revealed that WordPress was using a different timezone than expected.


Root Cause

The activation logic depended on:

current_time( 'mysql' )

while the stored auction schedule had been entered using local time.

As a result:

  • Auction Start appeared to be in the future.
  • The SQL condition never matched.
  • No auctions were activated.

The activation function itself was working correctly.


Lessons Learned

This debugging session reinforced several important development principles.

Instead of immediately changing the SQL query, we:

  • Verified the stored database values.
  • Confirmed the SQL logic.
  • Checked the current application time.
  • Identified the real source of the problem.

This systematic approach saved considerable time and prevented unnecessary code changes.


Why We Built Manual Activation First

Eventually, auctions should activate automatically.

However, during development, a manual activation tool provides several advantages:

  • Easier debugging
  • Immediate testing
  • No dependency on WP-Cron
  • Faster development cycle

Once the activation logic has been thoroughly tested, replacing the manual button with automatic scheduling becomes straightforward.


What’s Next?

In the next lesson, we’ll complete the scheduling workflow by implementing Manual Auction Closing.

Auctions whose scheduled end time has passed will automatically transition from Active to Closed, laying another important foundation for a production-ready auction platform.


Download Source Code

Download the starting version before this lesson:

Download the completed version after implementing this lesson:
Lesson 31 Implementation: Adding Status Filters to the Flipnzee Auctions Plugin

In the previous lessons, we enhanced the auction management table with searching, pagination, sortable columns, and bulk actions. As the number of auctions grows, administrators need an easier way to view only auctions in a particular state.

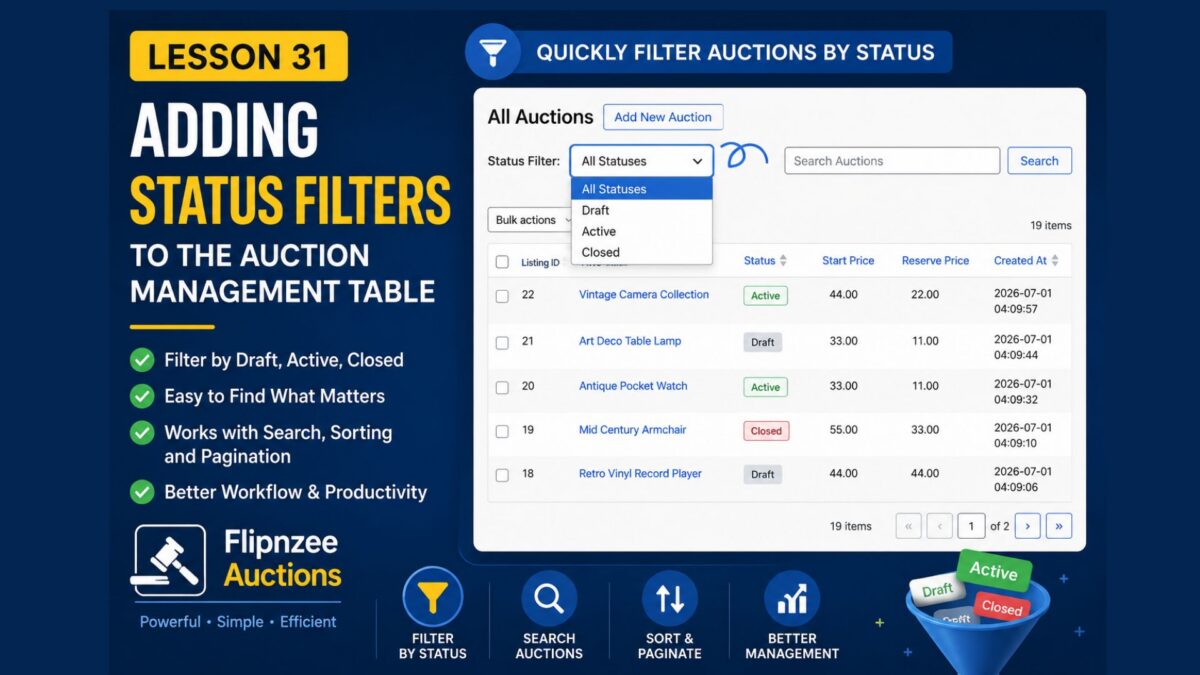
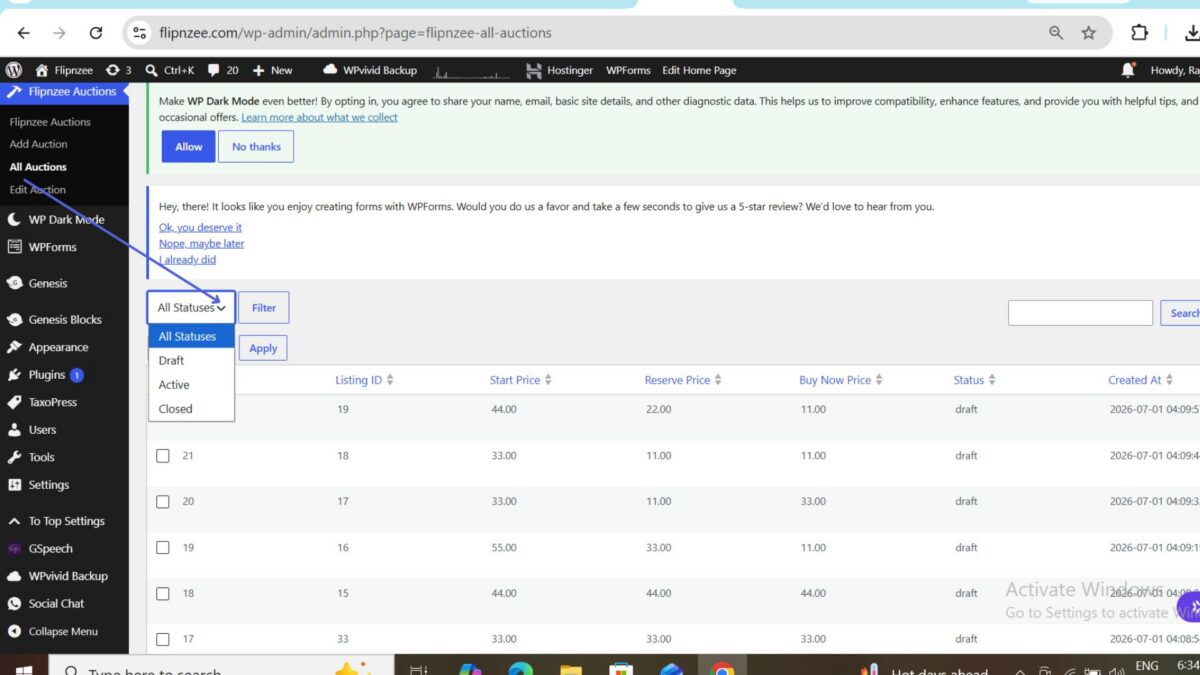
In this lesson, we’ll add a Status Filter that allows administrators to display only Draft, Active, or Closed auctions.


Step 1: Add a Status Filter Dropdown

The first step is to add a filter control above the auction table.

Open:

admin/class-admin.php

Locate the all_auctions_page() method and add a dropdown before the search box.

$status = isset( $_GET['status'] )
	? sanitize_text_field(
		wp_unslash( $_GET['status'] )
	)
	: '';
?>

<select name="status">

	<option value="">All Statuses</option>

	<option
		value="draft"
		<?php selected( $status, 'draft' ); ?>
	>
		Draft
	</option>

	<option
		value="active"
		<?php selected( $status, 'active' ); ?>
	>
		Active
	</option>

	<option
		value="closed"
		<?php selected( $status, 'closed' ); ?>
	>
		Closed
	</option>

</select>

<?php

submit_button(
	'Filter',
	'secondary',
	'',
	false
);

This creates a familiar WordPress-style filter that remembers the selected option after the page reloads.


Step 2: Read the Selected Status

Next, the selected status needs to be available while preparing the table data.

Open:

admin/class-auctions-table.php

Inside the prepare_items() method, read the selected status.

$status = isset( $_REQUEST['status'] )
	? sanitize_text_field(
		wp_unslash( $_REQUEST['status'] )
	)
	: '';

The filter value is sanitized before being used anywhere else in the plugin.


Step 3: Pass the Filter to the Manager Class

The manager class is responsible for retrieving auction records from the database.

Update the method calls inside prepare_items().

$total_items = Flipnzee_Auction_Manager::count_auctions(
	$search,
	$status
);

Likewise, update the method that retrieves the auction list.

$this->items = Flipnzee_Auction_Manager::get_all_auctions(
	$per_page,
	$offset,
	$search,
	$status,
	$orderby,
	$order
);

This allows the selected filter to travel from the user interface to the database layer.


Step 4: Update the Manager Method Signatures

Open:

includes/class-auction-manager.php

Update the method definitions to accept the new $status parameter.

public static function get_all_auctions(
	$per_page = 20,
	$offset = 0,
	$search = '',
	$status = '',
	$orderby = 'created_at',
	$order = 'DESC'
)

Similarly, update the counting method.

public static function count_auctions(
	$search = '',
	$status = ''
)

Step 5: Apply the Status Filter to Database Queries

Modify the SQL queries so that they include the selected status whenever a filter has been chosen.

For example, if the administrator selects Draft, only auctions whose status is draft should be returned.

If All Statuses is selected, the query should continue returning every auction.

This approach keeps the filtering logic entirely inside the manager class.


Step 6: Update the Pagination Count

Pagination should display the number of filtered results instead of the total number of auctions.

For example:

  • 8 Draft auctions
  • 5 Active auctions
  • 12 Closed auctions

Each filtered view should have its own correct page count.


Step 7: Test the Feature

After uploading the updated plugin:

  1. Open Flipnzee Auctions → All Auctions.
  2. Select Draft from the Status dropdown.
  3. Click Filter.
  4. Confirm that only Draft auctions appear.
  5. Repeat the process for Active and Closed.
  6. Finally, choose All Statuses to display every auction again.

Also verify that:

  • Searching continues to work.
  • Sorting still functions correctly.
  • Pagination remains accurate.
  • Bulk actions continue working as expected.

Final Result

The auction management screen now includes a convenient Status filter that allows administrators to quickly narrow the list of auctions.

Instead of manually searching through every record, administrators can instantly display:

  • Draft auctions
  • Active auctions
  • Closed auctions
  • All auctions

This greatly improves usability, especially as the number of auction records grows.


What We Learned

In this lesson, we learned how to:

  • Add a custom filter control to a WordPress admin page.
  • Read filter values from user input safely.
  • Pass filter values through different layers of the plugin.
  • Update manager methods to support filtering.
  • Modify database queries based on selected filters.
  • Keep pagination accurate when filters are applied.
  • Preserve compatibility with searching, sorting, and bulk actions.

The Flipnzee Auctions plugin now provides an even more professional administration experience by allowing auction records to be filtered by status with just a few clicks.

Download Source Code

Download the starting version of the plugin before the lesson:

Download the completed version after this lesson:

Lesson 31 — Adding Status Filters to the Auction Management Table


Introduction

As the number of auctions grows, searching by keywords alone is often not enough. Administrators frequently need to view only auctions in a particular state, such as active auctions currently accepting bids or closed auctions that have already ended.

In this lesson, we’ll enhance the All Auctions page by adding status filters above the table. Administrators will be able to quickly filter the auction list by Draft, Active, or Closed without manually searching through every record.

By the end of this lesson, your auction management screen will feel even closer to the professional interfaces found throughout the WordPress admin area.


What You’ll Learn

After completing this lesson, you’ll know how to:

  • Add custom filter controls to a WP_List_Table
  • Read filter values from the URL
  • Sanitize incoming request parameters
  • Filter database queries dynamically
  • Preserve filters during pagination and searching
  • Display only matching auction records

Why Status Filters Matter

When managing a large number of auctions, administrators often need answers such as:

  • Which auctions are currently active?
  • Which auctions are still drafts?
  • Which auctions have already closed?

Without filters, administrators must search manually or scroll through multiple pages.

Status filters provide several advantages:

  • Faster administration
  • Improved usability
  • Cleaner workflow
  • Reduced scrolling
  • Better organization of auction records

Files We’ll Modify

During this lesson we’ll update the following files:

admin/class-auctions-table.php
admin/class-admin.php
includes/class-auction-manager.php

Implementation Overview

We’ll complete this feature in several small steps.

Step 1

Add a Status dropdown above the auction table.


Step 2

Read the selected status from the request.


Step 3

Modify the database query to filter results.


Step 4

Update the total record count for pagination.


Step 5

Preserve the selected filter when navigating between pages.


Step 6

Combine filtering with searching and sortable columns.


Expected Result

After completing this lesson, administrators will be able to:

  • View all auctions
  • View only Draft auctions
  • View only Active auctions
  • View only Closed auctions
  • Combine status filtering with keyword searching
  • Continue using pagination and sortable columns while filters remain active

Final Thoughts

Status filters are a common feature in professional WordPress plugins because they allow administrators to quickly focus on the records that matter most.

In this lesson, you’ll learn how to integrate custom filters into your existing WP_List_Table while preserving compatibility with searching, sorting, pagination, and bulk actions.

By the end of the lesson, the Flipnzee Auctions plugin will provide an even more polished and efficient administrative experience, making it easier to manage growing numbers of auction listings.

Implementing Lesson 28 — Adding Sortable Columns to the Auctions Table (Step by Step)


Difficulty: Intermediate
Project: Flipnzee Auctions Plugin
Lesson Implemented: Lesson 28


Introduction

In the previous lessons, we transformed our custom Auctions page into a professional WordPress administration screen by adding pagination and search functionality.

Although administrators could now search for auctions, they still could not sort the table by different columns. WordPress users expect to be able to click column headings like ID, Start Price, or Created At to sort data.

In this implementation, we enhanced our custom WP_List_Table by making its columns sortable.


Step 1 — Define the Sortable Columns

The first step was to tell WordPress which columns should be sortable.

Inside:

admin/class-auctions-table.php

we added a new method:

public function get_sortable_columns() {

	return array(
		'id'            => array( 'id', true ),
		'listing_id'    => array( 'listing_id', false ),
		'start_price'   => array( 'start_price', false ),
		'reserve_price' => array( 'reserve_price', false ),
		'buy_now_price' => array( 'buy_now_price', false ),
		'status'        => array( 'status', false ),
		'created_at'    => array( 'created_at', false ),
	);
}

Each array entry tells WordPress which database column should be used for sorting.


Step 2 — Enable Sorting in prepare_items()

Defining sortable columns alone is not enough.

Inside prepare_items(), we updated the column headers:

From:

$this->_column_headers = array(
	$this->get_columns(),
	array(),
	array(),
);

To:

$this->_column_headers = array(
	$this->get_columns(),
	array(),
	$this->get_sortable_columns(),
);

This small change tells WP_List_Table to convert the column headings into clickable links.


Step 3 — Read Sorting Parameters

Next, we needed to determine which column the administrator clicked.

Inside prepare_items(), we added:

$orderby = isset( $_GET['orderby'] )
	? sanitize_key(
		wp_unslash( $_GET['orderby'] )
	)
	: 'created_at';

$order = isset( $_GET['order'] )
	? strtoupper(
		sanitize_text_field(
			wp_unslash( $_GET['order'] )
		)
	)
	: 'DESC';

Why?

When a user clicks a sortable column, WordPress automatically appends parameters such as:

orderby=start_price
order=ASC

We safely read these values before using them.


Step 4 — Pass Sorting Information to the Database Layer

Previously, our manager class received only:

  • page size
  • offset
  • search term

We extended the call to include:

Flipnzee_Auction_Manager::get_all_auctions(
	$per_page,
	$offset,
	$search,
	$orderby,
	$order
);

Now the database query knows exactly how to sort the results.


Step 5 — Update the Manager Method

Inside:

includes/class-auction-manager.php

we modified the method signature:

public static function get_all_auctions(
	$per_page = 20,
	$offset = 0,
	$search = '',
	$orderby = 'created_at',
	$order = 'DESC'
)

This allows sorting preferences to be passed from the table class.


Step 6 — Validate the Column Name

Unlike values, SQL column names cannot be protected using prepared statements.

Instead, we created a whitelist:

$allowed_columns = array(
	'id',
	'listing_id',
	'start_price',
	'reserve_price',
	'buy_now_price',
	'status',
	'created_at',
);

We then verified the requested column:

if ( ! in_array( $orderby, $allowed_columns, true ) ) {
	$orderby = 'created_at';
}

This prevents invalid or malicious column names from being used.


Step 7 — Validate the Sort Direction

We also limited the sort direction:

$order = ( 'ASC' === strtoupper( $order ) )
	? 'ASC'
	: 'DESC';

Only two values are accepted:

  • ASC
  • DESC

Anything else automatically falls back to descending order.


Step 8 — Update the SQL Query

Previously, every query ended with:

ORDER BY created_at DESC

We replaced it with:

ORDER BY {$orderby} {$order}

Both the search query and the default query were updated so that sorting works in every situation.


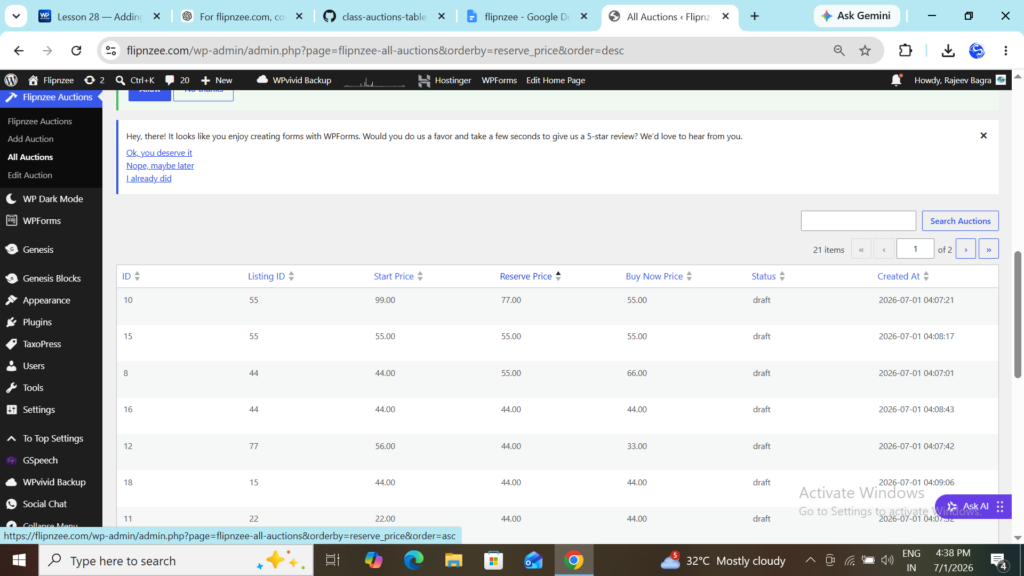
Step 9 — Test the Feature

After uploading the updated plugin, we verified that:

  • ID became clickable
  • Listing ID became clickable
  • Start Price became clickable
  • Reserve Price became clickable
  • Buy Now Price became clickable
  • Status became clickable
  • Created At became clickable

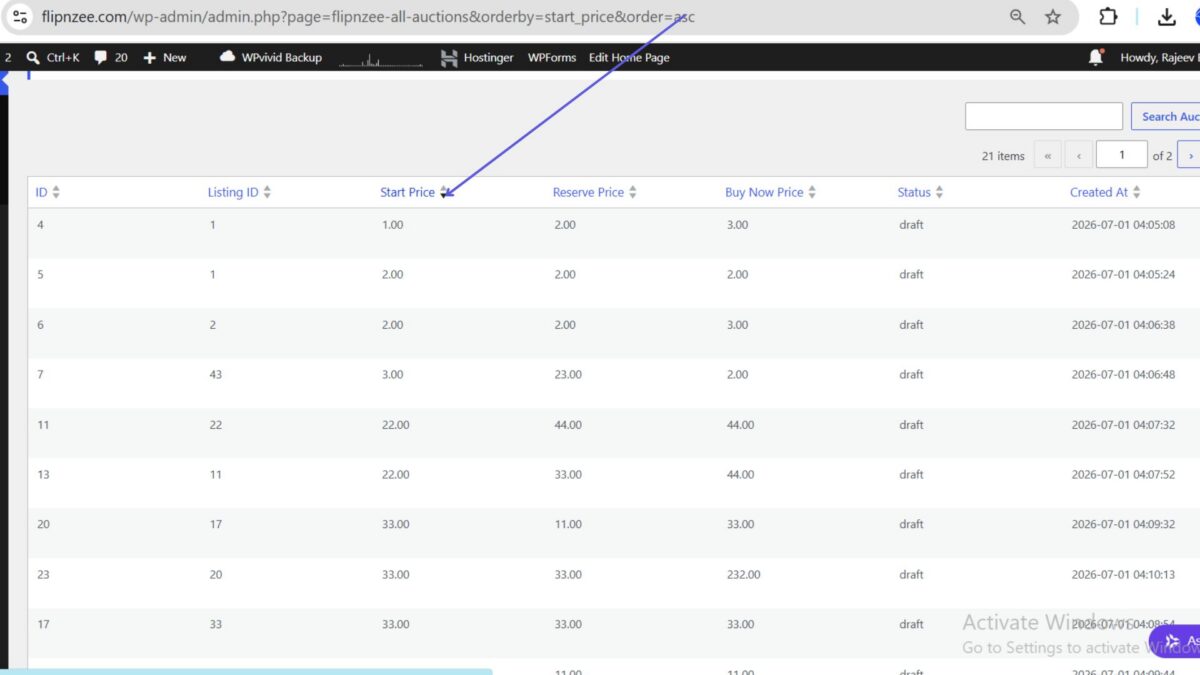
Clicking a column heading automatically updated the URL and changed the sort order.


Challenges Encountered

This lesson involved several small debugging tasks before everything worked correctly.

Some of the issues included:

  • Accidentally duplicating the search query inside get_all_auctions().
  • Forgetting to replace ORDER BY created_at DESC with the dynamic sorting variables.
  • Leaving the third element of _column_headers empty, which prevented WordPress from displaying clickable column headings.

By resolving these issues one by one, the sortable table behaved exactly as expected.


What We Learned

This implementation introduced several important WordPress concepts:

  • Using get_sortable_columns()
  • Registering sortable columns with WP_List_Table
  • Reading URL parameters safely
  • Passing sorting information between classes
  • Validating SQL identifiers using a whitelist
  • Restricting sort directions
  • Building flexible SQL queries while maintaining security

These are common techniques used in professional WordPress plugins that display tabular data.


Final Result

After completing this implementation, the Flipnzee Auctions plugin now provides a much more user-friendly administration interface.

Administrators can click any supported column heading to reorder the table, making it easier to analyse auction data and locate important records.

Combined with the search and pagination features implemented in earlier lessons, the Auctions page now closely resembles the polished interfaces found throughout the WordPress admin dashboard.


Download Source Code

Download the starting version of the plugin before implementing sortable columns:

Download the completed version containing fully functional sortable columns:

Lesson 28 — Adding Sortable Columns to the Auctions Table Using WP_List_Table

Series: Building the Flipnzee Auctions WordPress Plugin
Lesson: 28
Difficulty: Intermediate


Introduction

In the previous lessons, we transformed our Auctions table into a professional management interface by adding pagination and functional search.

However, one important feature is still missing.

When managing many auctions, administrators often want to sort records by clicking column headings, just like they can on the WordPress Posts, Pages, Users, and Comments screens.

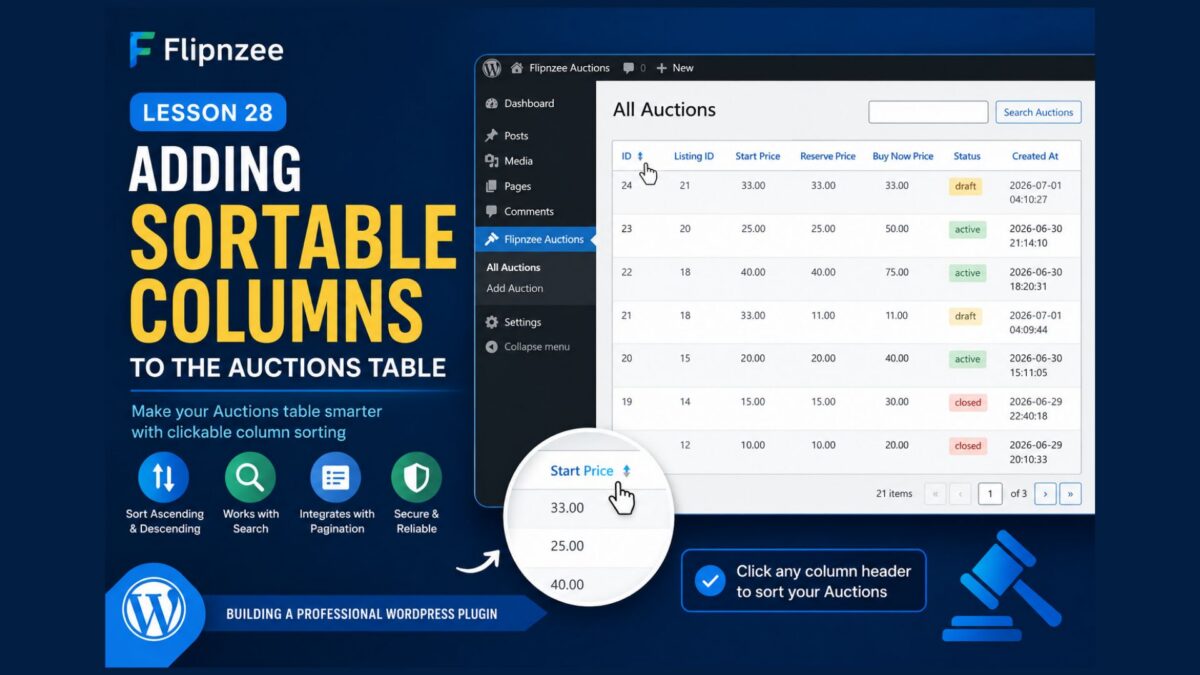
In this lesson, we’ll add sortable columns to our custom WP_List_Table, allowing administrators to sort auctions with a single click.


What You’ll Learn

By the end of this lesson, you’ll know how to:

  • Register sortable columns in WP_List_Table
  • Detect the selected sort column
  • Detect ascending and descending order
  • Build secure dynamic SQL queries
  • Keep sorting compatible with pagination and search
  • Create a much more professional admin interface

Why Sortable Columns Matter

Imagine managing hundreds of auctions.

Sometimes you may want to:

  • View the newest auctions first
  • Sort by Listing ID
  • Find the highest Buy Now price
  • Group auctions by Status
  • Review the lowest Start Price

Without sortable columns, administrators must manually search through multiple pages.

Sorting makes large datasets much easier to manage.


How WordPress Sorting Works

When a column header is clicked, WordPress automatically appends two URL parameters.

Example:

admin.php?page=flipnzee-all-auctions&orderby=start_price&order=asc

or

admin.php?page=flipnzee-all-auctions&orderby=status&order=desc

Your plugin simply needs to read these values and use them safely.


Step 1 — Register Sortable Columns

Inside your table class, implement:

public function get_sortable_columns() {

	return array(
		'id'            => array( 'id', true ),
		'listing_id'    => array( 'listing_id', false ),
		'start_price'   => array( 'start_price', false ),
		'reserve_price' => array( 'reserve_price', false ),
		'buy_now_price' => array( 'buy_now_price', false ),
		'status'        => array( 'status', false ),
		'created_at'    => array( 'created_at', false ),
	);
}

This tells WordPress which columns are sortable.


Step 2 — Read Sorting Parameters

Inside prepare_items(), retrieve the selected column:

$orderby = isset( $_GET['orderby'] )
	? sanitize_key( $_GET['orderby'] )
	: 'created_at';

Next, retrieve the direction:

$order = isset( $_GET['order'] )
	? strtoupper(
		sanitize_text_field(
			wp_unslash( $_GET['order'] )
		)
	)
	: 'DESC';

Step 3 — Whitelist Allowed Columns

Never trust user input directly.

Instead, create an allowed list:

$allowed = array(
	'id',
	'listing_id',
	'start_price',
	'reserve_price',
	'buy_now_price',
	'status',
	'created_at',
);

If an invalid column is supplied, fall back to:

created_at

This prevents SQL injection.


Step 4 — Update the Database Query

Modify the Auction Manager so get_all_auctions() also accepts:

$orderby

and

$order

The SQL becomes:

ORDER BY created_at DESC

or

ORDER BY start_price ASC

depending on the administrator’s selection.


Step 5 — Keep Search and Pagination Working

Sorting should work together with:

  • Search
  • Pagination

All three features should operate simultaneously.

For example:

  • Search for draft
  • Sort by Start Price
  • Navigate to Page 2

Everything should continue working correctly.


Step 6 — Test Every Column

Click each heading:

  • ID
  • Listing ID
  • Start Price
  • Reserve Price
  • Buy Now Price
  • Status
  • Created At

Verify that clicking once sorts ascending.

Clicking again sorts descending.


Security Considerations

Because column names cannot be parameterized using $wpdb->prepare(), always whitelist allowed columns before inserting them into SQL.

Never allow arbitrary column names supplied by users.

Continue sanitizing all URL parameters using:

  • sanitize_key()
  • sanitize_text_field()
  • wp_unslash()

This keeps the plugin secure while supporting dynamic sorting.


Expected Result

After completing this lesson, administrators will be able to:

  • ✅ Click any supported column heading
  • ✅ Sort ascending or descending
  • ✅ Combine sorting with searching
  • ✅ Combine sorting with pagination
  • ✅ Manage auctions much more efficiently

The Auctions page will now behave almost identically to the native WordPress administration tables.


Conclusion

Adding sortable columns is another significant milestone in the development of the Flipnzee Auctions plugin.

Together with pagination and search, this feature creates a much richer administration experience and brings the plugin closer to production quality.

At this stage, the Auctions table supports the three most important data management features expected in professional WordPress plugins.


In the Next Lesson

We’ll implement bulk actions, allowing administrators to select multiple auctions using checkboxes and perform operations such as:

  • Delete Selected Auctions
  • Activate Multiple Auctions
  • Close Multiple Auctions

Bulk actions are one of the final major features needed before the Auctions management screen reaches enterprise-level usability.

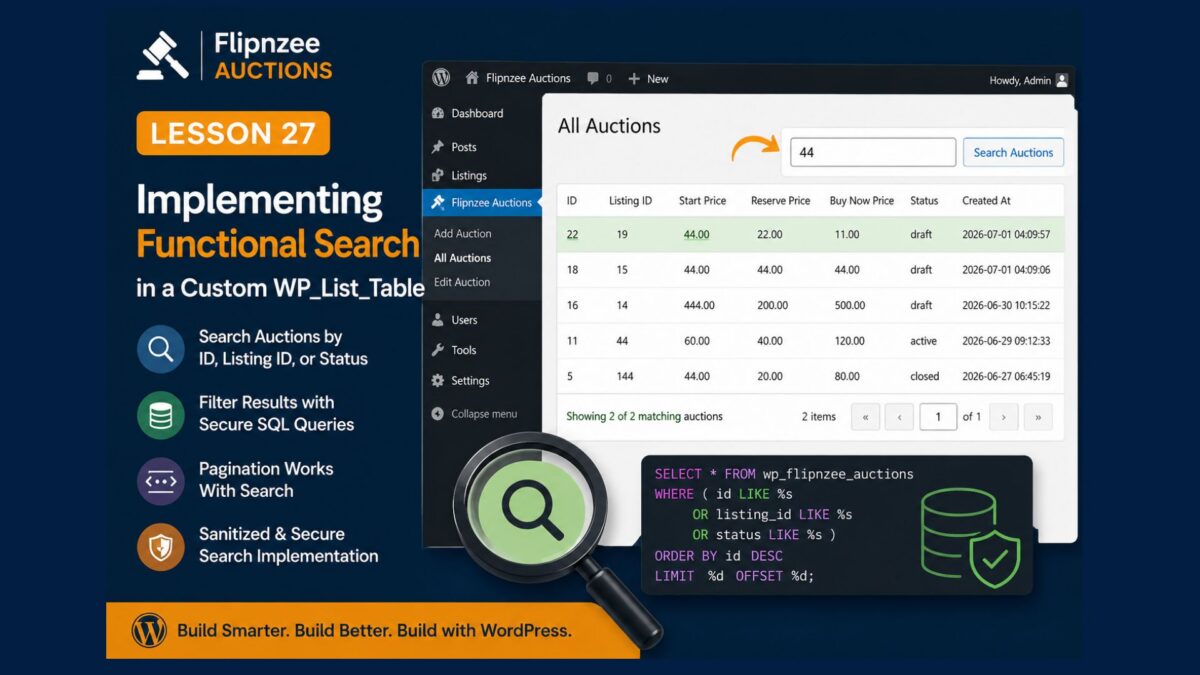
Lesson 27 — Implementing Functional Search in a Custom WP_List_Table

Series: Building the Flipnzee Auctions WordPress Plugin
Lesson: 27
Difficulty: Intermediate


Introduction

In Lesson 26, we successfully added a professional search box above the auctions table. Although the interface looked complete, typing a search term did not actually filter the records.

In this lesson, we’ll connect the search box to the database so administrators can search auctions directly from the WordPress dashboard. This brings our custom WP_List_Table much closer to the functionality of WordPress’ built-in administration screens.


What You’ll Learn

By the end of this lesson, you’ll know how to:

  • Read search keywords submitted by WP_List_Table
  • Pass search terms to your database query
  • Filter auction records using SQL
  • Keep pagination working while searching
  • Display only matching auctions

Why Search Matters

Imagine managing hundreds or even thousands of auctions.

Without search, finding Auction ID 357 or Listing ID 8421 would require scrolling through multiple pages.

A search box allows administrators to instantly locate records, improving productivity and making the plugin feel much more professional.


How WordPress Search Works

When you click the Search button, WordPress automatically sends the search keyword as a GET parameter named:

s

For example:

admin.php?page=flipnzee-all-auctions&s=44

Your plugin simply needs to:

  1. Read $_REQUEST['s']
  2. Pass it to the database
  3. Display matching records

Step 1 — Read the Search Term

Inside the table class, retrieve the search keyword submitted by WordPress.

Example:

$search = isset( $_REQUEST['s'] )
	? sanitize_text_field(
		wp_unslash( $_REQUEST['s'] )
	)
	: '';

Always sanitize user input before using it.


Step 2 — Pass the Search Term

Modify the call to retrieve auctions.

Instead of:

Flipnzee_Auction_Manager::get_all_auctions(
	$per_page,
	$offset
);

pass the search term as well:

Flipnzee_Auction_Manager::get_all_auctions(
	$per_page,
	$offset,
	$search
);

Step 3 — Update the SQL Query

Inside the Auction Manager, check whether a search keyword exists.

If it does, filter the results.

Example SQL:

WHERE
	id LIKE ?
	OR listing_id LIKE ?
	OR status LIKE ?

This allows administrators to search by:

  • Auction ID
  • Listing ID
  • Auction Status

Step 4 — Keep Pagination Working

Searching should not disable pagination.

Instead of counting every auction:

SELECT COUNT(*)

count only the matching records.

This keeps the page numbers accurate.


Step 5 — Test the Feature

Create several auctions.

Then try searches like:

44
draft
21

The table should immediately display only the matching auctions.


Security Considerations

Never place raw user input directly into SQL queries.

Always use:

  • sanitize_text_field()
  • wp_unslash()
  • $wpdb->prepare()
  • $wpdb->esc_like()

These functions protect your plugin against SQL injection attacks.


Common Mistakes

Many developers accidentally:

  • Forget to sanitize the search term
  • Build SQL using string concatenation
  • Break pagination after filtering
  • Ignore empty search values

Avoiding these mistakes results in a more secure and reliable plugin.


Expected Result

After completing this lesson:

  • ✅ Search box filters auctions
  • ✅ Pagination still works
  • ✅ Database queries remain secure
  • ✅ Administrators can quickly find auction records
  • ✅ The Auctions page behaves much more like WordPress core admin tables

Conclusion

Adding a search box was only the first step. Connecting it to the database transforms it into a practical tool for managing real auction data.

With searchable, paginated listings now in place, the Flipnzee Auctions plugin continues to evolve from a learning project into a production-ready WordPress plugin.


Lesson 27 Implementation — Adding Functional Search to the Flipnzee Auctions Table

In the Next Lesson

We’ll further enhance the Auctions table by allowing administrators to sort auctions by clicking the table headers, such as:

  • Auction ID
  • Listing ID
  • Start Price
  • Status
  • Created Date

This is another feature users expect from professional WordPress plugins and will make navigating large auction datasets even easier.

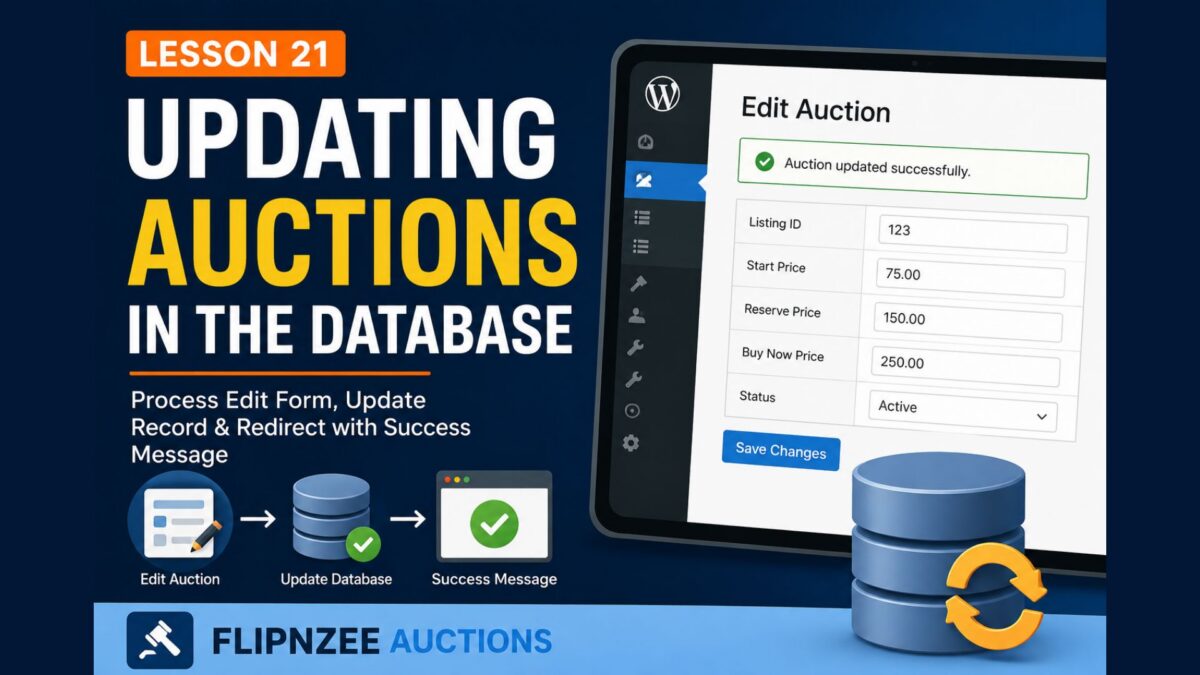
Lesson 21: Updating Auctions in the Database

In the previous lesson, we transformed our Edit Auction page into a fully editable form. Administrators can now modify auction values such as the listing ID, prices, and status.

However, clicking Save Changes currently results in a blank page because our plugin does not yet know how to process the submitted form.

In this lesson, we’ll complete the editing workflow by processing the form submission, updating the database, and redirecting the administrator back to the Edit Auction page with a success message.


Learning Objectives

By the end of this lesson you will be able to:

  • Register a new WordPress admin_post action.
  • Process an Edit Auction form securely.
  • Verify nonces before updating the database.
  • Sanitize user input.
  • Update an existing database record using $wpdb->update().
  • Redirect back to the Edit page with a success message.

Current Workflow

At the moment our workflow looks like this:

Edit Auction
      ↓
Modify Fields
      ↓
Click Save Changes
      ↓
Blank Screen

After this lesson it will become:

Edit Auction
      ↓
Modify Fields
      ↓
Click Save Changes
      ↓
Update Database
      ↓
Redirect Back
      ↓
Success Message

Step 1 – Register a New Admin Action

Open:

admin/class-admin-posts.php

Inside the constructor, add another action:

add_action(
	'admin_post_flipnzee_update_auction',
	array( $this, 'handle_update_auction' )
);

Your constructor should now contain both actions:

public function __construct() {

	add_action(
		'admin_post_flipnzee_create_auction',
		array( $this, 'handle_create_auction' )
	);

	add_action(
		'admin_post_flipnzee_update_auction',
		array( $this, 'handle_update_auction' )
	);
}

Step 2 – Create the Update Handler

Inside the same class, add:

public function handle_update_auction() {

	check_admin_referer(
		'flipnzee_update_auction',
		'flipnzee_nonce'
	);

	$auction_id = absint( $_POST['auction_id'] );

	$listing_id = absint( $_POST['listing_id'] );

	$start_price = floatval( $_POST['start_price'] );

	$reserve_price = floatval( $_POST['reserve_price'] );

	$buy_now_price = floatval( $_POST['buy_now_price'] );

	$status = sanitize_text_field(
		wp_unslash( $_POST['status'] )
	);

	$updated = Flipnzee_Auction_Manager::update_auction(
		$auction_id,
		$listing_id,
		$start_price,
		$reserve_price,
		$buy_now_price,
		$status
	);

	$message = $updated
		? 'updated'
		: 'error';

	wp_safe_redirect(

		admin_url(

			'admin.php?page=flipnzee-edit-auction&auction_id=' .
			$auction_id .
			'&message=' .
			$message
		)

	);

	exit;
}

Notice how every value is sanitized before being passed to the Auction Manager.


Step 3 – Add the Update Method

Open:

includes/class-auction-manager.php

Add the following method beneath create_auction():

public static function update_auction(
	$auction_id,
	$listing_id,
	$start_price,
	$reserve_price,
	$buy_now_price,
	$status
) {

	global $wpdb;

	$table = $wpdb->prefix . 'flipnzee_auctions';

	$result = $wpdb->update(

		$table,

		array(

			'listing_id'    => $listing_id,
			'start_price'   => $start_price,
			'reserve_price' => $reserve_price,
			'buy_now_price' => $buy_now_price,
			'status'        => $status,

		),

		array(
			'id' => $auction_id,
		),

		array(
			'%d',
			'%f',
			'%f',
			'%f',
			'%s',
		),

		array(
			'%d',
		)

	);

	return false !== $result;
}

This method updates only the selected auction.


Step 4 – Display a Success Message

Open:

admin/class-admin.php

Inside edit_auction_page(), immediately after the <h1> heading, add:

<?php

$message = isset( $_GET['message'] )
	? sanitize_text_field(
		wp_unslash( $_GET['message'] )
	)
	: '';

if ( 'updated' === $message ) :
?>

	<div class="notice notice-success is-dismissible">
		<p>Auction updated successfully.</p>
	</div>

<?php elseif ( 'error' === $message ) : ?>

	<div class="notice notice-error is-dismissible">
		<p>Unable to update auction.</p>
	</div>

<?php endif; ?>

Now the administrator receives immediate feedback after saving changes.


Step 5 – Test the Plugin

Create a fresh ZIP and upload the updated plugin.

Go to:

Flipnzee Auctions → All Auctions

Click Edit.

Change one or more values.

Click Save Changes.

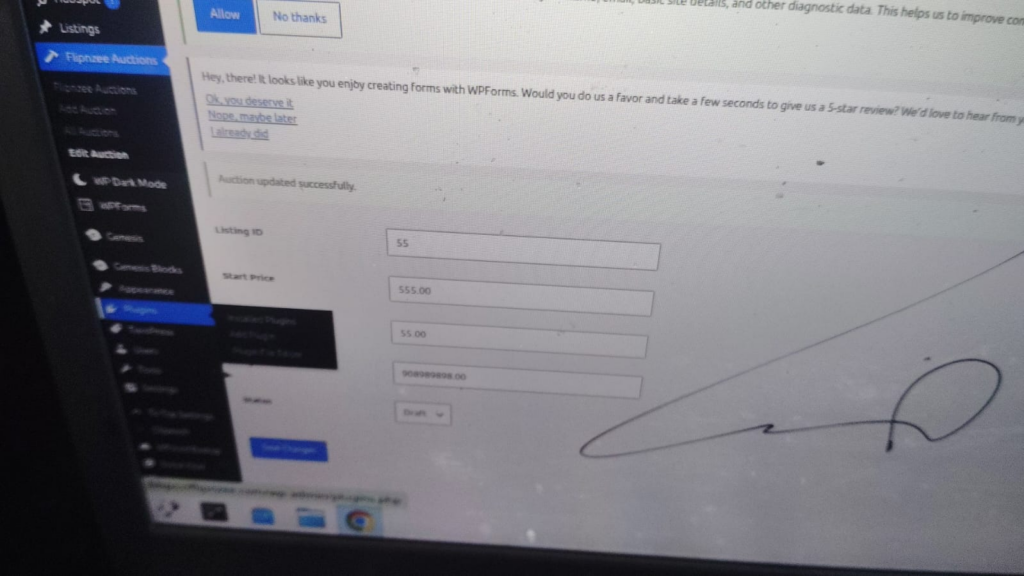
You should now:

  • Return to the Edit page.
  • See a success message.
  • See the updated values displayed in the form.

Why Redirect Instead of Printing a Message?

Professional WordPress plugins generally follow the POST → Redirect → GET pattern.

Instead of displaying output immediately after processing a form, they redirect back to the appropriate page.

Benefits include:

  • Preventing duplicate form submissions.
  • Cleaner browser history.
  • Easier refresh behaviour.
  • Better user experience.

Lesson Summary

In this lesson we completed the Edit Auction workflow.

The plugin now processes form submissions securely, validates the nonce, sanitizes user input, updates the database, and redirects the administrator back to the Edit Auction page with an appropriate success or error message.

This represents another major milestone because the plugin now supports both creating and updating auction records.


Key Takeaways

  • Register a dedicated admin_post action for each form.
  • Always verify nonces before processing requests.
  • Sanitize every submitted value.
  • Use $wpdb->update() to modify existing database rows.
  • Redirect after processing forms.

Common Mistakes

  • Forgetting to register the new admin_post action.
  • Omitting nonce verification.
  • Forgetting to sanitize submitted values.
  • Redirecting before calling exit.
  • Returning output instead of redirecting.

Git Commands Used

git add .

git commit -m "Lesson 21: Update auctions"

git push

Testing Checklist

Before moving to the next lesson, verify that:

  • ✅ Edit page opens correctly.
  • ✅ Auction values can be modified.
  • ✅ Clicking Save Changes updates the database.
  • ✅ Success message appears.
  • ✅ Refreshing the page does not resubmit the form.
  • ✅ No PHP warnings or notices appear.

Project Status

✅ Dashboard

✅ Add Auction

✅ Save Auction

✅ View Auctions

✅ WP_List_Table

✅ Row Actions

✅ Edit Auction Form

✅ Update Auction

⬜ Delete Auction

⬜ Auction Scheduling

⬜ Bid Engine

⬜ Escrow Workflow

Developer’s Notebook

WordPress encourages developers to separate the user interface from business logic. In this lesson, the form is responsible only for collecting user input, while the admin_post handler processes and validates the request before delegating the database update to the Auction Manager. This separation of responsibilities makes the plugin easier to test, maintain, and extend in future lessons.

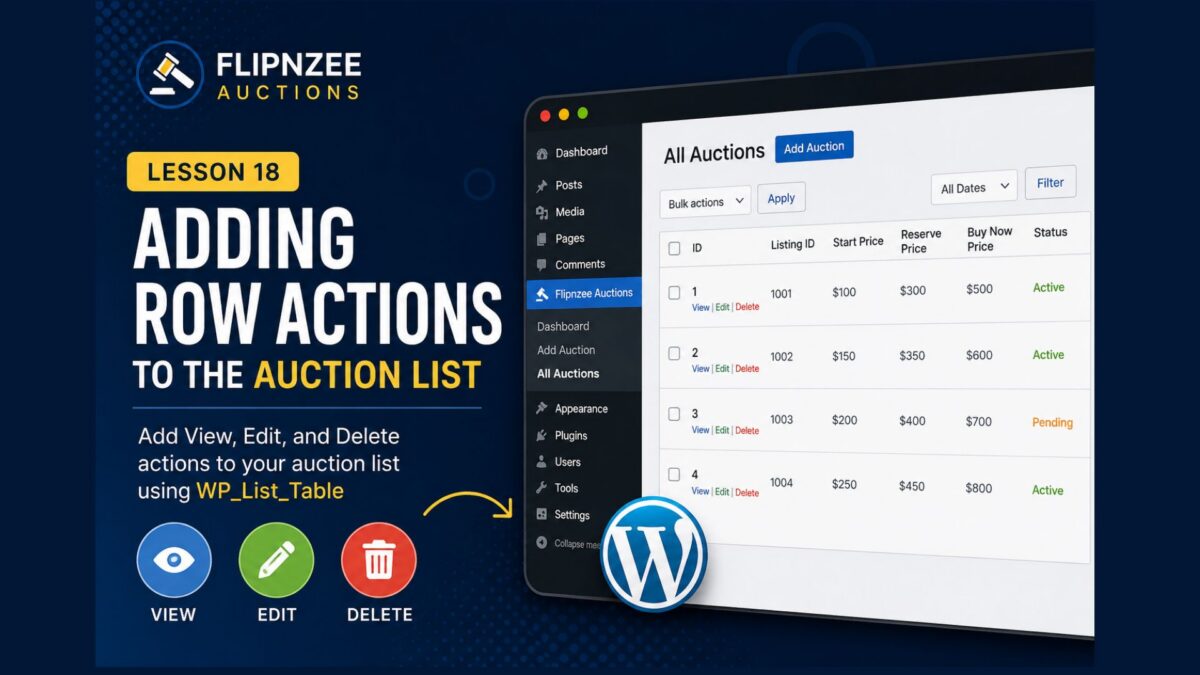
Lesson 18: Adding Row Actions to the Auction List

Introduction

In the previous lesson, we migrated our auction list to WordPress’s WP_List_Table framework.

Although the table now uses WordPress’s native administration interface, each row is still read-only.

Professional WordPress plugins allow administrators to perform actions directly from the list table. Common actions include viewing details, editing records, deleting items, or changing their status.

In this lesson, we’ll add our first row actions to the auction list, preparing the plugin for editing and deleting auctions in the next lessons.


Learning Objectives

By the end of this lesson, you’ll be able to:

  • Understand row actions in WP_List_Table.
  • Override the column_id() method.
  • Add custom row actions.
  • Build administrator-friendly interfaces.
  • Prepare the plugin for editing and deleting auctions.

What Are Row Actions?

When you open the Posts page in WordPress, each post displays actions such as:

Edit | Quick Edit | Trash | View

These are called row actions.

Instead of placing buttons in separate columns, WordPress displays contextual links directly beneath the primary column.

We’ll adopt the same approach.


Step 1 – Choose the Primary Column

For our plugin, the Auction ID will become the primary column.

Every action related to an auction will appear beneath its ID.


Step 2 – Add a Custom Column Method

Open:

admin/class-auctions-table.php

Add the following method inside the class.

public function column_id( $item ) {

	$actions = array(

		'view' => sprintf(
			'<a href="#">View</a>'
		),

		'edit' => sprintf(
			'<a href="#">Edit</a>'
		),

		'delete' => sprintf(
			'<a href="#">Delete</a>'
		),

	);

	return sprintf(
		'%1$s %2$s',
		$item->id,
		$this->row_actions( $actions )
	);
}

Understanding row_actions()

The WordPress base class automatically formats our links into the familiar style used throughout the administration area.

Instead of manually creating HTML, we simply pass an array of actions.

WordPress handles the rest.


Step 3 – Test the Table

Create a fresh ZIP.

Upload the plugin.

Open:

Flipnzee Auctions → All Auctions

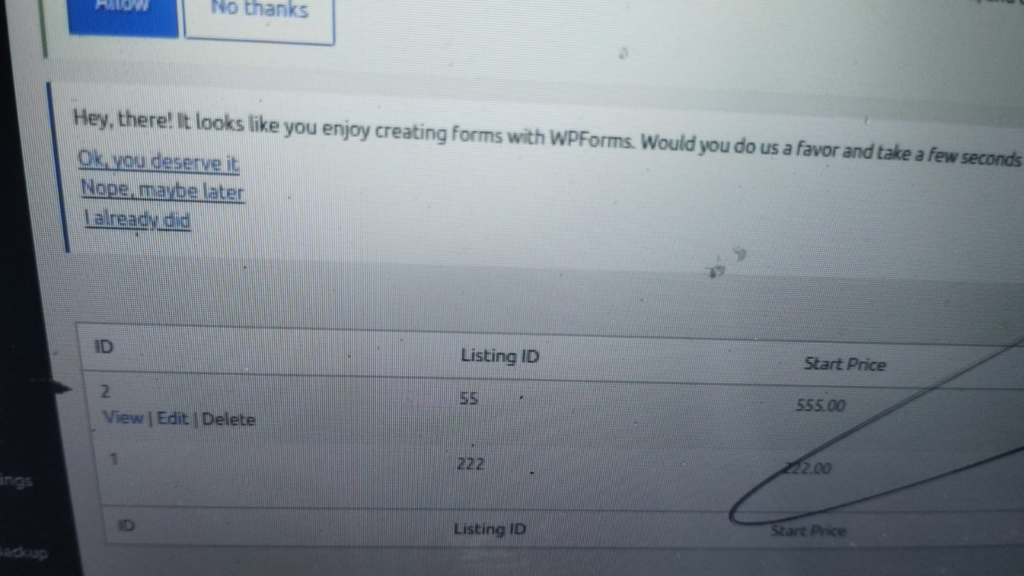
Each auction should now display:

1

View | Edit | Delete

directly beneath the Auction ID.

Although these links don’t perform any actions yet, they establish the navigation we’ll build upon in future lessons.


Why Placeholder Links?

You might wonder why the links currently point to #.

This allows us to focus on one concept at a time.

Today’s goal is to understand how row actions are rendered.

In the next lessons, we’ll replace each placeholder with working functionality.


Lesson Summary

In this lesson, we enhanced the auction list by introducing row actions through the column_id() method.

The auction table now follows the same interaction model used throughout the WordPress administration area, giving users familiar controls while preparing the plugin for more advanced features.


Key Takeaways

  • ✓ Row actions belong beneath the primary column.
  • ✓ Override column_id() to customize the first column.
  • ✓ Use row_actions() instead of manually building links.
  • ✓ Keep one lesson focused on one new concept.

Common Mistakes

  • Forgetting to create the column_id() method.
  • Returning only the ID without row actions.
  • Placing action links inside separate columns.
  • Trying to implement edit and delete functionality before creating the row actions.

Git Commands Used

git add .

git commit -m "Lesson 18: Add row actions to auction list"

git push

Testing Checklist

Before moving to the next lesson, verify:

  • ✅ Plugin activates successfully.
  • ✅ Dashboard still loads.
  • ✅ Add Auction still works.
  • ✅ All Auctions page loads correctly.
  • ✅ Every auction displays its ID.
  • View, Edit, and Delete appear beneath each Auction ID.
  • ✅ No PHP warnings or fatal errors.

Project Status

✅ Dashboard

✅ Add Auction

✅ Save Auctions

✅ View Auctions

✅ WP_List_Table

✅ Row Actions

⬜ View Auction

⬜ Edit Auction

⬜ Delete Auction

⬜ Bid Engine

⬜ Escrow Workflow

Project Evolution

Our administration interface is becoming increasingly similar to native WordPress screens. Instead of treating auctions as static records, administrators can now see contextual actions associated with each auction. While the actions are placeholders today, the underlying structure is now in place. Future lessons will simply connect these links to real functionality without redesigning the interface.


Developer’s Notebook

One of the strengths of WP_List_Table is that it encourages consistency across the WordPress administration area. By adopting row actions rather than adding separate action columns, our plugin immediately feels more familiar to WordPress users. This small architectural decision improves usability while reducing unnecessary visual clutter.


Looking Ahead

In Lesson 19, we’ll replace the placeholder Edit link with a fully functional auction editing page. Administrators will be able to modify auction details directly from the dashboard, making Flipnzee Auctions feel even more like a native WordPress application.

How to Verify That Your WordPress Plugin Created a Database Table (Hostinger phpMyAdmin & Other Methods)

When developing a WordPress plugin, one of the most satisfying moments is seeing your first custom database table appear.

In our Flipnzee Auctions series, we created the wp_flipnzee_auctions table using WordPress’s dbDelta() function.

But how do we know the table was actually created?

There are several ways to verify this. In this article, I’ll show the method I used while developing Flipnzee Auctions on Hostinger, along with several other approaches that work on different hosting providers.


Why Verify the Database?

Suppose you activate your plugin and nothing appears to happen.

Did the activation hook run?

Was the SQL correct?

Did dbDelta() create the table?

Rather than guessing, it’s always a good idea to verify the database.


Method 1 – Using Hostinger phpMyAdmin (Recommended)

Since Flipnzee.com is hosted on Hostinger, this is the method I personally used.

Step 1

Log in to your Hostinger hPanel.


Step 2

Open:

Websites → Manage

for your WordPress website.


Step 3

Open:

Databases → phpMyAdmin


Step 4

Select your WordPress database.

You’ll see all WordPress tables listed in the left sidebar.


Step 5

Scroll through the list.

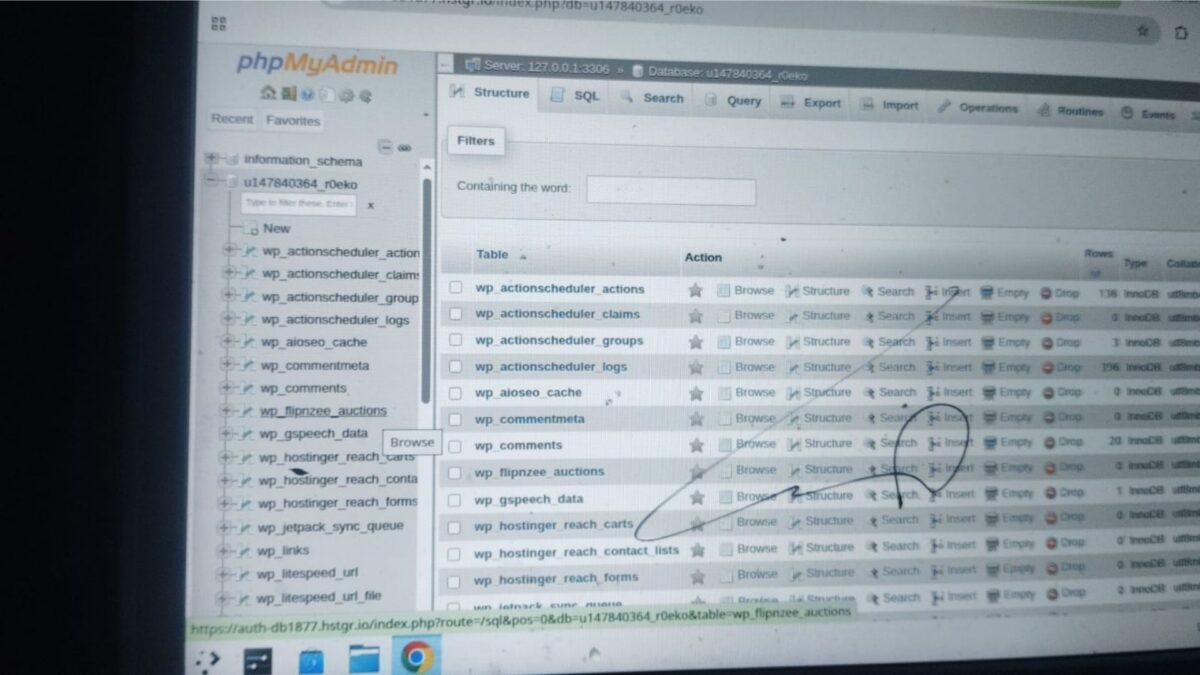
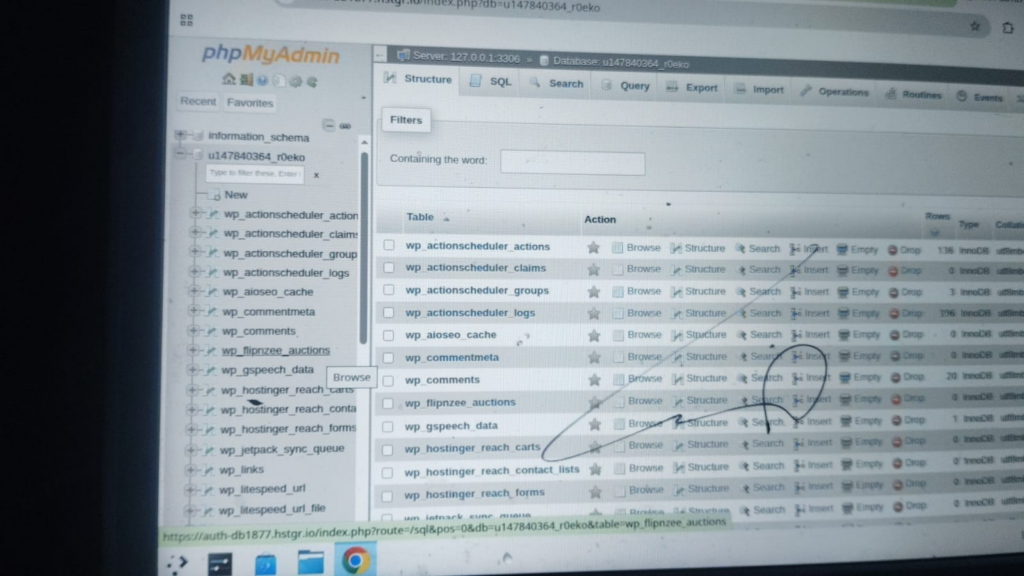
After activating the Flipnzee Auctions plugin, I found the newly created table:

wp_flipnzee_auctions

This confirmed that the activation hook executed successfully and that WordPress created the database table.


My Development Screenshot

The following screenshot shows the actual database used while developing the Flipnzee Auctions plugin.

Notice the presence of the wp_flipnzee_auctions table among the standard WordPress tables.


Method 2 – phpMyAdmin on Other Hosting Providers

Most shared hosting providers offer phpMyAdmin.

For example:

  • cPanel Hosting
  • Bluehost
  • SiteGround
  • DreamHost
  • A2 Hosting
  • Namecheap Hosting

The process is almost identical:

  1. Open phpMyAdmin.
  2. Select your database.
  3. Look for your custom table.

Method 3 – MySQL Workbench

Many professional developers use:

  • MySQL Workbench

Connect using your database credentials.

Refresh the database.

Your custom table should appear automatically.


Method 4 – Adminer

Adminer is a lightweight alternative to phpMyAdmin.

Many developers prefer it because it’s fast and easy to use.

Simply connect to your database and check whether your table exists.


Method 5 – DBeaver

Another popular database tool is DBeaver.

It’s free and supports multiple database systems.

After connecting to your WordPress database, simply refresh the tables list.


Method 6 – Create an Admin Dashboard (Future Lesson)

As our plugin evolves, we won’t need to open phpMyAdmin every time.

Instead, we’ll build an administration page inside Flipnzee Auctions that displays information such as:

Plugin Status

✓ Plugin Active

✓ Database Connected

✓ Auction Table Exists

Version 1.0.0

This provides a much friendlier experience for plugin users.

We’ll build this later in the series.


Which Method Should Beginners Use?

If you’re just getting started with WordPress plugin development, phpMyAdmin is usually the easiest place to begin because it lets you see exactly what’s happening behind the scenes.

As you become more experienced, you’ll probably rely more on dedicated database tools or build your own plugin diagnostics.


Lesson Learned

Creating a database table is only half the job.

Professional developers always verify that the database matches what the code intended to create.

Developing the habit of checking your database after major schema changes can save hours of debugging later.


Final Thoughts

One of the goals of the Flipnzee Auctions project is not just to build a marketplace plugin, but to understand what happens behind the scenes as WordPress plugins interact with the database.

Learning to inspect your database is an important step toward becoming a confident WordPress developer.

As we continue this series, we’ll gradually move from simply creating tables to inserting records, updating them, retrieving data, and eventually powering a complete website marketplace.

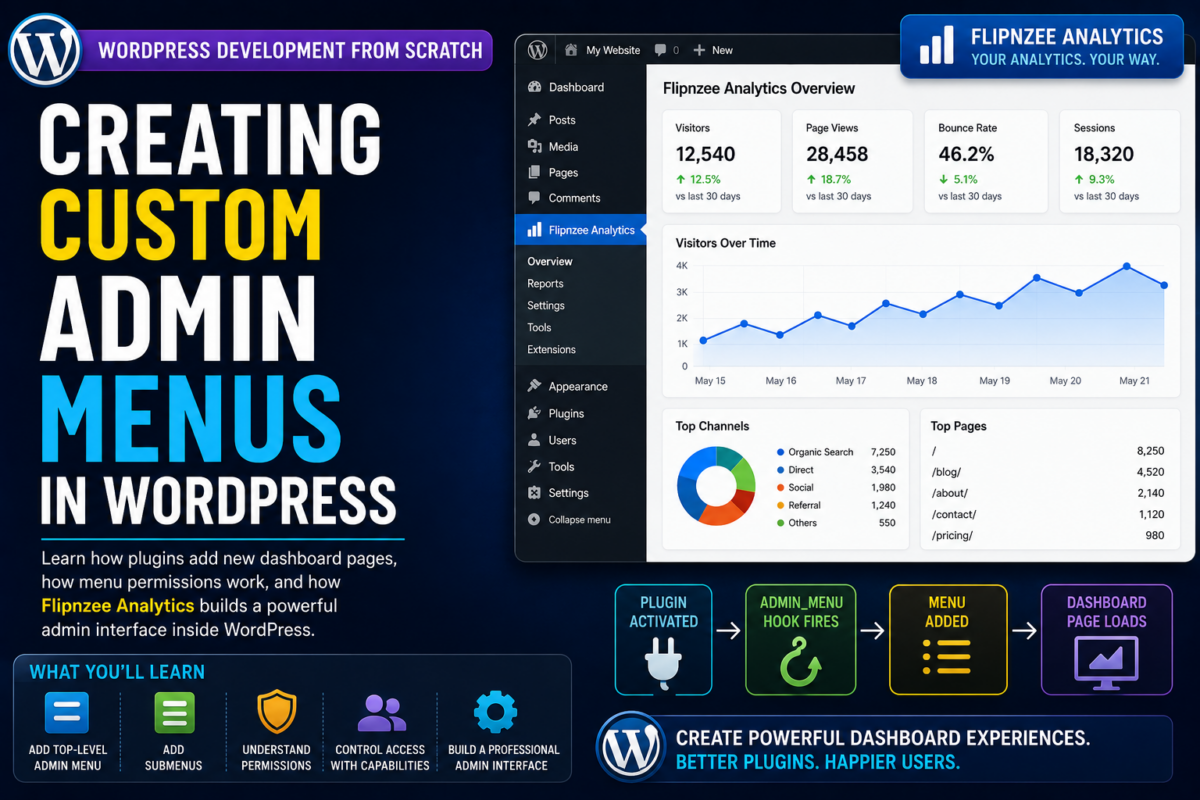
Creating Custom Admin Menus in WordPress

Series: WordPress Development From Scratch
Level: Beginner to Intermediate
Project Reference: Flipnzee Analytics


Introduction

One of the most powerful features of WordPress plugins is the ability to create custom pages inside the WordPress dashboard.

Have you ever installed a plugin and noticed a new menu item appear in the admin sidebar?

Examples include:

  • WooCommerce
  • Yoast SEO
  • Elementor
  • MonsterInsights
  • Flipnzee Analytics

These plugins create custom admin menus that allow users to configure settings, view reports, and manage plugin features.

In this tutorial you’ll learn:

  • How WordPress admin menus work
  • How plugins create dashboard pages
  • The purpose of menu permissions
  • Creating top-level menus
  • Creating submenu pages
  • Best practices for admin interfaces
  • How the Flipnzee Analytics plugin creates its dashboard

By the end, you’ll be able to add professional dashboard pages to your own plugins.


What Is an Admin Menu?

An admin menu is a navigation item inside the WordPress dashboard.

Examples:

Dashboard
Posts
Media
Pages
Comments
Appearance
Plugins
Users
Tools
Settings

Plugins can add their own entries:

Dashboard
Posts
Media
Pages
Flipnzee Analytics

Clicking the menu opens a custom admin page.


Why Create Admin Menus?

Many plugins need a place to:

  • Store settings
  • Display reports
  • Configure APIs
  • Show analytics
  • Manage users
  • Run maintenance tools

Without admin menus, users would have no easy way to interact with the plugin.


How WordPress Creates Menus

WordPress uses the:

admin_menu

hook.

Example:

add_action(
    'admin_menu',
    'wpnzee_admin_menu'
);

This tells WordPress:

“Run my function when admin menus are being built.”


Creating Your First Admin Menu

Example:

function wpnzee_admin_menu() {

    add_menu_page(
        'WPNzee Dashboard',
        'WPNzee Dashboard',
        'manage_options',
        'wpnzee-dashboard',
        'wpnzee_dashboard_page'
    );

}

add_action(
    'admin_menu',
    'wpnzee_admin_menu'
);

Understanding add_menu_page()

The function:

add_menu_page()

creates a top-level menu.

Example:

add_menu_page(
    'WPNzee Dashboard',
    'WPNzee Dashboard',
    'manage_options',
    'wpnzee-dashboard',
    'wpnzee_dashboard_page'
);

Let’s examine each parameter.


Page Title

'WPNzee Dashboard'

Displayed in the browser title.


Menu Title

'WPNzee Dashboard'

Displayed in the sidebar.


Capability

'manage_options'

Determines who can access the page.


Menu Slug

'wpnzee-dashboard'

Unique page identifier.


Callback Function

'wpnzee_dashboard_page'

Function that displays page content.


Creating the Dashboard Page

Now create the callback:

function wpnzee_dashboard_page() {

    echo '<div class="wrap">';

    echo '<h1>WPNzee Dashboard</h1>';

    echo '<p>Welcome to your first plugin dashboard.</p>';

    echo '</div>';

}

After activation, you’ll see a new menu inside the WordPress dashboard.


Understanding User Permissions

One of the most important concepts in WordPress administration is permissions.

Example:

'manage_options'

Only administrators can access pages using this capability.


Common Capabilities

CapabilityAccess
manage_optionsAdministrators
edit_postsAuthors and above
publish_postsEditors and above
activate_pluginsAdministrators
edit_pagesEditors and above

Choosing the correct capability is important for security.


Adding a Custom Icon

You can assign an icon:

add_menu_page(
    'WPNzee Dashboard',
    'WPNzee Dashboard',
    'manage_options',
    'wpnzee-dashboard',
    'wpnzee_dashboard_page',
    'dashicons-chart-line'
);

WordPress includes hundreds of Dashicons.

Examples:

dashicons-chart-line
dashicons-admin-generic
dashicons-analytics
dashicons-admin-tools
dashicons-chart-pie

Creating Submenus

Professional plugins usually contain multiple pages.

Example:

Flipnzee Analytics
├── Dashboard
├── Reports
├── Settings

WordPress provides:

add_submenu_page()

Example Submenu

add_submenu_page(
    'wpnzee-dashboard',
    'Reports',
    'Reports',
    'manage_options',
    'wpnzee-reports',
    'wpnzee_reports_page'
);

This creates a Reports page beneath the main menu.


Creating the Reports Page

Example:

function wpnzee_reports_page() {

    echo '<div class="wrap">';

    echo '<h1>Reports</h1>';

    echo '<p>Analytics reports appear here.</p>';

    echo '</div>';

}

Organizing Menu Code

As plugins grow, menu code should move into a dedicated file.

Example:

admin
├── menu.php
├── settings-page.php
└── reports-page.php

Then load it:

require_once plugin_dir_path(__FILE__) . 'admin/menu.php';

This keeps the plugin organized.


Real Example: Flipnzee Analytics

The Flipnzee Analytics plugin uses custom admin pages to manage:

  • Google Analytics connections
  • Property configuration
  • Reports
  • Dashboard widgets
  • Search Console integration

Instead of placing everything inside Settings, it provides a dedicated interface designed specifically for analytics management.

This creates a better user experience.


Typical Flow of an Admin Menu

Plugin Activated
          ↓
admin_menu Hook Fires
          ↓
add_menu_page()
          ↓
Menu Appears in Sidebar
          ↓
User Clicks Menu
          ↓
Callback Function Executes
          ↓
Dashboard Page Loads

Understanding this flow makes admin development much easier.


Common Beginner Mistakes

Using Duplicate Slugs

Bad:

'settings'

Good:

'wpnzee-settings'

Always use unique prefixes.


Incorrect Permissions

Avoid:

'read'

for administrative pages.

Choose capabilities carefully.


Mixing Logic and Presentation

Keep:

Menu Registration

separate from:

Page Rendering

This improves maintainability.


Creating Too Many Top-Level Menus

Bad:

Dashboard
Posts
Pages
Plugin A
Plugin B
Plugin C
Plugin D

Use submenus whenever possible.


What You’ve Learned

In this tutorial you learned:

✓ What admin menus are

✓ How plugins create dashboard pages

✓ How add_menu_page() works

✓ How add_submenu_page() works

✓ How permissions control access

✓ How menu callbacks work

✓ How Flipnzee Analytics organizes its admin interface

✓ Best practices for scalable dashboard development


Key Takeaway

Admin menus are the foundation of plugin user interfaces.

They provide a professional way for users to interact with plugin settings, reports, and tools.

Most successful WordPress plugins rely heavily on custom admin pages, making this an essential skill for every plugin developer.


Next Lesson

In the next tutorial we’ll explore:

Building a Professional Settings Page Using the WordPress Settings API

You’ll learn how plugins save settings securely, how WordPress stores configuration data, and how the Flipnzee Analytics plugin manages API credentials, analytics settings, and user preferences using professional WordPress development practices.